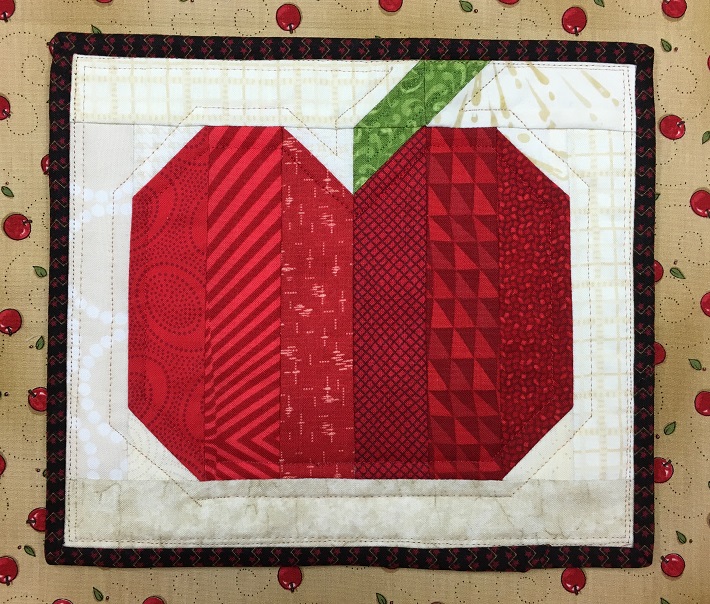
 Mug rugs may not grow on trees, but they can come out of fabric scraps. This quick and easy project is perfect for summer or fall, and — bonus! — makes an A+ gift for any teacher.
Apple Mug Rug
Level: EasyWhat You Need
- Red and green fabrics
- Background fabric
- Batting
- Binding strip
- Thread
- Cutting mat
- Rotary cutter
- Ruler
- Iron
Cutting instructions
- Six 1½” x 5½” red fabric strips
- Three 1½” green fabric squares
- One 1½” x 8½” background fabric strip
- Three 1½” x 5½” background fabric strips
- One 1½” x 3½” background fabric strips
- Five 1½” background fabric squares
- 8½” x 9½” backing unit
- 34″ binding strip
- 8″ x 9″ batting unit
Instructions
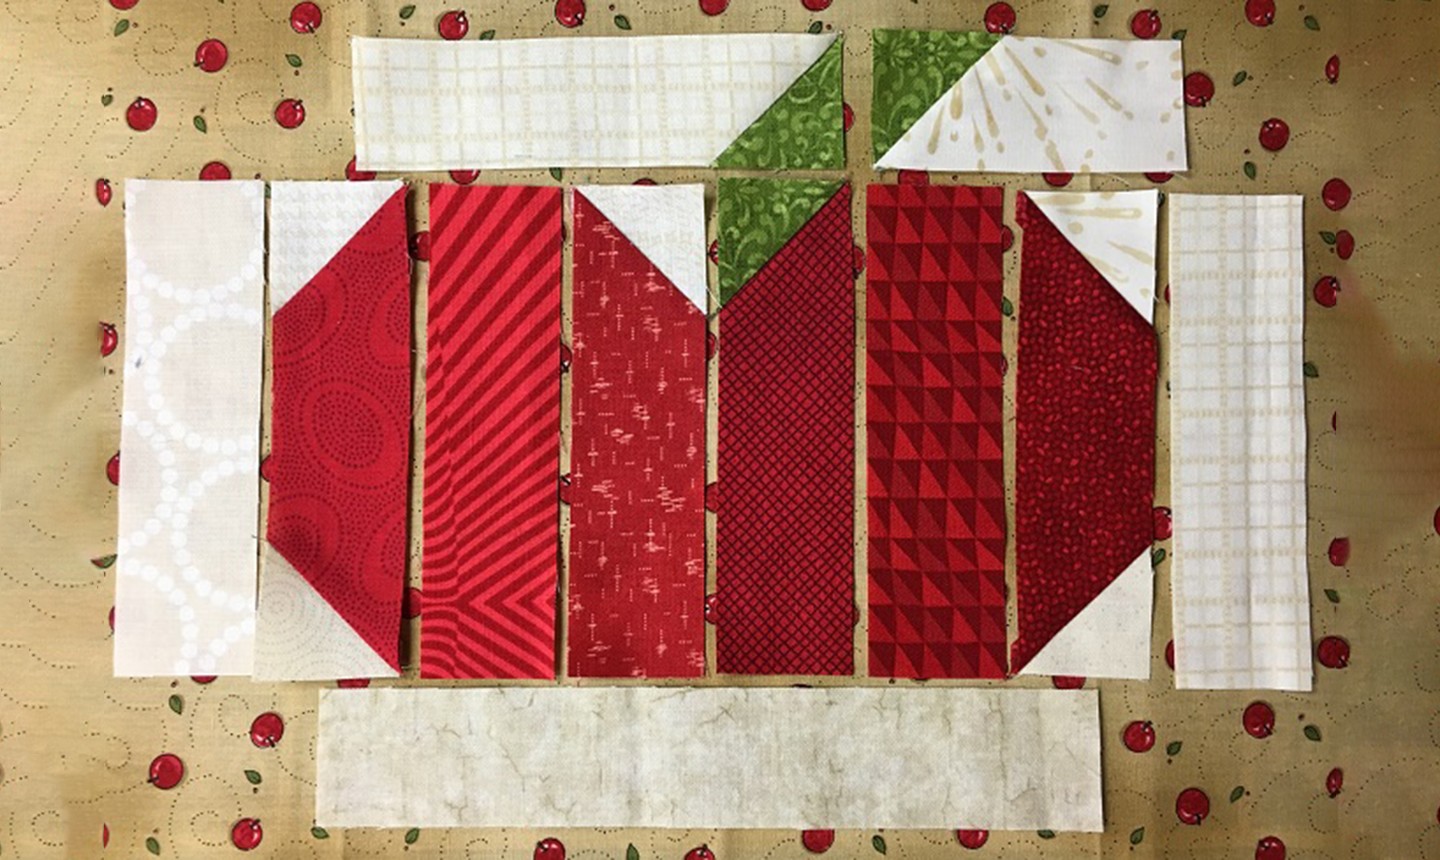
1. Cut and Arrange the Pieces
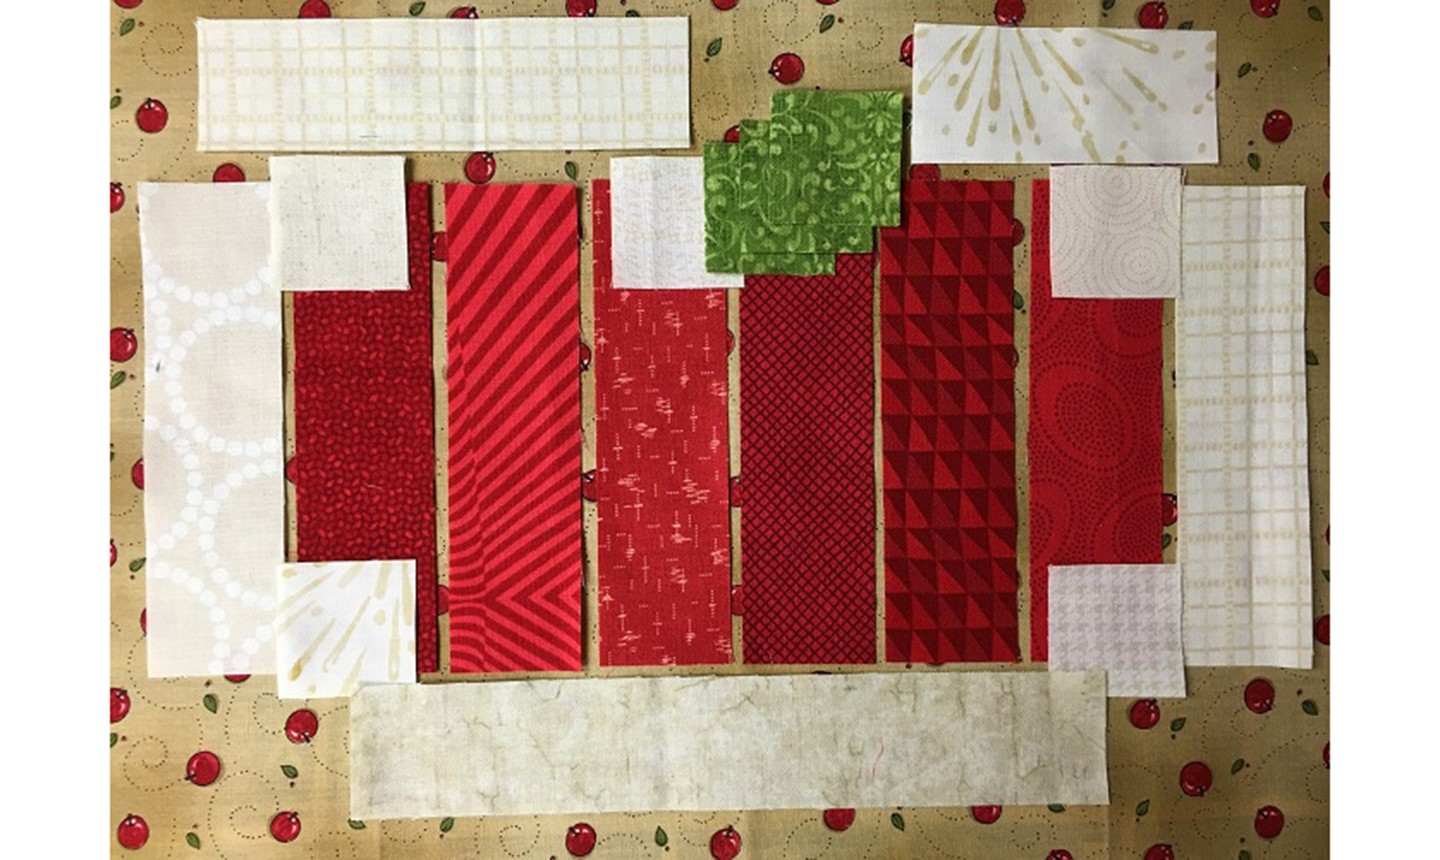 Cut your fabric and line up the six red strips side by side. Continue building the foundation of your block as pictured above. Stagger the green fabric and place the background squares on top of the red strips, then place the background fabric as such:
- The 1½” x 8½” strip across the bottom.
- Two 1½” x 5½” strips on each side, and on the top left.
- The 1½” x 3½” strip on the top right.
2. Sew
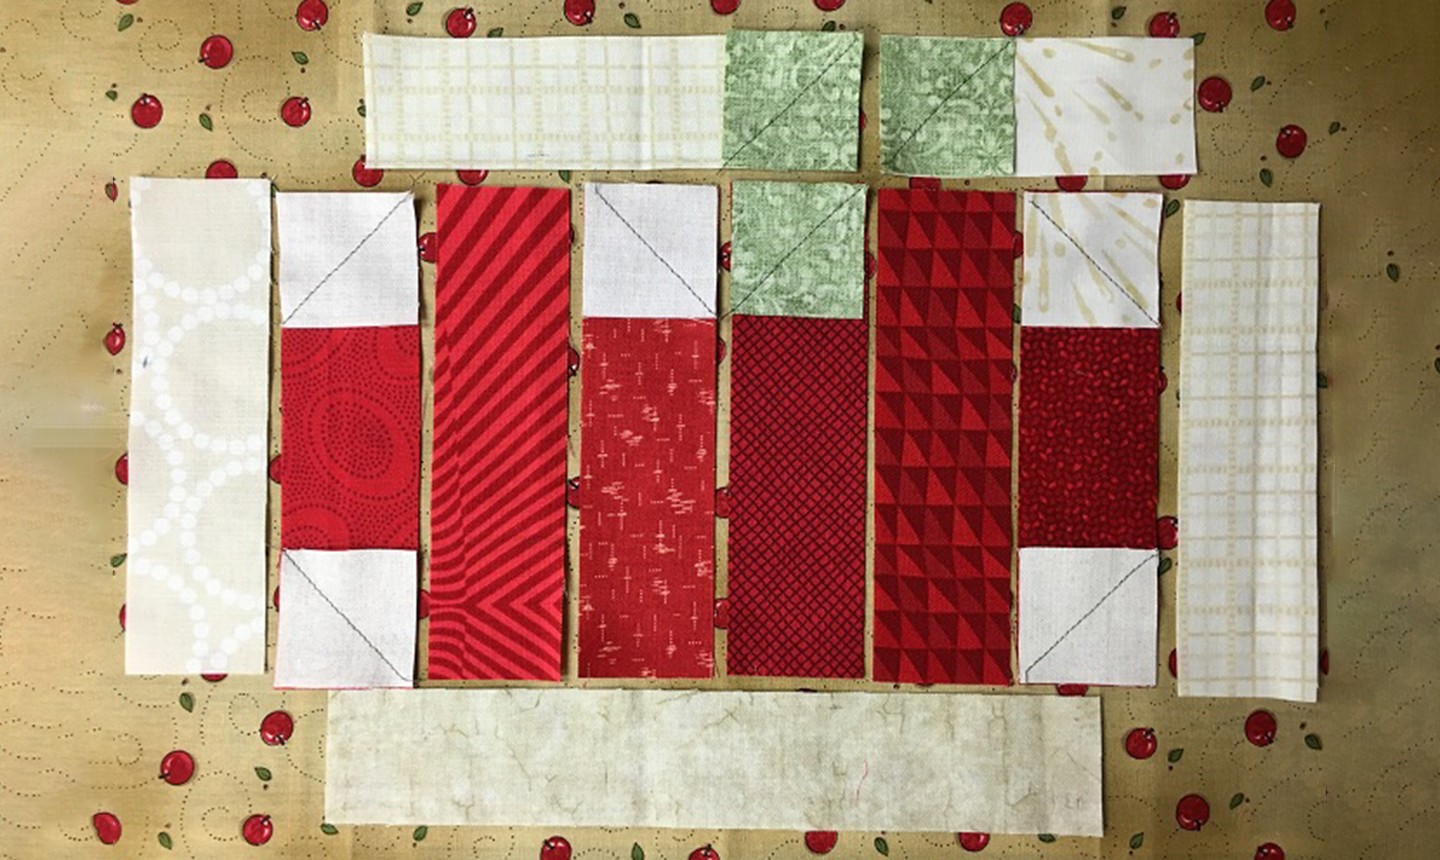 When you have all your fabric pieces cut out and placed, arrange them as shown above. The background and green squares should be right sides together with the red fabric and the vertical strips should all line up evenly. The other two green squares should be right-sides together with the top two background strips.
Sew diagonal lines, from corner to corner, joining the squares to the strips.
Good to Know: This tutorial uses dark thread to demonstrate the sewing lines. When you’re making your block, choose a thread that matches the background fabric.
When you have all your fabric pieces cut out and placed, arrange them as shown above. The background and green squares should be right sides together with the red fabric and the vertical strips should all line up evenly. The other two green squares should be right-sides together with the top two background strips.
Sew diagonal lines, from corner to corner, joining the squares to the strips.
Good to Know: This tutorial uses dark thread to demonstrate the sewing lines. When you’re making your block, choose a thread that matches the background fabric.
3. Trim
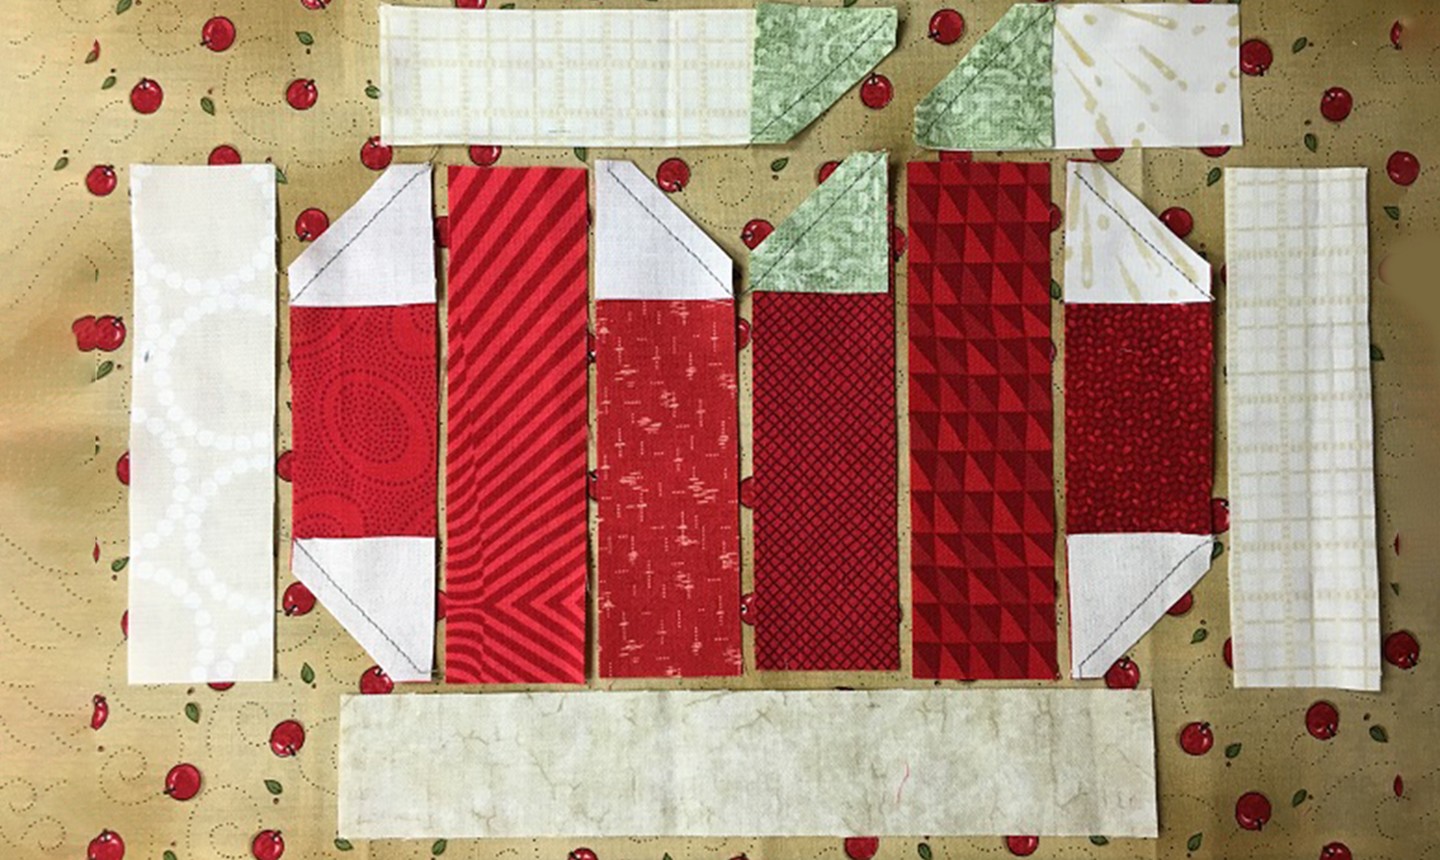 Use a ruler and rotary cutter to trim away a corner on each square ¼” away from the sewing line.
4. Open and Press
 Fold open each square and press the seams away from the background fabric. The red strip with the fabric leaf should be pressed toward the green fabric.
Good to Know: This pressing will make piecing the strips easier, as the seams will nest together.
Fold open each square and press the seams away from the background fabric. The red strip with the fabric leaf should be pressed toward the green fabric.
Good to Know: This pressing will make piecing the strips easier, as the seams will nest together.
5. Sew the Strips
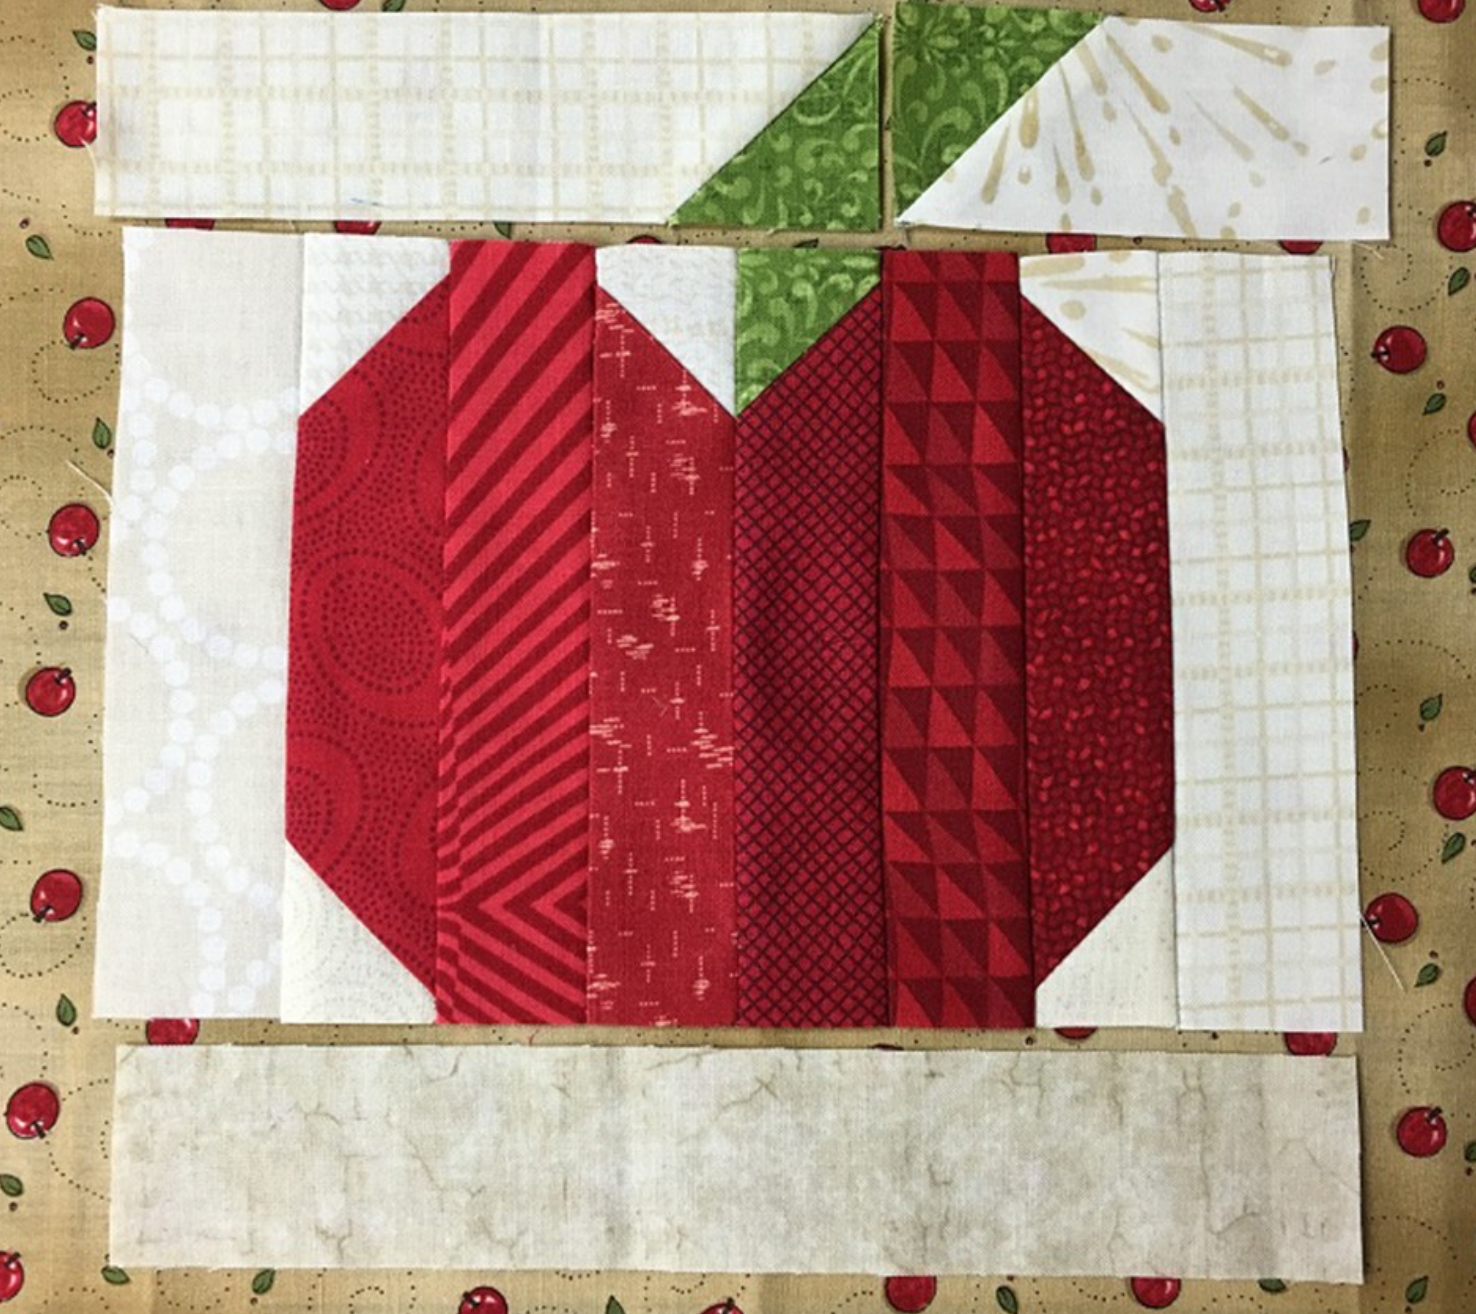 Sew all the vertical strips together lengthwise with a ¼” seam allowance. Then sew the top strips together into one unit. Sew the top and bottom strips to the apple unit, joining the block together.
6. Layer the Mug Rug
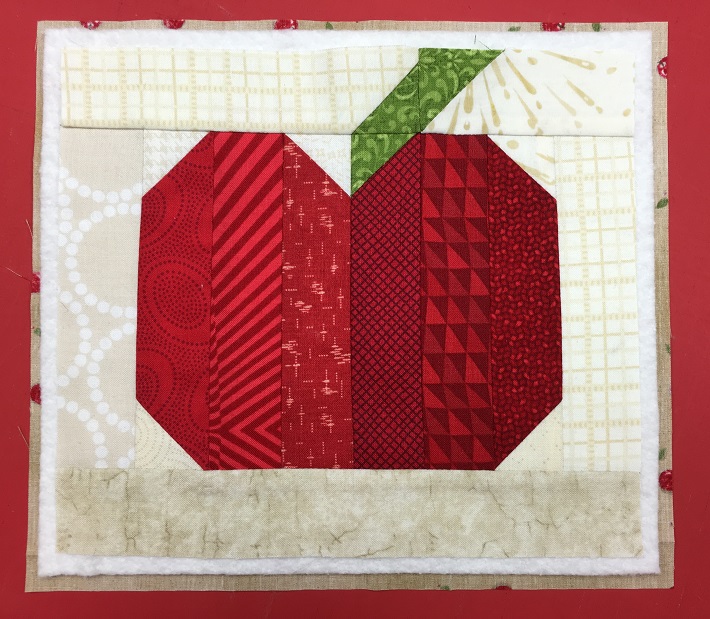 Lay the quilt top on your batting and trim the batting to be ¼” larger than the top. Layer the batting and fabrics into a quilt sandwich: backing fabric (wrong side up), batting and quilt top (right side up). Trim the backing to be ¼” larger than the batting.
7. Sew It Together
Choose coordinating threads for the red apple, green leaf and background fabrics. Use a simple straight stitch to outline each shape.8. Bind It
Cut a binding strip at least 34″ long and bind the mug rug . Then you’re done!
Sweet design for a mug rug.
Would make a great teacher's gift
Very cute
Really cute…
What a cute idea.
Cute!
So cute!
Love mug rugs
Cute!
This looks really fun to make