
Once your quilt top is finished, your backing is ready to go and your batting is cut to size, you only have two more steps before you can finally start quilting! Here's how to make your quilt sandwich and baste the layers so you can get going on the good stuff.
How to Make a Quilt Sandwich
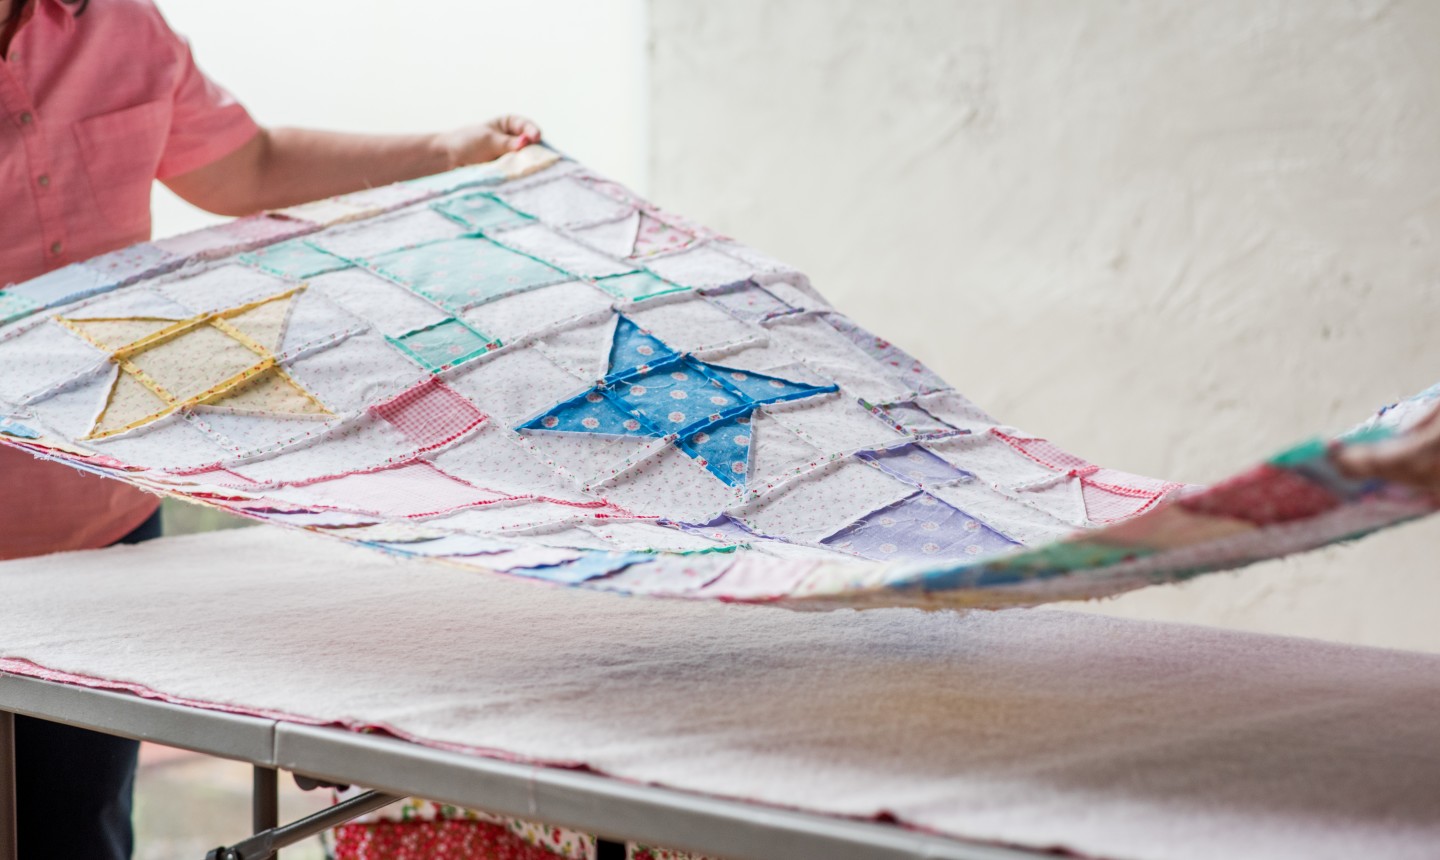
Simply put, a quilt sandwich is the two layers of fabric and one layer of batting that you stack on top of each other just before the quilting process. Basically, it's what makes a quilt a quilt. And creating one is as easy as placing the three pieces in the following order:
It's so simple, sometimes the hardest part is finding the space to lay out all the pieces. It's easiest to work on a wide, hard-surfaced floor — just don't use any carpeted space, as it'll be tough to keep the layers aligned because they won't lie perfectly flat. If you have a big enough table (or if you're making a mini quilt), you can also use that to make your quilt sandwich.
Whatever surface you use, always use tape, paperweights or other heavy objects to hold each layer in place. And while you're stacking those layers, keep these things in mind:
After your layers are neatly arranged in a quilt sandwich, it's time to baste. In quilting, basting is a technique that temporarily holds together the quilt sandwich's layers as you quilt.
How to Baste a Quilt
There are a ton of different methods for basting a quilt, and every quilter has their own go-to. Here are some of the most popular options.
1. Pin Basting
One of the most common basting methods is to use safety pins. All you do is place pins all over the quilt sandwich so the layers are securely in place. Pin basting can be time-consuming, but it's a solid method for both large and small quilts.
Craftsy instructor Wendy Butler Berns recommends using 1½" safety pins or 1½" curved basting pins, as they won't leave large holes in the quilt top. Flat flower pin shafts are delicate and may bend, and safety pins any larger are not sharp enough to pierce all three layers of the quilt sandwich.
You’ll need a big collection of pins for this method — Wendy estimates 100 for a twin-sized quilt. To know how many you'll need, some quilters use the hand test: after you've placed a good amount, place your hand on the quilt surface. If you can do so without touching any pins, you need more!
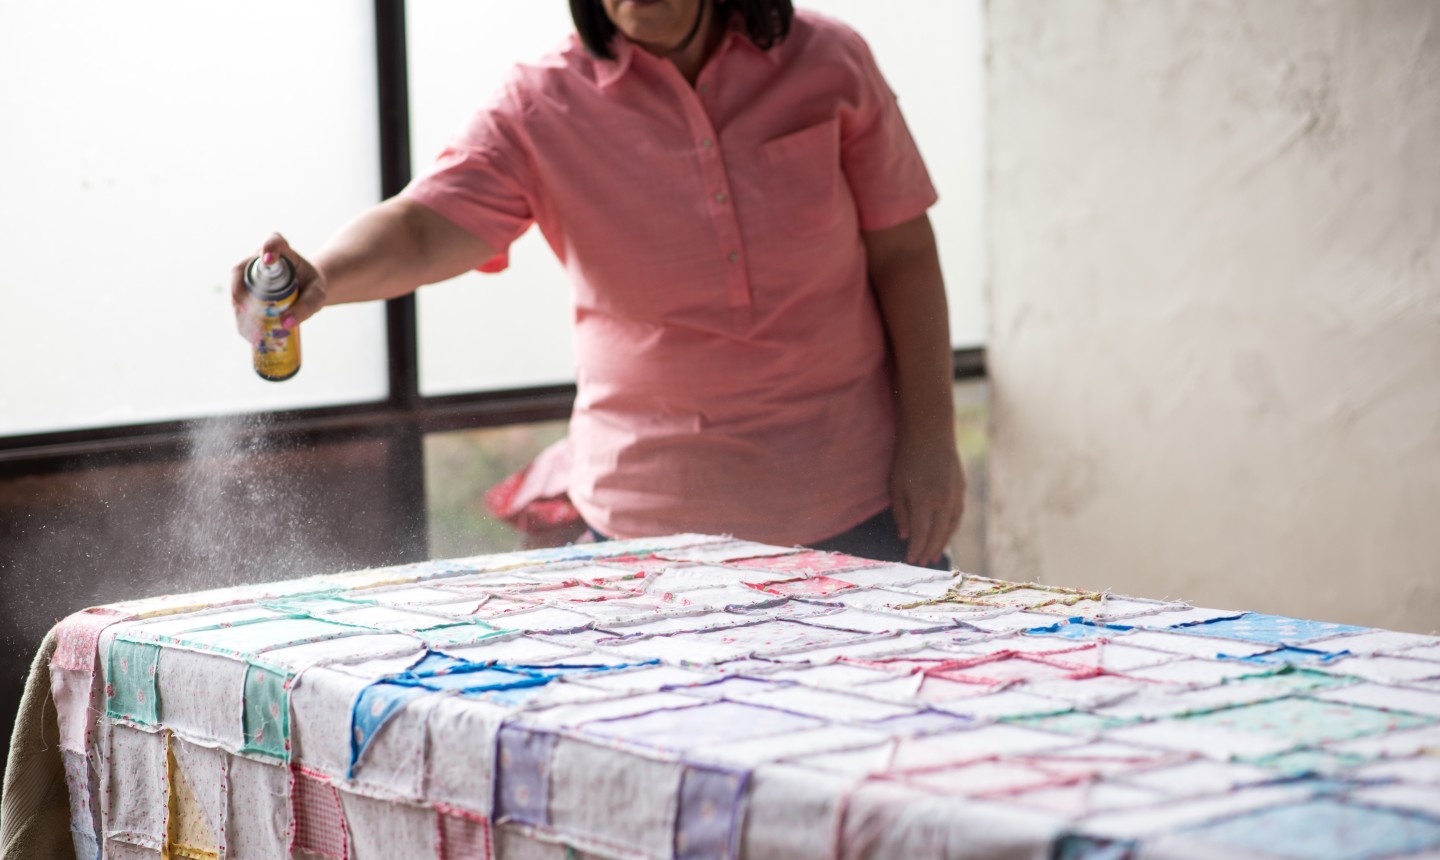
2. Spray Basting
The spray basting method uses a temporary adhesive spray specially formulated for fabric to hold the layers of a quilt sandwich in place. Simply spray the adhesive onto the wrong side of both the back and the quilt top, then make your quilt sandwich.
Spray basting is fast (you can baste a twin-sized quilt in about 10 minutes) and effective, leaving fewer wrinkles than pin basting. But spray basting can also be pricey at about $13 for a 10-ounce can. Plus, the spray is flammable and can be harmful to breathe in, so it should only be used in a well-ventilated area (and if you're pregnant, you shouldn't use it at all).
For spray basting, you’ll need special spray adhesive. Make sure to choose one with the word “temporary” on the label so it washes away later. A few popular brands include June Tailor Quilt Basting Spray, Dritz Basting Spray and 505 Spray and Fix.
3. Fuse Basting
There are also fusible products available for basting your quilts. For example, you could place large cuts of a double-sided fusible web on both sides of the batting to fuse the quilt sandwich. Or you could use strips of fusible tape to create small basting tacks between the backing, batting and quilt top.
Although this method can add to your materials cost, it can also be a time-saver. It's a good choice for smaller quilts and quick quilting projects like table runners.
4. Hand Basting
In this basting method, you’ll make long, loose stitches by hand to hold the layers together. It usually works best for quilters who plan to hand quilt their projects, as you can remove these stitches along the way by simply snipping the threads.

This is a test.
Do you have to pin your quilt sandwich before thread quilting it if it is a small (less then 20" square) project?