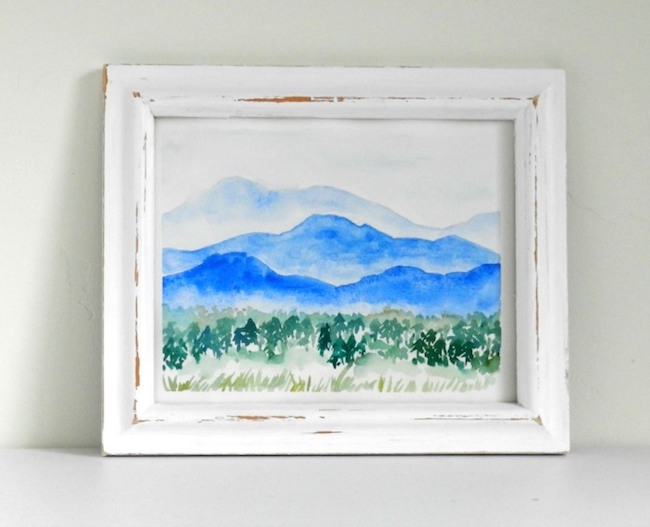
A fun way to practice and learn the element of perspective in your art is by painting landscapes. Mountains, in particular, make great subjects for practicing atmospheric perspective. So get outdoors or get your imagination in gear to create some watercolor mountains!
Before you start painting watercolor mountains, there are a few rules to memorize and follow throughout the painting process. Once you get these rules down, you can let your imagination run wild and create your own little landscape world or go outside and paint real mountains.
Rules for perspective in landscapes:
- Far away objects appear lighter and more blue-ish, smaller and higher up on the horizon.
- Closer objects appear darker and more saturated in color, larger and lower on the horizon.
What you’ll need for this project:
- Watercolor paper
- Masking tape
- Pencil
- Medium round paintbrush
- Small round paintbrush with fine tip
- Watercolor paints
Color list:
- Cobalt Blue
- Phthalo Green
- Yellow Ochre
Let’s get started! Follow the steps below to create your own watercolor mountains painting.
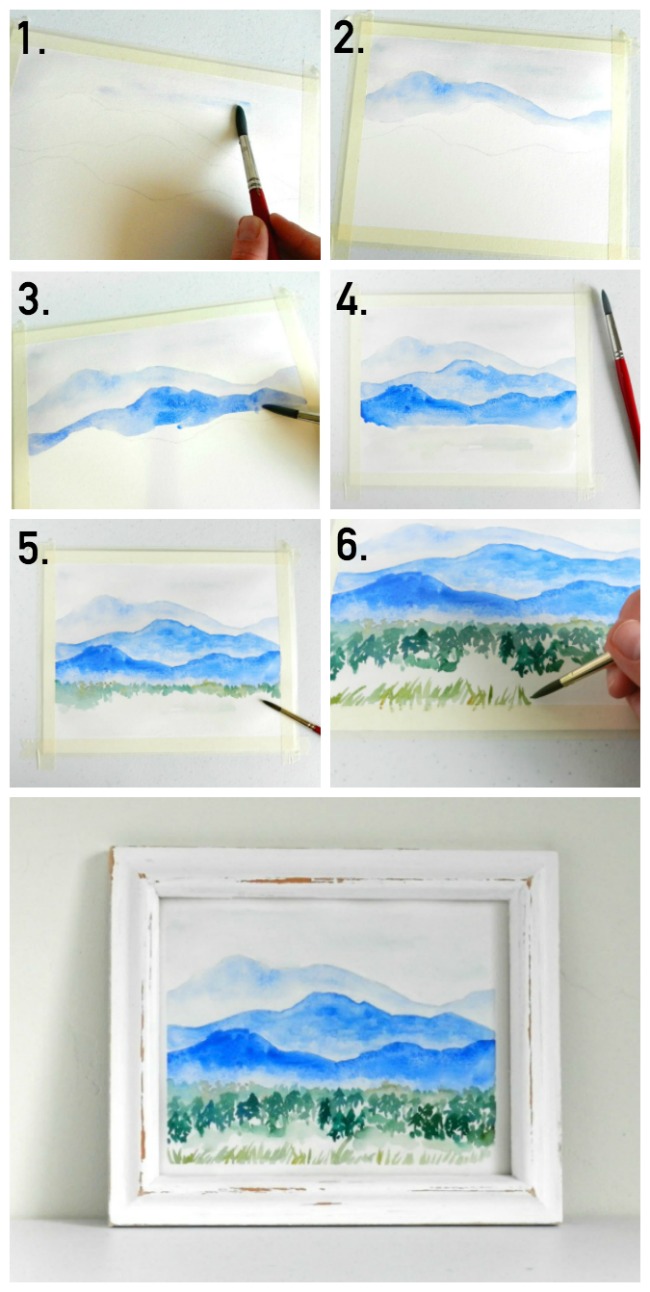
Step 1: Tape down paper and sketch.
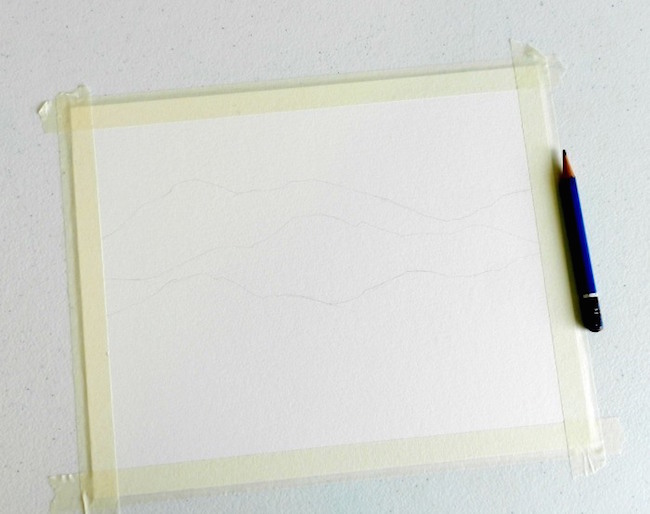
Using masking tape, secure your paper down to a table or drawing board. It’s important to take the time for this step when painting landscapes, as they require lots of watery layers and the paper will curl if not taped down.
You can look at a photo of mountains or real mountains for a reference, but with this kind of painting, you really can just make it up if you want. That’s what I did! Let your imagination take you and create some interesting mountains with rounded or sharp peaks.
Lightly sketch outlines of mountain peaks. Create three layers of mountain ranges. The mountain ranges should occupy the middle third section of your paper. Leave space at the top for the sky and space at the bottom for the foreground.
Step 2: Apply a light wash for the sky.
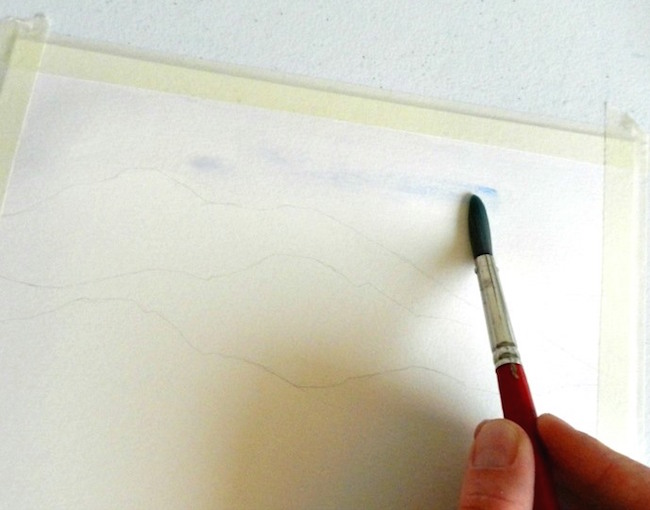
With some very watered-down Cobalt Blue and a medium round brush, paint a light and airy sky above the mountains. Let dry.
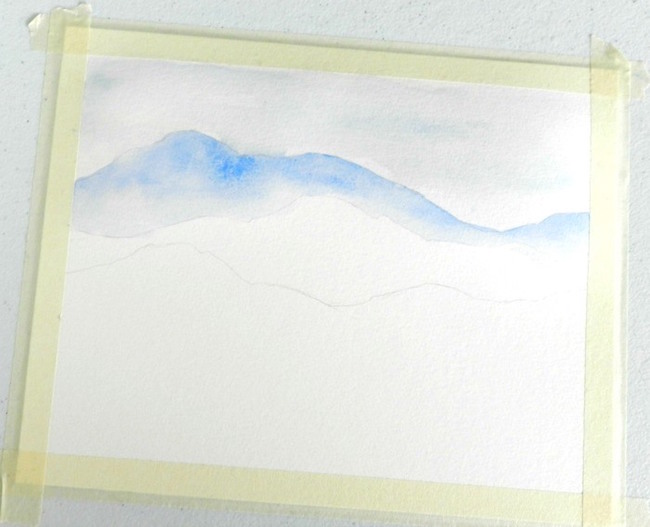
Step 3: Paint a light wash over most distant mountains.
As stated at the beginning of this tutorial, one way to achieve perspective is with value. Lighter colors go in the back, darker and more saturated colors go in the front. This is the concept you want to keep in mind when painting mountains.
The watercolor wash over the mountains at the top and back of your painting needs to be very light. Make it slightly darker than the sky next to it, but not too dark. Use Cobalt Blue and a medium round brush for the all of the mountain ranges. Let dry.
Step 4: Paint a darker wash over the middle mountain range, then dab with paper towel.
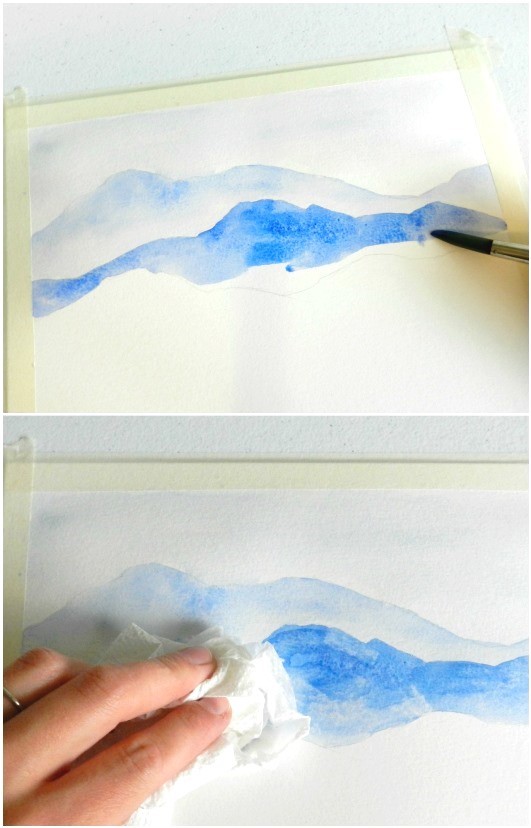
With more saturated, less watery paint, paint the middle section of mountains. It’s OK to vary the value a little here and there as long as it’s darker than the section behind it.
To create softness and atmosphere, you can blot small sections with a paper towel. This will lift some of the paint off your paper. Let dry.
Step 5: Paint the front mountain range and add a light wash to foreground.
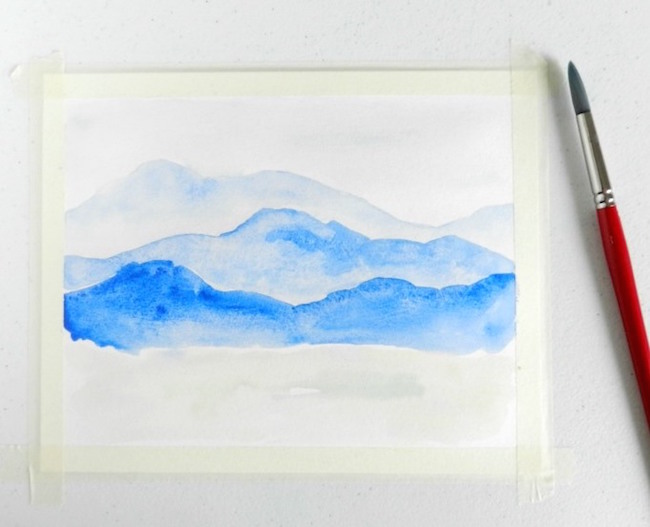
For the foremost mountain range, use darker, more saturated paint. Paint down to the base of your mountains, rinse your brush, then mix a little Yellow Ochre and Phthlalo Green for a light wash over the foreground. Let dry.
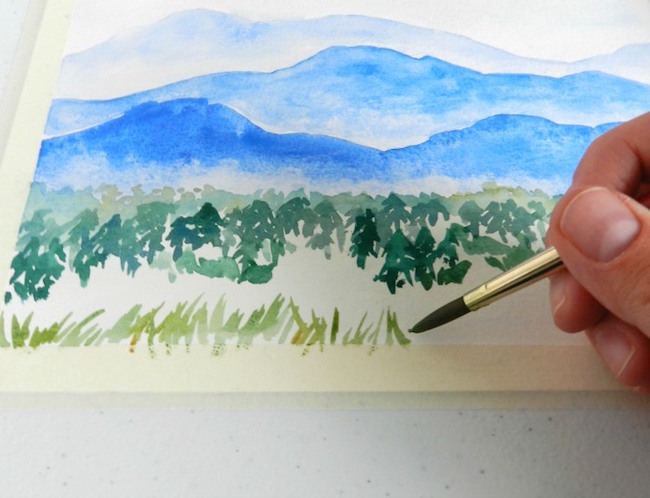
Step 6: Paint trees and grass.
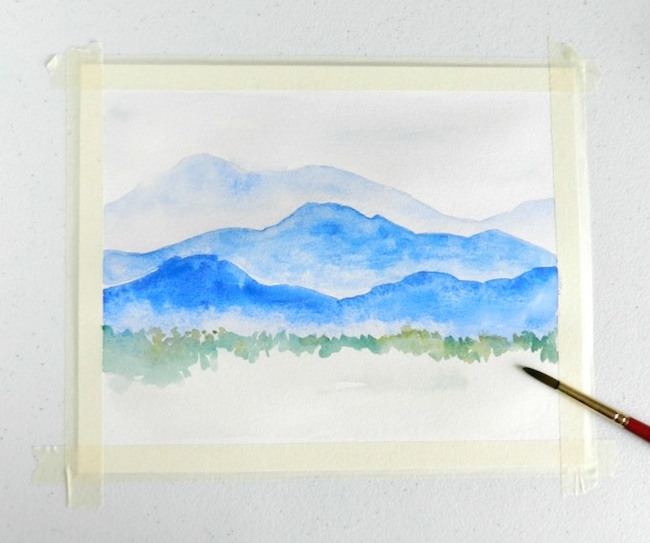
Right next to the base of the mountains, paint some lighter, less defined trees. Let these dry.
Then mix a darker green and paint darker, larger trees in front of the lighter ones.
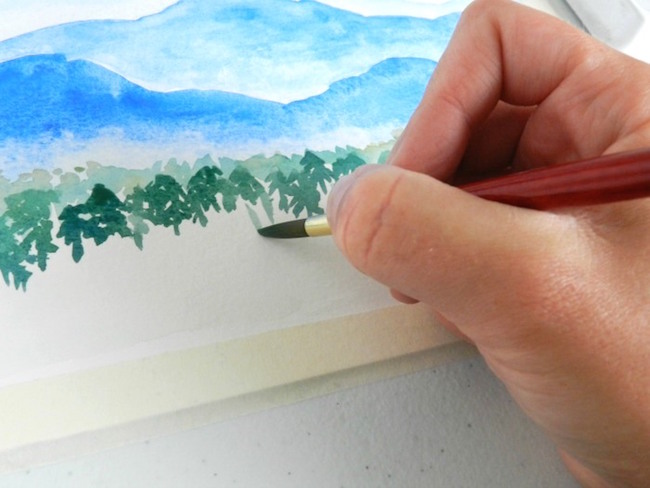
For the grass in the foreground, mix Yellow Ochre and Phthalo Green and paint sharp strokes from the bottom of your paper. Allow a little space between the top of the grass and the beginning of the trees.
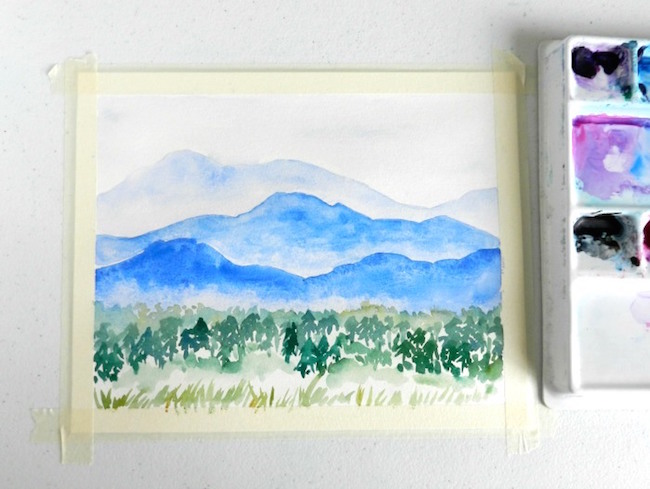
Step 7: Peel tape off and frame!
After your painting is completely dry, carefully peel the masking tape away from the edges. Now your painting is ready to sign and frame!
Pin this step-by-step tutorial and save it for later!
 <!–
<!–
Wow With Watercolors!

Learn how to paint your best watercolor works.
I am playing with this tutorial right now and its so easy to follow, thank you very much for sharing this free online <3
Very nice
I plan to try this mountain water color. The explanation helps to understand about color values, and distance.
very helpful. This is what I like about Craftsy. Their tutorials are easy.
very helpful