Hand-painted watercolor cakes can be seriously stunning! While beautiful, it's easy to feel intimidated when trying to create a watercolor cake of your own. Especially if you don't fancy yourself an artist!
Why not let buttercream do the work for you? Just a few colors of buttercream plus a simple frosting technique equals impressive results. Leaving you feeling like a rock-star cake artist with minimal effort.
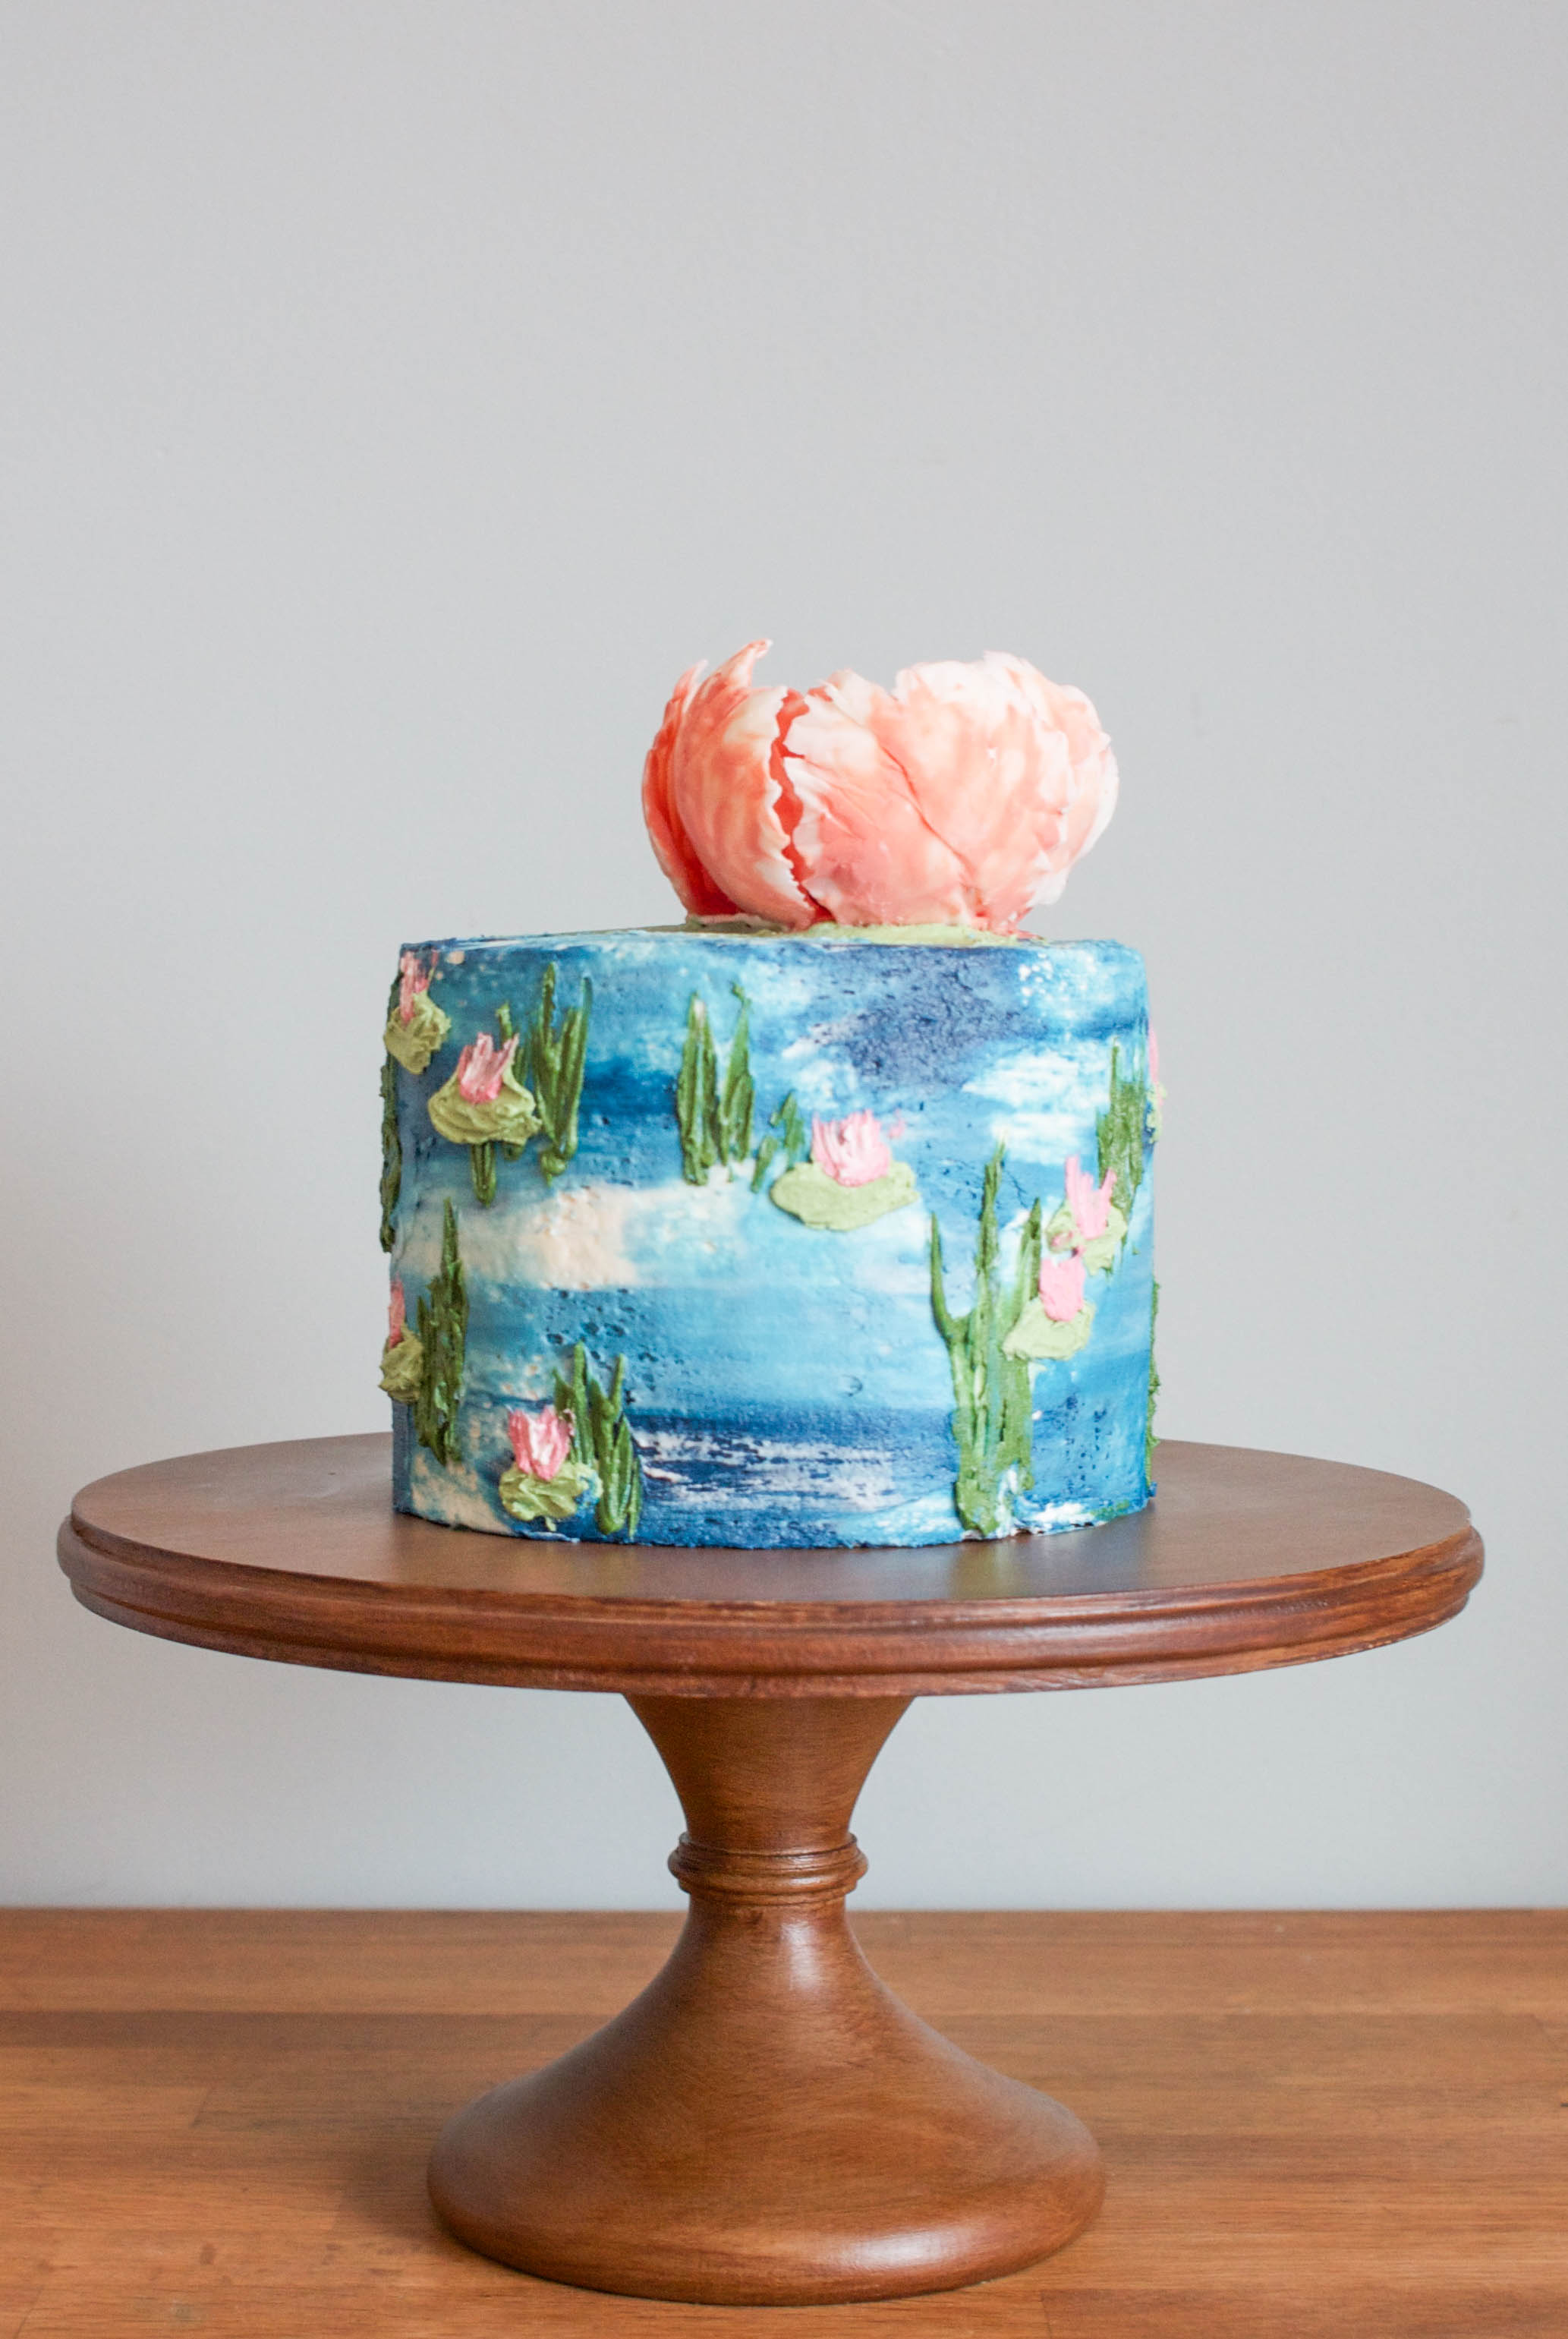
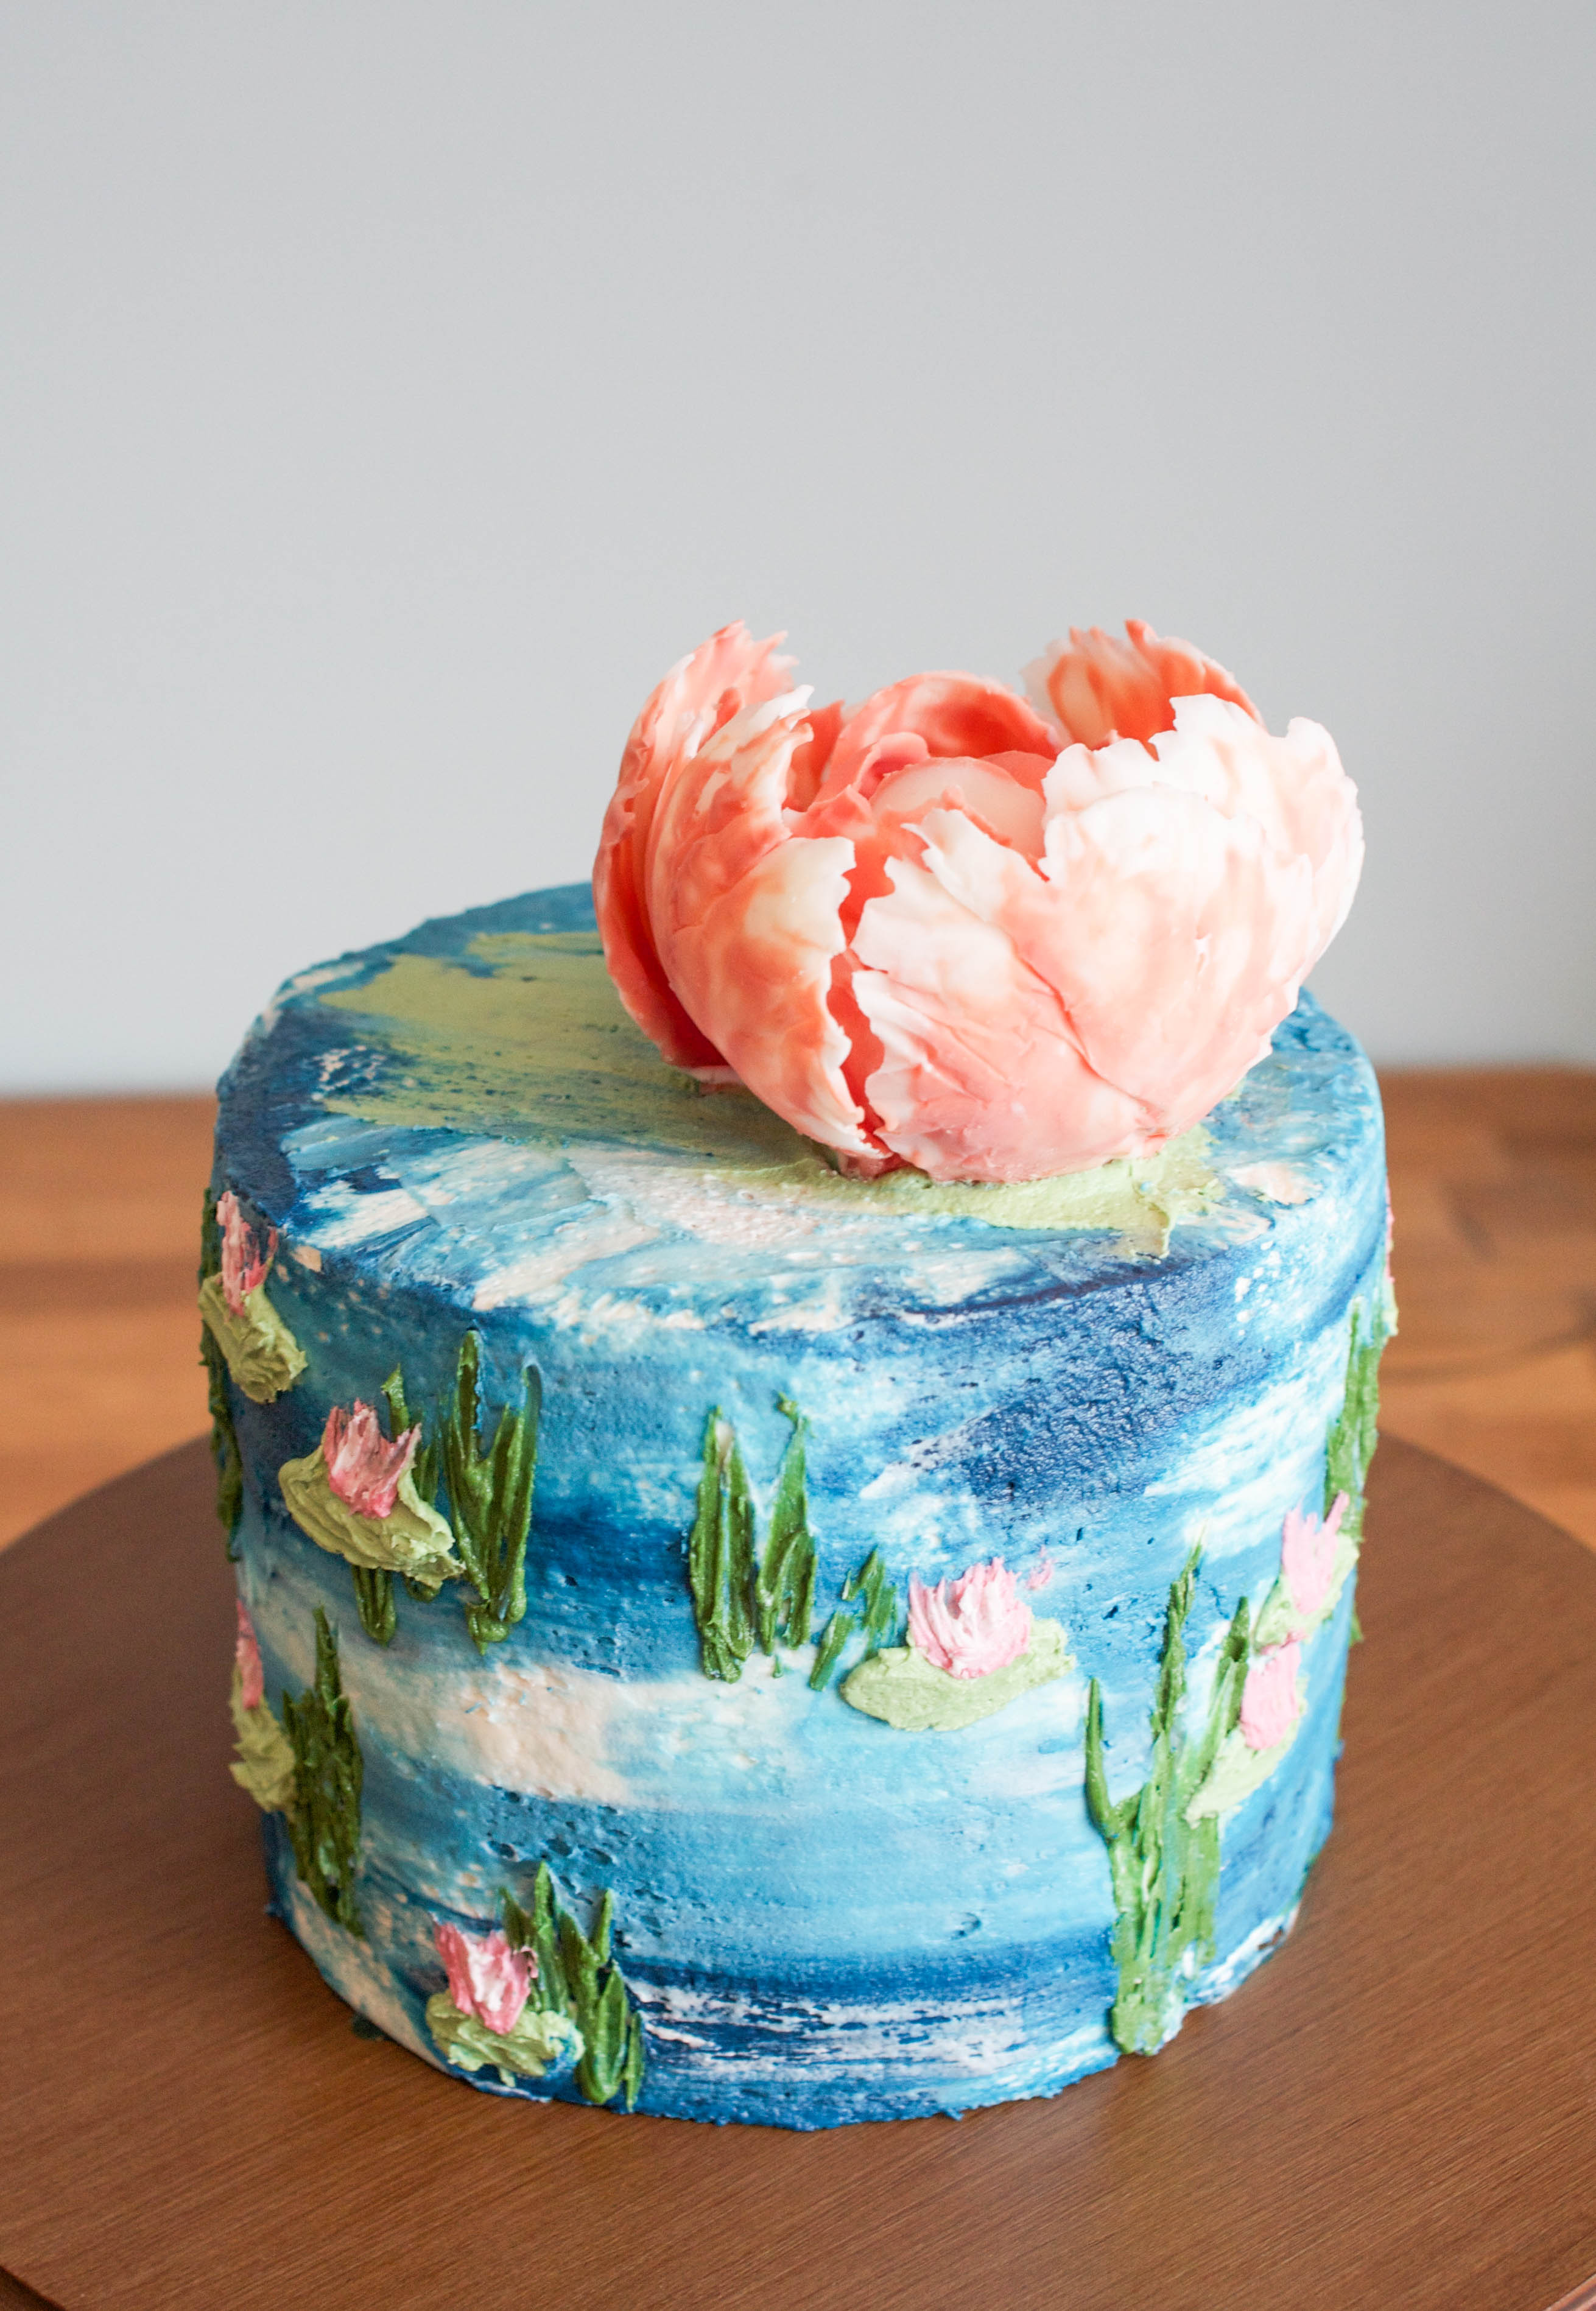
Here I show you how to create a Monet inspired Water Lilies cake, but this technique can be used in so many different ways. Create beautiful gradients of color, a fun under-the-sea cake, or even a striking sunset.
How to make a water lilies-inspired watercolor cake
Supplies:
- Crumb coated cake
- Bench scraper
- Small icing spatula
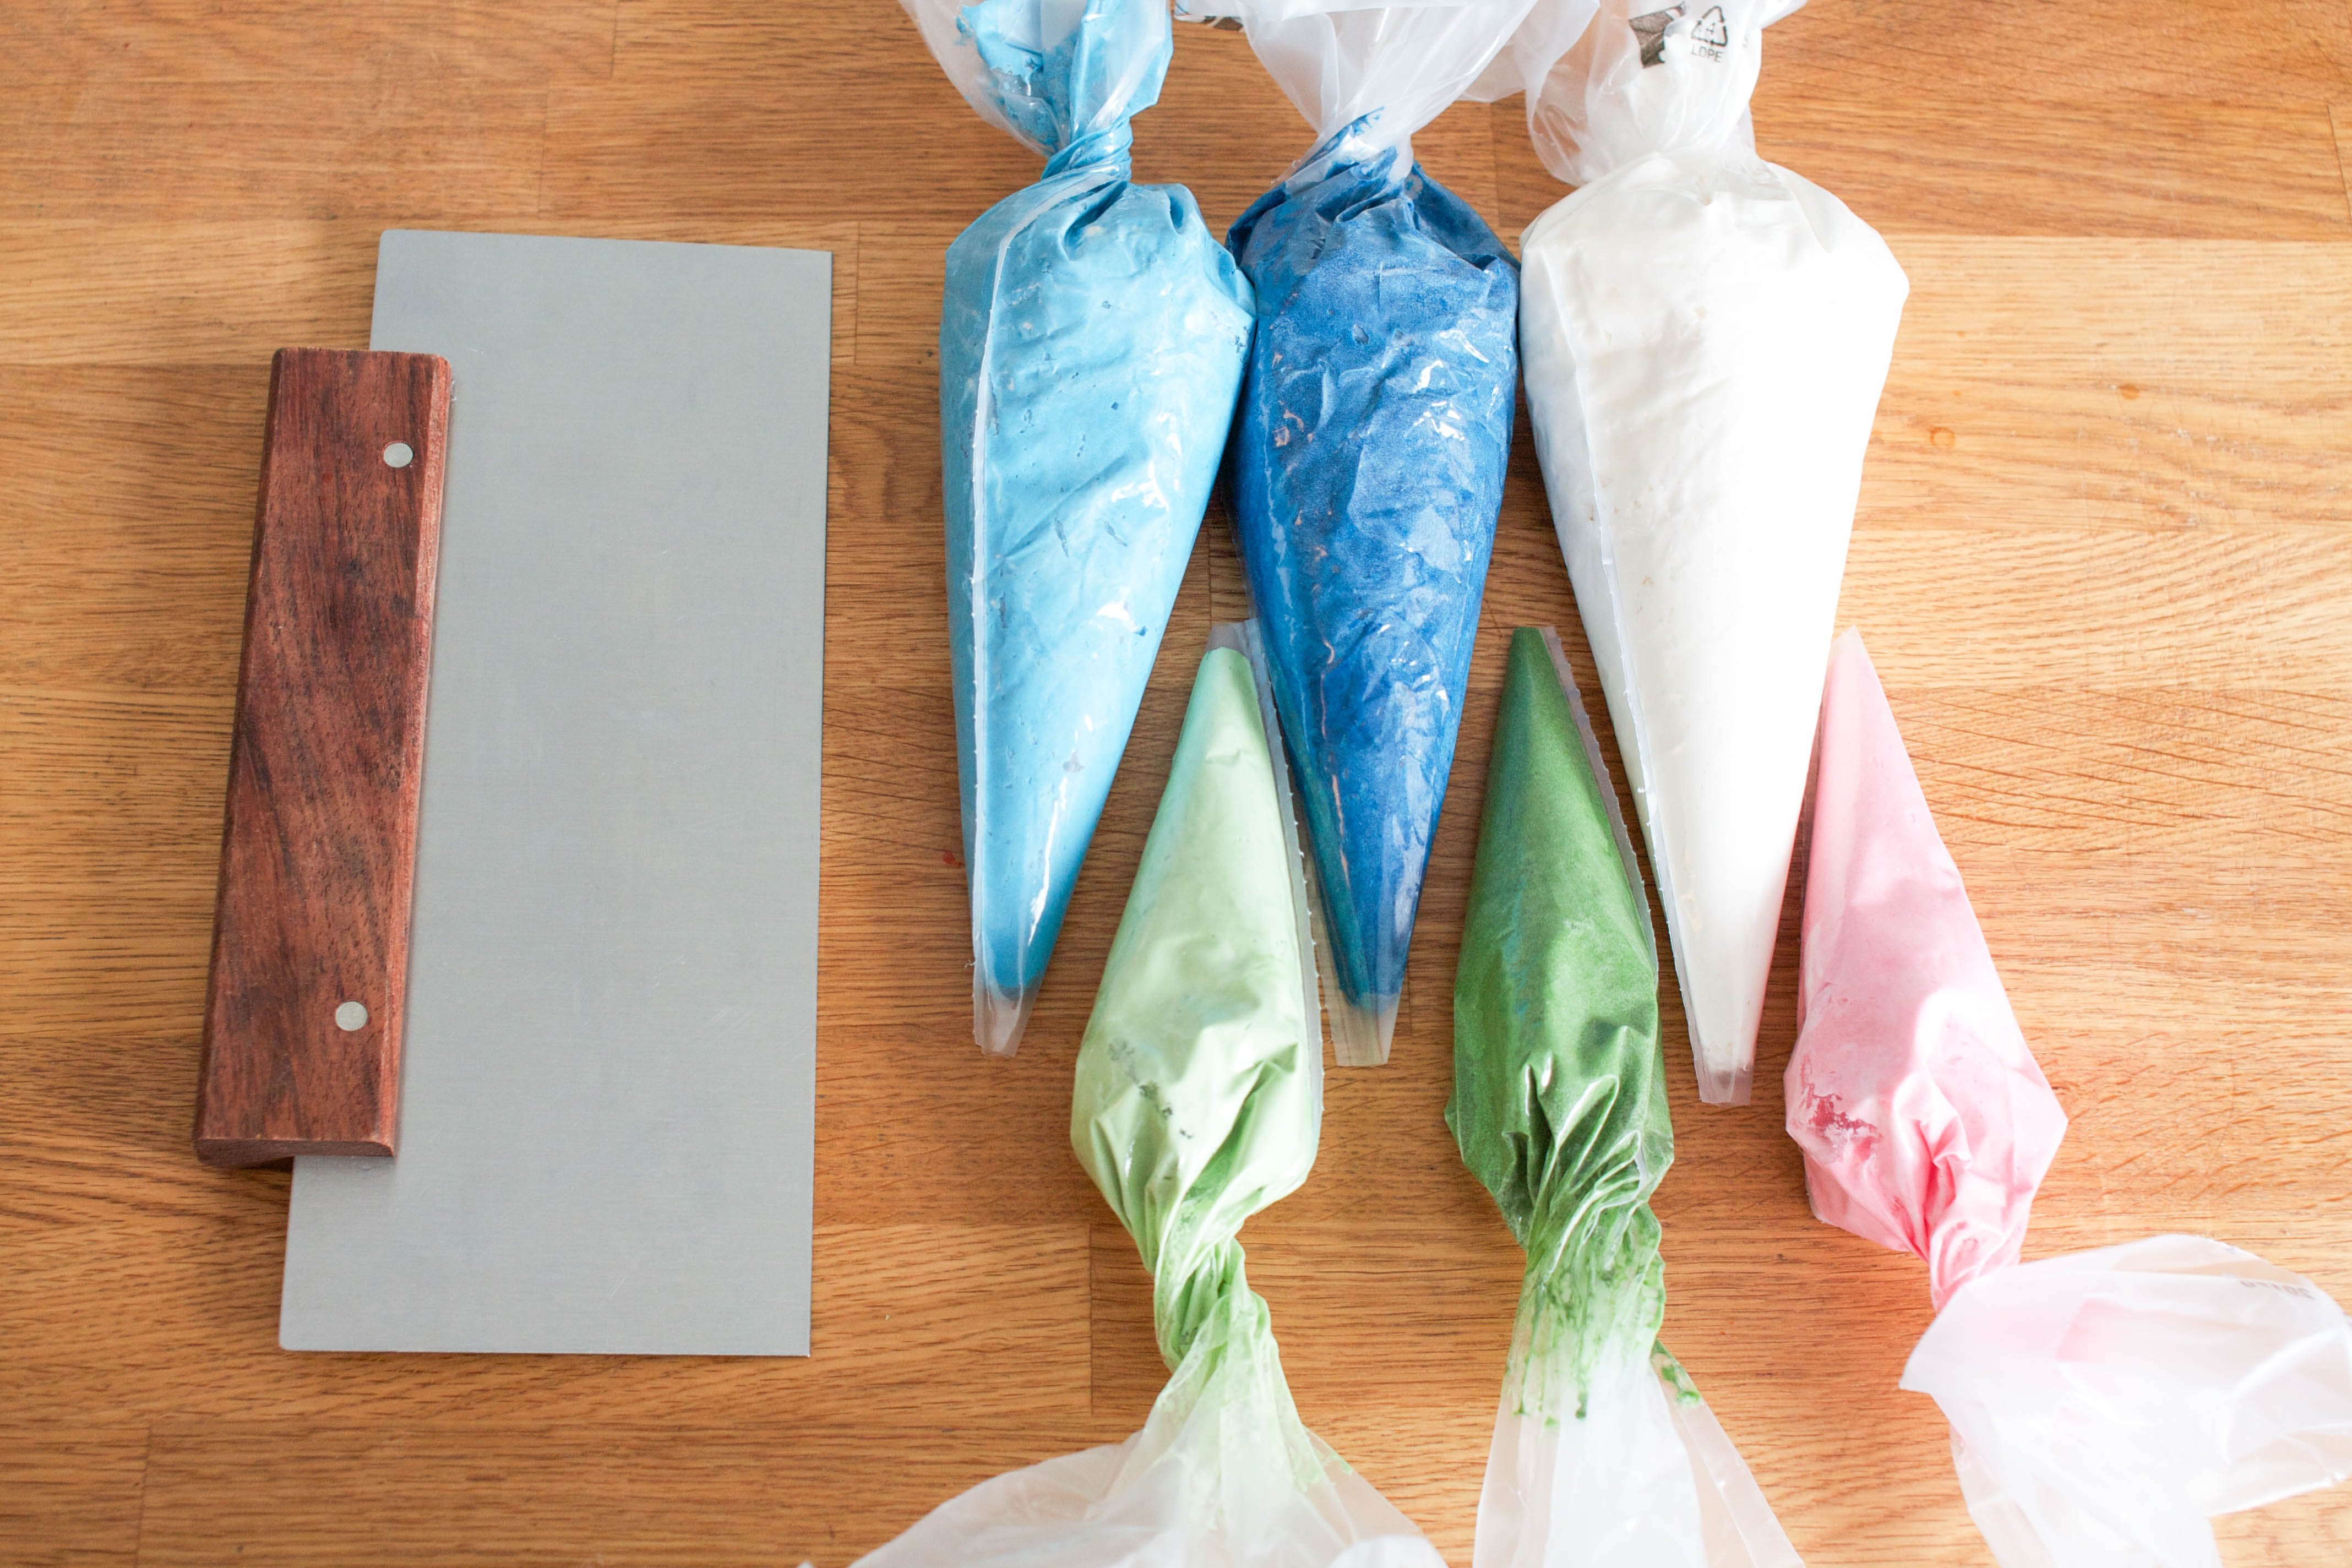
- Tinted buttercream (white, dark blue, light blue, light green, dark green and pink)
- Piping bags
- Fine tip paint brush
Step 1:
Place all of your buttercreams into piping bags. You won't need to use any piping tips. This is just to make applying the colors easier.
I decorated a 6-inch round cake using approximately 1 cup each of white, dark blue, and light blue, and about 1/4 cup each of light green, dark green, and pink.
All images via Erin Bakes
Step 2:
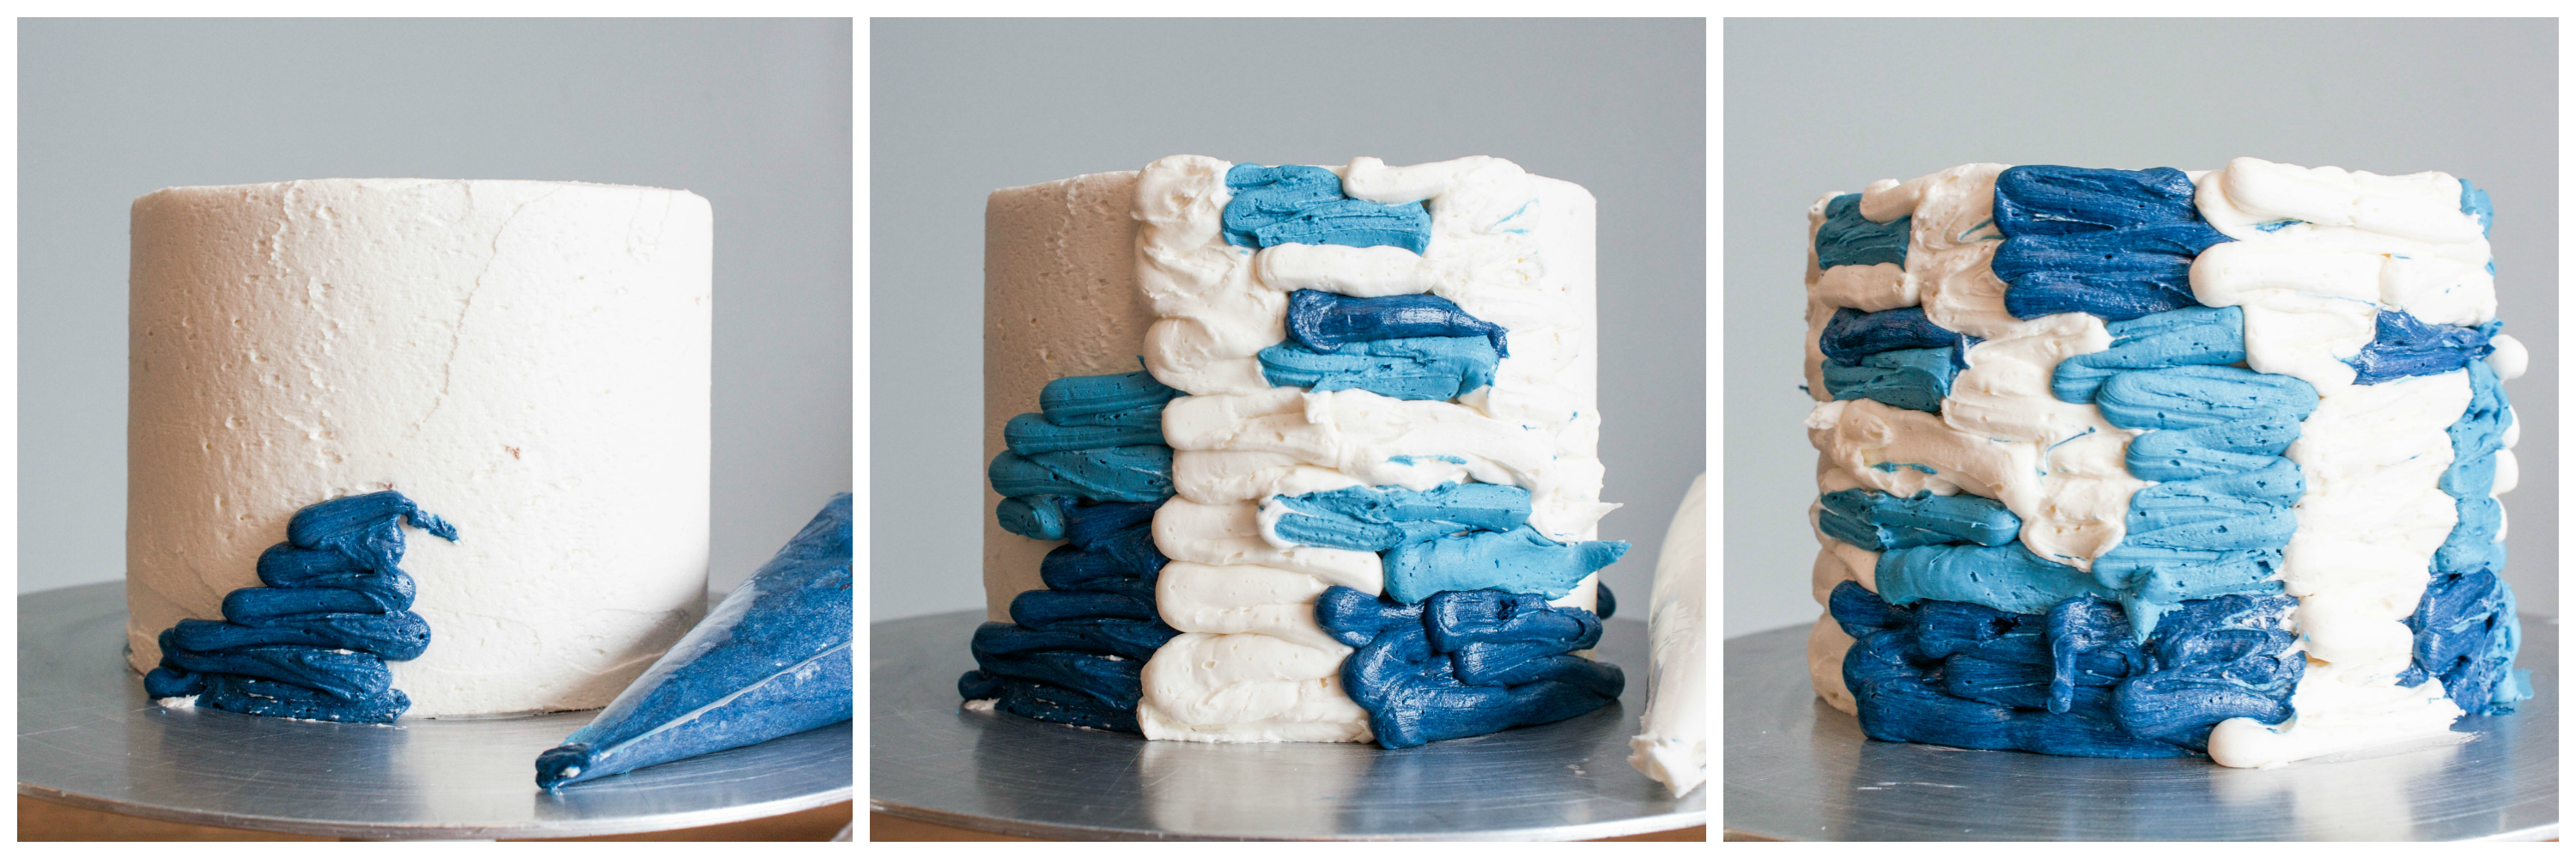
Start with the dark blue, light blue, and white buttercream filled piping bags. Pipe horizontal lines and squiggles all around the sides of your cake. This doesn't have to be perfect by any means! But it helps to keep it a little purposeful. I used the original painting for inspiration when placing on my colors.
Step 3:
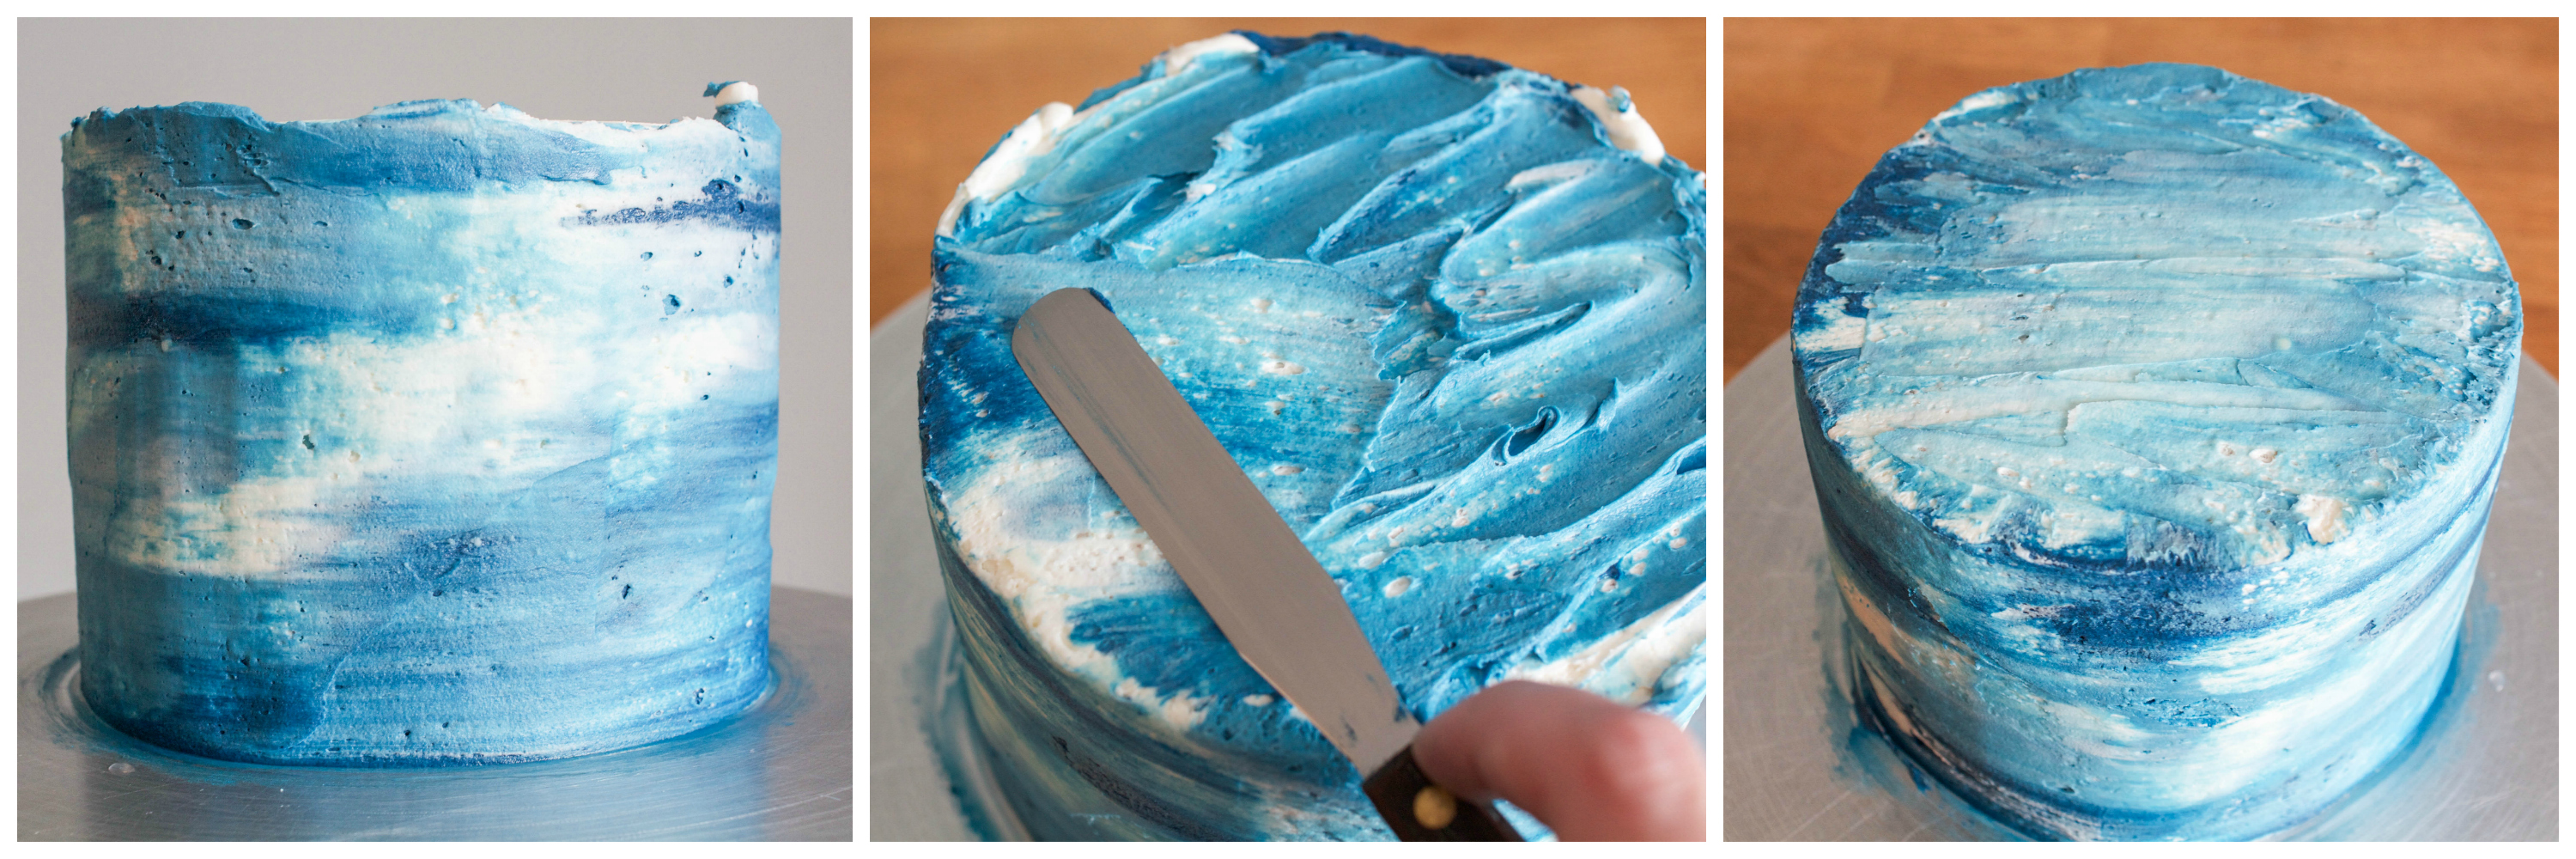
Use your bench scraper to smooth and blend the colors all around the sides of your cake. Stop and clean your scraper frequently to prevent the colors from getting too muddied.

Step 4:
Smoothing over the sides of your cake will leave a little ridge of frosting sticking up over the top edge of your cake. To finish the top, first fill in the center with a little bit of buttercream. Use any or all of the three colors we worked with on the sides. Hold the small icing spatula horizontally with the blade slightly tilted. Smooth the buttercream that's sticking up over the top edge of the cake in towards the center. Work your way around the top of the cake until it's all level and smooth.
Step 5:
You could totally stop here and I wouldn't be mad at you! It's just so pretty as it is. But with a little bit of simple piping, the Water Lilies look will really be complete!
Pipe on short, vertical blades of grass using the dark green buttercream. Use your paint brush to smear the lines a little bit, keeping with the watercolor look of the cake.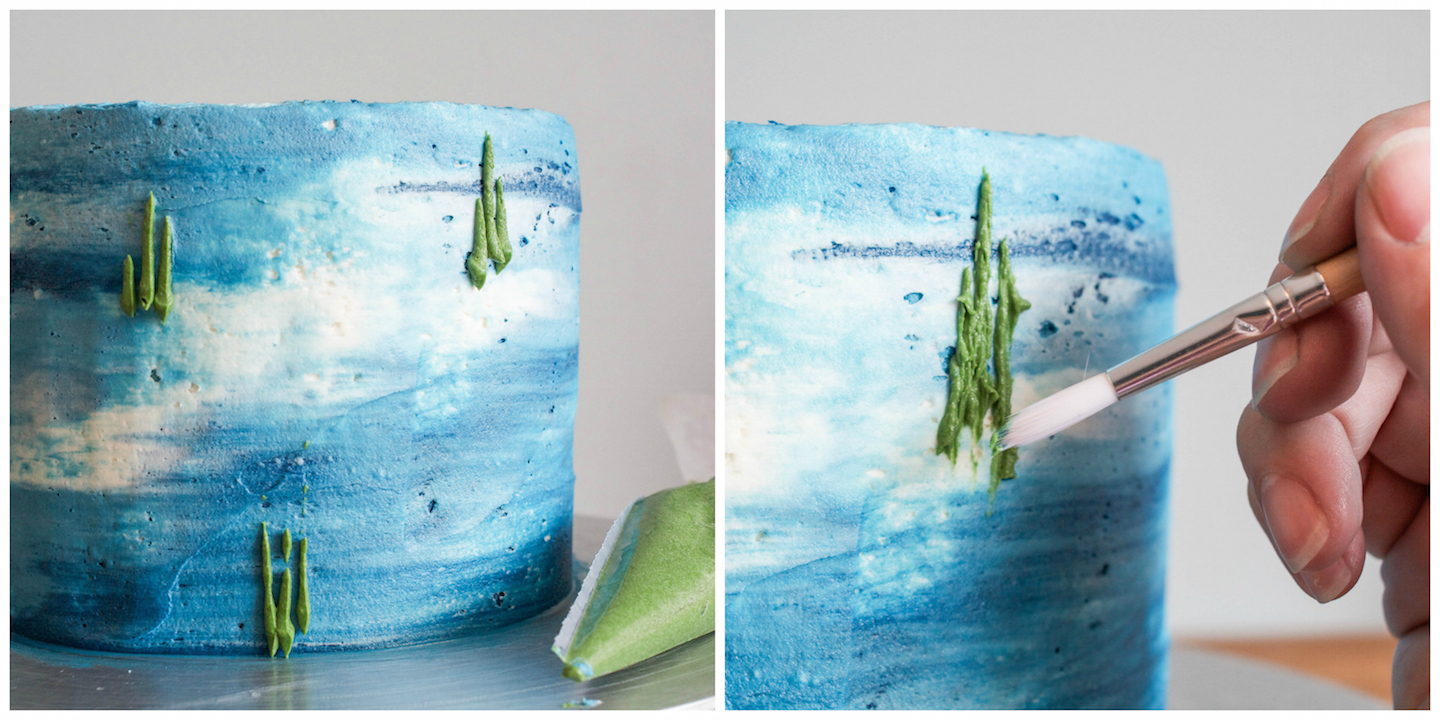
Step 6:
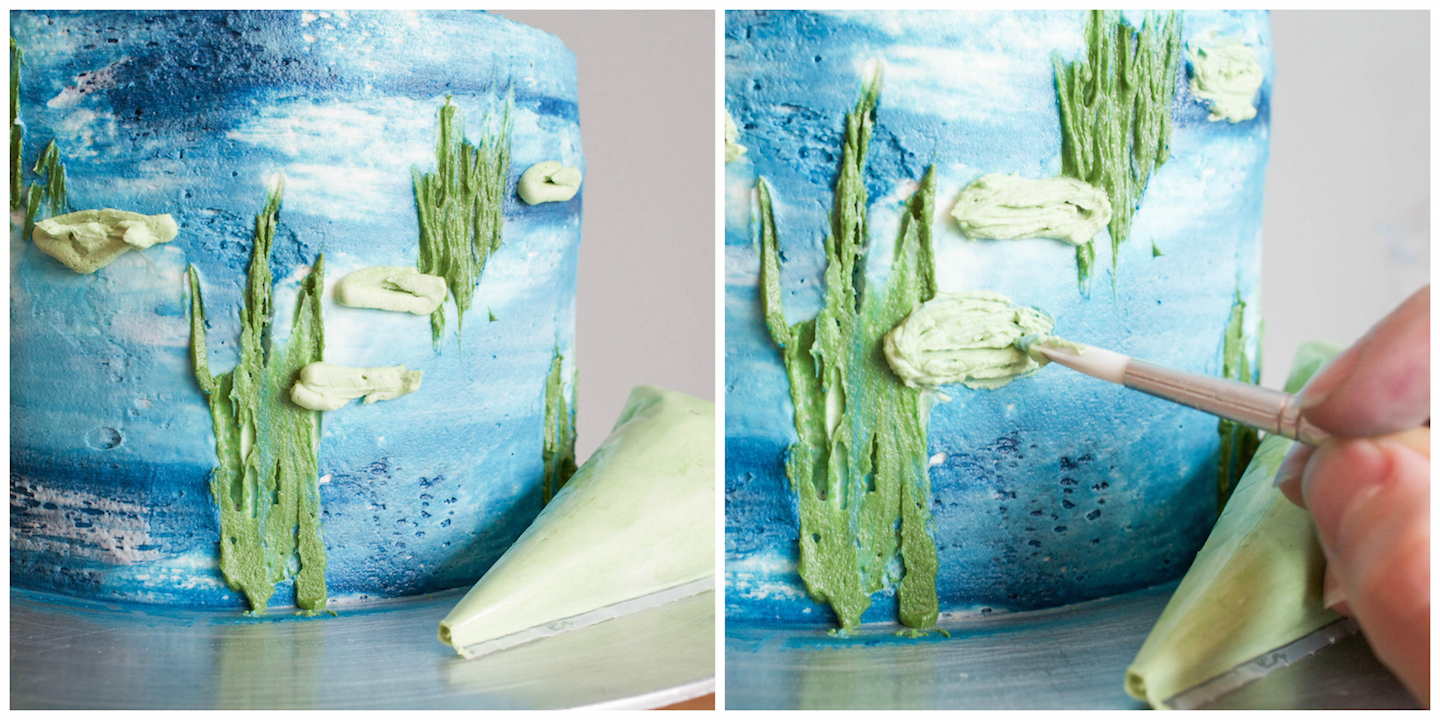
Use the light green buttercream to pipe on small oval lily pads within your blades of grass. Swirl and smear the buttercream using the small paint brush. It's ok (and encouraged) if you pick up some of the other colors as you swirl and smear.
Step 7:
Pipe small pink dots onto the light green lily pads. Use your paint brush to pull lines up and away from the pink dot, creating the shape of a small water lily. Again, it's great if some of the other colors show through or begin to bled.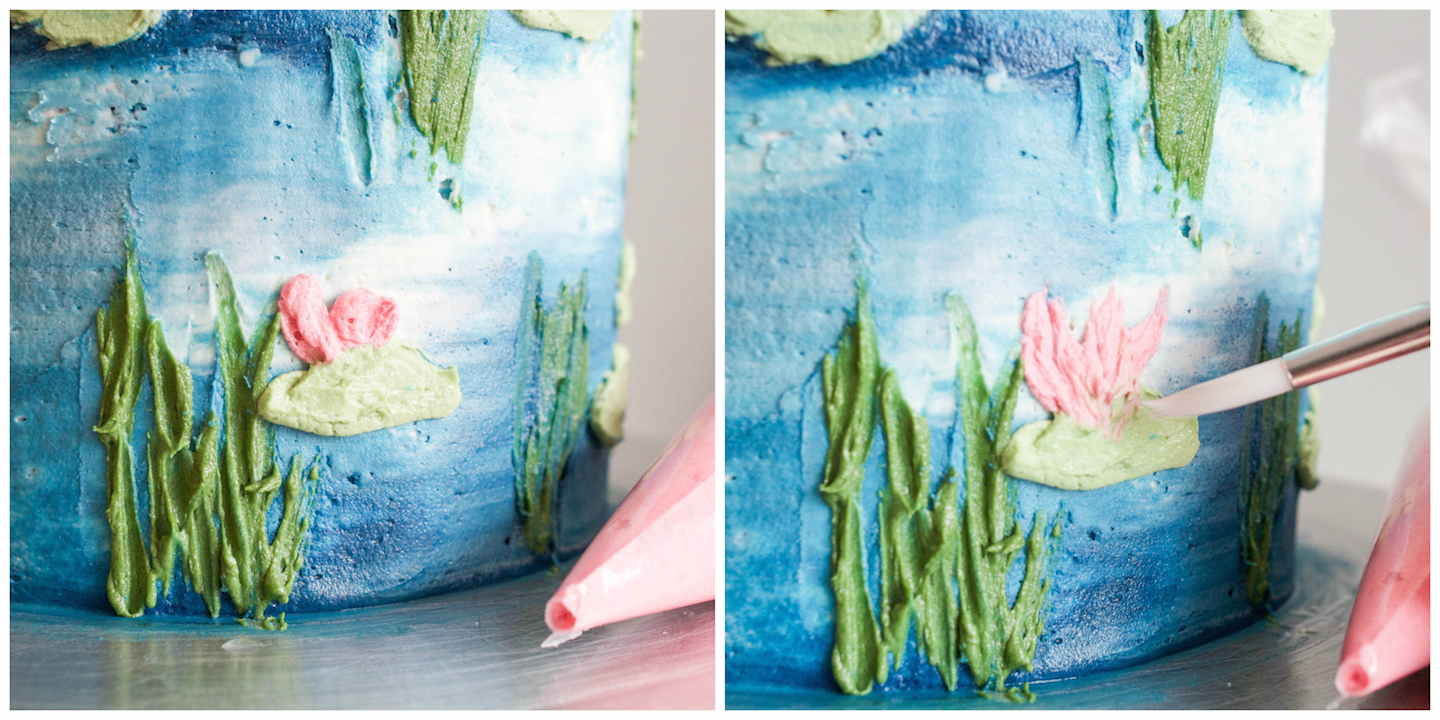
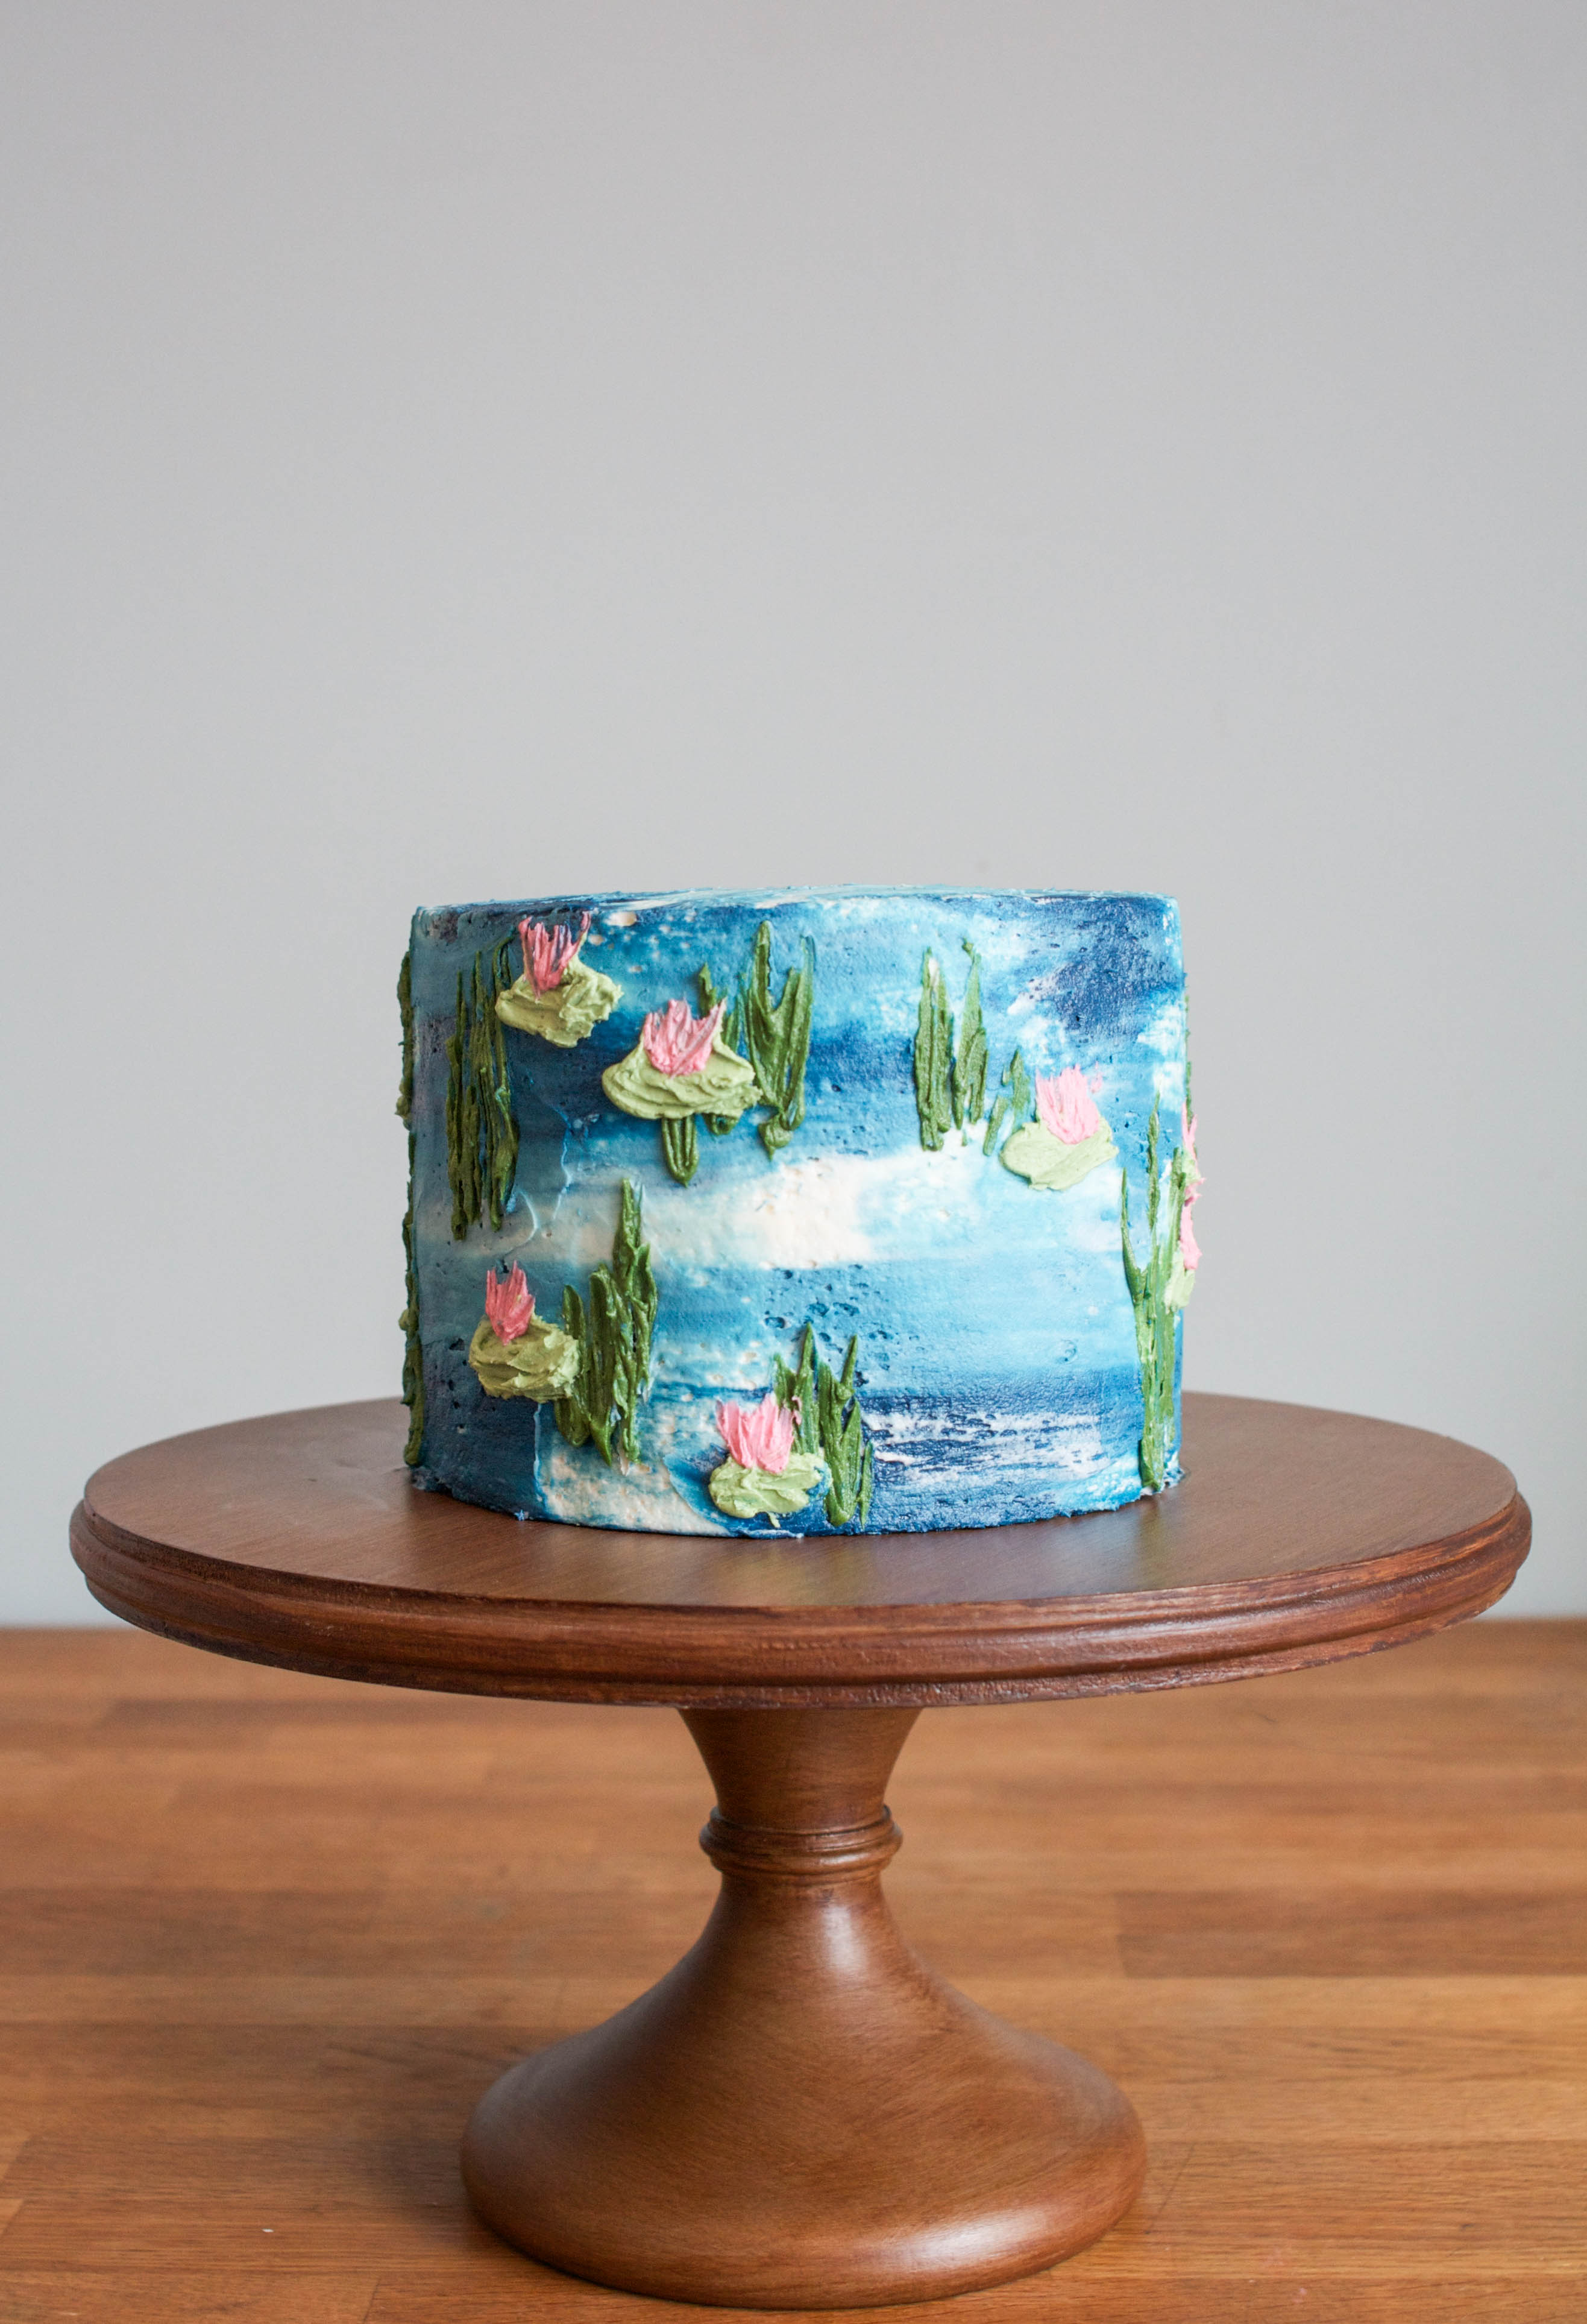
The cake is perfectly pretty without a topper. I just couldn't help but gild the lily (he he) and finish my cake with a pink and white chocolate flower. You could do the same, or finish yours with a sugar flower or even fresh flowers.

Make Wow-Worthy Hand-Painted Cakes — FREE!
Get the hand-painting skills you need to create ombré roses, chevrons & more for your most impressive cakes yet. It's all in this FREE online video class.Enroll FREE Now »


Share tips, start a discussion or ask other students a question. If you have a question for an expert, please click here.
Already a member?
No Responses to “Hand-Painted Cakes Made Easy With Buttercream!”