
Before breaking out your wallet to buy a new apron, take a peek inside your closet — we bet there's an old, oversized shirt in there that's just begging to be transformed. And with this quick and speedy tutorial, you'll be back in the kitchen making delicious dinners and decorating cakes in no time.
Upcycled Apron
Level: Easy
What You Need
Pro Tip: When choosing a shirt, remember that your shirt must be oversized and have a stand collar. Basically, you can't go wrong with a large men's button-down.
Instructions
1. Cut the Seams
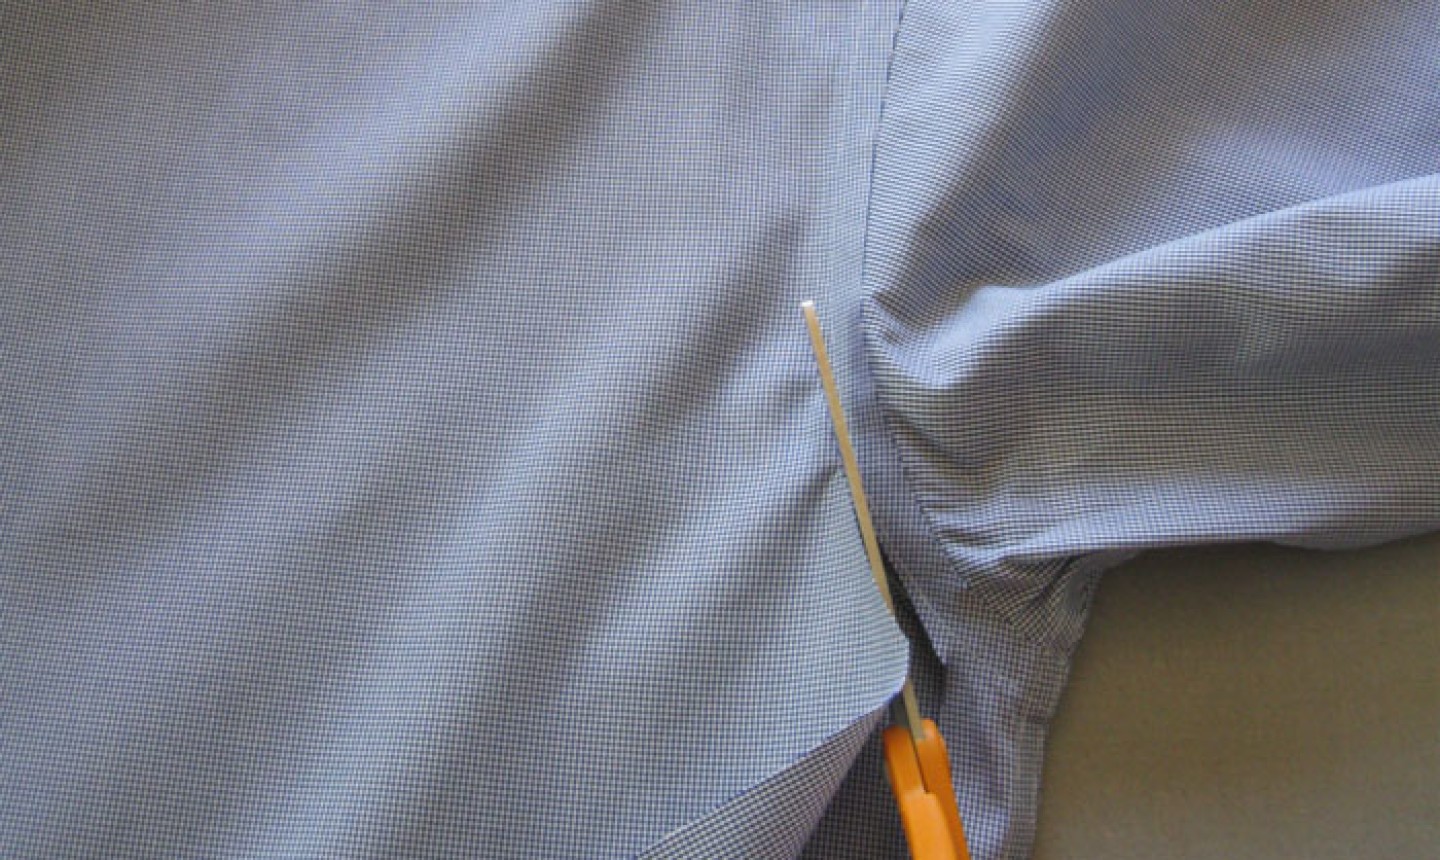
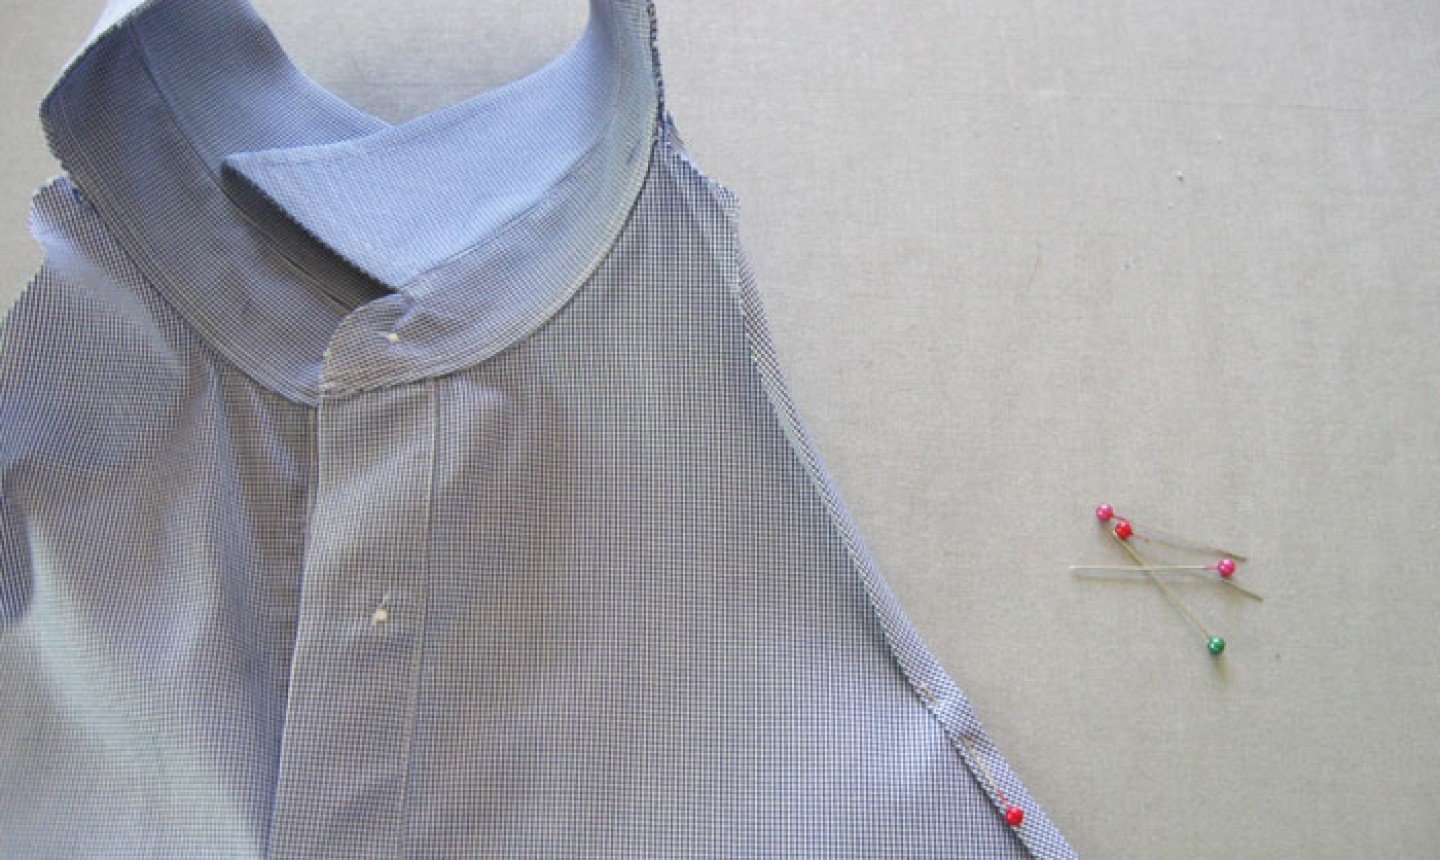
Lay the shirt front-side down on your work surface. Start dismantling it by cutting up from the bottom edge of the shirt, along the side seam. We chose to cut about an inch from the seam, but you can make the apron larger by leaving more space.
Next, cut along the back armhole seam up to the top of the shoulder. You can find the top of the shoulder by laying the shirt flat and marking it with a pin.
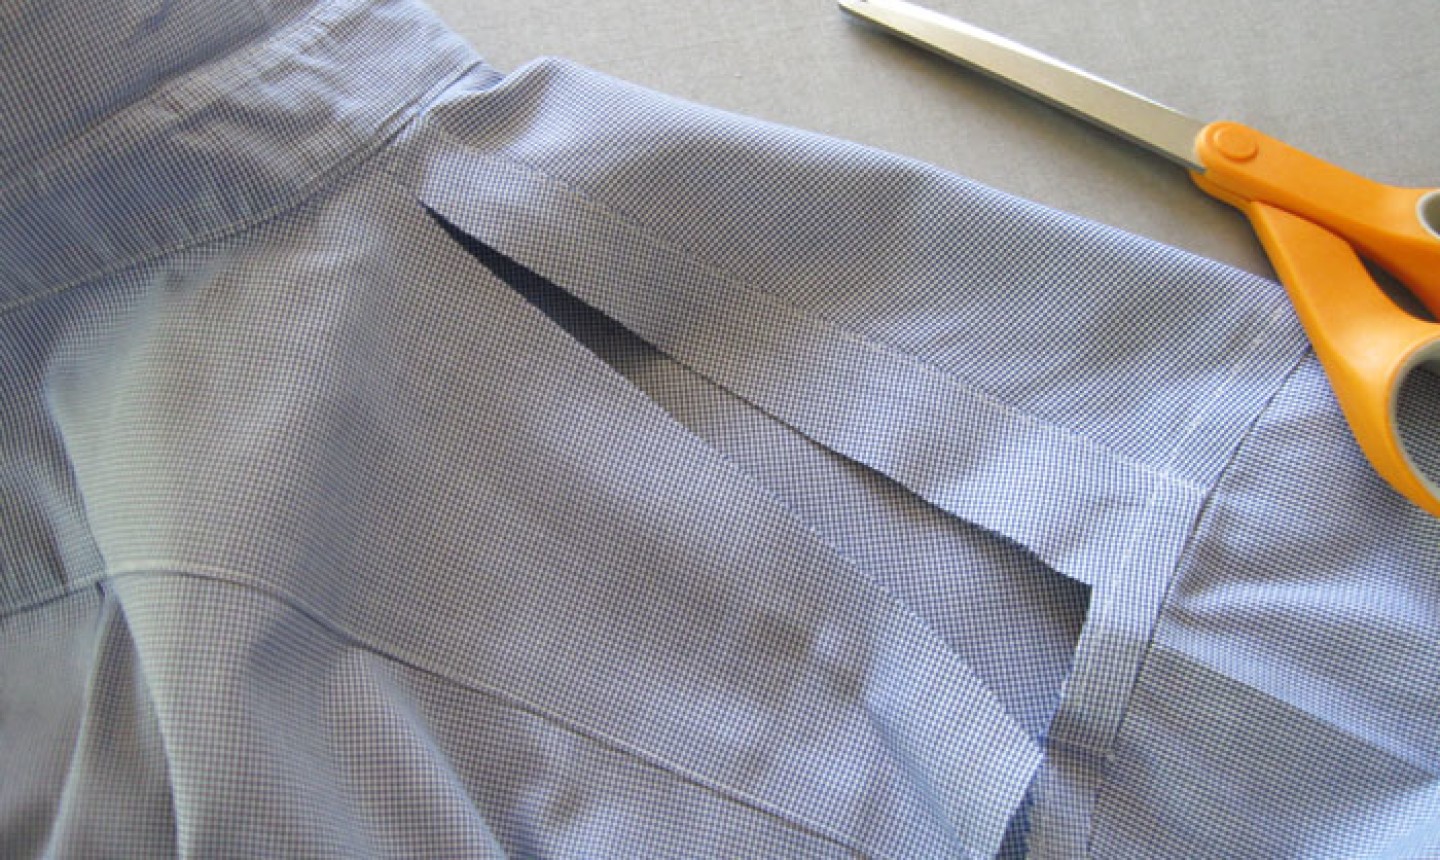
Now, cut along the shoulder line up to — but not through — the collar stand. This will create the neckband of the apron.
Repeat this step on the other side of the shirt. Be sure not to cut through or throw away the back fabric — you’ll use it later to make the straps, pockets and trim.
2. Cut Along the Collar
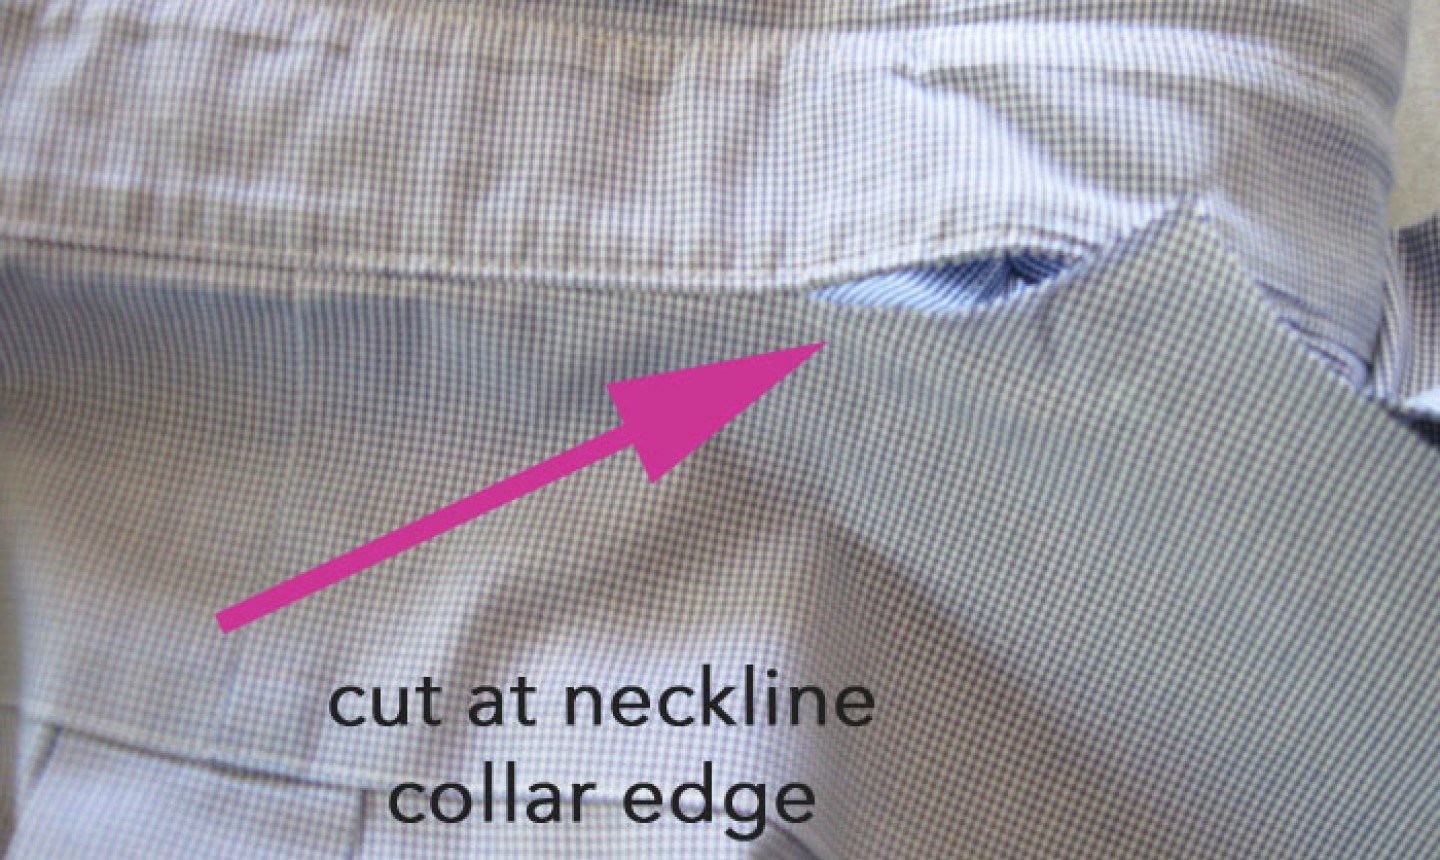
Very carefully cut along the seam at the collar stand to remove the back.
3. Cut the Front
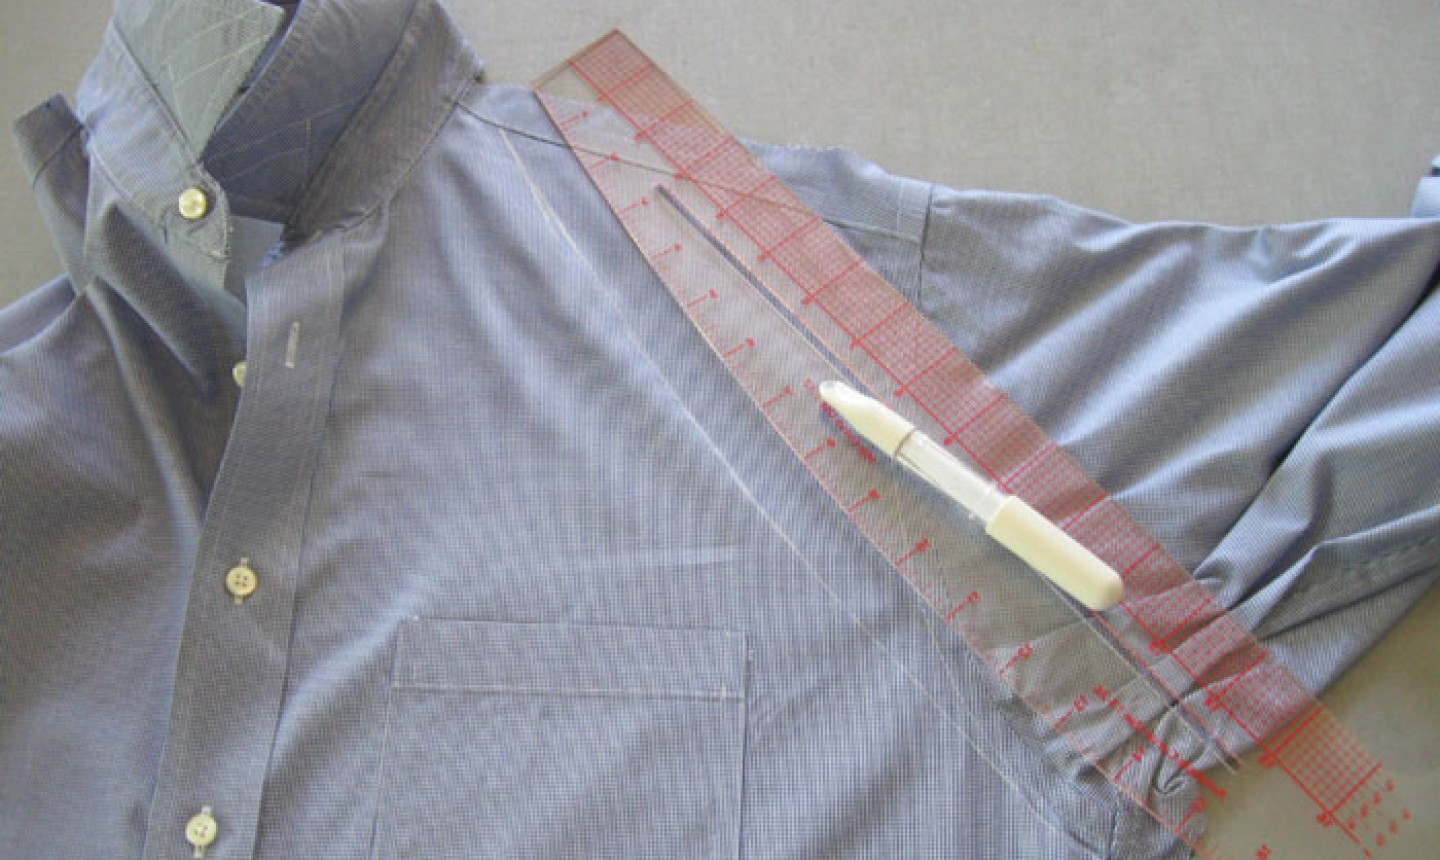
Flip the shirt so the front is facing up, then cut off one shoulder and sleeve. We used a French curve ruler to mark the line for cutting, but you can also trace the shape of an existing apron if you prefer.
Once the piece is removed, line it up with the other side so the cuts match. Remove this shoulder and sleeve as well.
4. Finish the Edges
Fold the fabric along the cut edges to the wrong side; pin in place. Use a ruler to make sure the hem is even, then press and stitch into place.
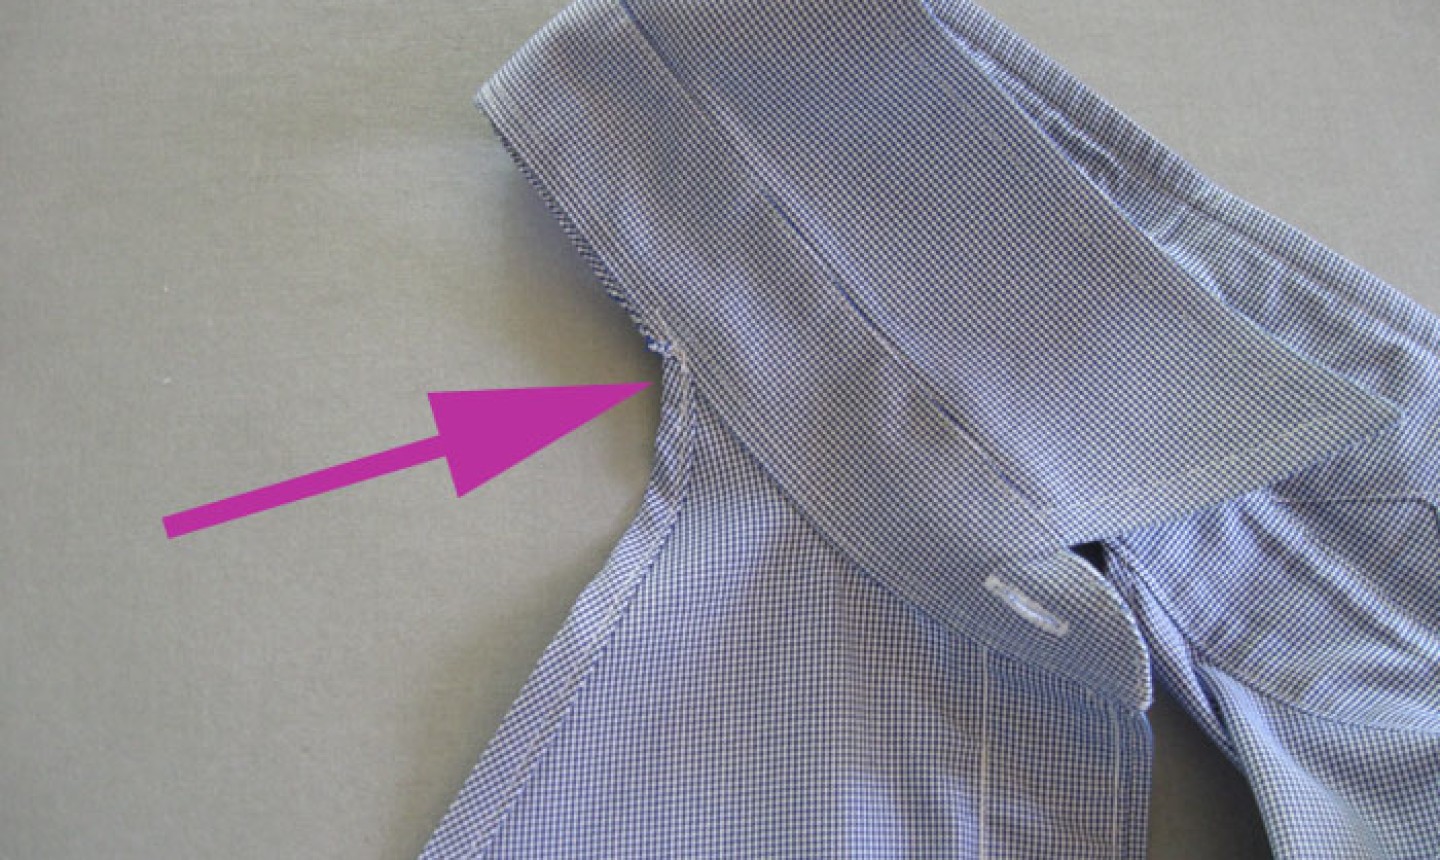
Add a few stitches at the corner where the shirt front meets the collar. This will reinforce this area and keep it from fraying or pulling apart.
5. Cut the Apron Straps
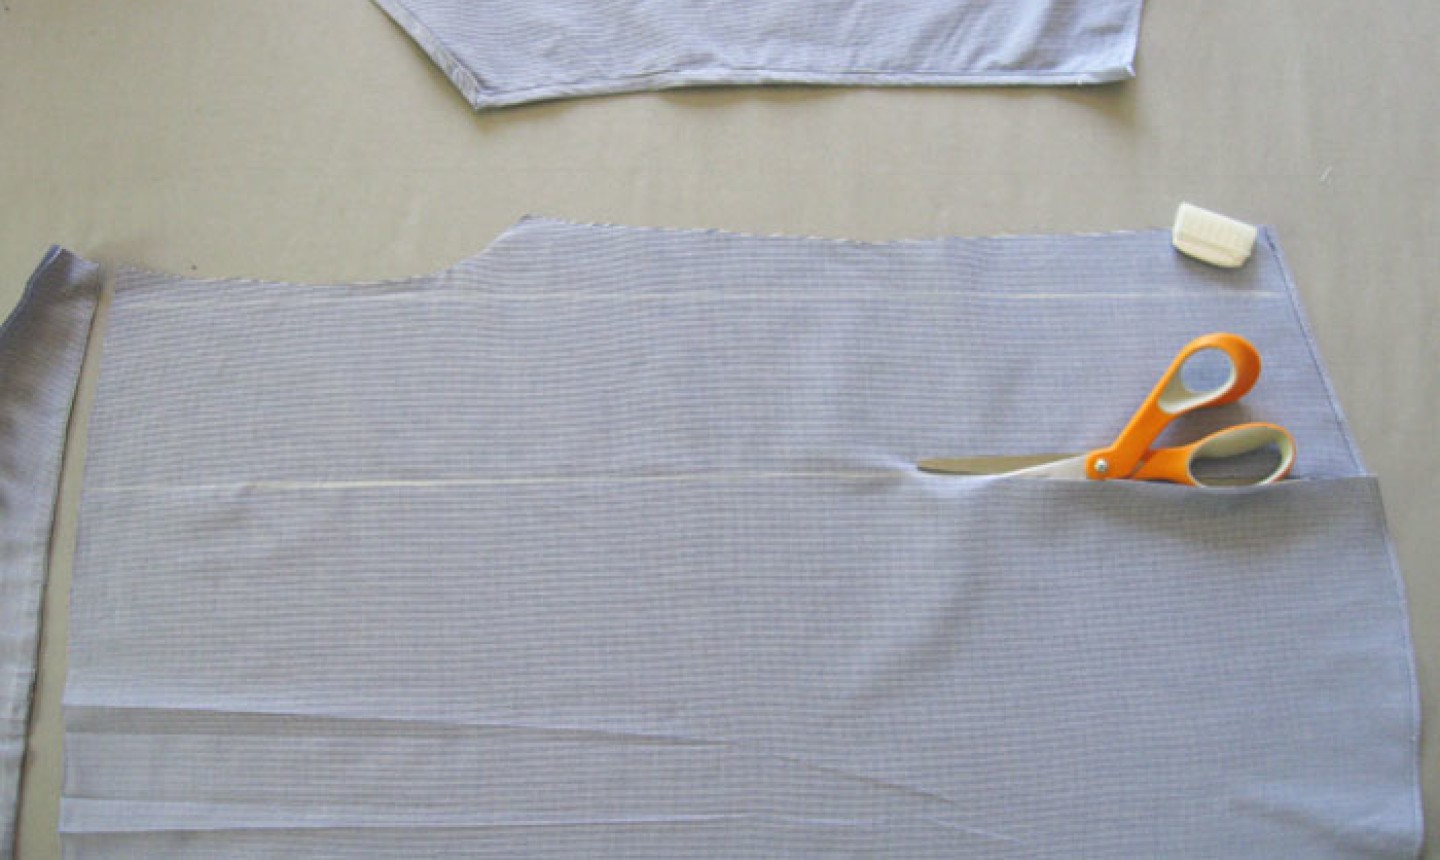
Using the fabric that you cut off the back, cut out two pieces that are 4″ wide by the full length of the fabric. Fold in half and sew a narrow seam along the raw edges, leaving one end open, then turn right side out and press. Repeat for the second strap.
6. Attach the Straps

Lay your apron wrong side up, and place your first strap on top. (The strap can go anywhere along the side of the apron — we placed ours just below the shoulder edge.) To make a clean, enclosed edge, pin and stitch with the strap edge as shown above (with the raw edge aligned just inside the edge of the apron), then flip the strap toward the outside edge and stitch again, enclosing the raw edge.
Repeat with the second strap, making sure to place it directly across from the first strap.
7. Embellish!
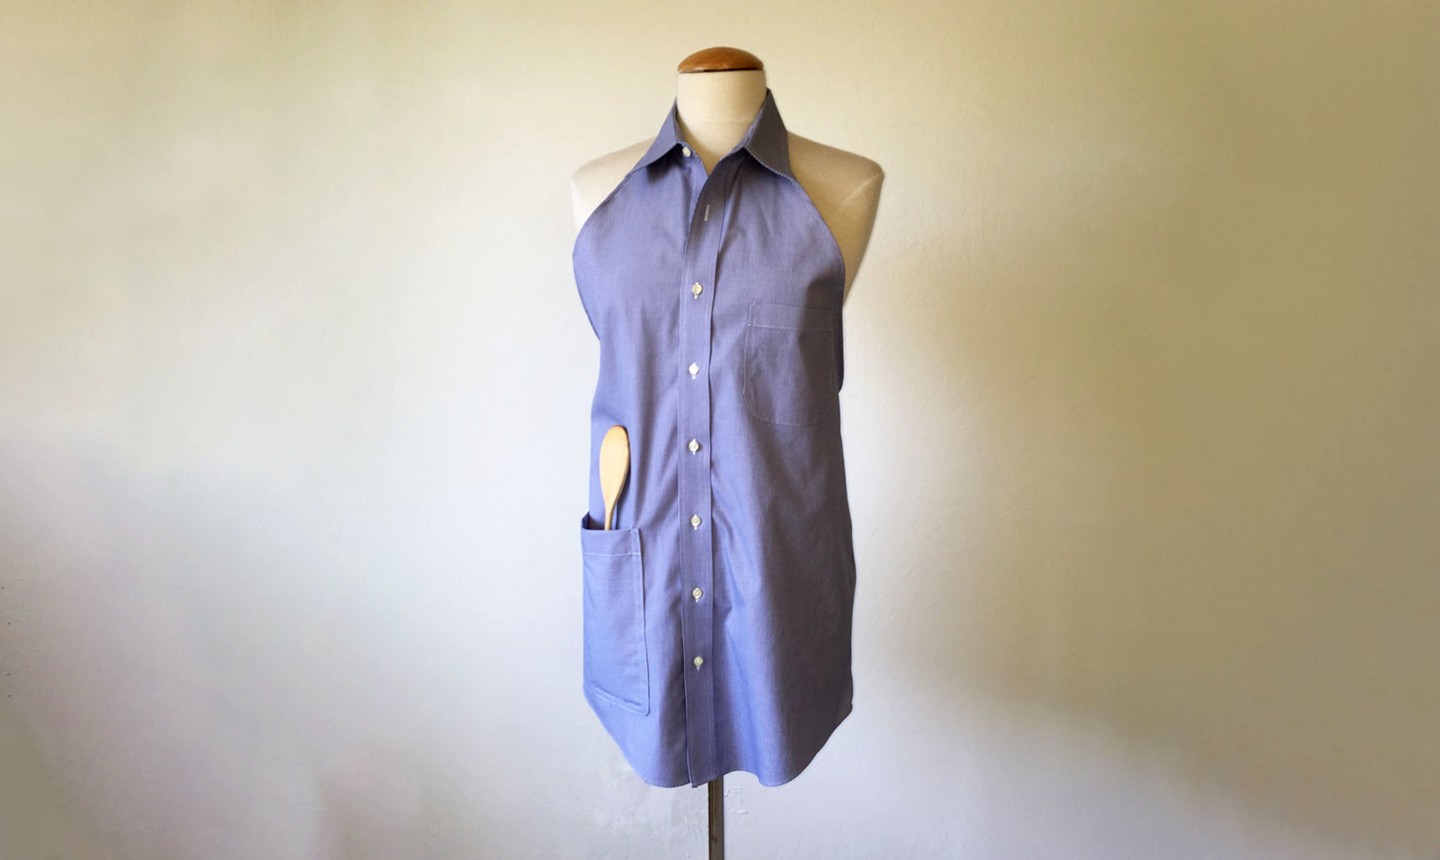
Technically you're done here, but now you can take time to personalize your apron (which is arguably the best part of any project). Use your leftover fabric from the shirt back or sleeves to add a pocket like we did, or give it a ruffled hem.

I made several of these when my husband was very ill. It made him feel better in his shirt apron. Very easy to put on. When no longer needed, donated them to our men’s group at Church for their BBQ’s. They are well used and enjoyed.
Fantastic idea.
I made one and it turned out really good
Love this idea. This would be great for gifts for people who have everything.
yes !!1 my hubby has many military blue shirts that need to be remodeled. am going to try thiis weekend.
I would love to see a picture of the finished back of the apron. I love the idea! Yes!
what a great idea, I am now going to make one, thank you
Love it! Like Diane, I would like see a view of the finished back.
Love this apron
I would like to see a view of the finished back.