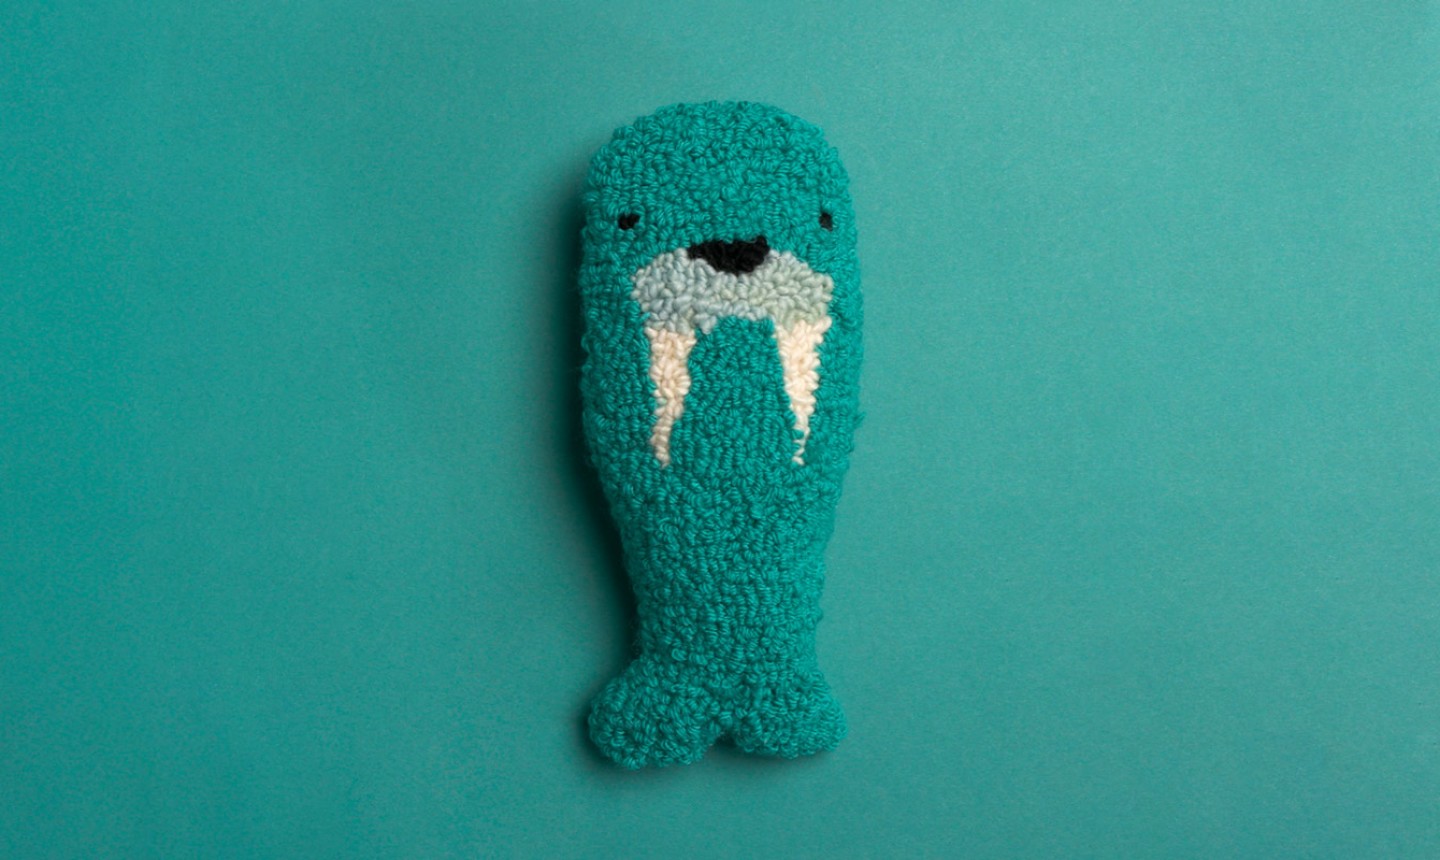
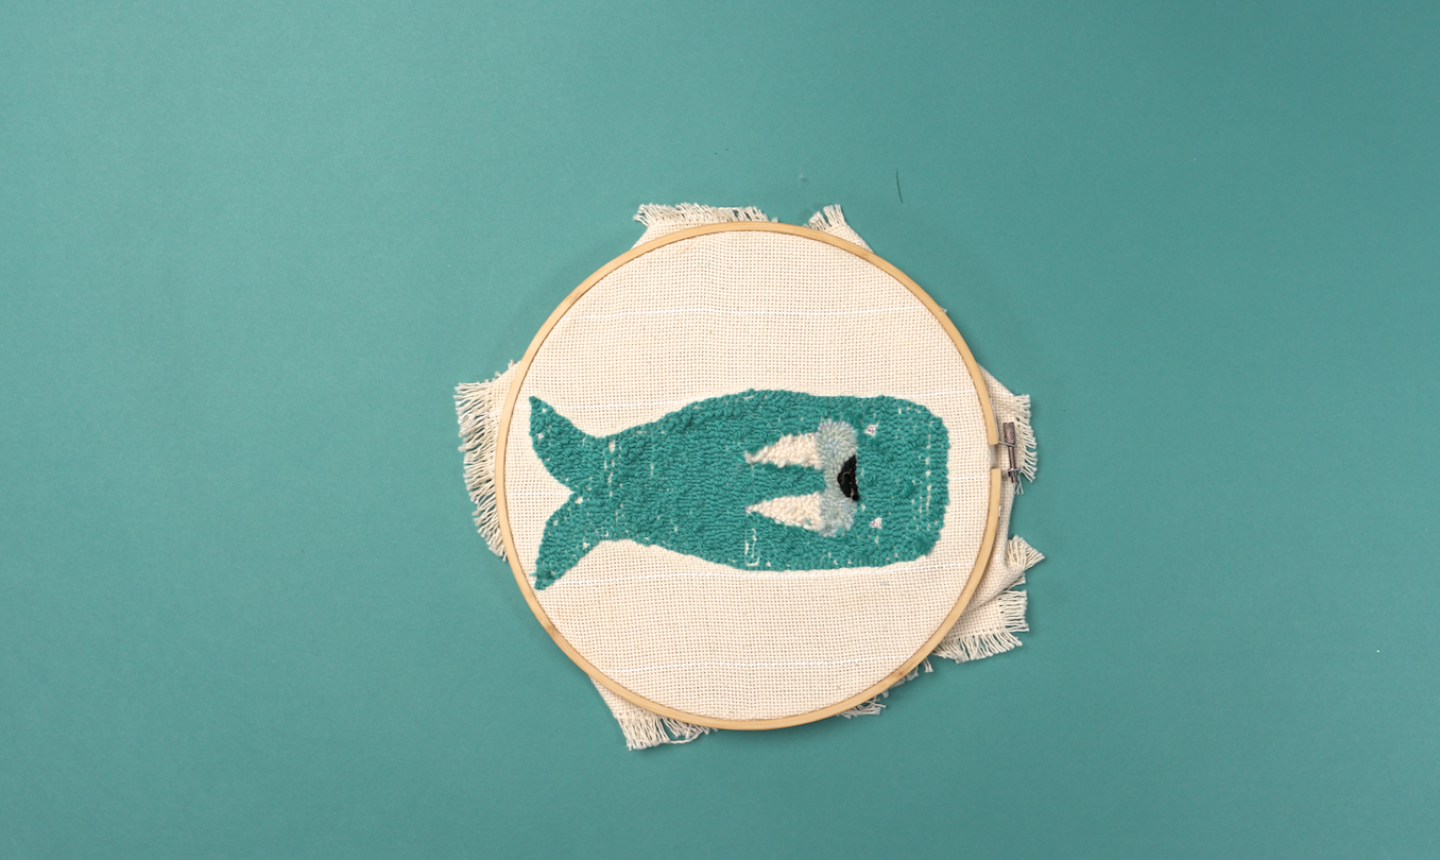
We don’t know what we love more about this walrus: how cute it is, or how easy it is to make! This is a great beginner craft for any newbie punch needle artist.
Punch Needle Stuffed Animal
Level: Easy
What You Need
- Monks Cloth
- Oxford punch needle # 10 regular
- Embroidery hoop
- Teal, pale blue, cream, and black bulky yarn
- Fabric pen
- Tapestry needle
- Scissors
- Canvas
- Safety pins
- Needle and heavy thread (we used button thread)
- Fiber fill
- Cardboard for template (optional)
Pro TipGood to Know Wool or wool blend yarns work best for punch needle — they’ve got a bit of grip, so they’ll stay put in your project.
Instructions
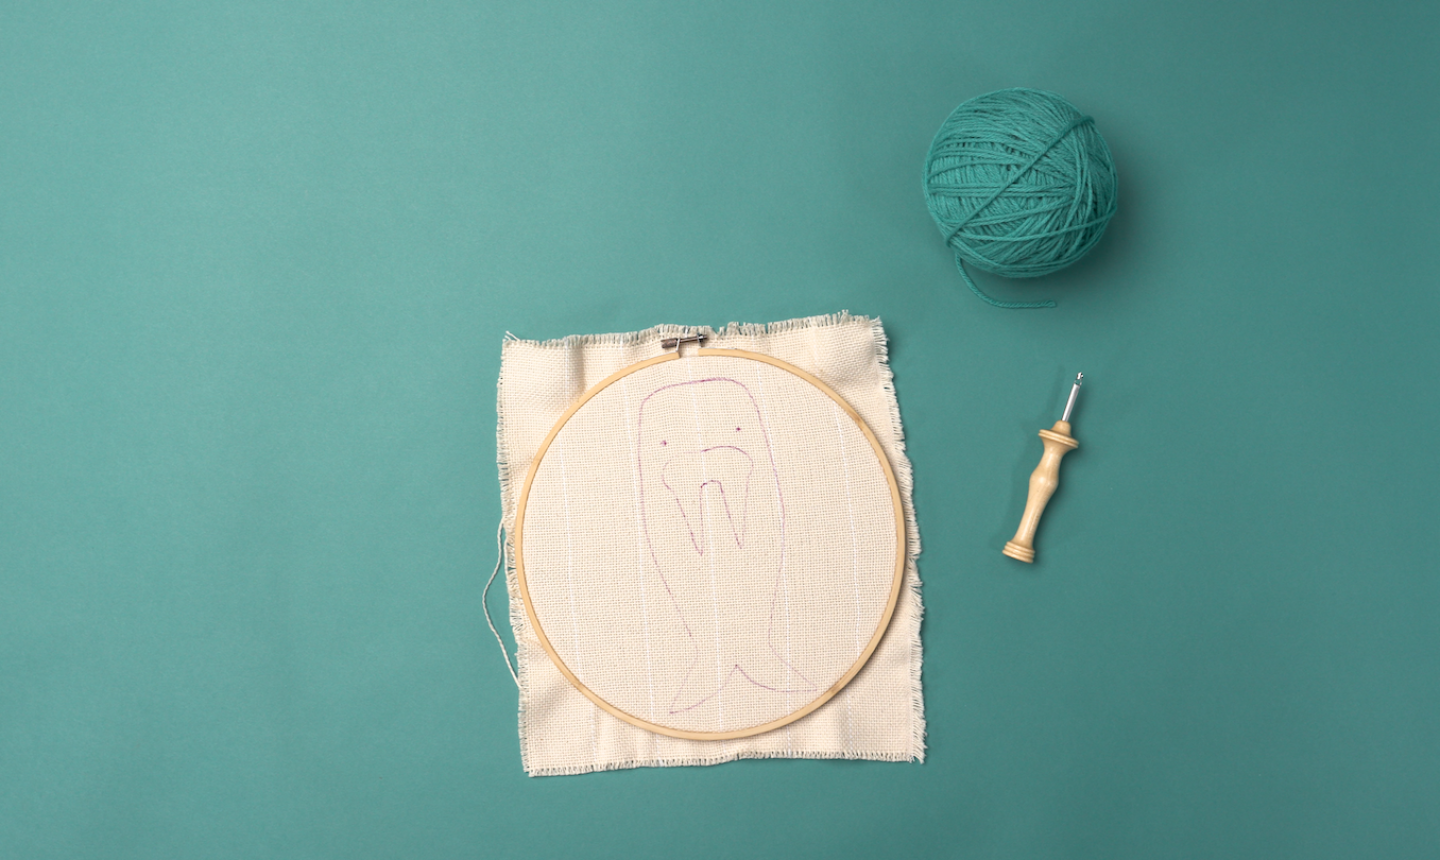
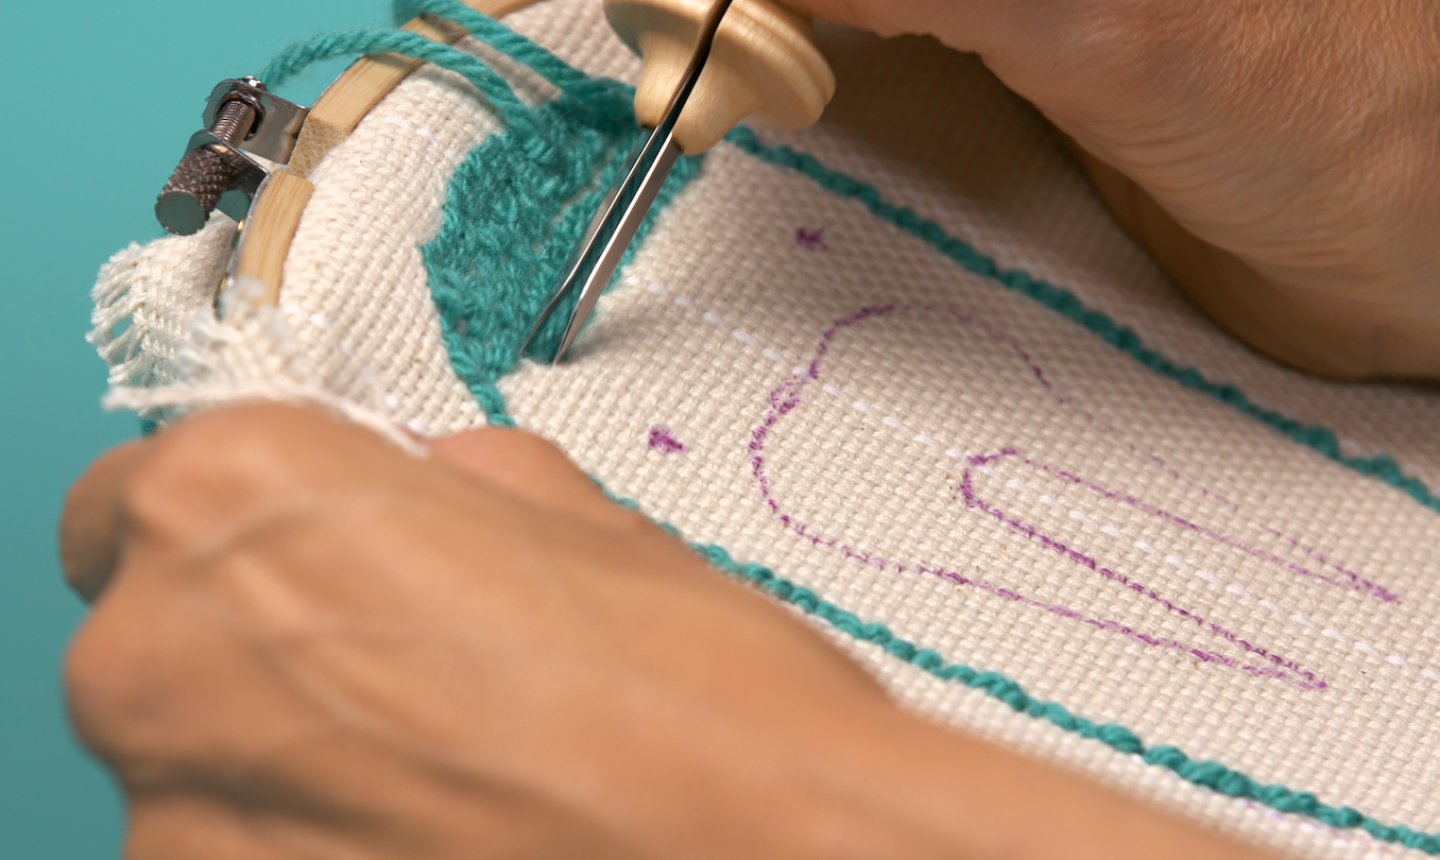
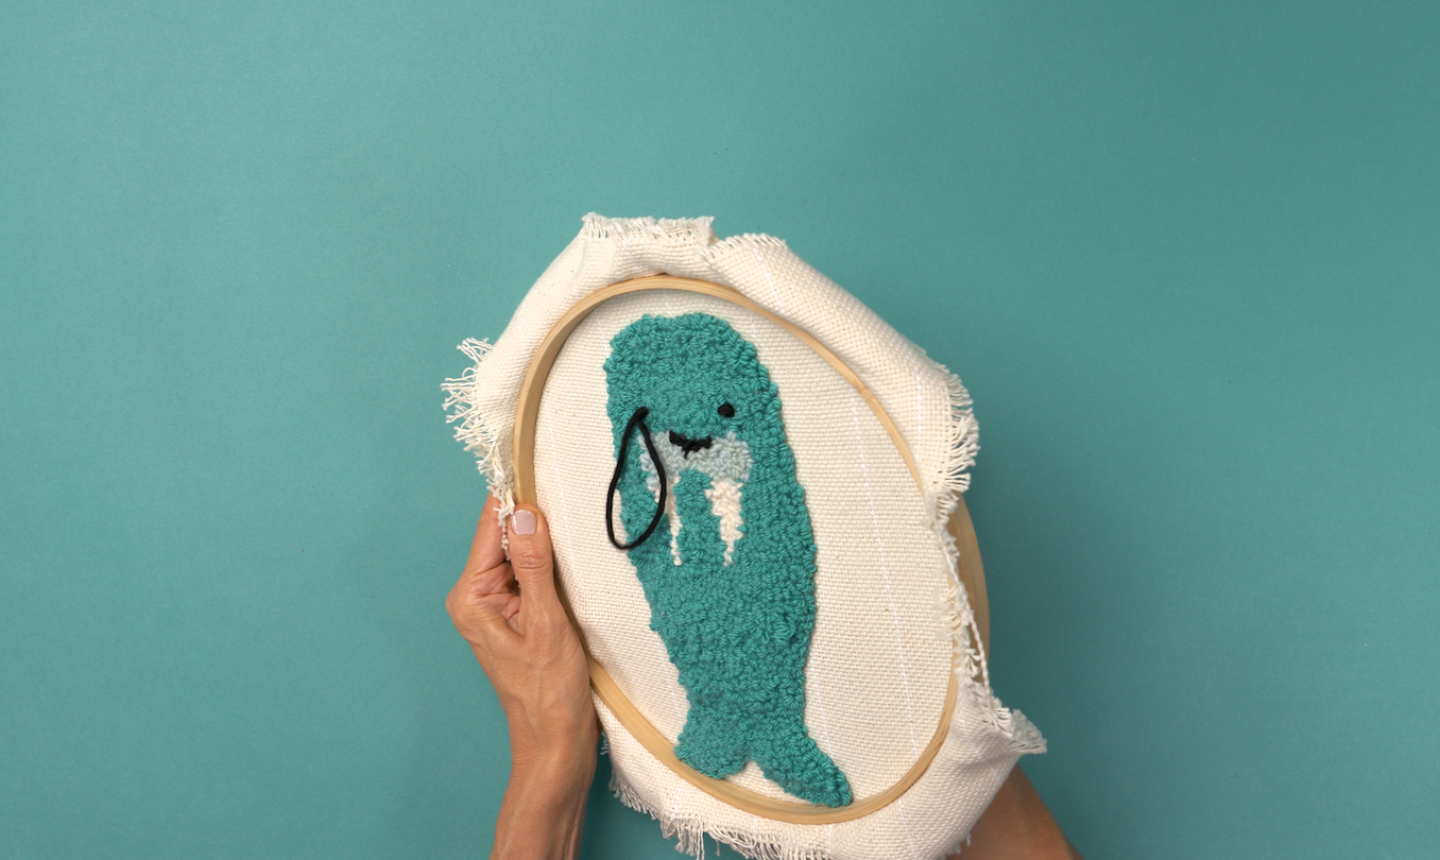
1. Trace the Design
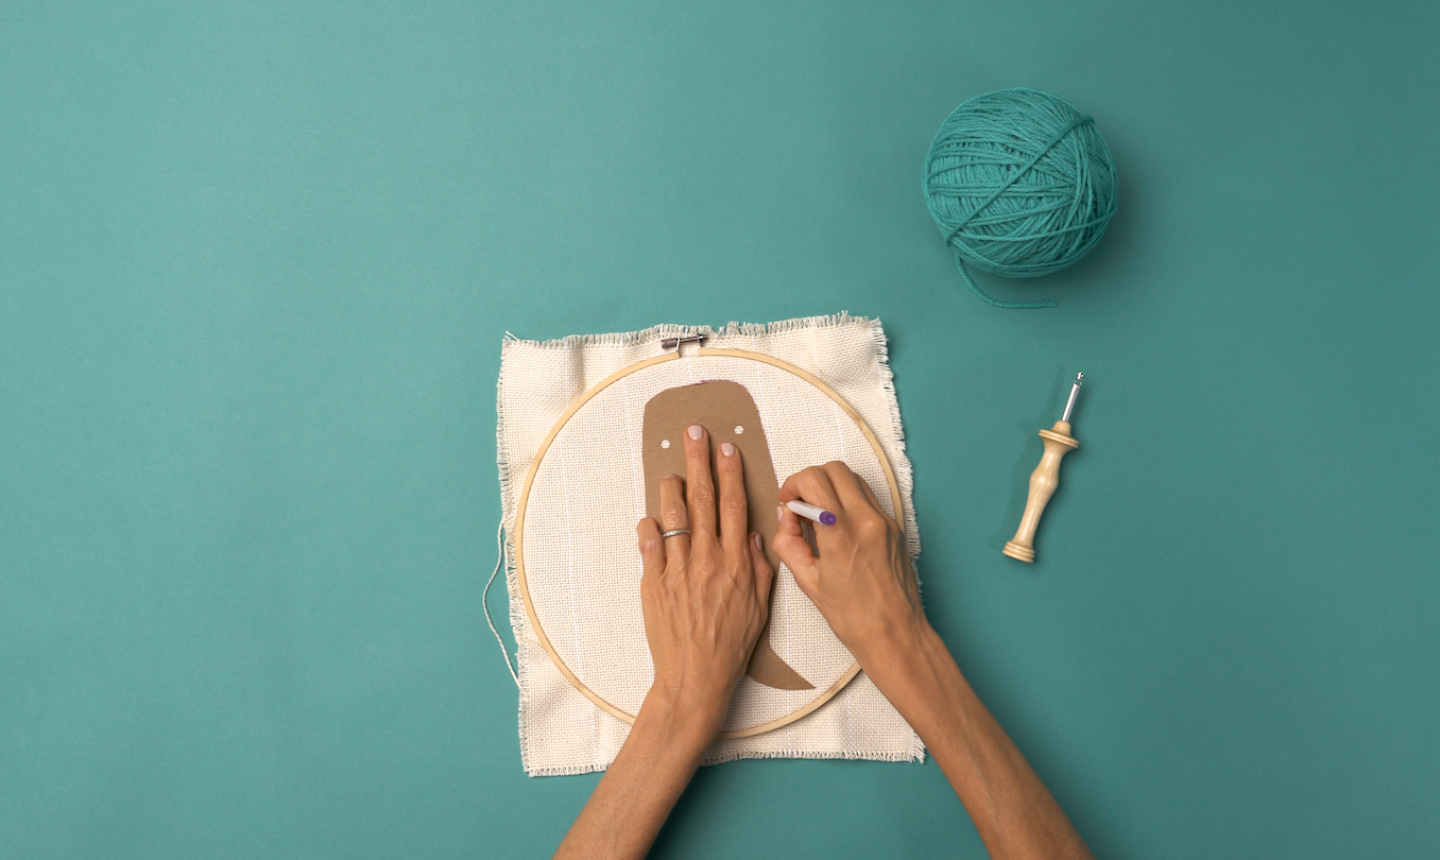
Hoop up your monks cloth and use a fabric pen to draw your animal. You can totally free-hand it if you’re artistically inclined, but it’ll be much easier to transfer your design from a template, like we did with this walrus.
Pro Tip Make sure you hoop your fabric as tight as you can — a taut cloth will make punching so much easier.
Either draw your animal on a piece of paper and use a lightbox or sunny window to trace the design, or draw it onto your cardboard, cut it out and trace around it. You’re tracing onto the wrong side of your fabric, so don’t worry about the lines showing up on your finished pillow.
Once it’s transferred, you’re ready to grab your yarn!
2. Thread Up
Thread the punch needle with whatever color you’re making your walrus (we used teal). To do this, hold the punch needle with the groove facing up, and thread the yarn down through the eye of the needle. Pull the working yarn back, until you feel it slide into the groove. It should move freely through the needle.
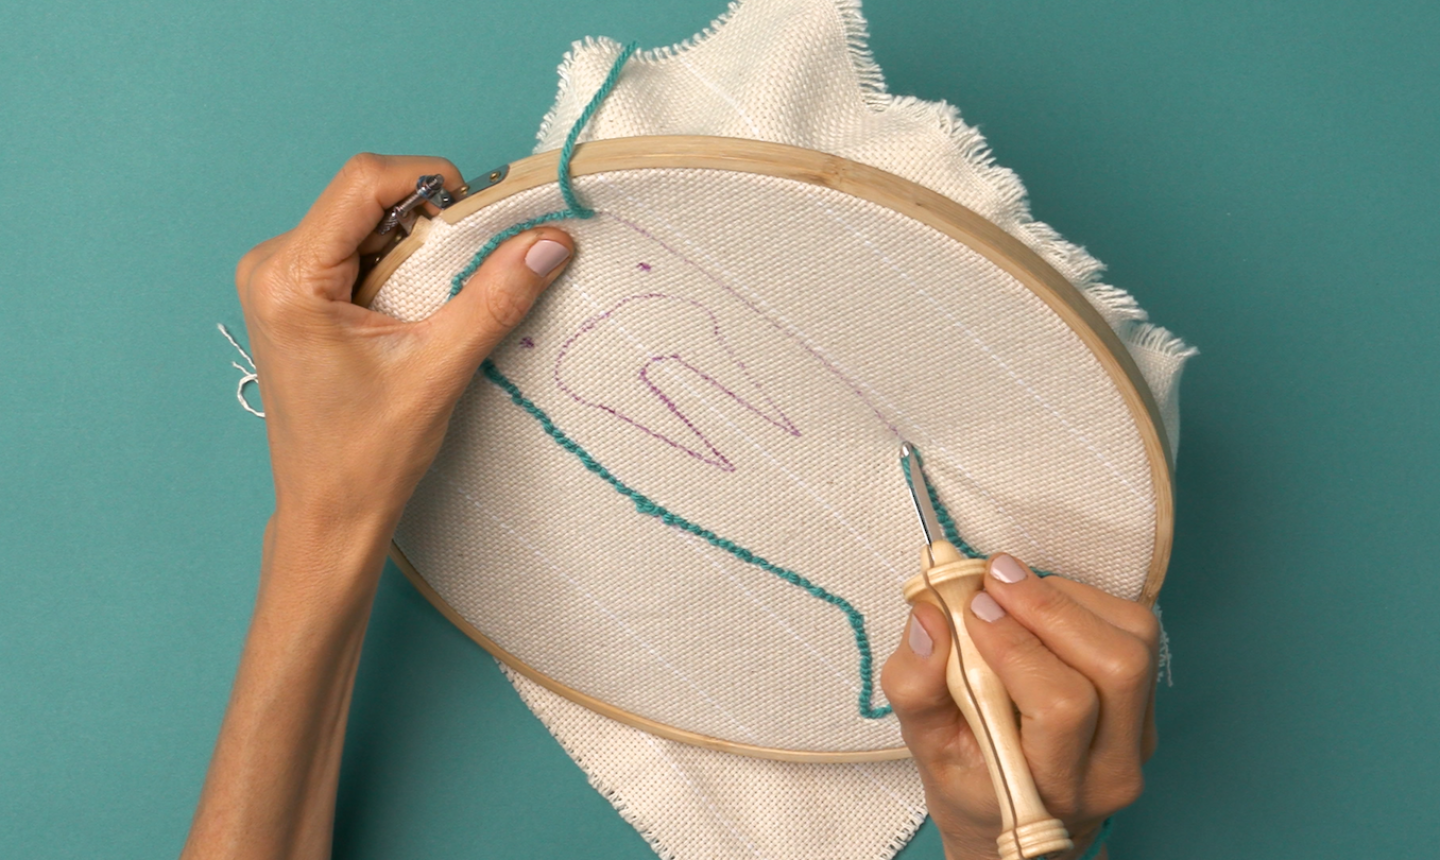
3. Get Punching
Pick a starting point on the body outline and punch your needle through the fabric, pushing it all the way through (the handle of your needle should hit the fabric). Bring it back up, and drag the tip across the fabric slightly, then insert it again. Be sure to keep the needle with the groove facing up, and punch away from you.
Repeat this motion, punching your needle all the way through the fabric, pulling it back up, and dragging across the fabric to the next stitch. Rotate the hoop as you keep punching around the body outline. Try to keep each stitch about a ¼” long.
4. Fill it Up
Once you finish the outline, start filling in the walrus. Your stitches should be slightly staggered from the previous row, sort of like laying bricks. Don’t worry about having a bit of white space show between stitches — it will look more filled out on the right side.
When you’re finished with the body (remember to leave space the for the eyes and snout!), just trim your yarn, and leave the end hanging out on the wrong side.
Pro Tip Since the wrong side of your pillow is facing you, flip the hoop over from time to time to see how the stitches will look on the final product. If you don’t like what you see, it’s super easy to rip the stitches out — just pull on the yarn until you’ve taken out the part you don’t like, and start again.
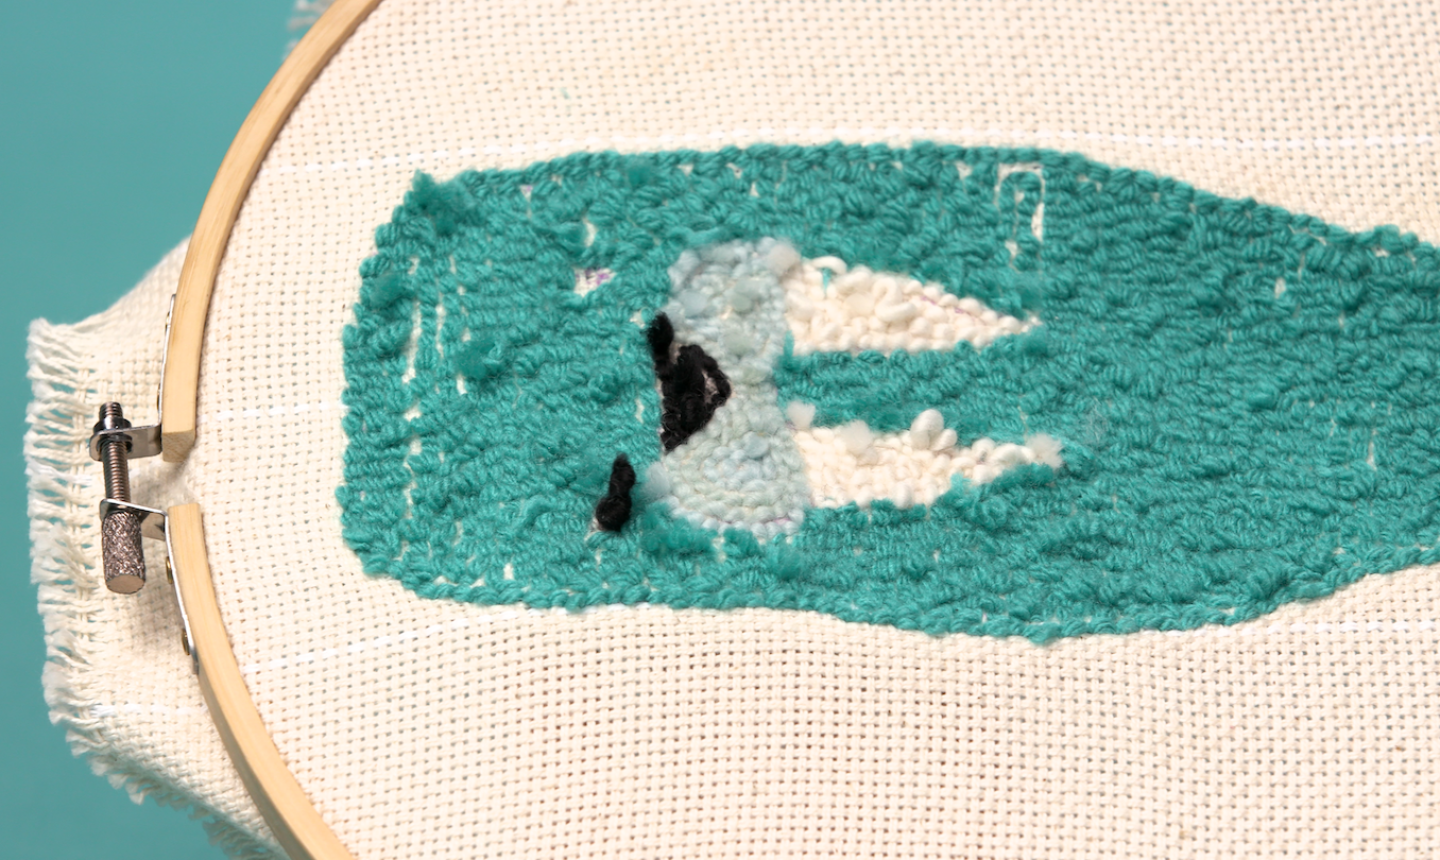
5. Tusk Time
Rethread your punch needle with pale blue and fill in his snout. Use black for his little nose and cream for the tusks. Trim the excess yarn when you’re done.
6. Knot the Eyes
When you get to the eyes, thread a tapestry needle with black yarn. Knot the end and push the needle through to the right side (remember, this side you’re working from is the wong side, so you won’t see this knot once the walrus is finished).
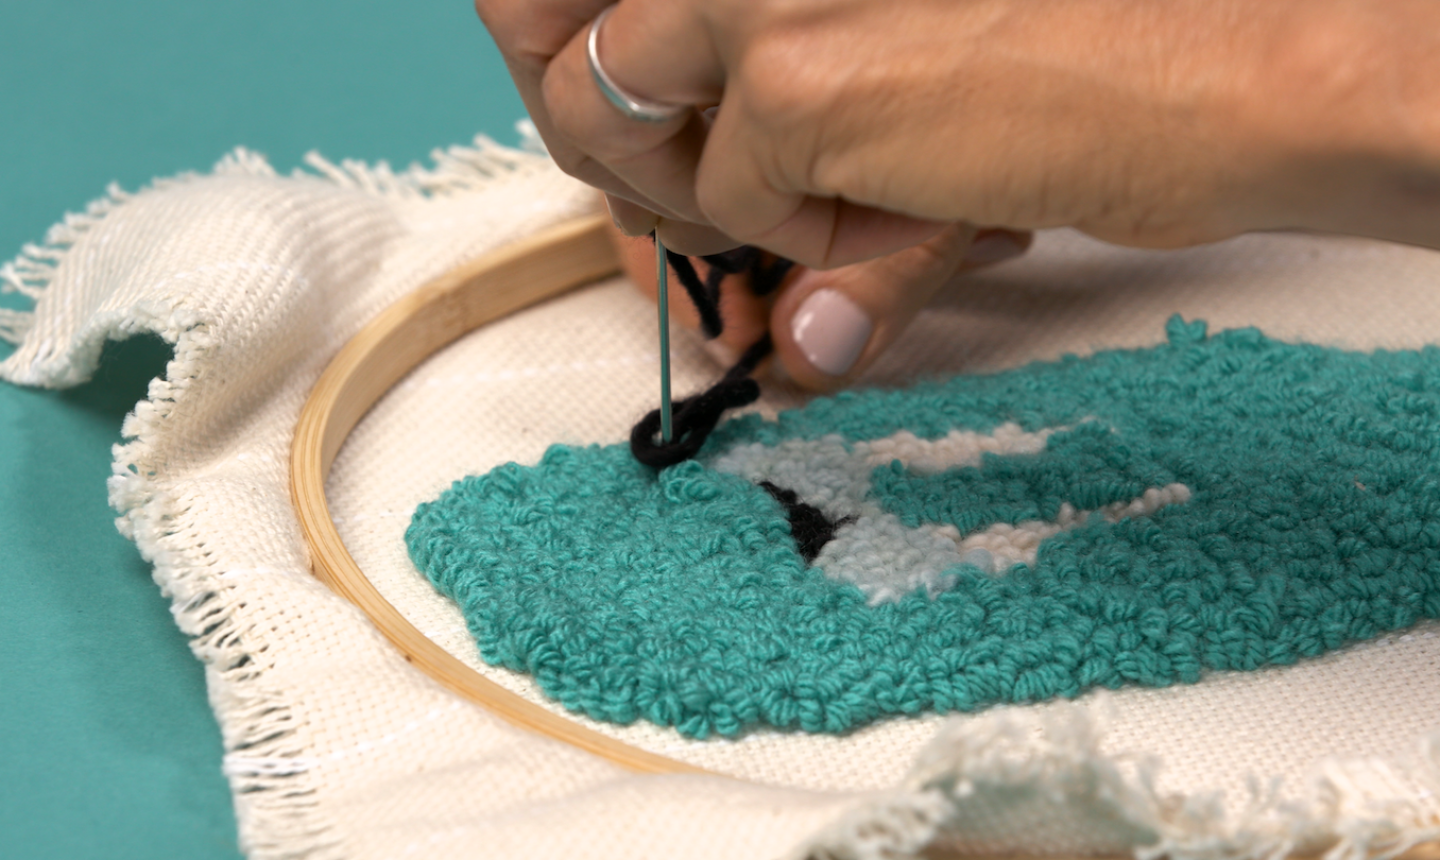
Flip the hoop over (to the front side of the stuffed animal). Make a double knot for each eye by looping the yarn, as demonstrated in the video. Thread the needle back down through the first finished eye and up through the second eye.
Repeat the knots, thread the yarn back through to the back side and trim the excess. Cut the length of black yarn connecting the two eyes on the back as well, so it doesn’t get caught or pulled when you assemble the walrus.
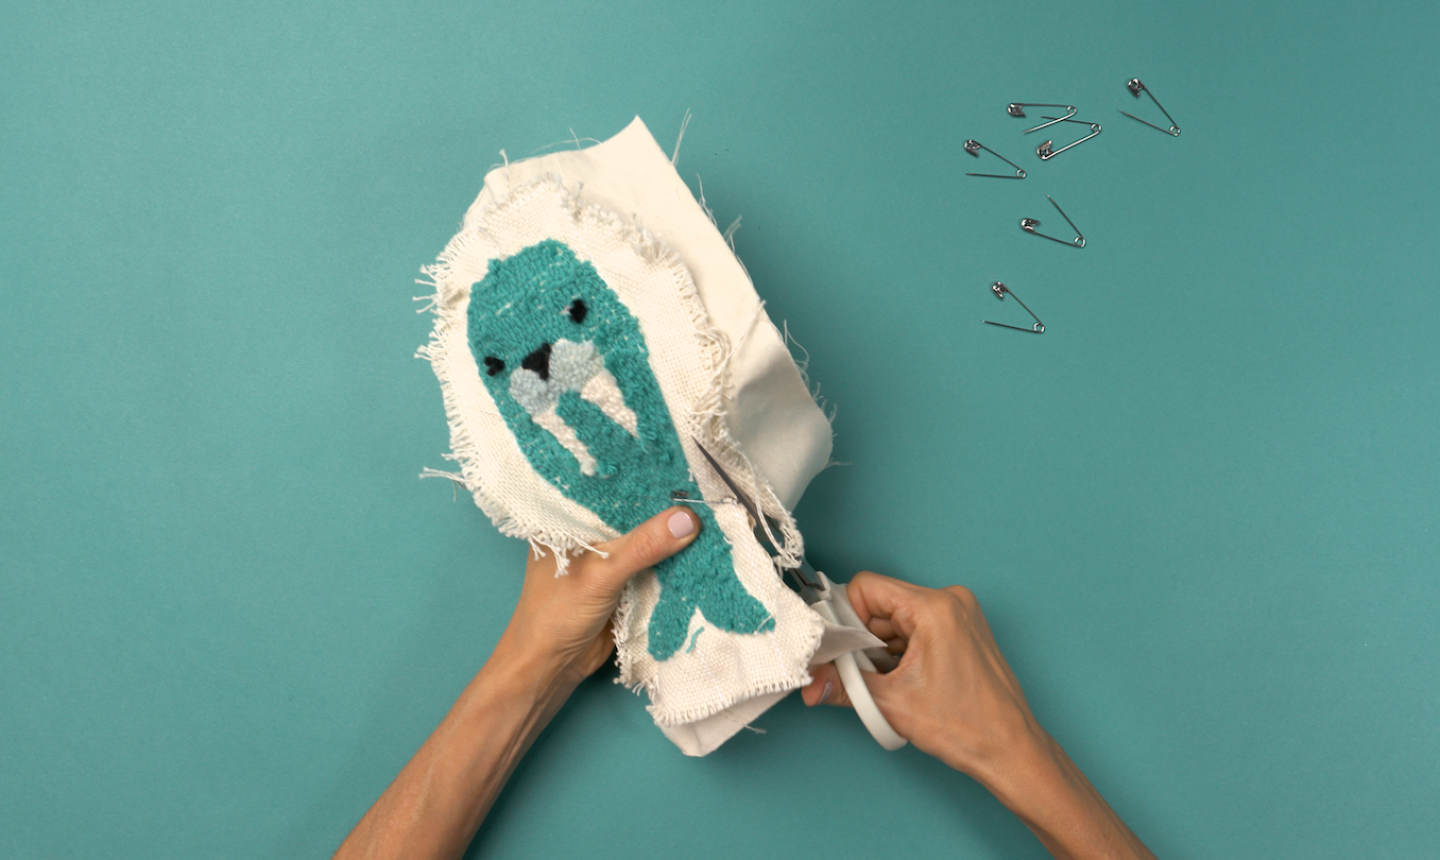
7. Trim and Pin
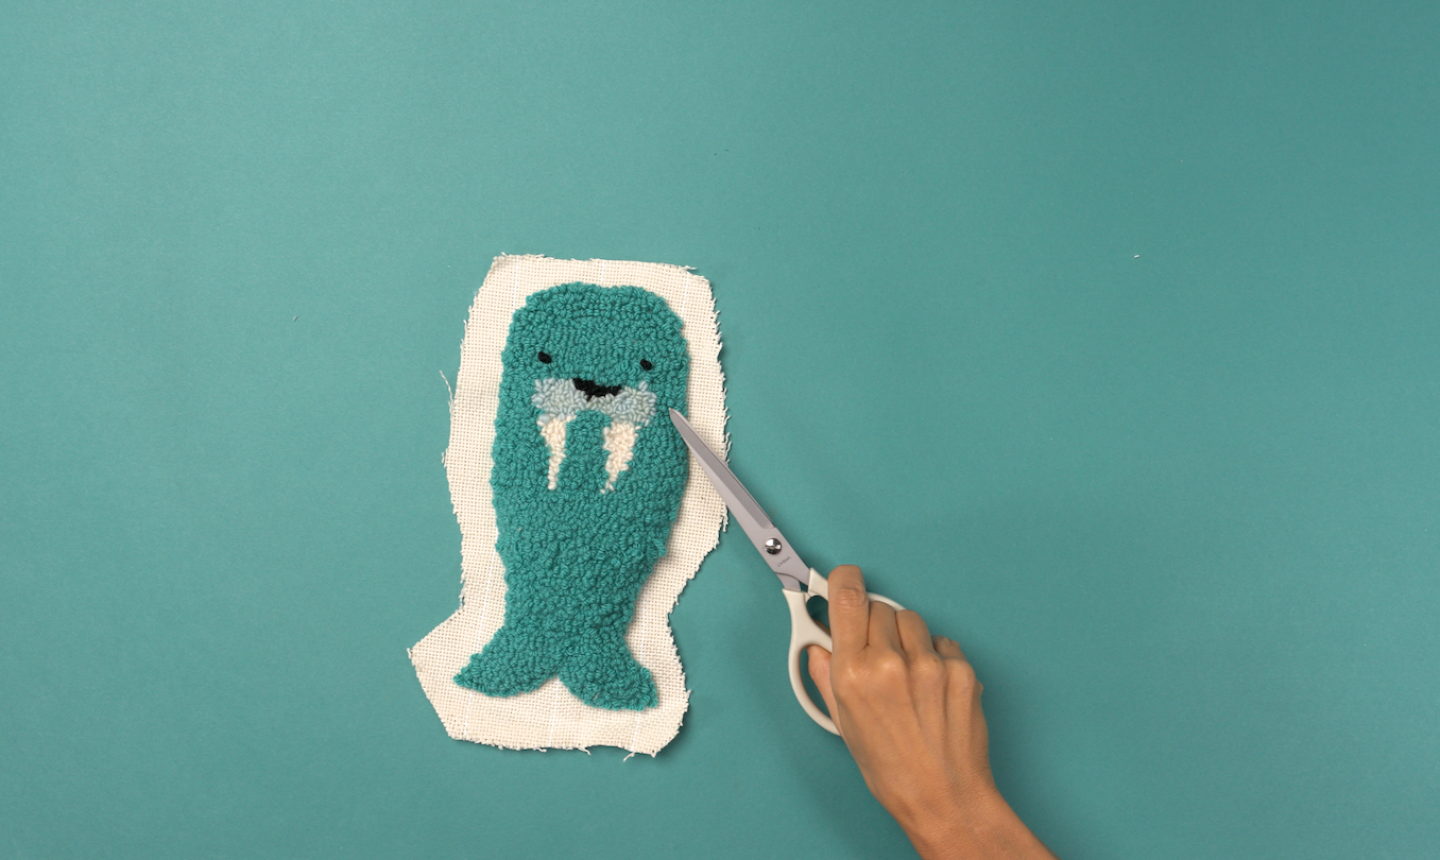
Remove the walrus from the hoop and cut around it, leaving about a 1″ seam allowance.
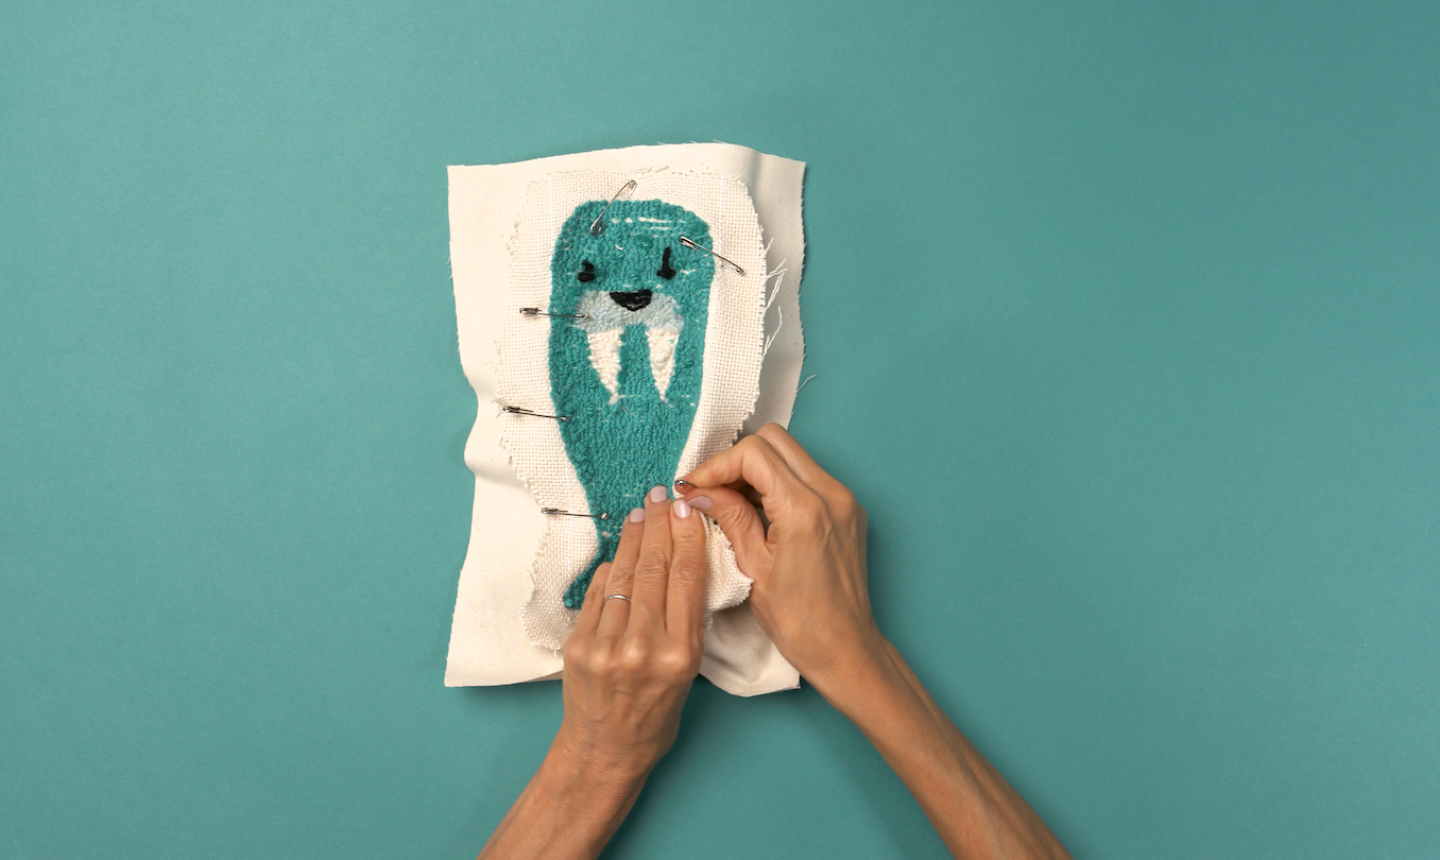
Place the walrus right-side down on a piece of canvas. Your canvas piece should be slightly bigger than the monks cloth. Pin to secure.
8. Start Stitchin’
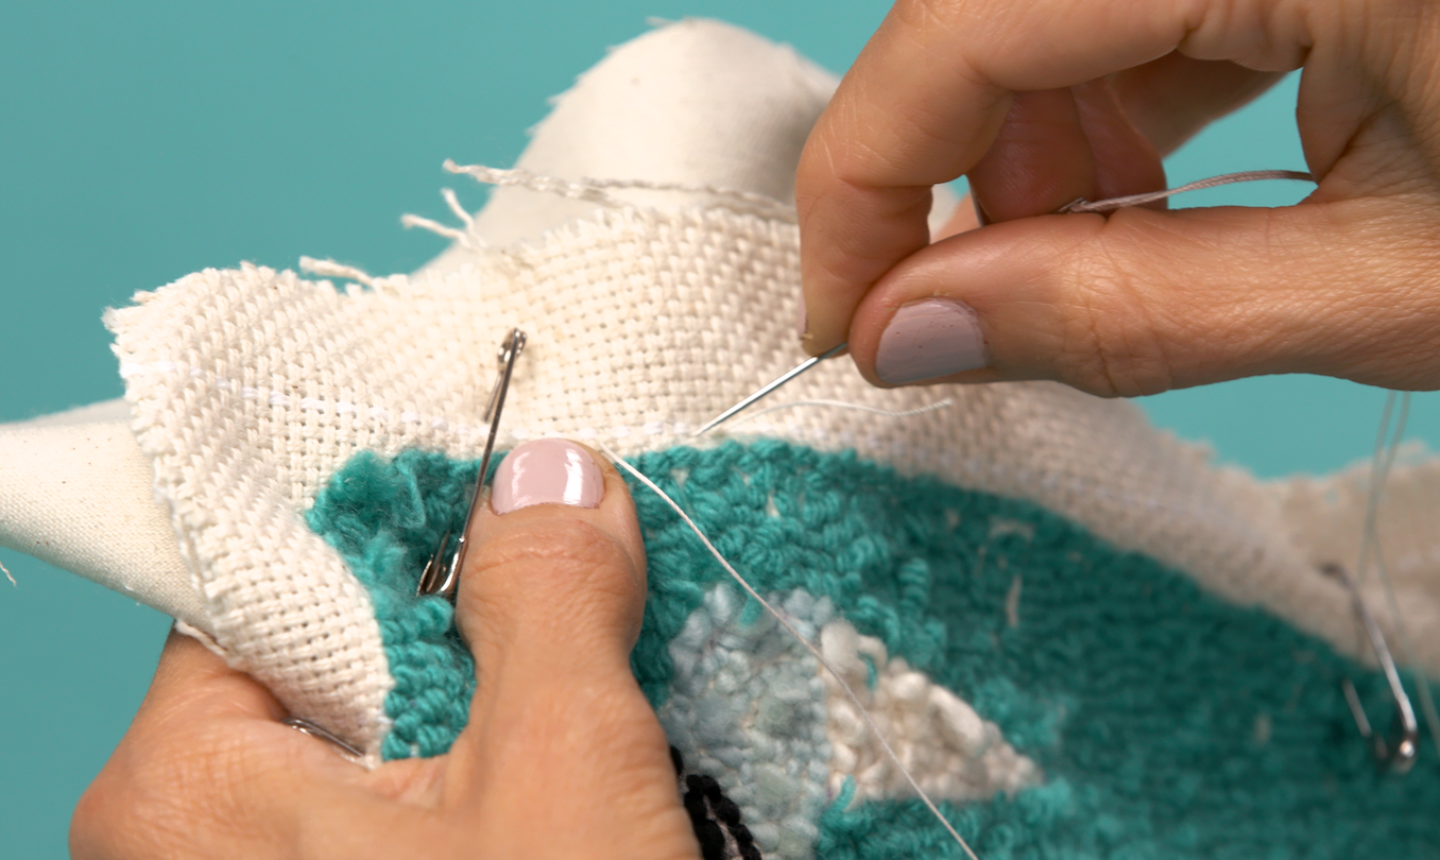
Thread a needle with heavy thread and backstitch along the walrus to join it with the canvas. Remove the safety pins as you work. Leave a 3″ space unstitched — this will leave a hole so we can turn the stuffed animal right-side out later.
9. Trim (Again)
Cut around the walrus once again, cutting both the canvas and monks cloth to bring the seam allowance down to about ½”. Clip notches in the outward curves.
10. Get Stuffed
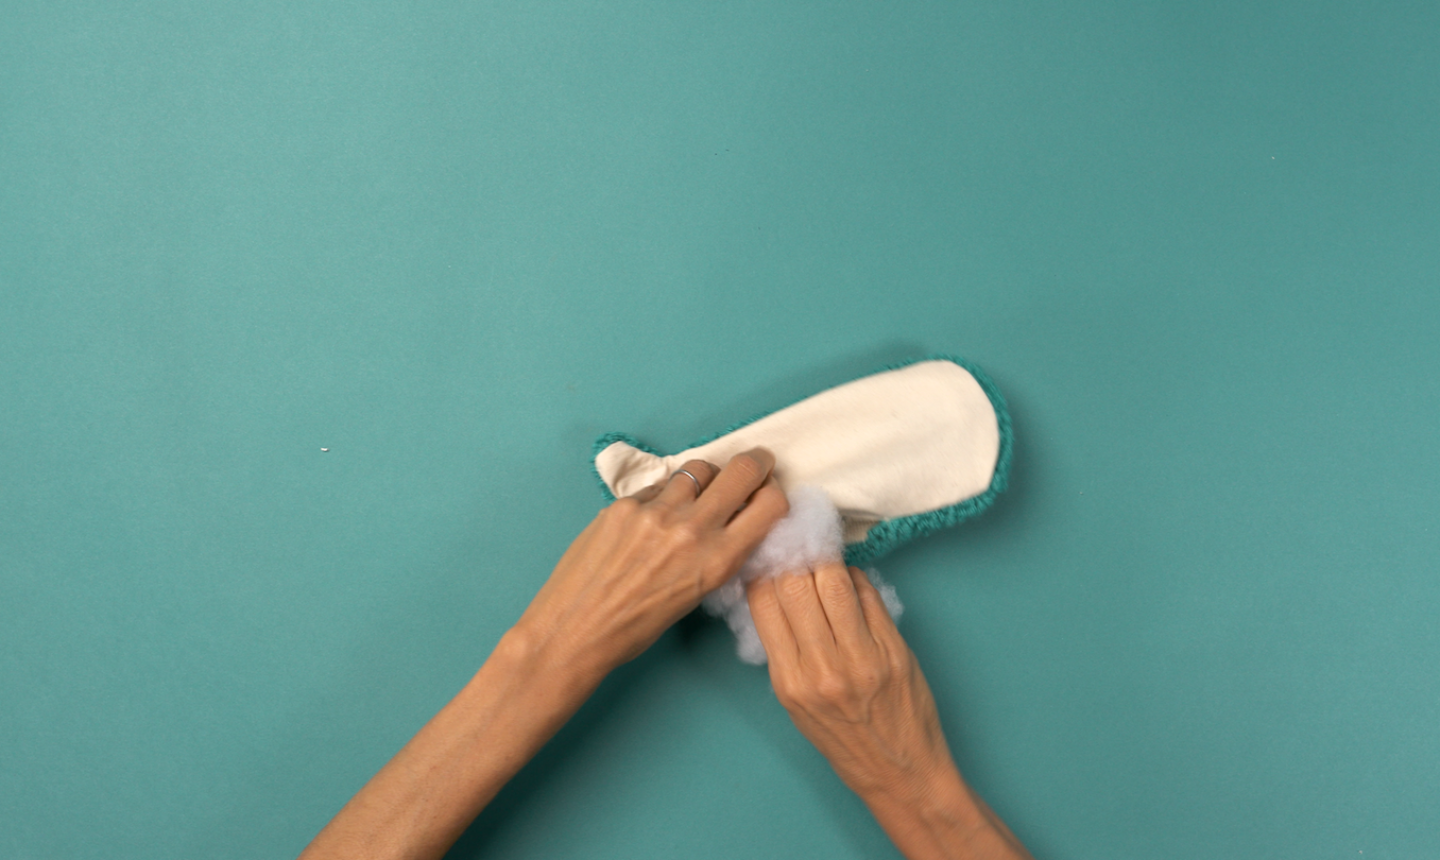
Turn the stuffed animal inside out (look how cute it looks now!) and stuff it with fiberfill.
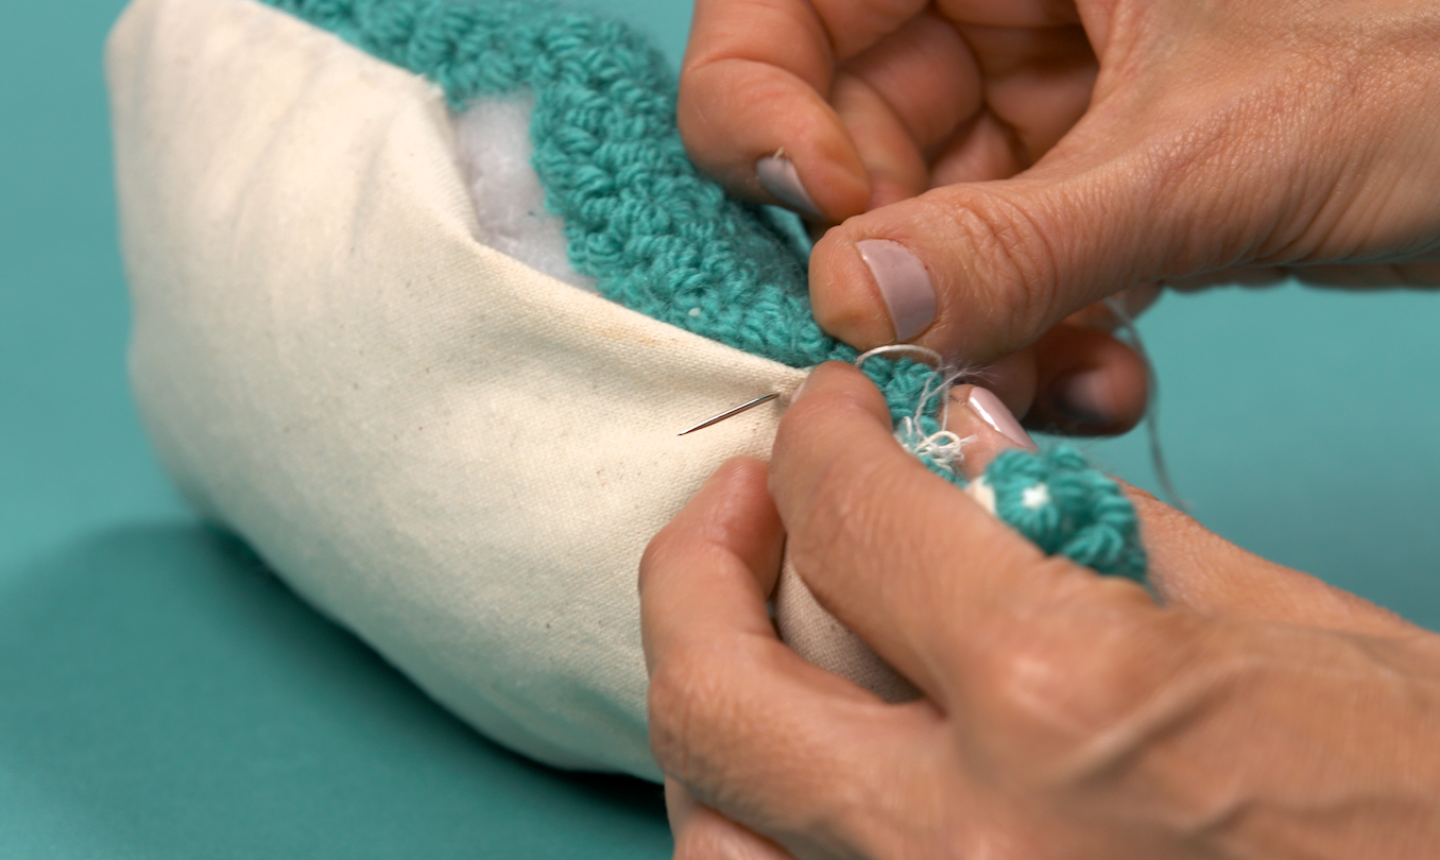
Once the walrus is poofed up with stuffing, tuck the seam allowances in and stitch the hole closed.
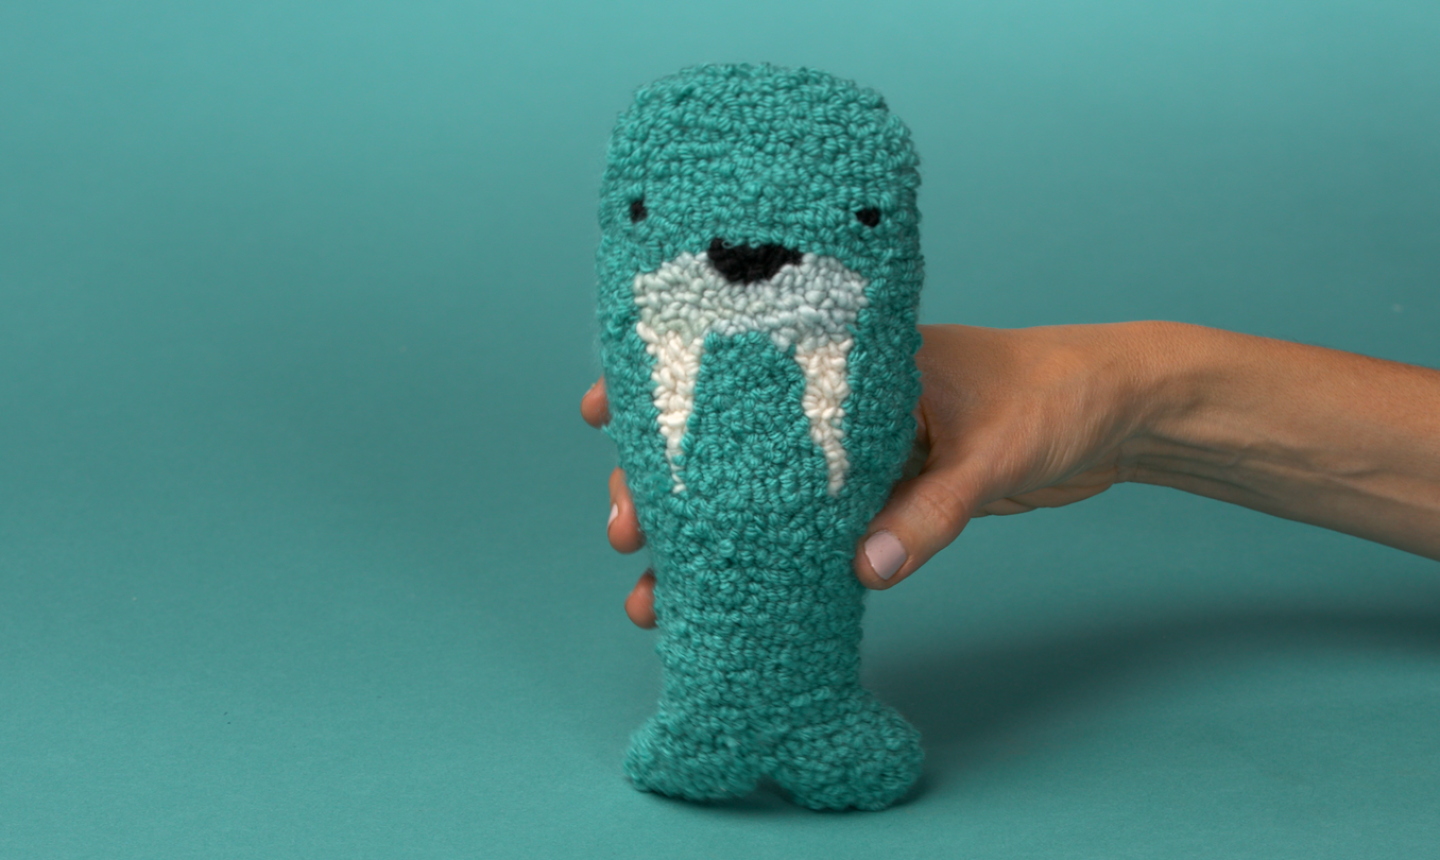
Okayyy, how cute is that?

Do you use some kind of stabilizer for the back? I made one of these for my nephew and his mom walked in the room and saw him unraveling the entire top. He had fun, but....
I love it! I’m going to work the technique.
I've never worked with monks, but I do sew, and some material does do this. I'd cut about 1-3 inches further, giving it a little more stability, or you could sew it again when you flip it inside out with thinner thread
This Craftsy post shows the techniques a bit more clearly: https://www.craftsy.com/post/punch-needle-rainbow-clutch/
Adorable. Always wondered what punch needle work was ☺️
How do you keep the punch needle loops from being pulled out? If I gave this to a child, could they just pull on the loops and destroy the piece?
My Monks Cloth ravels like crazy when I cut it. Do you need to zigzag or finish the edges somehow before stitching on the backing? Otherwise, I'm afraid it wouldn't hold up for long.