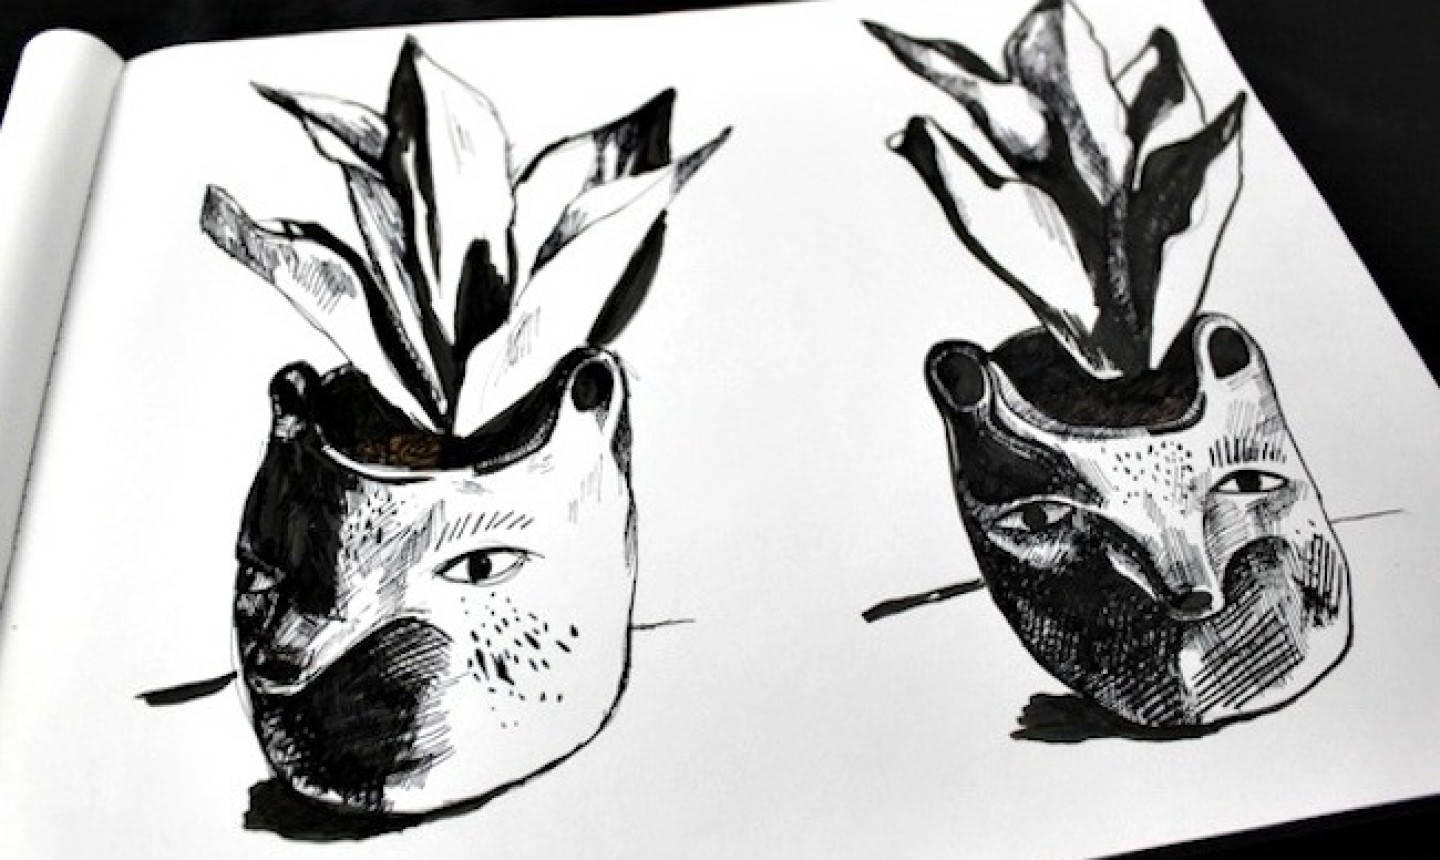
If you’re a pen-and-ink newbie, you may already know that hatching and crosshatching are two important (and very cool) moves. But if that’s all you know, get ready for an ink-splattered surprise: There are so many other fabulous methods for creating shape, texture, dimension and more.
Try out all the techniques below (don’t worry about making mistakes!) and decide which ones you like the most, then see what combinations work best with your personal style. You’ll be another step closer to being a pen-and-ink #boss.
Hatching
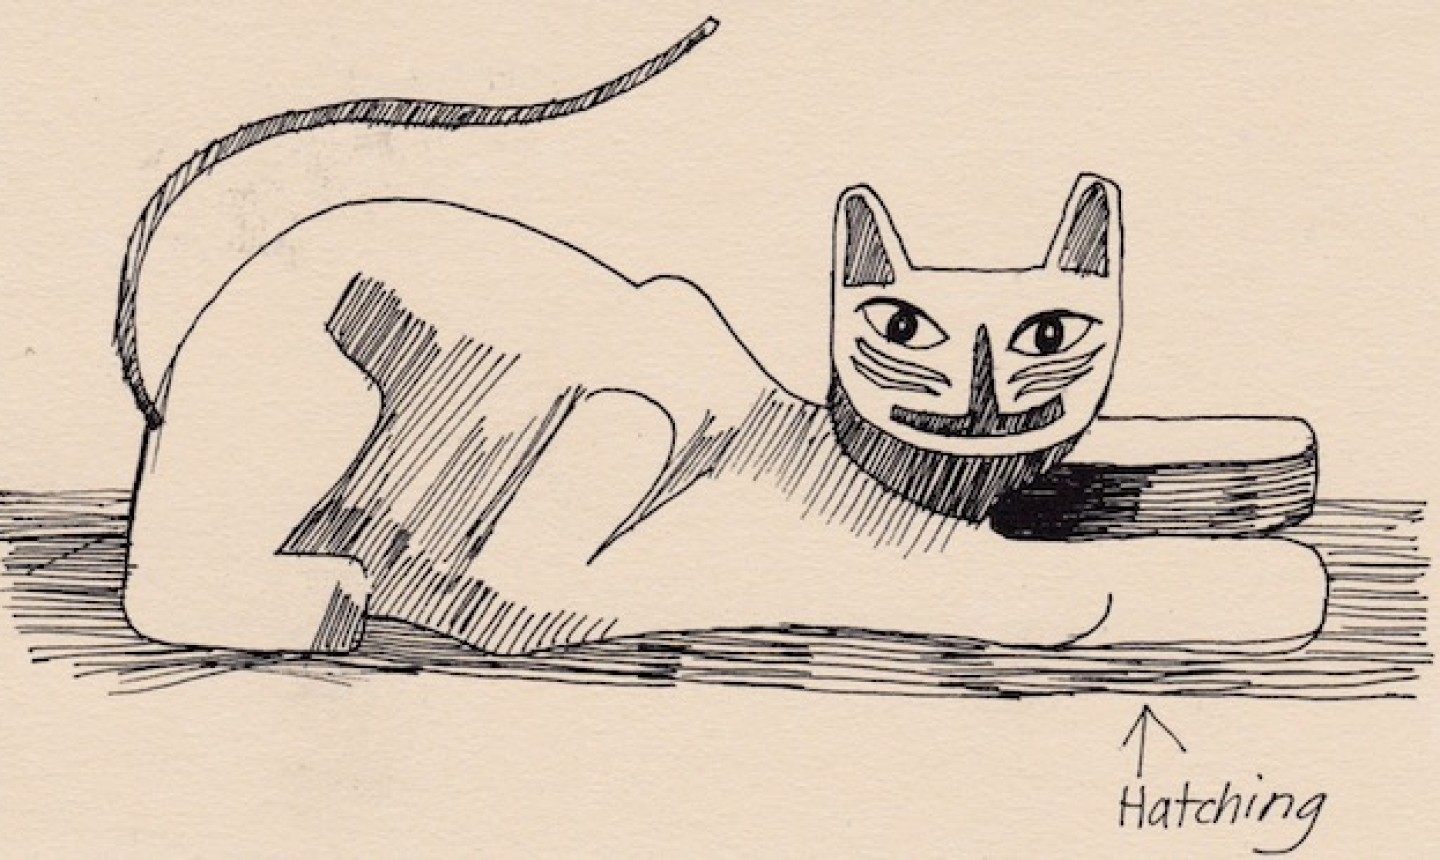
This is as basic as pen-and-ink techniques get. Hatching involves making a series of straight lines on your paper. The closer together you place the marks, the darker they’ll look. Your marks can be short or long, and you’ll typically make them all about the same length.
Keep in mind: Hatching can have a flattening effect, since all the lines are straight and don’t necessarily follow the contour of your subject.
Crosshatching
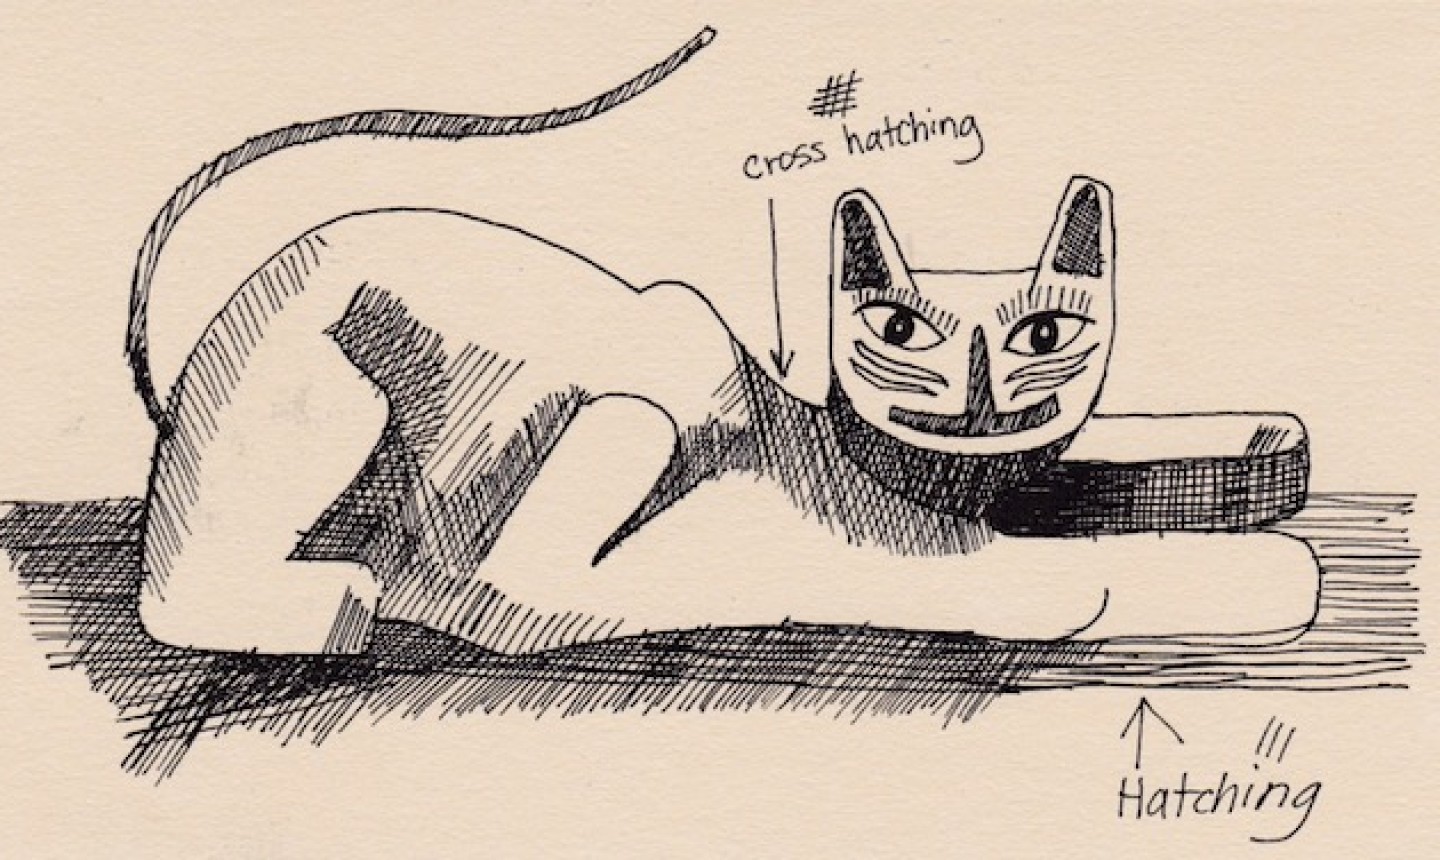
Crosshatching is pretty much exactly what it sounds like. First you make a series of straight lines in one direction, then a series of lines in an intersecting direction. As with hatching, the closer together you draw the marks, the darker they’ll appear.
Stippling
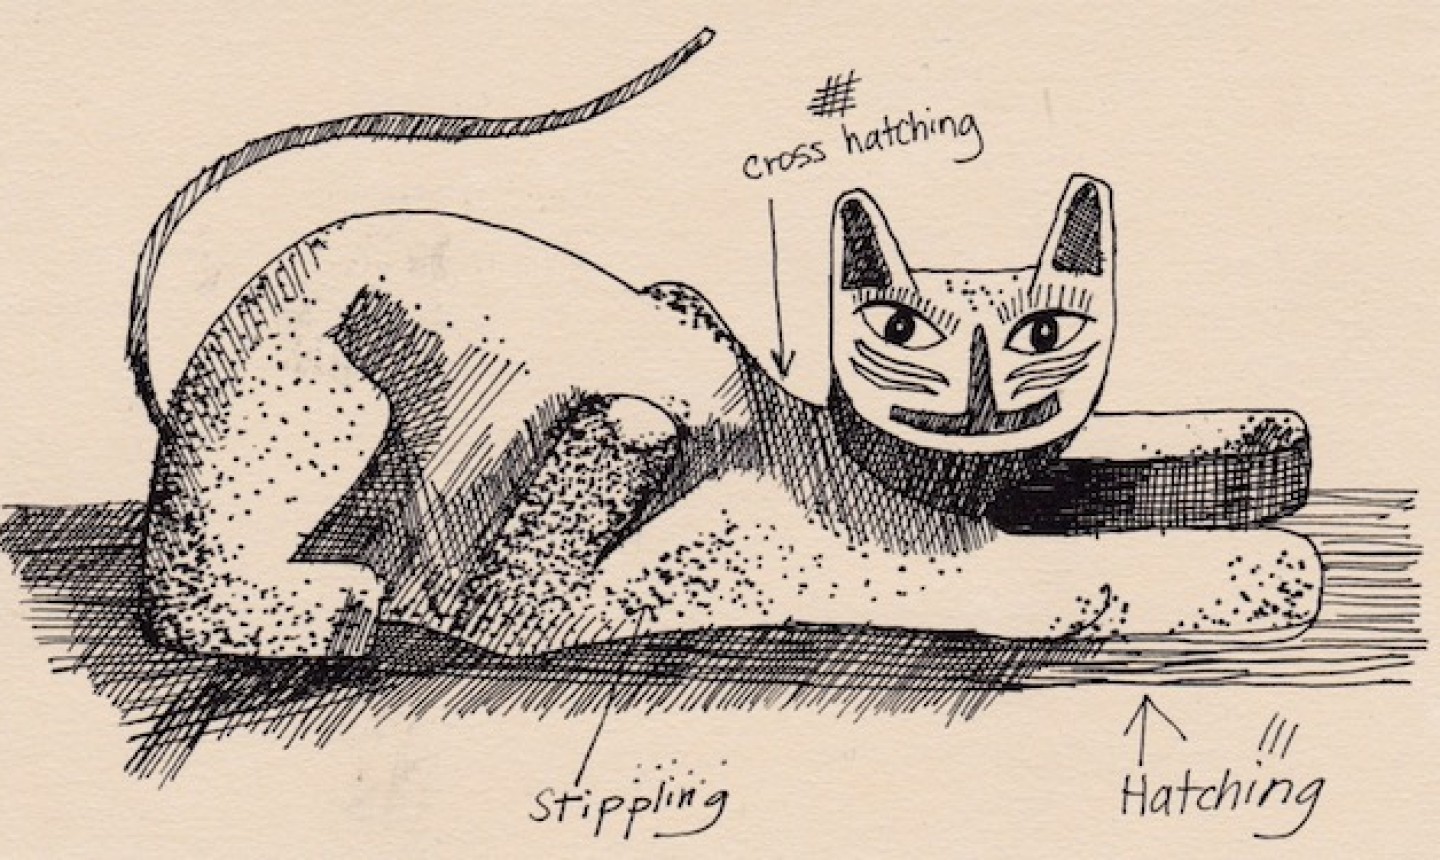
How patient are you? If that’s your superpower, you’ll need it if you want to try this method. Stippling involves making lots and lots (and lots) of tiny dots on the page.
If you cluster the dots tightly together, they’ll seem darker and will give your drawing form. Plus they’ll bring an element of surface decoration to your work. The technique is definitely worth the effort, but it’s not for everyone.
Cross Contouring
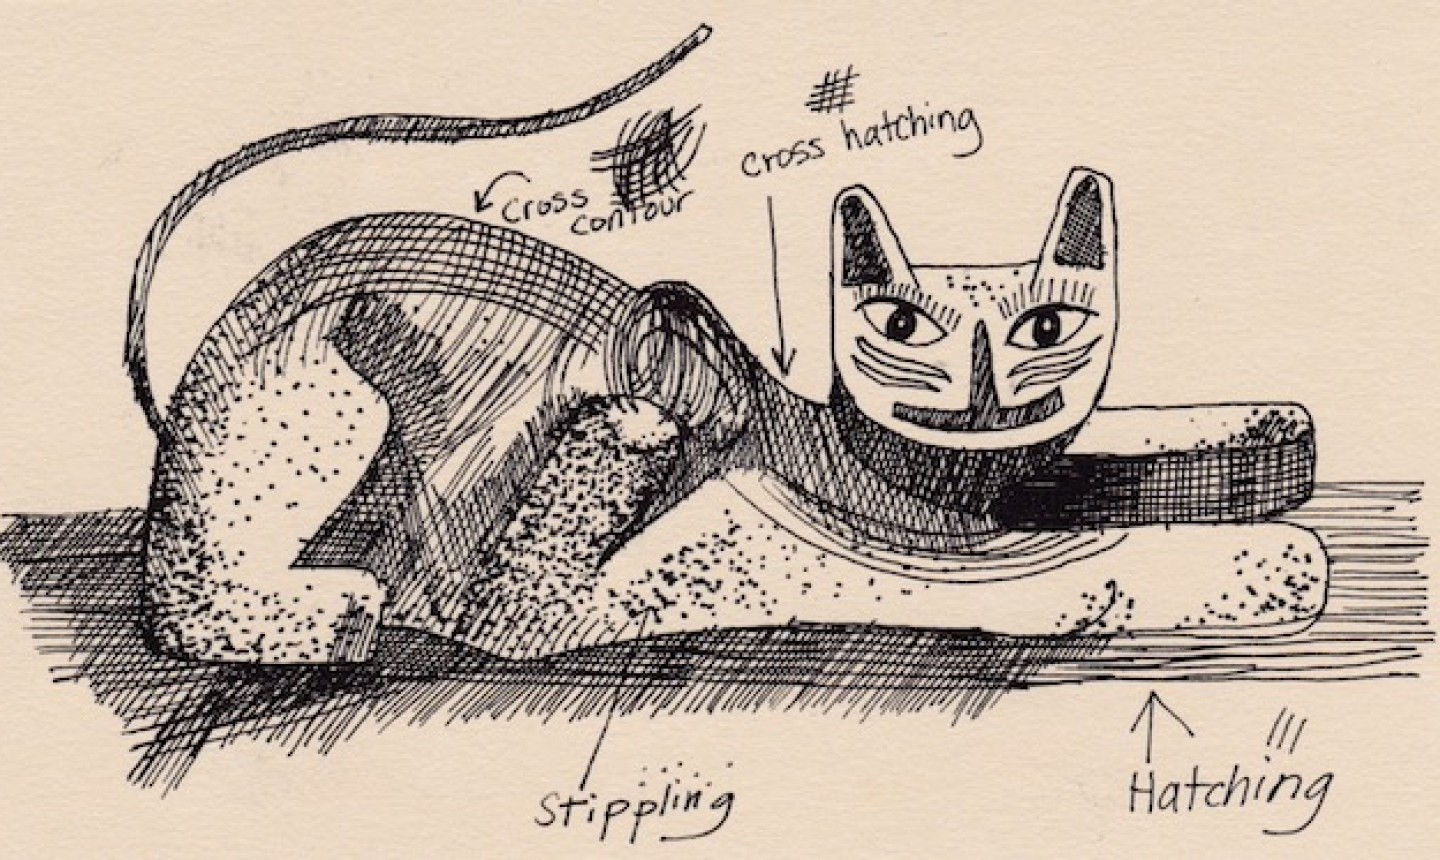
Remember how hatching can flatten your picture? Cross contouring helps give your drawing form. The technique works kind of like crosshatching, but the lines follow the contour of your subject — and make it look more rounded and three-dimensional.
Scribbling
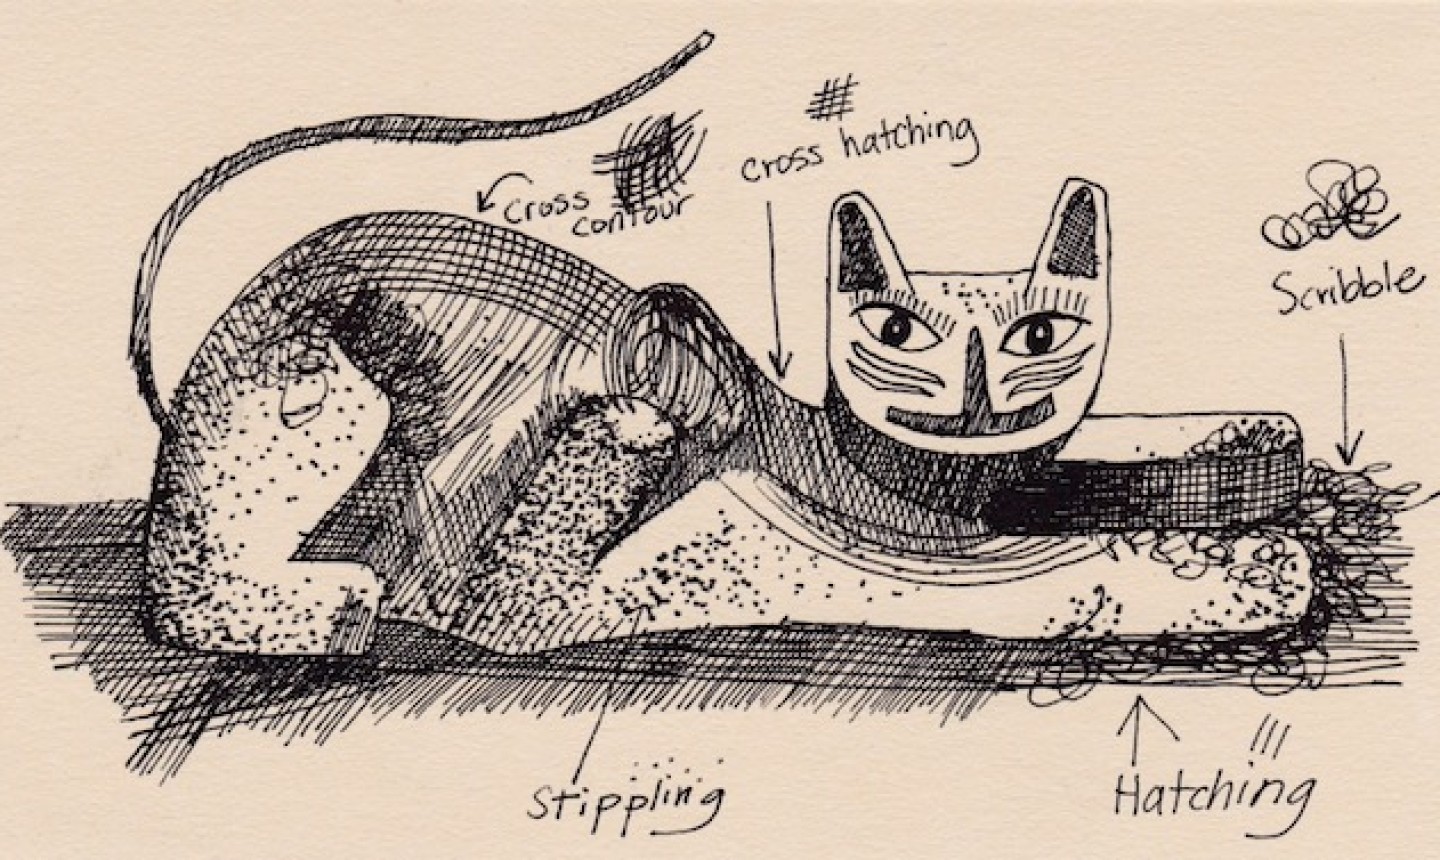
Go ahead and just scribble. Seriously, scribble away. It may sound silly, but scribbling can be a useful method even if you’re a pro.
The random-lines technique is great for building texture, like when you’re drawing leaves on trees. The scribble marks convey mass, and you can layer them to build depth in your drawing.
Mixing Strong and Delicate Pen Strokes
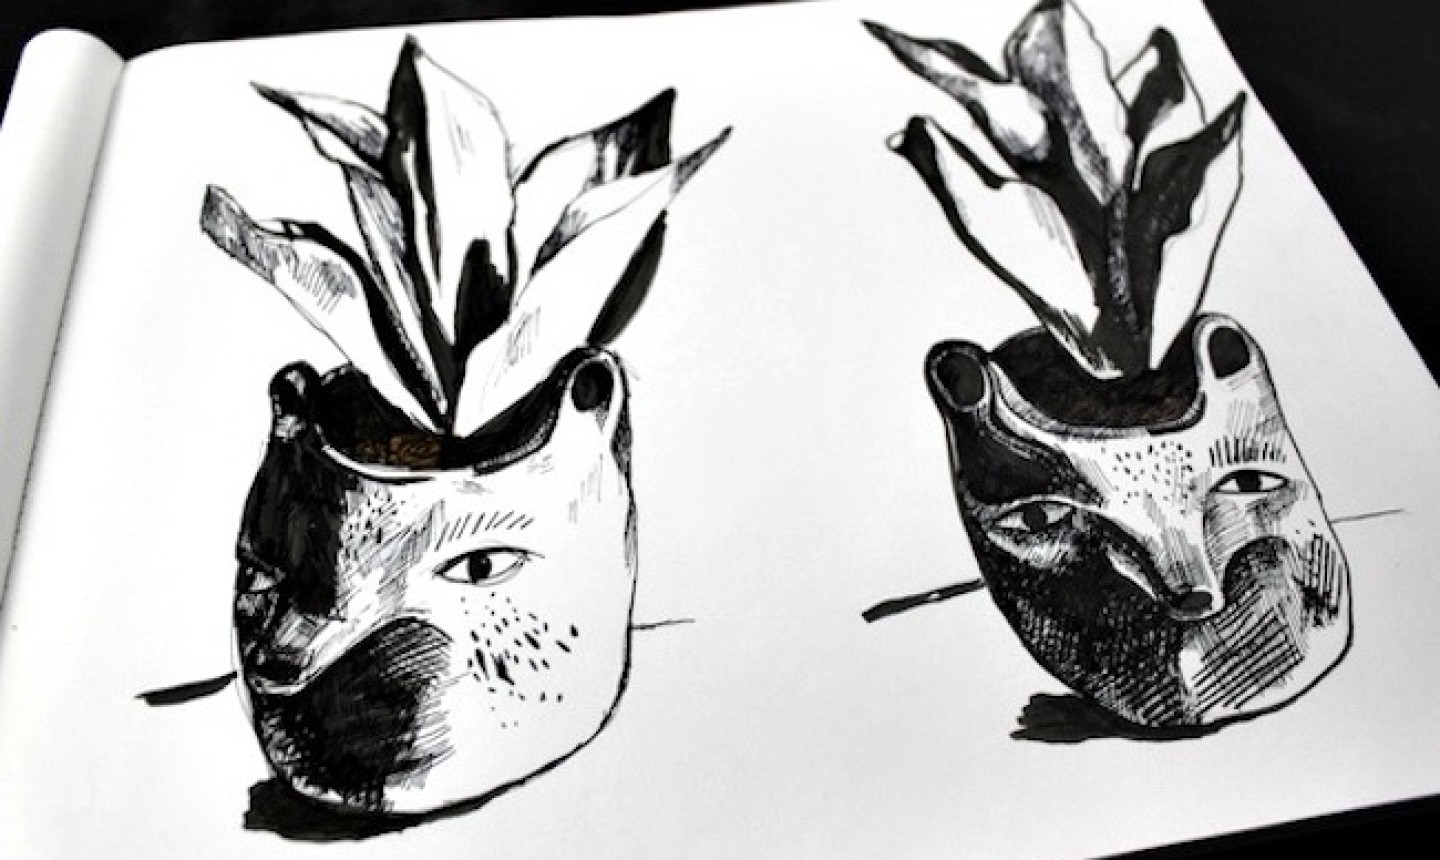
You’ll see strong lines in the drawings above, but you can get more texture and personality into your illustrations by using different pen strokes. Mixing stronger lines with smaller, delicate ones makes your image more compelling.
Experiment with a variety of pen strokes like crosshatching and pointillism to create texture, contrast and dimension — and see which pen strokes feel right for you.
Painting with Ink Wash
If you’ve done watercolor painting before, you’re in luck: Creating an ink wash uses a lot of the same principles. But if you’re new to painting, don’t worry! You’ll be an ink-wash pro in no time.
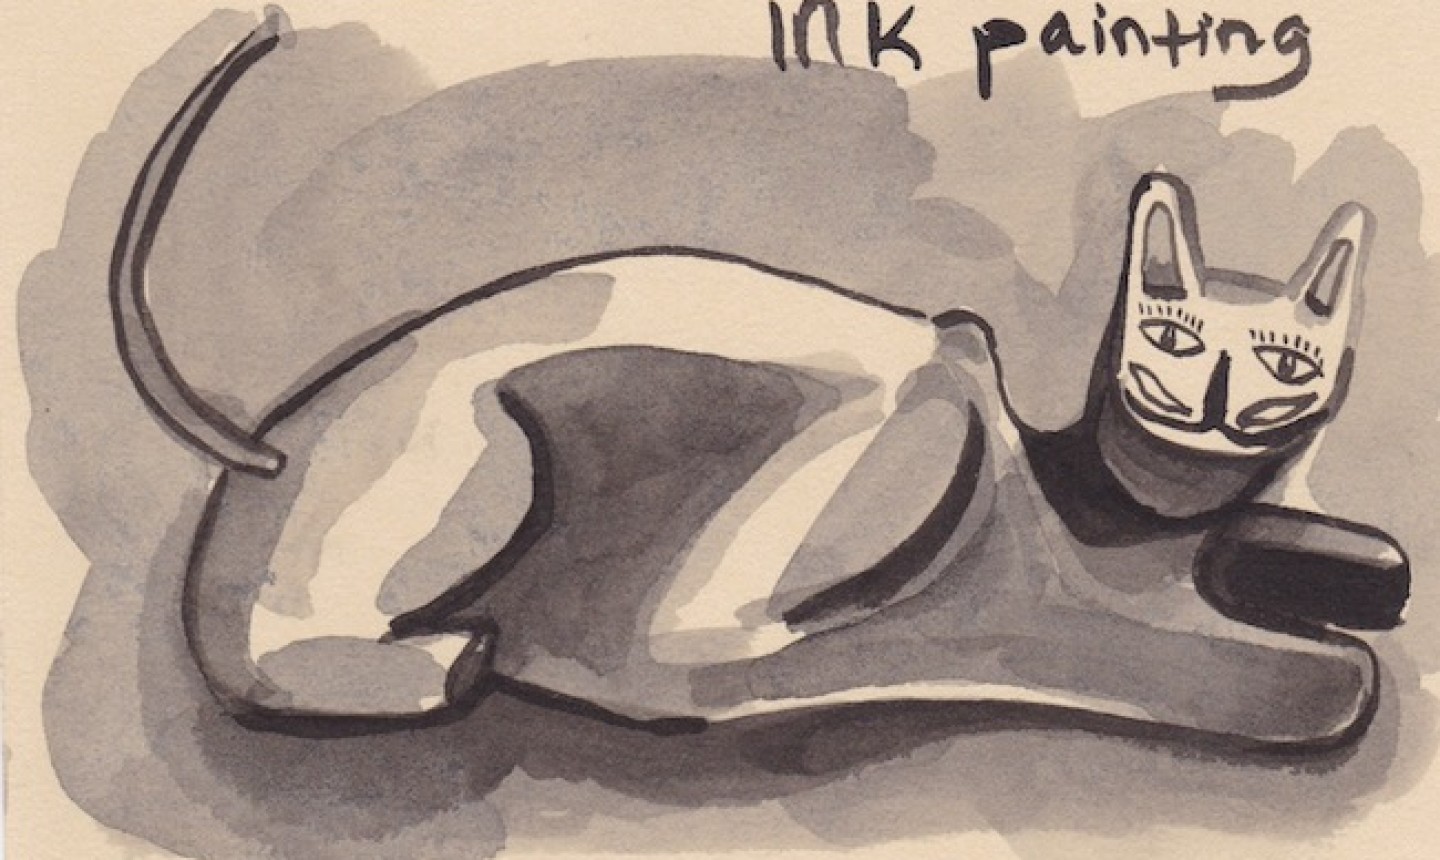
The basic idea is to work light to dark, and large to small. Don’t start with the darkest shade. It’ll be hard to do anything with that, like add variation in tone, detail or colors. It’s best to work in layers instead.
Start by painting the lightest shade you see. Wait for everything to dry before you move on to the next layer, which will be slightly darker than the last one. Mix the wash and apply it to the necessary areas. Again, wait for it to dry and mix again. Repeat the process until you’ve added all the tones. That way you’ll get a nice balance and contrast.
Working with Wet-On-Wet Ink Wash
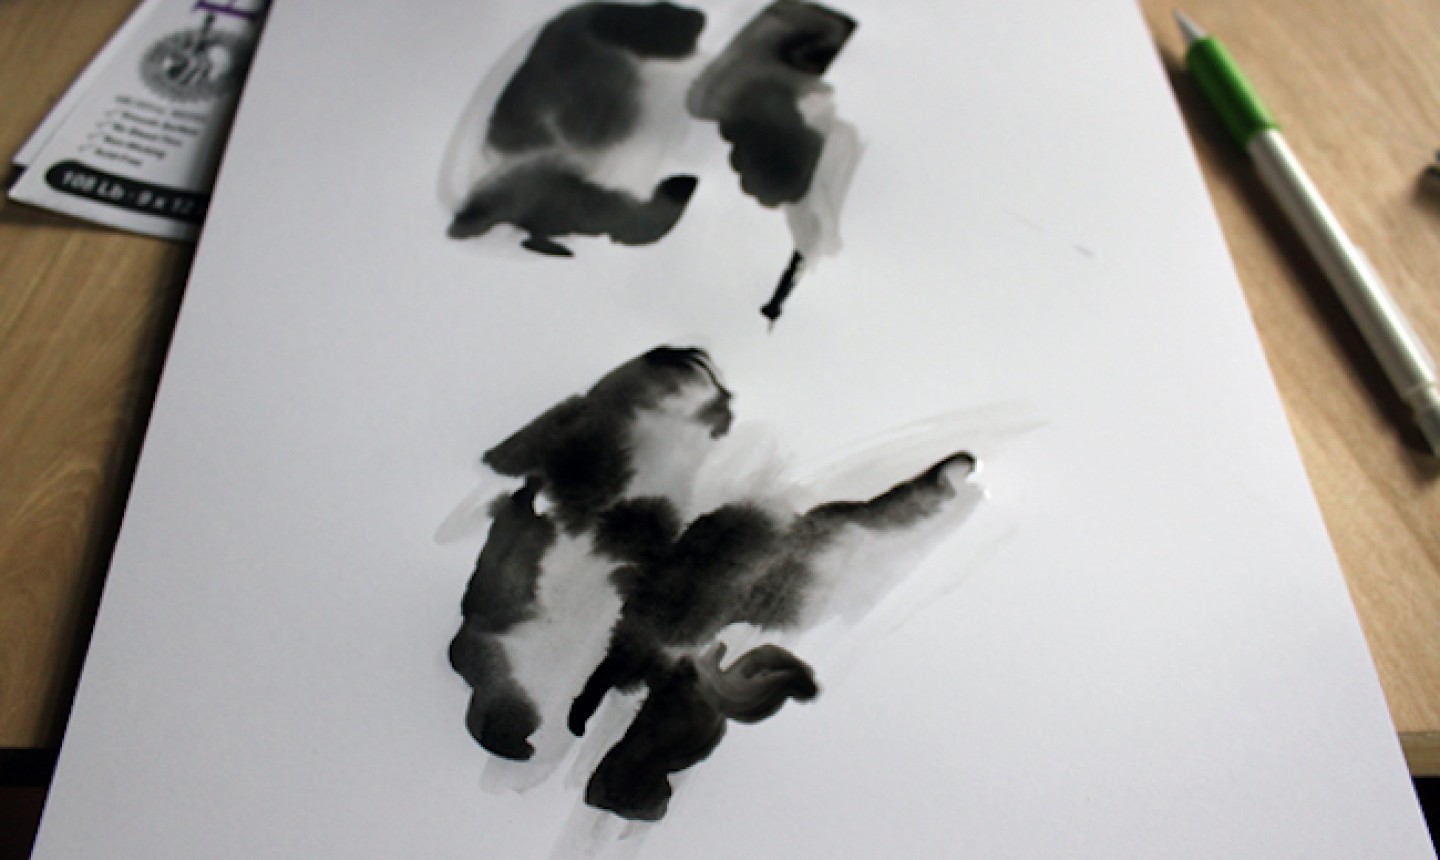
Say you want to create some experimental washes that aren’t concerned with form. One way to do this is by using a “wet-on-wet” technique.
Wet the part of the paper you’ll be painting on; make it as big or as small as you want. Then, using your brush, drop ink onto the watered spot. You’ll watch the pigment do its own thing and start feathering in multiple directions. That’s the whole point! But if you want more control, you can pick up the paper and guide the ink around the page.
Adding a Water Wash Over Ink
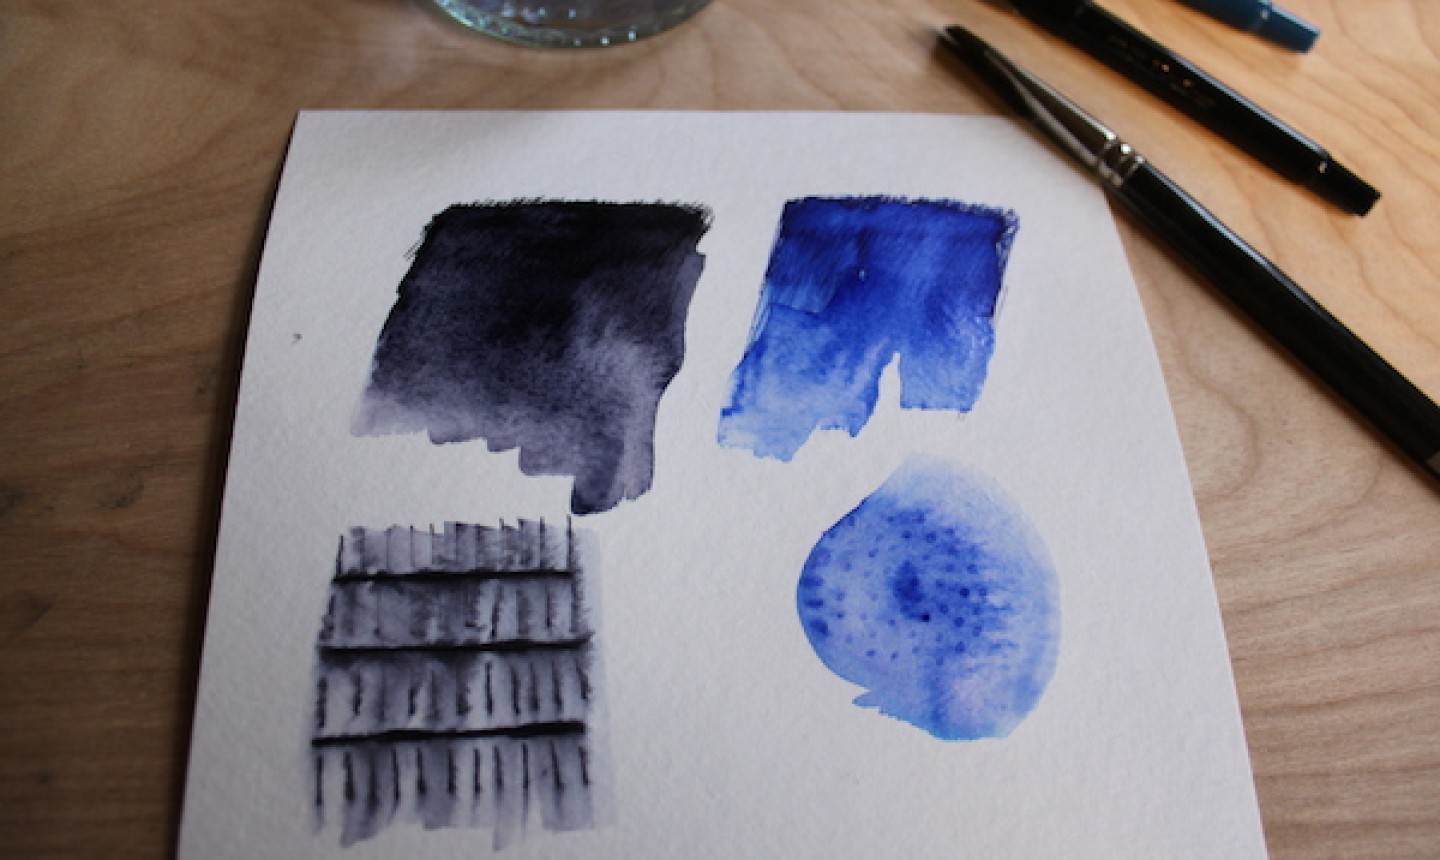
You can still get that wash-like look even if you don’t have a bottle of ink. All you need is cold-press watercolor paper (since it sucks up water quickly) plus a pen (something like a Pilot Fineliner works well) and a paintbrush. Oh, and water too.
Start by creating your drawing in pen. Then dip a paintbrush in water and touch the brush to the ink on your page — the ink should start to spread. Now, go over all of the parts where you want the pigment to move, and transform them from lines to washes.
Splattering Ink
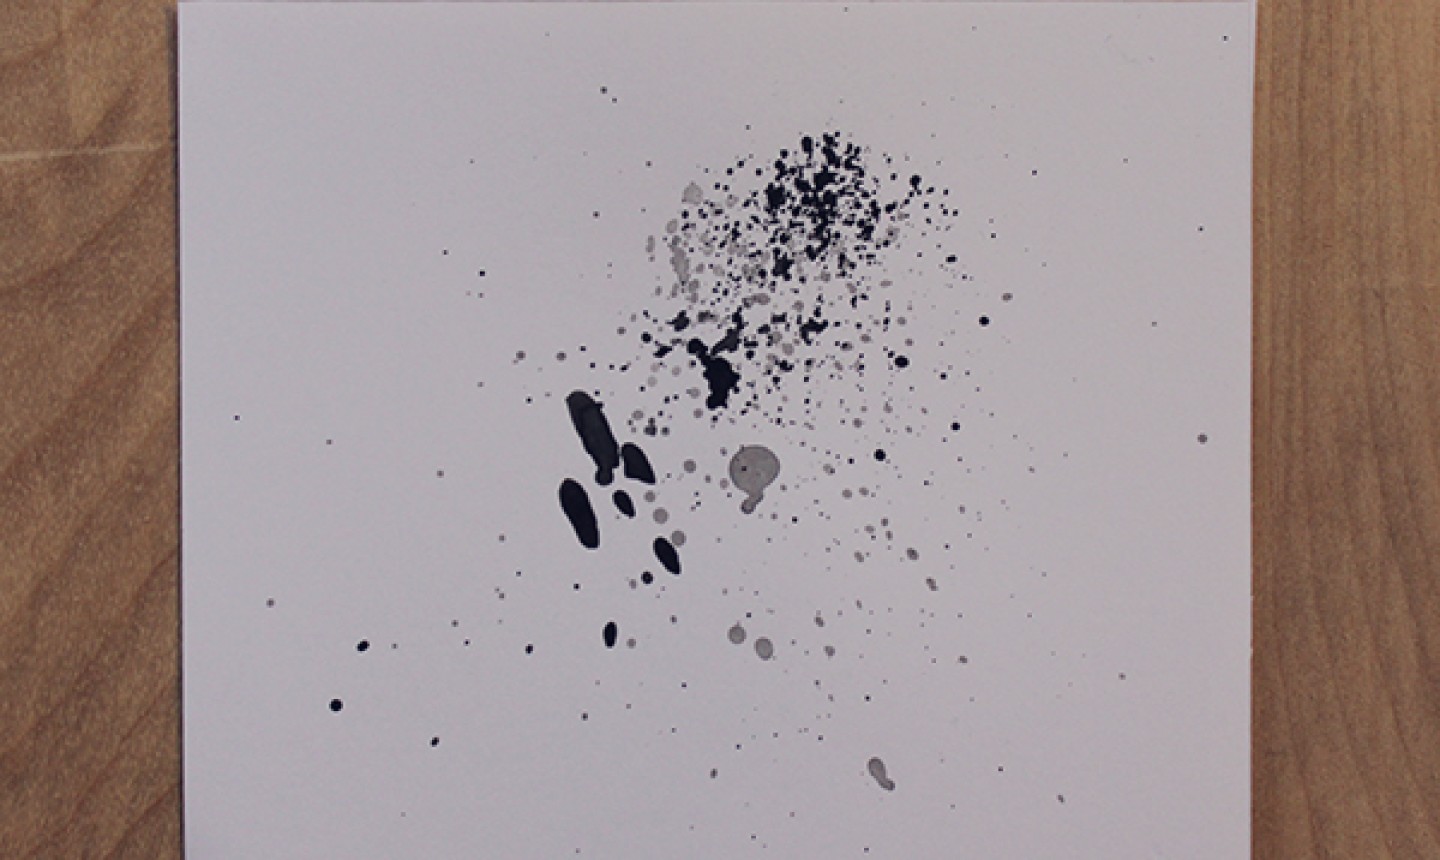
The splatter technique is really fun, but it’s messy! Start by holding a brush or nib dipped in ink in one hand. In your other hand, hold a pencil. Gently tap the inked brush or nib against the pencil, and let the drops fly onto the paper. Use different colors or washes to create a layered, complex effect.
If you’re going for a wild and free look, this technique works great. Just keep in mind that it’s unpredictable, but that’s the beauty of it. Have a blast splattering away.
Push the limits of the medium and see just how much you can do with pen and ink. Hatching and crosshatching are really just the start!
Share tips, start a discussion or ask other students a question. If you have a question for an expert, please click here.
Already a member? Sign in
No Responses to “These Basic Pen-and-Ink Techniques Will Get You From Beginner to #Boss”