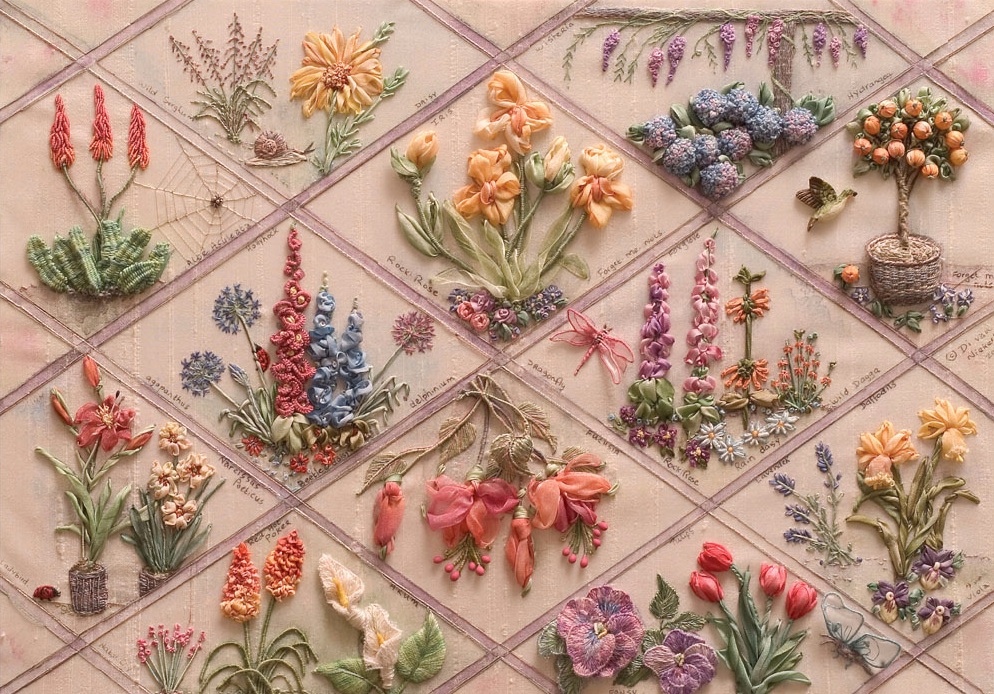
Photos via Di van Niekerk
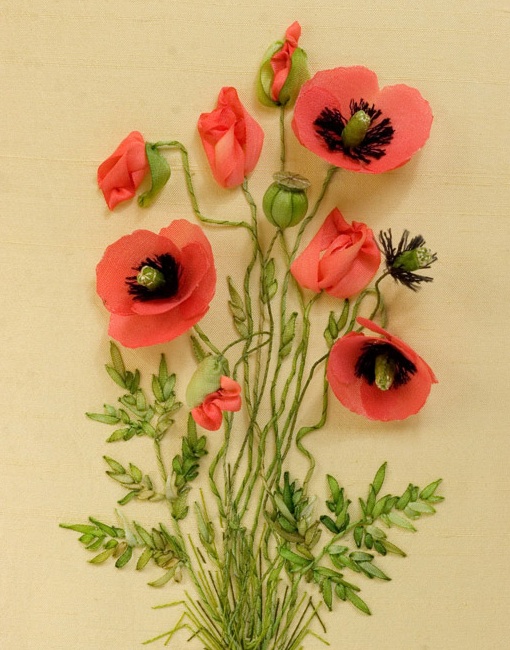
Stumpwork techniques make hand embroidery quite extraordinary. We’ll show you how it’s done with plenty of eye candy and a few stumpwork tutorials to whet your appetite. Get an introduction, then take a class and create stitching that is a work of art!
Learn some of these stumpwork techniques shared by international author and teacher Di van Niekerk.
In stumpwork, embroidery is raised off of the fabric surface by either building on stitches or creating three-dimensional components. The lifelike result is stunning. Professional fiber artist Di van Niekerk has taught stumpwork and ribbon embroidery while also authoring nearly a dozen books on the subject. She has graciously allowed us to share some of her tutorials on various stumpwork techniques.
Stitch padding:
Satin stitching is not new to embroidery, but add satin stitching over quilt batting or foam and the extra lift makes leaves take on a life of their own.
Padded leaf tutorial:
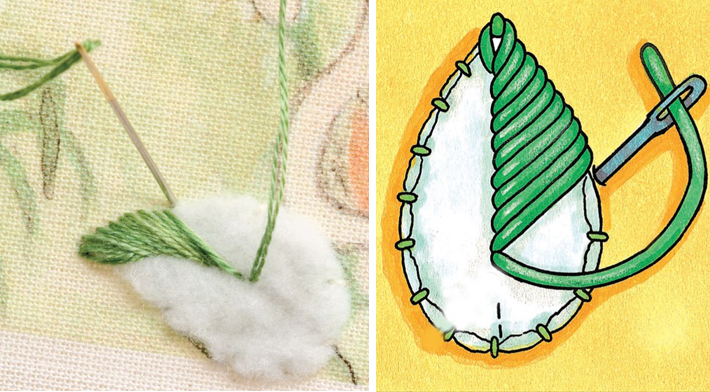
1. Cut padding to the size of the leaf.
2. Stab stitch the batting to the fabric around the outside edge.
3. Add satin stitching on each half of the leaf, covering the batting.
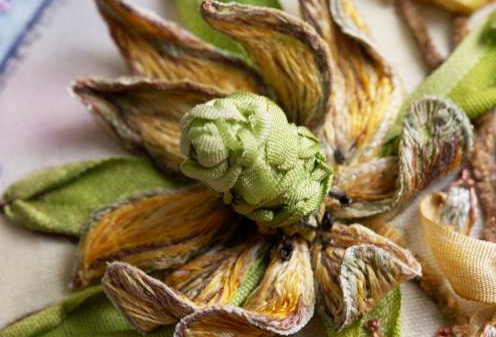
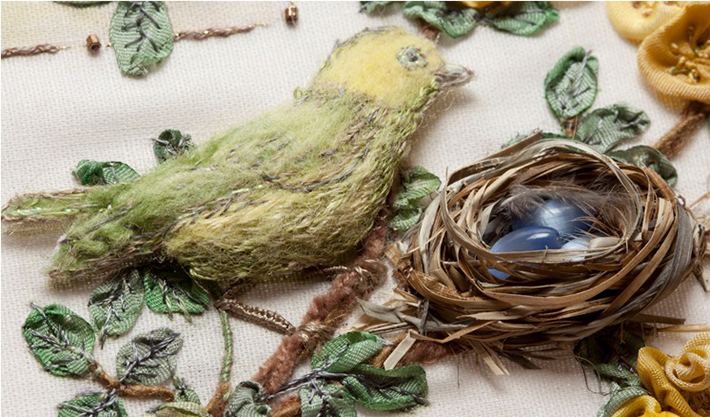
Appliqué style stumpwork:

These rose leaves were created like an appliqué with buttonhole stitching around the edges.
Items that do not need much lift off of the fabric, like leaves or birds, are created just like an appliqué.
Appliqué stumpwork tutorial:
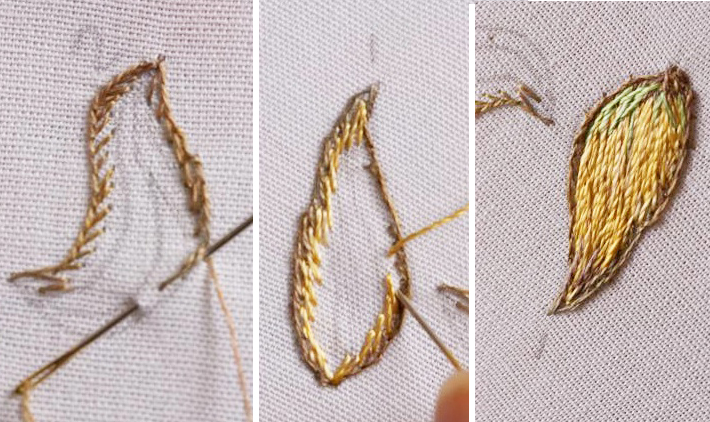
1. Start by outlining the shape with angled buttonhole stitches.
2. Fill in the shape with long and short stitches. Change thread colors to create shading.
3. Cut out the shape close to the edge, being careful to not cut into the stitches. Add an anti-fray product if necessary.
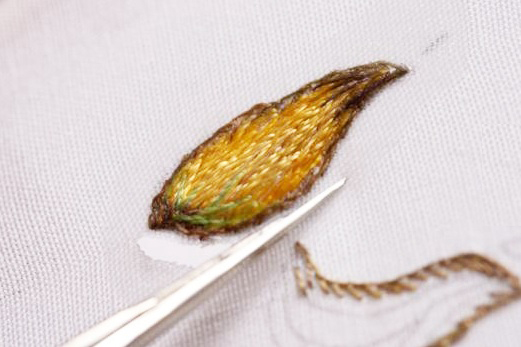
The shapes can then be added to lower levels of the embroidery project.
Even this little bird can be created as a stumpwork “appliqué.”
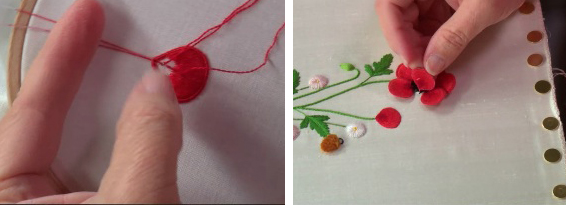
French knot stumpwork:
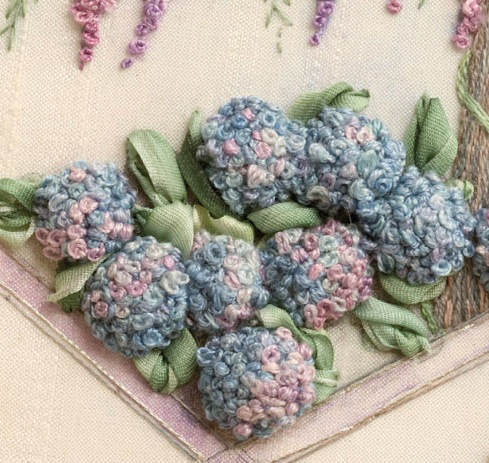
These beautiful hydrangeas are made of French knots.
French knot hydrangea tutorial:
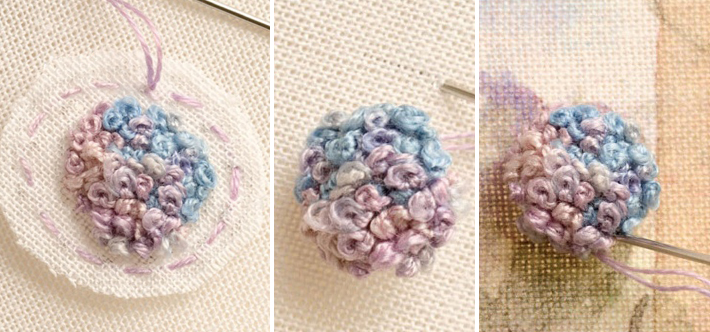
1. Add French knots to a small circle.
2. Place a row of running stitches around the outside diameter of the hydrangea.
3. Pull to gather into a ball and stitch to secure the gather.
4. Tack the hydrangea ball to the project.
Wire slips stumpwork:
Wire really makes a statement in stumpwork embroidery. It is the foundation for many three-dimensional creations such as leaves, petals and wings.
Wire stumpwork tutorial:
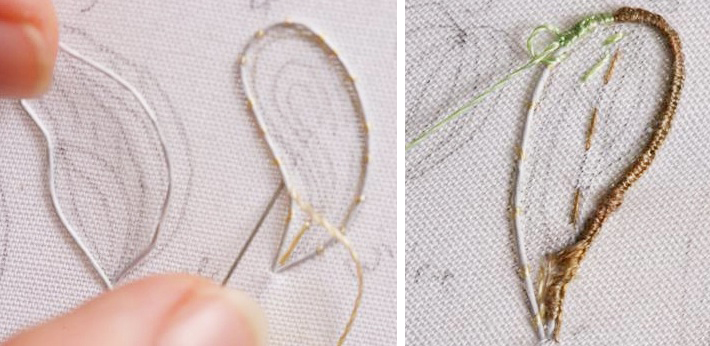
1. Start by shaping a wire (#22 up to #30) around the fabric drawing.
2. Tack the wire to the fabric using little stab stitches around the shape.
3. Use the buttonhole stitch to go around the wire shape, attaching it to the fabric.
4. Fill in the area inside the wire that forms your petal.
5. As above, carefully clip close to the edge of the stitching.
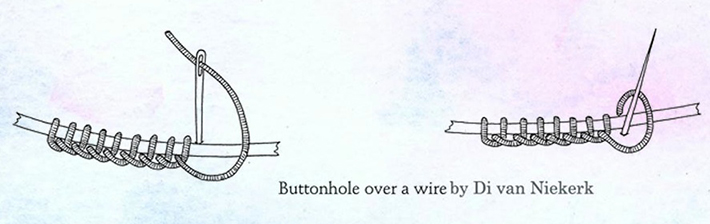
6. Poke the wire through the project fabric and secure to the back.
The same technique can be used to create insect and fairy wings, often using organza as the base fabric.

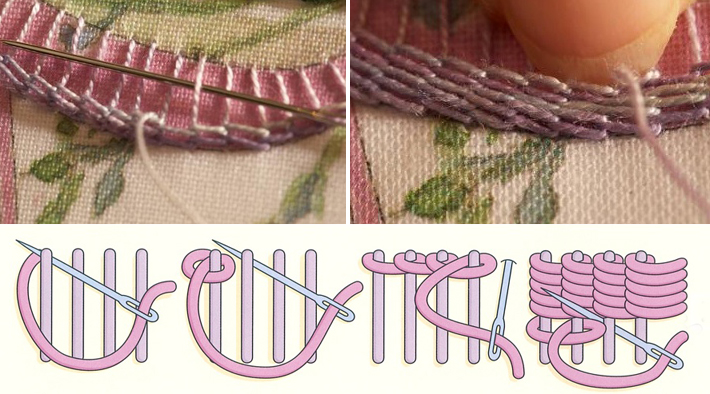
Stumpwork stems:
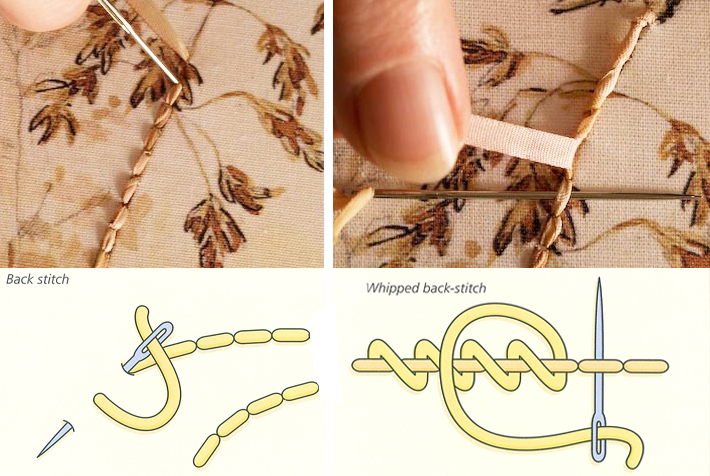
Dimensional stems can be created by stitching the back stitch with silk ribbon along the stem line, then wrapping ribbon around the stem-stitched ribbon with a whipped back stitch to encase it.
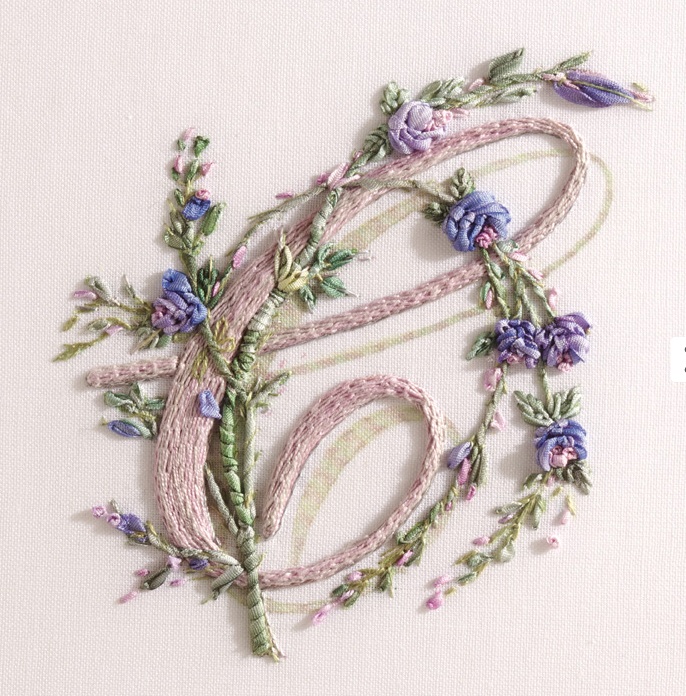
Stem stitch monogram:
Stem stitching allows you to weave stitches so that they are built up on the fabric. This is very useful for creating monograms that stand out from the background.
By combining these basic stitches, you can create extraordinary pieces of textile art that will leave your friends and family breathless.
For in-depth training you can access around the clock, be sure to take Bluprint’s class, Stumpwork: Raised Embroidery Essentials with Celeste Chalasani.
Learning!!
Do you have any books for sale showing how to do the raised-stumpwork stitches?
My first introduction to Stump work. I love it and am inspired to start. Thank you.
thank you thank you thank you!!!!!
Great & inspirational 😃😍
I have just learned sooo much by viewing this post. Thank you.
Beautiful work. Eager to get started.
Eager to learn this beautiful craft
These embroidery techniques show pure artistry!
I have bought the entire set by Debbie Henry ( Di van Niekerk)!the picture above and I would like the tutorial. How do I go about getting this tutorial for all the stitches required for this sampler?