If you're stressed by the thought of piecing perfect diamonds to use in classic quilt patterns like the Lone Star quilt, sashing strips, or in unique borders, we're here to put your nerves to rest.
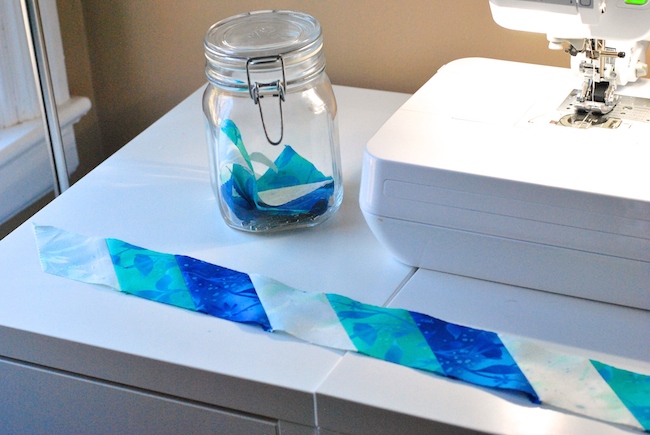
This tutorial will show you how to sew strip-pieced diamond units.
You can use 2½" pre-cut strips (I used a design roll of Boundless Blenders Botanical Hydrangea)
), or cut your own fabric strips from yardage. Let's get started!
Step 1: Line up your fabric strips
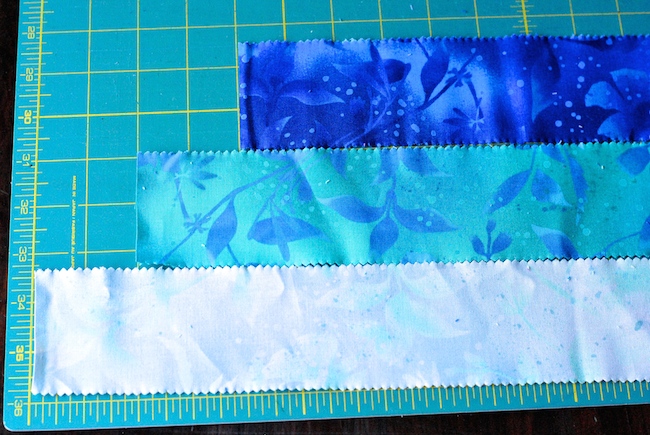
Line up your 2½" precut fabric strips so they are staggered by 2" as shown. You can use the lines on your cutting mat or a ruler to mark the strips. Although I am using three strips here, you can use as many strips as you'd like... try four, five or six!
Step 2: Pin and stitch two strips
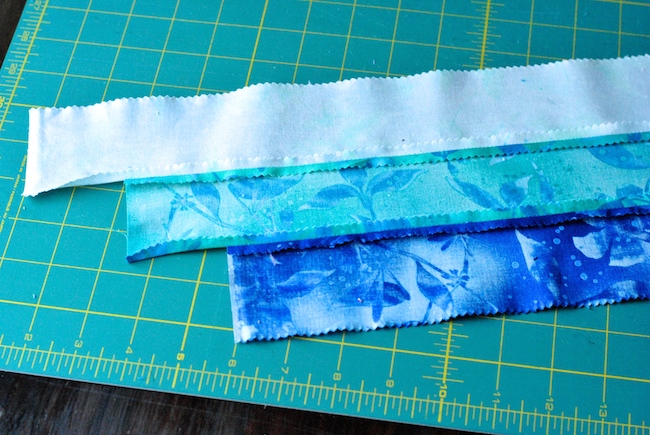
Pin two of strips with right sides together, and stitch the first two strips right sides together using a ¼" seam allowance. Add the third strip, again placing right sides together with the strip unit and sewing with a ¼" seam allowance. Press the seams open.
Step 3:
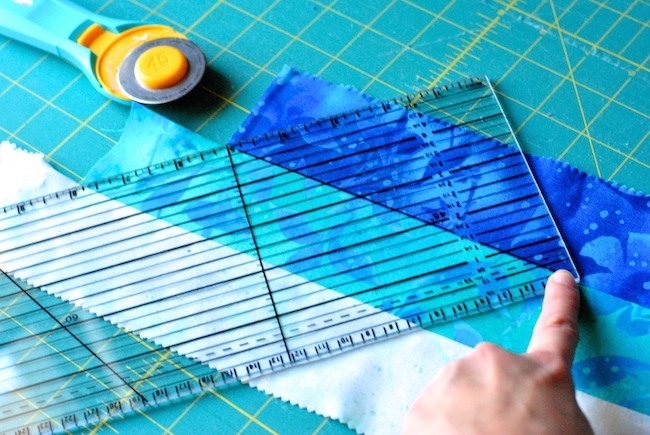
Using a clear acrylic ruler with a 45-degree diagonal line, align the edge of the ruler with the staggered points of the strips, as shown above. Make sure the 45-degree line is aligned along one of the sewn seams (shown here between the teal and the blue strips).
Step 4:
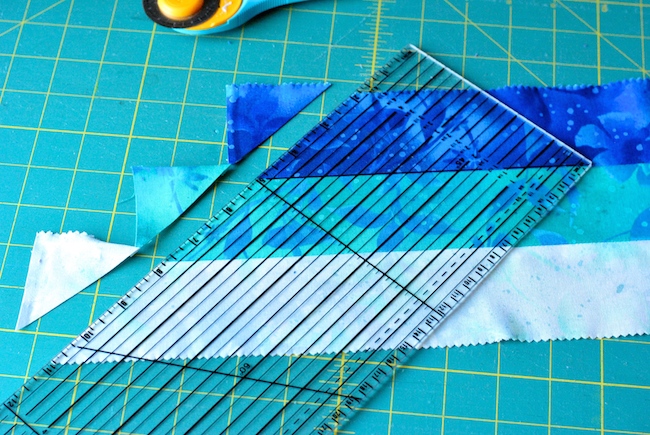
Making sure the 45-degree mark stays in place and the ruler does not extend over the triangle edges, trim off the flaps to make a straight edge that's cut to 45-degrees.
Step 5:
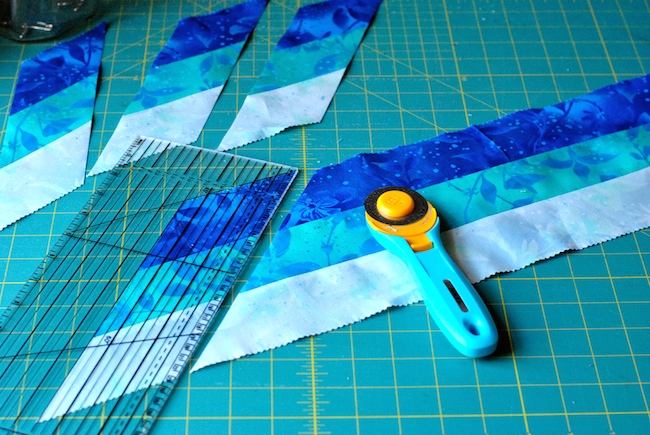
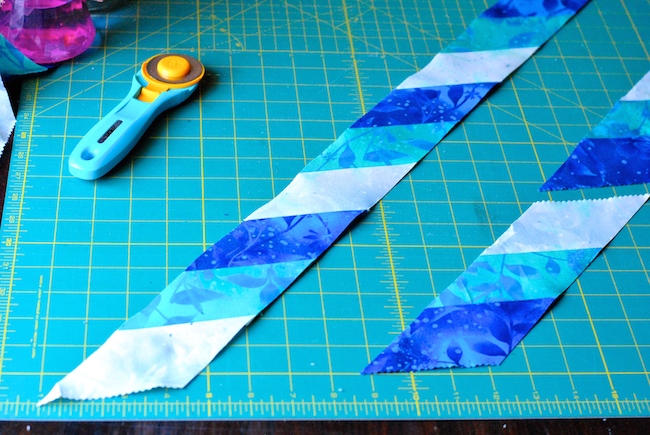
Next, rotate your ruler so the 2½" mark (or whatever size your original strip width was) is along the straight edge you just cut. Keep the 45-degree line aligned with the edge of your strip set or one of the seams. Trim the strip set to 2½" wide.
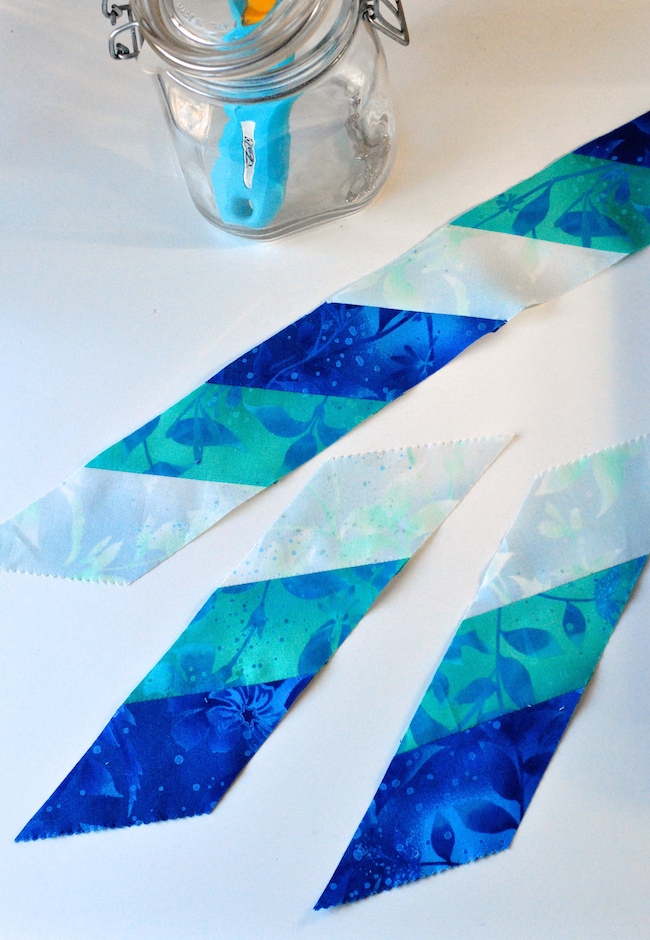
You now have one unit of three pieced diamonds. Move the diamond pieced units aside, and cut the next strip set.
Step 6:
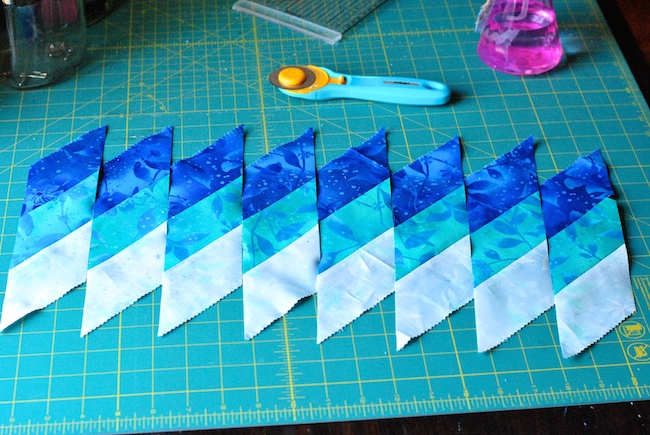
Repeat Step 5 all the way down the strip set. You should be able to get 8 or more units when using standard 2½" precut strips. Press all the strips, pressing the seams open.
Step 7:
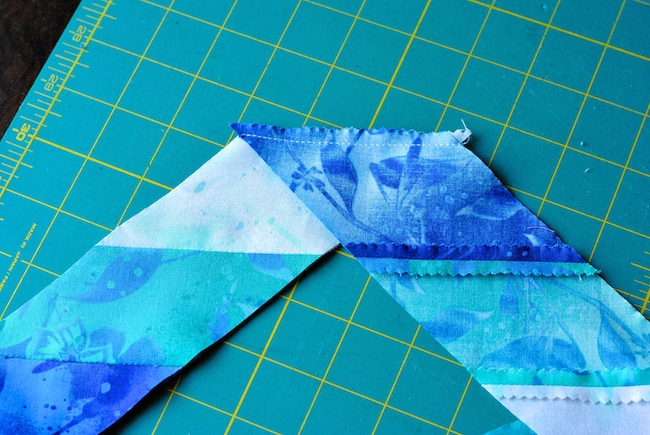
If you'd like to join the strips end to end, place two strips right sides together so that the diamond corners overlap by ¼". Stitch together with a ¼" seam, press the seam open, and trim off the corners.
Step 8:
If you are using the diamonds in a border or as a pieced binding, simply sew them onto your project. If you hope to make a lone star quilt, you can find more detailed piecing directions in the free 2017 Craftsy Block of the Month.
I hope you find that these strip-pieced diamonds are easy and fun to make! If you have any tips on sewing strip-pieced diamond units, please let us know in the comments.

Thank you 😊
Thanks for tutorial. I’m trying to incorporate into sew as you go strips. Wish me luck.