Whether you’re a new watercolorist or have been practicing for years, painting accurate skin tones in watercolor can be intimidating. Attaining lifelike and dimensional tones can be tricky — there’s a little more to it than just using colors straight from the tube.
It’s not complicated to mix realistic skin tones in watercolor.
By using the simple method in this tutorial, you’ll learn how to mix watercolor skin tones starting with different ratios of primary colors. It may take some mixing and experimentation to find the tones you’re looking for, but this technique requires minimal materials and is accessible for artists at every level. With a little practice, you’ll soon be a pro!
What skin color are you trying to paint?
Before you start mixing, first consider the skin tone you’re trying to paint. If you have a reference image or are painting from life, really take a close look at your subject.
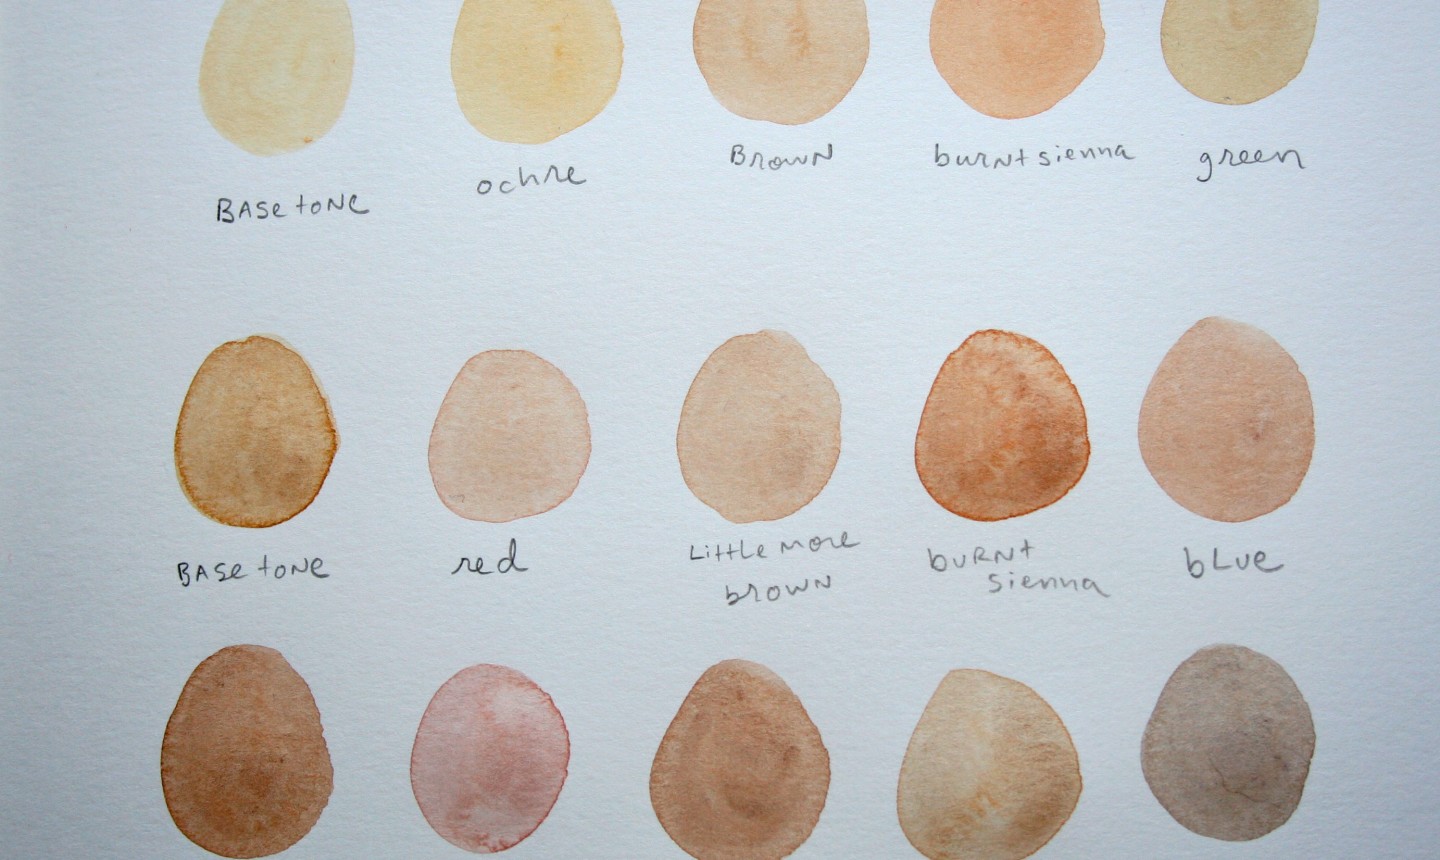
While it's be easy to determine if a skin tone is dark, medium or light, you’ll also want to look for subtleties in the undertone color of the skin. For example, when you really look close, you may notice that there are actually tones of blue or green in many skin colors of all shades. This can help you determine what colors you’ll need to mix to make a base tone.

Helpful tips for mixing skin tones in watercolor
- Remember: watercolor looks slightly darker when it is applied to the paper; as it dries, it lightens up quite a bit.
- If you mix the perfect skin tone for a project, make notes about what colors you used to mix it, so that you don’t forget next time you sit down to paint.
- When it comes to watercolor, both white and black paint should be used sparingly when painting skin tones. Often, white watercolor paint will have a bit more pigment, which can affect the translucence of tones and make them seem flat. Black paint can make skin tones appear slightly muddy. I often find that to darken skin tones, using brown paint is a much better bet.
How to paint skin tones in watercolor
Step 1:

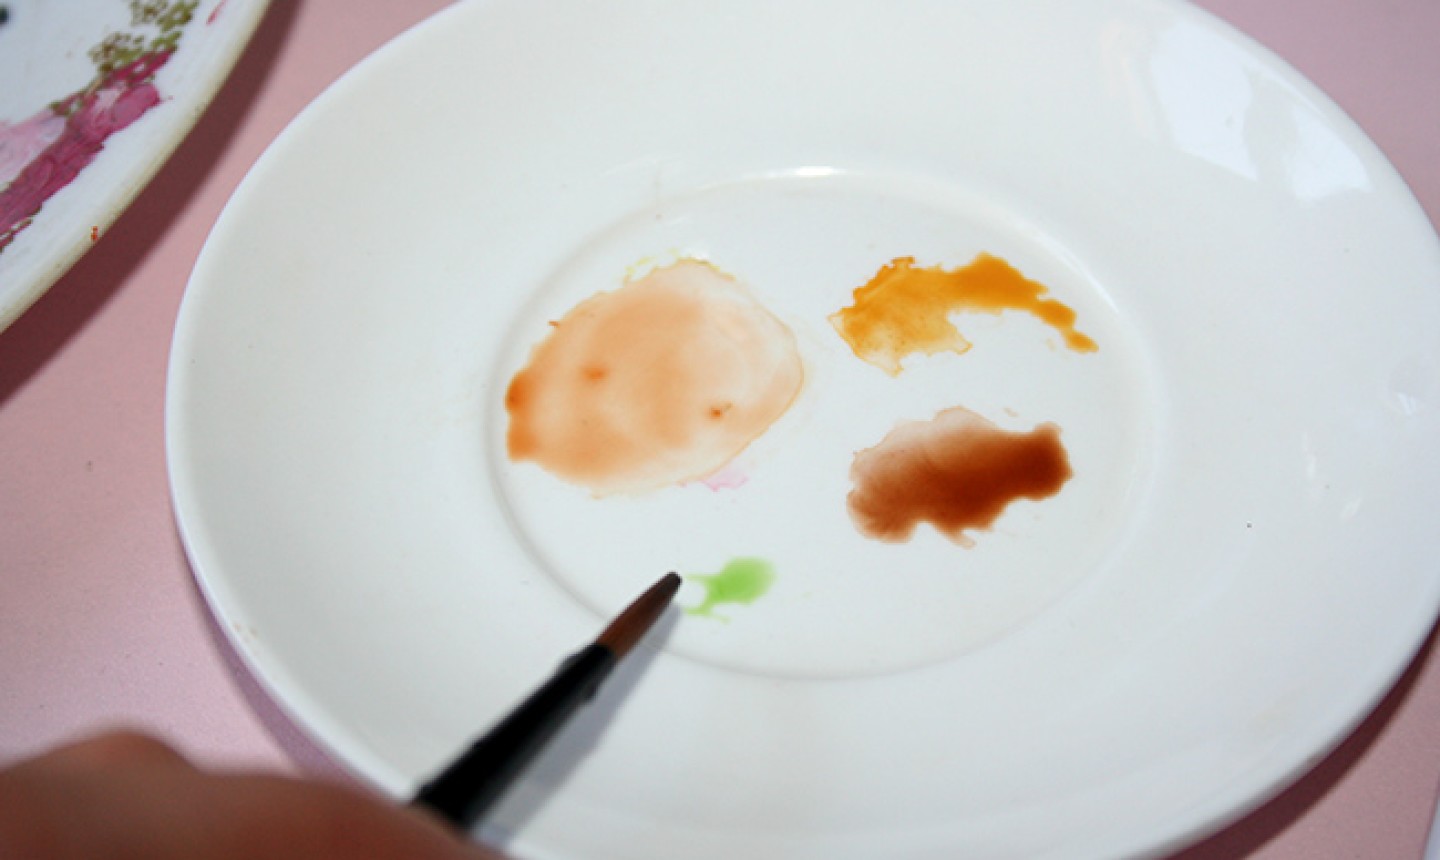
Create a palette with a portion of yellow paint, a smaller portion of red paint, and a tiny dot of blue paint. This will be your basic starting tone for light skin tones. If mixing a medium skin tone, add 1 part brown paint. If mixing a dark skin tone, add 2 parts brown paint. Be sure to have a reference image handy so that you can refer to it as you mix.
Step 2:

Mix together your basic palette. Dab some of the paint on a piece of scrap paper so that you can see how it looks. Rarely will this mix be the perfect skin tone, but it’s a good starting point.
From here, begin to refine the color. Start by evaluating if the skin tone is too light or dark. If it is too dark, use more water to dilute it. If it is too light, add more brown paint.
Step 3:

Continue to refine. Most skin tones have hints of different colors such as red, green or yellow. Add a little bit of the colors needed to attain the perfect skin tone.
Continue to refine the color by adding a bit of this, a bit of that, until it matches the tone you’re looking for.
Create a family of tones

Once you’ve mixed your chosen skin tone, create a family of tones around it so that you can create accents in your finished painting. For instance, mixing your skin tone with a little bit of red will give you the perfect color for painting rosy cheeks.
What's your method for mixing skin tones in watercolor?
Looking to get started with watercolors? Check out the class Startup Library: Watercolors below!


As new to watercolour painting I would like to do some portraits painting so would like to get the skin tone right any tips please thanks
Please may you email me tips for watercolor skin tones? Thankyou ahead of time Sandy seifried
Why not use white for lighter tones?
Need to know about engravings
This may be silly, but starting off a realistic watercolor, should you make your first round of flesh a large amount and add shade throughout as you layer? Or do you mix a new layer each time for depth? Hopefully that makes sense. Very helpful though. Thank you
yay
How to mix skin color?
What coiours to use to give depth please
I want to be a great artist
got it