
If you’ve ever tried quilting with minky fabric, you know that it’s a plush material that offers excellent results for cuddly quilts. It’s often used as a backing for baby quilt or lap quilts, but can also be worked into patchwork quilt tops as well as toys, home decor and clothing.
I’m excited to share a quilting tutorial for a changing pad cover made from Shannon Fabrics Cuddle, which is a high-quality minky. It comes in lots of colors, prints and textures, which is perfect for customizing to your nursery decor. Let’s get started!
Materials:
- 54″ inches of fold-over elastic
- 32″ wide by 48″ tall piece of Cuddle fabric
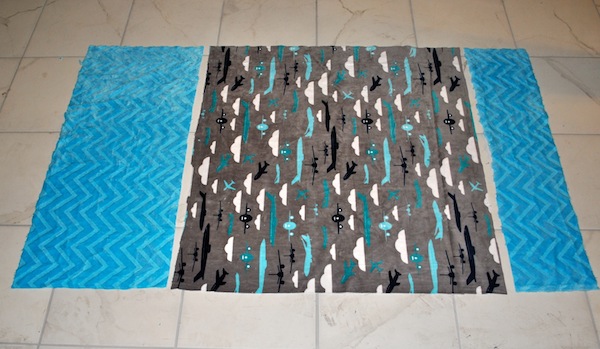
You can also combine scraps to make a pieced version. Here are the cuts I used, which together add up to 32″ by 48″ with the 1/2″ seam allowance.
- 32″ wide x 30″ tall airplane Cuddle
- 32″ wide x 13″ tall teal Chevron Cuddle
- 32″ wide x 7″ tall teal Chevron Cuddle
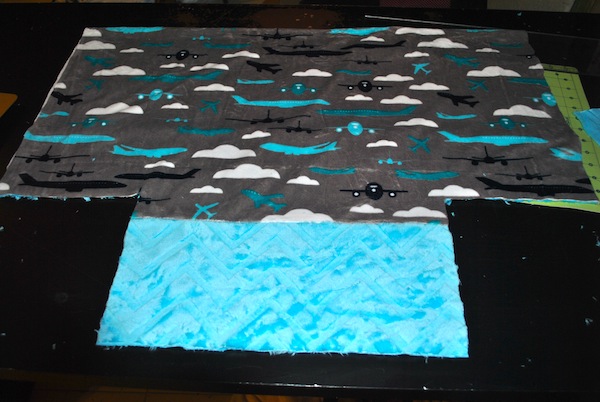
Tip: When joining the pieces together for a patchwork version, make sure to use plenty of sewing pins. Minky fabric has a natural stretch to it and tends to curl up, so this will help keep it aligned. Use a 1/2″ seam allowance to stitch each section together.
Step 1:
Shake off the excess fabric “crumbs” from your fabric. Press the seams open. Your solid or patchwork fabric should now measure 32″ by 48″.
Step 2:
Fold the cover in half width-wise, and cut an 8″ square through the corners with raw edges (the non-folded side). When you open it up, you’ll see four corners missing.
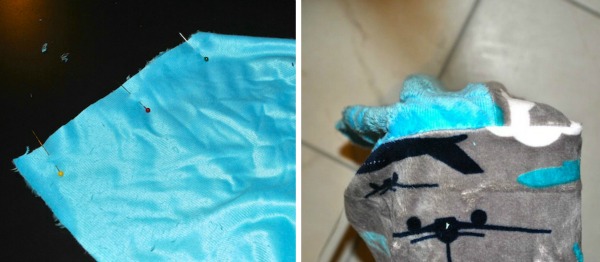
Step 3:
With the right sides of your fabric facing, pin together the 8″ cut edges of each corner. Stitch together with a 1/2″ seam allowance. Repeat for the other three corners, and turn the cover right-side out.
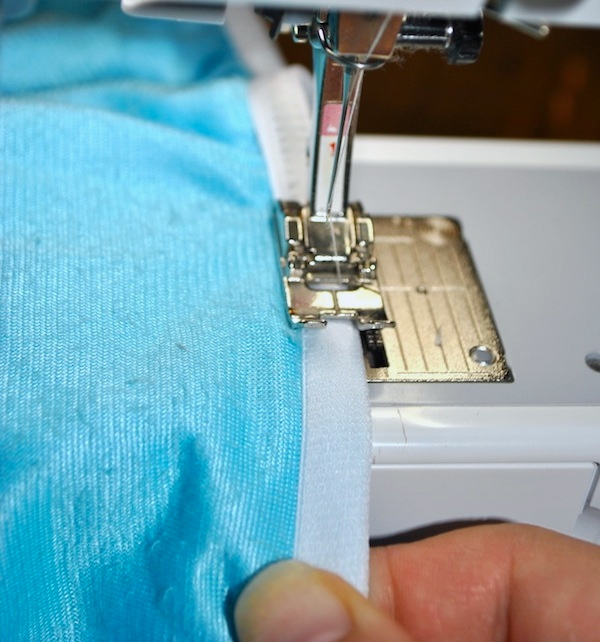
Step 4:
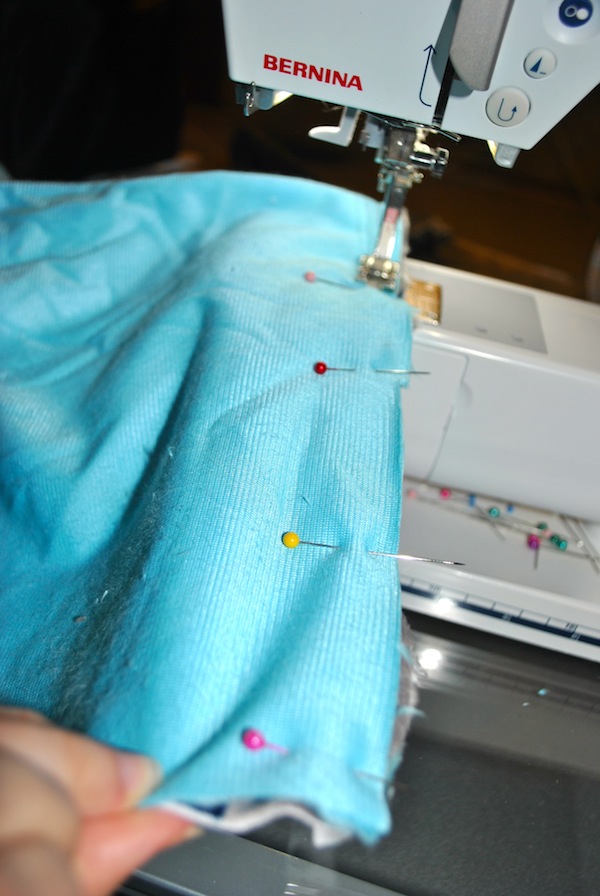
Using a wide zigzag stitch, sew the fold-over elastic to the raw edge of the minky. The secret is to stretch the elastic but not the minky fabric. This takes a bit of practice, since the fabric will be sandwiched inside the folded elastic. You’ll need to adjust your grip every few inches. Keep stretching and sewing the elastic until you’ve covered the entire perimeter of the changing pad cover.
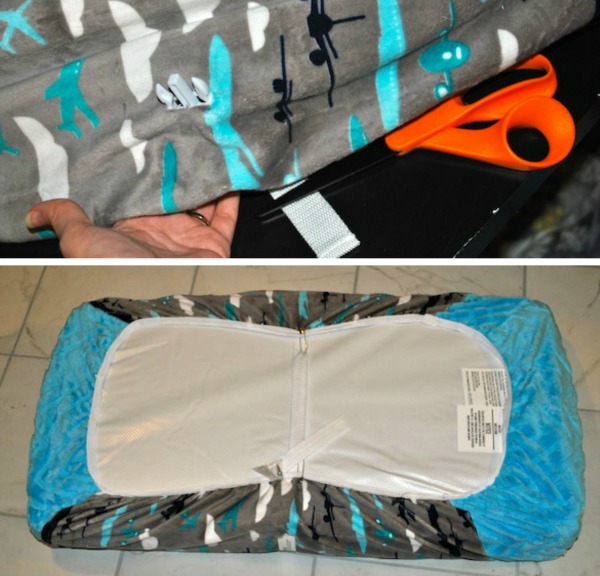
Step 5:
Slip the gathered cover over the changing pad. If you’d like, cut slits into the fabric so you can feed the nylon straps through each side. Because minky fabric doesn’t fray, you won’t need to finish the edges of your slit. If you’d like, flip over the changing pad and tighten the cover by safety pinning each of the long edges to the nylon straps.
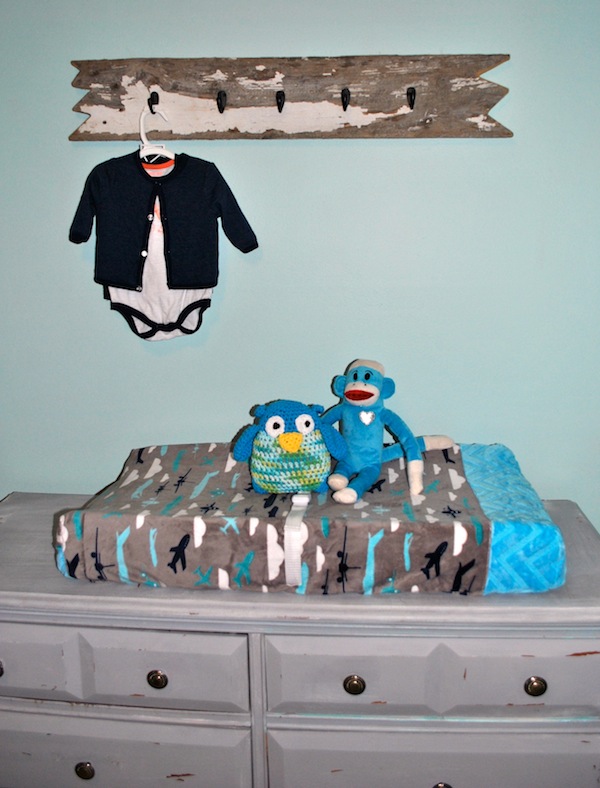
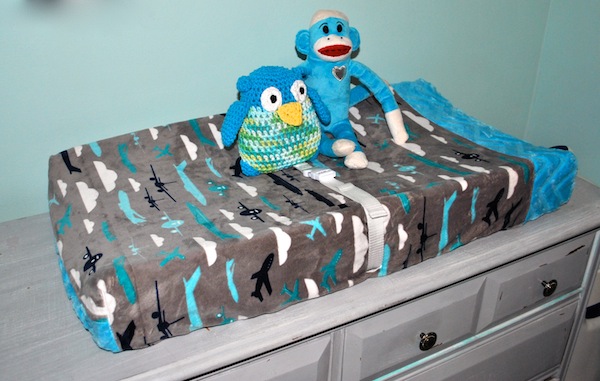
Here is the finished changing pad cover, which makes a great baby shower gift! It’s easy to remove and throw in the washer, though it never hurts to have an extra on hand.
Share tips, start a discussion or ask one of our experts or other students a question.
No Responses to “Sewing With Minky Fabric: A Changing Pad Cover Tutorial”