Looking to take your sewing up a notch? Here are ten quick and easy techniques you can master to make sewing perfect garments a breeze.
1. Know how to press (and do it often)
Although both involve an iron, pressing is different from ironing. When you iron, you are gliding the iron back and forth over the fabric or garment. When you press, you are placing the iron on the fabric or garment, leaving it there for a few seconds, and then removing. Ironing can actually distort fibers, which is why it’s important to press rather than iron when sewing. Pressing helps to set and blend stitches and helps you get nice, crisp seams. Press often! (Of course, make sure you are following proper care instructions for your fabric.)
2. Staystitching

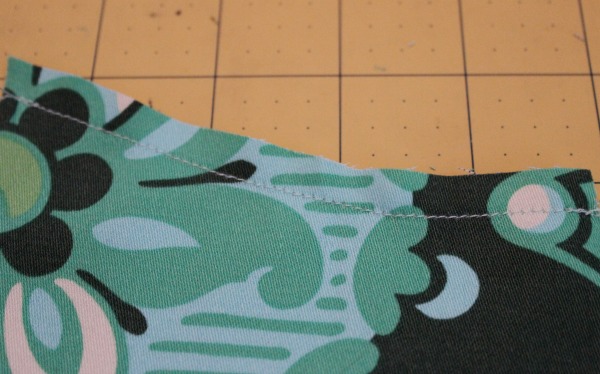
Staystitching prevents distortion to curves. To staystitch a curve, set your stitch length to 1.5. Your stitching should be ⅛” in from your sewing line. Ideally, you should staystitch any curves as soon as possible after cutting. Even just moving the fabric around a couple of times can cause distortion.
3. Clipping corners and curves


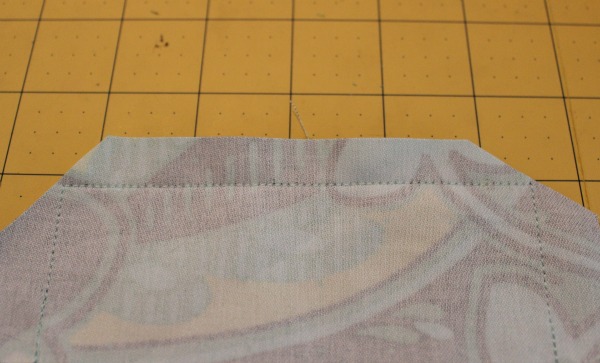
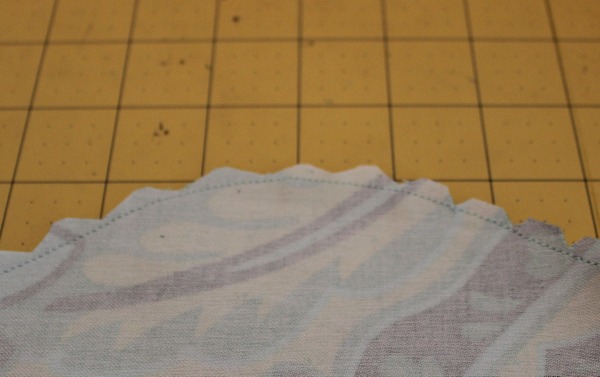
This is a simple technique that can make a huge difference! Seams can be bulky on projects with corners and curves, and once you turn your item right side out you’ll be fighting to make it lay flat. But, if you clip a corner at a diagonal, getting close to the seam (but not too close!), you’ll get a nice, crisp corner when you turn it right side out. The same principle applies to curves: you need to remove some of the bulk for a flat seam. Curves that look like mountains should be notched, curves that look like valleys should be clipped.
4. Seam finishes
Beginner sewists might think that once they’ve sewn a seam, the work is done. Not true! It’s important to finish your seams to prevent raveling and make the inside of your work look just as nice as the outside. Many times you can simply pink your seam with a pair of pinking shears. However, the best seam finish really depends on your fabric and garment.
5. Hems
Much like properly finishing your seams, a well-executed hem gives your garment a professional finish. The right hem for your garment does depend some on the type of fabric and the style of garment. It’s worth it to familiarize yourself with the different types of hems so that you can pick the best one for your garment.
6. Using a rotary cutter
A rotary cutter and cutting mat are invaluable tools for sewists. Becoming comfortable cutting with a rotary cutter is a great skill to master; you’ll be amazed at how much faster you can cut out a pattern. It’s important to always protect your work surface with a cutting mat. Just like scissors, you’ll want to keep your rotary blade sharp. Fortunately, this is even easier than maintaining your fabric shears, since you can stock up on rotary blades and swap them out yourself.
7. Fussy cutting
Fussy cutting is a technique used on patterned fabric to isolate a motif. This is a great way to create easy appliqués to add to garments or home decor projects. To fussy cut, roughly cut around the motif you want to isolate, leaving plenty of extra room. Next, trim the motif to size, making sure to leave a small seam allowance. Then, place the motif on the fabric. You might want to use a spray adhesive to keep the appliqué in place while you are sewing. Stitch around the appliqué using a satin stitch.
8. Bar tacks
Bar tacks are used to reinforce areas that will receive a lot of stress, such as pocket openings. These can either be sewn by machine (using a zig-zag stitch) or by hand (using a whip stitch). They are usually 1/16”-⅛” in width and ¼”-⅜” in length.
9. Dog ear pockets

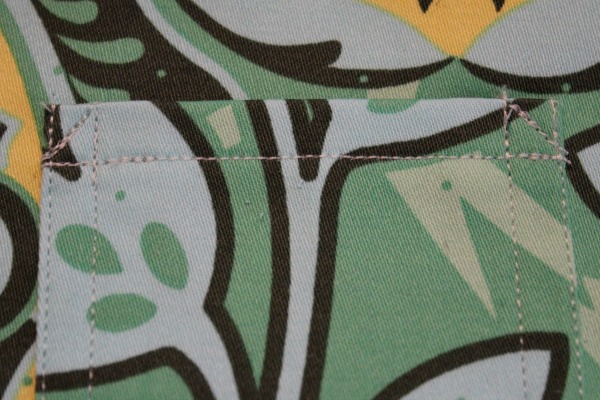
Never dog-ear the pages of a library book, but always dog-ear the corners of your patch pocket for added stability. Adding small triangles to the corners will reinforce the pocket and prevent it from separating from the garment. To do this, simply stitch a short diagonal line in the upper corners after you have attached the pocket, making sure to backtack a couple of times.
10. Calculating yardage for custom bias
Even if you’re familiar with how to make your own bias tape, you might find yourself at a loss when it comes to how much yardage you will need to create the amount of bias tape for your project. I recently discovered a formula for determining exactly that. No more guessing and ending up with too much or too little fabric! Be sure to keep this formula handy if you want to make your own piping, too.
Looking for even more essential sewing skills and techniques to make your garments top-notch? Check out 40 Techniques Every Sewer Should Know with Gail Yellen.

Your website is very inspiring with high-quality content. We are sure that you will find additional useful information on our website. Come on, visit us at <a href="https://junjunan.co.id/">Konveksi Seragam Kerja</a> and we can collaborate with each other. Warm Regard.
I really love the explanation very detailed and educative thanks
I have been involved in sewing it was my first job at 15 sewing factory no frills . I can yous a sewing machine but I never had any training I mulled through on my own I never reached any heights I can be proud of I left sewing and went on to learn floristry... Now I'm quite old I got inspired by a yearly programme in the UK purchased a quite expensive sewing machine but I'm not happy with the finish of my sewing . Also so much to learn about changing sewing machine foots for buttonholes and top stich zips the list goes on in my are there is very little sewing experts or workshops
I am trying hard to make my sewing topnotch.
Quite important techniques one requires in tailoring. Am a beginner/a student and am determined to be an expert in garment making.
I may be missing something, but I don't see the formula being referenced to in step 10. Is it included in the Craftsy class link within the paragraph?
Good
Your Comment here...I want learn to sew machine how to skill
Good skills training
Whant to learn proper fashion designs