
Sure, you can make beautiful clothes and accessories by sewing straight seams. But if you want to tackle scooped necklines or round pillows and clutches, you need to be curvalicious. Here's what you need to know.
1. Draw Before You Sew
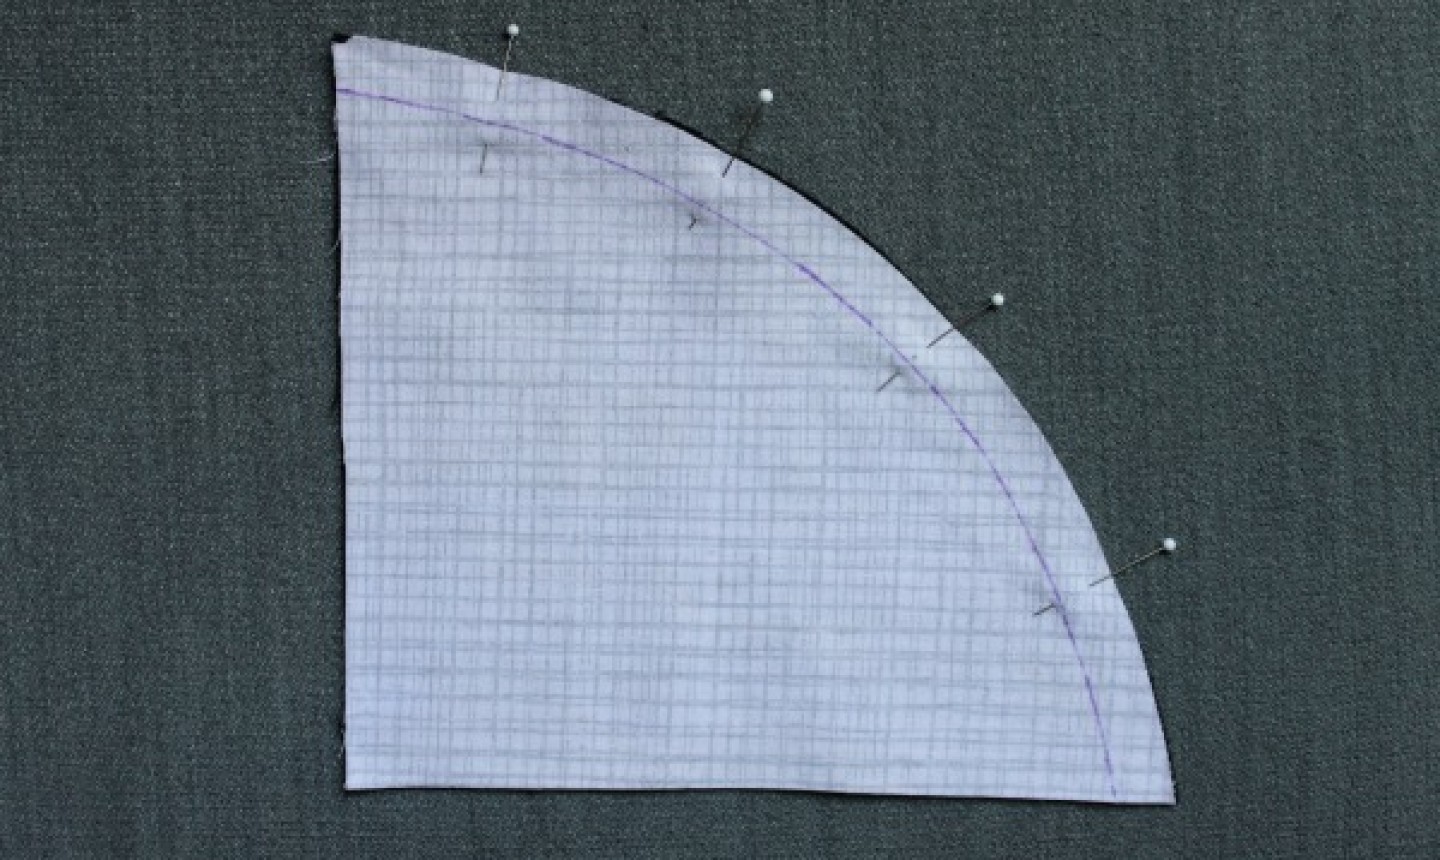
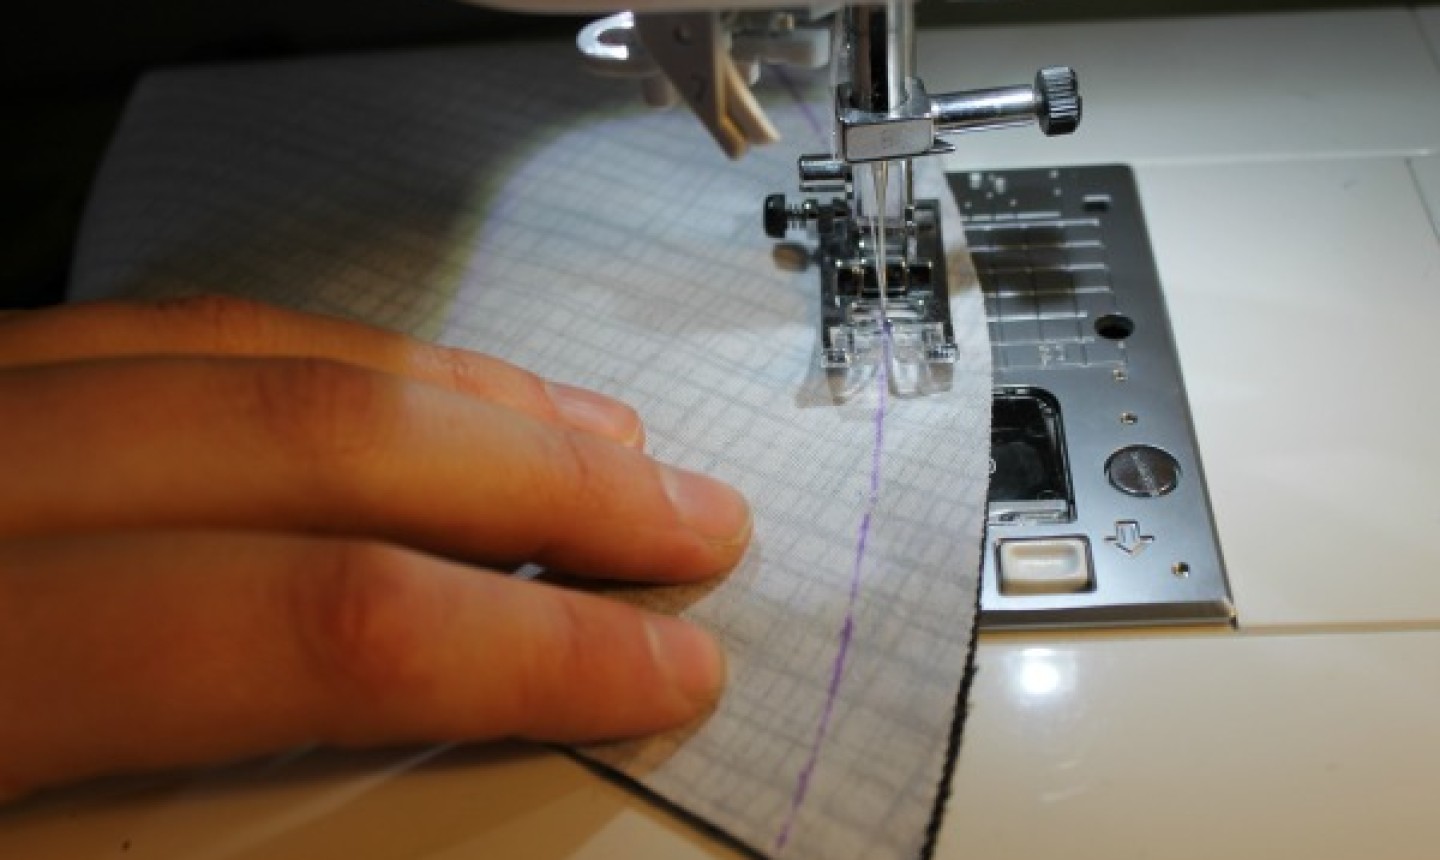
It's tough keeping an even seam allowance as you guide the machine needle around the fabric's curve. To help, measure the seam allowance with a ruler and then mark it on the fabric with chalk. That will help you focus on the fabric in front of the machine needle instead of the seam guide.
2. Look Ahead
If you think of a curve as a collection of small straight stitches and focus on a couple stitches at a time, you'll sew more accurately. Otherwise, as you prep for a curve, you may yank the fabric from under the presser foot or turn it too soon. The result: jagged stitches and uneven seams.
So keep your eyes glued to the area right in front of your machine needle; large or long curves will seem less scary this way. To guide the fabric around the curve, gently push the fabric sideways with your fingertips.
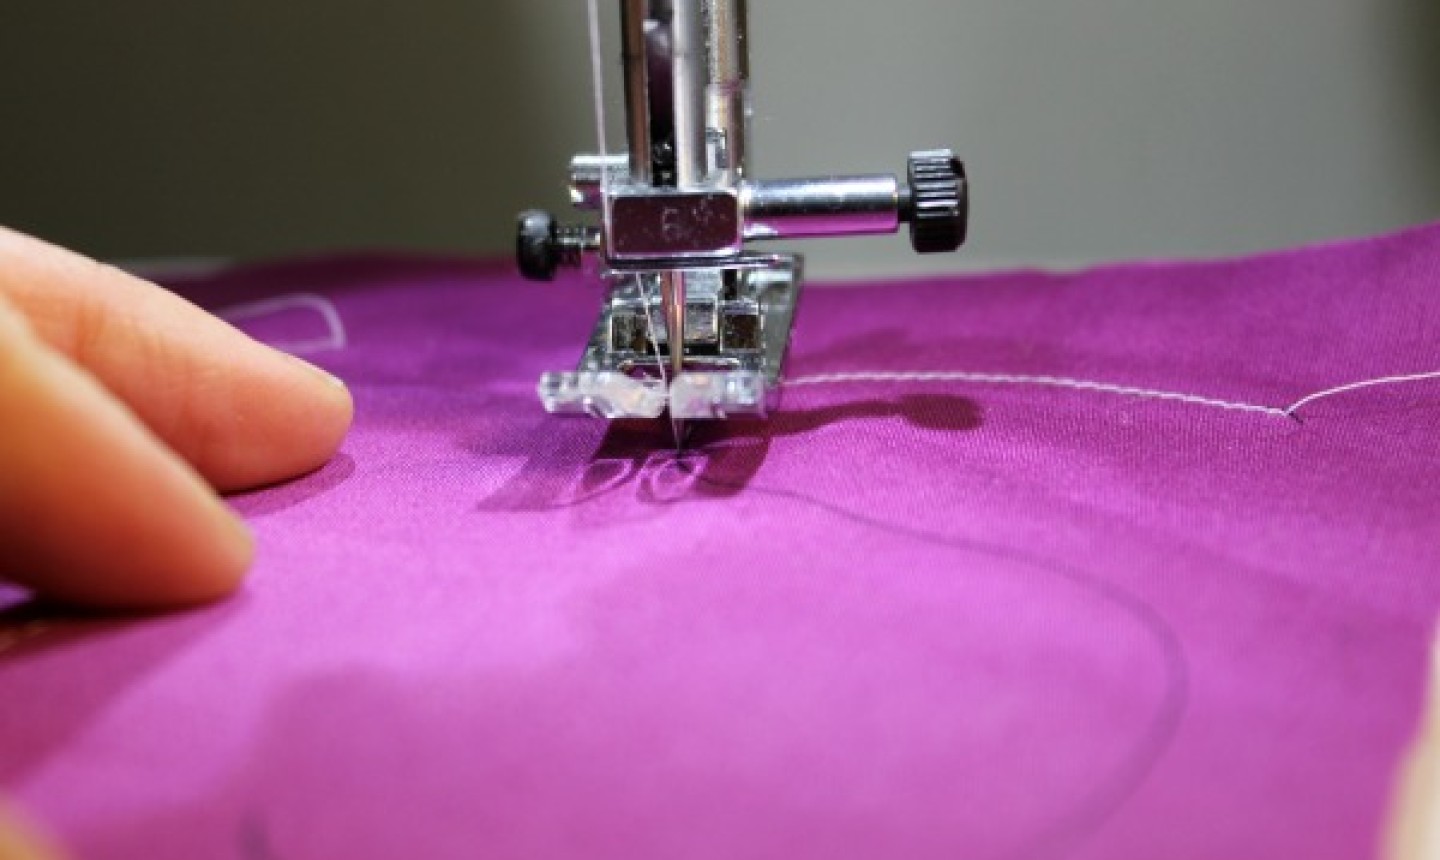
3. Shorten the Stitch Length

Sewing around tight curves is easier with a shorter stitch length because the machine moves the fabric under the presser foot more slowly. Smaller stitches also make a curve look less angular.
In the stitching above, the left curve was sewn with a 3mm stitch length and the right curve was sewn with a 2 mm stitch length. See the difference?
4. Walk, Sink and Pivot
Sometimes the machine can't turn sharply or quickly enough to stay on course around a sharp curve. Your hand wheel helps the machine "walk" the needle through each stitch, giving you more control and keeping stitches even.
Use the hand wheel to sink the needle down into the fabric, then lift the presser foot and pivot the fabric slightly before putting the foot back down as you sew. Any time you see the fabric bunching too much around the presser foot as you sew curved seams, lift the foot so the fabric relaxes. Then continue sewing. Smooth!
5. Scale Down Seam Allowances
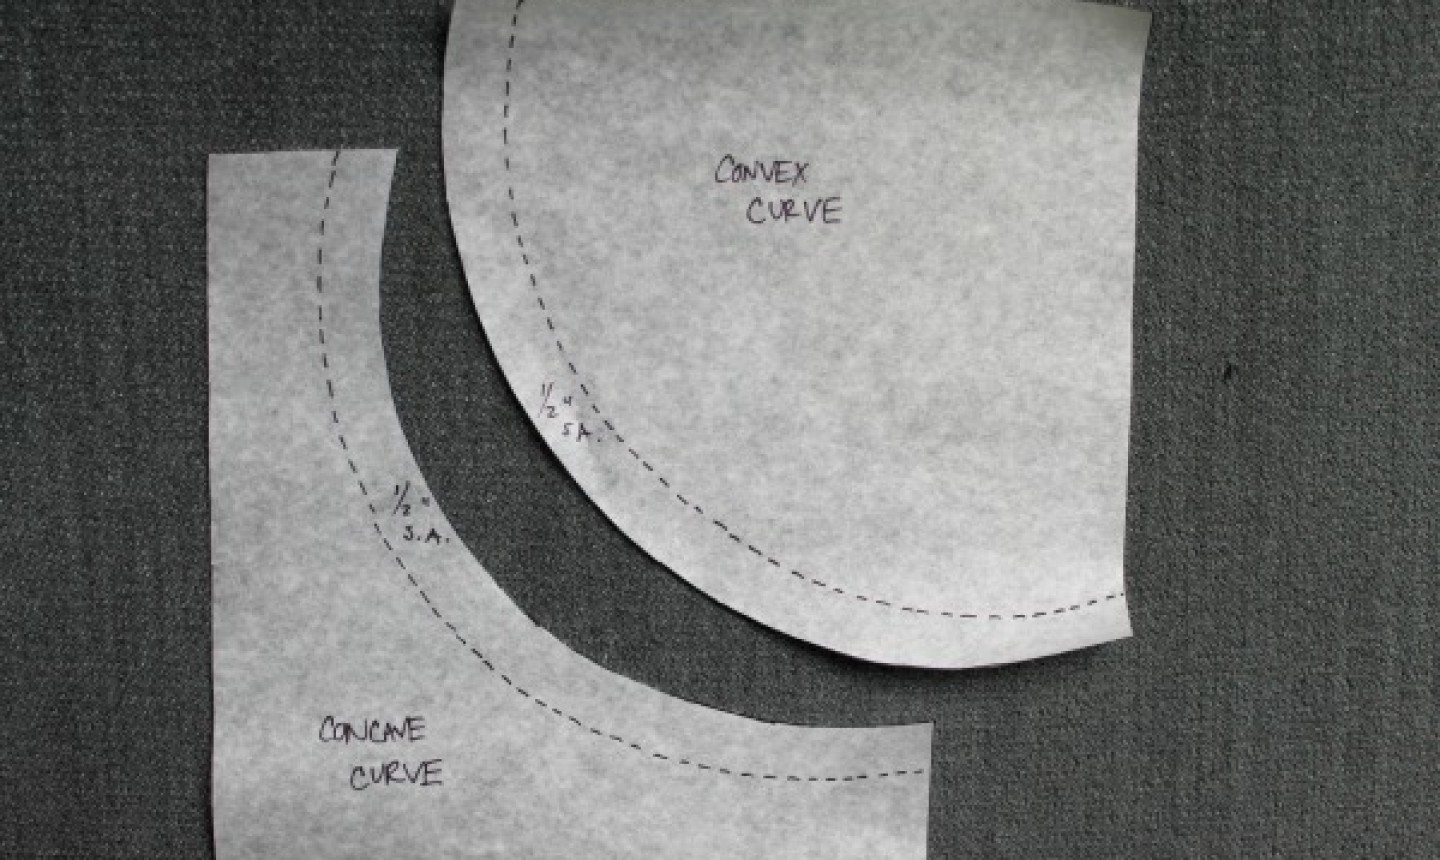
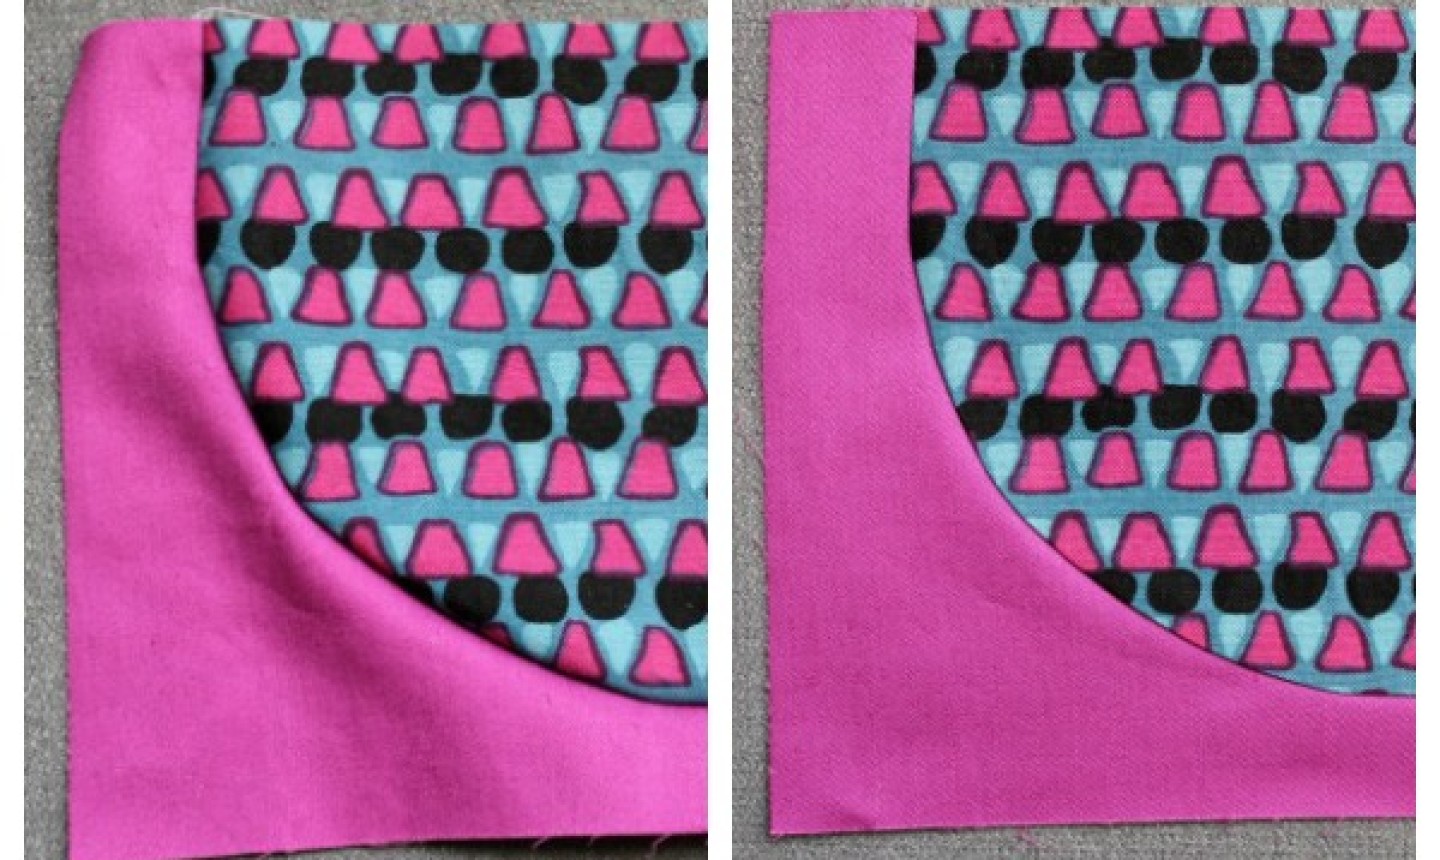
When you attach lining to a facing, you usually have to sew a convex curve (a curve that sticks out slightly) to a concave curve (one that goes in, like the neckline of a dress). Ease the convex curve's edge into the smaller edge of the concave curve. As you can see in the photo above, the raw edges of both pieces are different lengths, but the seam lines are the same so they match up when you sew them together.
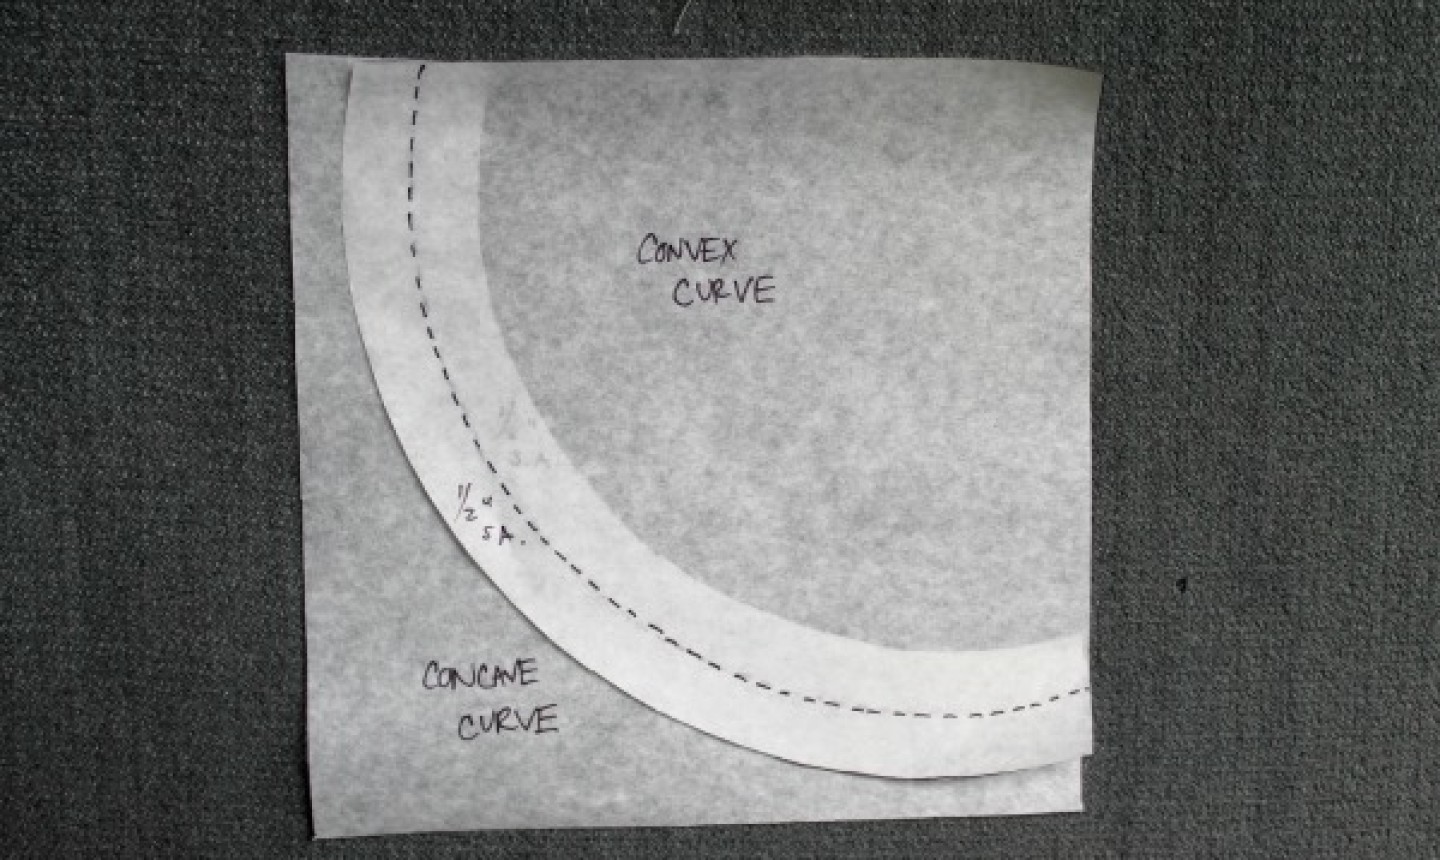
If the seam allowance is larger, it means more fabric needs to be eased into a curve — and that can give you puckers. If you are working with a pattern with ½" or larger seam allowances, think about reducing the seam allowances to ¼" so it is easier to pin and sew.
You're less likely to make a mistake if you reduce the seam allowance on the actual pattern pieces before you cut the fabric. But it's also okay to trim down the seam allowances on the fabric pieces before you sew them together.
6. Match the Centers
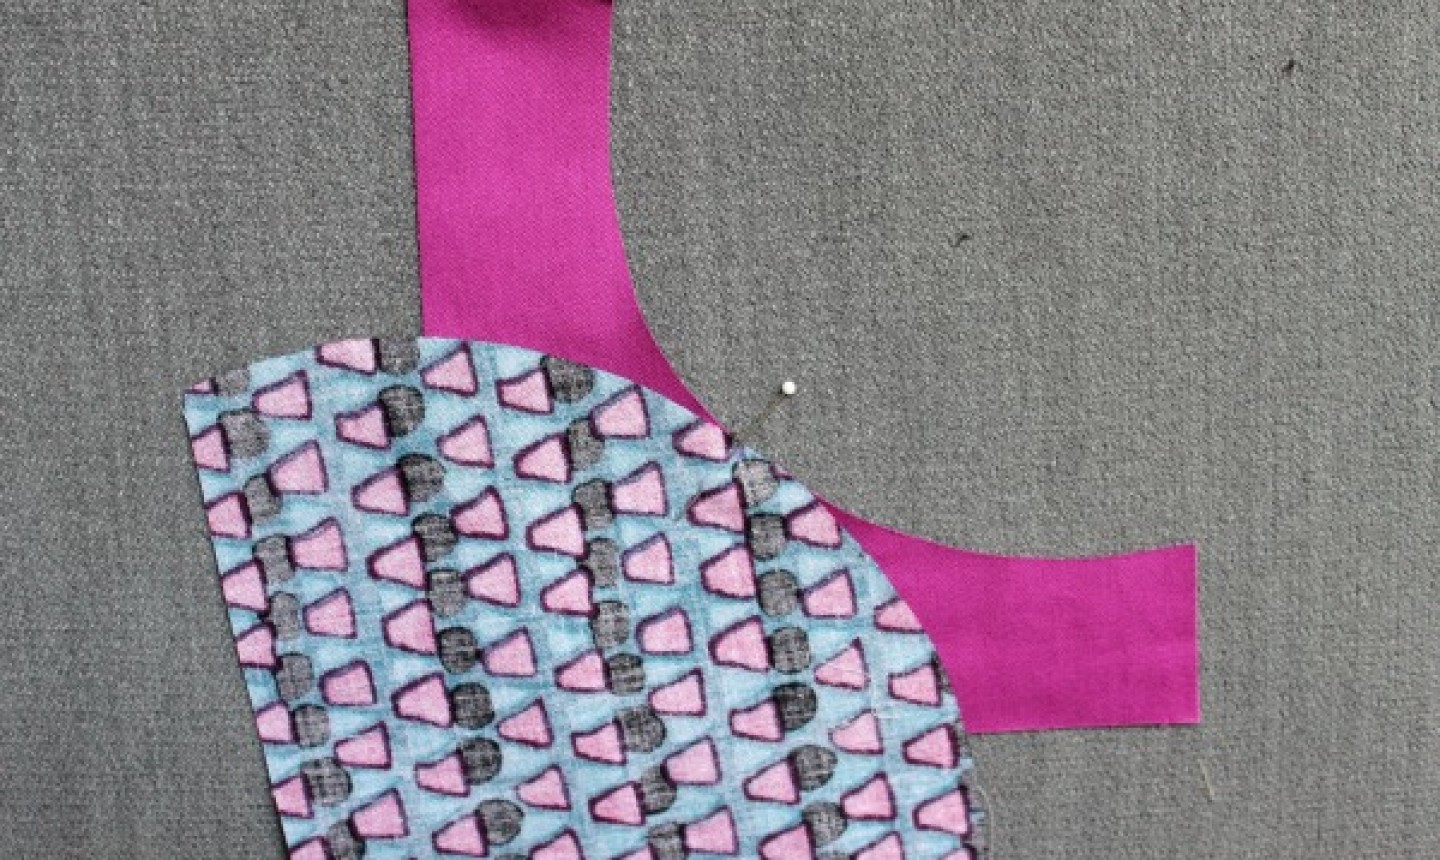
If your pattern doesn't include notches along the curve to help you line up the pieces, find the center of each curved piece and then mark with chalk or a small notch.
When you pin the pieces together, match the centers as well as the two ends of the seam. That way, you'll distribute the fabric evenly when you ease it together.
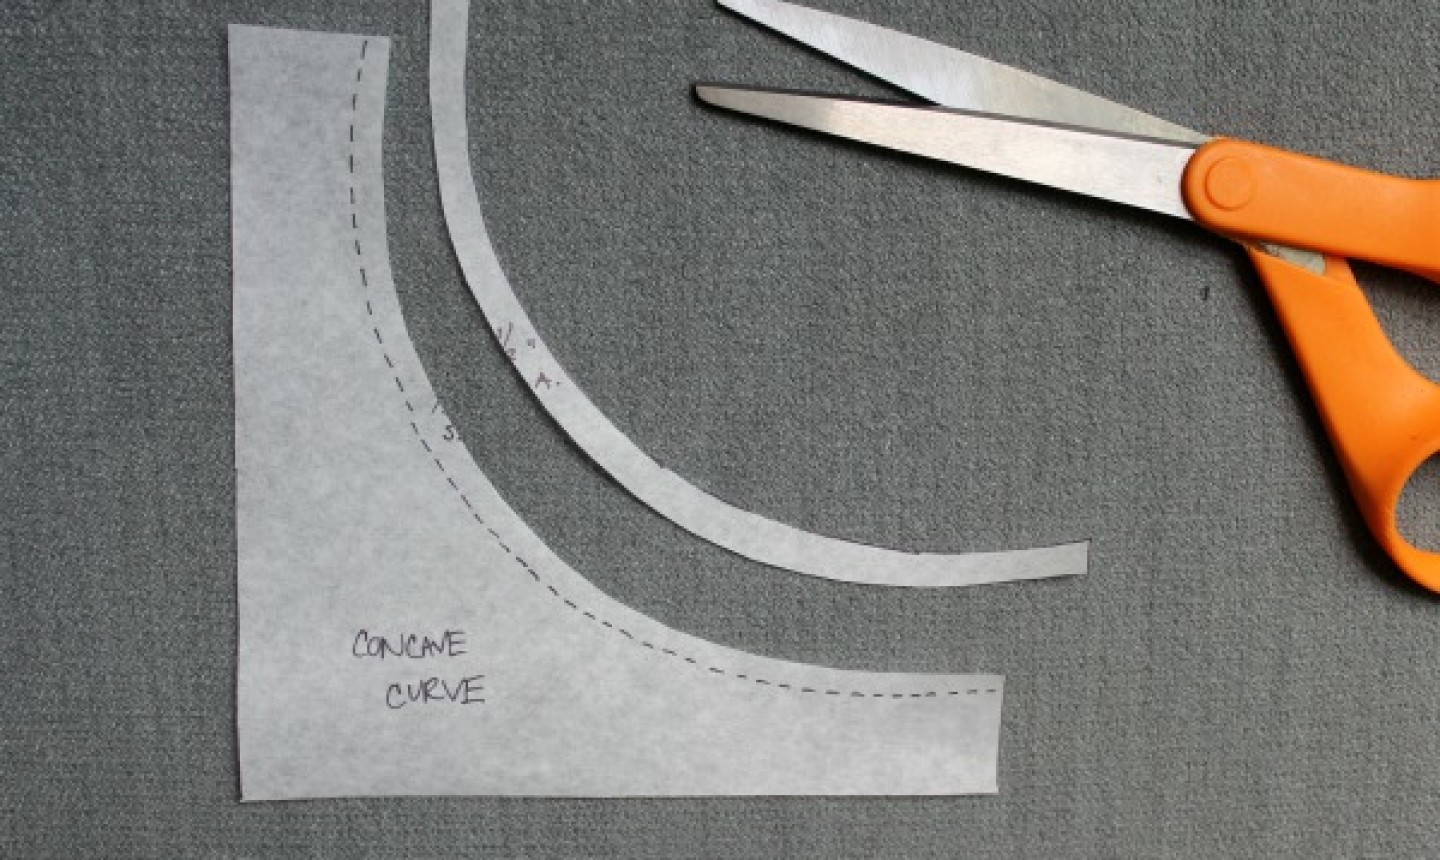
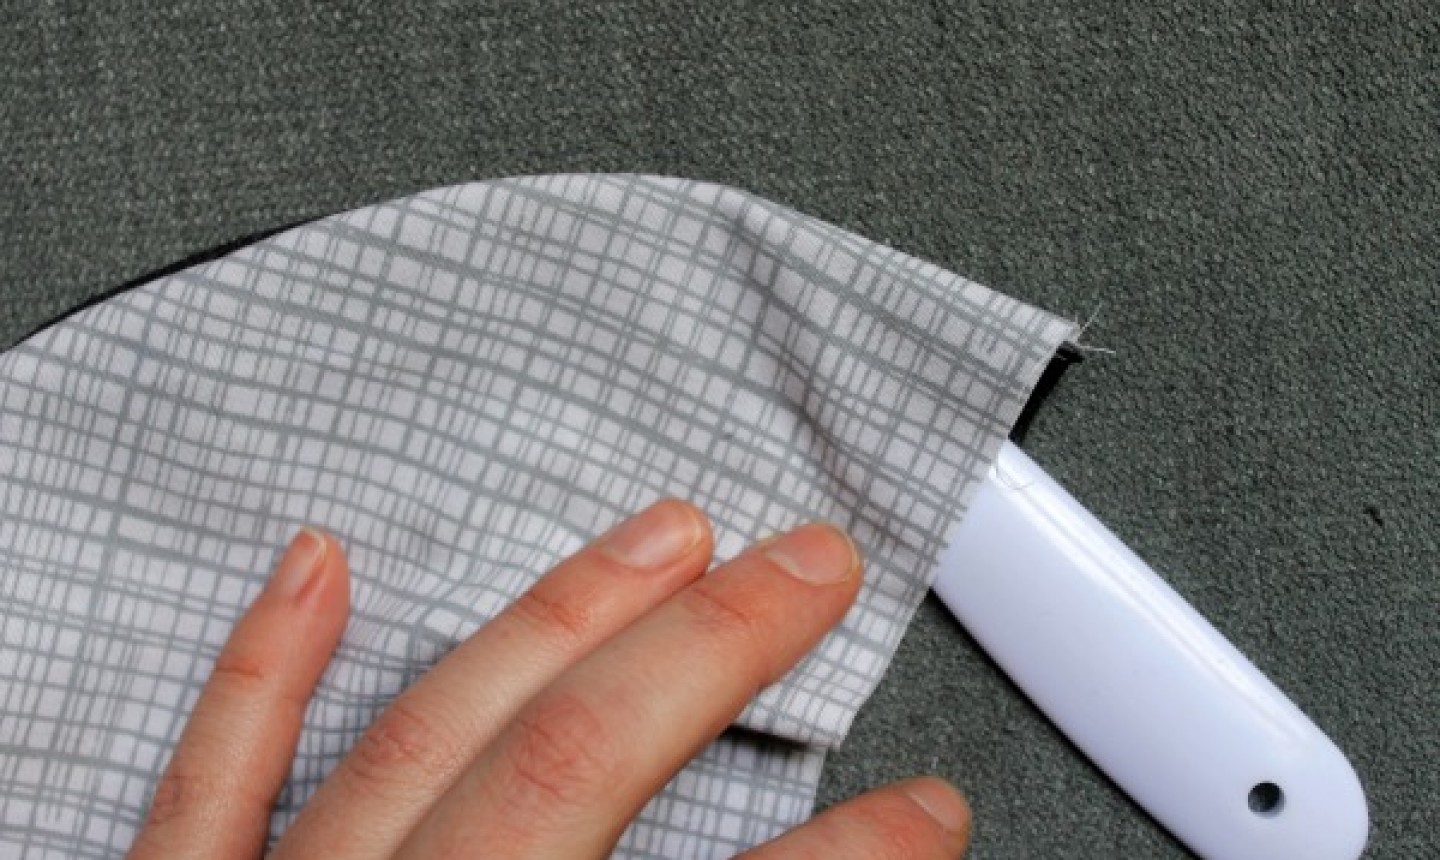
7. Cut Notches or Slits
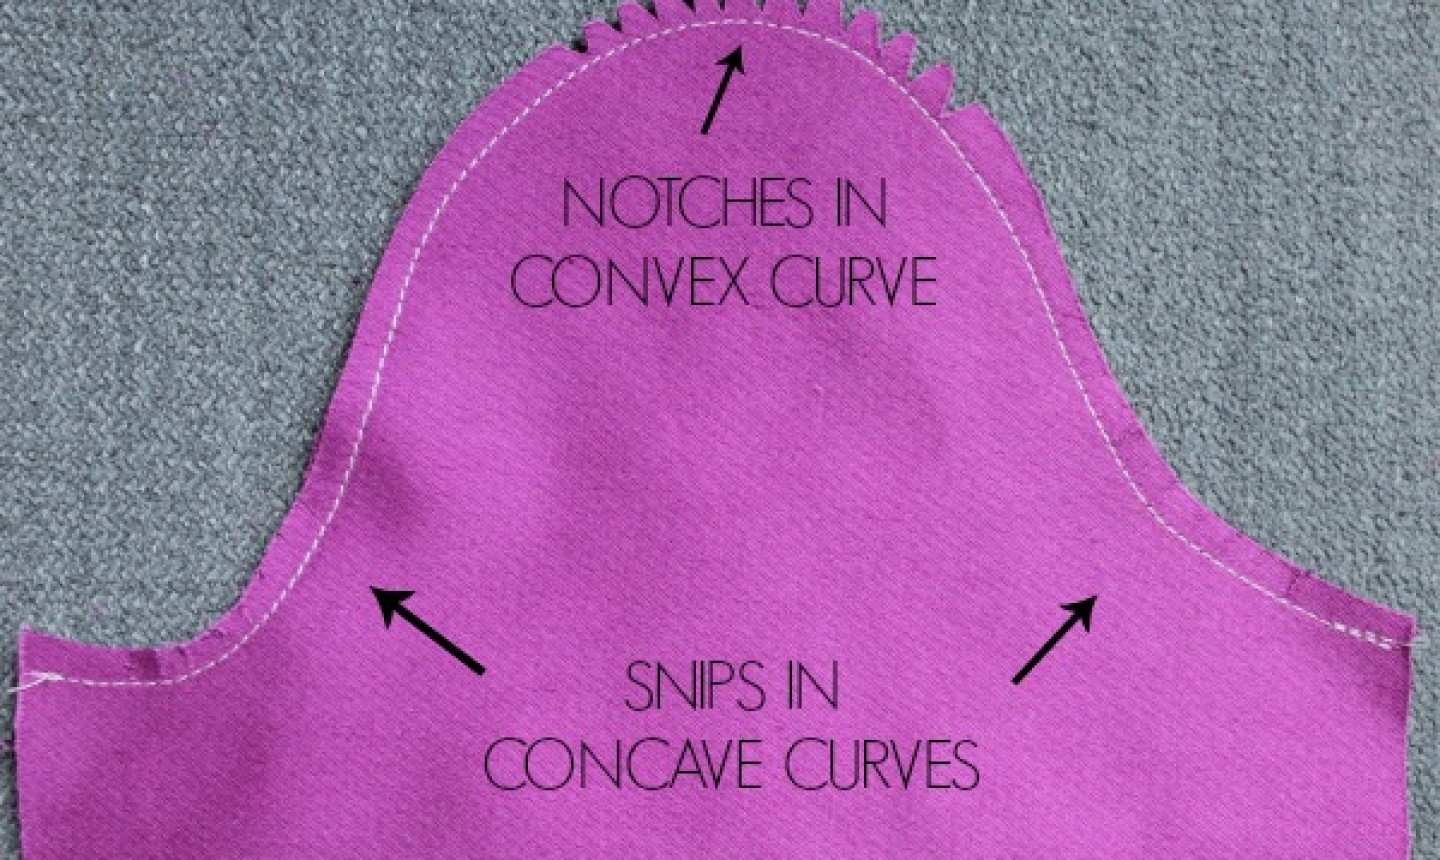
Convex curves have more fabric in the seam allowance than the actual seam line, so if you leave them as is and try to turn the project right side out, it'll be bulky. Plus, it won't look pretty.
Cut down on the bulk by trimming close to the stitches and then snipping small notches in the fabric within the seam allowance. Be careful not to snip into your stitches! When you're done there will be less fabric shoved against the seam's edge.
Concave curves have less fabric in the seam allowance than at the actual seam line. So cut small slits into the seam allowance to allow the fabric to stretch and flatten out once the project is turned right side out.
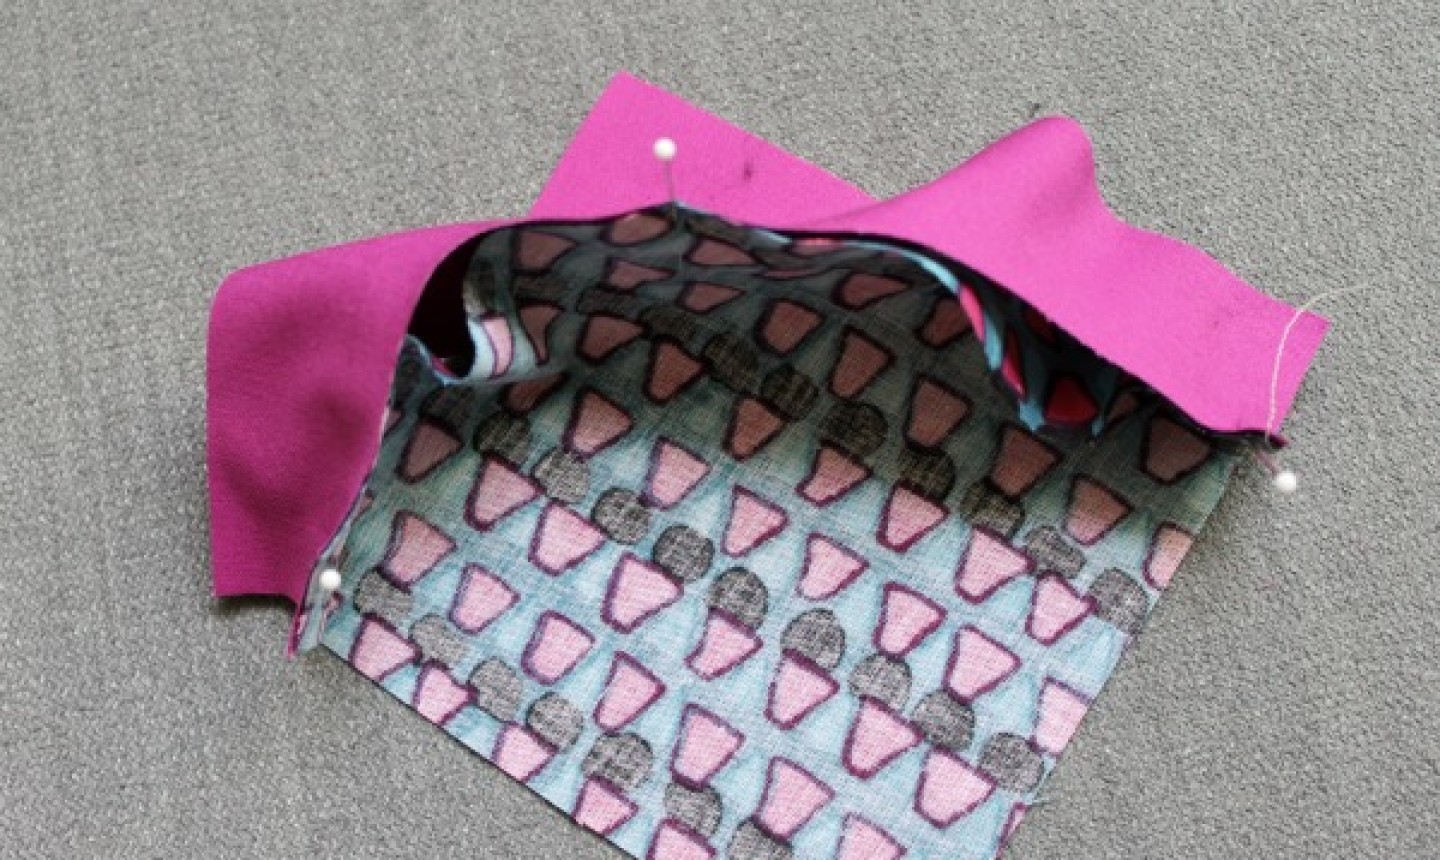
8. Smooth Out Curves
Once you turn your project right side out, smooth out the edge by pushing out the curved seam with a pointed object like a knitting needle or chopstick. Don't use something too sharp (like a knife) or you'll poke through the seam line.
After you smooth out the curved seams, it's time to iron and get out the last wrinkles and bumps. A bit of steam and weight from the iron will give the seams a more pro look.
A tailor's ham can help press out any type of curve, from princess seams to curved darts. Iron the seam over the curved edges of the ham and your clothing is guaranteed to fit better when you wear it.
Enjoy your new curves!

I have sewn small craft projects, but not garment sewing. This information is very helpful because I sewed something with a curve and did not do very well. Thank you for the information.
One of the best sewing tips I ever got: when you're "easing" put the longer piece on the feed dogs. It gently pulls the fabric a little . This also works when attaching a bias cut to a straight grain(bias on the bottom).
Many good tips. I’ve sewn since I was a teenager ( made my own wedding dress) so have been using many of these tips and find that they help your garments go from looking “ homemade” to “ hand tailored”- even had a friend across the hall from me at college, who was a home economics major ask to take the slacks I was making for my then fiancé to her tailoring class to show the difference between “ homemade” and “ hand tailored”. It only takes a little more time to make a better garment. Also, the one thing my Mama always taught me was to iron every seam- this is the biggest mistake I see some home sewers doing and it’s a dead giveaway that a garment is “ homemade”
Very helpful tips, especially the one about reducing the stitch length when sewing curves.
Really helpful and clear advice, thankyou.
Sewing construction
Very clear explanations
A very good advice! great tip.
So smart so clear
Great tips, Andrea! I had never thought to trim the seam allowances before stitching, that’s my favorite idea.