 Whether you’re flying a red eye or simply trying to block out the light from your TV, there are many reasons to use a sleep mask and get some quality shuteye. The good news is that it’s super easy to sew a travel eye mask, and only calls for a little bit of fabric. (Stash-buster project, anyone?) Whip up one for yourself, or go to town and make ’em for the whole fam so you can all get some beauty rest, stat.
Sleep Eye Mask
Level: Easy
What You Need
- Adult Eye Mask PDF pattern
- Fabric (We recommend dark colors to keep light out)
- Batting
- Clear ruler
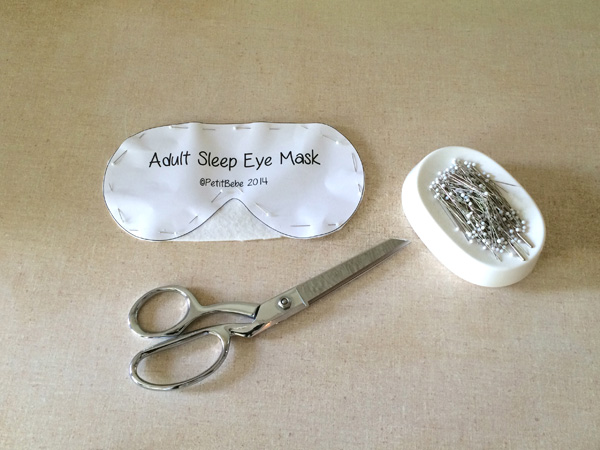
- Pins
- Paper scissors
- Fabric scissors
- Elastic (this will be visible, so choose a color that goes well with your fabric)
- Thread
- Point turner
- Fabric marker
- Seam gauge
Pro Tip: Choose fabrics that are comfortable on your face and easy to wash, as it will get dirty from face oils and beauty products and could require frequent cleaning.
Instructions
1. Print the Pattern

When using a PDF downloadable pattern, it’s important to get the size correct. Print the page with the test pattern first, then check it with your ruler before printing any additional pages. Set the PDF software (like Adobe Acrobat) to print at 100 percent and not to scale the pattern to fit the pages.
Once the size is correct and the pages are printed, cut out the pattern with your paper scissors.
2. Pin Your Pattern
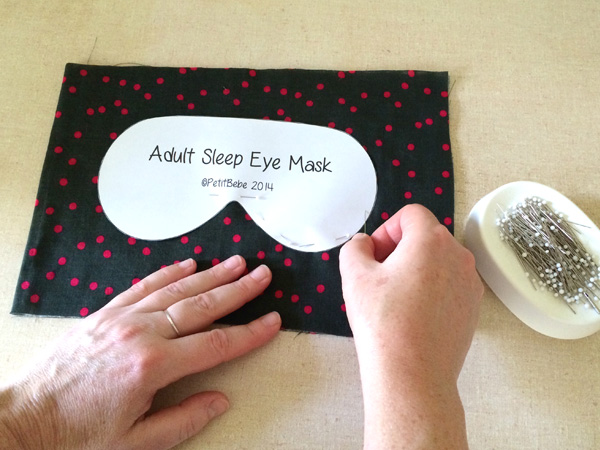
Fold your fabric in half and pin the pattern to your fabric. There is no grainline on the pattern piece, but be sure to keep the top edge perpendicular to the selvage edge so the crosswise grain goes across the mask. This means the little bit of crosswise grain stretch will be going around the head to ease in fitting.
Once pinned, cut out the fabric so you have two eye mask pieces.
3. Cut Out the Batting
Cut one single layer of the batting of your choice — we used a thin cotton and bamboo blend. Leave the batting longer than the fabric at the nose bridge, as shown above — it’s easier to cut away after you sew.
4. Pin the Elastic
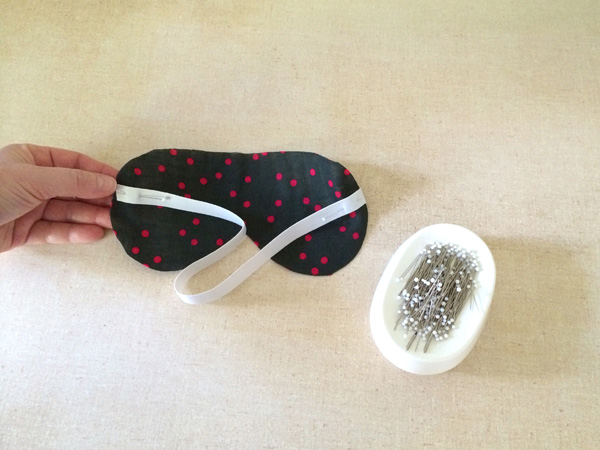
Measure down from the top of the mask and pin the elastic in place on the right side of the fabric. Repeat on the other side of the mask so the straps are evenly placed on both sides.
Pro Tip: The pattern calls for the elastic to be 13⅜” in length. Measure your head to make sure that size will fit you correctly, and remember you’ll loose ⅜” on either side for the seam allowance. You want it to be fitted, but not too tight.
5. Baste
Baste each side of the elastic to the fabric at a ¼” seam allowance. This will hold the elastic in place and keep the basting inside the mask’s ⅜” seam allowance.
6. Mark the Center Curve
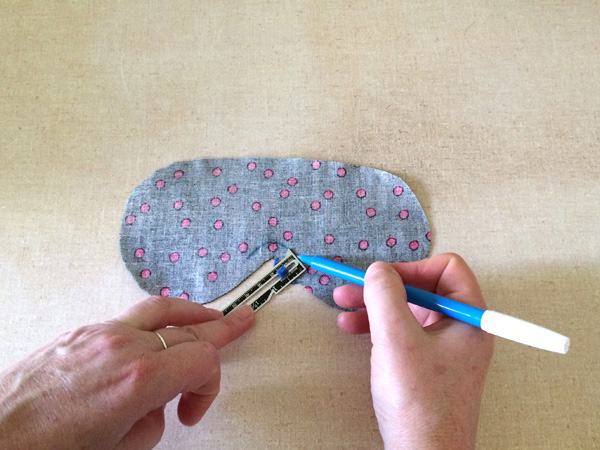
The pattern has a tight curve in the center, right above where your nose will be. It’s easy to sew this more accurately if you mark it in advance. Use your seam gauge and fabric marker to draw the stitching line above this curve at the ⅜” seam allowance. You only need to mark the wrong side of one fabric piece.
7. Pin the Layers
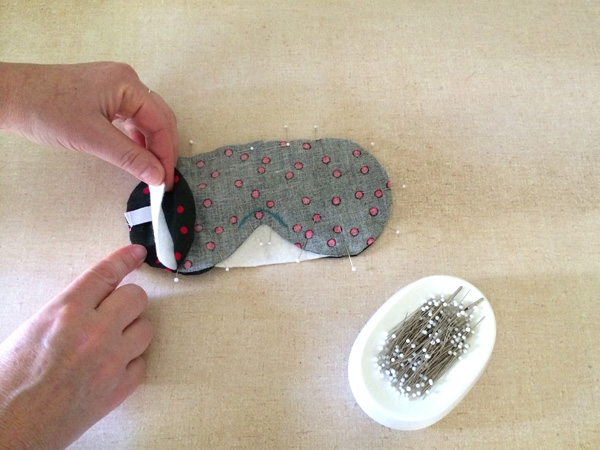
Pin the fabric pieces right sides together and the batting underneath the two fabric pieces. Keep the elastic away from the stitch line and tucked into the fabric pieces so it’s out of the way.
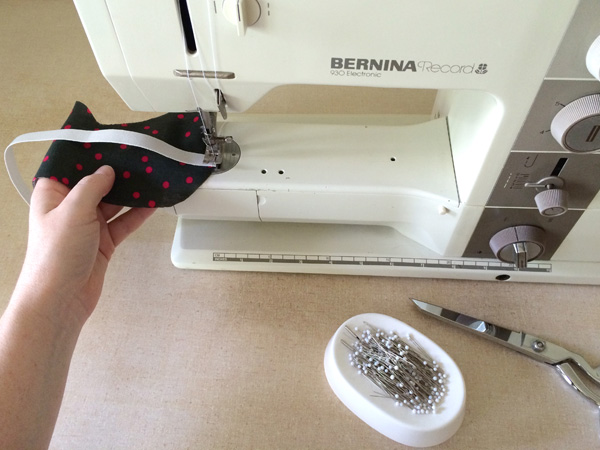
8. Stitch
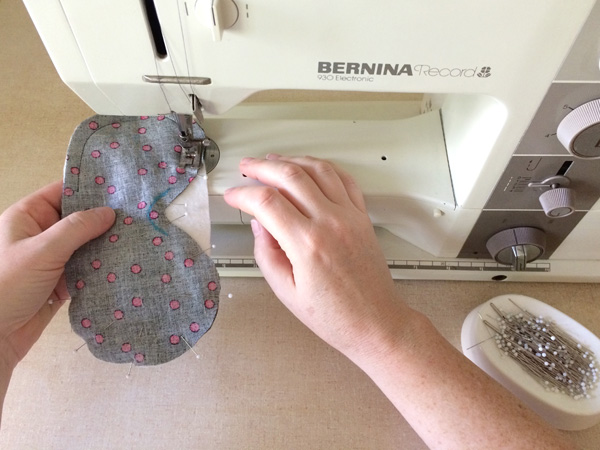
Sew all the way around the mask with a ⅜” seam allowance, leaving a 2″ opening at the top along the flat edge.
Pro Tip: When you reach the nose bridge, turn the stitch length down a bit to create a smoother line.
9. Trim
After sewing, trim the seam allowance down to about ¼”-⅛”. Do not trim at the opening along the top.
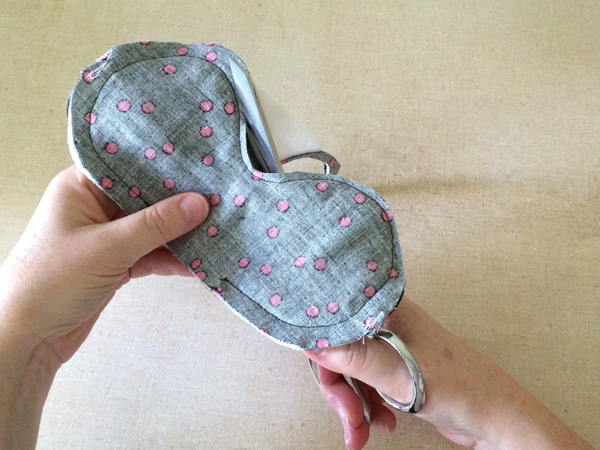
10. Turn Right Side Out
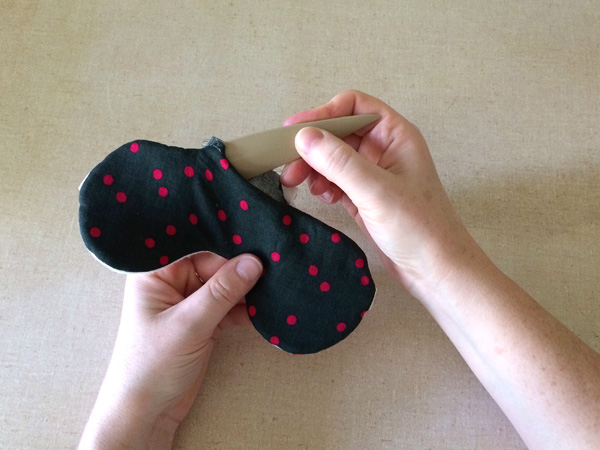
Use the 2″ opening to turn the eye mask right side out. Then use the curved end of a point turner and open up the seams around the entire mask.
11. Tuck in the Seam Allowance
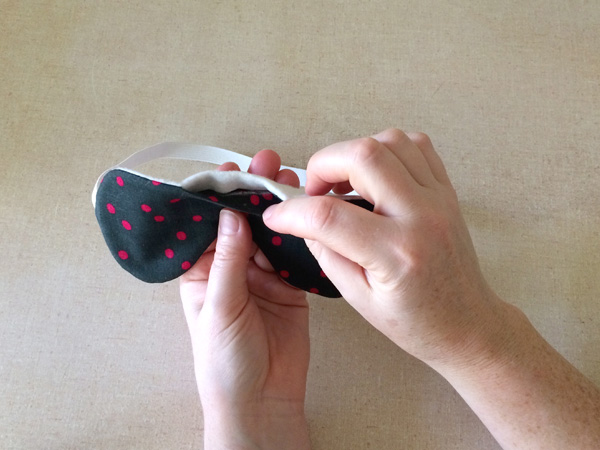 Fold the seam allowance at the 2″ opening inside the mask. Take your time to finger press the edges and create a smooth line.
12. Stitch It Closed
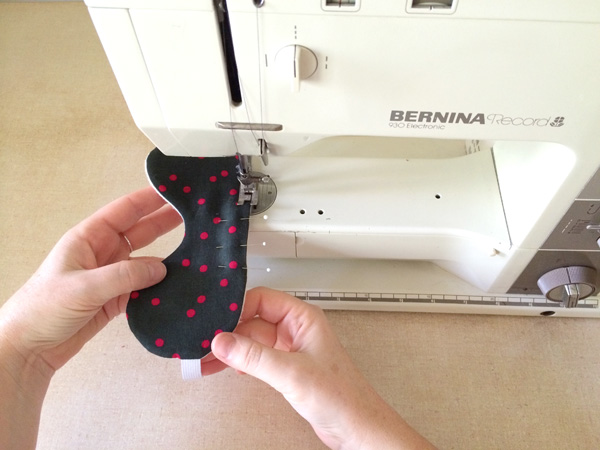
Pin the opening closed and press with an iron if necessary. Topstitch around the perimeter of the entire mask, closing the opening at the same time. Use a ¼”-⅛” seam allowance and a thread color you like on top of your fabric.
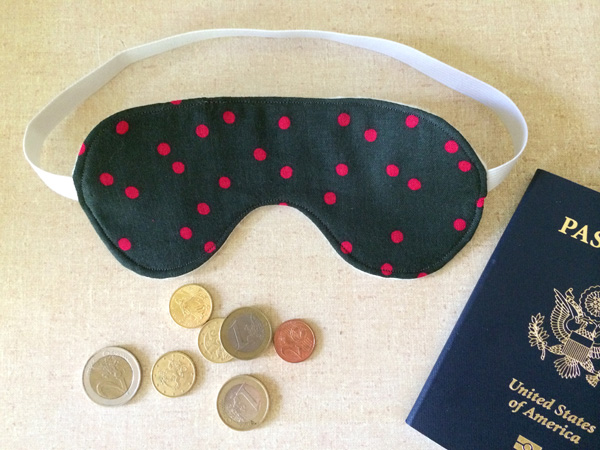
Give it a final press with your iron, and that sleep mask is ready for some Zzzs!
What does "turn the stitch length down" refer to? Is this making the stitch longer or shorter? - Thanks.
Thank you for this tutorial. Now all I have to do is figure out out to print it out.
For this exact pattern, go to https://petitbebecreationz.files.wordpress.com/2011/08/7-petitbebe-adult-sleep-eye-mask-tutorial-final.pdf , last page to find the template.
Where is the link for the pdf pattern for the sleep mask? If it has uploaded, as of yet, when can we expect it? Thanks
The link that is supposed to take you to the PDF takes you somewhere else, is the PDF still available?