
The bounty at the farmers market or local shop can be irresistible, but if you’re stocking up on summer produce too, your fruits and veggies could crush your lovely flower bouquet. Sew up this quick fabric carrier and carry your flower stems hands-free — and in perfect condition.

How to sew a bouquet carrier, step by step
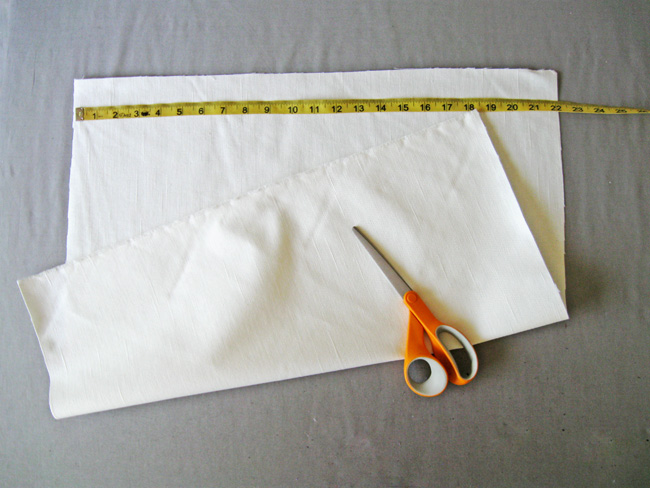
Step 1: Cut a square of fabric
You can use just about any fabric for this project. For sturdiness, try a canvas or denim. Even quilting cotton would work. Just turn to your stash!
Start by cutting 22″ square piece of fabric.
Step 2: Fold and trim
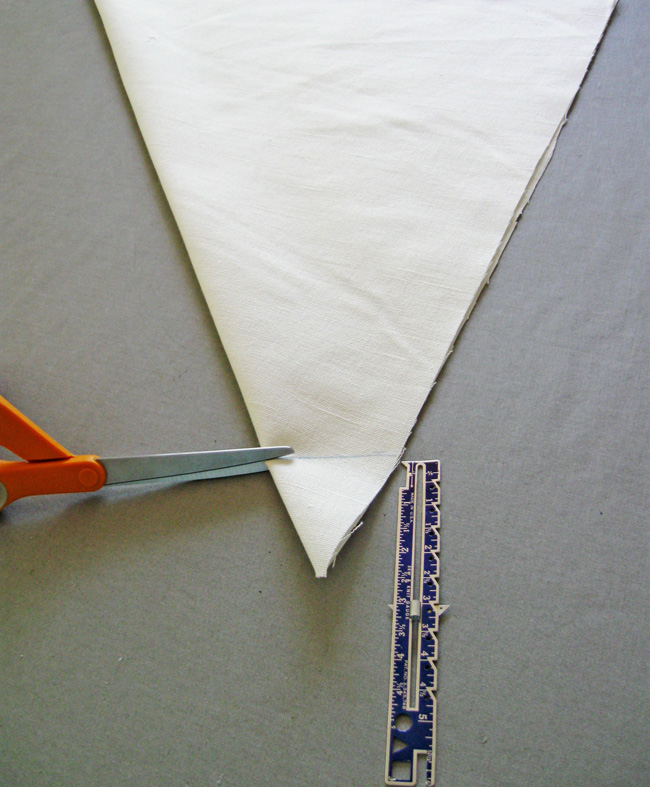
Fold the fabric square on the diagonal so that two opposite corners are together — you should have a triangle.
On one of the two folded points, trim off 3″ – 4″. Now the folded fabric should look like a cone.
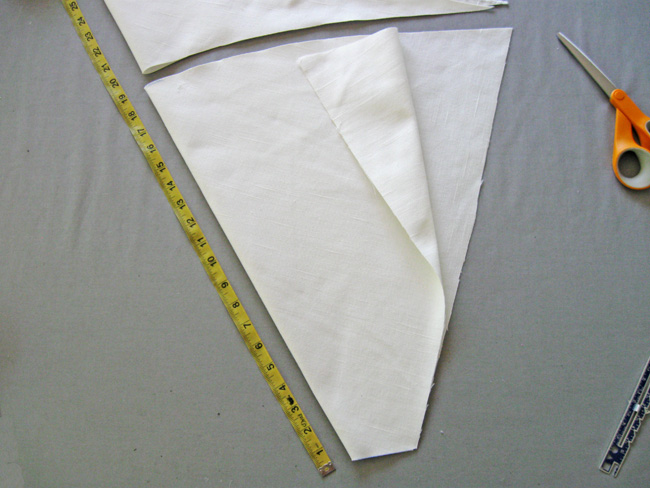
Next, starting at the trimmed corner, measure 20″ along the folded edge. Repeat on the open edge, marking the same distance from the bottom.
Draw a line to connect these two marks. Then, cut along the line so you have a shorter “cone” shape.
Step 3: Hem the edges
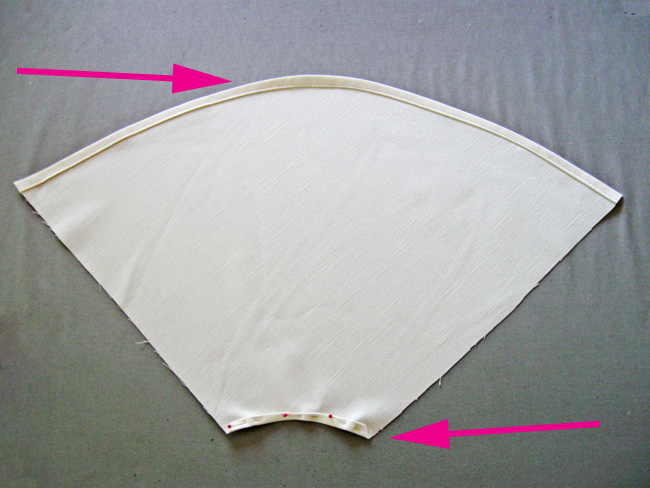
Unfold the fabric so you can easily access both edges. Turn and press ¼”, then turn and press another ½” on both top and bottom edges. Stitch these edges in place to create a clean finish.
For a little extra detail, you could finish these edges with bias tape or contrast fabric as well.
Step 4: Seam up the cone
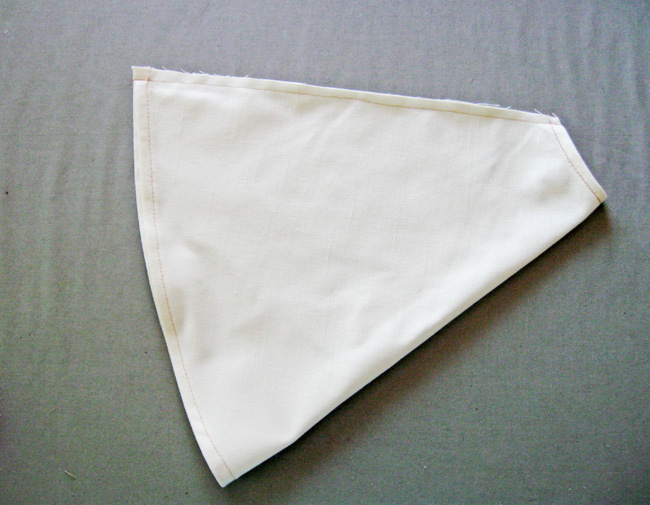
To give the carrier a smooth finish inside and out, use an enclosed or French seam. The first step is to fold the cone wrong sides together along the raw edge and stitch.
Then, turn the cone so the wrong sides face out. Pin the seam and stitch again, making sure to enclose the raw edge inside the seam allowance.
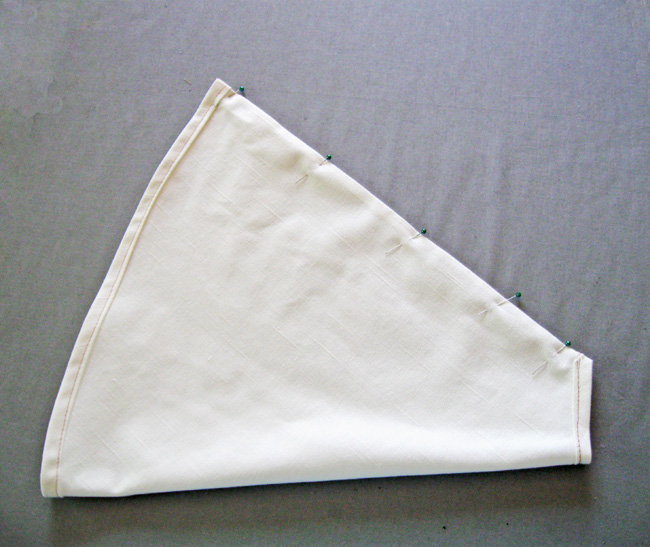
Step 5: Add ties (optional)
If you buy a lot of different types of flowers, you might want to add ties, which can be used to cinch the cone tighter so a shorter or slimmer bouquet won’t slip down and crush the flowers. When you’re not using them, you can just tie them in a bow.
You can use grosgrain ribbon, bias tape or make fabric ties. Align the center of the ties near the seam and stitch them securely in place.
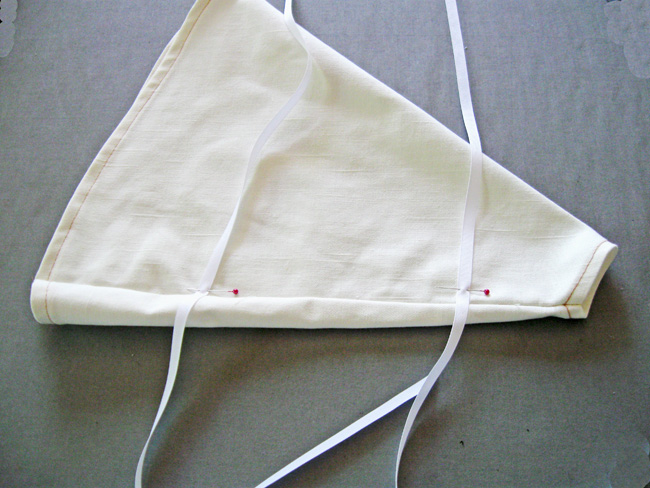
Step 6: Make the carry strap
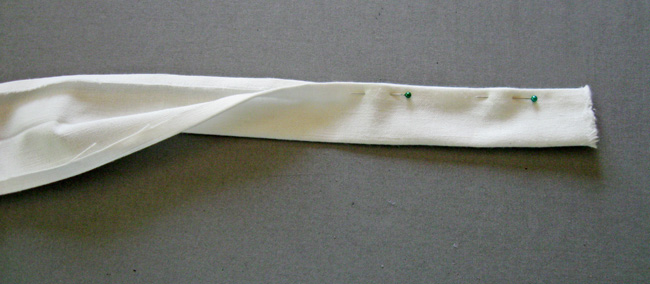
Cut a strip of fabric 42″ long and 4″ wide. Press each long edge in ¼”. Then bring the folded edges together, press and stitch closed.
Alternatively, you could use a piece of grosgrain ribbon or even some wide twill tape or webbing for the strap.
Step 7: Attach the strap
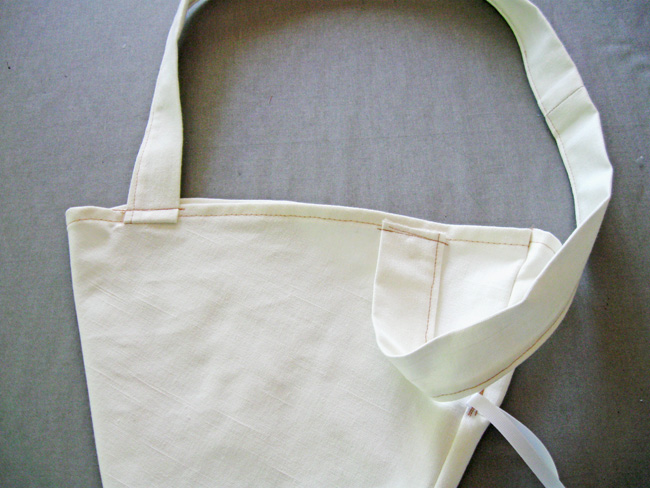
Lay the cone flat on your work surface. Pin each end of the strap onto the upper edge, about 2″ in from each edge. I like to stitch the raw edge of the strap just a bit below the upper edge of the cone, then flip up the strap and stitch again to enclose that raw edge. Stitch over it a few times to make sure it is secure.
Now your farmers market flower bouquet carrier is ready and all you have to do is choose what flowers to bring home this week!
Share tips, start a discussion or ask one of our experts or other students a question.
No Responses to “Sew This Easy-to-Make Bouquet Carrier in an Afternoon!”