Weekend warriors, this quilt-in-a-day log cabin block is a fantastic project for beginners. You can make the block using a simple method of piecing called strip piecing, use strips of fabric, rather than template pieces. Strip piecing is a much faster way to make quilts — with strip piecing, you can piece together an entire quilt top in a single day!
Follow along to learn how to make this quilt-in-a-day log cabin block!

One of the pioneers of the strip piecing movement of the 1980s was Eleanor Burns. Through her videos, she showed quilters how to strip piece their quilts, and have a lot of fun while doing it! Lucky for us, she’s also a Craftsy instructor and teaches the online class Quick & Easy Quilting.

Quilt-in-a-day log cabin tutorial
To make a simple strip-pieced block, you will need:
- Strips of fabric (we are using 2.5″ strips here, but any size will work)
- Ruler
- Rotary cutter
- Mat
- Sewing machine
- Iron and Ironing board
Step 1:
Decide on your fabric. We are using seven different fabrics — three lights, three darks and one central fabric. The lights are light, lighter, lightest and the darks are dark, darker, darkest. You can choose whatever fabric you like for the center that pulls your fabrics all together, but red is a traditional choice for the center of a log cabin block. It represents the hearth or the center of the home.
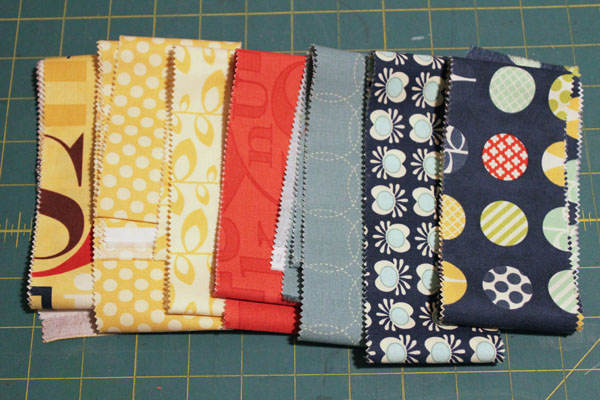
If you are making a single block, one width-of-fabric strip of each is enough. However, if you are making multiple blocks, you’ll need additional strips.
Step 2:
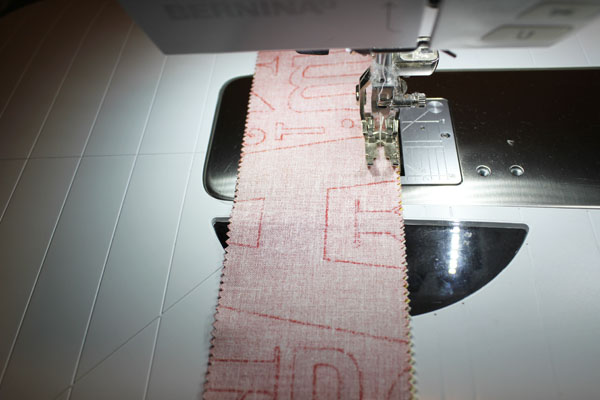
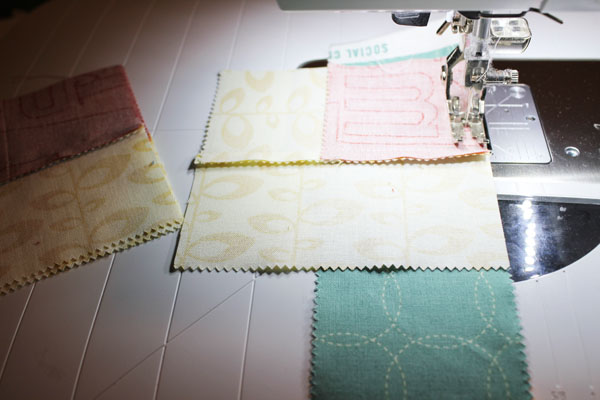
Time to start stitching. For this tutorial, as with most quilts, all seams are 1/4″.
Start with your center fabric, and your lightest light fabric. Use 1/2 strip of each. Place them right sides together and stitch together down one side.
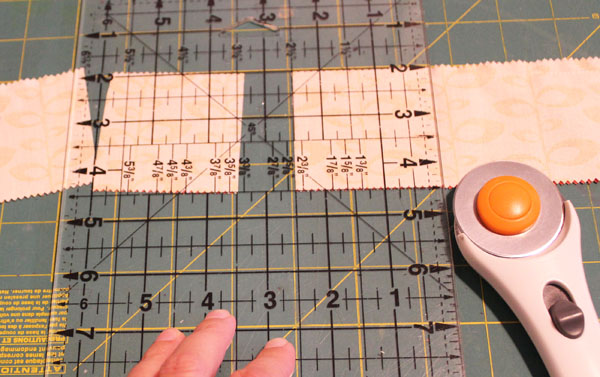
Step 3:
Cut the stitched together strips into 2 1/2″ segments (the width of the original strips).
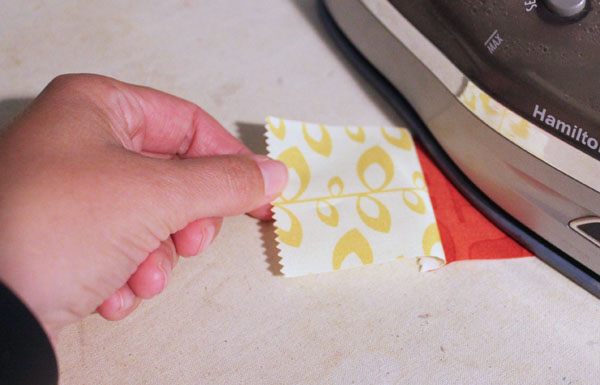
Step 4:
You can press your seams open, or to the side. If you press your seams toward the side, you will press in the direction of the most recently added fabric (pressing out). For this seam, that will be away from the center fabric, and toward the light fabric.
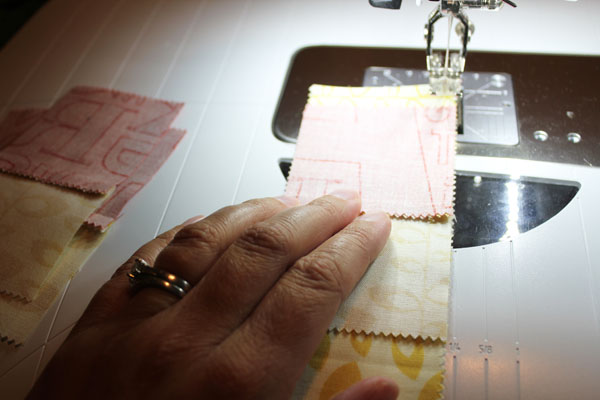
Step 5:
Using the second half of the light fabric strip, place it right side up on your sewing machine. Place the stitched and pressed segment on top, with the most recent strip towards you. Stitch until you near the end of this first piece.
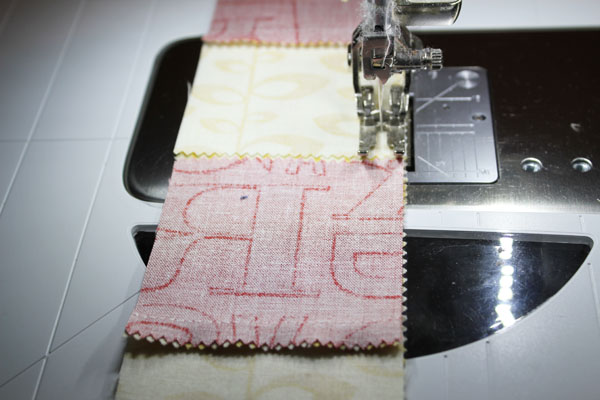
Step 6:
If you’re making more than one block at a time, here is where the magic of strip piecing comes into play. Butt the next two-part segment up against the first (again with the most recently added piece closest to you), and keep stitching. Repeat with each unit.
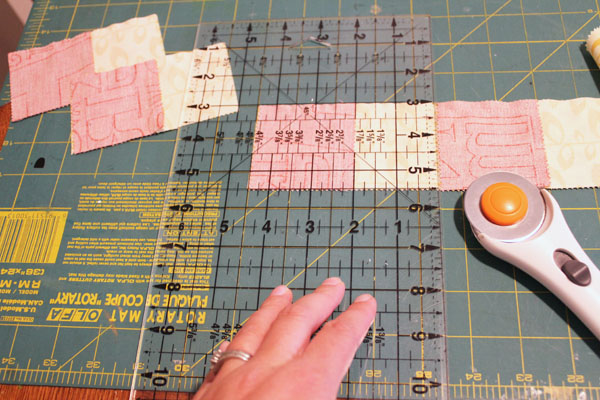
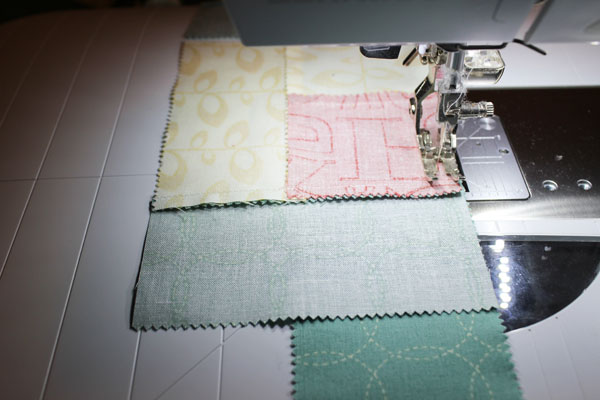
Step 7:
Using the rotary cutter and ruler, cut the segments apart by cutting between each segment to cut the strip.
Step 8:
Press your seam. You have added the first color!
Step 9:
Pick up the lightest of your dark strips. Place it on the sewing machine, right side up. Place the pressed unit on top, with the most recently added strip toward you.
Step 10:
Again, if you’re making more than one block, you can butt the pieces up against one another. Once you’re done, cut the pieces apart and press just like before. Add the second row of your lightest dark.
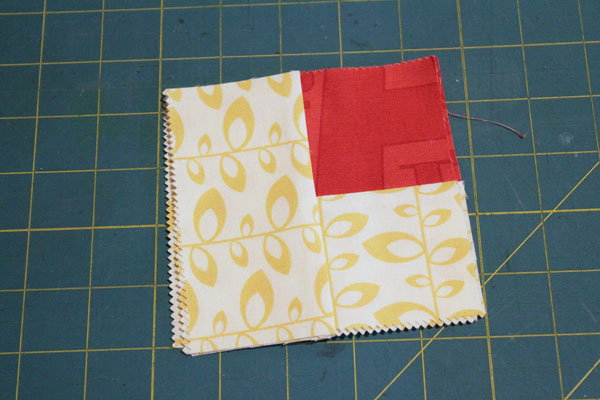
Step 11:
Cut apart and press. You now have the lightest light and the lightest dark added to your block!
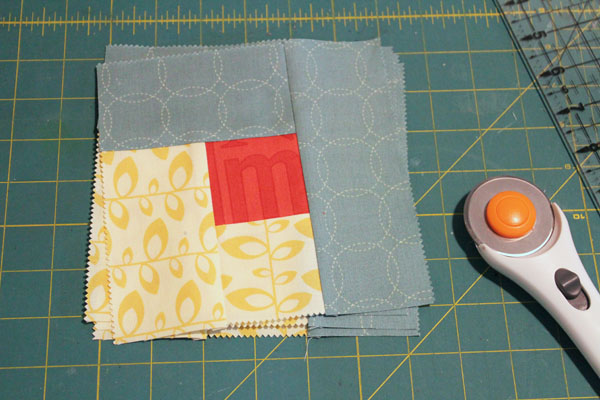
Step 12:
Repeat these steps, adding the second light, the second dark, the final light and the final dark fabric.
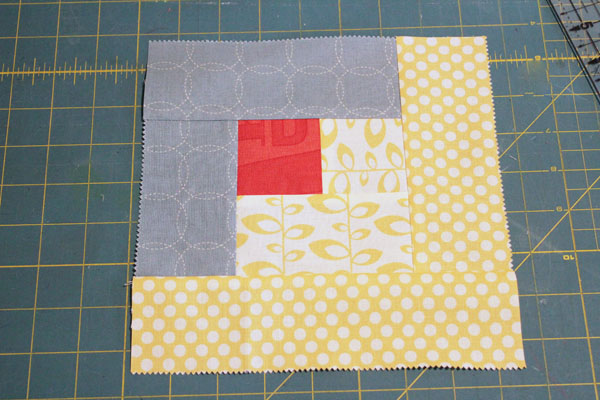
You’ll notice that as you add more fabric strips, each strip is longer than the last. If you want to make multiple blocks, a single strip of the center is often enough, but you may need a dozen or more of the outer strips.
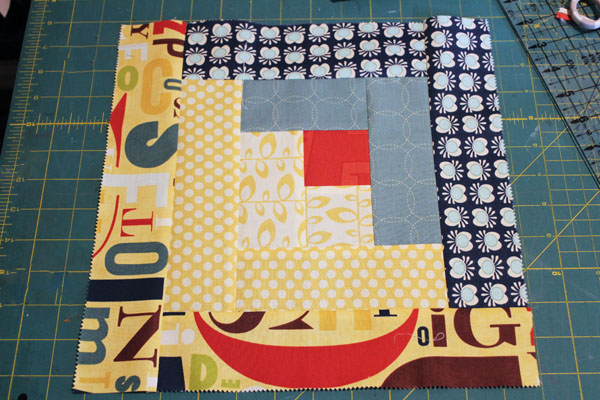
Once your block is complete, you can square it up. Include it as a block in a sampler quilt, quilt and bind it to make a mini quilt, or make several log cabin blocks to make a log cabin quilt.
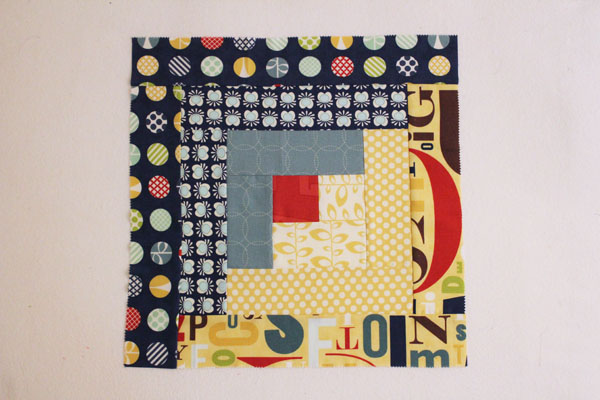
There are lots of ways you can change up this simple quilt-in-a-day log cabin tutorial. Use varying widths of fabric for a wonky or more modern-looking block. Switch up your light and dark fabrics to make a scrappy looking block. Use very wide strips to make a one-block quilt.
Once you understand the basic construction of a strip-pieced log cabin block, the possibilities are endless! And, because they come together so quickly, you can get an entire quilt done in a day.

Share tips, start a discussion or ask other students a question. If you have a question for an expert, please click here.
Already a member? Sign in
No Responses to “A FREE Quilt-in-a-Day Log Cabin Tutorial to Work on This Weekend”