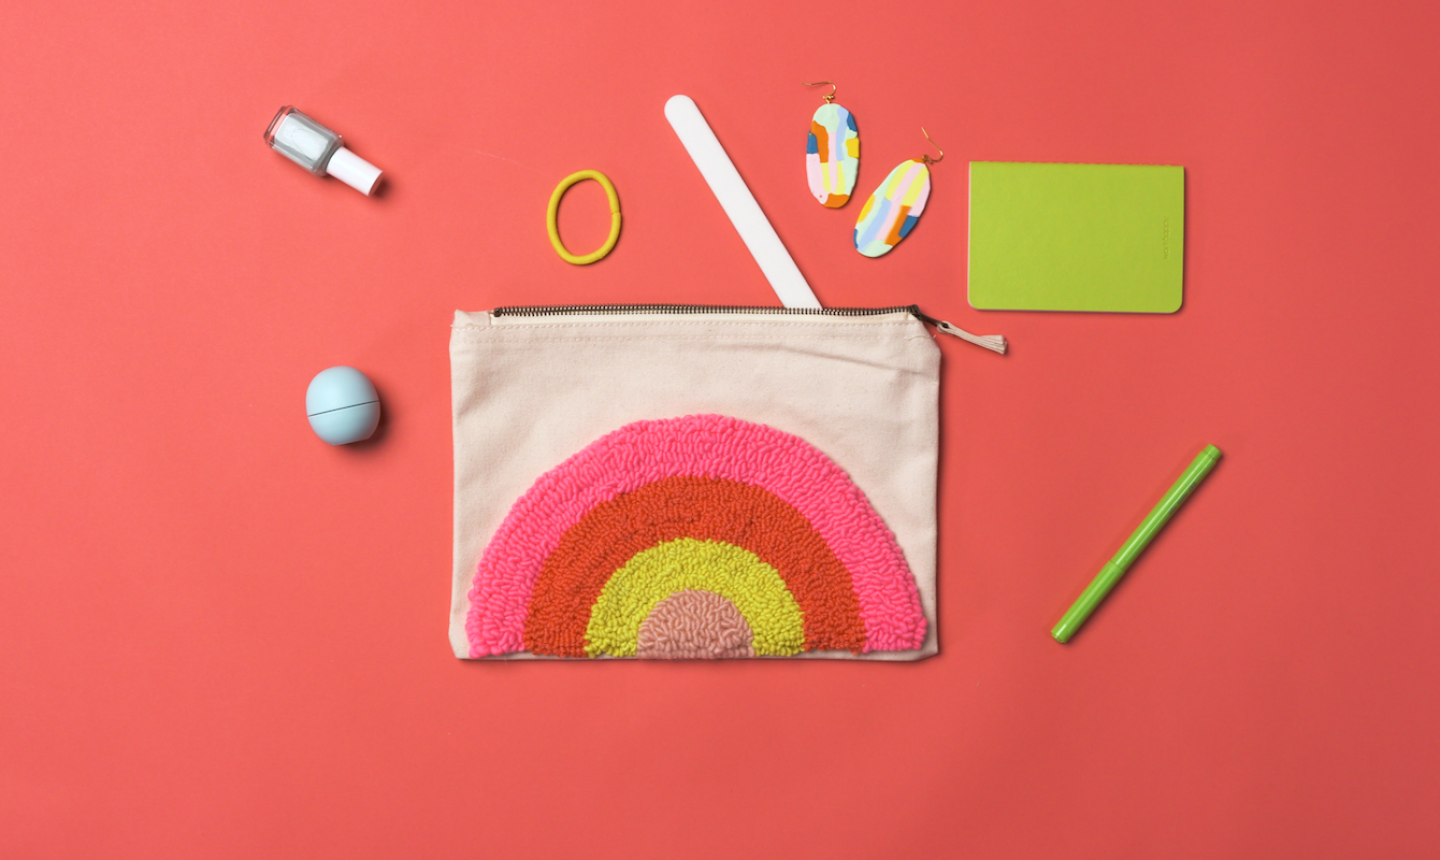
That’s right: the cutest pouch you’ve ever seen is only a few punches away! Take advantage of the punch needle trend and design a one-of-a-kind clutch that’ll store your phone, cash and (of course) crafting supplies.
Punch Needle Clutch
Level: Easy
What You Need
Instructions
1. Make a Template
Make the rainbow semi-circles by tracing four circular objects in different sizes onto stiff cardstock paper or cardboard. Once traced, fold them in half and cut out one side to use as a template.
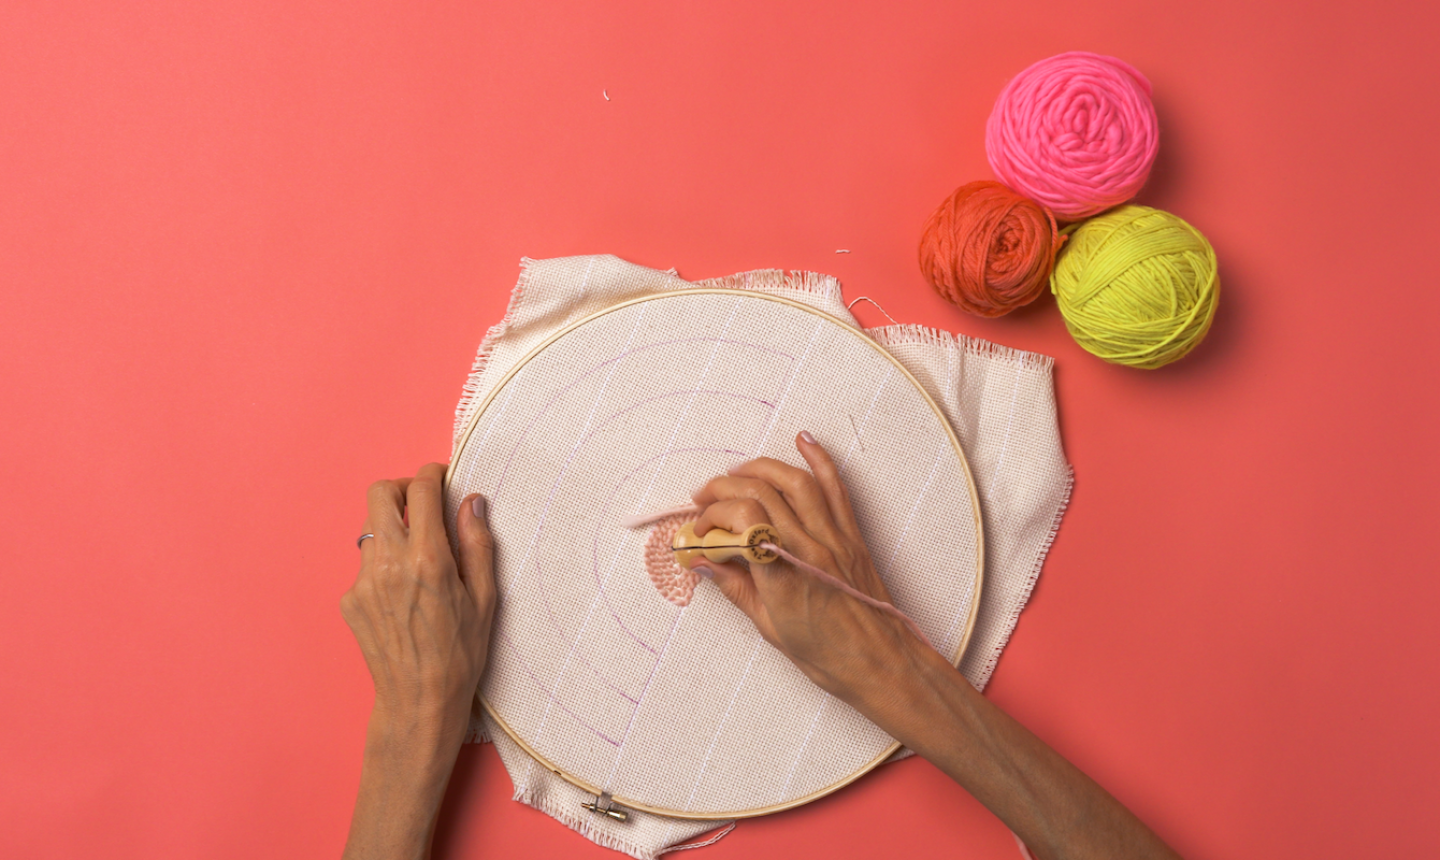
2. Hoop Up
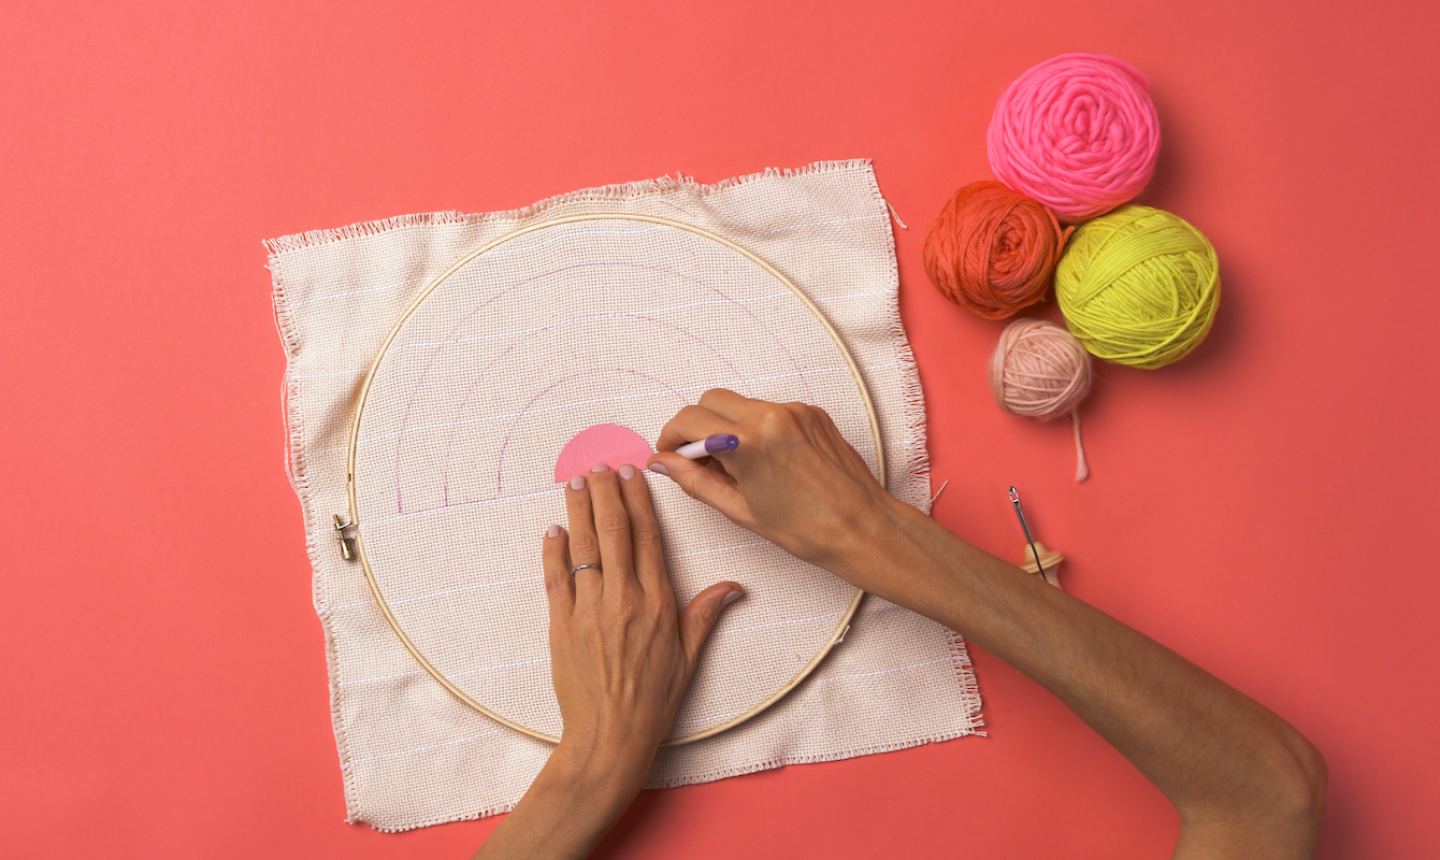
Stretch the monks cloth into your embroidery hoop so it’s tight like a drum. Trace the four semi-circle templates onto the fabric with a fabric marker — this will be the wrong side/back of your work (you’ll punch with the back facing you).
3. Thread Your Needle
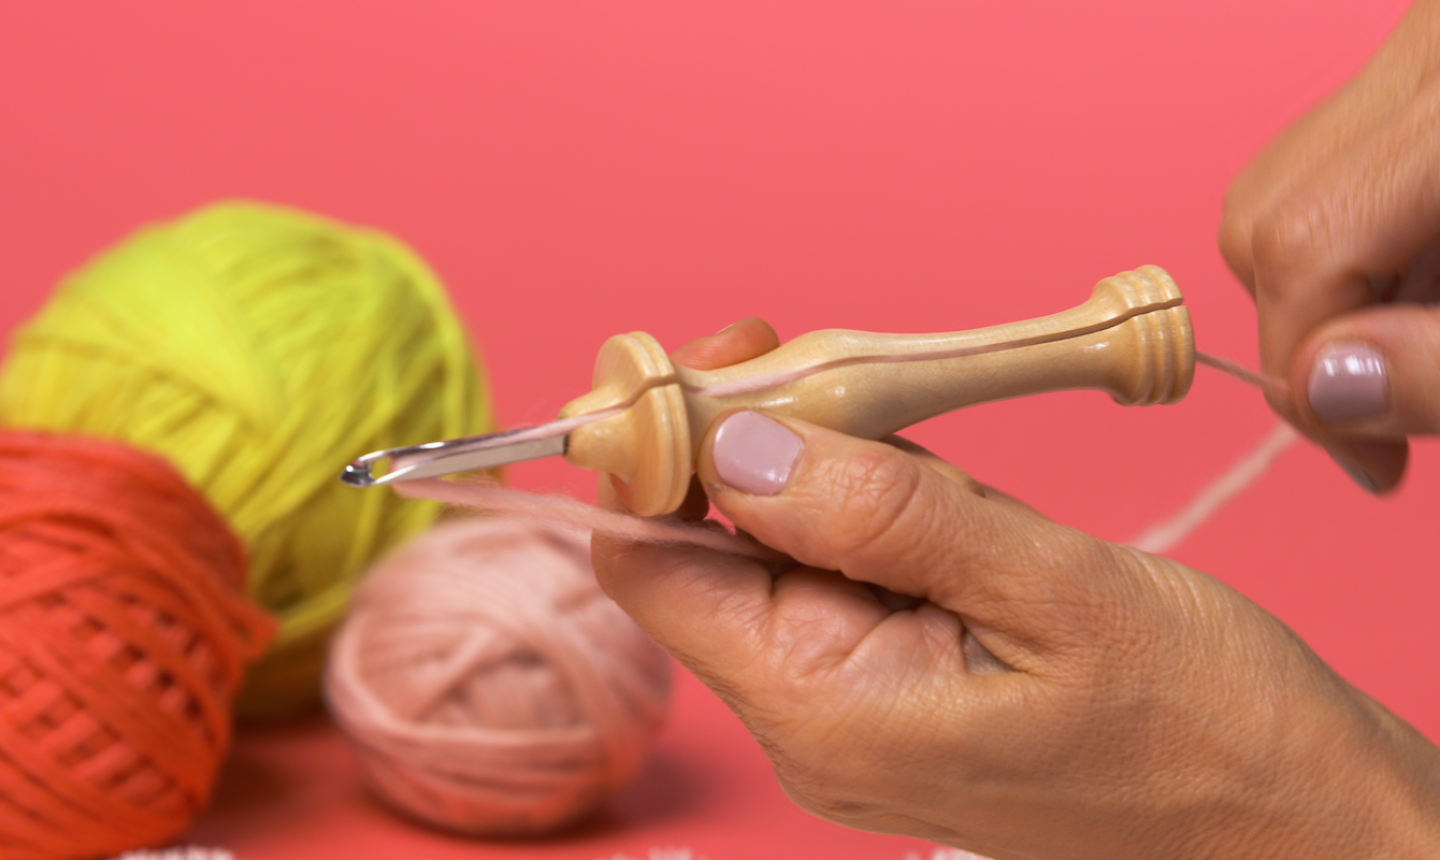
Hold the punch needle with the groove facing up and thread the yarn down through the eye of the needle. Pull the working yarn back until you feel it slide into the groove. It should move freely through the needle.
4. Punch the Outline
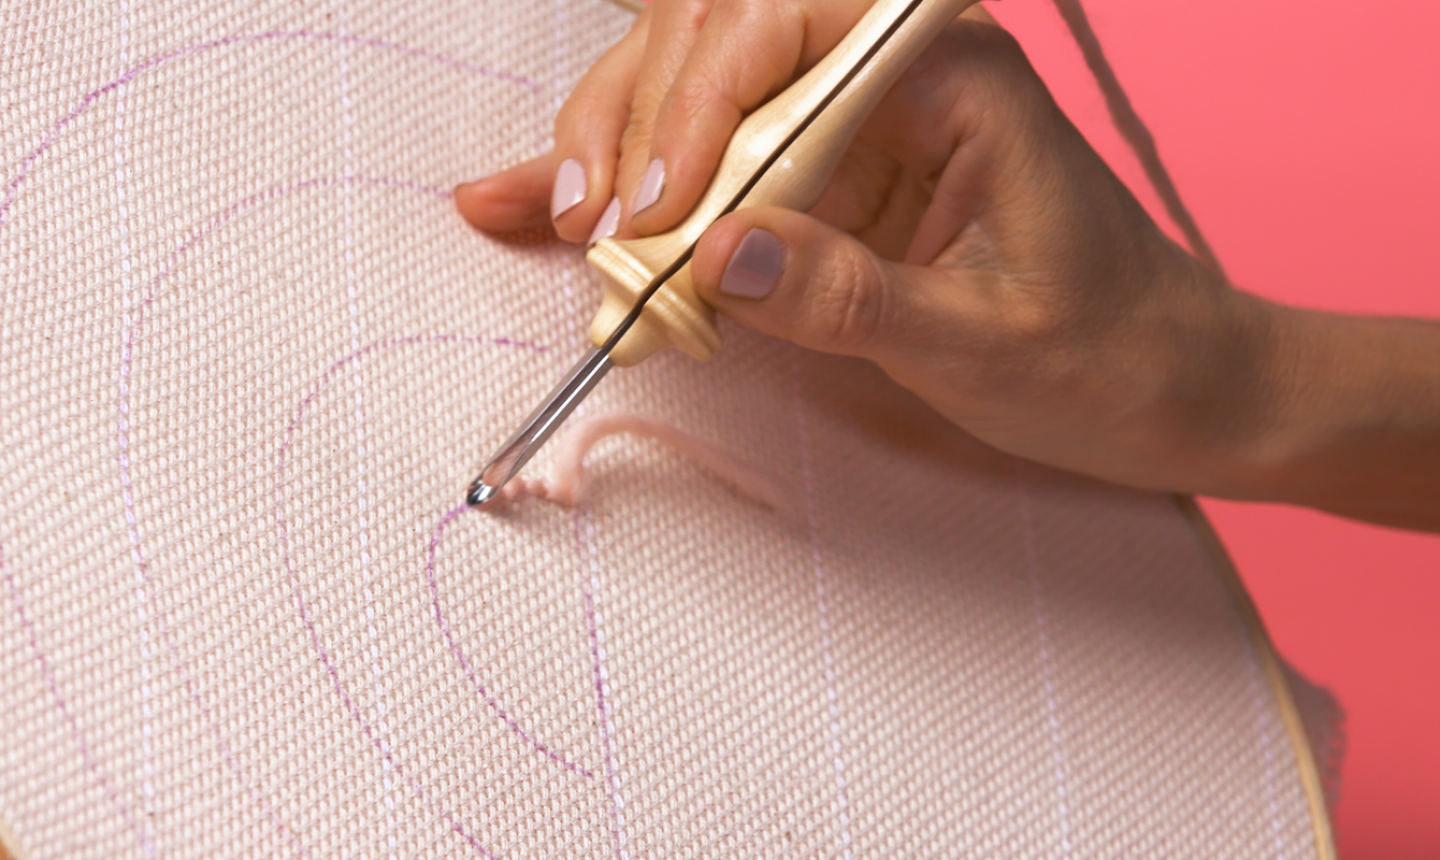
Start with the smallest semi-circle in the middle. Make sure the groove in the needle is facing the direction you’re punching. Press the needle all the way through the fabric until the base of the wooden handle touches the monks cloth. Pull the needle until the tip is just out of the fabric, drag the tip about ⅛” and punch down again. Keep punching evenly around the outline.
Pro Tip: Periodically check the right side of your work (the side not facing you) to make sure the stitches are even. If they’re uneven, you’re either lifting the tip too high or not punching down all the way.
5. Fill It In
Once the outline is finished, fill in the first semicircle with punches. Your stitches should be slightly staggered as you punch each row. Don’t worry if you have white spaces showing on the wrong side — as long as the right side is filled, you’re fine.
When you’re finished punching, trim the yarn and leave it hanging on the wrong side.
6. Repeat
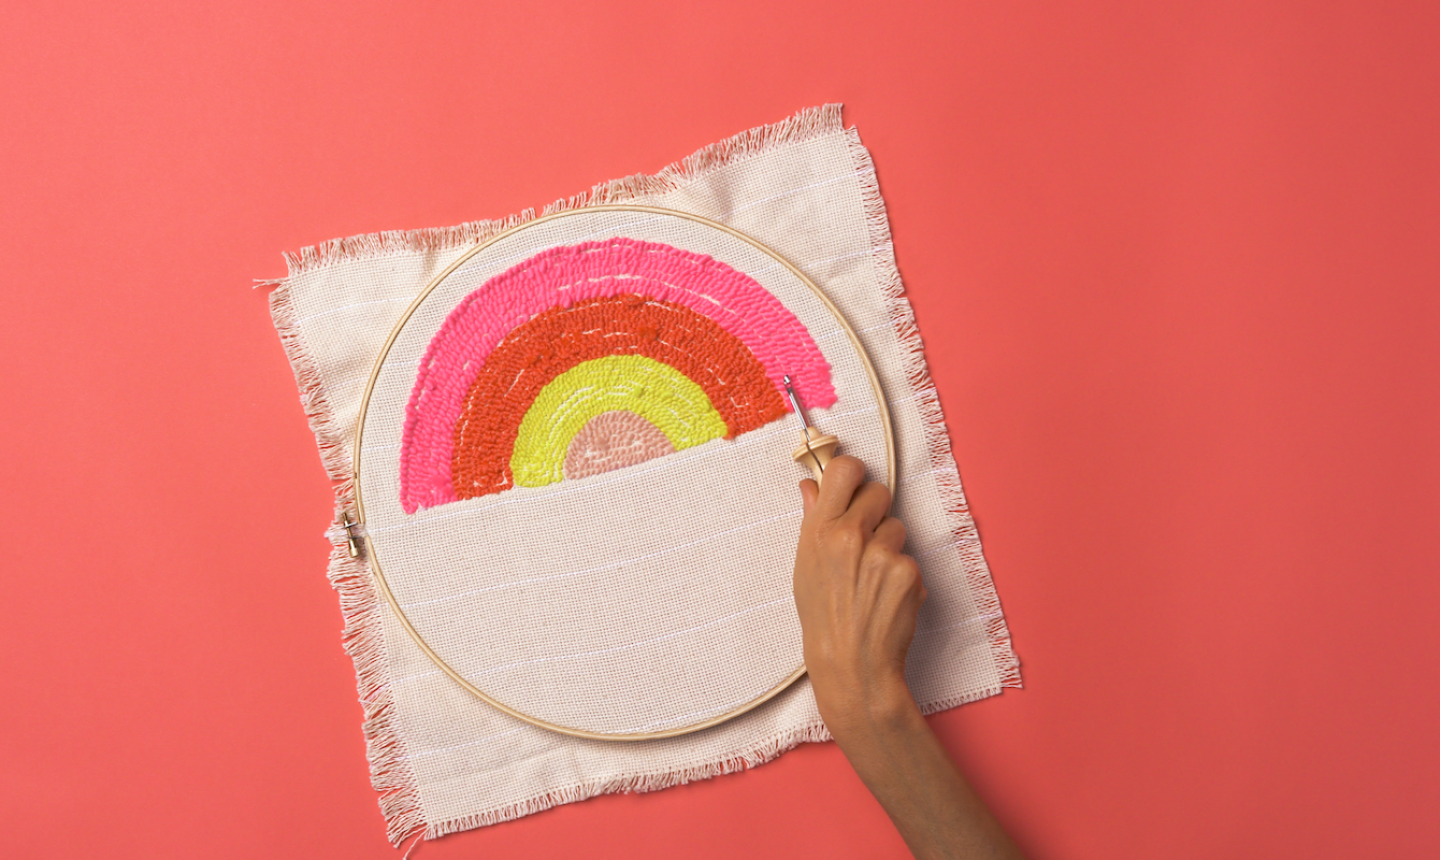
Thread your second color and repeat steps 3 and 4. Keep working until all the sections are filled in.
7. Create a Patch
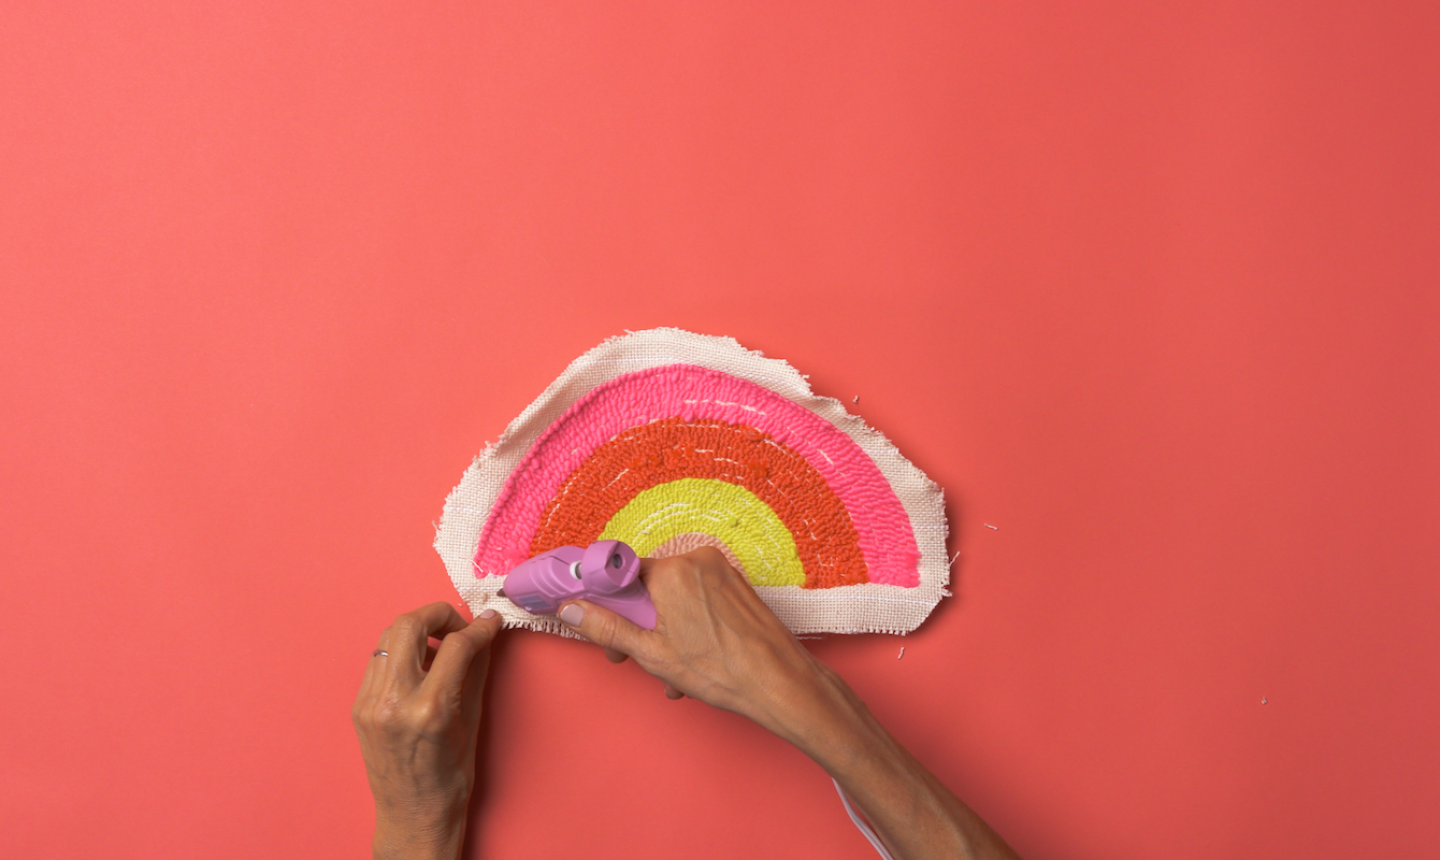
Remove the monks cloth from the embroidery hoop and trim around the rainbow, leaving ¾” of fabric around the perimeter. With the wrong side facing up, add hot glue along all sides of the excess fabric and fold up into the rainbow to secure it.
8. Glue It Down
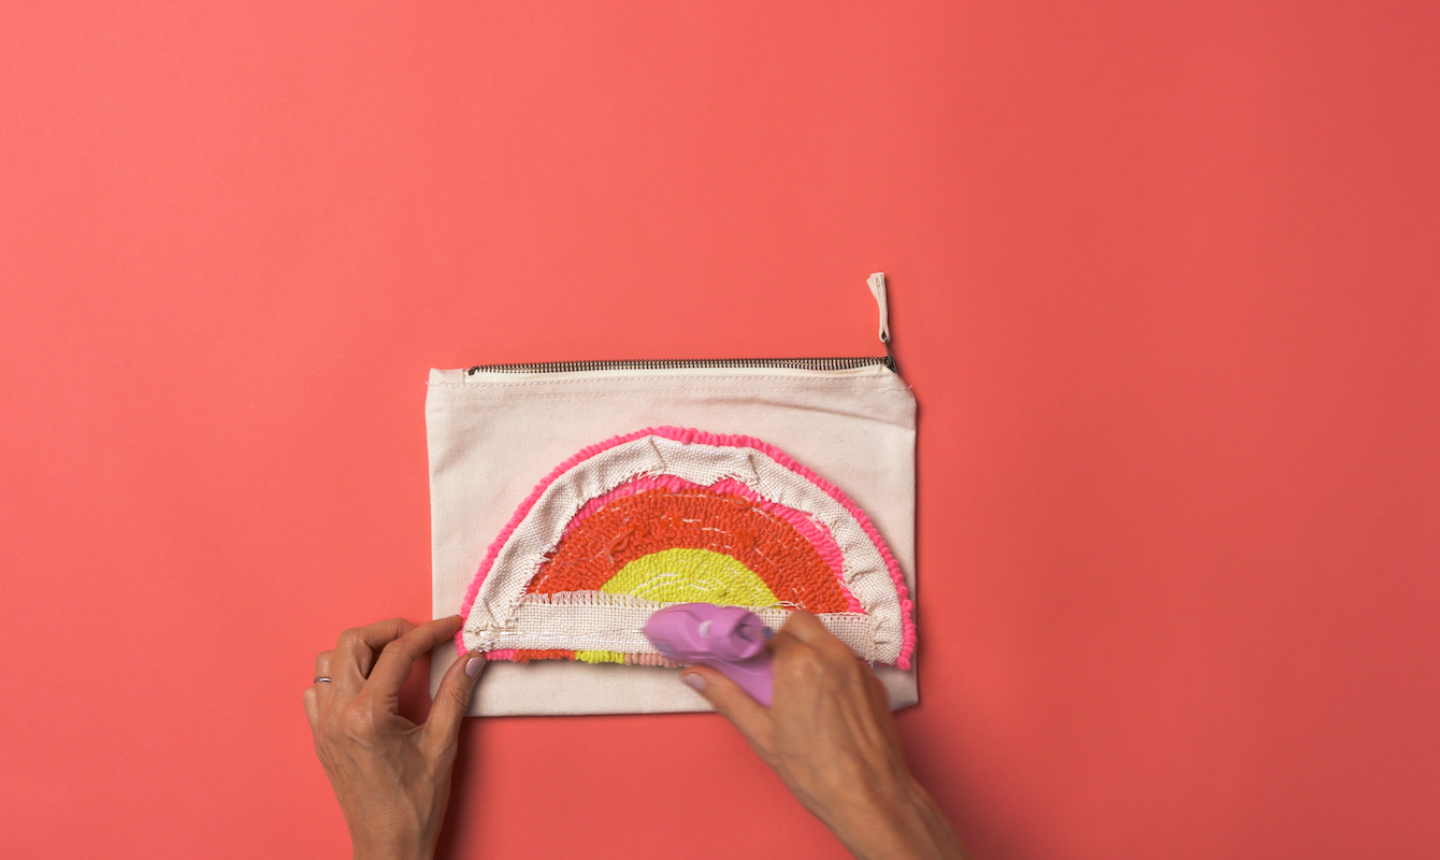
Slide a piece of scrap cardboard into your canvas pouch. Add more hot glue along the fabric on the wrong side of the punch needle patch. Flip the patch over to the right side and press it onto the clutch.
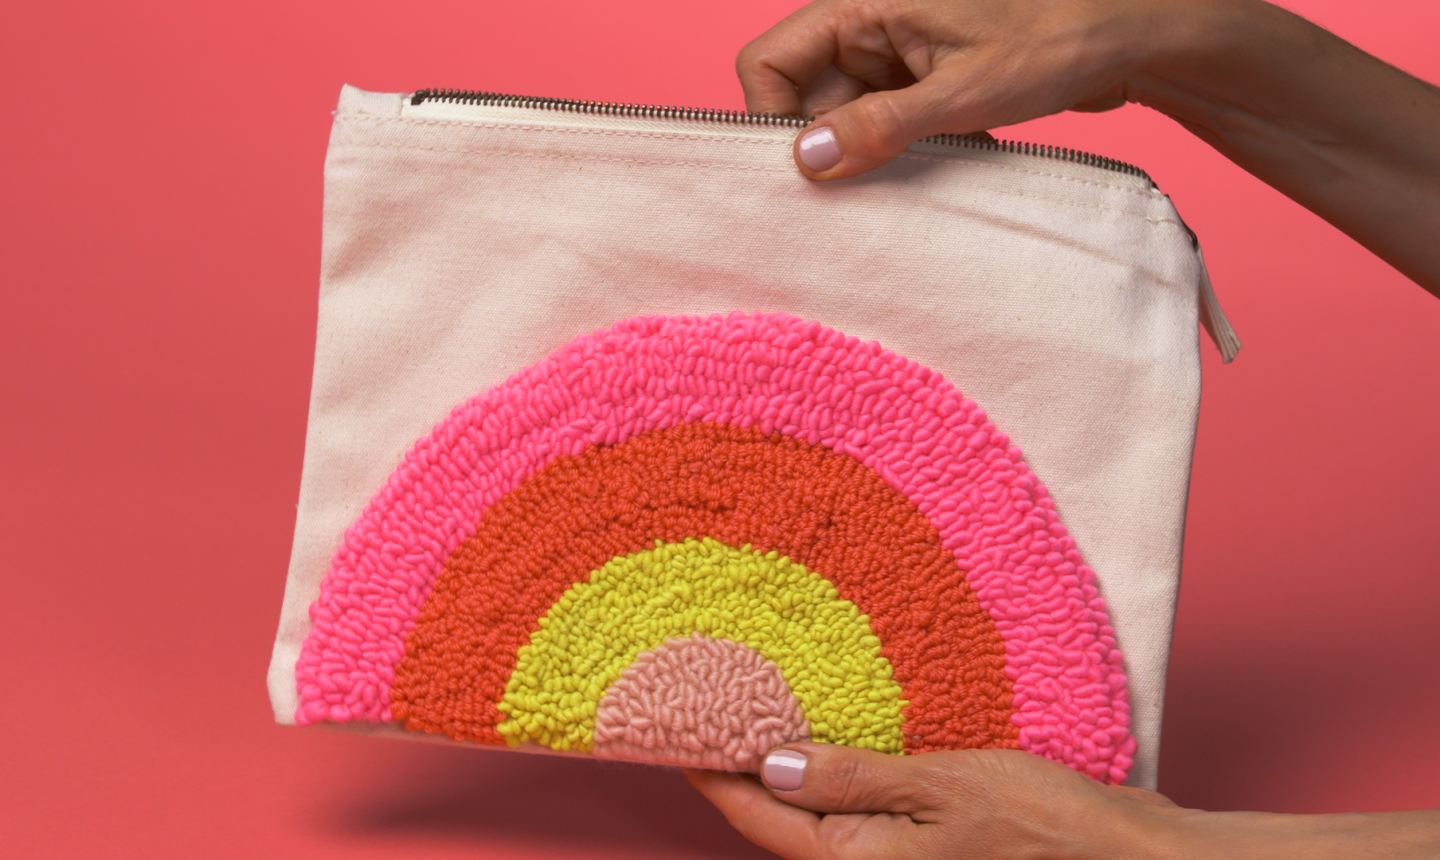
And just like that, you’ve got the cutest — and most colorful! — bag for when you’re on-the-go.

Simply beautiful!
Great tutorial. Thank you!