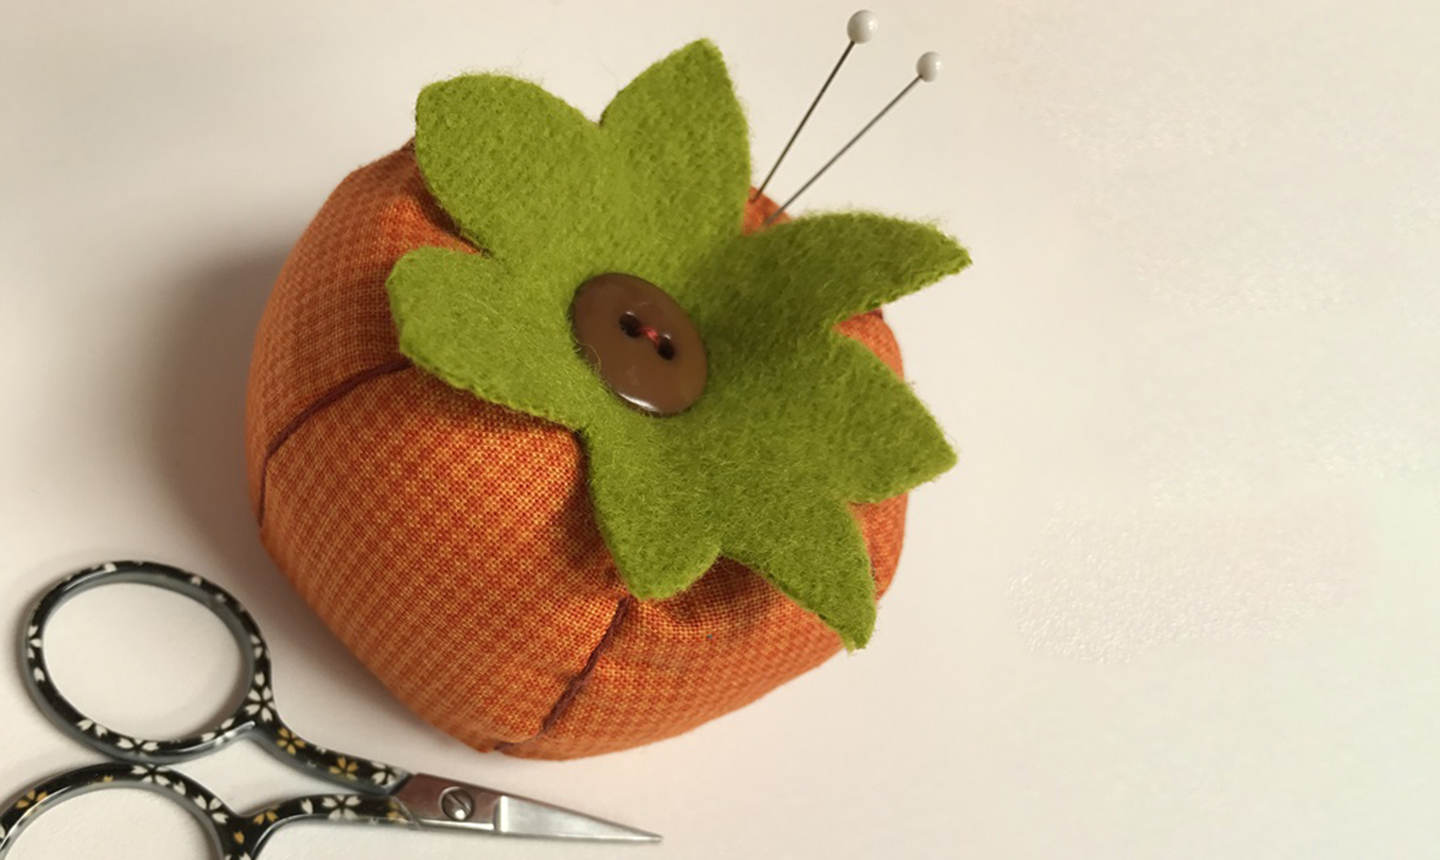
Add some autumn cheer to your next sewing project! This handy little pincushion is super cute and can be whipped up in no time.
Pumpkin Pincushion
Level: EasyWhat You Need
- PDF template
- 5" x 18" orange fabric
- Green wool, cut into a 2½" square
- Cotton thread, in color of your choice (for sewing the seams)
- 1 cup ground walnut shells (or your favorite pincushion filling)
- Large-eye needle
- 2 yards orange pearl cotton thread
- 1 brown button
- Sewing pins
- Fabric pen
- Rotary cutter or scissors
- Small funnel (optional)
Instructions
1. Cut Out the Pattern
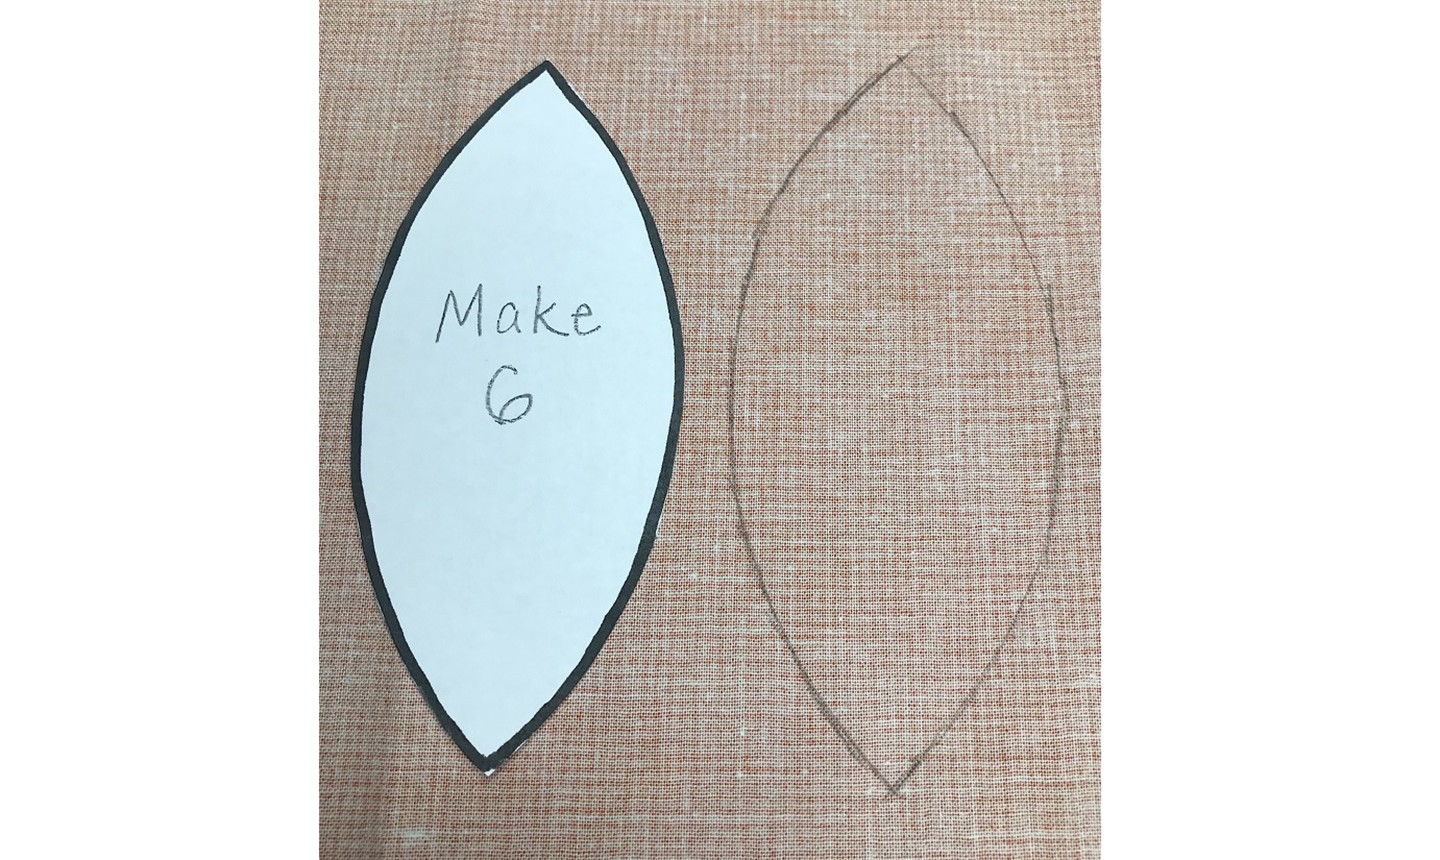
Download and print the PDF template and cut out the template pieces. Lay the oblong pumpkin template on the wrong side of your orange fabric and trace around it. Repeat until you have six shapes, then cut out each shape.
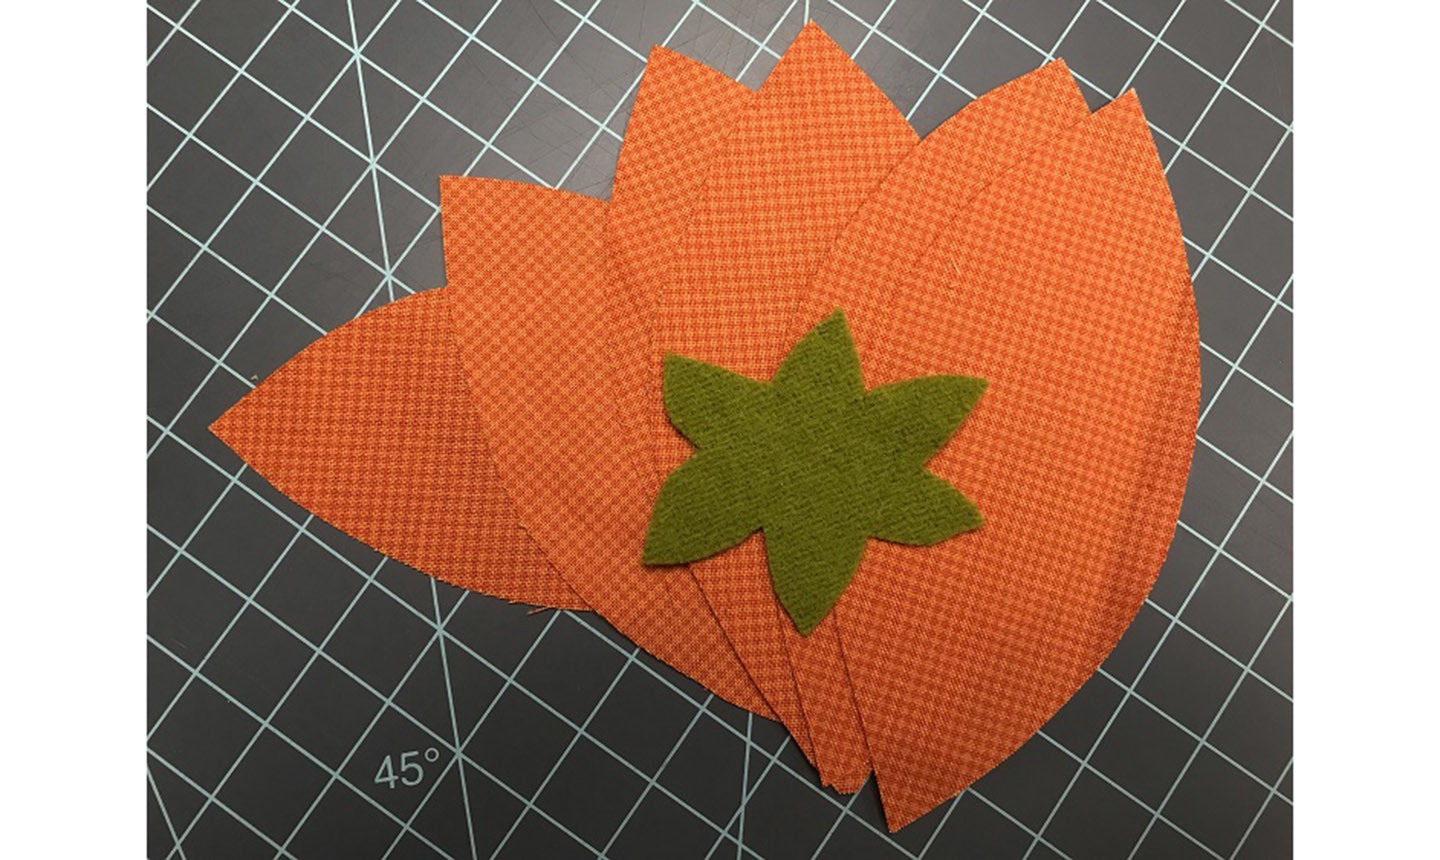
Lay the leaf template on the wrong side of your green wool, trace and cut out. When you're done, you'll have one green leaf and six pieces for your pumpkin.
2. Stitch the Pumpkin Pieces
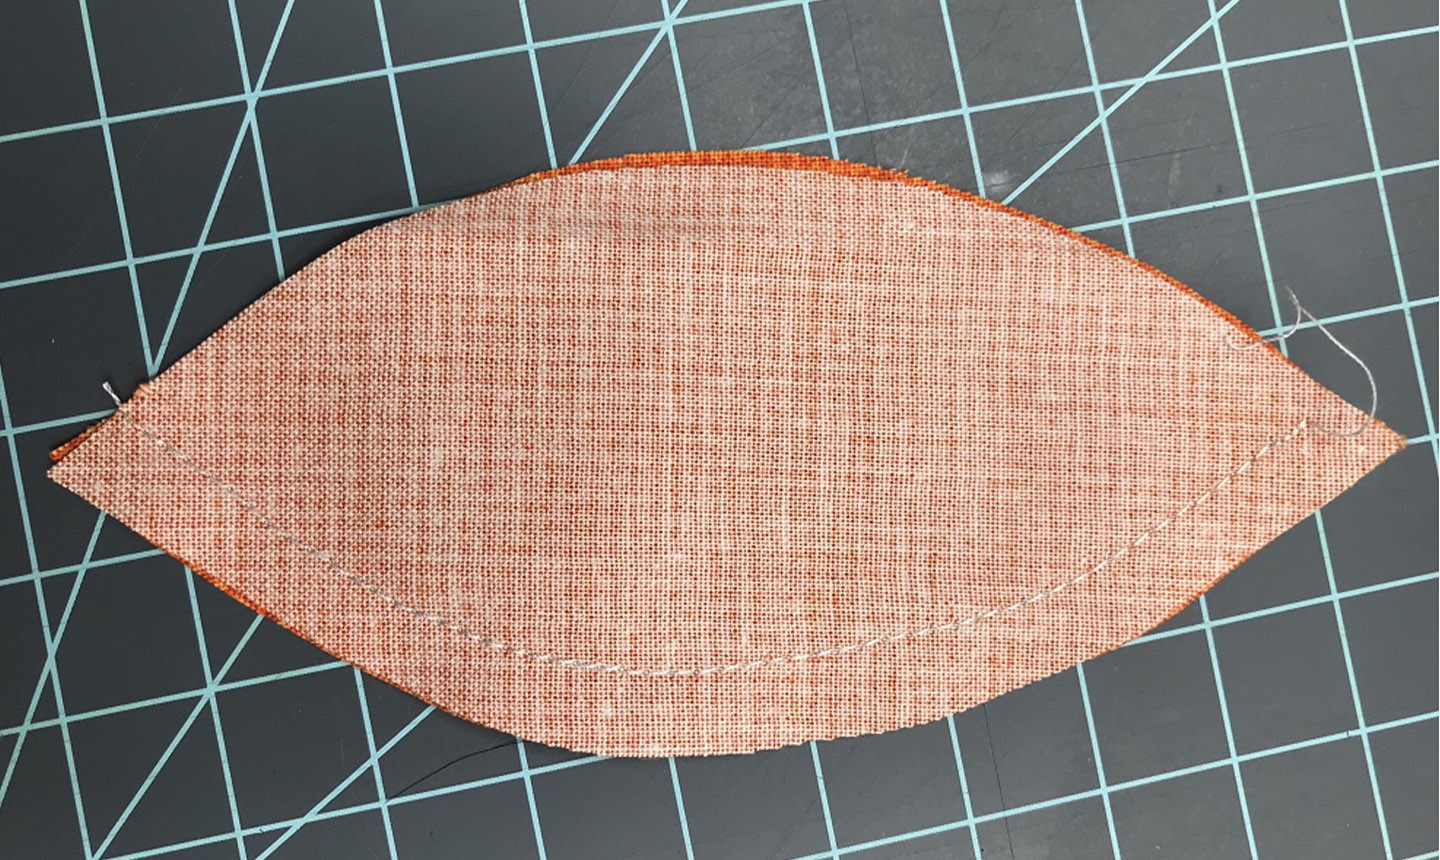
Place two pumpkin cut-outs on top of each other, right sides together. Sew them together along one edge with a ¼" seam allowance.
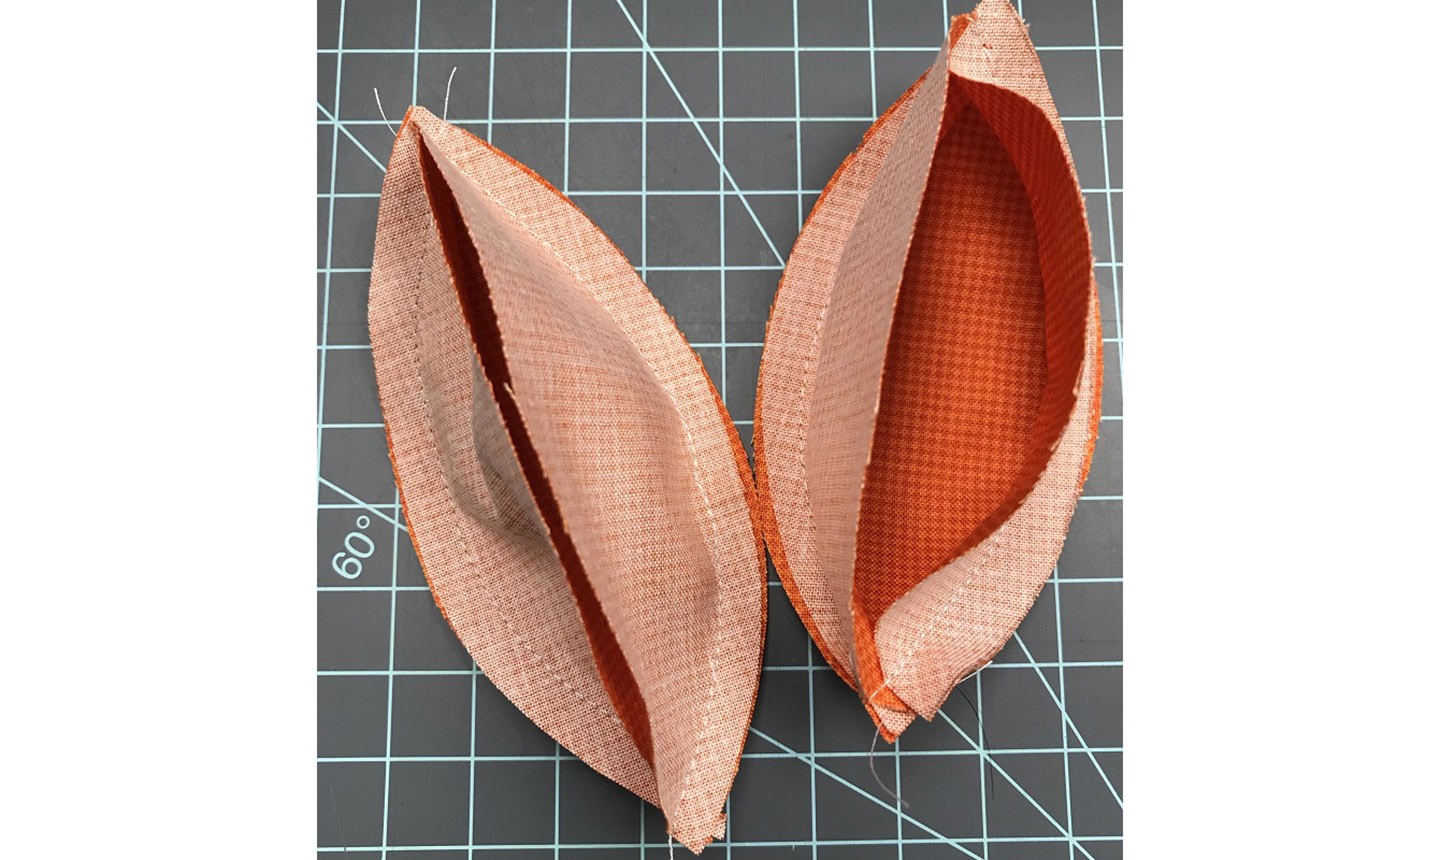
Open the unit, and sew a third strip of pumpkin fabric along the other edge, right sides together, so three pumpkin pieces are sewn together. Repeat this with the other three pumpkin pieces so you have two units of three sewn together.
3. Sew It All Together
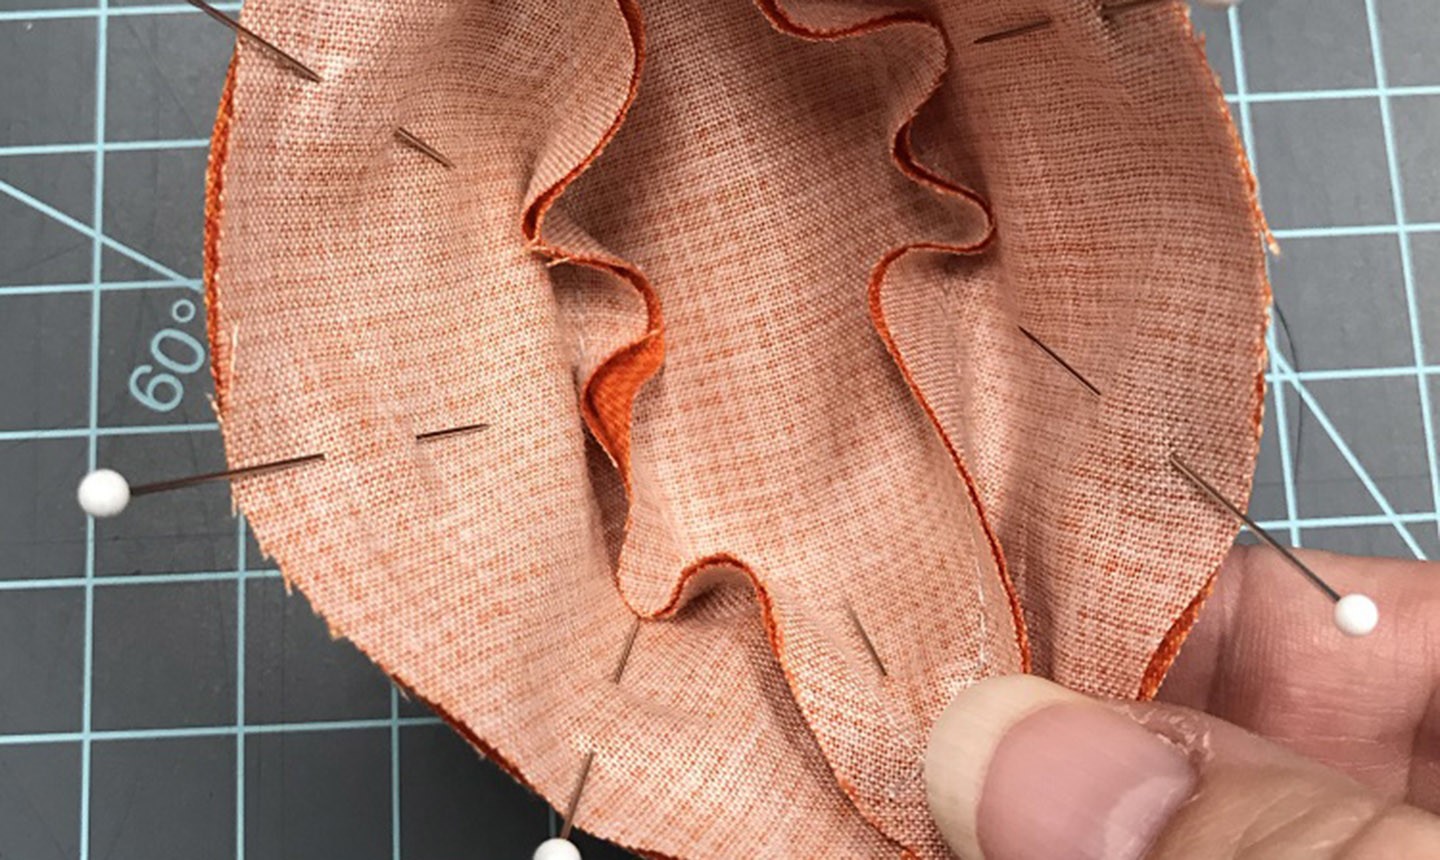
Place the two units of fabric together, wrong sides out (you're essentially nestling one inside the other), and pin. Sew all the way around the edge, leaving a small opening a few inches long. Turn the pincushion right side out through the opening.
4. Fill It Up
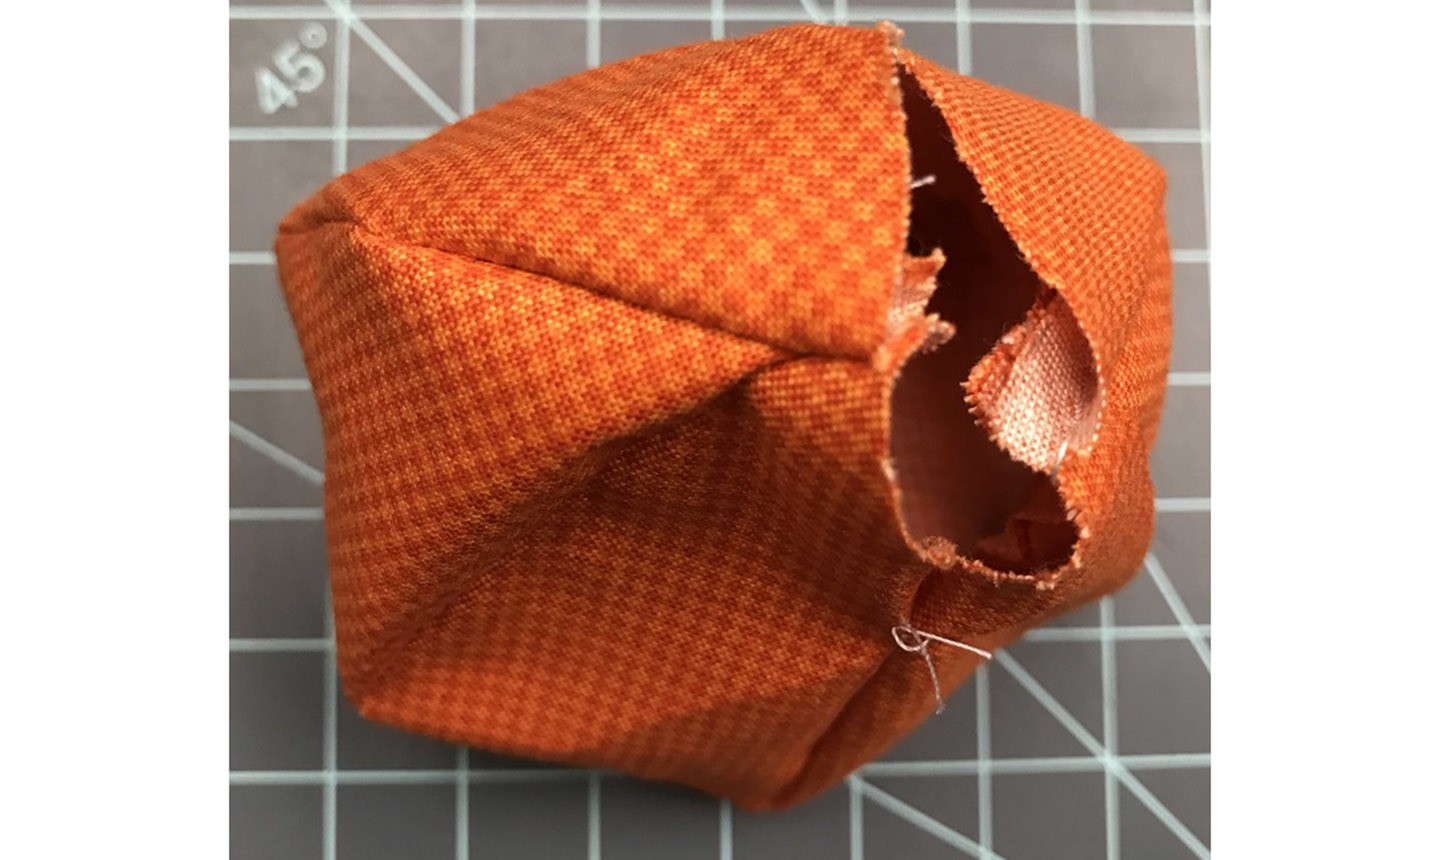
Fill the pumpkin with ground walnut shells, or whatever you chose as filling. (Use a small funnel if necessary.) When the cushion is fully stuffed, carefully turn the raw edges of your opening under, then hand sew the opening closed.
5. Embellish the Seams
Thread the large-eye needle with pearl cotton thread and tie a knot at the end of the thread. Insert the needle through the top center of the pumpkin, where the seams intersect, and out through the bottom center. Pull the thread up around the pincushion so the thread is nested along one of the seam lines.
Again, insert the needle through the top of the pumpkin and out the bottom. Repeat until all the seams around the pincushion are lined with thread. This will give your pumpkin grooves along the seam lines. Leave your needle threaded, and make sure you end with the thread coming up through the top of your pumpkin.
6. Add the Final Details
Place the leaf wool cut-out on top of the pincushion. Using the attached needle and thread, sew the brown button to the center of the leaf. This will secure the leaf to the pincushion. Tie off your thread under the leaf to hide your ends, and trim the thread.
Now you've got a festive tool for your fall projects!

Super cute! Can you please tell us how big across it is?
is there anyway that I can get print of this pattern, it would be easy for me to remember how to make the pincushion
Looks adorable
Looks super easy. I'll have to make one.
Love the pin cushion pattern, going to make it!
Really cute
I'll give this to my granddaughter she is just starting to sew
looks good and easy
Can't wait to make one of these.
Lovely little project to do.