
Great, big, expansive landscapes are a joy to photograph. The only problem is that you often can’t fit the entire scene within a single frame.

An introduction to panorama photography
By taking a series of overlapping photos across the scene and then stitching them together with a photo editing software, you can more easily capture those awe-inspiring views. Another bonus? This process gives you larger image files, which are great for printing large prints for display.
We’ll walk through each step of the panorama process, from taking the photos to putting them together.
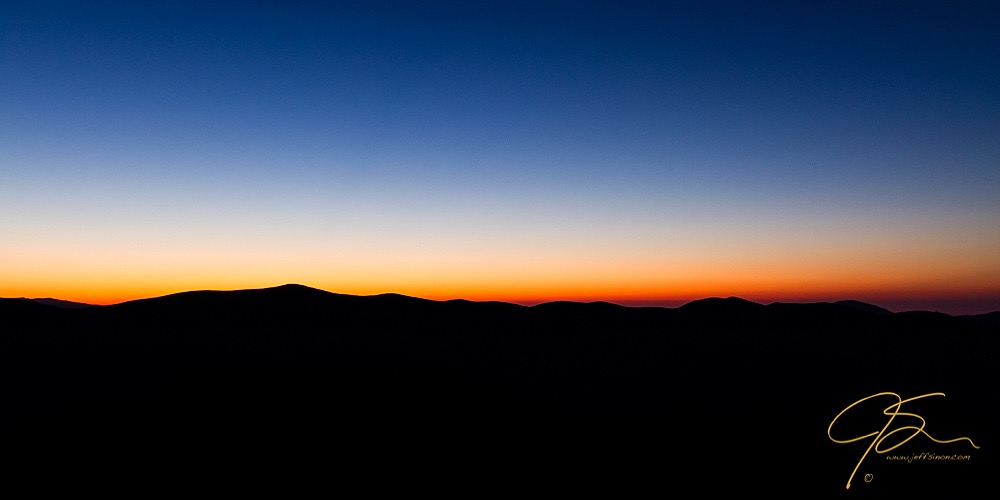
Speaking of large files for large prints, while each of the 8 source files for the above image(you can see them side by side below) measures a measly 3,456 x 5,184 pixels, the finished pano is a whopping 11,876 pixels wide and 3,959 pixels tall and If I hadn’t cropped out a lot of the boring sky the height would be closer to the 5,184 pixels of the long edge of the source files. Now that’s a file size for making huge prints!
Step 1: Taking the shots

What you need
When first starting out with panoramas, use a good, sturdy tripod. The steadier and more level the camera, the more aligned the images will be. The more aligned the images, the easier it will be to seamlessly stitch them digitally.
There are three additional pieces of gear that will make life a lot easier when taking panoramas (though they’re not absolutely necessary).
- A ball head with an independent panning feature
- An L bracket for the camera
- Bubble level (unless your camera has an internal electronic level)
The L bracket lets you mount the camera on the tripod in the vertical/portrait orientation. I shoot pretty much all of my panos with the camera in portrait orientation because it allows for a taller final image: That is, the height if the final photo will be the same as what the width would normally be on a single horizontal image. Make sense?
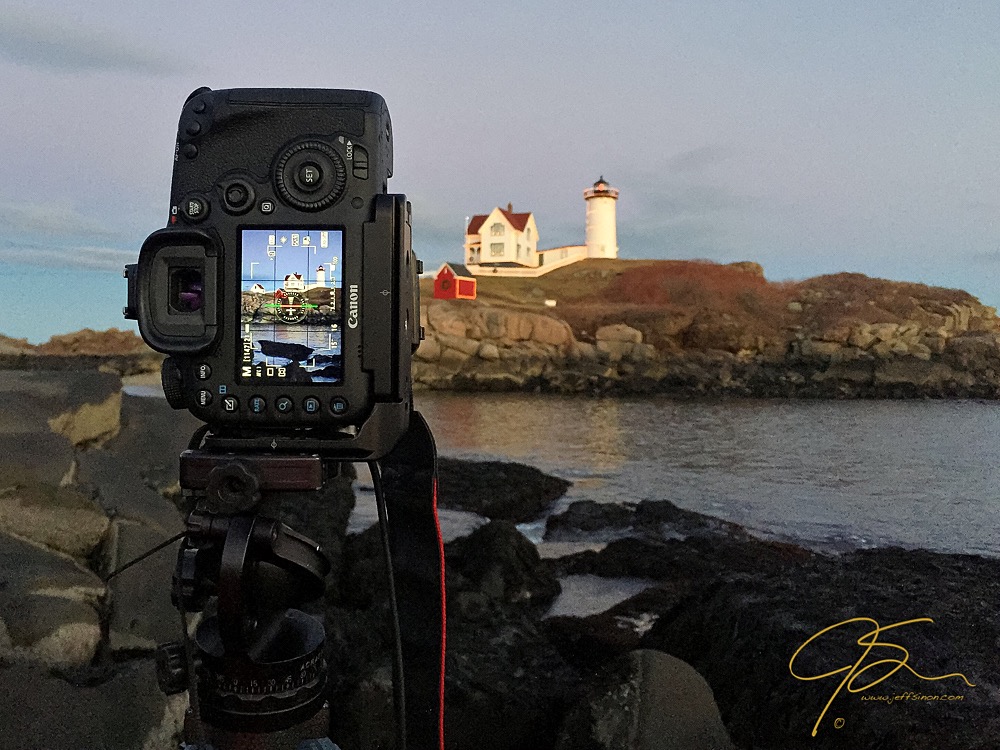
The L bracket makes it easier to keep the camera centered over the center of rotation of the ball head.
Setting up the shot
Now it’s time to mount the camera to the tripod and level everything. It’s easier if your tripod has a built-in bubble level, but it’s still not that difficult without. I’ve found the pano stitching in Photoshop as well as the recently added feature in Lightroom to be quite forgiving.
Once you’re done leveling, it’s time to set your exposure. You’ll have to use manual exposure — no exceptions. Since the light can change throughout the scene, using one of the semi-automatic modes can result in uneven exposures between your source images, which will result in a lot of extra work in Photoshop.
To set exposure, I’ll meter off of several areas across the scene and set the camera somewhere in the middle of the average. Since you should be shooting in RAW, using an average exposure should leave you with enough leeway to correct any slight over or under exposed areas.
Determining the shot range
Next, I’ll determine the starting and finishing points of the final image (I shoot from left to right).
Important tip: Be generous on each end, leaving yourself extra room. There’s almost always a need for cropping once the images have been stitched)
I also use the grid lines displayed on the LCD during live view to help guide each shot. When shooting for a pano, I like to overlap each image by about 1/3, and these grid likes make it super easy to do just that.
Post-processing and stitching
Now that you have all the images, it’s time to put them together digitally. I use both Lightroom and Photoshop, though with the added pano-stitching feature in Lightroom I don’t use Photoshop as much.
Starting in Lightroom, the only thing I do before stitching the images together is to enable lens correction. This removes any distortion and vignetting caused by the lens.
Stitching panoramas in Photoshop
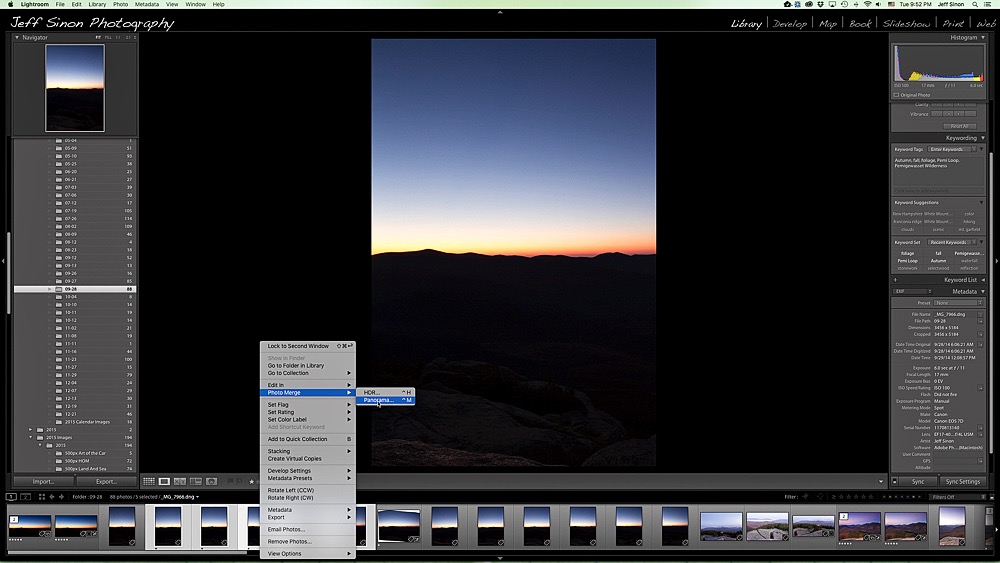
While still in Lightroom, select all of the files for the panorama: Clicking the first image, then hold down the shift key and click on the last. Then, right click on the selected files then go to Edit > Merge To Panorama In Photoshop. This brings up the following dialog.

I normally leave the Layout set on Auto and click OK. It may take a few minutes for Photoshop to generate the pano, since it’s creating layers and layer masks based on each file.
Once Photoshop is done working its magic, I zoom in and look for problems with the alignment. In my experience, the alignments have been pretty darn good. When I’m satisfied, I flatten the image: Layers > Flatten Image. Then, just navigate to File > Save As… and give it a name and a location. From there, I move onto my normal image enhancements.
Stitching panoramas in Lightroom
Lightroom is much quicker when it comes to stitching panos. However, there are far fewer controls to work with should you have alignment issues. Select all of the images files (just like you did getting ready to send them into Photoshop) but this time, right click on them then select Photomerge > Panorama, as seen below.
Once done, you’ll get this window with a preview of your new pano:
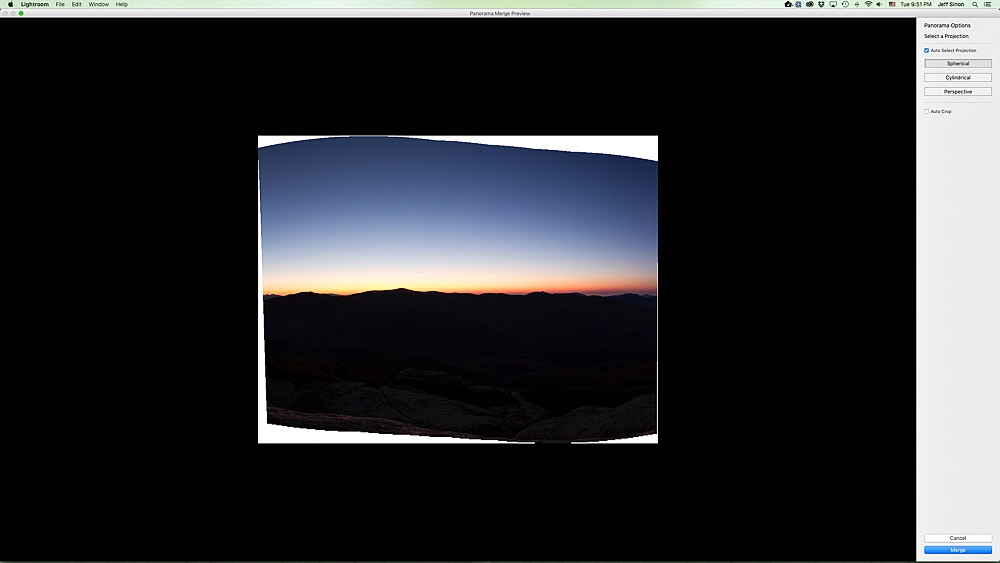
Again, I leave the Auto Select Projection box checked, though I might try the other options just to see how they look. By the way, notice all the white around the border of the photo? This is why I suggested being generous with your framing. All of that white will need to be cropped out, which will be done automatically if you leave the Auto Crop box checked.
Once I’m satisfied with how it looks I click Merge. Your nice, new panoramic photo is sent back to the same folder as the source files, ready for your final enhancements.
Share tips, start a discussion or ask one of our experts or other students a question.
No Responses to “How to Take Panorama Photos Like an Expert”