
Have you ever taken a photo and later noticed that the proportions look a little out of whack? Your first thought may be that the distortion has completely ruined the photo. But don’t let that thought overwhelm or discourage you. This problem, lens distortion, is more common than you’d think! On this Fix-It Friday, we’ll walk through a quick fix for your distorted photos in Adobe Lightroom.

What is lens distortion?
There are two main type of lens distortion: barrel distortion and perspective distortion. These are slightly different because barrel distortion is related to your lens, whereas perspective distortion has to do with how you hold your camera.
Barrel distortion
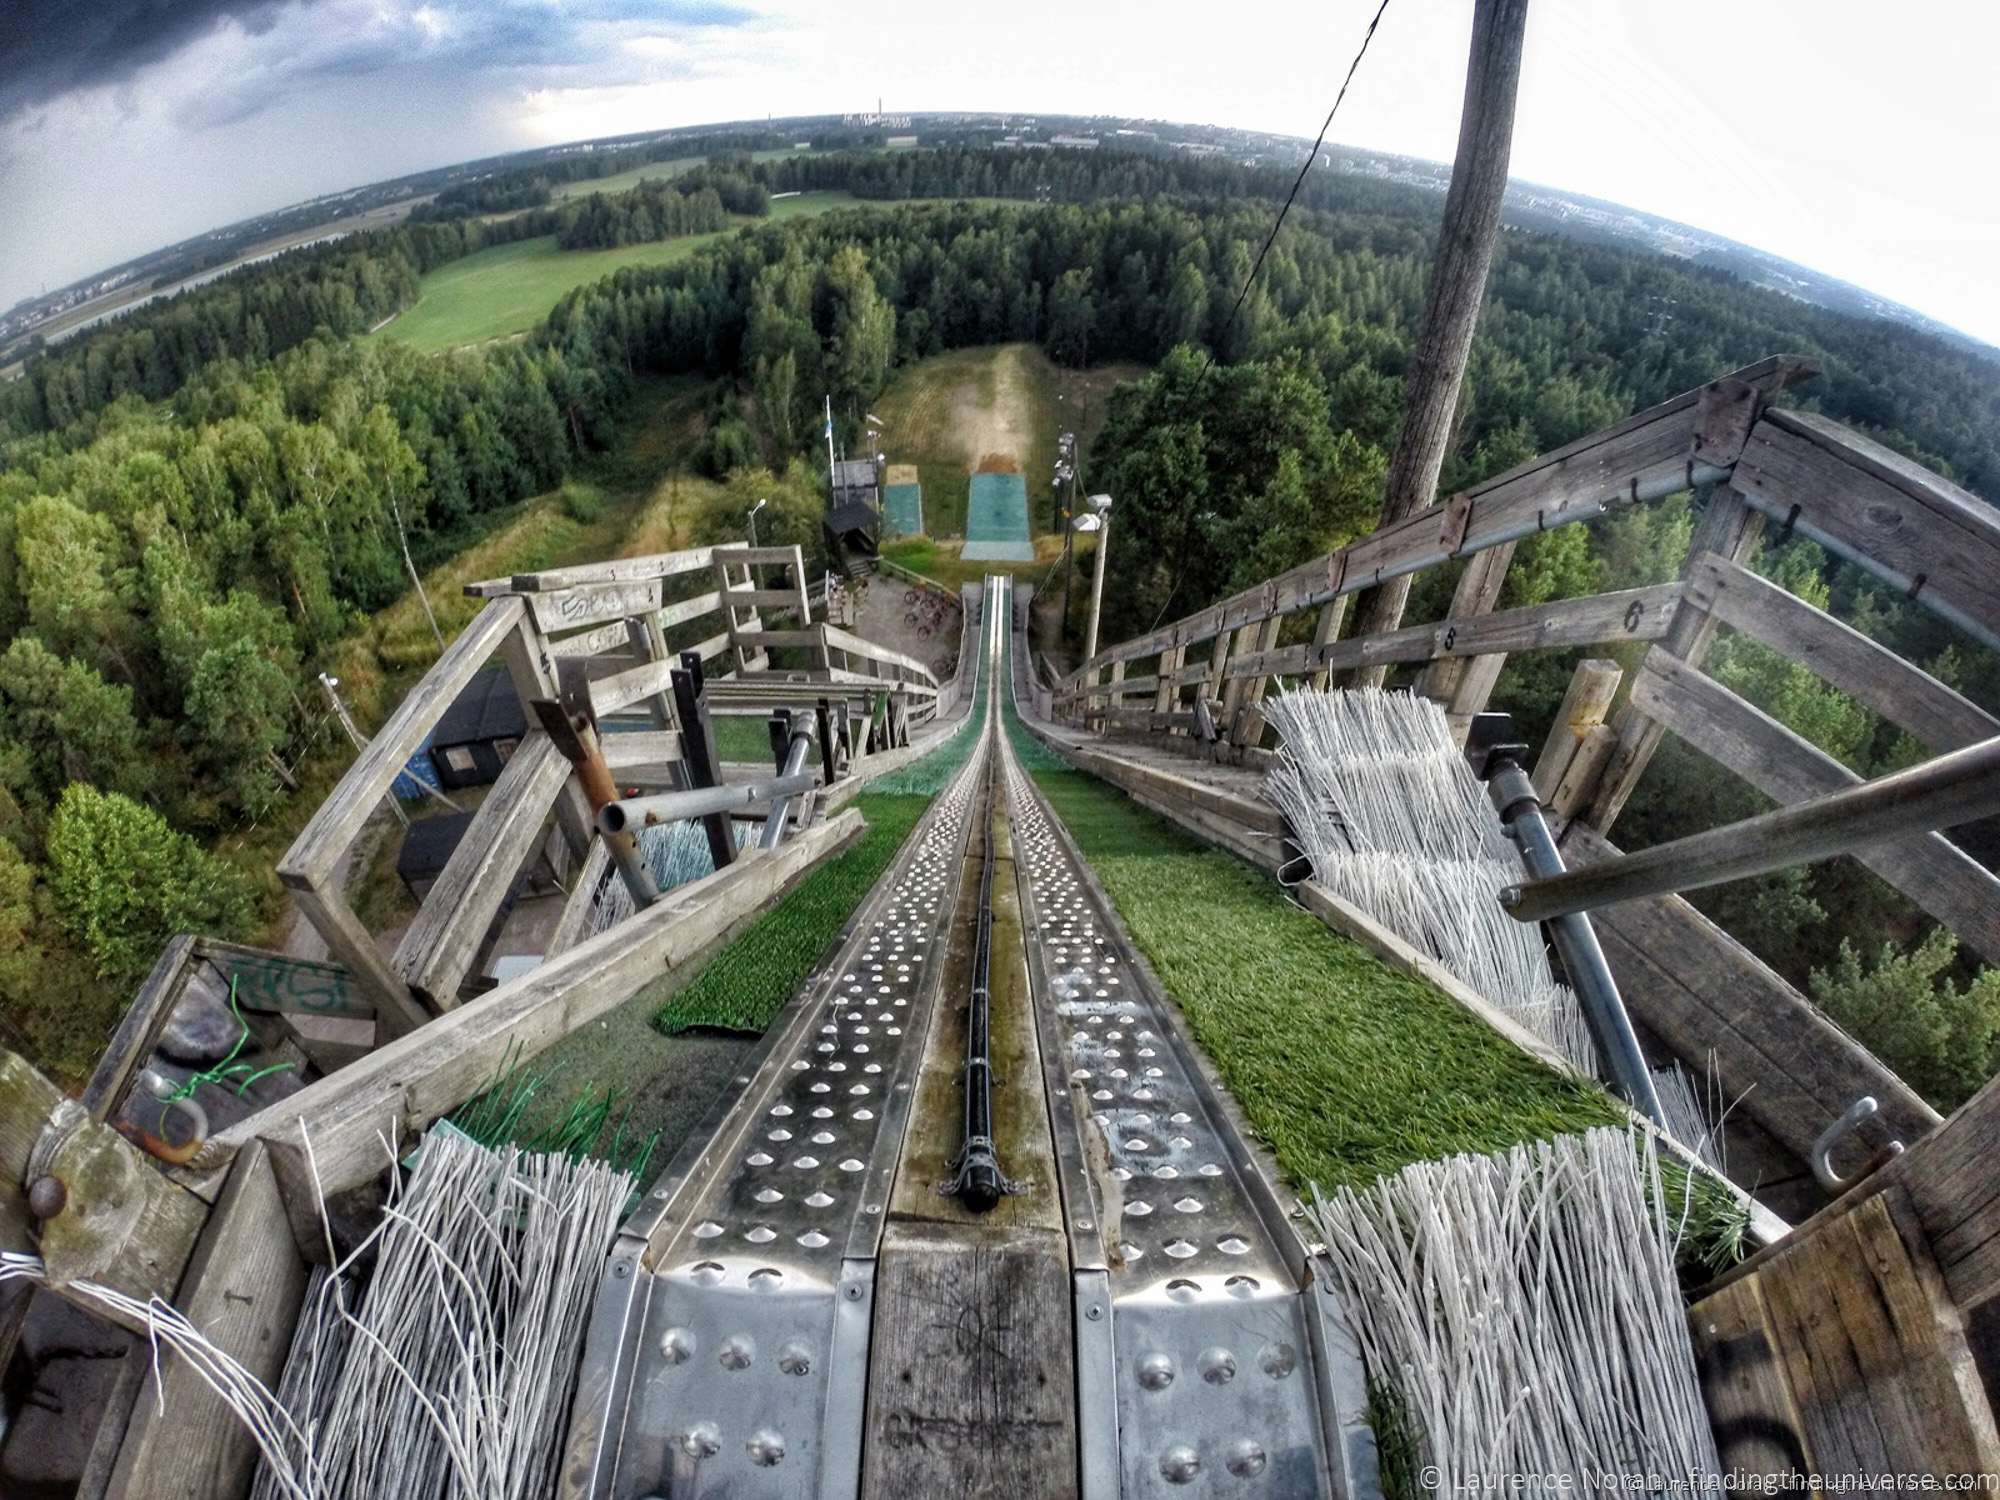
You may notice when you look at a camera’s lens that the glass at the front is curved. Barrel distortion usually occurs when shooting wide angle shots and is a result of the optics of the camera bending the light. Lines towards the edges of the scene aren’t quite straight, such as in this extreme example shot with a GoPro.
All photos in this post copyright the author, Laurence Norah of Finding the Universe
Clearly the horizon shouldn’t be at this drastically curved angle. However, this type of lens distortion isn’t always a bad thing. In this case it works quite well. In fact, I used the photo like this as I preferred this version to the corrected version.
Perspective distortion
Ever taken a picture of a tall building and wondered why the photo shows the building leaning oddly? That’s perspective distortion. It’s a result of you standing close to something and taking a shot of it at an angle — in the case of a building, you’re pointing you’re shooting up at an angle.
How to fix lens distortion in Lightroom
The good news is that a lens distortion correction is quick and easy when you have the right software. You can also often fix it in your camera if you shoot in JPG. Most cameras will apply lens distortion fixes as part of the image save process, so you might not even need to apply fixes after the fact. If you shoot in RAW, however, you’ll need to make these changes yourself.
First, load up the image you want to fix into the Lightroom Develop module. I’ll use the image from earlier for this example.
On the right hand side, scroll down through all the develop modules until you find “Lens Corrections” near the bottom.
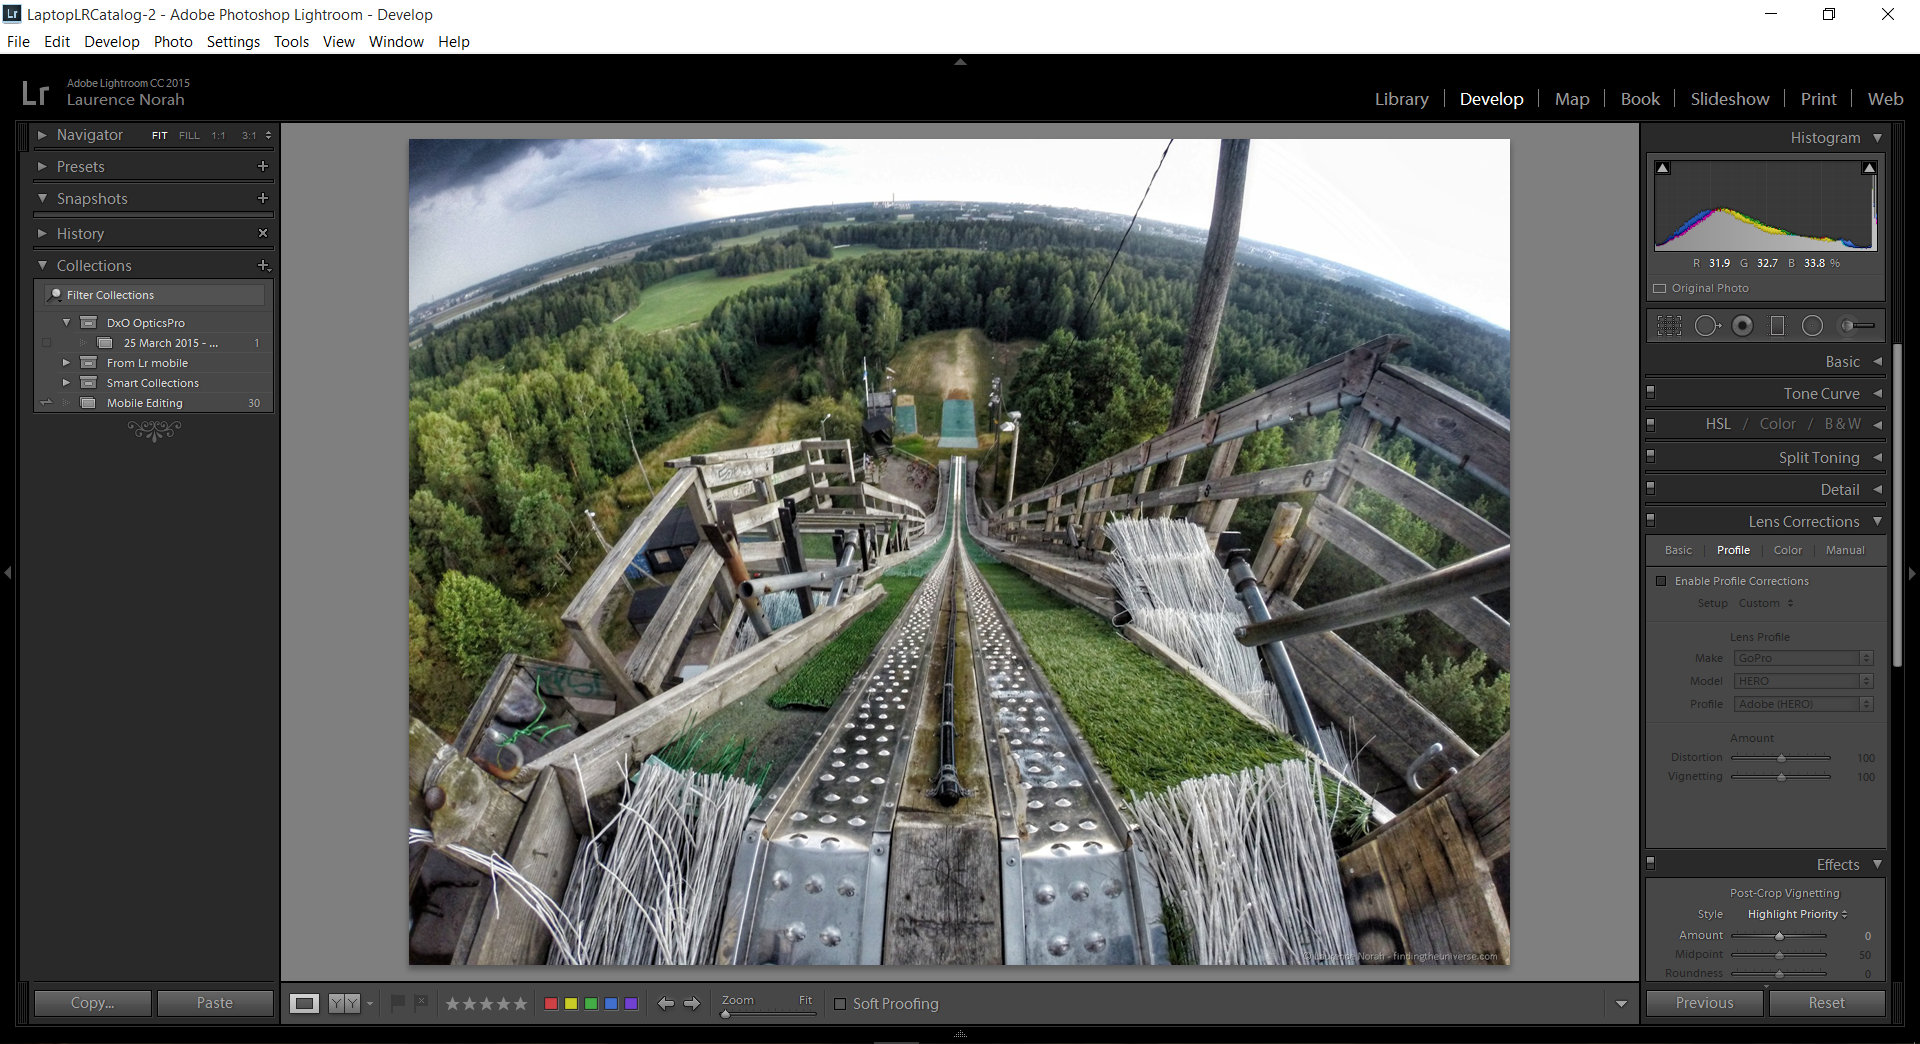
There are four tabs in this section: Basic, Profile, Color and Manual.
For photos Lightroom recognizes
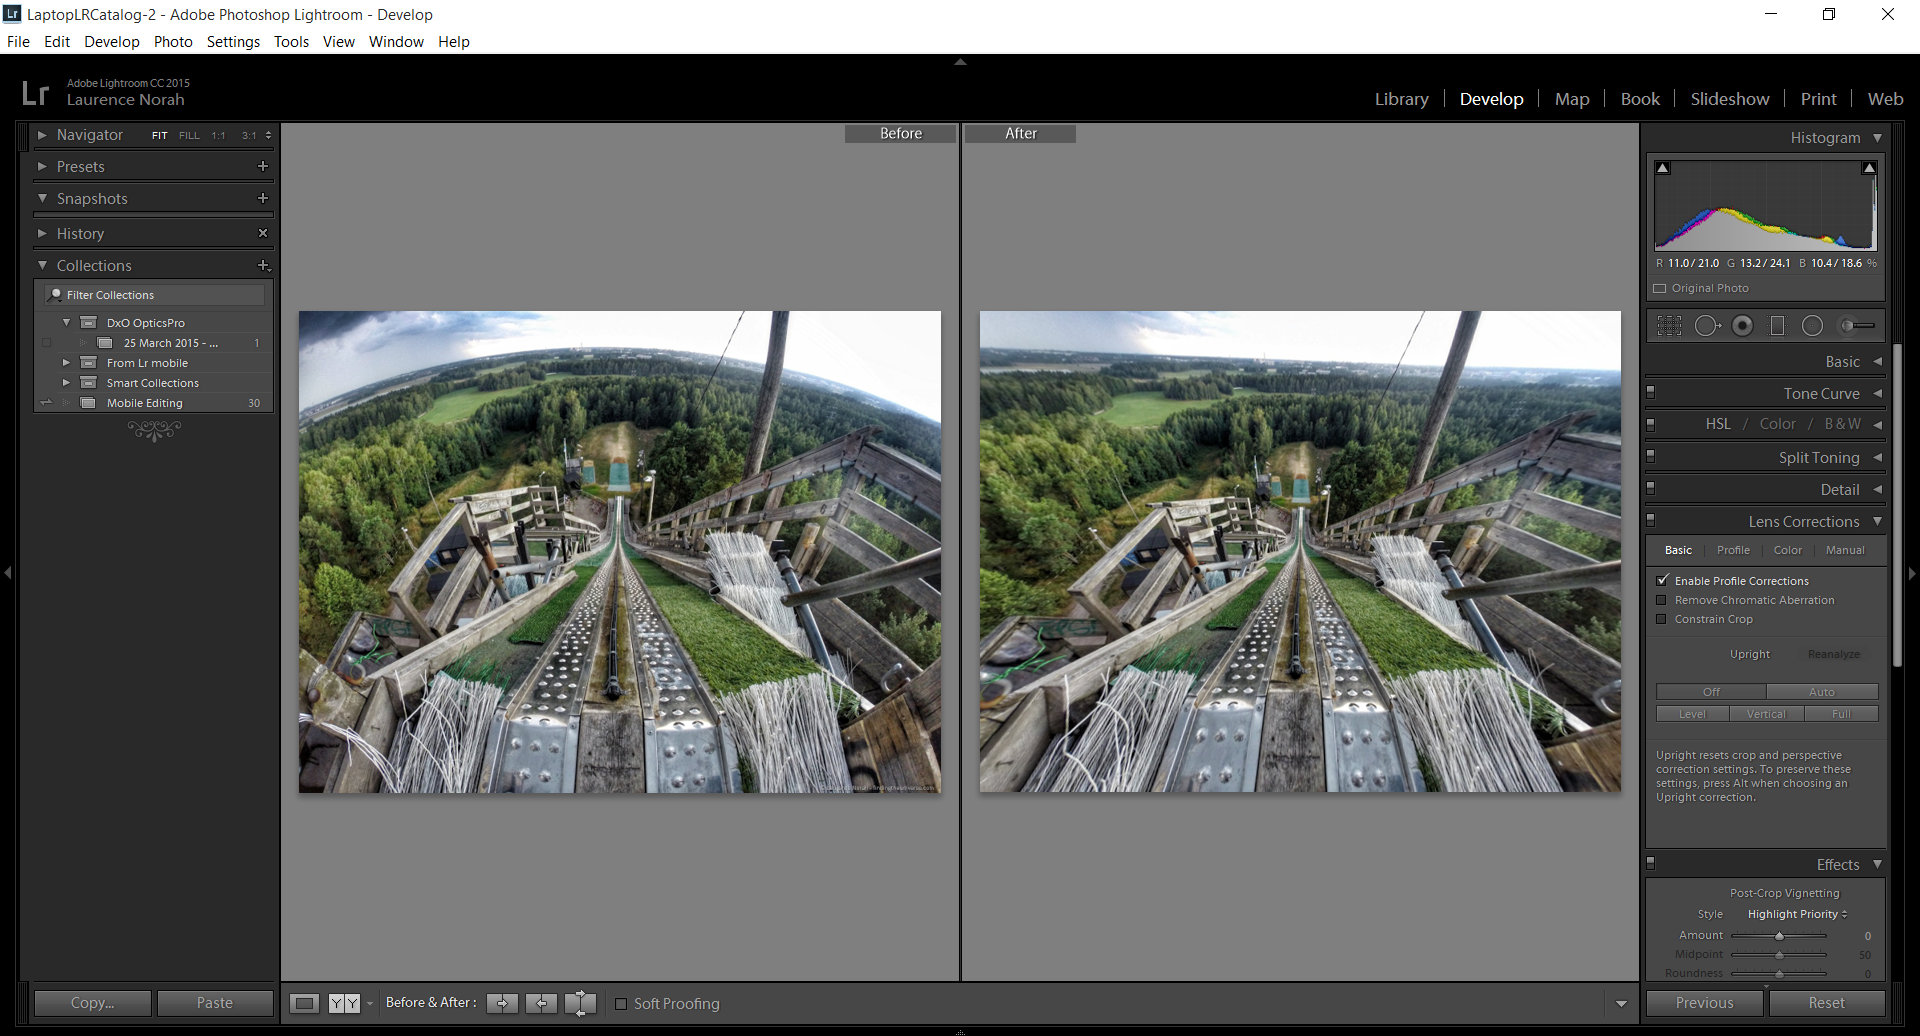
In the Basic tab, check the box that says “Enable profile corrections.”
If you have a camera that Lightroom recognizes, you will see the image has changed straight away. Use the forward slash key ( ) shortcut to flip between the original and the edited image, or you can split the screen into the edited and unedited version at the bottom of the image panel.
For photos Lightroom does not recognize
If you don’t have a camera that Lightroom automatically recognizes, this will have no effect. Don’t worry, though — you still have options!
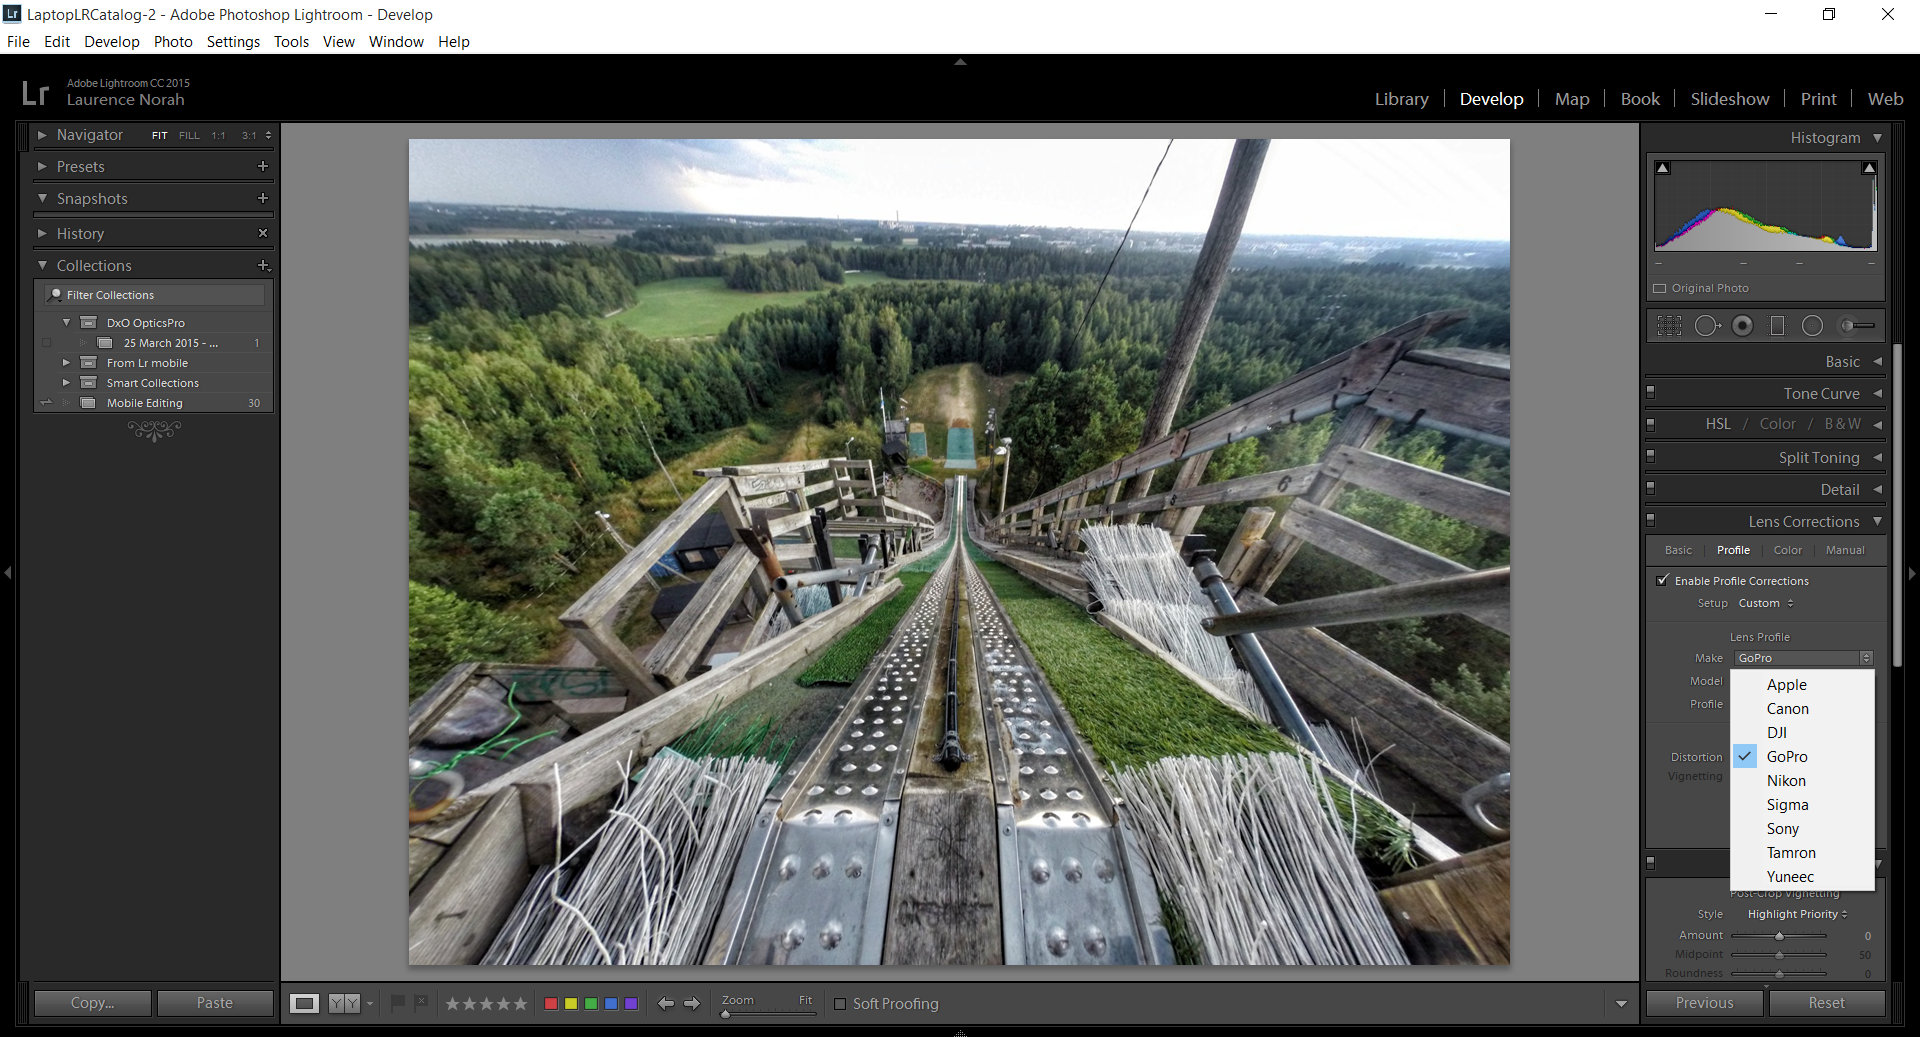
Move one tab along, from Basic to Profile.
Here, you will see a series of drop-down options that list popular camera manufacturers. Once you select the right manufacturer, you can select your camera model and lens. As you can see below, Lightroom does in fact have built-in corrections for the model of GoPro I used for this shot, so I can apply those quick fixes.
For cameras not listed in Lightroom
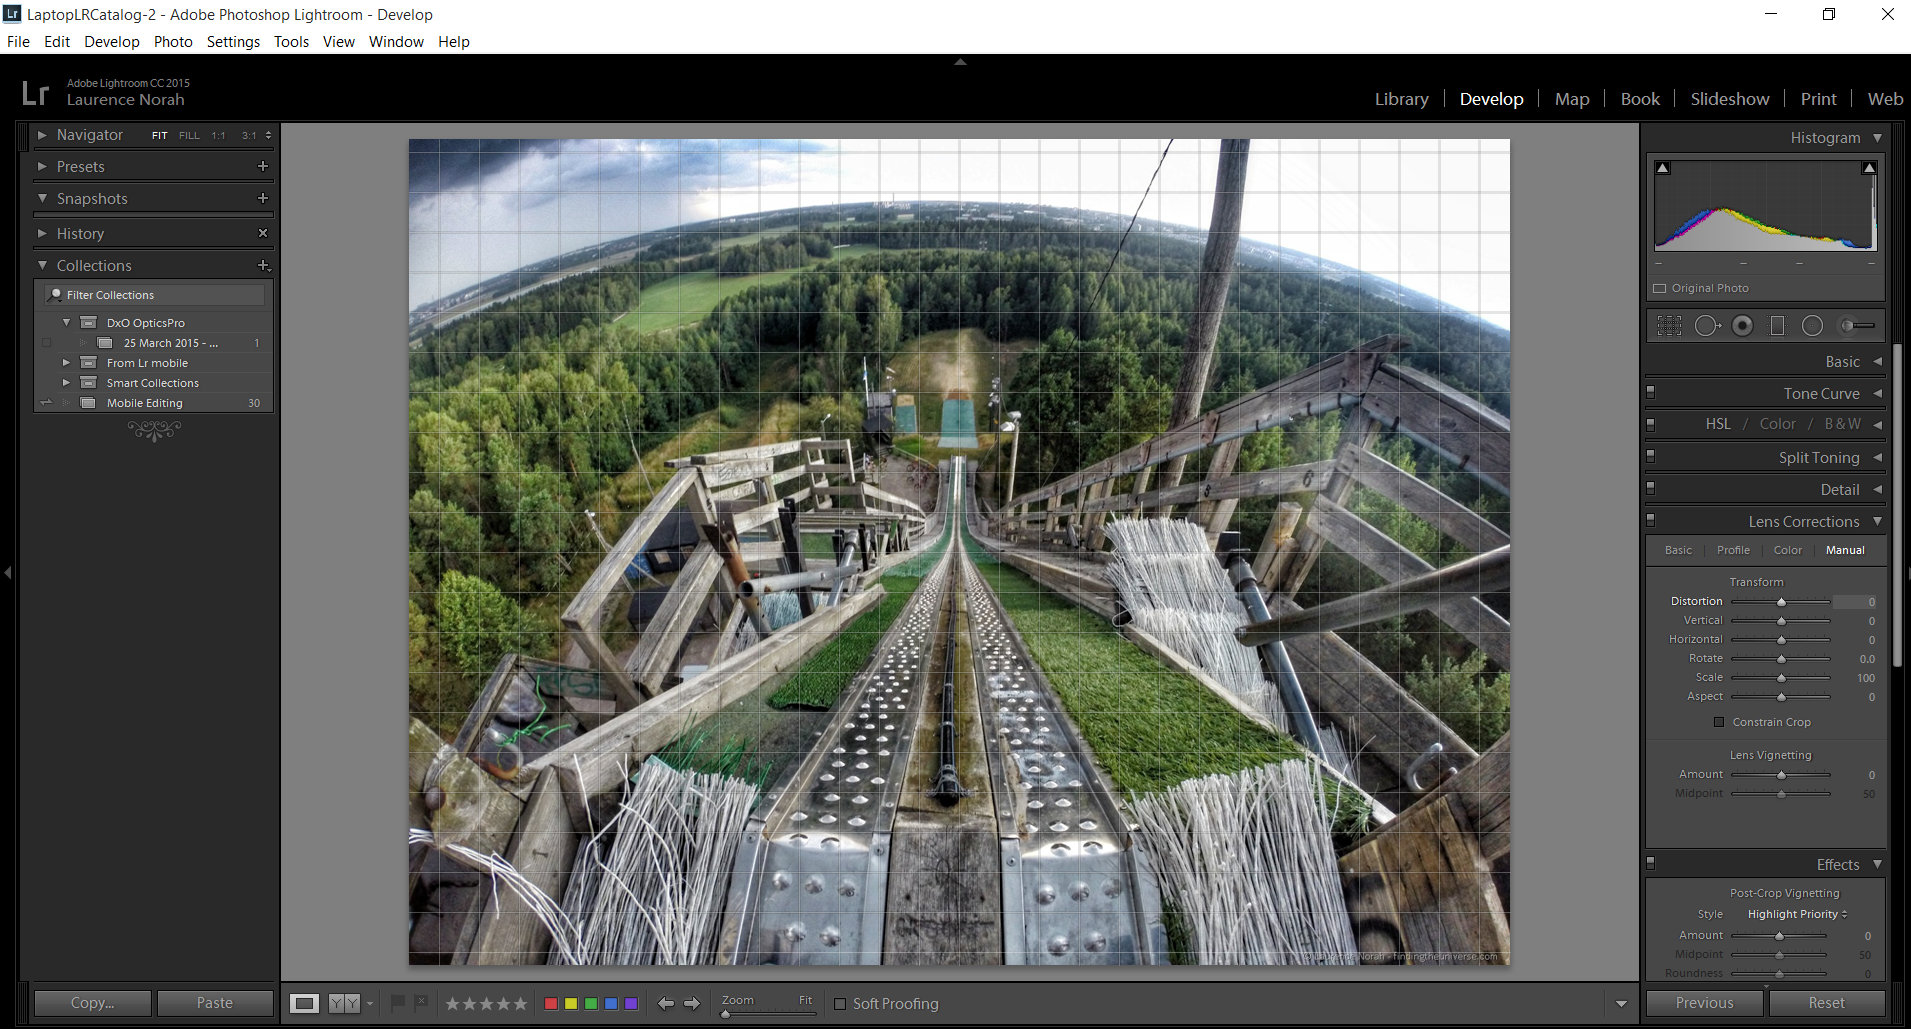
If you can’t find your camera, again, don’t panic. Lightroom has you covered. Go to the last tab, Manual. You will see a series of sliders, and when you hover over them, a grid will overlay on your image.
Use the Distortion slider (the first one) to adjust the barrel distortion of the image. Then, use the vertical and horizontal sliders to adjust perspective distortion.
You should also check the “Constrain crop” box under the sliders. This prevents the image from becoming an unusable shape as a result of your fixes.
For extreme distortions
For an extremely distorted images, such as those produced by a GoPro, the manual slider might not go far enough. In this case, fix the image as much as possible and export the image as a new JPG. Then, repeat the process with the exported image. The majority of cameras do not distort to this extreme, so you are unlikely to need this trick.
Finally, to speed up this whole process, my tip would be to apply these fixes as a preset in Lightroom. One of Lightroom’s most powerful features is its ability to save presets and apply them as a batch, and you can apply developed presets at the point of import. I have a “lens correction” setting, which just fixes lens distortions, and I always apply it during the import, saving myself development time later.
16 Must-Have Lightroom® Shortcuts

Make your work in Adobe Lightroom more efficient than ever with simple keyboard shortcuts sure to cut down on time!
Come back next week for another Fix-It Friday post. You’ll learn a smart trick for getting great group photos every time. See you then!
Share tips, start a discussion or ask one of our experts or other students a question.
No Responses to “How to Quickly Fix Distorted Photos in Lightroom”