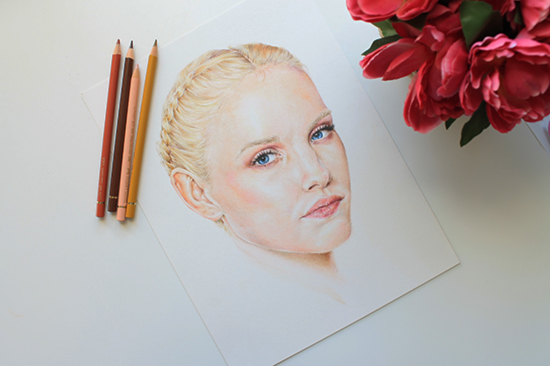
Creating a lifelike portrait is a challenge no matter the medium. From drawing to painting, techniques vary, but the results can be amazing.
One technique is to use colored pencils to create a result that looks as complex as a painting. In this tutorial I will be showing you my own technique for how to draw a portrait with colored pencils.
Each of us develop our own set of techniques made up of bits and pieces that we adopt from tutorials like this one, books, classes and, most importantly, practice. This is not necessarily the right way and it's not wrong either, it's just the process I have found I'm most comfortable with and delivers the results I'm after. In art there's no right or wrong way of doing things, there are simply certain guidelines that help steer us in the different directions we'd like to go and, in turn, help us make up our own rules as we go along. Take what's most useful for you from this guide and leave out what does not suit your preferred techniques and methods.
I will be using Faber Castel Polychromos, but please don't feel like you need to go buy these same pencils in order to paint a portrait. Yes, they are very good quality, definitely some of the best around, but they are certainly not a prerequisite for creating this effect. Feel free to use any brand you like or already own. I will be mentioning, throughout this post, the names of some of the Faber Castell colors I'm using so that you can look them up online and find similar matches in your favorite brands.
Let's get started painting with colored pencils!
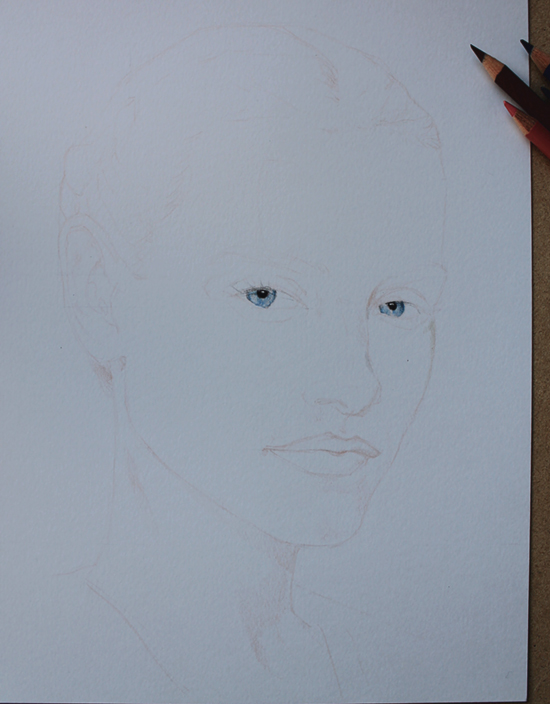
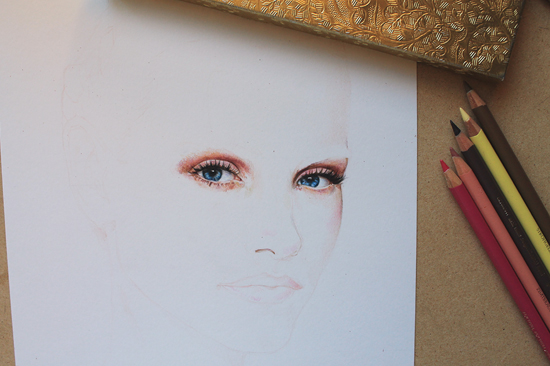
First things first, we have to draw the basic sketch for our portrait. I cannot stress enough how important this step is. This step will define the whole outcome of your painting, so you want to take your time and carefully depict a close resemblance to the face you are drawing. This takes some time and plenty of practice, so don't feel discouraged if you don't think it's right at first.
Something that can help you get familiar with the face you are drawing is creating some preliminary sketches on a different piece of paper. This will allow your mind to get into an observational mode and focus its attention on looking at the particular face you are drawing. Getting to know its lines, curves and shadows will certainly help to achieve closer likeness.
Draw the basic lines with a medium flesh-colored pencil. I wouldn't recommend using graphite pencils because the lines will show through later on when you apply layers of color over it. Drawing with a colored pencil will allow you to blend the lines into the rest of the colors.
Paint the eyes
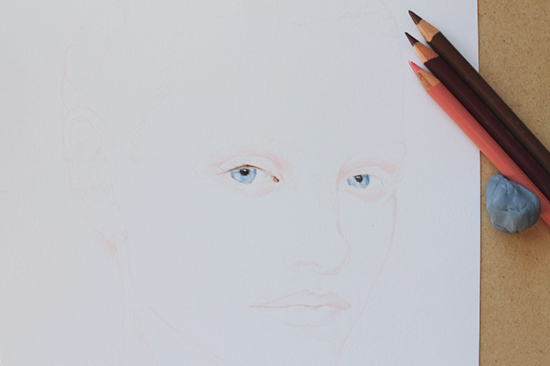
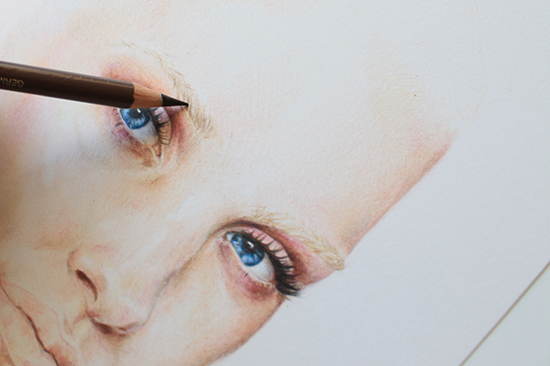
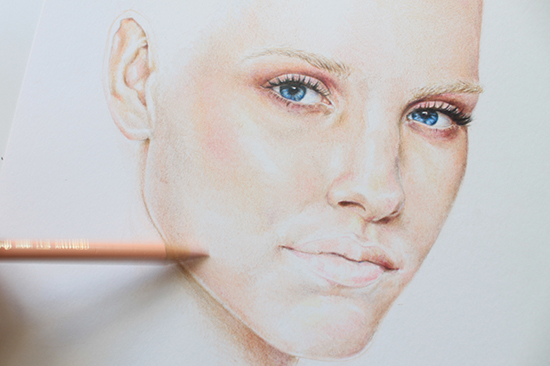
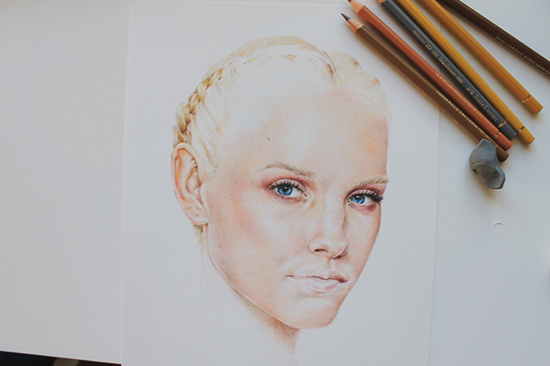
Once the basic outline of the face is drawn, we can start laying down the first layers of color. Keep in mind that these layers will be very faint and we will build up the color as we go along. Here I am using the colors medium flesh, Van Dyck brown and burnt sienna.
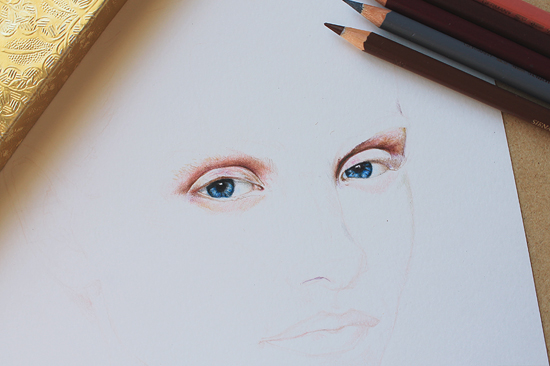
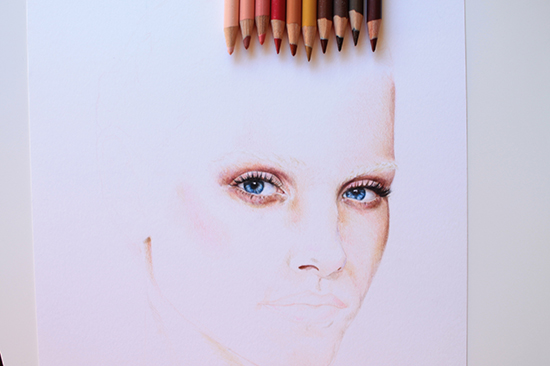
After that first faint layer of color, we will continue to pile on layers of color to increase the intensity of the colors. Here I keep adding shadows, refining the eyes, adding depth to their deep blue color and I start to paint her reddish eyeshadow.
Paint the top and bottom lashes with black and brown pencils. Sharpen well your pencils first so that you get thin and tapered lashes.
Paint the skin
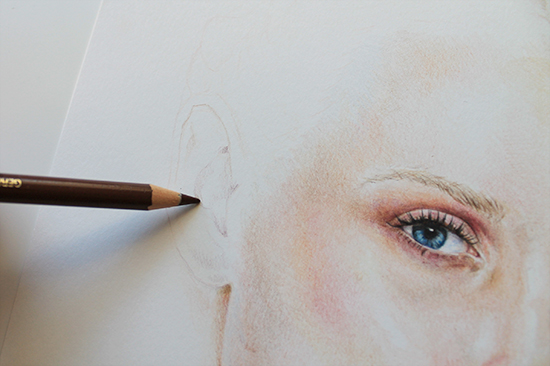
Slowly begin to branch out away from the eyes, painting the area under the eye and some of the darker shadows around the nose. I stick to the colors I used above and start to incorporate some red for the cheek and burnt ocher throughout all of the skin to balance out some of the pink from the medium flesh and cinnamon-colored pencils.
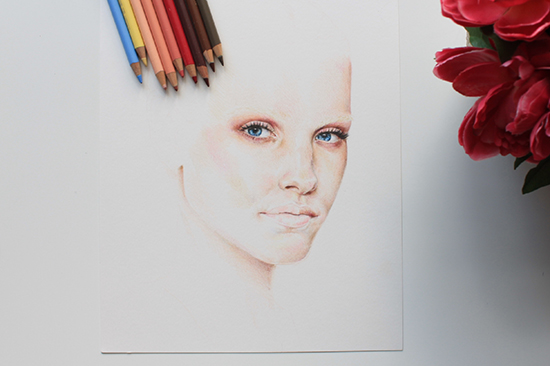
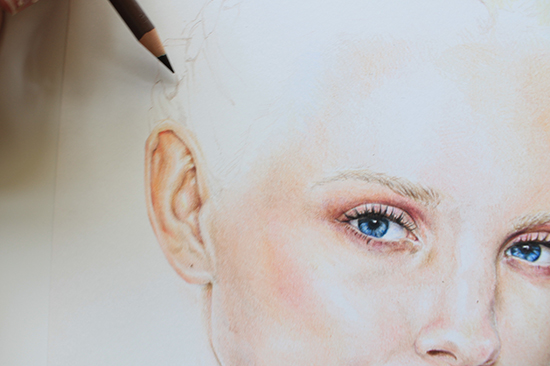
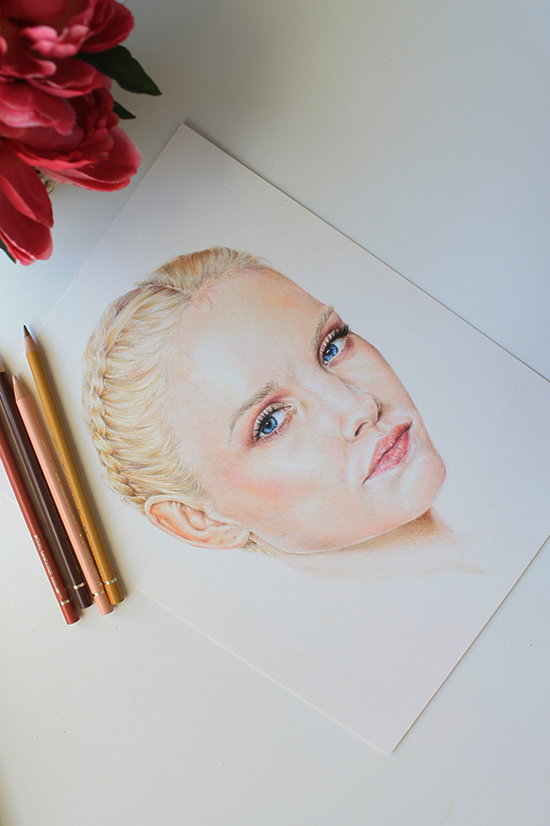
When you have reached this amount of definition throughout the whole face, you can bring in some sky blue and cream (the yellow pencil you see above) colors to accentuate the lighting effects. Add cream throughout the lightest areas and blend it in with the light flesh and medium flesh colors. Apply some of the sky blue in the areas of light shadow, like under the lower lip and on the right side of the nose of the portrait below.
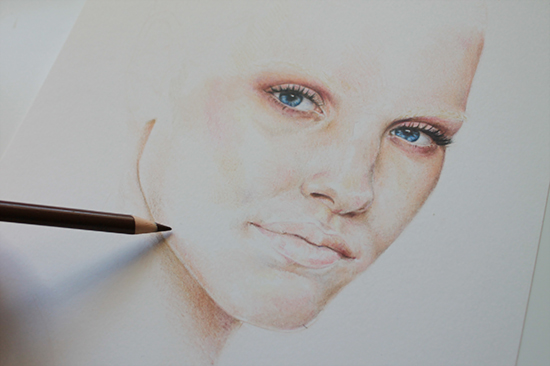

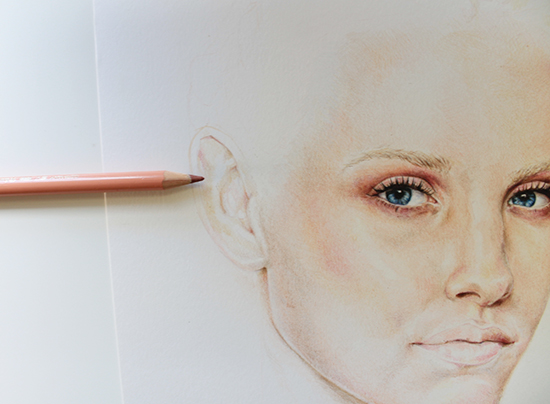
At this point you have managed to define the main planes and colors of the face so it's pretty much smooth sailing for the rest of the skin. You only need to keep building up the layers in the darkest areas and finish off by pressing down harder with some of the lighter flesh colors to blend every layer of color together.
Paint the eyebrows
Using a light yellow ocher pencil I drew in some of the eyebrow hairs and, with Van Dyck brown, I painted some of the darker hairs and shadows to add depth.
Paint the ears
Here you can see the step-by-step layering process I mentioned above for shading skin. We fist begin by painting the main dark areas of the ear with a dark brown pencil. As usual, lay down this color in soft strokes and don't press down with the pencil too hard. You want these shadows to remain faint, a mere guide for later.
Next, select your mid-tone — medium flesh in this case. Paint over the areas we have shaded as well as the lighter areas without applying too much pressure.
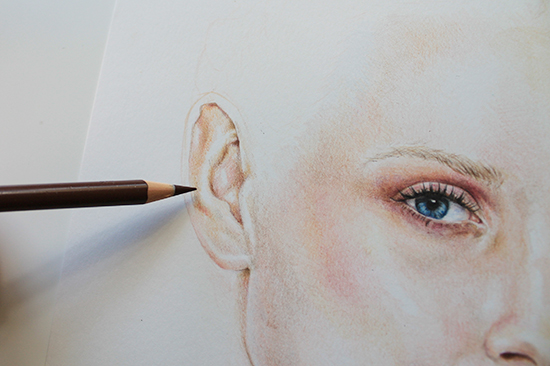
Go over it with some accent tones like yellow ocher and orange glaze. Depending on the lighting and skin tone, these could be blues, greens or, like you can see above, orange. Then grab your shadow color again and go over the darkest areas a second time to accentuate some of the shadows.
Finally, go over the whole area with your lightest color, in this case light flesh, and blend out all the layers by painting in circular motions and pressing down harder than you did in the previous layers.
Paint the hair
For the hair, we will start by drawing over the flesh-colored outline with a darker color, Van Dyck brown.
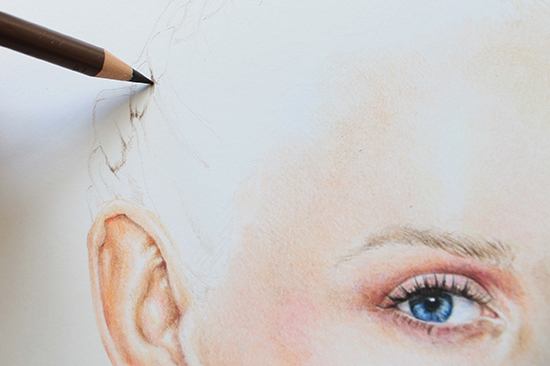
Use the same color for the shadows.
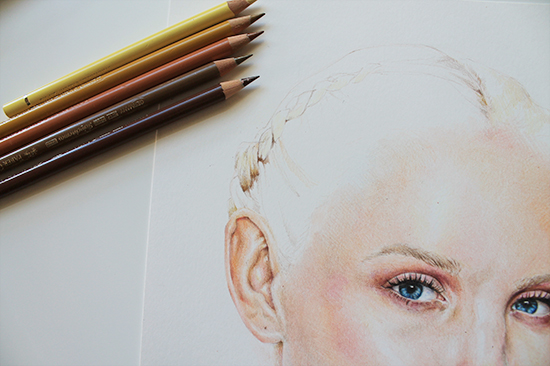
At this point, I brought into the mix the following colors to paint blonde hair: nougat, caput mortuum violet, light yellow ocher and cream. Here, instead of painting in circular motion as we did above, you want to paint with straight and curvy lines following the natural direction of the hair so as to give it some realism.
Keep painting the hair and building up color through layers. Here I started using cold grey IV to paint some of the mid-tones and shadows on the hair but it depends very much on the specific hair you are drawing.
I moved on to the lips later. Here, I used the flesh colors I applied to the skin along with madder and fuchsia to give them a rosy hue.
That's just the tip of the iceberg! Learn more about drawing portraits with colored pencil in Craftsy's's Radiant Portraits in Colored Pencil class.

HW to no the of human art Color work
A exclusive information is given by author in this article, I really like it. I think there must be an article on <a href="https://chemistryskills.com/how-to-make-organic-chemistry-flashcards/" rel="nofollow ugc">Flash Card</a>, that can help kids to learn different topics easily.
I am trying to draw my grandchildren
this is helpful, thank. you. I'd love to see a demo with darker skin tones as well :)