Ever struggled to capture the nuances of skin tones in your acrylic paintings? Whether you're a beginner or a seasoned artist, achieving lifelike, dimensional skin tones can be a challenge. Let's dive into a simple, effective method to mix acrylic paint for a realistic skin complexion.
This guide will equip you with the knowledge and skills to create vibrant, natural-looking skin tones in your artwork. From understanding the basic color palette to mastering shading techniques, we'll cover everything you need to know. So, grab your brushes and let's get started!
By using the simple method detailed in this tutorial, you'll learn how to mix skin tones using different ratios of the primary colors. This easy method requires a little work to refine, but it is a fantastic and accessible method for artists of any level. With a little practice, you'll be creating skin tones like a pro.
If you are looking for a broader understanding of color not limited to just skin tones, check out our class: Acrylic Color Mixing Made Easy
Getting Started with Skin Tones
Determining Skin Color
The colors you select depend a great deal on the skin tone of the person you are painting. While on one level it is easy to determine if the skin is dark, medium or light, you'll also need to consider the undertones of the skin. Many skin tones contain subtle amounts of blue, even if it's not immediately apparent. By carefully observing the flesh color you're trying to achieve, you can make informed decisions about the colors to mix for your skin tone paint.
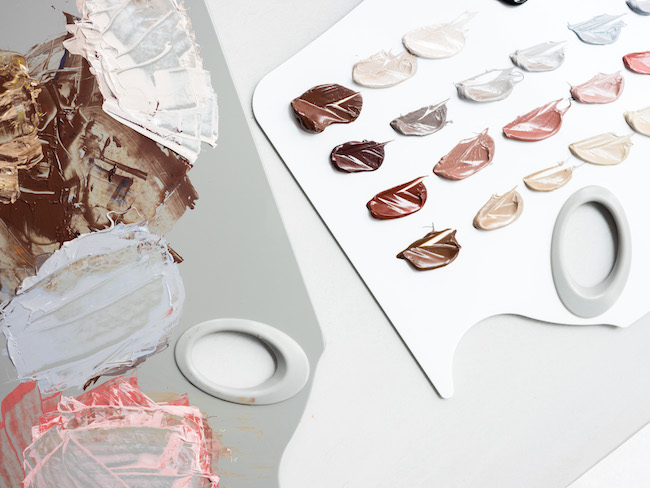
Creating a Family of Tones
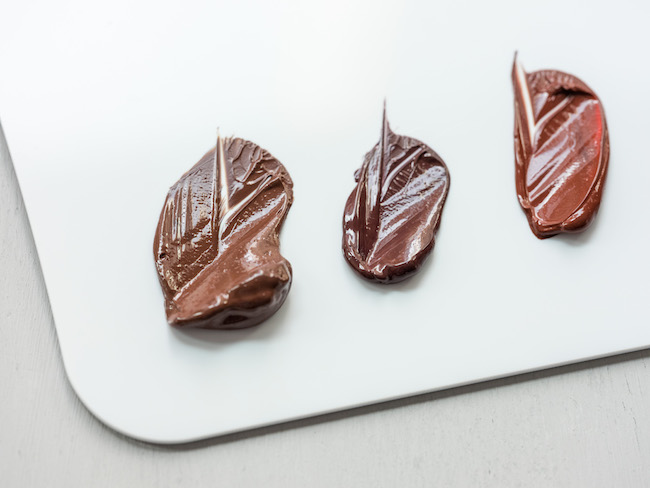
To add depth and dimension to your skin color paintings, it's helpful to create a "family" of tones around your chosen skin tone. As demonstrated in the image, you can achieve this by mixing your base skin tone with small amounts of blue, yellow, and red. These accent colors will be invaluable for creating subtle details on the skin, such as shadows, highlights, and variations in texture. By strategically using these tones, you can bring your subjects to life with a sense of realism and depth.
In the following section, we'll provide step-by-step instructions for mixing and applying these skin tone variations to achieve a polished and professional result.
Quick Tips for Mixing Skin Tone Accurate Acrylic Paint
- Acrylic paint looks a little bit darker dry than when it is wet. So make the paint color slightly lighter than you'd like the final outcome to be.
- It can be tough to mix a specific color using acrylic paint, so if you are looking for the perfect tone for a large piece or an ongoing series, make notes of the colors that went into the mixture. Better yet, mix up a large batch of the tone in question so that you will have plenty on hand.
- While white paint is helpful to attain skin tones, use black paint very sparingly. Black paint can react with the yellow in skin tones to create a greenish, muddy look. If you need to make a skin tone darker, use a small amount of each primary color in equal quantity rather than adding black paint to the mix.
How to Paint Skin Tones in Acrylic
Step 1:
Create a palette with the primary colors: yellow, blue, red. White and black are optional. Have a photograph or reference image handy for the tone you are trying to attain.
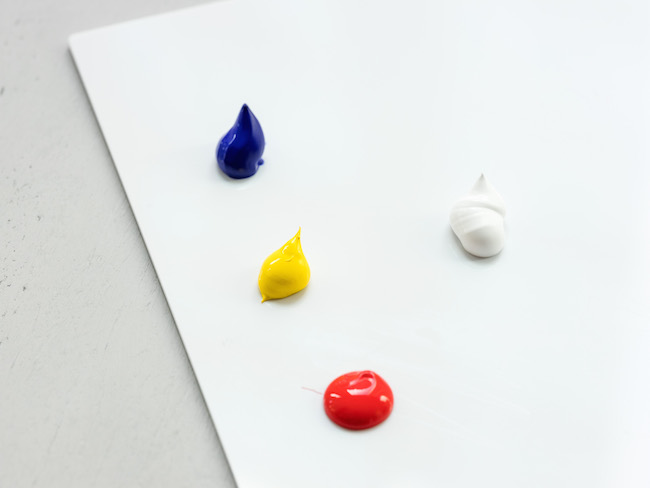
Note: Remember to be very sparing with black paint.
Step 2:
Mix together equal parts of each primary color.
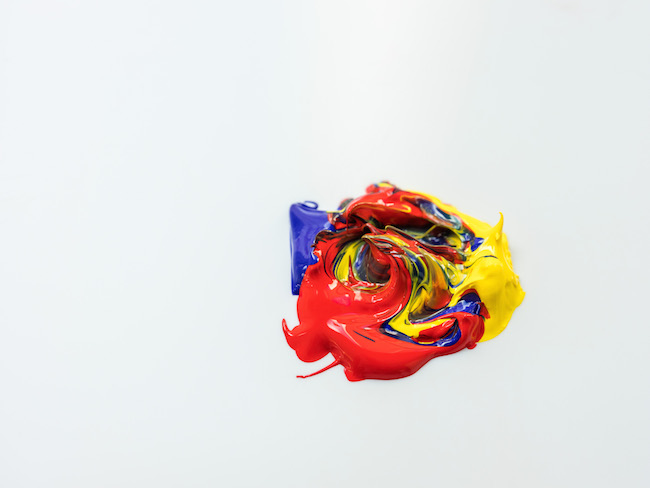
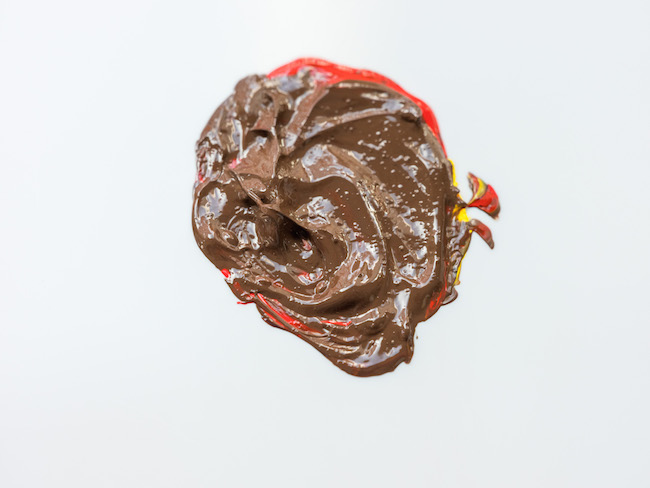
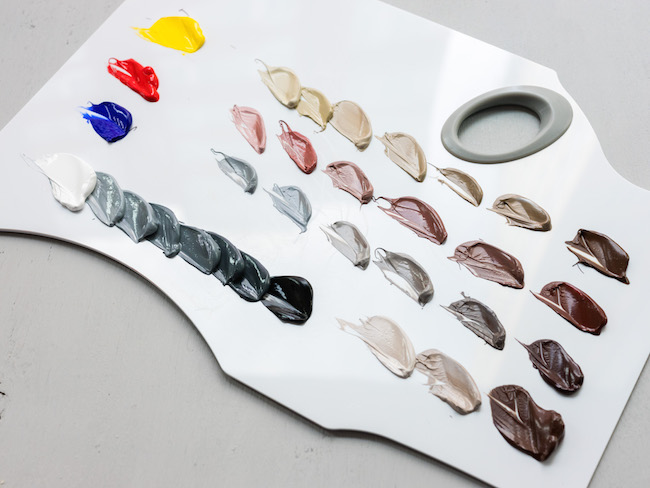
Just about every skin tone contains a little yellow, blue and red, but in different ratios. Once you've done this a few times, you might start with more of one color or another. But to start, go ahead and mix equal parts of each color with a palette knife. Your outcome will likely be somewhat dark. This is a good thing, because in general, it's easier to make skin tones lighter with acrylic than darker.
Step 3:
Now, it's time to refine your color. As noted above, if you've mixed equal parts of each color, the blue in particular has probably made the color mix quite dark. Initial adjustments will be clear: if you need to make the skin lighter, add white and/or yellow. If you need to make it more reddish, add more red.
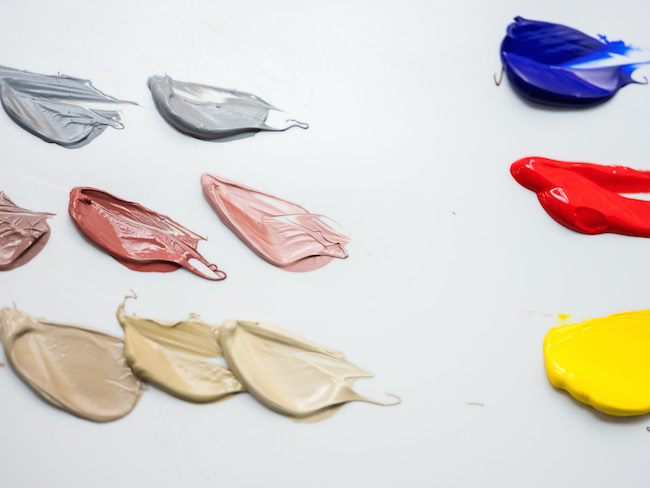
Once you make these obvious tweaks, you'll have the opportunity to refine, adding a little bit of this color, a little bit of that, until you've attained the exact tone you're looking for. All of the below skin tones were attained by making refinements to the initial primary color mix.
Advanced Techniques for Painting Flesh Tones
Once you know how to make skin tone paint, you can set yourself up like a professional painter. Try these advanced techniques to improve your paintings and add a whole new set of dimension to your flesh tones.
Mix Shadows and Highlights
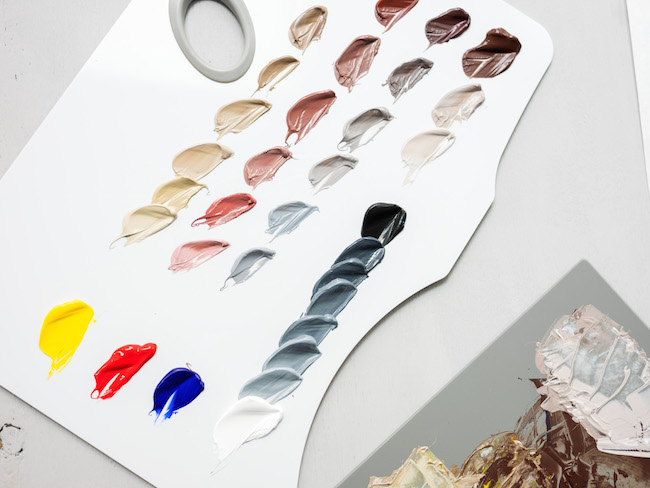
Once you've perfected your desired skin tone, it's time to create a "family" of related tones. This is where black paint can be a valuable tool. By mixing your base skin tone with varying amounts of black or white paint, you can create a gradient of tones for adding depth and dimension to your artwork. These variations will be essential for creating realistic shadows and highlights on the skin, enhancing its texture and three-dimensionality. In the next section, we'll demonstrate how to apply these tones effectively to achieve a natural, lifelike appearance.
Blush Tones
To create a realistic blush effect, avoid simply applying pink or red paint directly to your skin tone. Instead, craft a customized blush tone by carefully mixing your base skin tone with a small amount of red paint. This approach will ensure a more natural and harmonious appearance on your subject's skin. By following this technique, you can add subtle warmth and dimension to your portraits, bringing your subjects to life with a touch of color.
Painting Skin Tones in Tinted Light
To further enhance the realism of your skin tones, experiment with mixing your base skin tone with each of the primary colors. While some of these combinations may seem unconventional on the palette, it's important to remember that the skin of your subject can be influenced by the surrounding environment.
For instance, if a character is standing near blue drapes, a sliver of blue may appear on the highlights or shadows on the skin. By creating these variations, you'll be able to capture these details, which will make your final painting more lifelike.
Are you interested in skin tone color mixing across mediums? Or perhaps portrait painting? Check out these relevant classes and articles from Craftsy:
Paint Better Portraits: Realistic Skin TonesExplore How to Create Skin Tones With Colored Pencils
Acrylic Painting: Basics & Beyond
Know Your Acrylic Paints: Expand Your Palette
Our friends at Artist's Academy also have some helpful videos on the subject:
Painting Portraits: Mixing Warm & Cool Colors for Skin TonePainting Portraits: Skin Tone, Age & Gender
Painting the Color Wheel

I love painting skintone...
NICE
I like to paint
I'm interestedxinxportraitsxpainting but find it hard to mix the right colors and apply correctly
Hi Jessie. This is a great blog/article. Do you demonstrate this on video somewhere? I'd love to follow along in person. Although your written instructions are very easy to follow. Thanks!
I am a beginner at reborning dolls and this mixing explanation for painting skintones will be very helpful now I understand the basics of mixing variation better. Will let you know how it turn out.
Is it hard to make skin tones
I’ve learned more reading about acrylic blending for skin tones. Thank you, I’m fairly new artist painter but have read a lot about artistic creative expression using different media. I have completed a few acrylics so would like to continue in that direction. Thanks for the knowledge to enable me to physically Push forward with confidence 🇺🇸🫡
Awesome update. I love this
Thanks for the tips it was very helpful