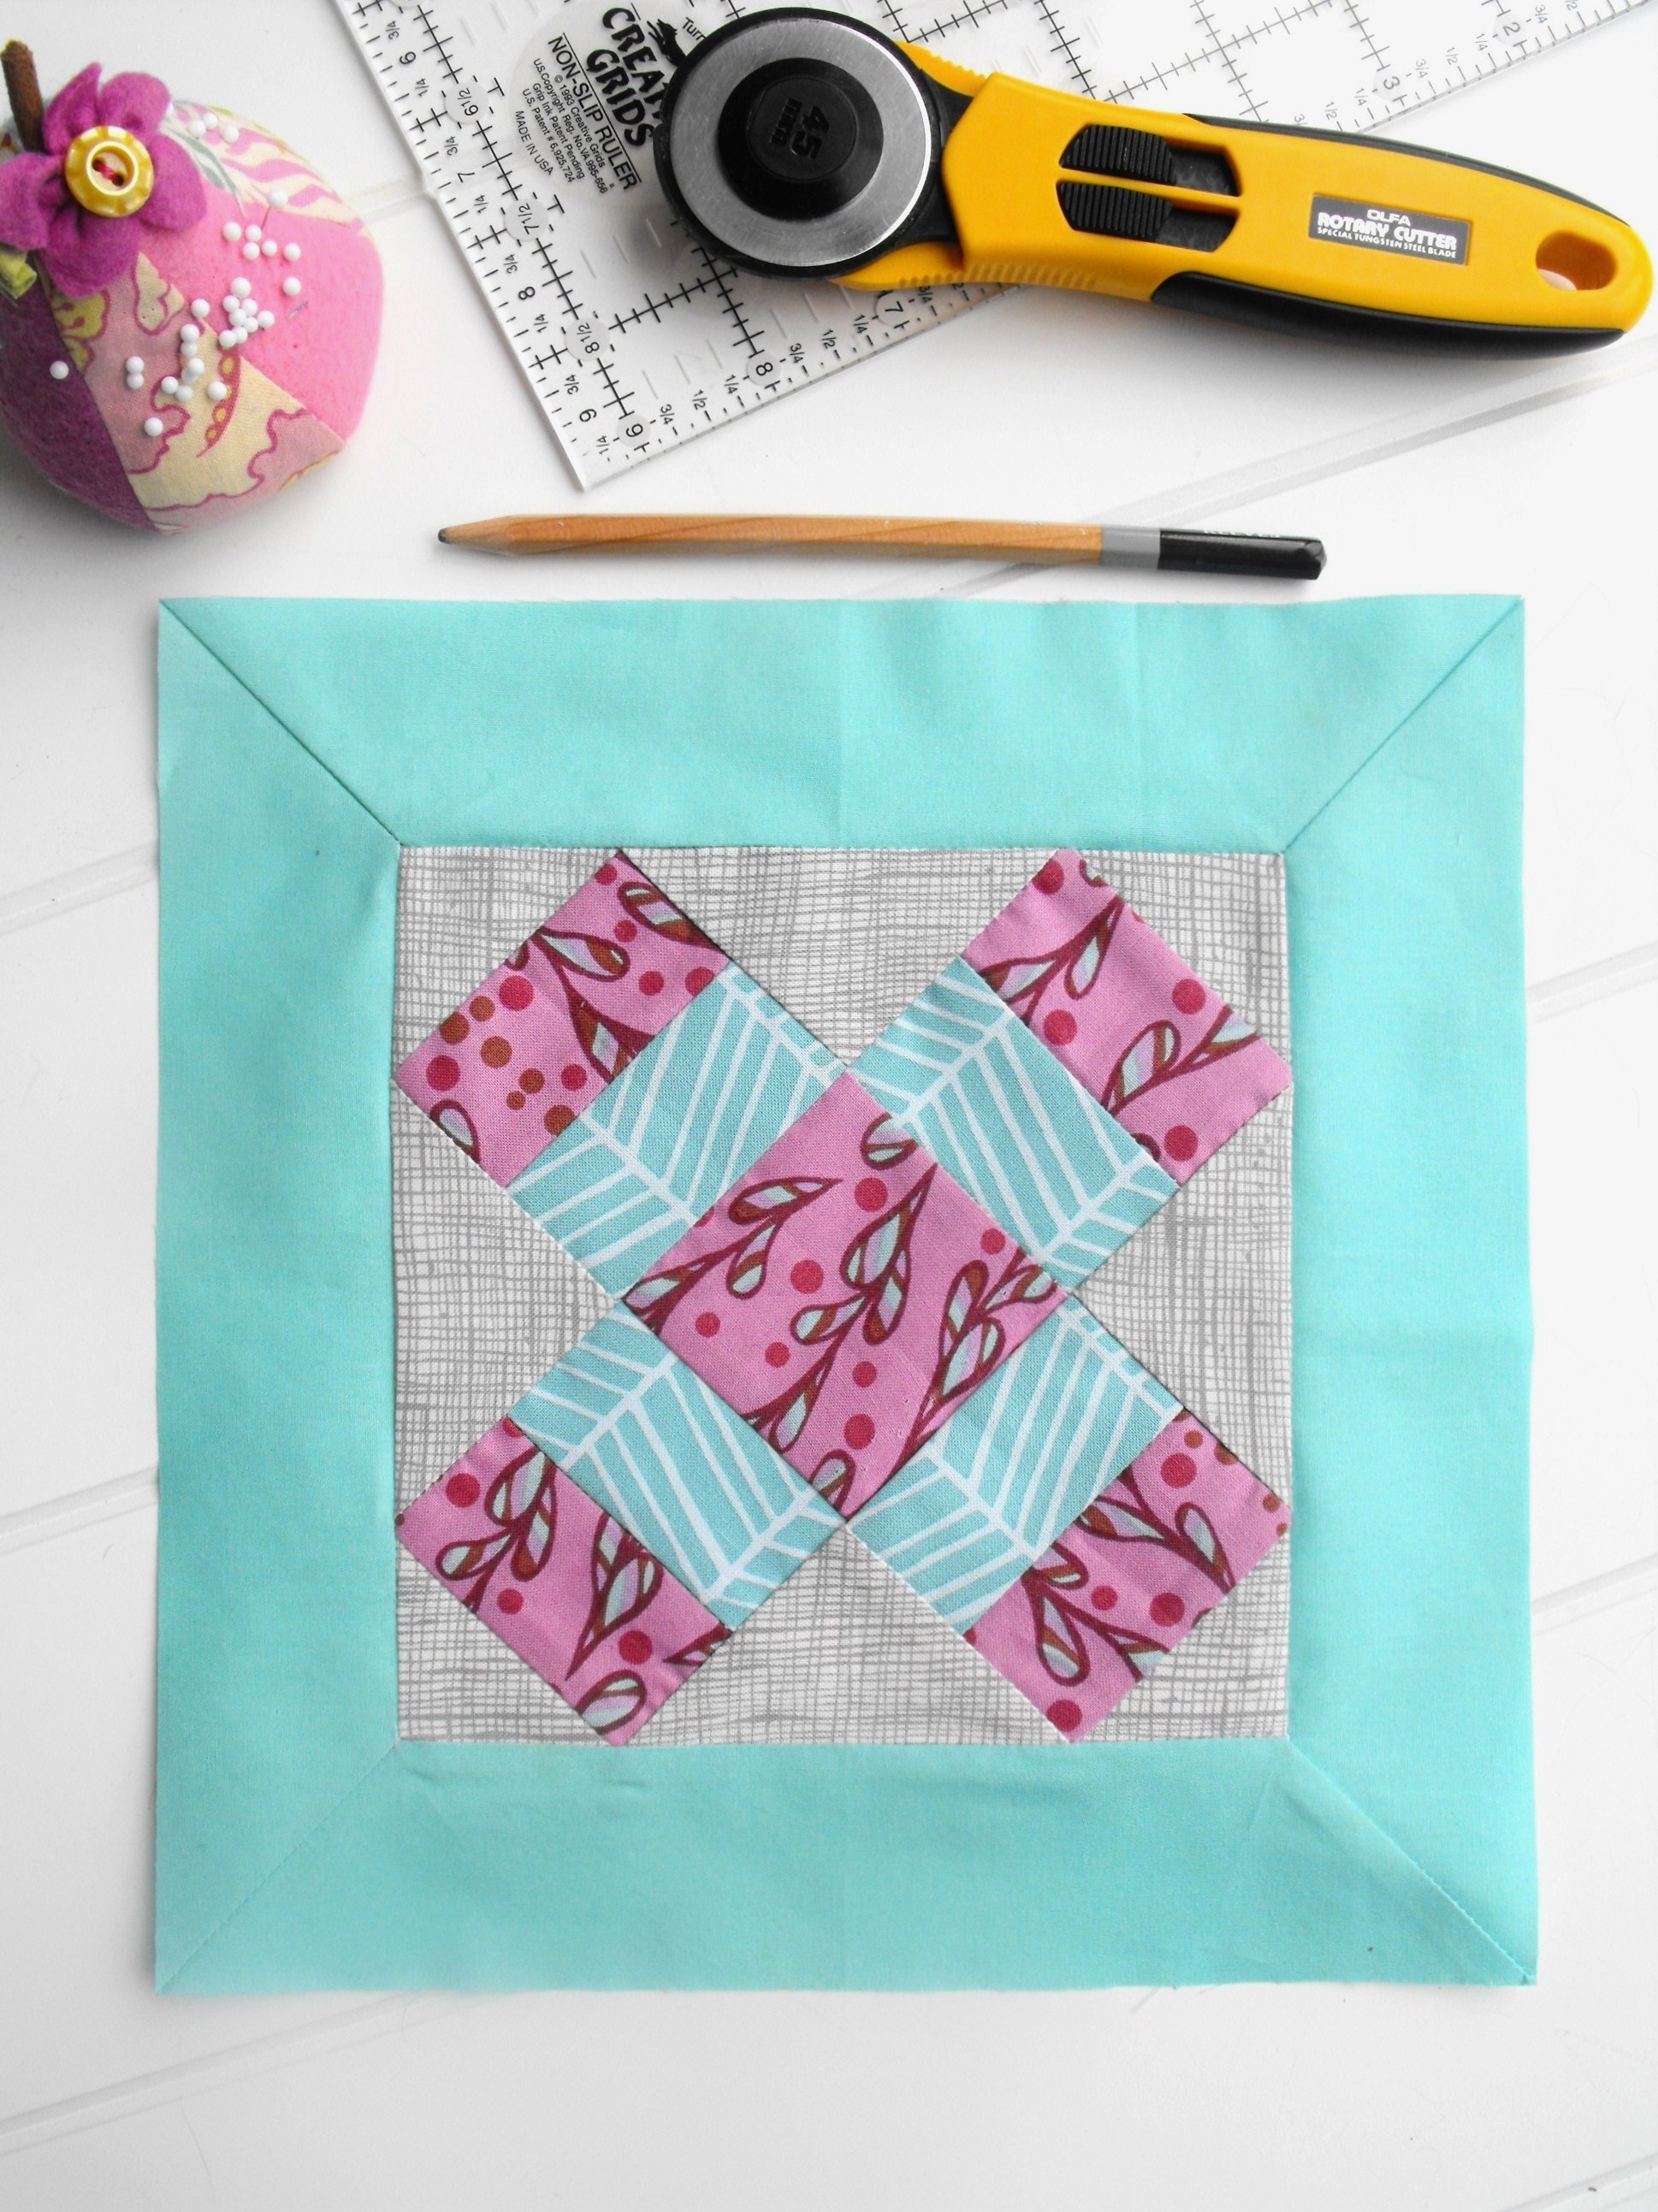
Let’s be real: that quilt top isn’t finished until it’s framed in a pretty border. And while there are several styles to choose from, the mitered border might just be the most wow-worthy. To add this sharp border to your next quilt, all you need to know is how to sew mitered corners.
What are Mitered Corners?
A mitered corner is when the corners meet at a 45-degree angle. It’s a more challenging border to create, but the picture-perfect angled seam is well worth the effort. And with careful measuring and accurate sewing, you can master the method.
Mitered Corner Quilt Border
Level: Intermediate
What You Need
Instructions
1. Determine Length
To find how long each border piece needs to be, use this equation: length of quilt side + (width of the border x 2) + 6″ = Total Border Fabric
- Length of quilt side: measure the length of the quilt’s side the border will be sewn to.
- Width of the border: measure the width of your quilt and multiply by two.
- Plus 6”: this includes the extra fabric needed for the mitered corner on each side of the border, plus the seam allowance.
Use this equation to find the border length needed for each side of the quilt, then cut the fabrics to the specifications.
For example, let’s say our quilt top is 40” x 50” and the borders are 2″ wide. The equation for the top and bottom border would be 40″ + 4″ + 6″ = 50″, so those two borders would each measure 2″ x 50″. The equation for the side borders would be 50″ + 4″ + 6″ = 60″, so my our side borders would measure 2″ x 60″.
2. Pin the Borders in Place
Fold the border and quilt top in half, marking each center. Line the centers up and pin them together. Pin the ends of the quilt top and border together, then pin to secure the two pieces throughout.
3. Sew the Borders to the Quilt Top
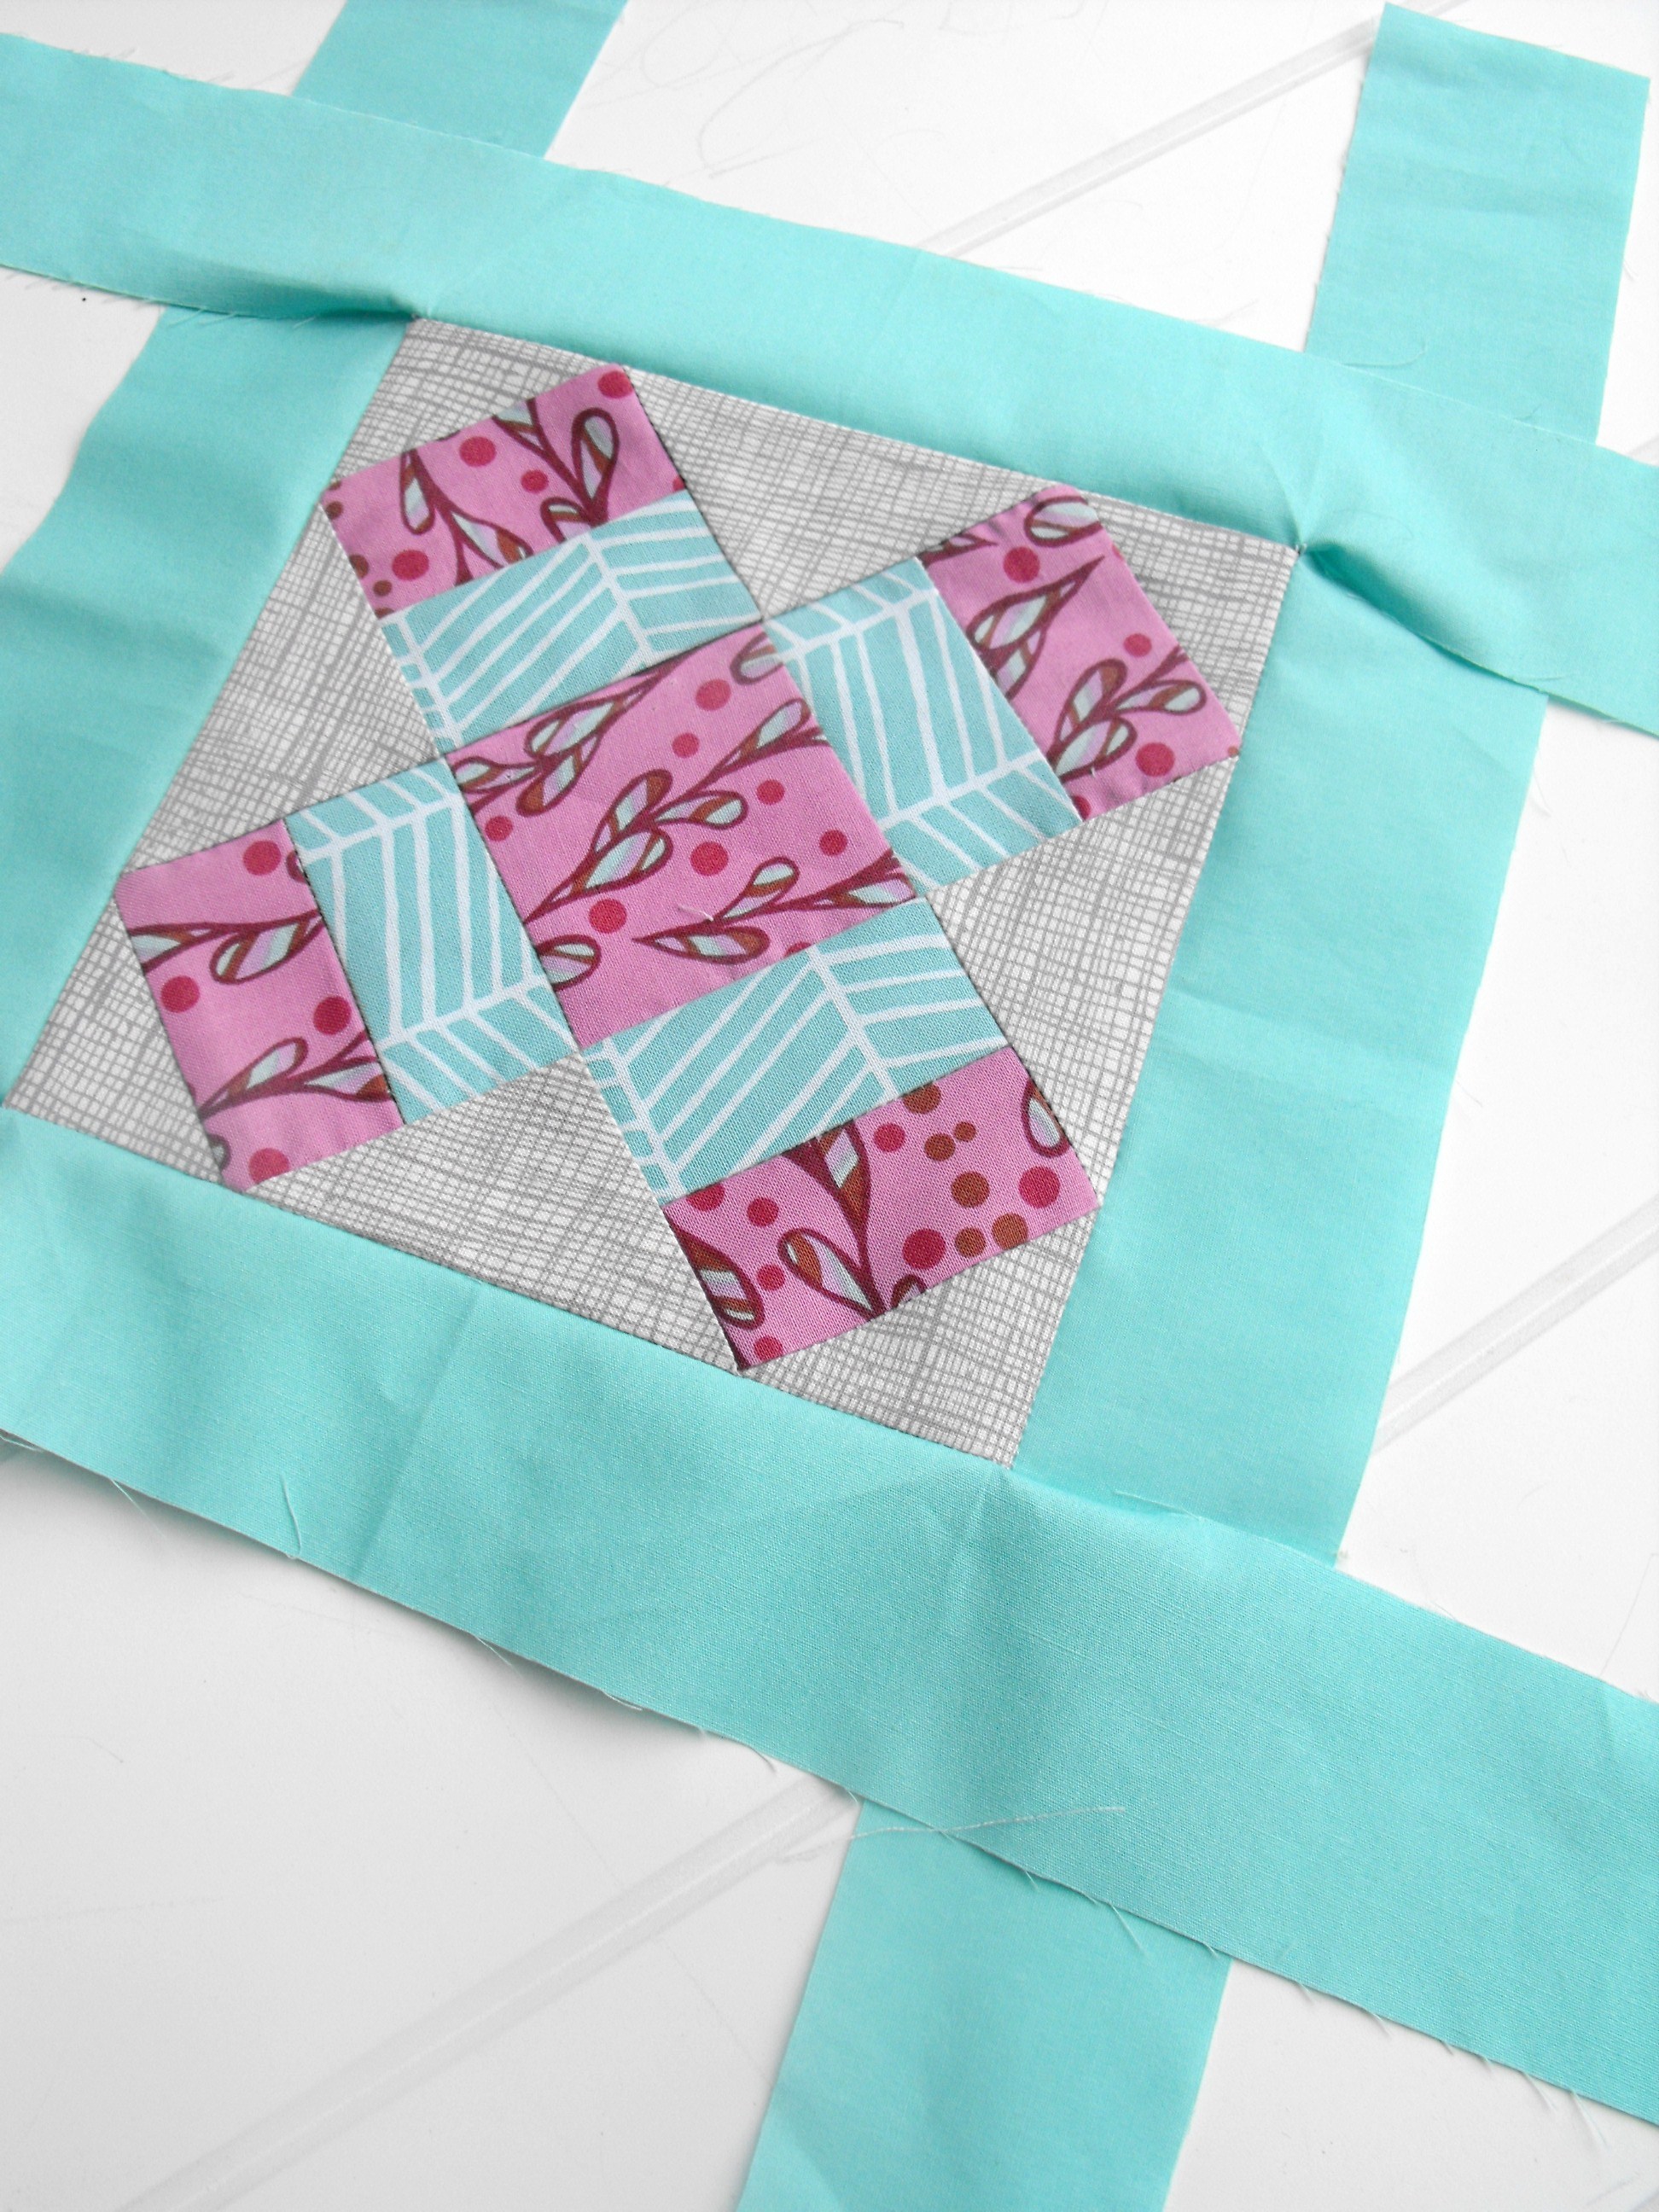
Sew the border to the quilt top, starting and stopping ¼” away from the ends of the quilt, backstitching at each end. Repeat with all four borders.
4. Mark
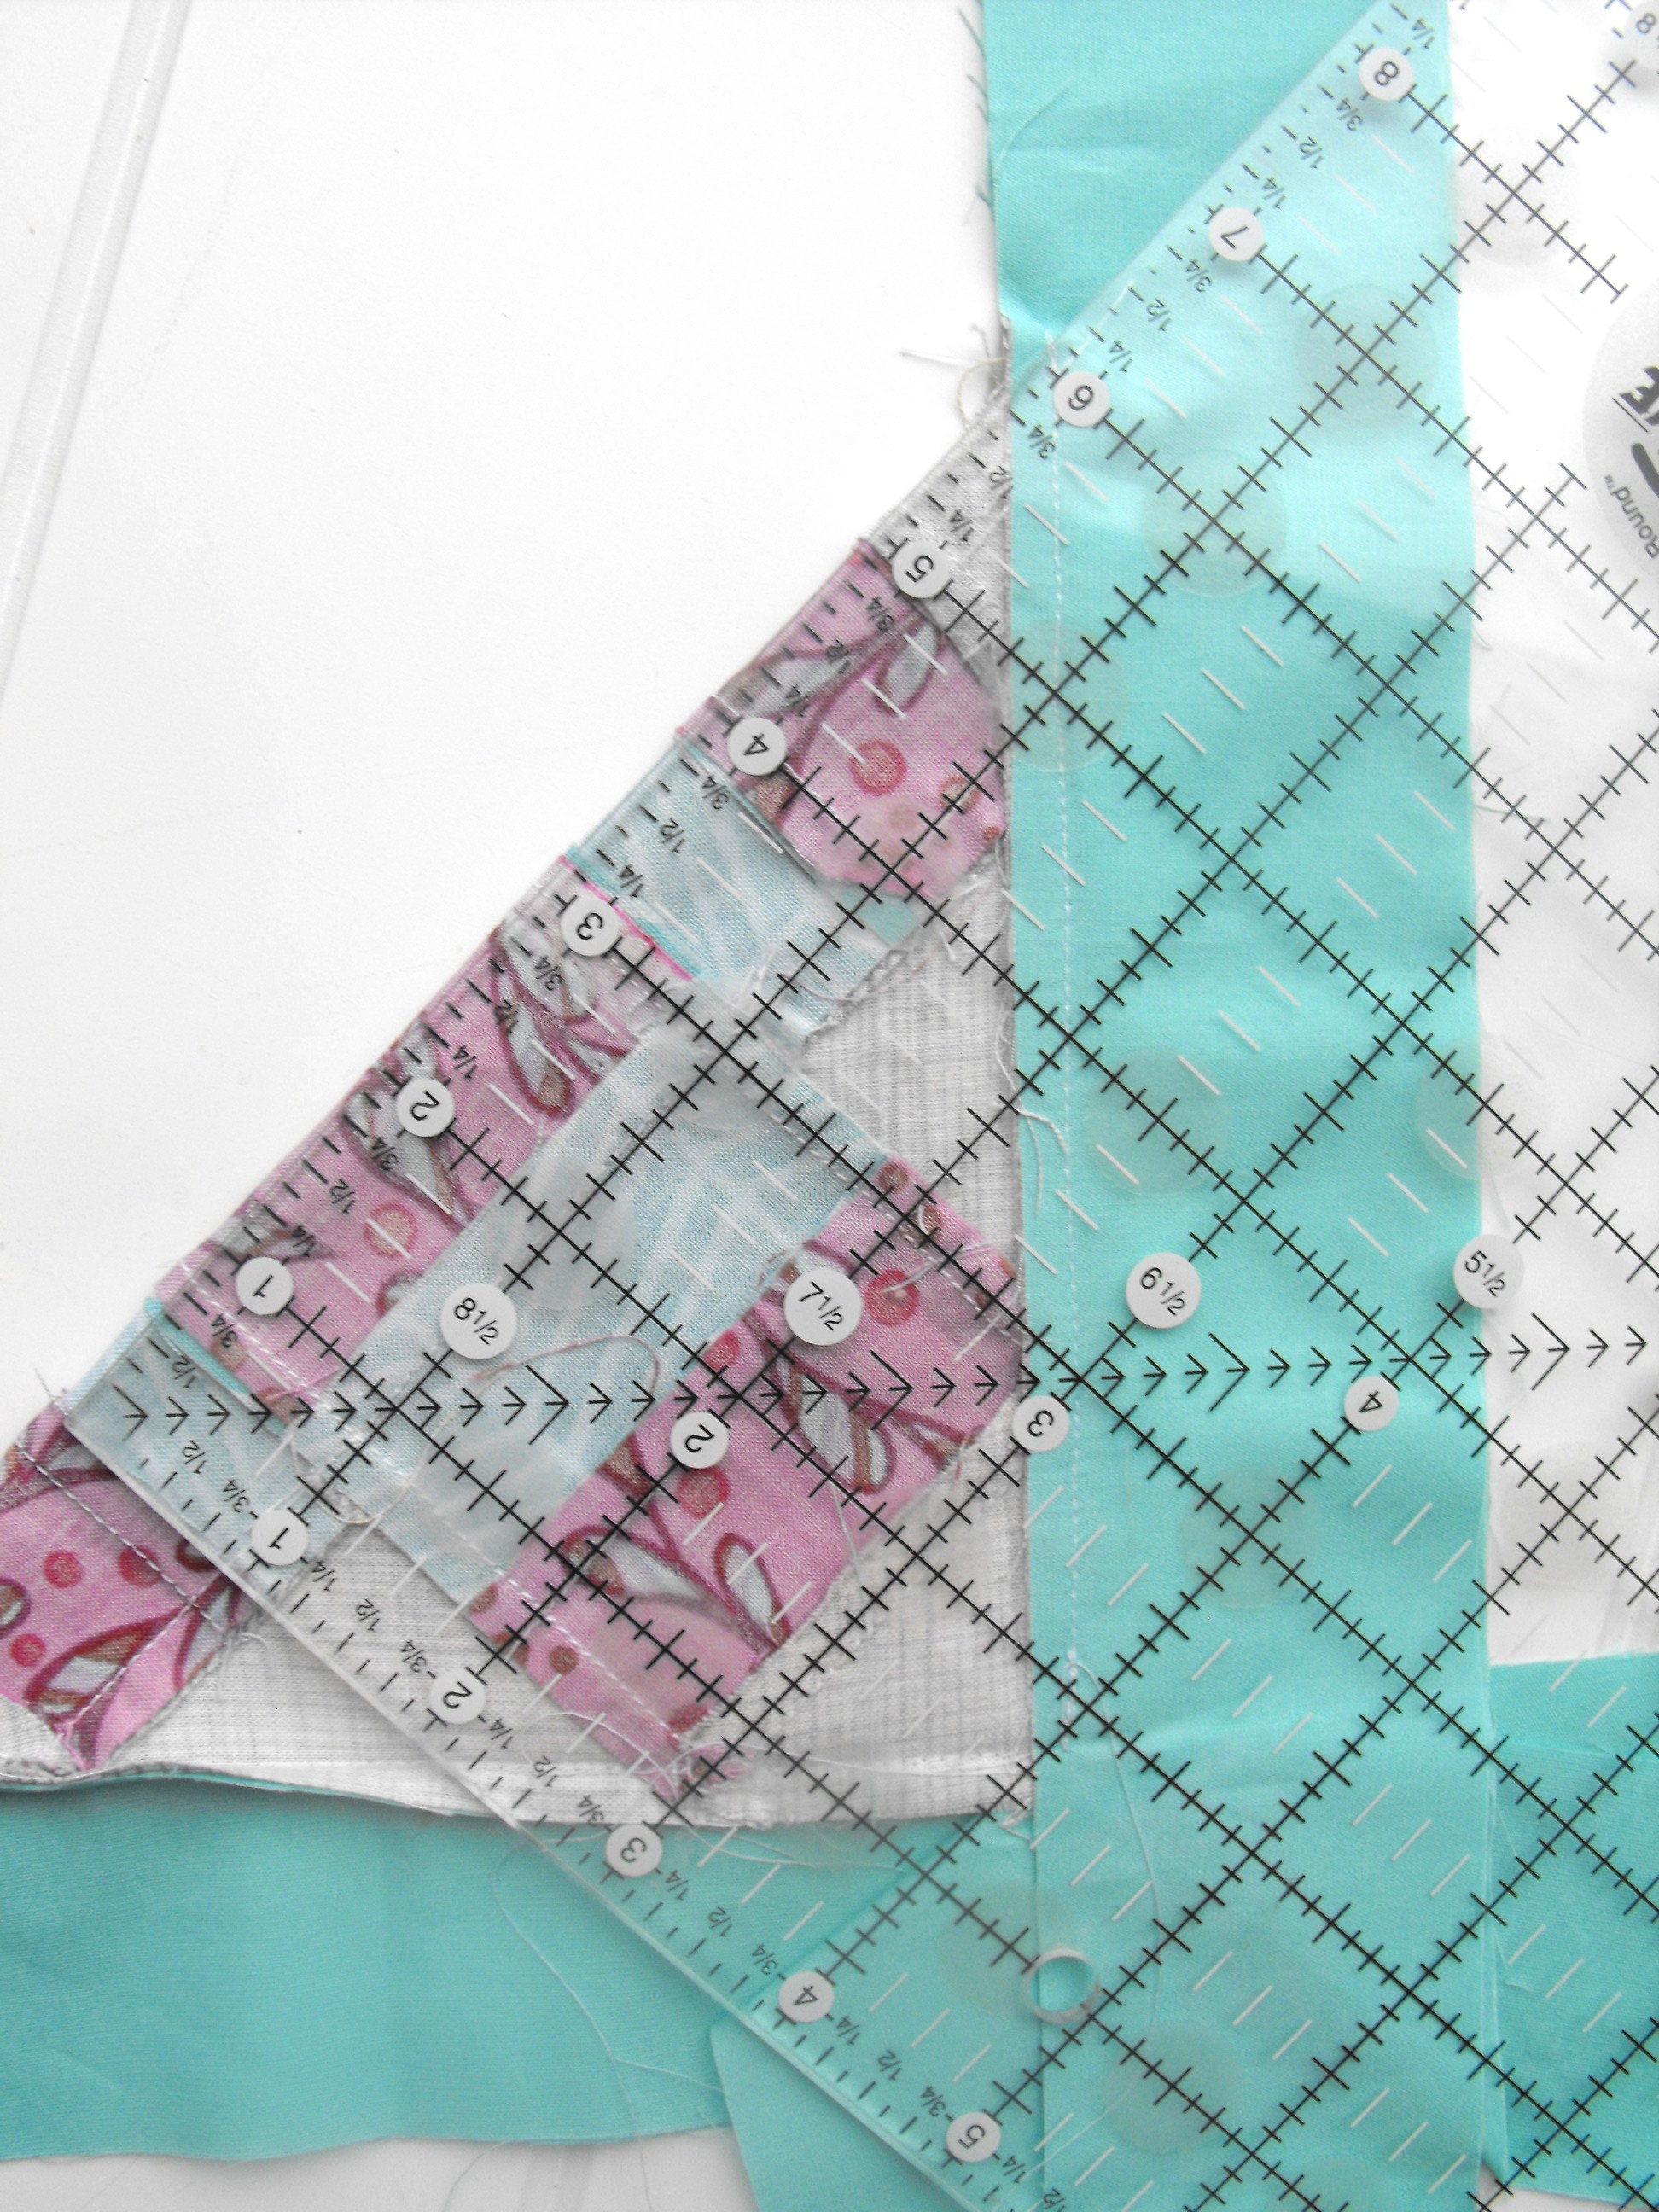
Fold the quilt top in half diagonally, right sides together, creating a triangle.
Line up two neighboring borders, like the top border and the right side border.
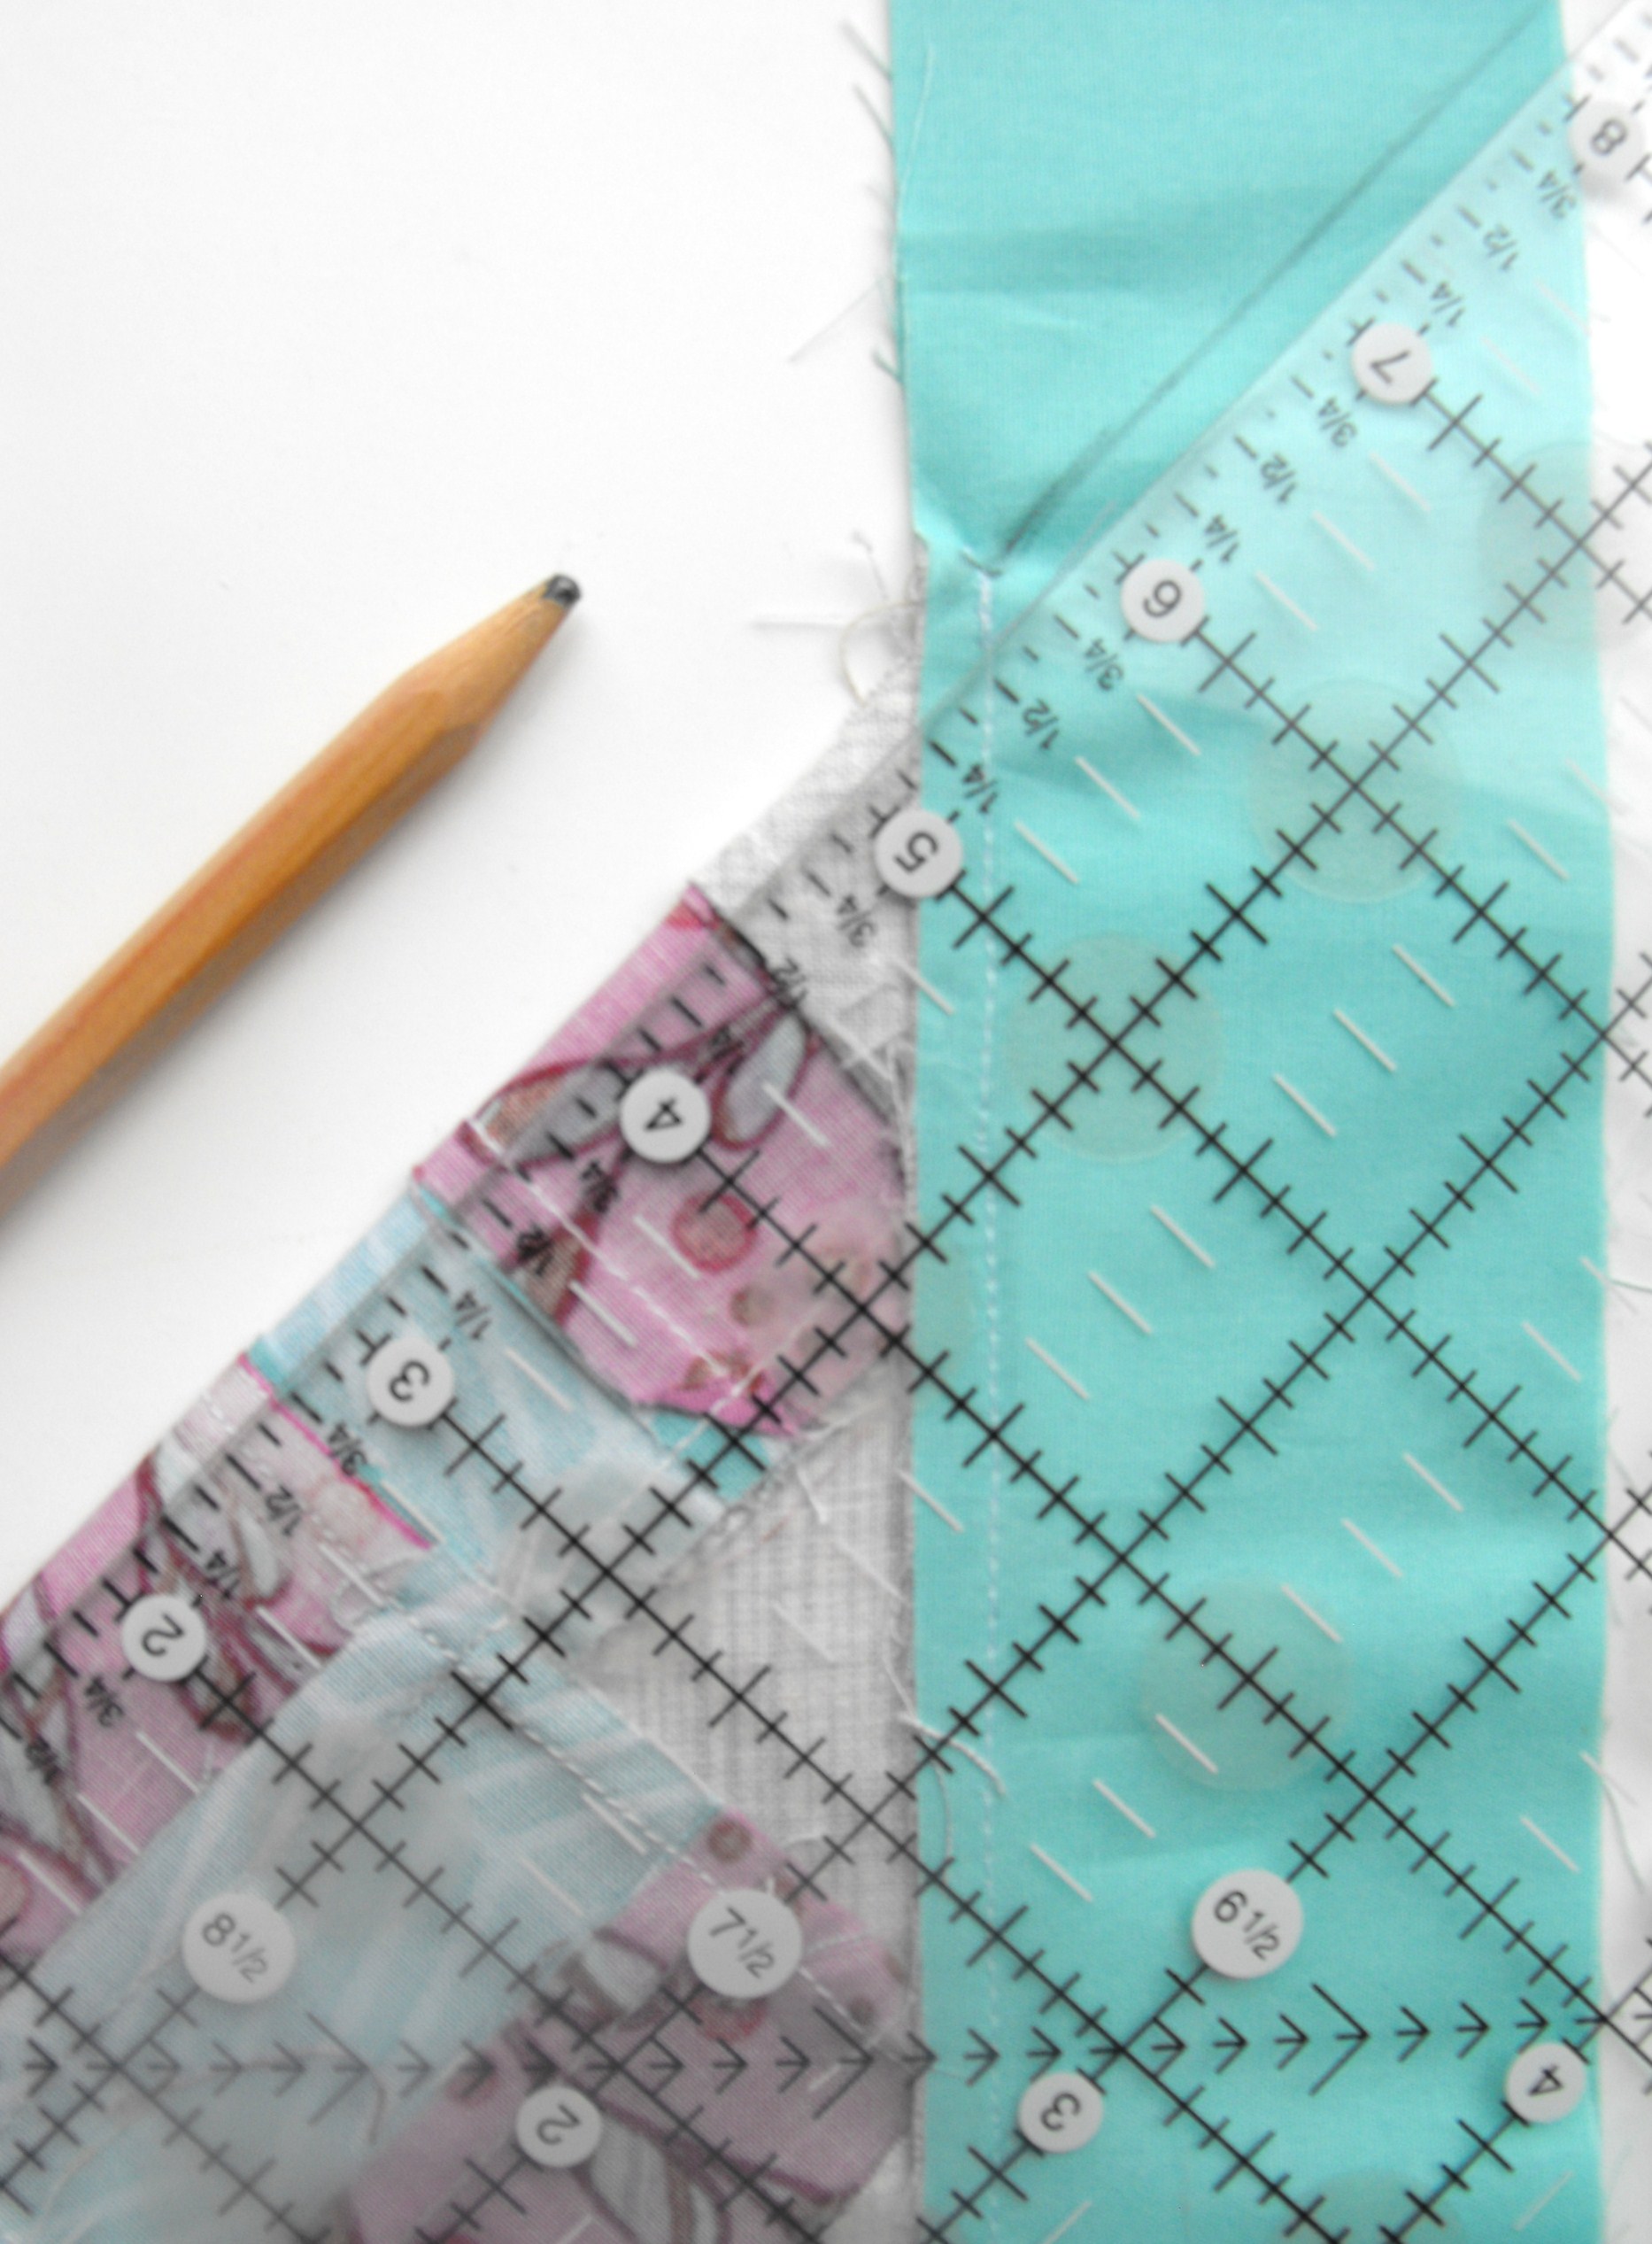
When lined up, grab a pencil and a ruler. Place the ruler along the 45-degree angle and extend it over the borders. Trace the angle onto the border and pin firmly place.
5. Sew the Mitered Corner
Sew from the stitch line out toward the end of the border, directly on the pencil line. Locate the stitch line you made when you sewed the border to the quilt top and begin sewing right there. This will ensure there are no gaps or spaces on the front.
Backstitch at the beginning and end. Unfold your quilt top and make sure there are no gaps in the inner corner and that the border lies flat.
6. Trim and Press
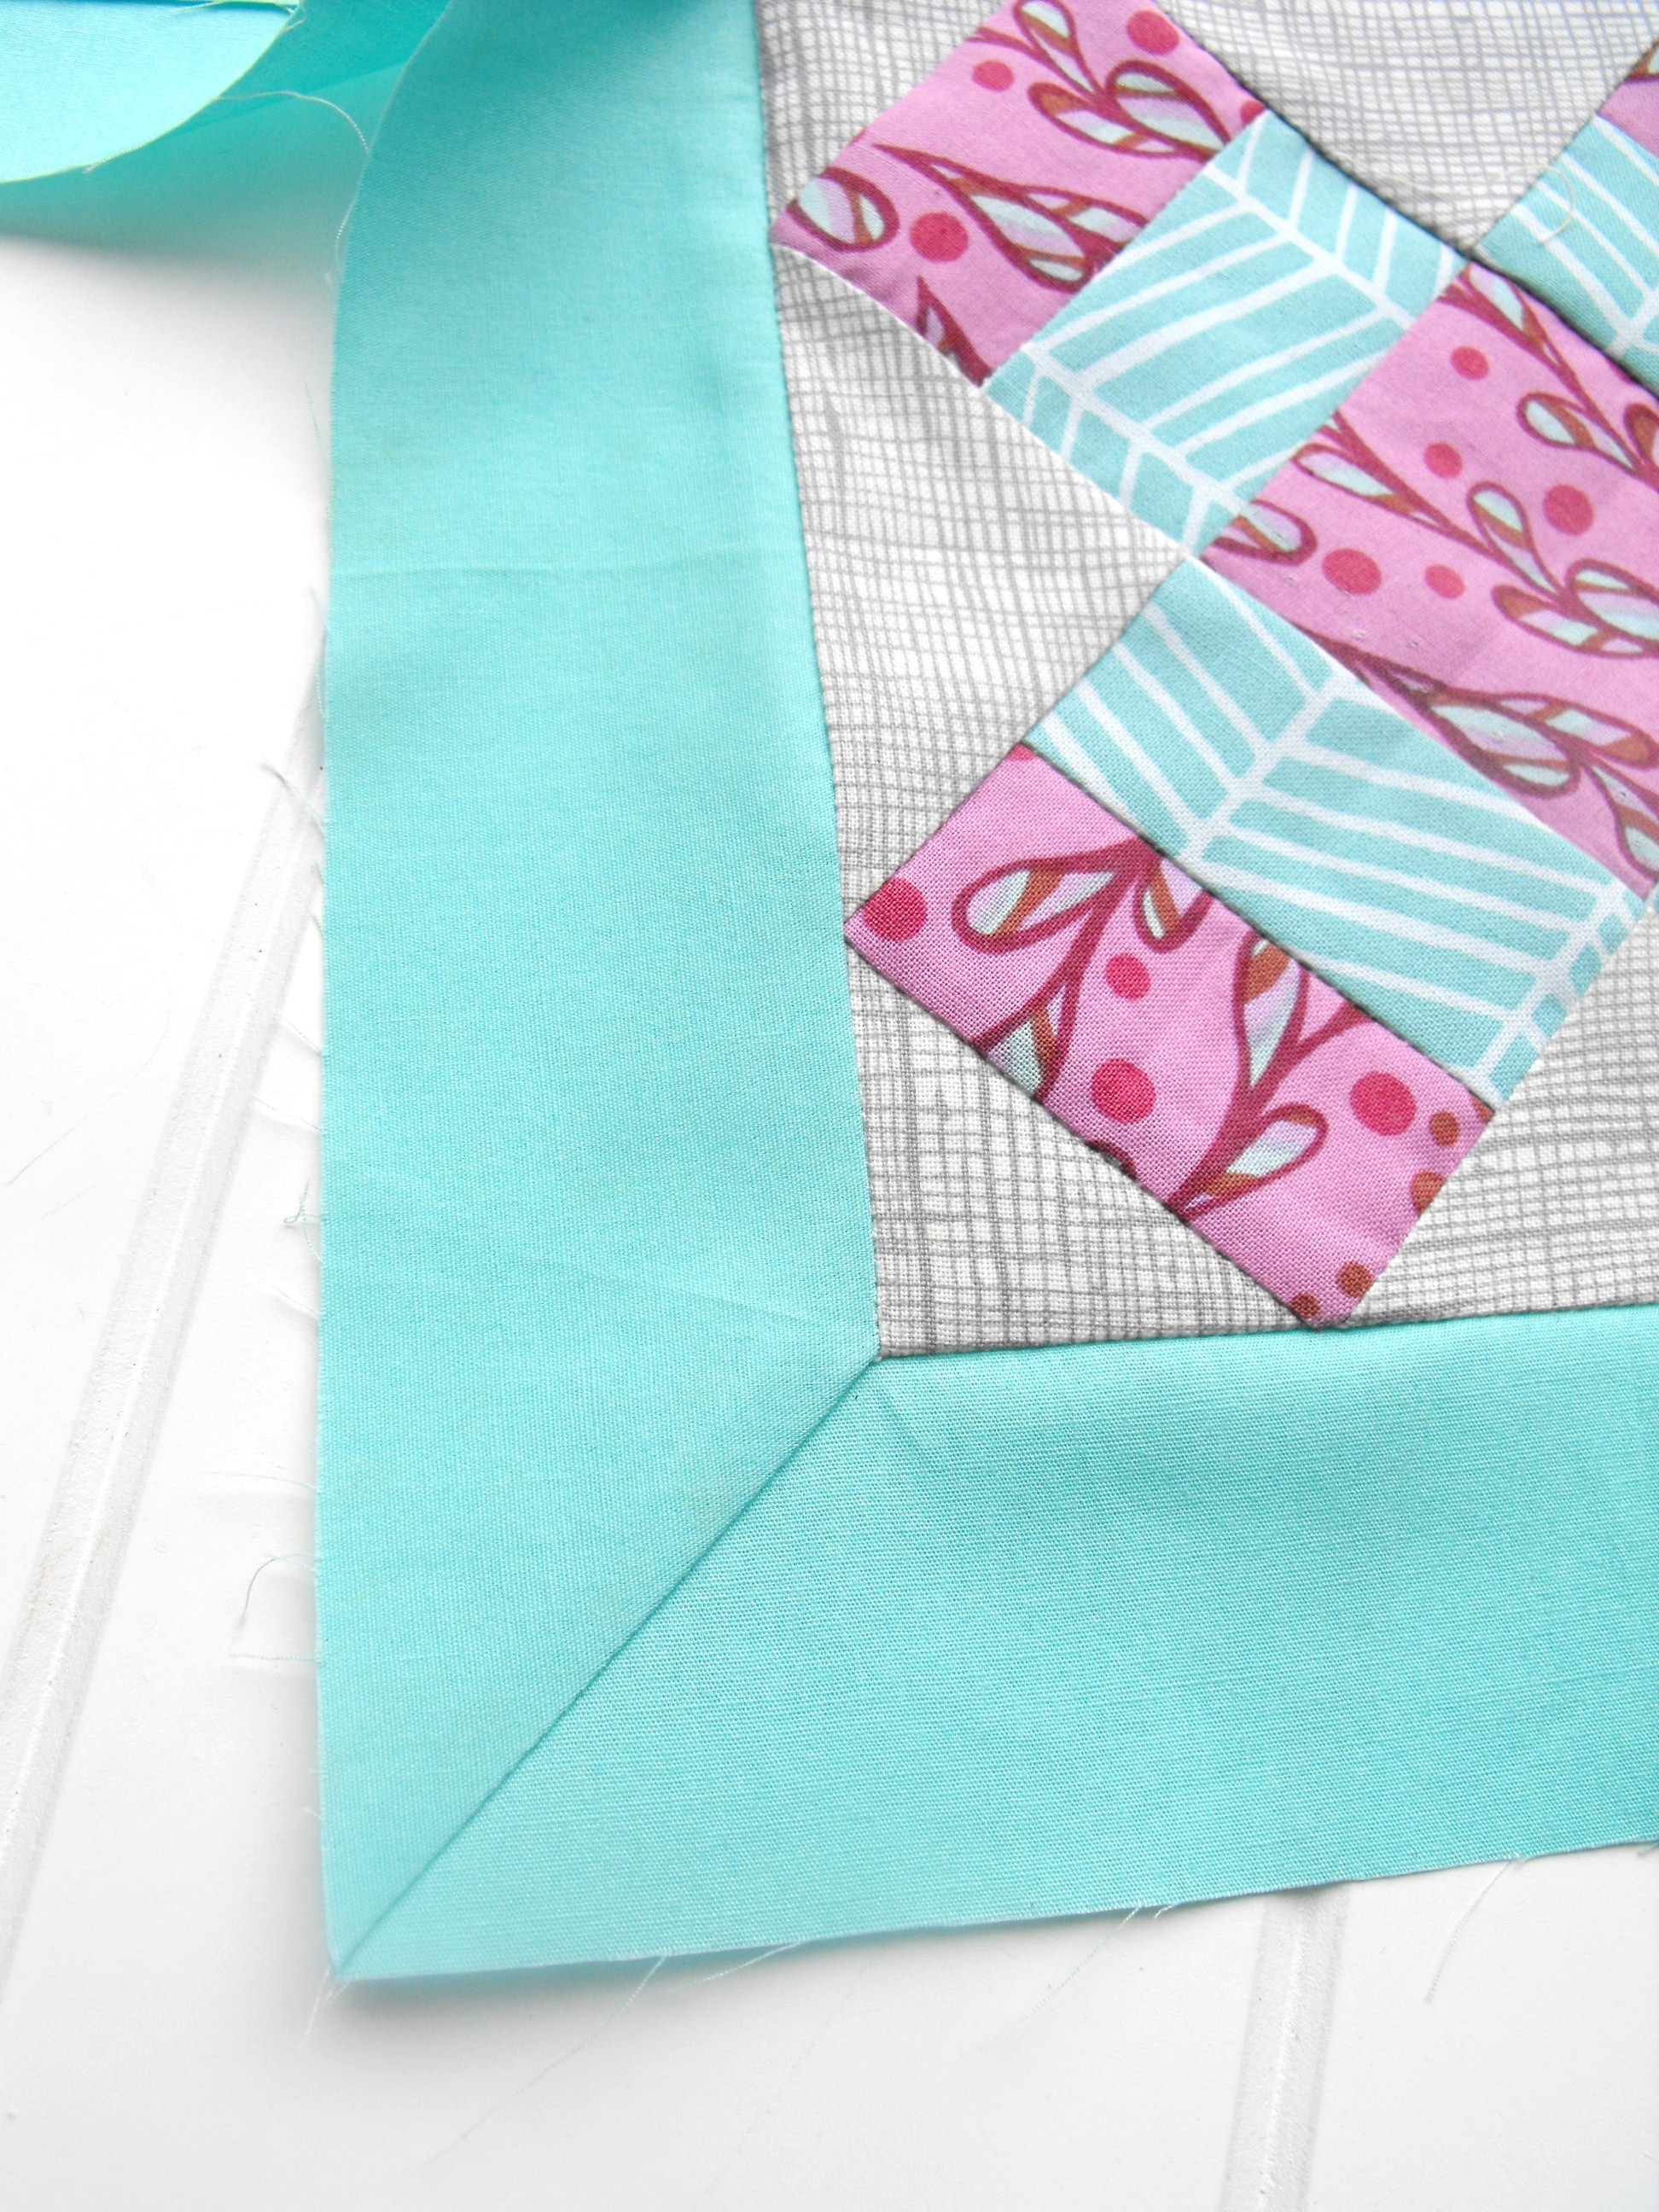
Trim the excess border to ¼” and press the seam. Repeat these steps with the other three corners, then sit back and admire your lovely work!
Looking for more information on mitered corners? Check out this article from our friends at National Quilters Circle: How to Make Mitered Binding Corners
This tutorial is not complete. You end up with beautiful mitered corners and a raw edge. How do you finish off the binding?
My sweet Mom and g ma would border many times. But I’m going to use this math anyway because as a kid I liked to watch them ,are beautiful quilts. And those quilts were love much on a cold January night. Thanks for sharing !
Thanks for the mitered corner instructions
how to cut and sew mitered corners on a quilt
The perfect way to sew any miter corner. I tried it and it does work perfectly. Thanks
Perfect!
Sounds like a perfect solution. Will try it soon.
Thank you
How would you do the mitre on a table runner that is 20 inches wide by 48 in long?
Great tutorials! Need video tutorial too!