There’s an old saying in my family that the best way to ruin an adventure is to bring too much stuff. I have found that to be true for en plein air watercolor painting, too.
Time spent painting outdoors is actually even better when you bring the bare minimum. Here’s a rundown on what you really need.
Paints

This isn’t the time to port along your gorgeous porcelain studio palette filled with 24 of your favorite pigments. I prefer a small, metal travel palette with refillable half-pans. If you buy one to fit 24 watercolor half pans, you can use the top section to hold up to 12 well-chosen pigments, and the bottom half to house a few brushes, a pencil, an eraser and anything else you may need.
Fill your tin with either pre-made watercolor pans, or make your own by squeezing a bit of tube paint into the empty half-pans. As for colors, choose the ones you like best for your normal watercolor work, or try out this limited palette based on the split-primary system:
It’s also a good idea to add a warm earth tone like Burnt Sienna, which you can mix with blues to easily create browns and grays, and a convenience green like Sap Green that you can transform into a myriad of natural greens by mixing in other colors from your palette.
Paper
For en plein air painting, you can’t go wrong with a small block from your favorite watercolor paper brand. If you’re not familiar with blocks, they’re tablets of paper that are glued on all four sides, so there’s no need for a drawing board or for stretching your paper — you can just paint right on the block.
If you choose to use single sheets, make sure to have large metal clips or tape to secure your paper to a drawing board. I tend to keep my outdoor work small, nothing larger than 9×12.
Brushes
I keep four brushes for painting outdoors:
If I’m carrying them in my palette box, I use masking tape to secure them so they don’t move around (and damage the fine tips). Otherwise, I tape them to a piece of cardboard and put them inside a plastic zipper bag to protect the points.
Keep your brushes simple. Not only does it lighten your load, but it forces you to be more creative in your mark making. Many artists also like to use water brushes on outdoor excursions to avoid carrying extra containers of water, but I tend to stick to my tried-and-true brushes, and just bring an old plastic peanut butter jar filled with water in my pack. And don’t forget a rag or some paper towels to wipe your brushes and to lift extra paint off your painting, if needed.
Easel
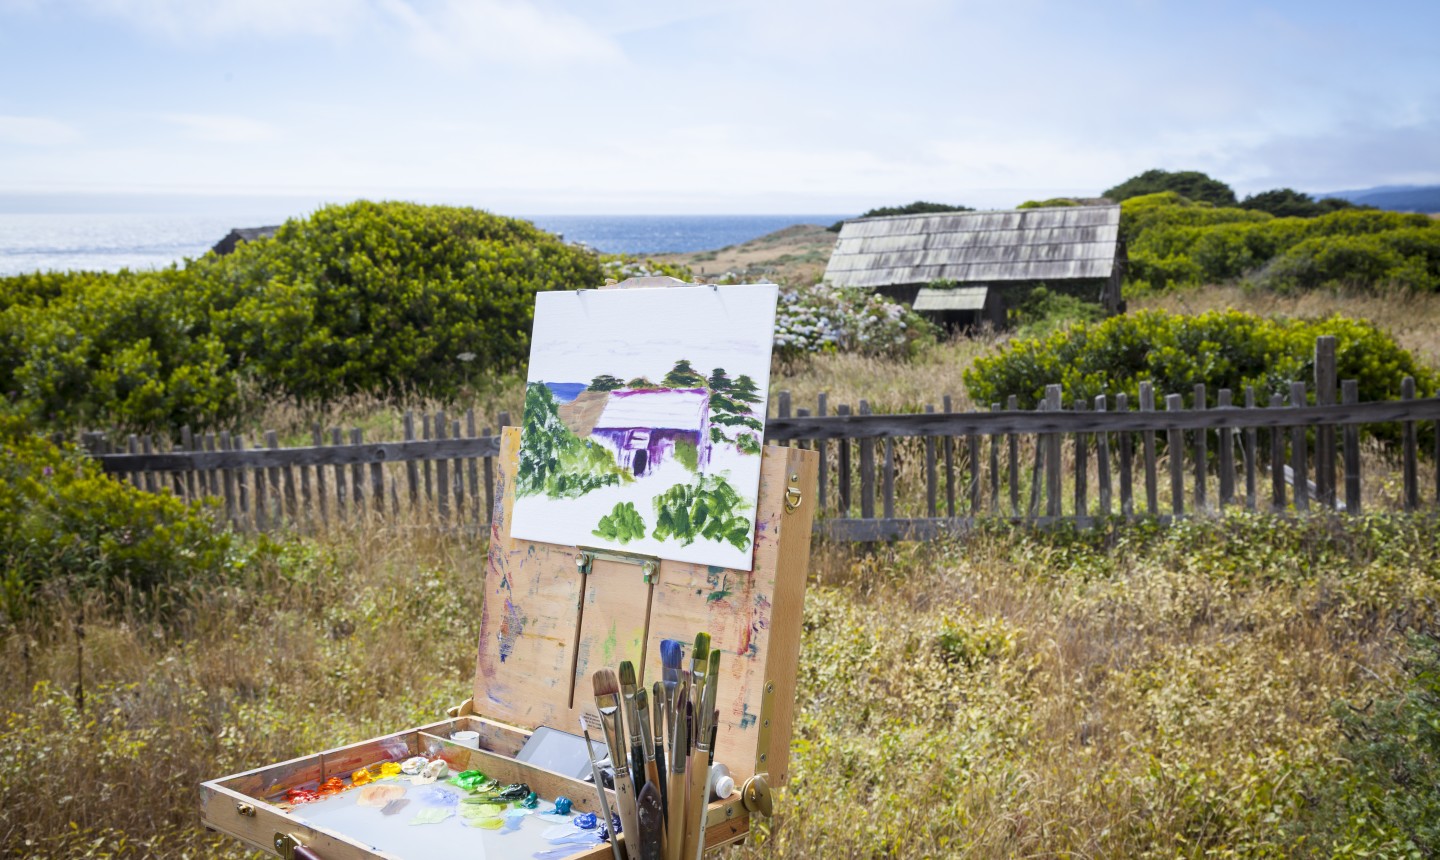
Do you paint on an easel at home or in the studio? If so, you will probably want a portable outdoor easel for en plein air painting too. Personally, I don’t use easels. When I want to tilt my paper, I just hold it in my hand or rest it on my lap.
But if you are planning to bring along an easel, make sure you do your research. Some are very easy to travel and hike with. Some can be frustrating to set up and demand a perfectly even ground for stability. Some can be secured into the soil for extra stability in windy conditions.
My best advice is to first try outdoor painting without an easel. You might be surprised by how much you like holding your paper block in one hand and painting with the other. And It’s far less to carry.
Other Materials
You’re likely to want a chair, and you shouldn’t skimp here! Find yourself the most comfortable portable chair that’s lightweight, but sturdy enough to hold your weight and your body size comfortably. (Camping and outdoor equipment stores are excellent places to look.) Of course a chair isn’t strictly required; If the weather is nice and dry, I bring a small tarp to spread out on the ground and leave my chair at home.
Another key piece of equipment you might not have thought of: An umbrella, preferably one that clips to the back of your chair. You’ll rely on this as a sun shade, since watercolor is pretty tricky in direct sunlight. The paint dries instantly and the glare can really make it tough to see colors clearly. Also, wear a hat with a brim. This will shield your eyes and make it much easier to see the gorgeous vistas you’re trying to capture.
You also might want to consider a tray that can attach to your chair to hold supplies, or even a small portable camp table. Remember some basics like snacks, water and sunscreen… and you’re all set for a long and satisfying painting session en plein air.
Looking to get started with watercolors? Check out the class Startup Library: Watercolors below!
Love the tips...haven't tried watercolor plein air...definitely see the advantages of oil and solvents.
Could you post a picture of what you have to carry and what you put your supplies in.