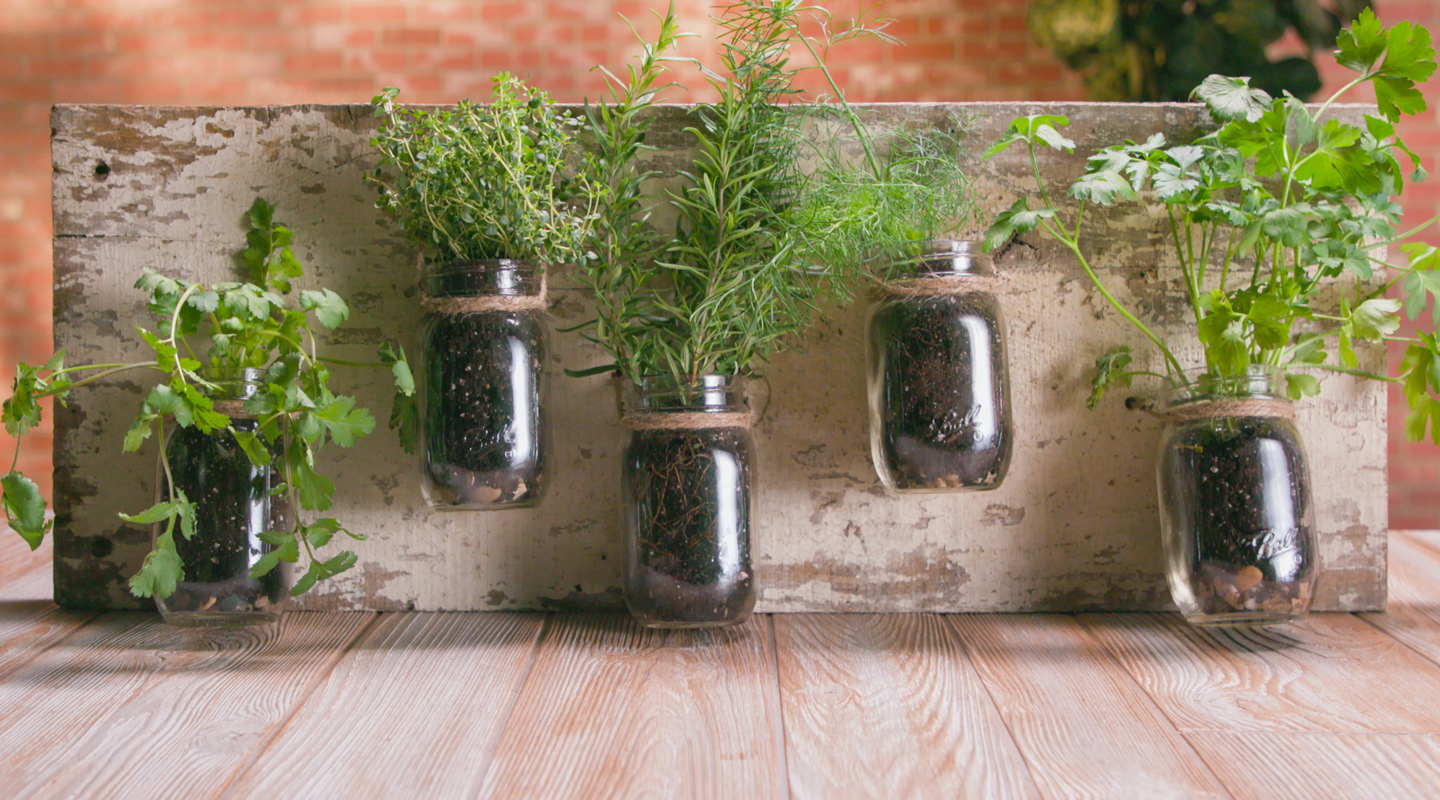
Having a constant supply of fresh herbs in your kitchen doesn’t have to be a far-away dream. This luxury can be yours as soon as this weekend, thanks to this smart and space-saving design.
Mason Jar Herb Garden
Level: Easy
What You Need
Instructions
1. Drill Your Holes
Start by drilling holes through your wooden board. You need two holes for each jar, spaced so you’ll have one hold on either side of the jar’s mouth.
Pro Tip: Before you start drilling, lay your jars on the board to find the placements you love. That way you can get the positioning perfect and mark in pencil where your holes will go.
2. Thread the Twine
Cut a long length of jute twine. Don’t get too caught up on the exact length — you can always cut off the excess later.
Thread the twine through the drilled holes and use it to loosely connect your jars to the board, looping the twine a few times for strength. (Don’t tie it down snug yet — you’ll do that after you add glue in the next step.)
3. Make Sure It’s Solid
The twine will hold the jar against the board, but to make sure it’s secure enough to hold the weight of your plants, go ahead and add some glue.
After adding a strong adhesive, pull both ends of twine so the jar is tightly against the board. Tie ‘em together in the back of your board and cut off any excess twine.
Repeat these steps until each mason jar is in place and the glue is dry.
4. Add a Drainage Layer
In case you haven’t noticed, mason jars don’t have drainage holes. So it’s important to take extra steps to protect the roots from excess water.
Start by placing small rocks or gravel at the bottom of your jars. Then sprinkle a little charcoal on top. This drains and absorbs any excess water so it can’t harm your roots.
5. Plant Your Favorite Herbs
Now just fill the jars with soil and plant your herbs! You might want to make a cute label for each jar so you don’t get ‘em mixed up. Place the board in a sunny kitchen spot, and you’ll always have fresh herbs just a few steps away!
Can you please tell me actually were do I place the glue and why, thanks Gail.
I miss the watercolor posts.
I love this idea and I love herbs. I do have a question, with the weight of the filled jars and the plants, what keeps the board from tipping over? Thank you.
This is awesome, and can be done with many types of jars. A good way to use those jars ye, re-purpose them. thank ye
Such a great idea
I love plants, flowers, and gardening...
How come I get emails from you but when I try to log in you do not recognise my email address?
Nice! Is there a way to save this to a "favorites" folder or something to make it easy to get back to?