l love a good DIY project just as much as the next girl. But a few years ago, I was craving a hobby I could also teach myself. And, preferably, teach myself while at home mindlessly watching Netflix. Brush calligraphy ended up being just the one! And while I won’t get into how many hours I spent practicing while binge-watching Parks & Rec, you really only need 10 minutes a day to hone this new skill.
Getting started
Brush lettering is a great give-it-a-try craft because you don’t have to go spend a zillion dollars on supplies just to see if you like it. You’ll need a notebook with lines or grid marks (I literally picked up a pack of graph paper from the convenience store) and a few brush pens. I found it helpful to use both a thicker and a thinner pen: Try a Dual Brush Pen for a thicker, more flexible tool; and the Fudenosukes for something a bit smaller and easier to control.
I’d also suggest poking around on Instagram to watch videos and see how other letterers form their words and hold their pens — observation was key when I started learning. You can practice freehand (which is what I did), or print out practice sheets that you can trace.
Ready to go? Here’s what week one should look like:
Your first-week practice guide –
Monday: Basic strokes

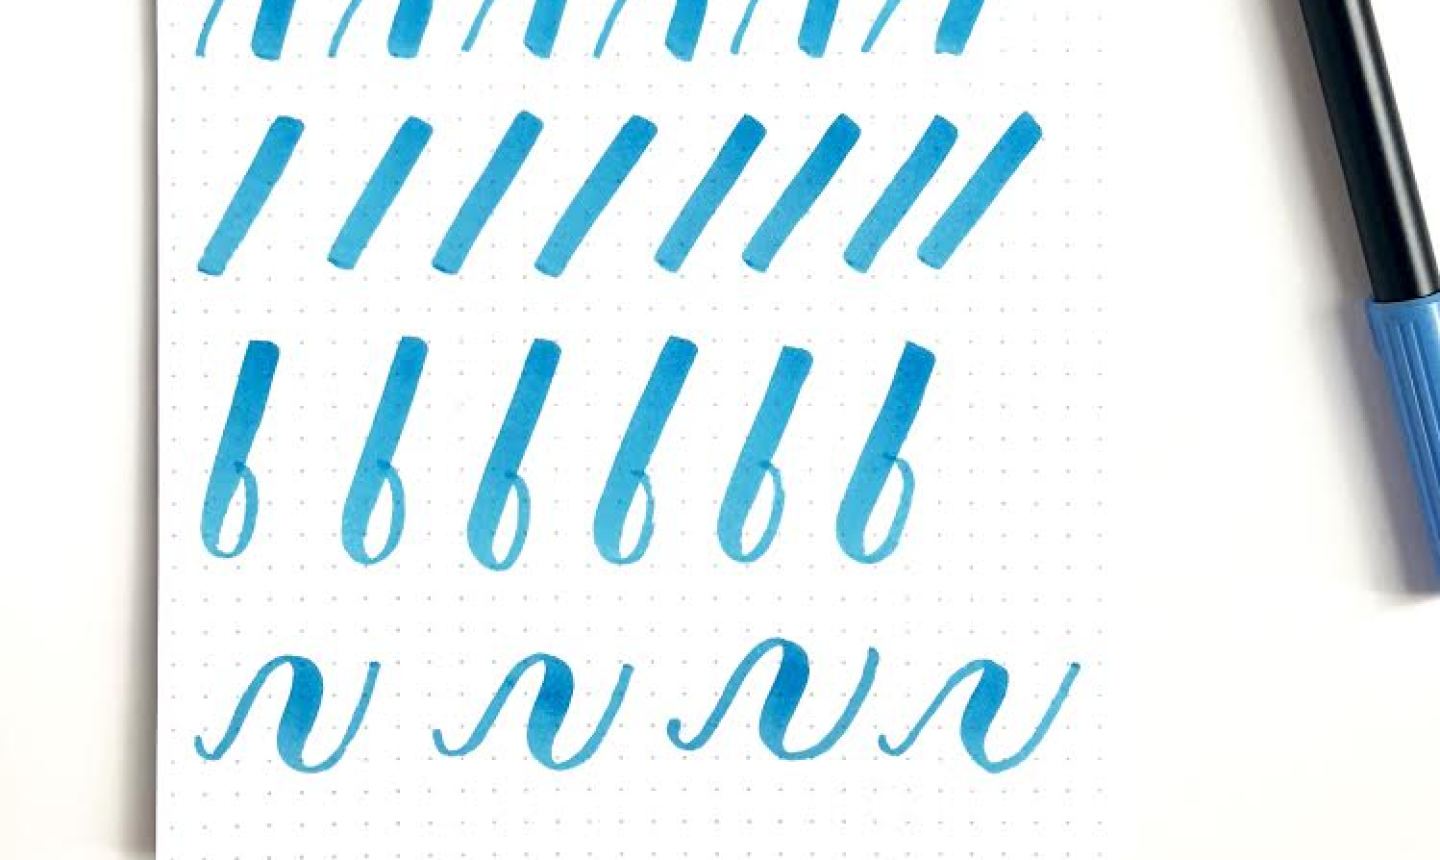
Don’t jump right into letters. Spend ten minutes just getting used to the pen and practicing different strokes — straight lines, slanted lines, loops, U-shapes — so you can see how the pen and your hand moves. You’ll notice that it feels different than writing in cursive, because calligraphy gets its unique look from the variation between thick and thin lines. Spending some time filling pages with loops and lines will help you get acclimated to the pen. (In the future, this is also a great warm-up exercise!)
Tuesday: Practice letters A-I

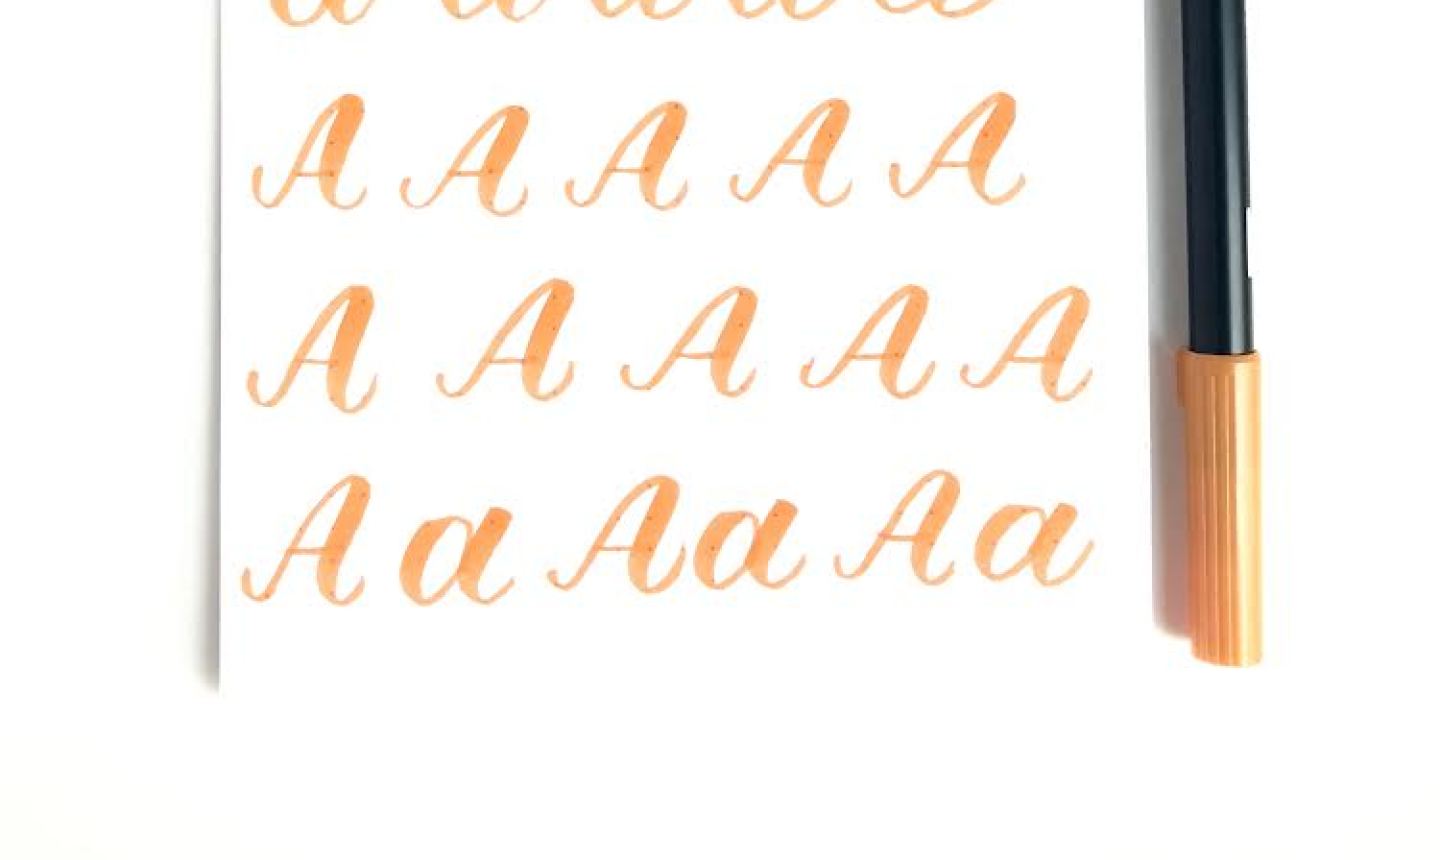
Divide the alphabet into sections that you can practice daily. Writing the letter A one time won’t help you learn its structure or the correct pressure to put on each stroke. However, filling an entire page with A’s will, and I guarantee you’ll see improvements happen right on the page. (Positive reinforcement, people!)
Start with letters A through I, and fill at least two lines up with both uppercase and lowercase versions of each one. Pay attention to the grid lines on your page to make sure your strokes stay even. And go slow. Most of the videos you see on Instagram are sped up at least two times — so when you’re just starting out, take your time.
Wednesday: Practice letters J-R
Keep going! Fill pages with your letters and feel free to keep the forms simple to start. You’ll see lots of flourished letters that you want to try (you know, the kind on wedding invitations), but it’s better to start with the basic cursive forms you’re already comfortable with. Once you’ve got that down, you can add on to your letters.
Thursday: Practice letters S-Z
You know the drill.
Friday & Saturday: Connect your letters

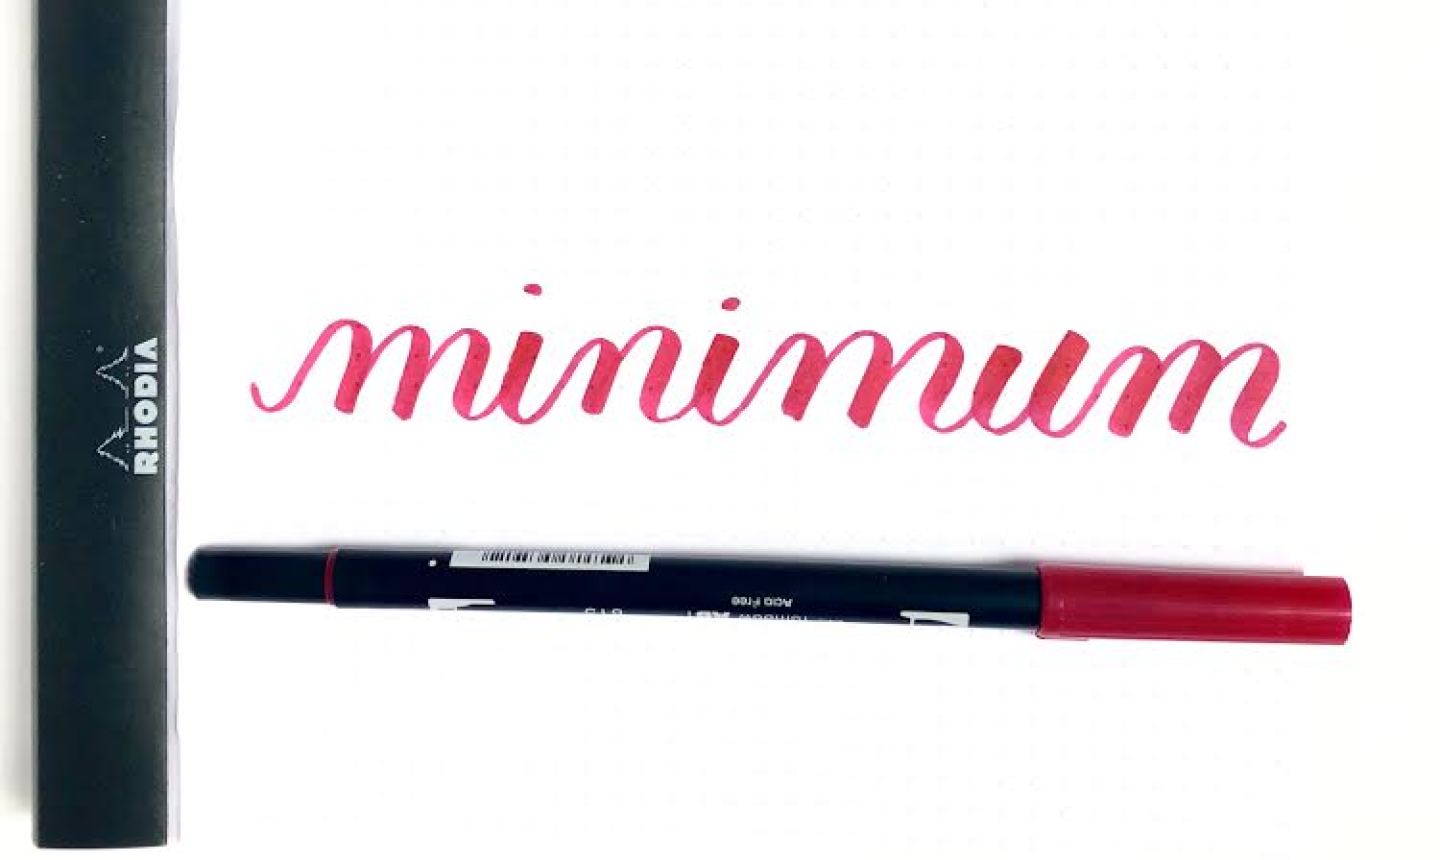
Time to start making words! A lot of letterers practice with the word “minimum” because of its fluid up and down strokes. Plus, all the letters are the same height and have similar connecting strokes, which makes it easier to write. Once you’re comfortable with that word, think of others that might loop less similar letters together, such as G and H, Sand Q, W and R. Practice your name, the word “calligraphy,” or even the word “practice!”
Sunday: Try a few phrases
One of the toughest things about learning calligraphy is composition. Once you’ve mastered the alphabet and have started to refine your lettering style, you’ll want to start composing quotes and handmade birthday cards and other fun phrases. This involves figuring out how words and letters fit together on a page. Take Sunday to have some fun and practice a few short phrases — keep them five words or less so that you don’t get overwhelmed.
And there you have it! In 10 minutes a day, you started learning a new skill. You probably already have a favorite and a least favorite letter (I really don’t like lowercase f), and you’ve found some fun new Instagram accounts to follow. Keep practicing — you’ll be amazed how quickly the words start to flow!
Share tips, start a discussion or ask other students a question. If you have a question for an expert, please click here.
Already a member? Sign in
No Responses to “Learn Brush Lettering in 10 Minutes a Day (For Real)”