Are you one of those knitters who ignores the gauge section of the pattern? If so, that could be why you're running out of yarn on projects or stitching projects that just don't quite fit.
Read on to find out all about gauge.
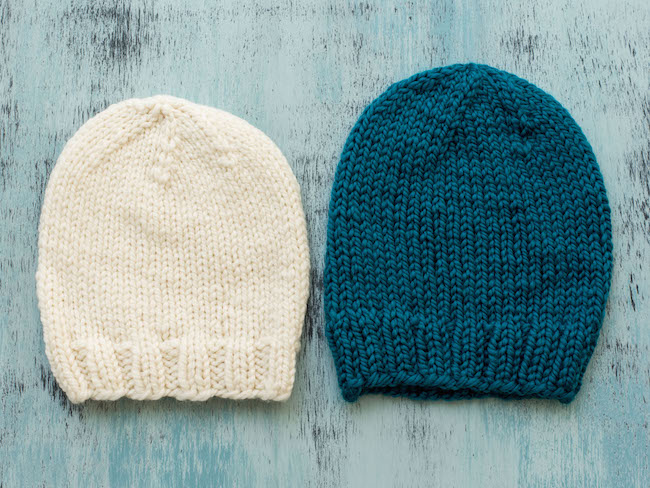
Take a peek at these hats below. They're both knit with the same pattern in the same size, but they have different gauges. And those different gauges affect more than just the fit of the hat.
What's gauge?
Gauge is just a measure of how big your stitches are. Gauge has two parts: stitches and rows. This means gauge is measuring both the width of your stitches and the height of your stitches.
Not all knitters stitch the same way: Some of us tend to knit tighter stitches while others have a very loose technique. You can't guarantee that your knitting technique matches that of the designer, so getting gauge helps you match the designer's pattern without having to make any changes to your knitting style.
Why does gauge matter?
You don’t necessarilyhave to match gauge, as long as you’re prepared for the consequences. If you don’t match the gauge, some potential consequences include:
1. Your garment/accessory won't fit.
The reason patterns have gauge is so the finished measurements of your project are what you expect. If you're knitting a sweater with multiple sizes and you want it to fit your 38-inch bust, then you'll need to match gauge to make sure that your stitch sizes match those of the designer. That way, you know that when you follow the pattern, the bust will be 38 inches. If you don't, then you could end up with either an oversized sweater or a sweater than you can't pull over your head!
Here's an example:
Take a look at the hats below above. This pattern comes in three sizes, and I wanted to make the medium size.
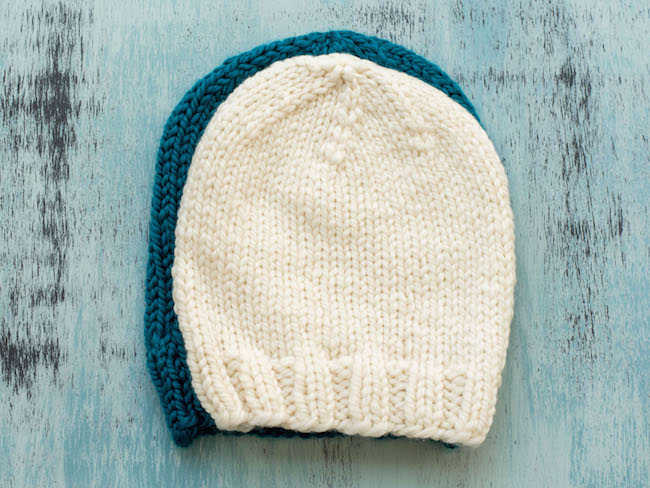
The medium-size cream hat on the left was knit with size 11 needles, as the pattern recommended. But this resulted in an incorrect gauge: the hat had 10.5 stitches per 4”, rather than 9 stitches per 4” as the pattern listed. As a result, the hat’s circumference was 18” — which is supposed to be the finished size of the size small hat!
Increasing the needle size to 13 did the trick on the teal hat, getting the gauge correctly to 10.5 stitches per 4”. The result was a hat that had a circumference of 18.5" — the correct measurement for the medium-size hat.
2. You'll run out of yarn or have leftover yarn.
Let's say, for instance, that you buy a knitting kit. The kit comes with the yarn you need to make the project, and you're making the largest size. But if you are knitting fewer stitches per inch than the gauge in the pattern, you'll run out of yarn before you reach the end of the project.
On the other hand, if you are knitting more stitches per inch than the gauge in the pattern, then you will have way more yarn leftover than you intended. This is especially disappointing when you can't return the yarn you've already purchased.
If you make sure to knit the correct gauge, you'll have just the right amount of yarn.
3. The project might not look like how it’s pictured.
Gauge affects more than just fit and size. If you look again at the Sand Stitch Hats, you'll notice that the gray hat has stitches that are close together, creating a nice solid fabric. The ocean hat, on the other hand, has looser stitches and a little bit more drape.
Sometimes a designer wants loose stitches on purpose, but that's not the case with this cozy hat. Not only does the gauge affect how the hat sits on my head, but it also affects the warmth. When your stitches are too loose, cold air can creep in, and you don't want that with this hat.
How to get the right gauge
So you’ve decided you want to get the right gauge. Good choice! You have two options:
1. Just start the project and measure as you go.
This option can work for some wearables like mittens and even hats. You can begin the project and either measure the gauge or just test the fit after a few rounds. Just be prepared to rip it out and start over if it doesn’t fit.
2. Knit a gauge swatch.
This is the safest bet, especially if you're working on a larger project like a sweater. Take a look at your pattern and see what the gauge measurement is. The standard gauge is 4 inches by 4 inches, but sometimes it varies.
Cast on twice the number of stitches that the gauge calls for, using the needles recommended by the pattern. For example, if the gauge is 8 stitches per inch, cast on 16 stitches. This will give you a nice big swatch to measure from.
Tip: I knit the swatch pictured above in the round, since the hat pattern was in the round. I did this because my in-the-round knitting tends to be looser than my flat knitting. When you're swatching, replicate the stitch as closely as possible to get an accurate number.
Knit until your swatch is about 6 inches tall, to give you a large swatch to measure. Then bind off.

The first thing you'll want to measure is the number of stitches. Lay your ruler or measuring tape across the center of the swatch and count the number of stitches that fit into 4 inches. This is your stitch gauge.
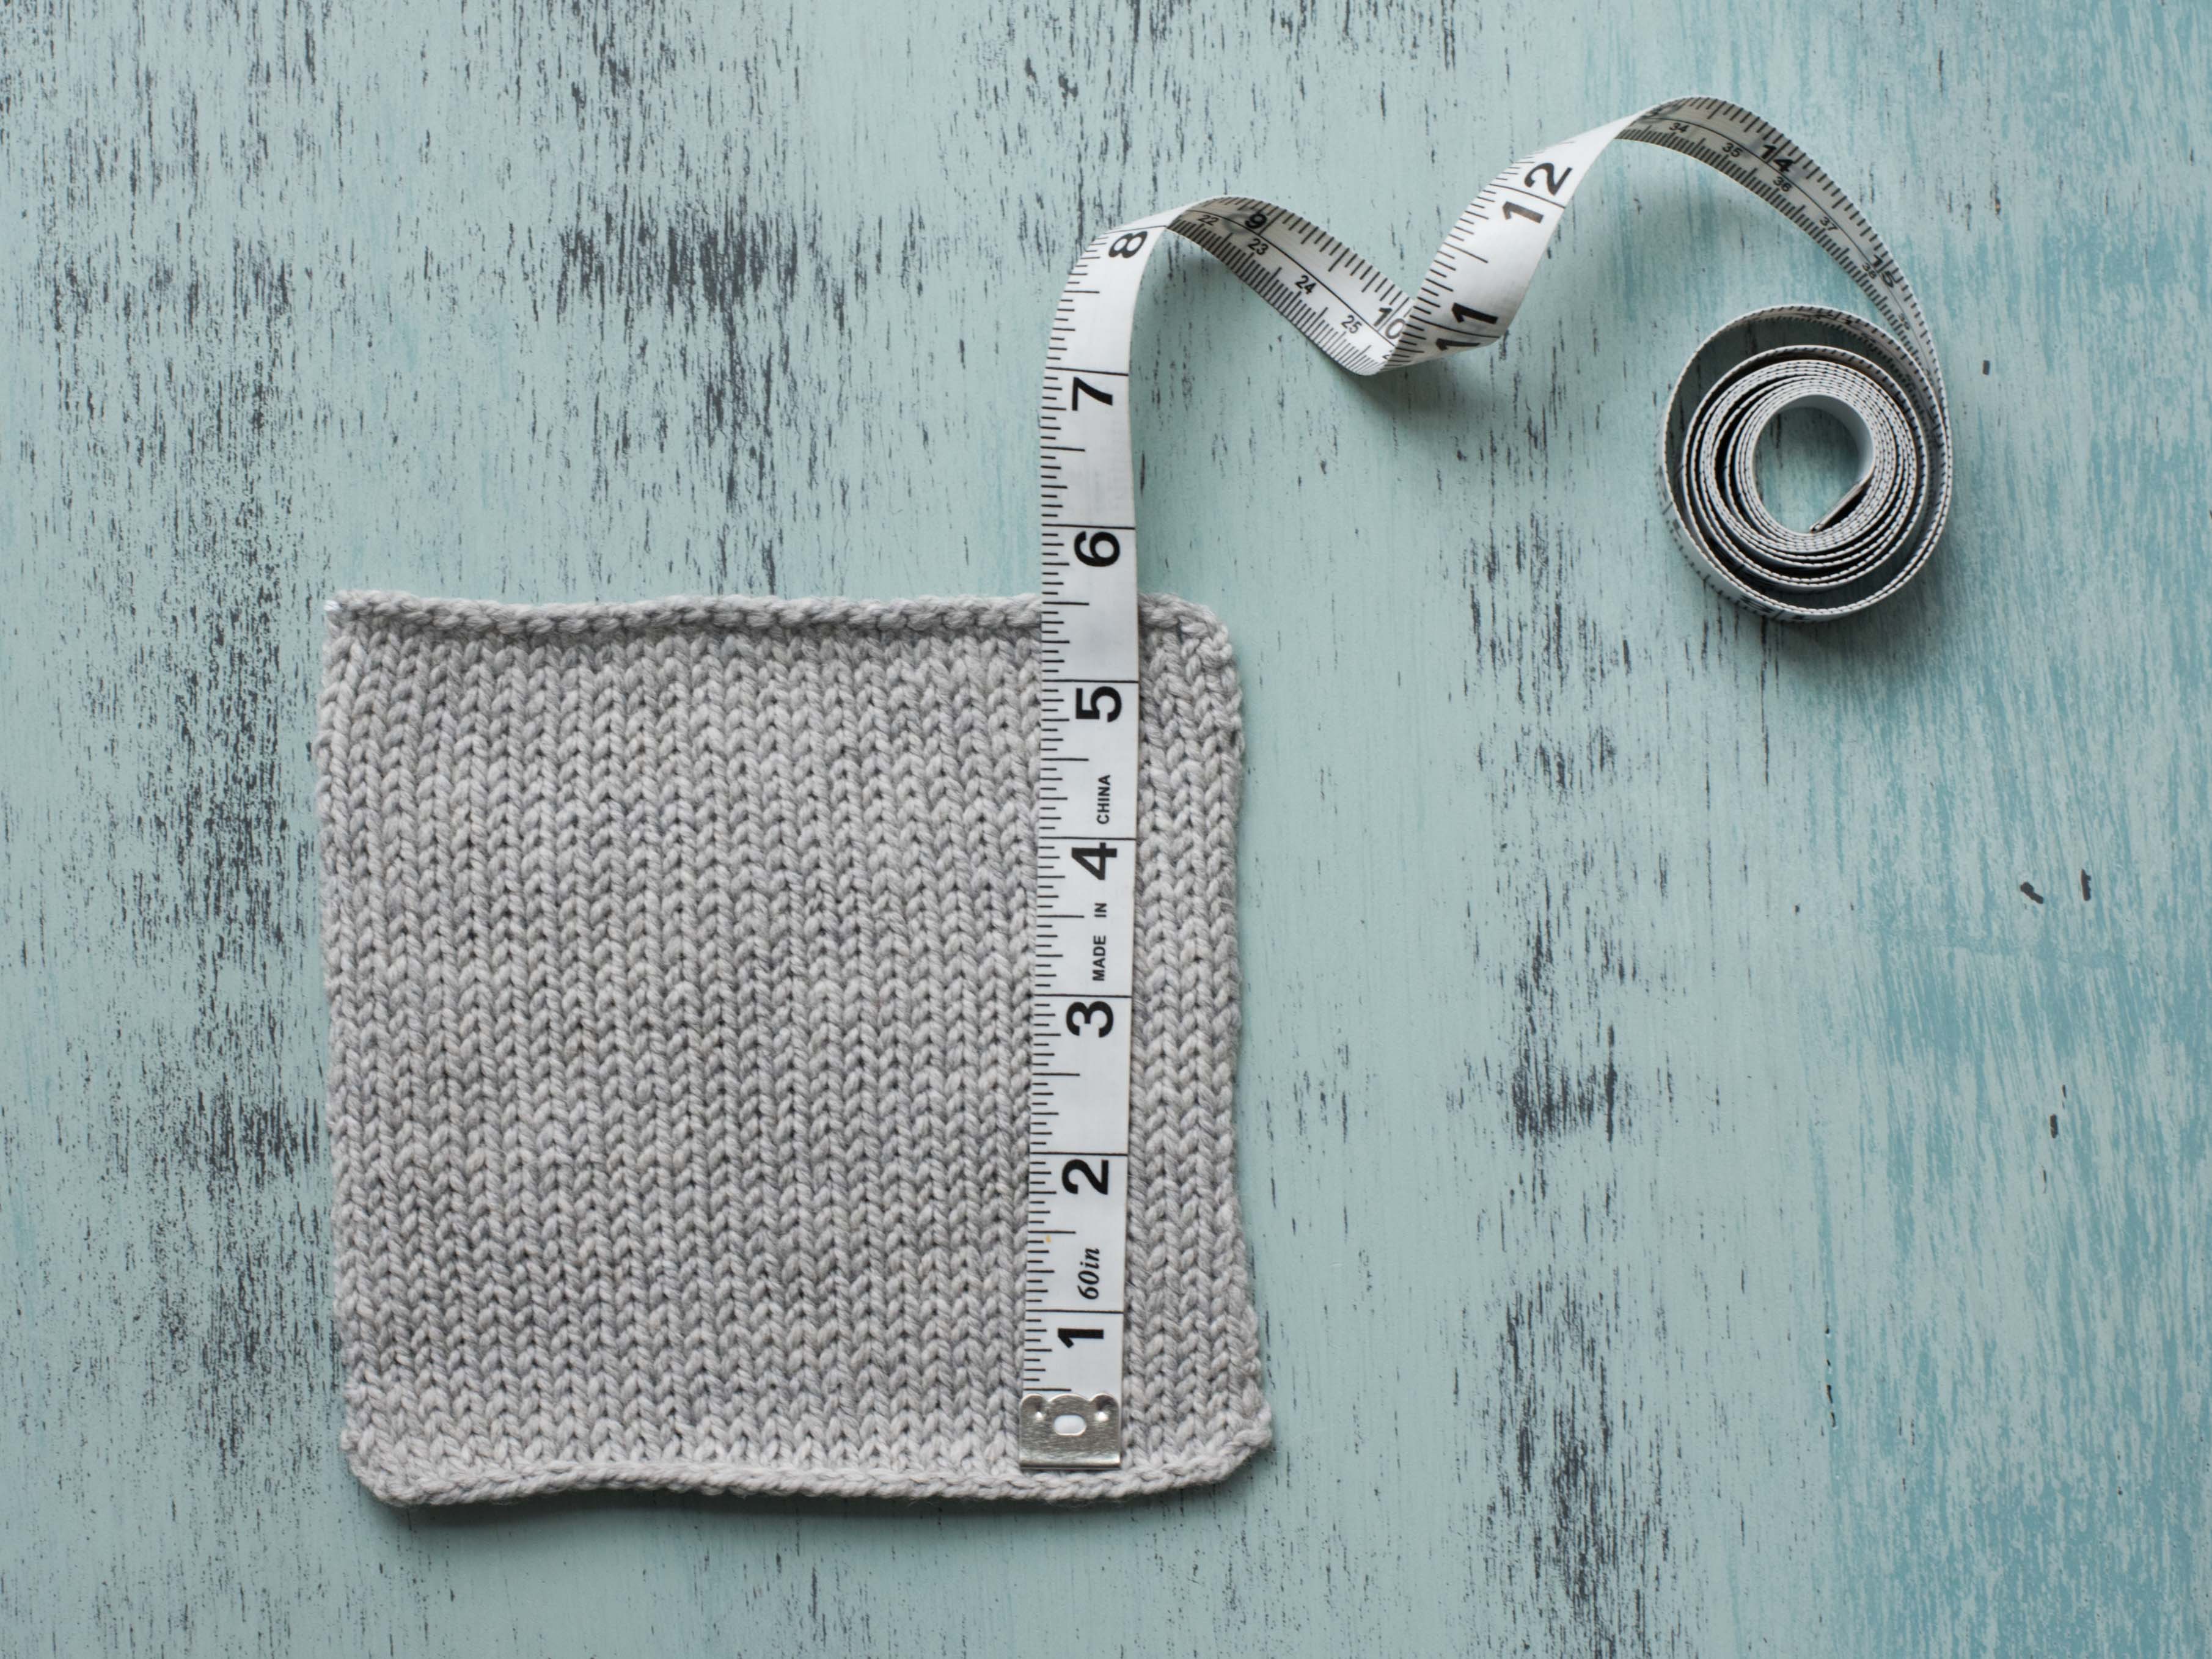
Now place the ruler vertically across your swatch and measure the number of rows that fit into 4 inches. This is your row gauge.
If you knit to gauge the first time, woohoo! You can go a head and get started with your project.
If not, read on for a few ways to get gauge.
What to do when your gauge swatch is not right
1. If you have more stitches per 4 inches...
...then your project will be too small. You'll also have a lot of leftover yarn!
To fix this, you have a few options. First, try using a larger knitting needle. This will make each stitch larger and therefore spread it out over the 4 inches.
2. If you have fewer stitches per 4 inches...
...then your project will be too large. You might even run out of yarn! This is what happened to me with the Ocean Sand Stitch Hat.
To fix this, first try using a smaller knitting needle. This will give you more stitches per inch.
What if changing needle sizes doesn't work?
If you're having no luck when changing knitting needle sizes, you can also try different types of needles. For example, if you were unsuccessful getting gauge with a plastic needle, you might be more successful with a bamboo needle. Fibers cooperate differently with each type of needle — you might get more grip with a bamboo needle, for instance — so you may just have to experiment a little to see which one works best.

This article was extremely helpful to me. I’m looking forward to learning more knitting tips and techniques. Thank you much. Lisa B.🐝
I have the right gauge when changing needles to 3.5 mm instead of 3.25, but i'm short on the # of rows. Do I just knii longer?