Though seemingly an obvious decision, your choice of edge stitch can really make your knit patterns pop. When working or designing garments or accessories, you should know your options.
Five different types of knitting edges you should know:
1. Ribs
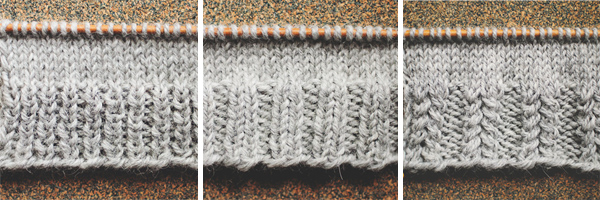
Ribbing is likely the first edge pattern you learned. The reason ribbing is so prevalent in patterns is that it lays flat, is pretty stretchy, and the pattern repeats are easily memorized. The most common types of ribs are comprised of simple knit-purl repeats, where the knits are always knit and the purls are always purled. There are even ribs, like "K 1, P 1" or "K 2, P 2", which is repeated across or around the design, or more complicated patterns. These are a little more detailed, but still simple enough to memorize and use interchangeably with your original designs.
2. Picots
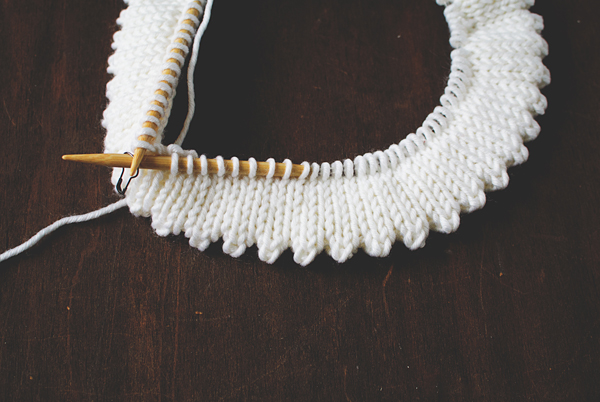
Picots are a more decorative stitch type. There are a few different ways to achieve gorgeous picots, but the most common is a folded picot hem. The hem starts with a few rows of stockinette stitch, then a row (or round!) of yarn overs and decreases, and then some more stockinette stitch.
3. I-Cord
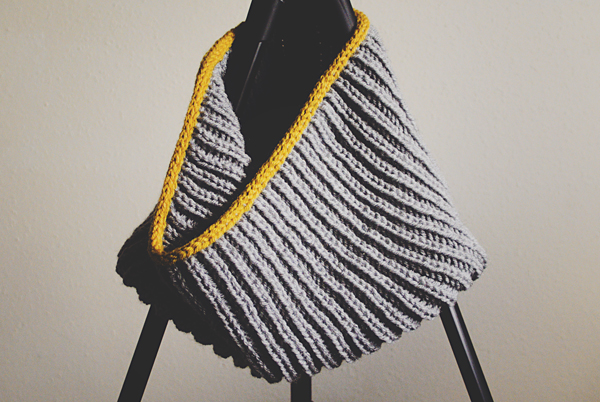
The i-cord edge is one of my favorites along the sides of stitches. It works best if your knit fabric is already laying flat. Try making your i-cord edge in a contrasting color for a more interesting look! If you are working it at the end of your work, you can use it as a bind-off stitch. IF you are working it on a cast-on or side edge, it is called an applied i-cord.
4. Stockinette stitch hems
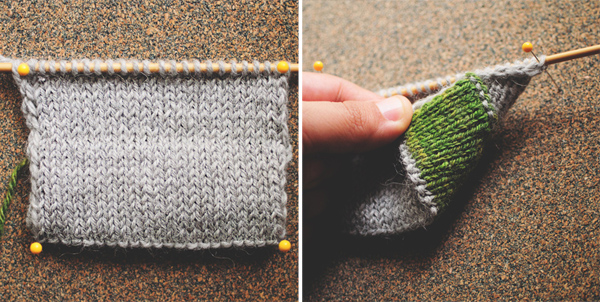
A stockinette stitch hem is the way to go if you are looking for an understated, yet polished look. It is a strong edge that is perfect for sleeves or collars. It is also a really great choice for button bands on sweaters. It's double thick, so it is very warm, if you decide to use it on the edge of a hat. Try working the "wrong side" with a contrasting color!
To work a stockinette stitch hem: cast on your stitches normally, work stockinette stitch (knit on the RS, purl on the WS) for as long as you want your hem, usually about 1.5 - 2 inches, taking note of the number of rows/rounds, and ending with a purl row. Purl the next row on the right side, then continue stockinette stitch for the same number of rows. Your hem should fold nicely in half on the purl row you made. You can knit the next row together with the cast on stitches by putting your needle through both the next stitch AND the corresponding cast-on stitch, OR you can just wait until you are finishing your item and sew the hem into place. I suggest knitting it together, as it will save you a lot of time!
5. Ruffles
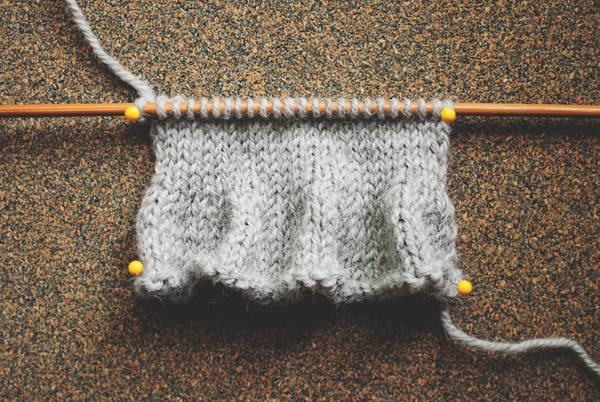
A ruffled edge is a classy yet playful look. You can use it as a blanket edge, on leg warmers, socks, or even hats. It's a very simple technique that you can apply at cast-on or bind-off.
If you are making the ruffled edge first: cast on twice as many stitches as your project will need, knit two rows (one garter stitch ridge on the right side). Knit to the height of the hem you want, then *K2tog (knit two together) across the entire next row/round.
If you are making the ruffled edge at the end of your project: knit to the hem, then increase after every stitch on the next row (*K 1, M1* or *K 1, yo* for an eyelet row). Work the hem to your desired length in stockinette stitch, then work a ridge of garter (knit two rows). Bind off as usual.
There are countless other edge ideas, but these are a start if you are new to knitting or thinking of sprucing up an existing pattern. You can change a rib into a hem or a hem into a ruffle! More advanced techniques can be employed with different patterns, such as knitted-on borders, which are great for lace shawls and blankets.

Vero interesting
Lovely edge to a baby coat (thick yarn 6.00mm) ..took a while as I had a lot of stitches to start with but it turned out beautiful .. thank you...