In this day and age when you can buy a pre-stretched, pre-primed canvas in virtually any size, there's still nothing quite like the feeling of doing it yourself. And for artists who paint a lot, it can certainly be more affordable when you buy the materials in bulk.
Stretching your own canvas is quite simple if you follow these steps.
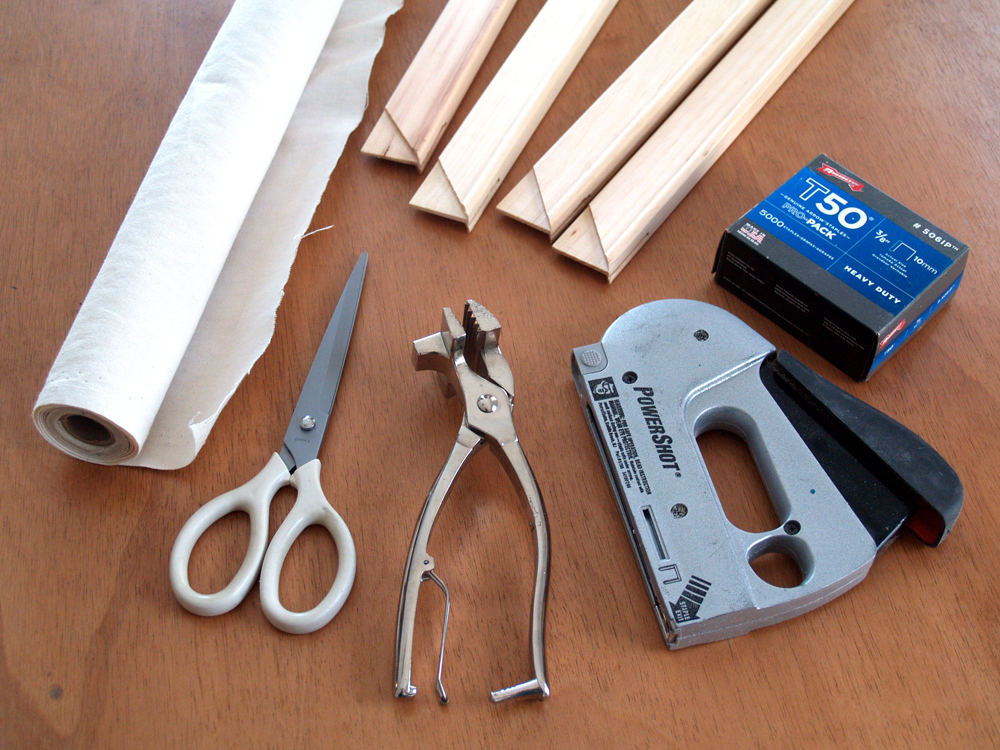
Materials you’ll need:
- Unprimed canvas
- 2 equal-length pairs of wooden stretcher bars (available at most arts and crafts stores)
- Staple gun and plenty of staples (I've found that T50 or equivalent work great)
- Fabric scissors
- Canvas pliers (optional -- available at most arts and craft stores)
- Not shown: T-square or carpenter’s square (available at arts and crafts stores and hardware stores)
You will also need a flat, clean surface to work on.
Note: It’s possible to buy pre-primed canvas in rolls, however, it's far more difficult to stretch than unprimed canvas, and it’s a lot pricier as well.
Directions:
Step 1:
Assemble your stretchers, making sure they are square and snug. Use your carpenter’s square or a T-square to square them just right. If they are too tight to assemble with just your hands, you can lightly sand the tabs (not too much -- you want them to stay together) or brace them against the wall and tap them together with a rubber mallet.
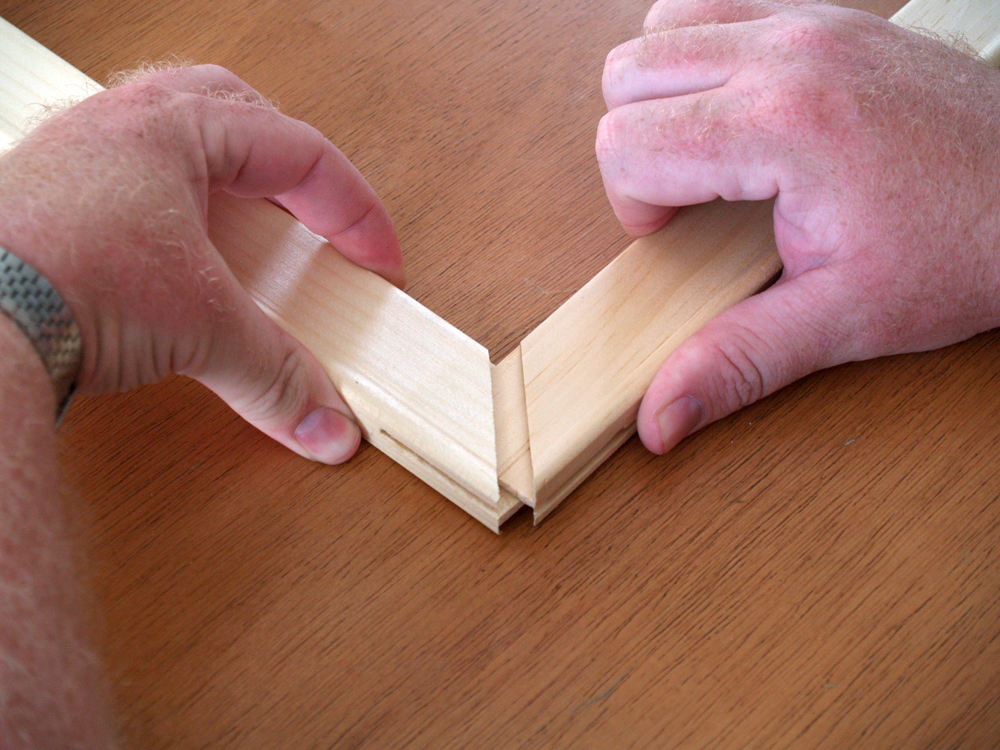
The stretcher bars shown above have an outer “lip” on both sides that will keep the stretched canvas suspended away from the wood. Some stretchers only have a lip on one side, so remember to assemble them with the lip facing the same direction.
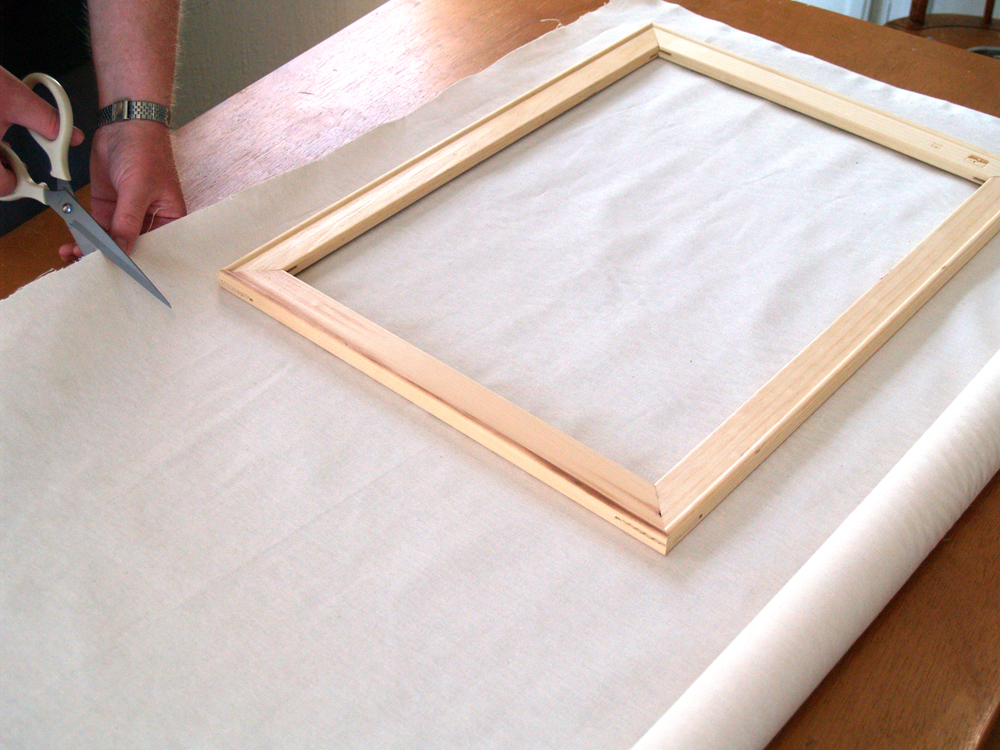
Step 2:
Place your assembled stretcher frame on the canvas (lip-side down if your stretchers have a lip on only one side). Try to orient the edges of your stretchers square with the weave of the fabric. Cut your canvas, leaving enough room on all sides for the canvas to fold over the edge of the stretchers and be stapled on the back.
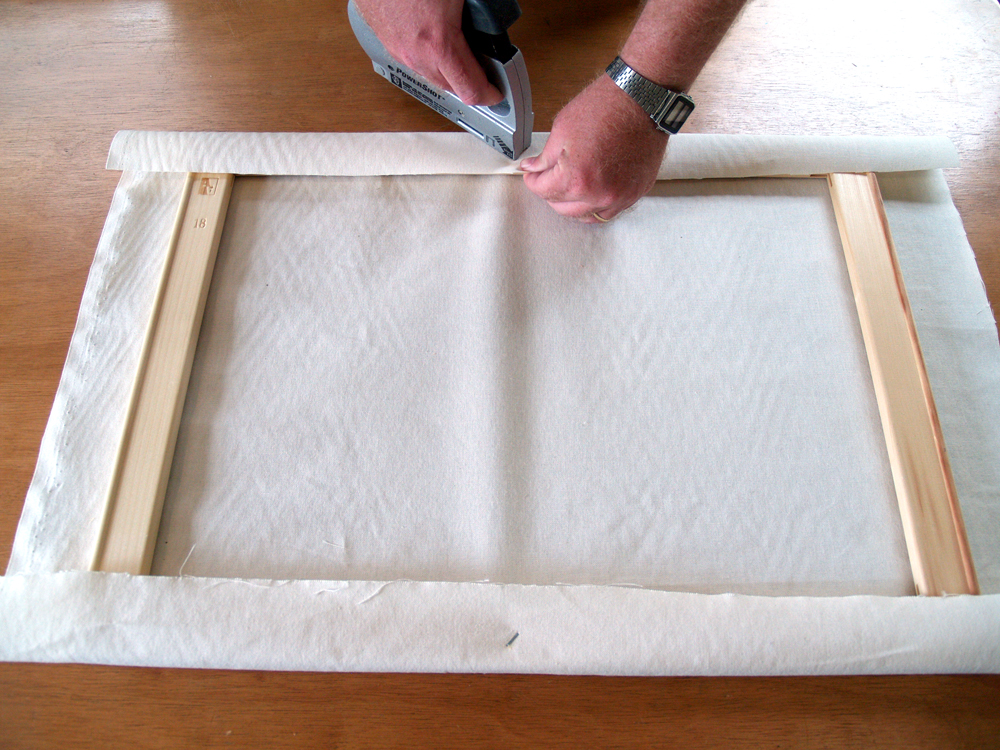
Step 3:
Fold over the canvas and place your first staple in the center of one side of the stretcher frame. I like to place my staples at an angle to the weave of the canvas so they won’t tear through the weave when the stretched canvas is at full tension.
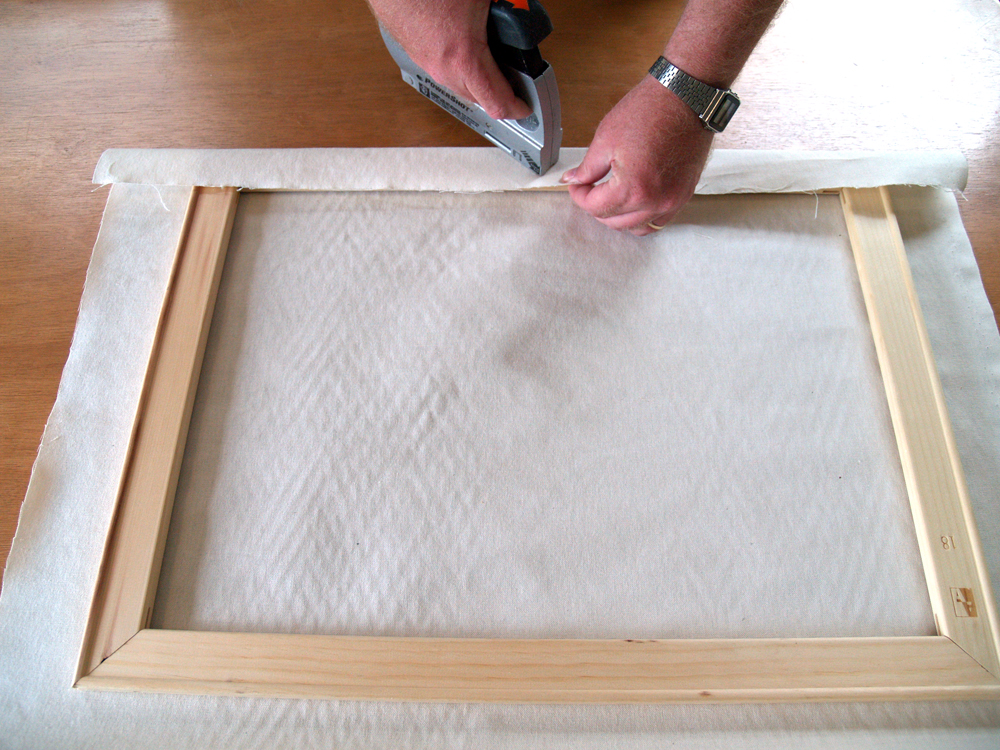
Note: The canvas can still appear wrinkled, so you may iron it first if you choose, but the wrinkles should disappear once it is stretched to full tension.
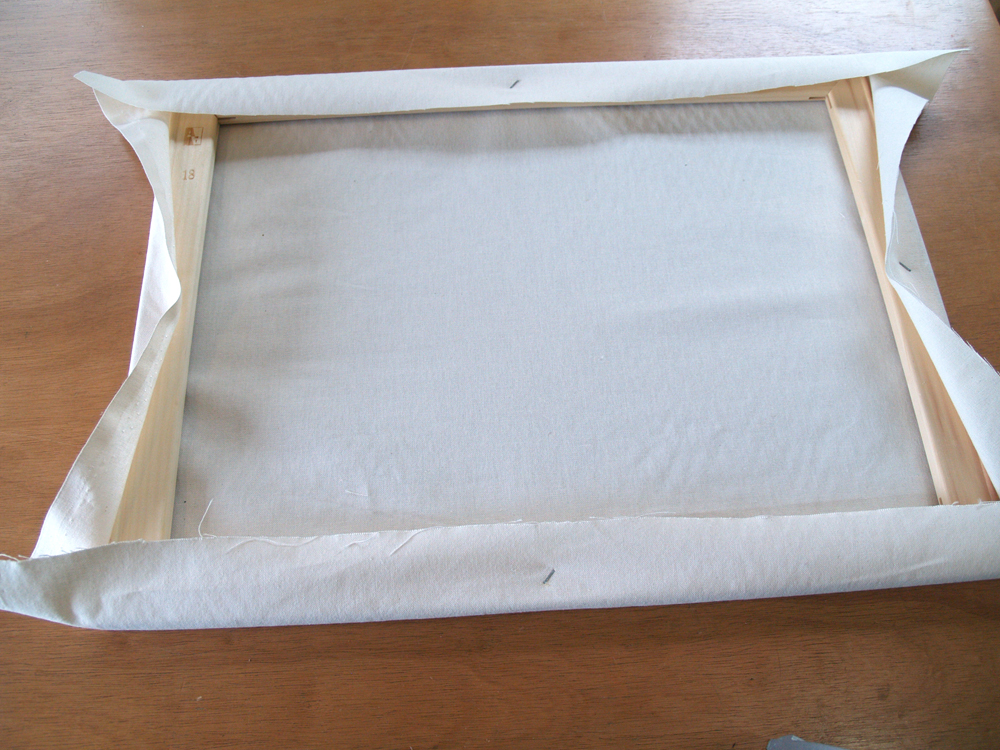
Step 4:
Rotate your stretcher frame 180 degrees, pull the canvas taut and place a staple on the opposite side as the first staple.
Step 5:
Do the same for the sides, rotating and pulling the canvas tight each time.
Step 6:
Add staples to each side of the initial staple, pulling tight across the frame and away from the innermost staple.
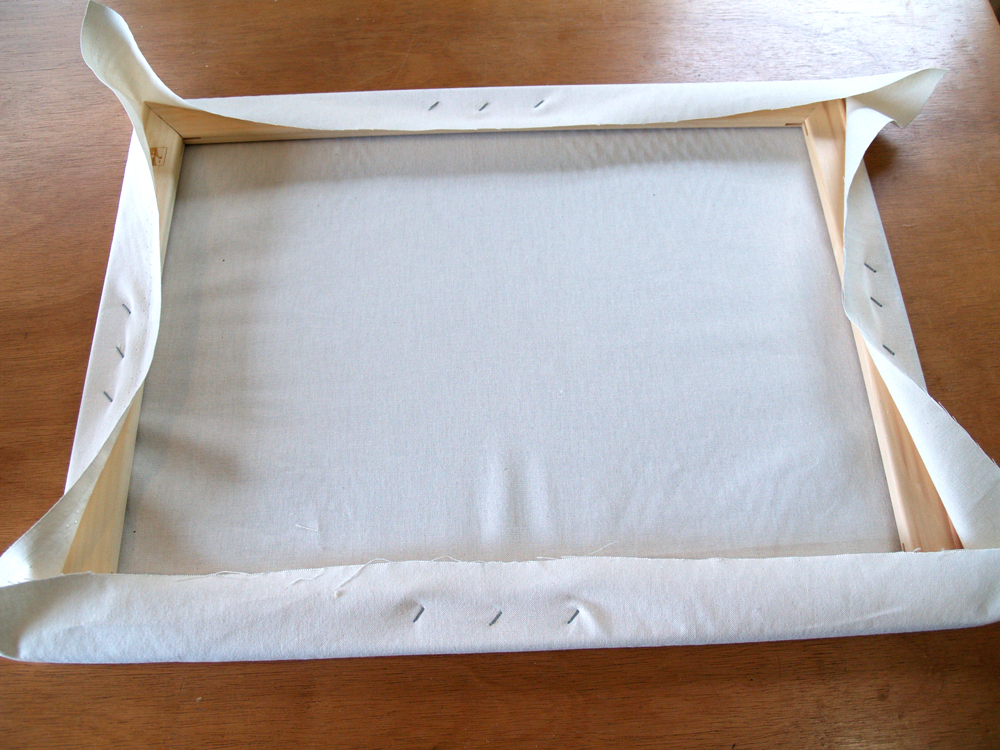
Step 7:
Continue working from the inside staple out, rotating as you go to keep consistent tension on all sides until your staples are about 2 inches from the corners. Your canvas should already be nice and taut, except in the corners.
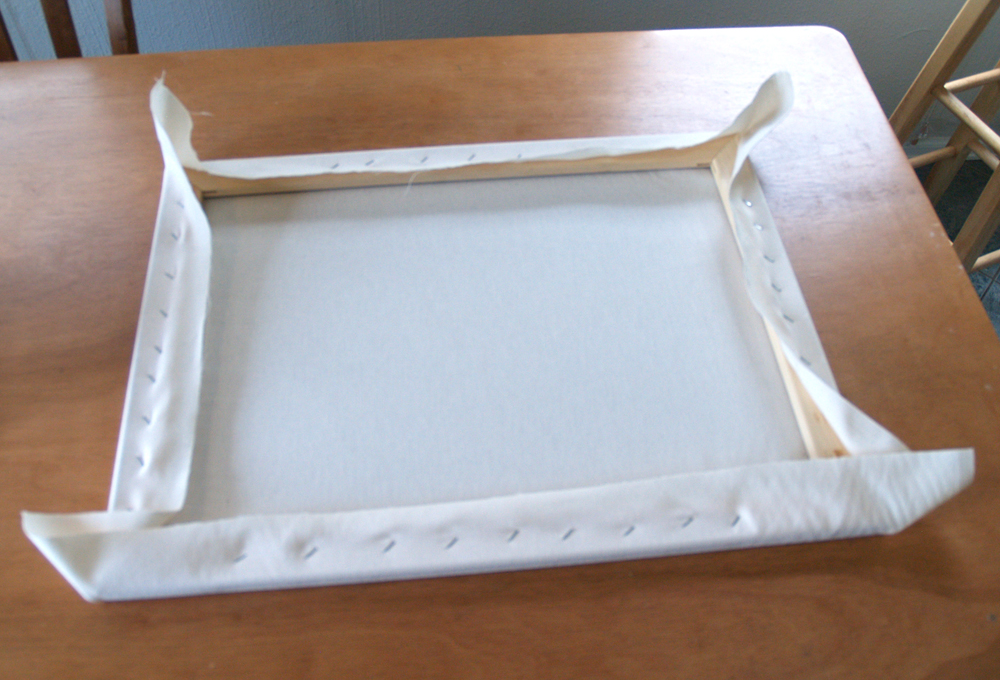
Step 8:
To fold over the corners, first pinch and pull a bit of canvas from the corner and fold it tightly against the frame at a 45 degree angle.
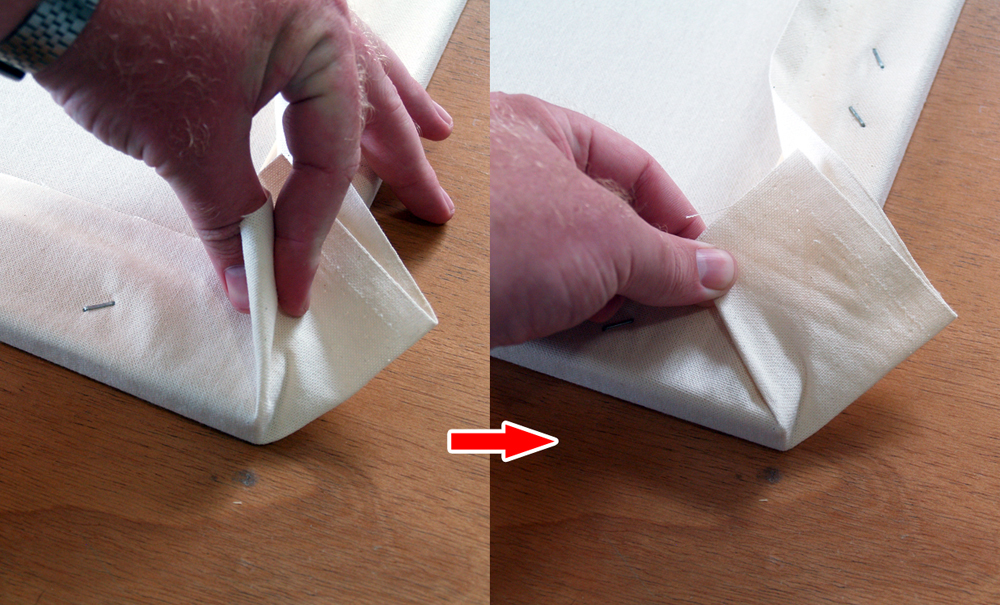
Then, while holding your first fold down with one hand, pinch and fold the excess fabric so it lines up along the edge of the frame, and staple it down.
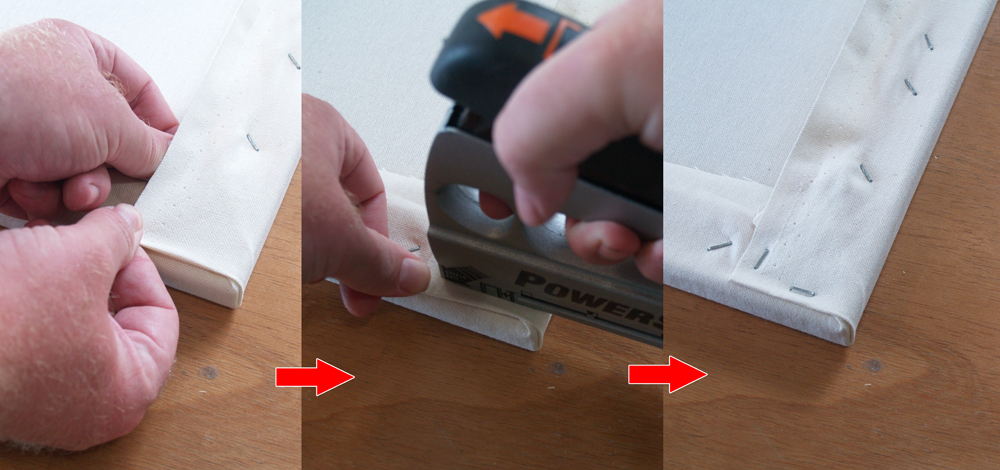
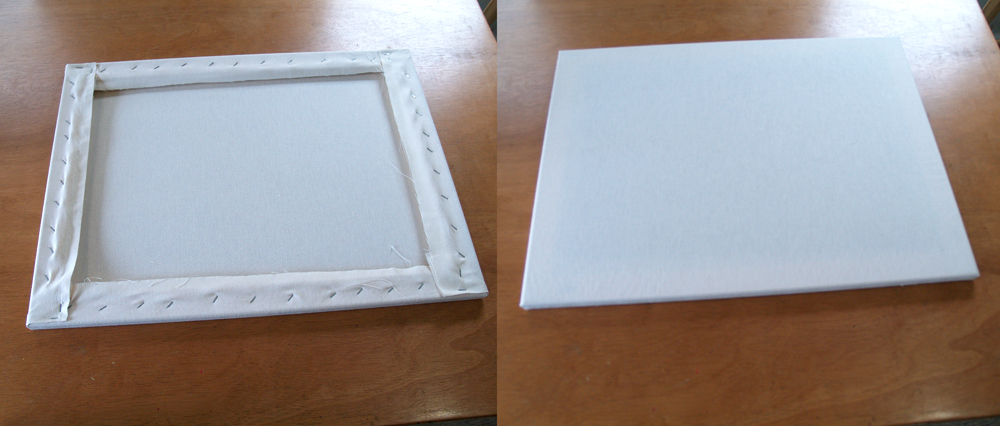
Do the same for all four corners, and you will have a tightly stretched, wrinkle-free canvas that should spring back when you thump it with your finger.
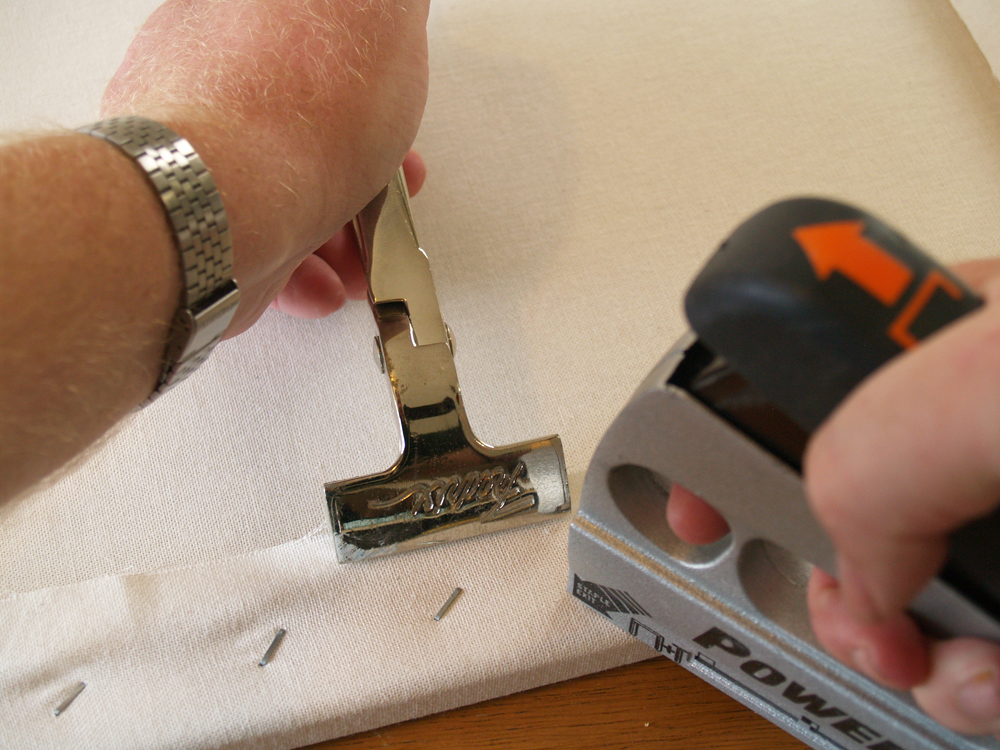
If there are still some wrinkles or the tension isn't high enough, you may have to remove staples with a flat-head screwdriver (starting from the outside in) and re-staple. If you find you have too much canvas hanging over the edge of your stretchers,you can cut it off with scissors.
Also, if you can’t achieve the desired tension in your canvas just by pulling with your fingers, you can use the canvas pliers to hold your canvas taut against the frame while you staple. It’s also easier on your knuckles.

Thank you for showing me the canvas. I noticed that the back is bare. Can I use it for painting? Love the clean and crisp look of your website. Awesome!
<strong>Thank you for sharing these easy steps of stretch canvas