Freshen up your dining table with a set of reversible, quilted placemats! This tutorial will teach you how to sew a placemat that’s both practical and stylish.
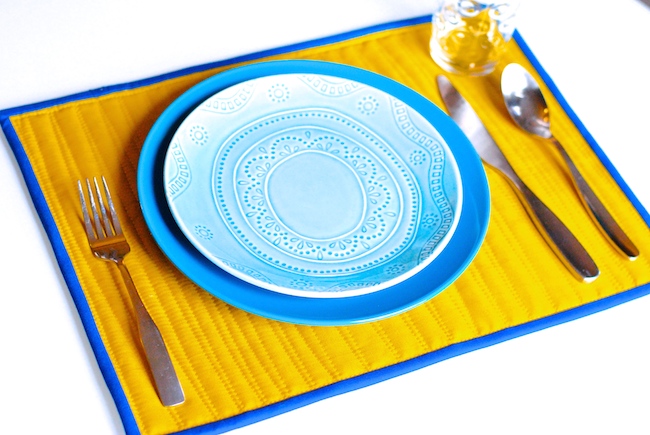
The thick placemat is quilted for durability, and it’s the perfect size for a dinner plate, silverware and drinking glass (and it doubles as a coaster).
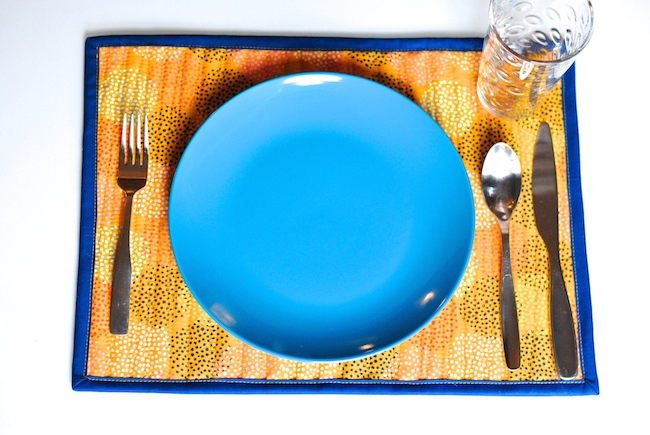
And better still, it’s reversible! I put a solid gold print on one side and a snazzy polka dot print on the other side, so it can be used for both formal and more casual dinners. The blue binding coordinates with both sides. Let’s get started!
How to Sew Placemats in 9 Simple Steps:
Materials for each placemat:
- 13″ x 18″ piece of quilting cotton for the front
- 14″ x 19″ piece of quilting cotton for the back
- 14″ x 19″piece of quilt batting or fusible fleece
- 70″ of quilt binding (either pre-made or DIY)
- Rotary cutter, ruler and cutting mat
- Binding clips and sewing pins
Step 1: Make the quilt sandwich
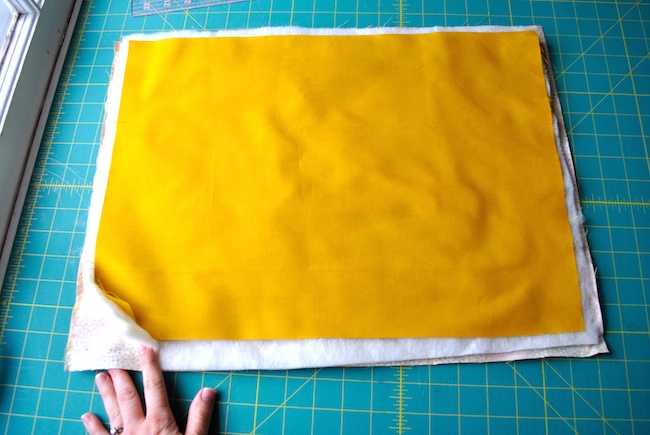
Layer a piece of batting between the two pieces of fabric. The batting should touch the wrong sides of the fabric. Spray baste the layers in place or pin in a few places, if desired. I skipped this step, and my layers still stayed together well while quilting.
Step 2: Quilt it
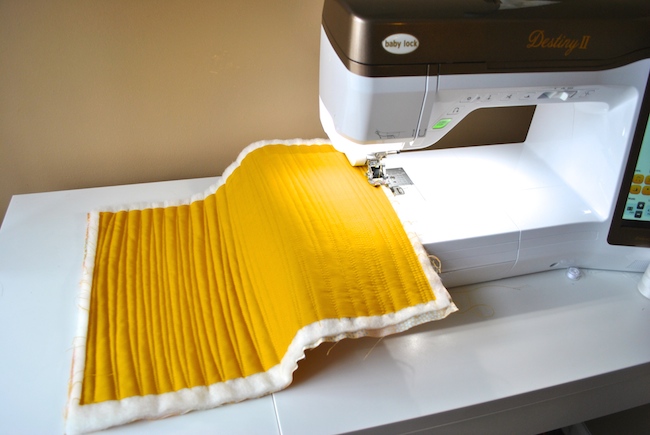
Starting in the middle, quilt through all the layers using a walking foot, using your hands to smooth out the layers as you go. I sewed vertical lines at a slight angle, but you could choose a different quilting design. Continue until the layers are all quilted together.
Step 3: Trim to size
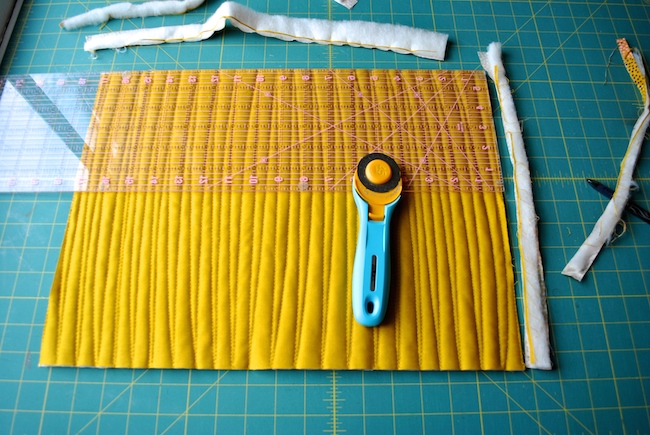
Trim the placemat to 13″ x 18″, using a ruler and rotary cutter. Using the lines of your cutting mat as a guide, make sure the edges are straight on all four sides.
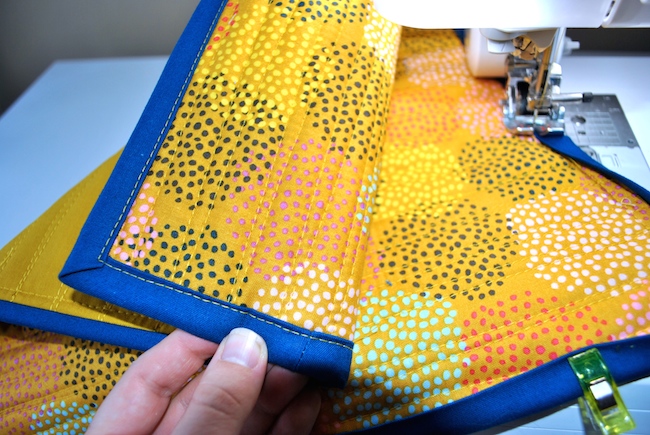
Step 4: Attach the binding
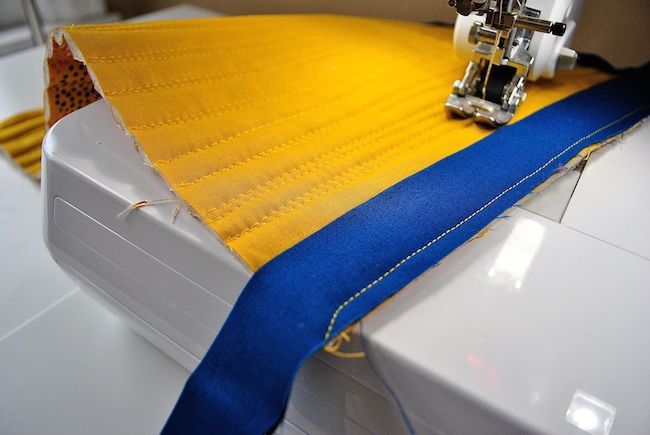
Place the raw edge of the binding strip along the raw edge of the placemat. Beginning in the middle of one side, sew a straight line about ¼” from the edge. When you get¼” from the corner, pivot your placemat under the sewing foot and sew toward the corner as pictured above
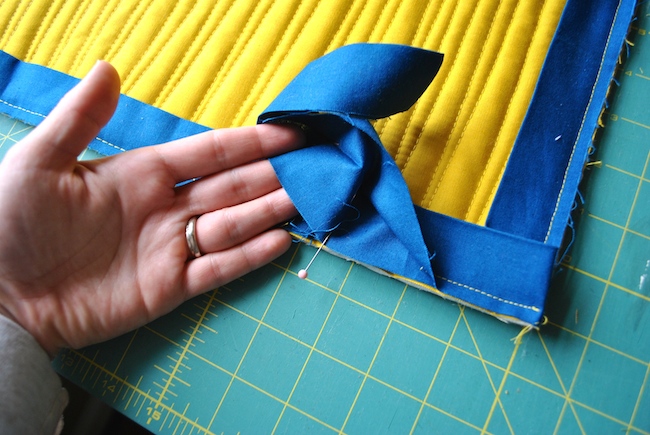
Step 5: Create the mitered corners
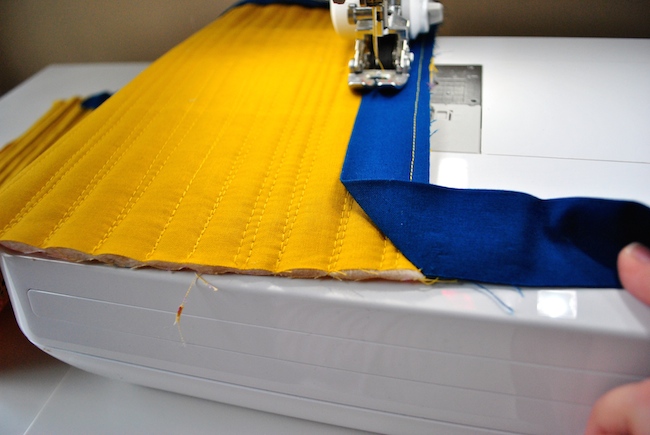
Fold back the binding strip at a 45-degree angle, along the line you just sewed. Use your fingernail to make a crease along this fold.
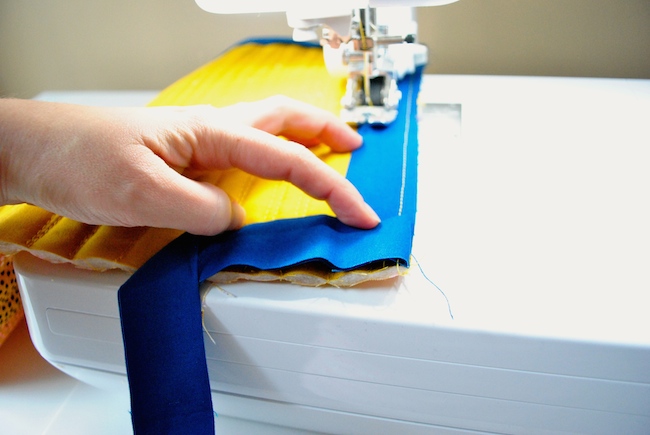
Keeping the fold you just made, fold the strip at a 90-degree angle as pictured. Press the crease with your fingernail, and place the binding strip’s raw edges against the next side of the placemat.
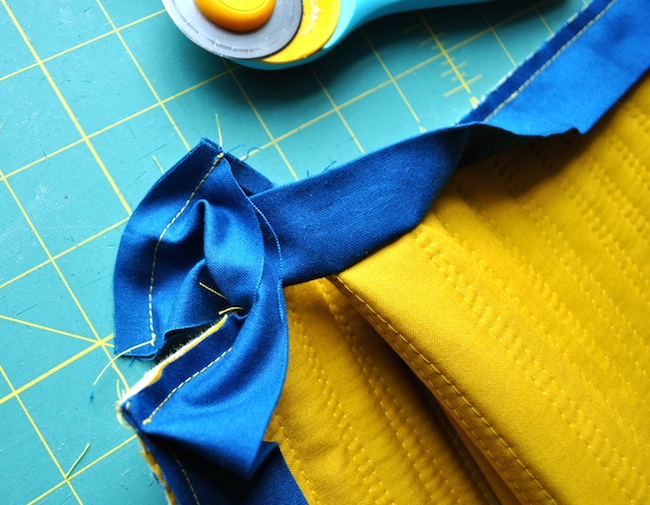
Step 6: Sew around the placemat

Sew the next side of the binding strip to the placemat, and continue around all four sides.
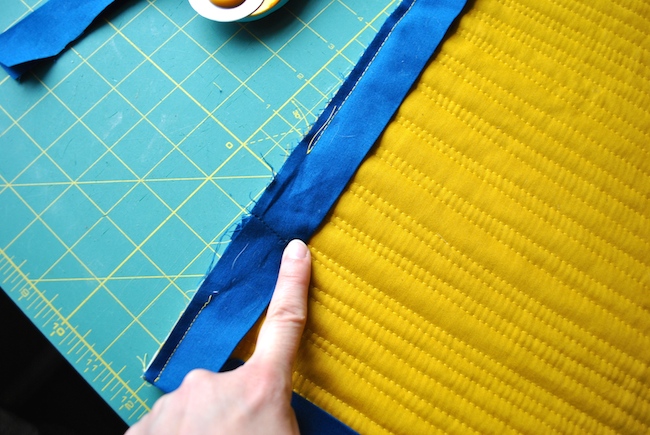
Step 7: Finish the binding

When you get close to your starting point, leave a gap of about 4″.
To join the binding tails, place a sewing pin at the point where they meet, pinning close to the placemat. Make sure the right sides of the binding fabric are touching.
Pull the pinned fabric away from your placemat. Carefully sew a straight line where you pinned together the strips. Trim off the tails ¼” past the stitched line.
Press the seam open and fold the binding in half so it lays nicely on the placemat. Stitch down the remaining binding, being sure to backstitch at both ends.
Step 8: Fold the binding over
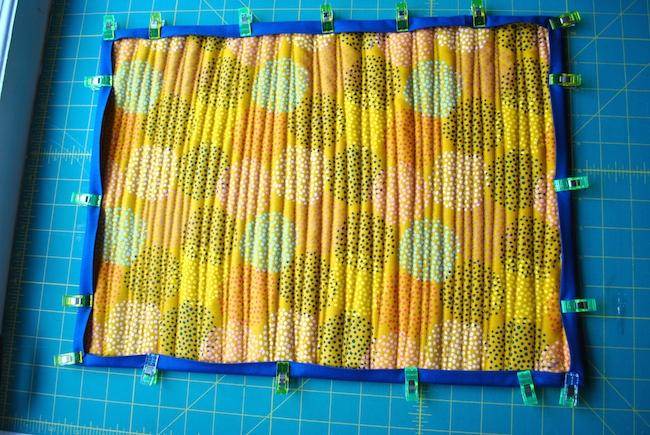
Press the binding on the front side around to the back; secure with binding clips. Make sure the binding extends past and completely covers the previous stitch line (so your stitches will blend in on the opposite side).
Step 9: Sew the binding into place
At this point you can either hand-stitch the binding to the back of your placemat or machine stitch it on, as I’ve done here.
With the backside of the placemat facing you, stitch 1/8″ from the edge of the binding in one continuous stitch. (Backstitch when your final stitches overlap the first ones.)
I’ve used a thread that matches the front of the placemat in both the spool and the bobbin, for a nice contrasting look on the backside. You can choose to match your top thread to the binding for stitches that blend in.

Now you that you know how to sew placemats, you can make a whole set and get ready for your next dinner party!
Variations on this quilted placemat
Skip the quilting
If you don’t wish to quilt your placemat, you can skip the batting. Fuse a 13″ x 18″ piece of lightweight interfacing to the front and back fabrics instead, to give them a bit more weight.
Skip the binding
If you choose the method above, you can skip the binding as well. Sew the top and bottom as you would a simple pillow cover. Stitch the top and bottom fabrics right sides together, ¼” from the edge, leaving a 4″ turning gap. Turn the placemat right side out. Poke out the corners. Press and hand sew the gap closed. Topstitch the placemat 1/8″ from the edge to finish. This method also gives you a double-sided placemat.
Editor’s Note: This post was originally published in October 2015 and was updated in December 2017.
How to make sewn mitered corners easily on the mats
looking for pattern for placemats for a round table. Saw your pattern on Pinterest but cannot find it on crafts
TANK UUUUU ME FINIS SKOOL PROOGEKT
Very clear and detailed instructions, thankyou
Great project! Thank you!