
There’s one little detail that can make all the difference between a homemade throw pillow that looks pro and one that looks, well, homemade: piping.
Back in the day, “piping” referred to what we now call “flat piping,” which is when you add a layer of fabric to a seam for extra definition. “Cording” used to be the term for piping that had cord inserted into it, creating the rolled trim you see in the image above. But these days, that rolled trim with the cord in it is most often just called “piping,” and the same effect without the cording is called “flat piping.”
If all that is enough to make you want to lay your head on a pillow and forget we said anything, we don’t blame you. But the bottom line is it’s easy to add piping to your pillow — and it will make that head rest look awesome.
How to Sew Piping On a Pillow
Level: Easy
What You Need
Instructions
1. Prepare Your Pillow Pieces
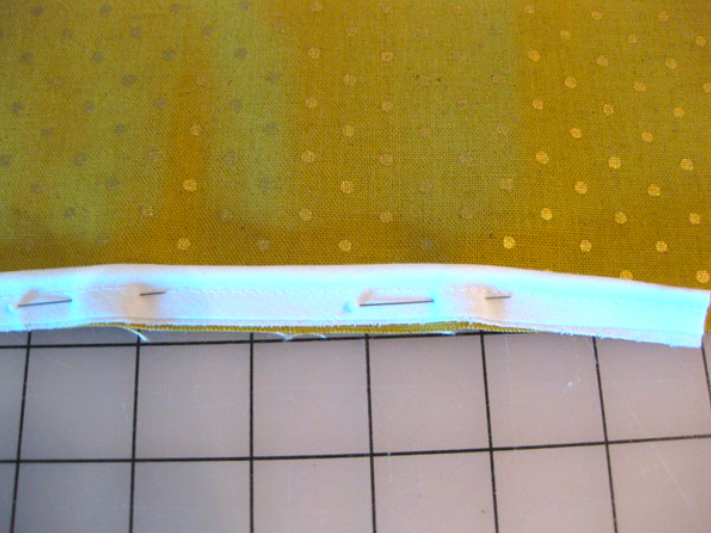
Once your pillow pieces are cut to size and an optional zipper is added, you’re ready to get started. First, pin the piping to the outer edge of one pillow cover piece, placed so the stitching on the piping is in line with the pillow’s seam allowance. Leave a couple of extra inches where the piping starts unpinned.
Pro Tip: If you inserted a zipper into one of the pillow pieces, you’ll probably find it easier to sew the piping to side opposite the zipper.
2. Make a Corner
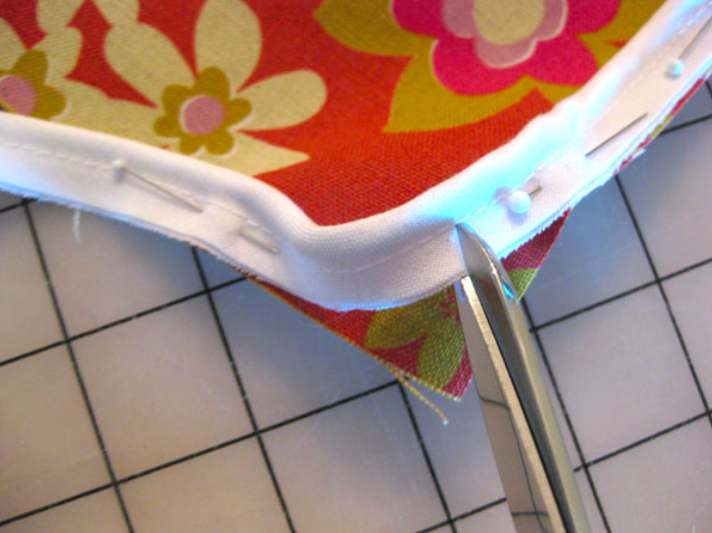
Pin the piping to the pillow cover and make a smooth but tight corner. Cut slits into the seam allowance of the piping, being careful not to trim into the stitching that’s holding the piping together. Cut enough slits so the corner sits flat and smooth.
Good to Know: It’s basically impossible to get 90-degree corners with piping, so this method will give you a slightly rounded corner.
3. Pin the Piping in Place
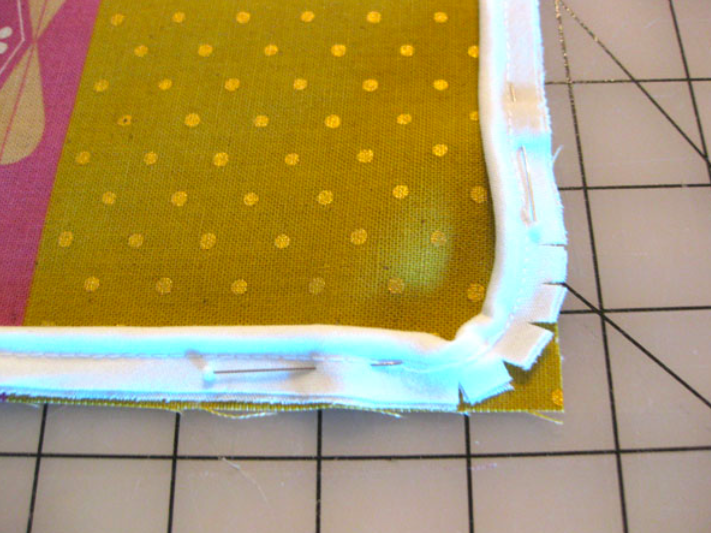
Once the corner is clipped, pin the piping in place along the corner. It’s OK if the piping is a little bunched, as it will soon be flipped out to the outside of the seam.
4. Leave the Extra Piping Unpinned
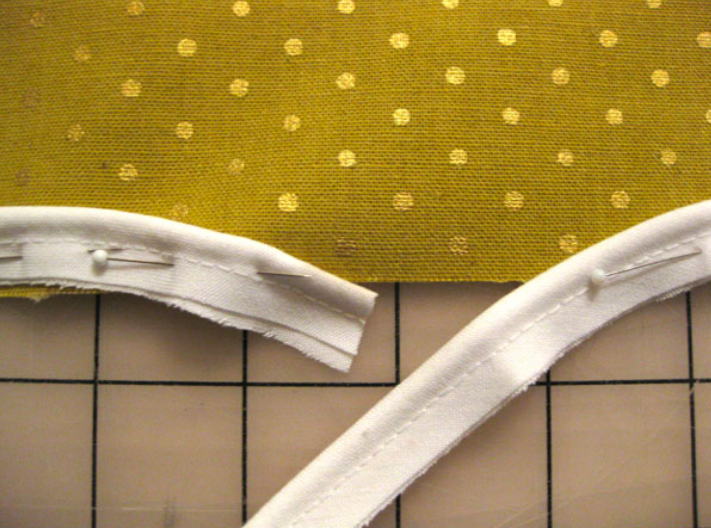
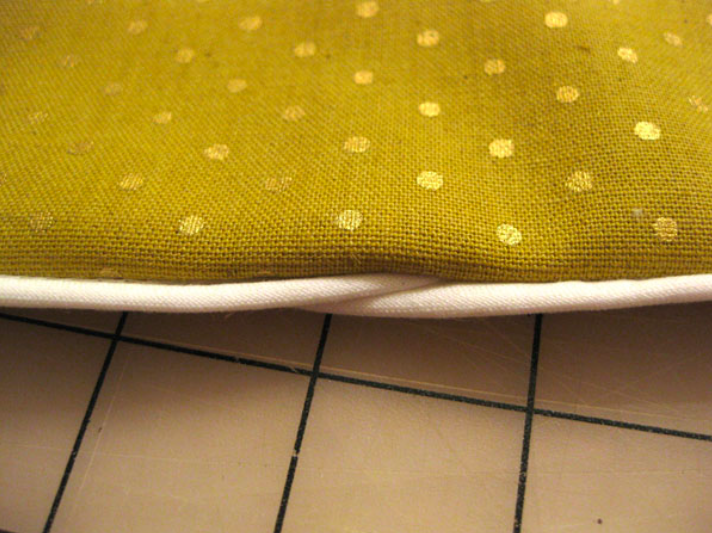
Once you’ve gone all the way around the pillow and are back to the starting point, you’ll have some piping left. Keep those few extra inches unpinned.
Pro Tip: These piping pieces will overlap. The first edge will come up onto the fabric, and the second edge will veer off the fabric on top of the first layer of piping. It’s better if this overlap is at the bottom of your pillow.
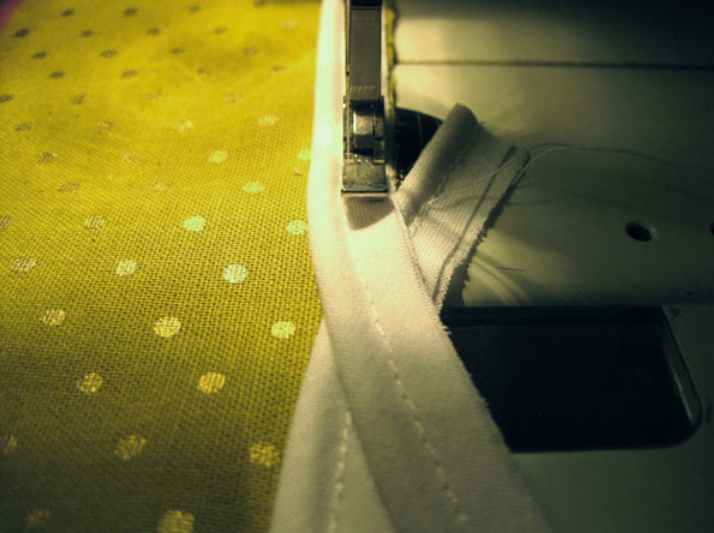
5. Sew the Piping onto the Pillow
To sew the piping on, use a regular zipper foot and stitch on top of the stitching that’s already on the piping. You want to be right up against the rounded part. Some machines have optional piping presser feet, so check with your machine dealer to see if you can get one.
Start sewing where your two ends of piping meet. Begin sewing the piping to the pillow with the piping hanging off the fabric. Keep the piping as a smooth slope that gently glides onto the fabric.
6. Stitch Around the Corner
When you reach the corner, stitch slowly, making sure you’re in line with the stitching on the piping. Keep the piping in place for a smooth, slightly rounded corner. Reduce your stitch length if you can — shorter stitches will give you more accurate curves.
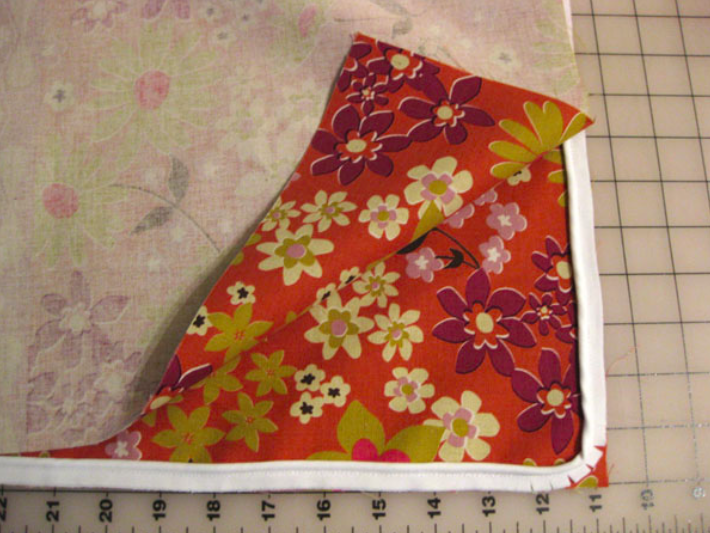
7. Overlap the Ends
When you’ve stitched all the way around, take the unpinned extra piping at the end and overlap it on top of the first bit of piping. You want to create a little “V” where the two ends meet.
8. Trim the Ends
Snip off the extra piping from the beginning and the end so they are in line with the edge of the fabric.
9. Add the Second Fabric Layer
Place the second layer of fabric on top of the first, right sides together. Line up the outer edges and pin in place all around the pillow.
10. Open the Zipper
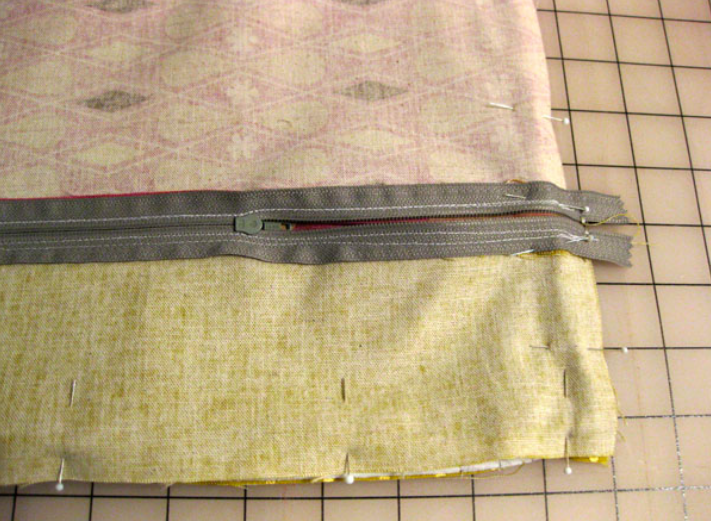
If you have a zipper in your second layer of fabric, unzip it a bit so you can get into the pillow after sewing. Make sure to pin the two layers of the zipper together well, so they don’t separate during sewing.
11. Stitch the Pieces Together
Still using your zipper foot, stitch the pillow pieces together on the seam allowance. This should keep you in line with the edge of the cord in the piping and the stitching on the piping. When you get to the overlap, sew right over it as if it were flat.
Pro Tip: Just like you did when you were sewing the piping on, be extra careful at the corners. When you reach one, keep the stitching smooth and make sure it’s right up against the piping. If it helps, feel along with your fingers to keep the foot firmly against the piping as you’re sewing around the corner.
12. Trim the Corners
Once the layers are sewn together, trim down the corners so they can be turned right side out easily and without too much bulk.
13. Trim the Zipper
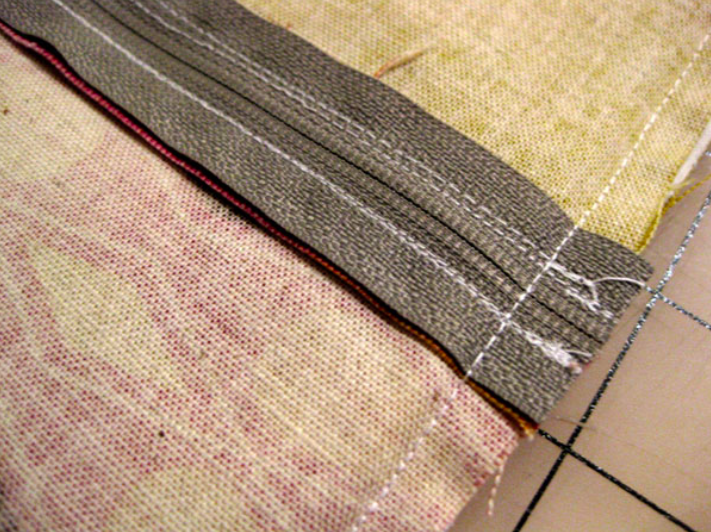
If you have a zipper in the top layer, trim the extra bit of it on both ends of the zipper tape. (Do not cut with your nice scissors if there are metal bits that need to be trimmed.)
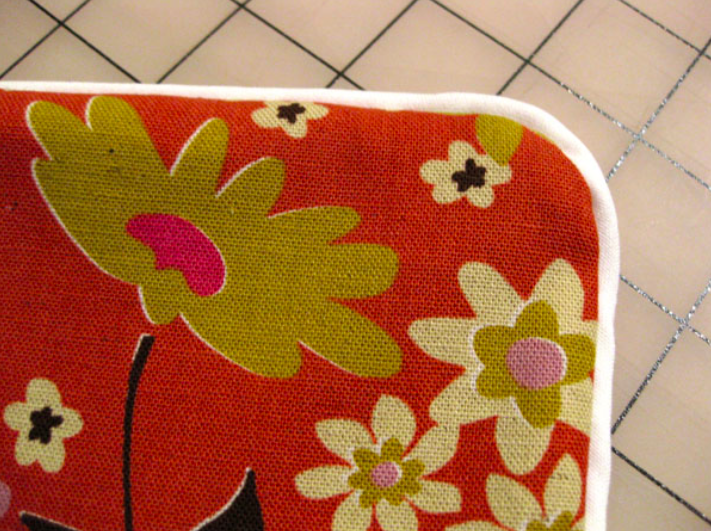
14. Turn It Out
Turn the pillow right side out. The finished piping overlap will look like the image above — nice and neat.

GREAT INSTRUCTIONS. THANKS!
How to edit this by hand
How do you flat/lip fabric covered piping at seam for armholes