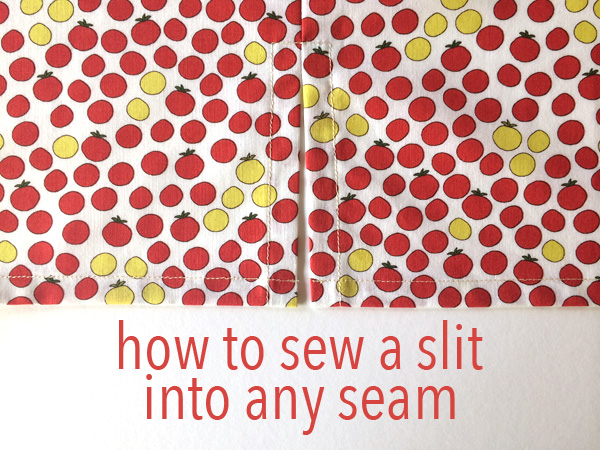
To make a skirt or dress feel sexier — or heck, more comfortable — there's one insanely easy trick: adding a slit. That little change can totally shift the mood of a garment depending on what type of slit you choose. Think about it: there are short and saucy slits, pencil skirt slits, even thigh-high maxi dress slits. And don't forget about your tops — adding a slit in a side seam can take a shirt from fitted to feeling much more casual.
So how do you make a side, back or center-seam slit? Let us show you the way.
How to Sew a Slit
Level: Easy
What You Need
WIP garment Thread Fabric marker Measuring tape Sewing pins Seam gaugeInstructions
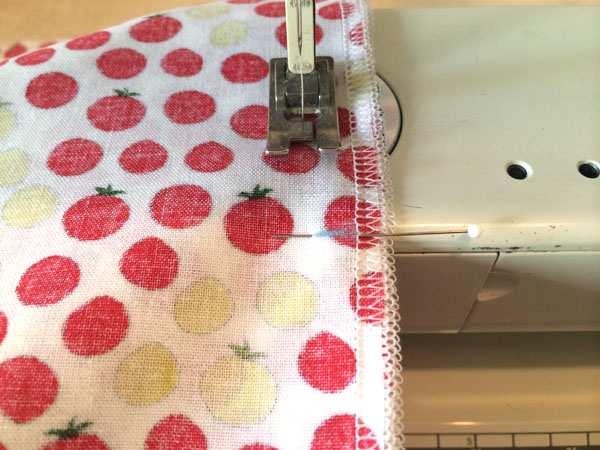
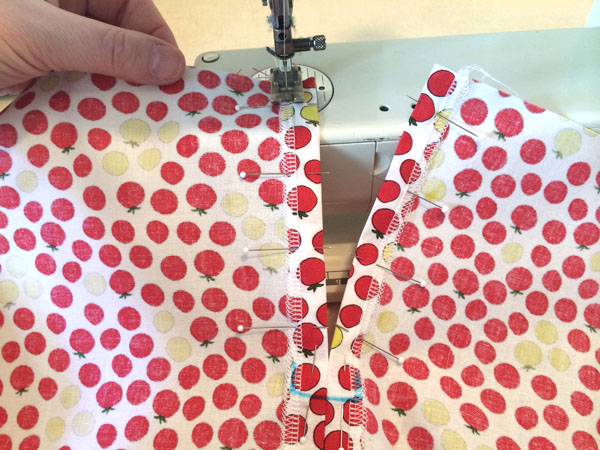
1. Finish the Seam Where You Want the Slit
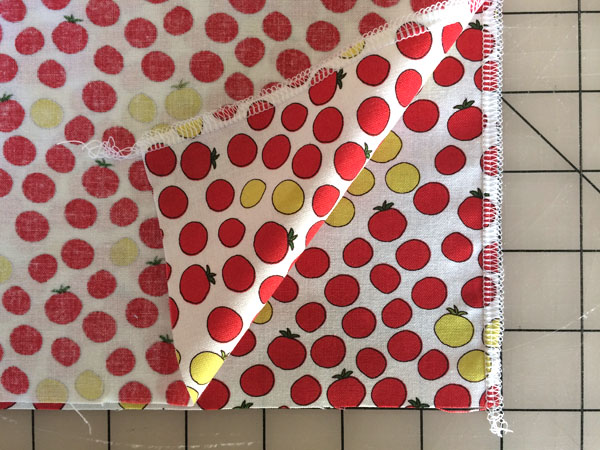
Wherever you want to add the slit, use your method of choice to finish the seam. (In the above photo, there's a serger finish.) Keep in mind that the seam allowance needs to be left intact, so no French seams allowed.
2. Measure Where to Place the Slit
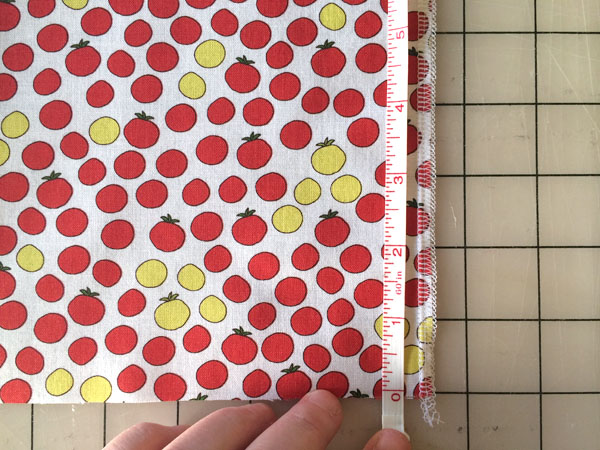
Grab a tape measure to determine where you want the slit to be on your body. Measure those dimensions on your fabric, making note of where the seam will finish and your slit will start.
3. Mark the Top of the Slit
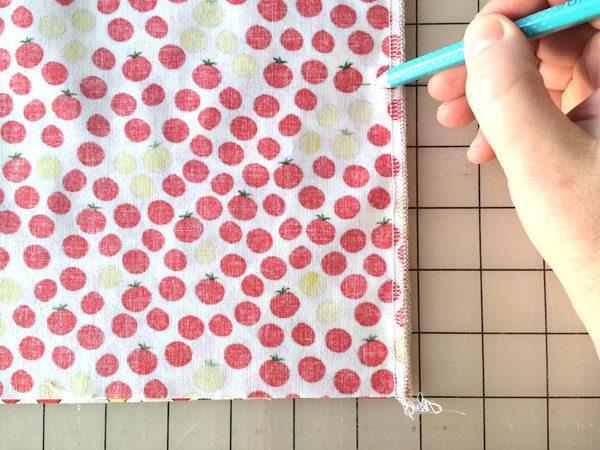
Indicate the top of the slit with a marking tool and pin the seam in preparation for sewing.
4. Sew the Seam to the Mark
Sew the seam per usual, but stop at the mark you made. If this seam has a zipper or any closures, treat them as you normally would before stopping at the mark.
5. Press the Seam Allowance Open to Hem
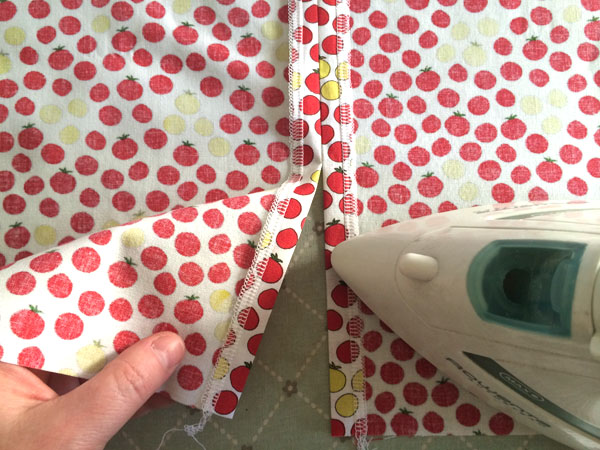
Press the seam open. Continue pressing so that the unsewn part of the seam is done too. Be sure to maintain the same consistent seam allowance all the way down to the end of the slit.
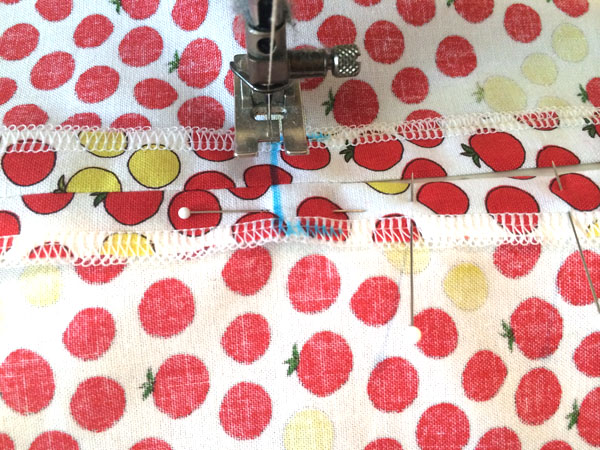
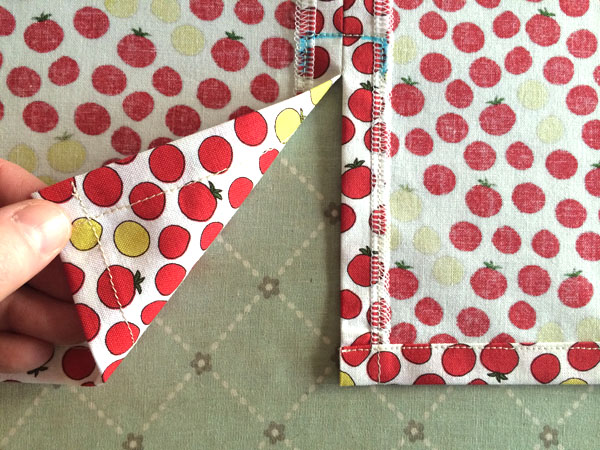
6. Mark the Top Edge
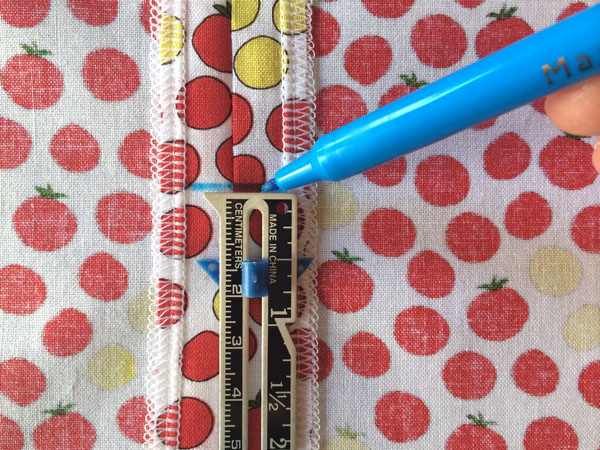
Either side of the opening will be topstitched, as well as at the top. To maintain a consistent distance from the opening, use a seam gauge to mark where you want the pivots to be at the top of the slit. In the photo above, the fabric is being sewn with a traditional ⅝" seam allowance, so the topstitching on either side of the slit is ½" from the sides. To keep it balanced, we stitched the same ½" from the top of the slit.
7. Pin the Seam Allowance
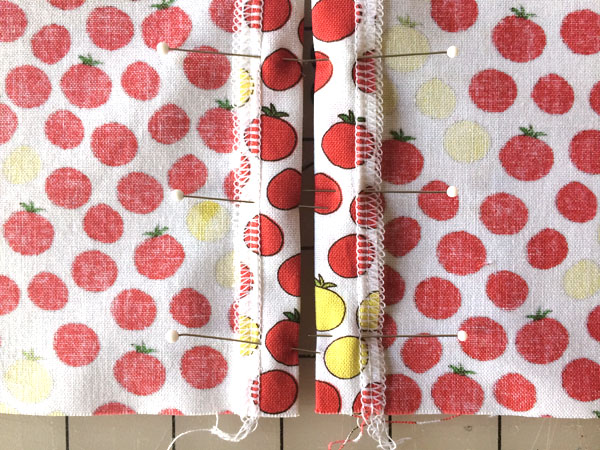
Pin each side of the seam allowance in place, around the area of the slit that's to be sewn.
8. Sew the First Side of the Slit
Starting at the hem, sew up one side of the slit, along your chosen seam allowance.
9. Pivot at the Corners
Once you reach the first corner, pivot and stitch across the top of the slit.
10. Sew Down the Other Side of the Slit
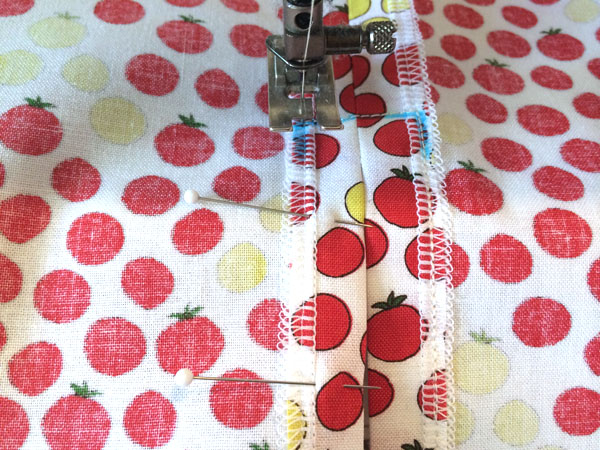
Pivot at the second corner at the top of the slit, then continue down the other side of the slit, maintaining a consistent seam allowance that matches your first side.
11. Press the Slit Flat
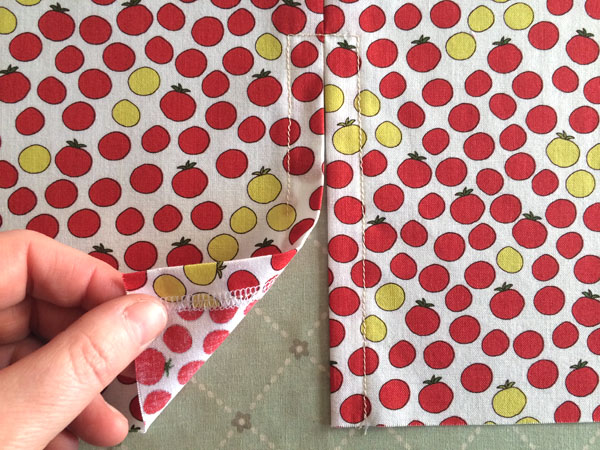
Once the entire slit is sewn, give the entire seam and slit a good press.
12. Sew the Hem

The hem of the garment can now be sewn normally, by folding up the fabric twice and topstitching in place.
If your fabric is best finished with hand stitches , these can be sewn on the inside so that the stitches on the hem and slit are invisible.
Once it is all hemmed, press again and you're finished! Now go out and enjoy the free feeling a well-placed slit can give you!

I am new to needle work. Thank you so much this site was the best one that could help me with a side split. Everything was shown good and I was able to do it neatly. Thank you again
This is a very handy sewing tip and it is very well explained.
Hi, how do I save or print this article?
So Helpful. Thanks
I wanna take part in the class.
Great adding this to my current top I'm working on. Thank you!
Love It
need these directions emailed to me for sewing a quick slit.