Many times, new watercolorists get frustrated with the medium because they aren’t immediately successful in creating something worthwhile. After all, there’s a lot to learn!
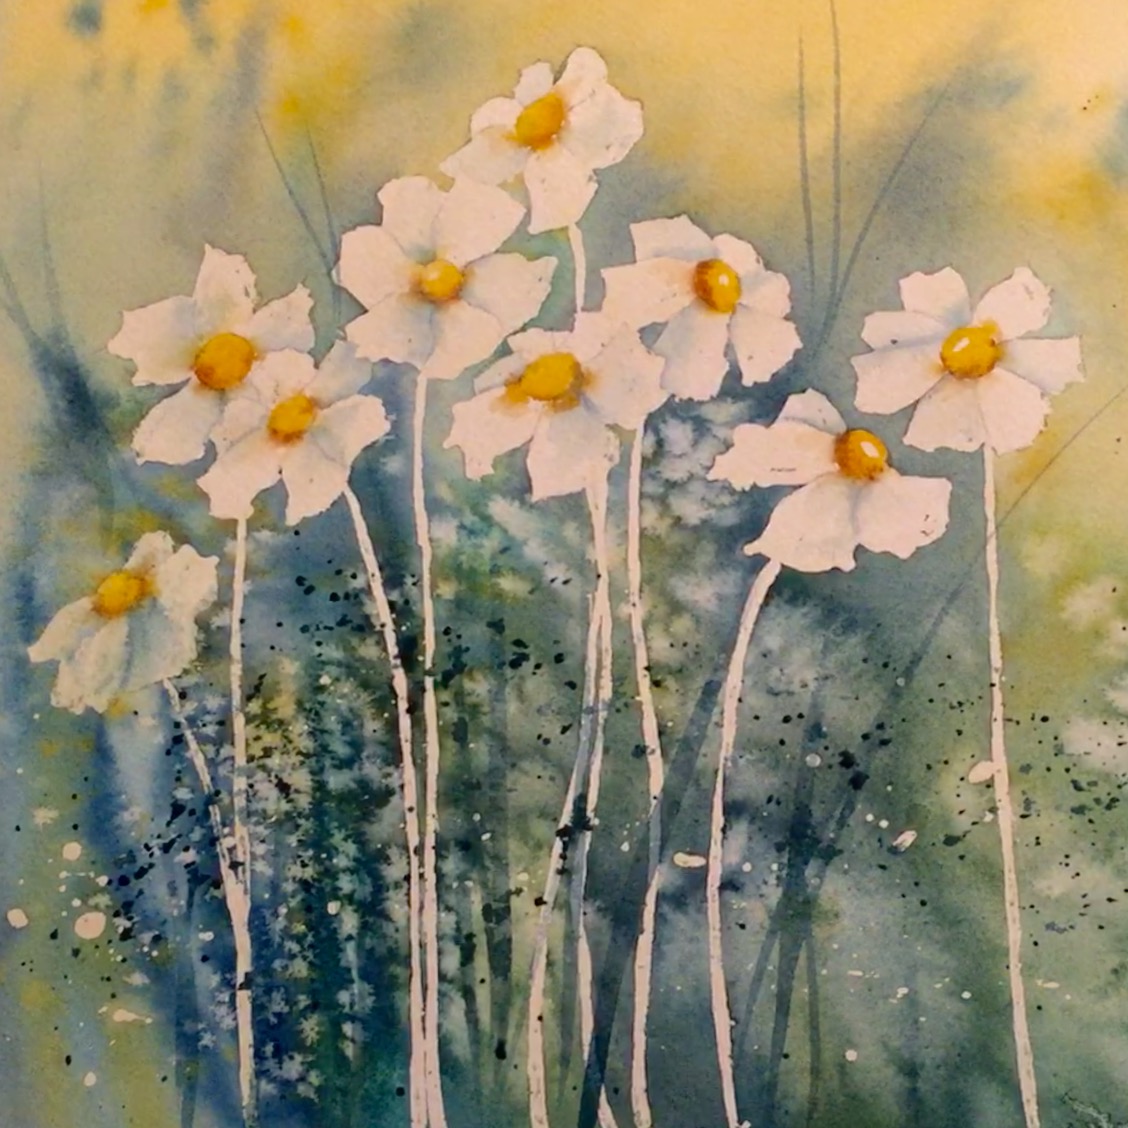
That’s why I’d like to take you through a lovely little project that I use to help all of my beginning watercolor students get started. It’s a simple daisy resist project that every new student can paint successfully, replicate and practice again and again.
Follow along to learn how to paint a daisy and other painting skills.
What you’ll need:
- Watercolor paper
- Masking tape to hold the paper in place
- Masking fluid
- Paintbrushes
- Bar soap
- Watercolor paints
- Table salt
Step 1: Masking the daisies
Draw a small cluster of simple daisies. You can take inspiration from my painting above, or create your own composition. Just be sure that each flower has its own space.
Wet a bar of hand soap and coat your brush bristles thoroughly before dipping your brush into masking fluid. Cover all of the flowers and stems completely and neatly with the masking fluid. You may need to wash your brush, re-coat it with soap and masking fluid a few times before this step is complete. Allow your fluid to dry completely before going to Step 2.
Step 2: The first wash
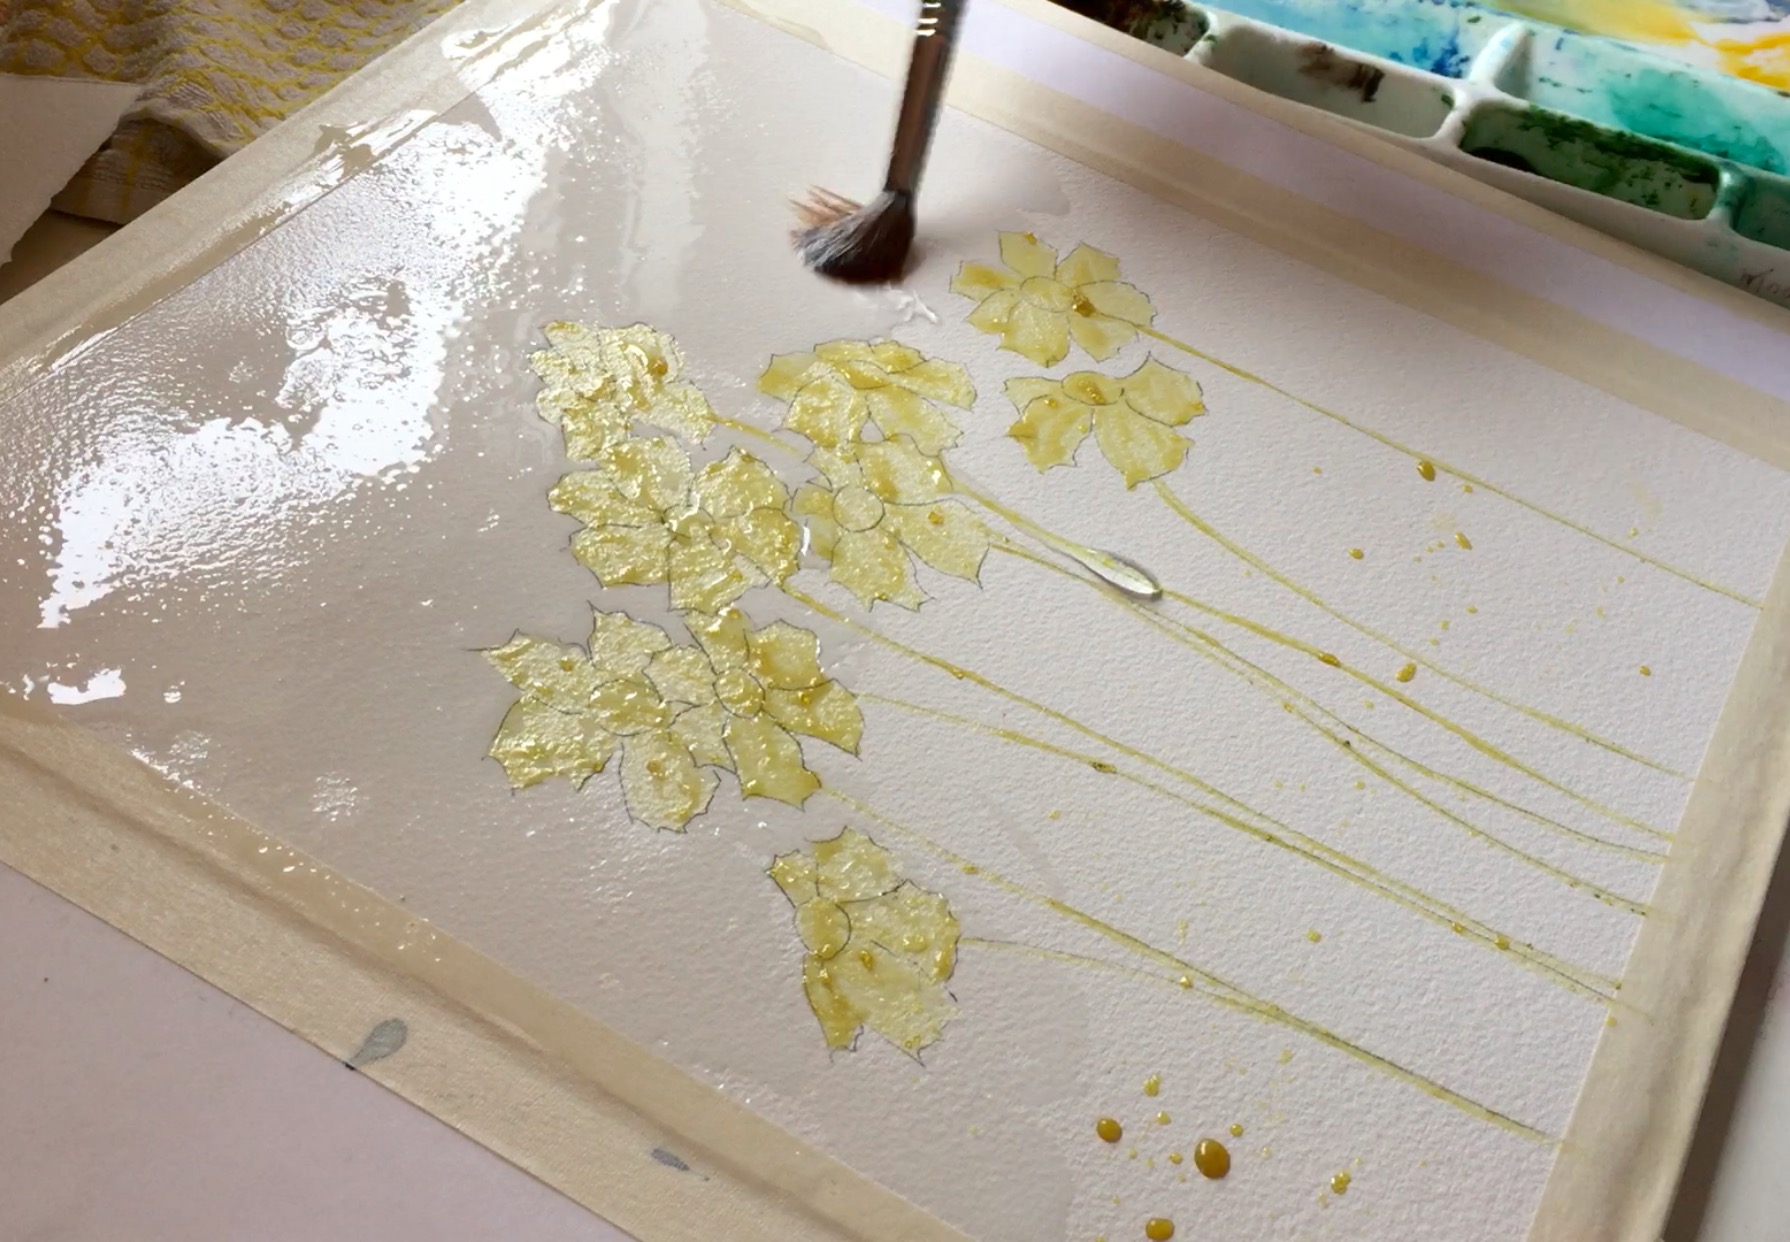
Mix your desired background colors on your palette before wetting your entire page thoroughly. For this painting, I used Indian Yellow, Ultramarine Blue, Payne’s Gray, Hooker’s Green and Burnt Umber.
Your first wash is going to be what is called a “wet on wet” wash. It will be loose, quick and soft. Starting with your lightest color first, lay on your Indian Yellow. Use a Number 12 round brush for this first large wash.
Now, quickly paint on your blues and greens in upward motion strokes. Start with your brush on the bottom edge of the paper and stroke upwards to create a grasslike background.
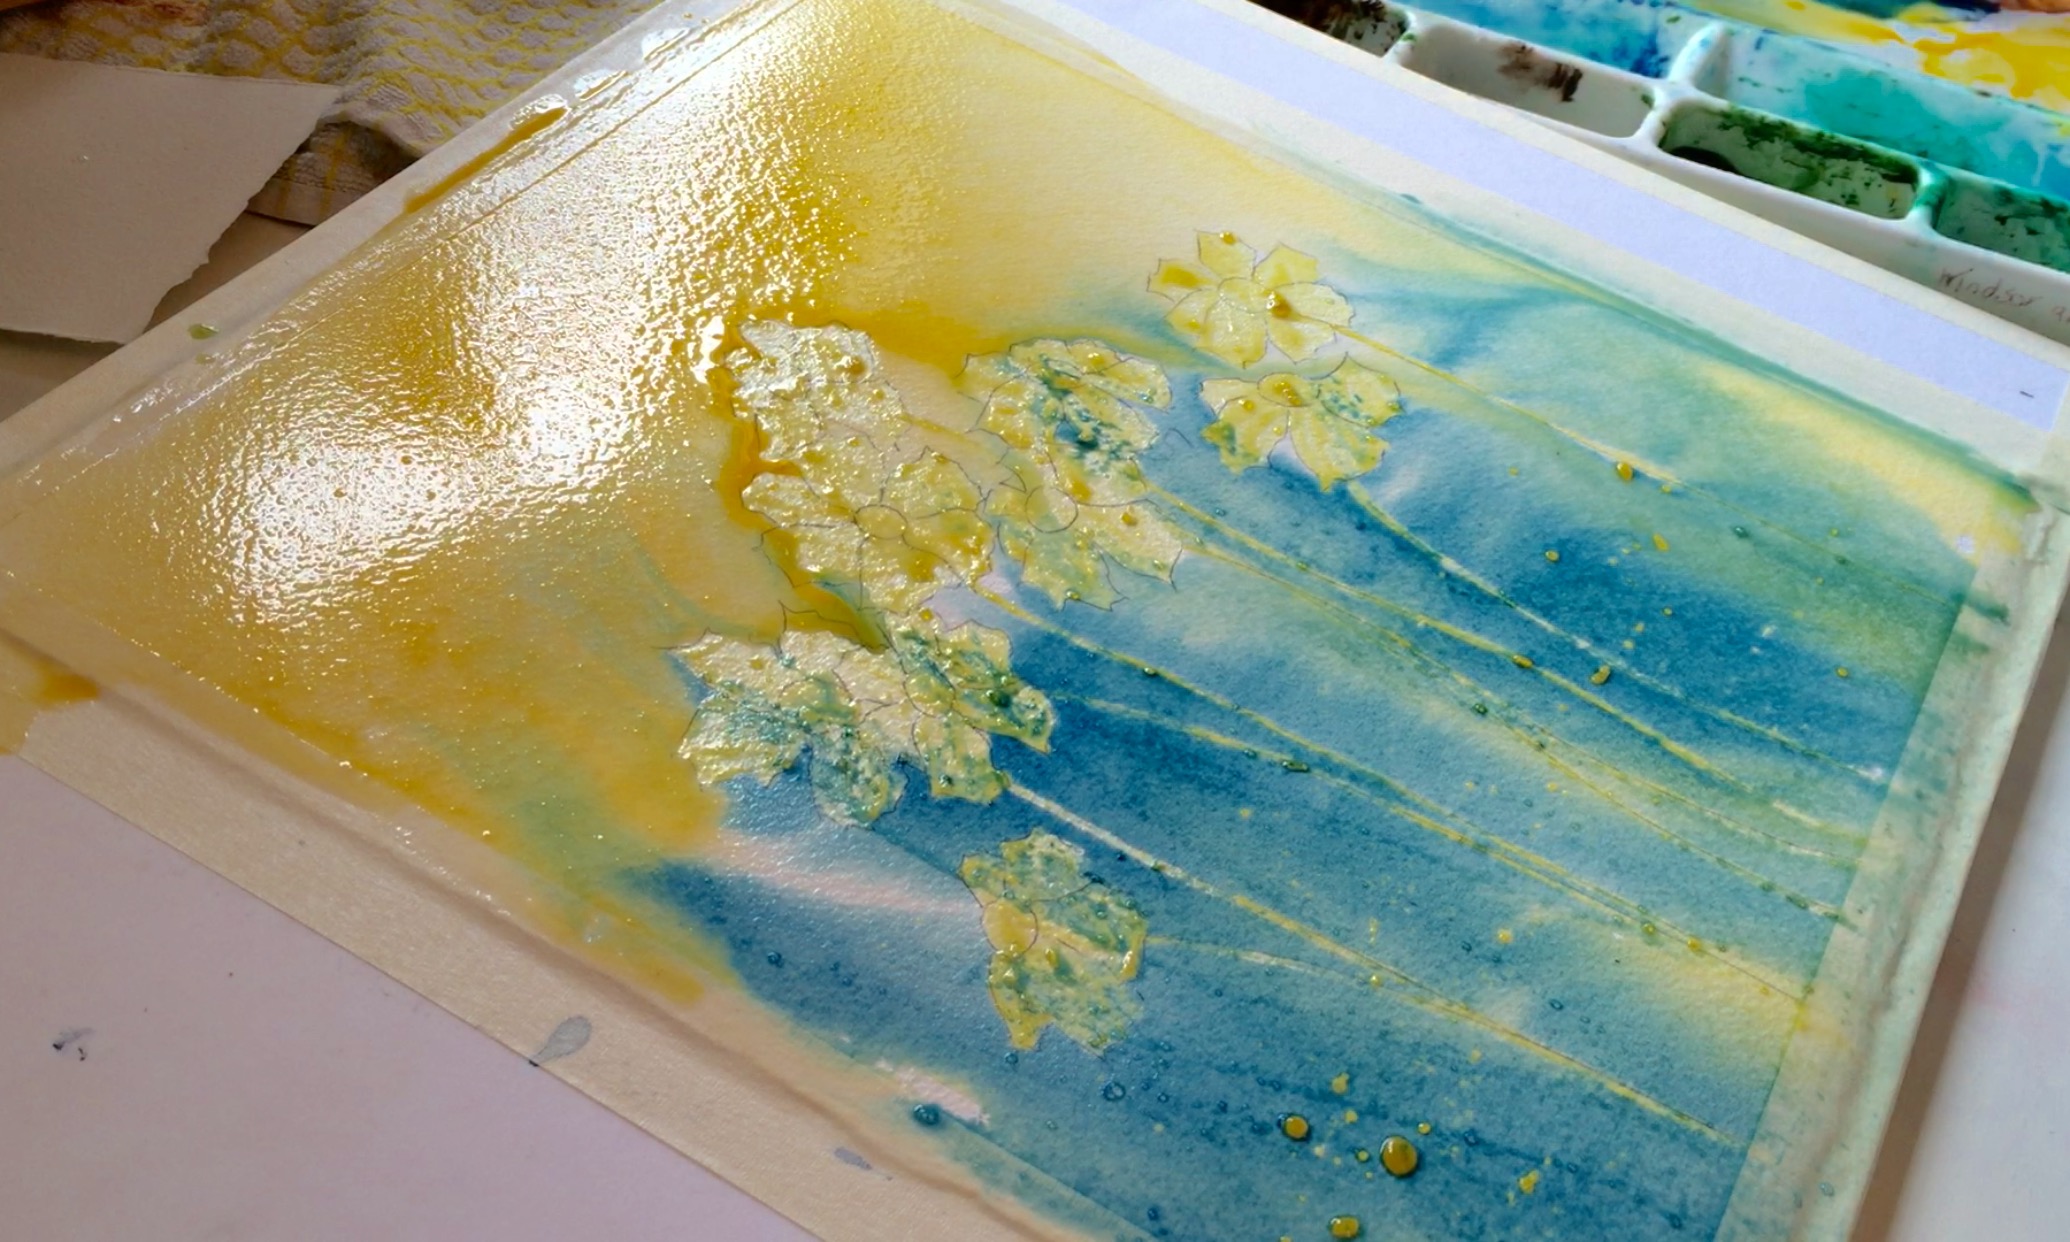
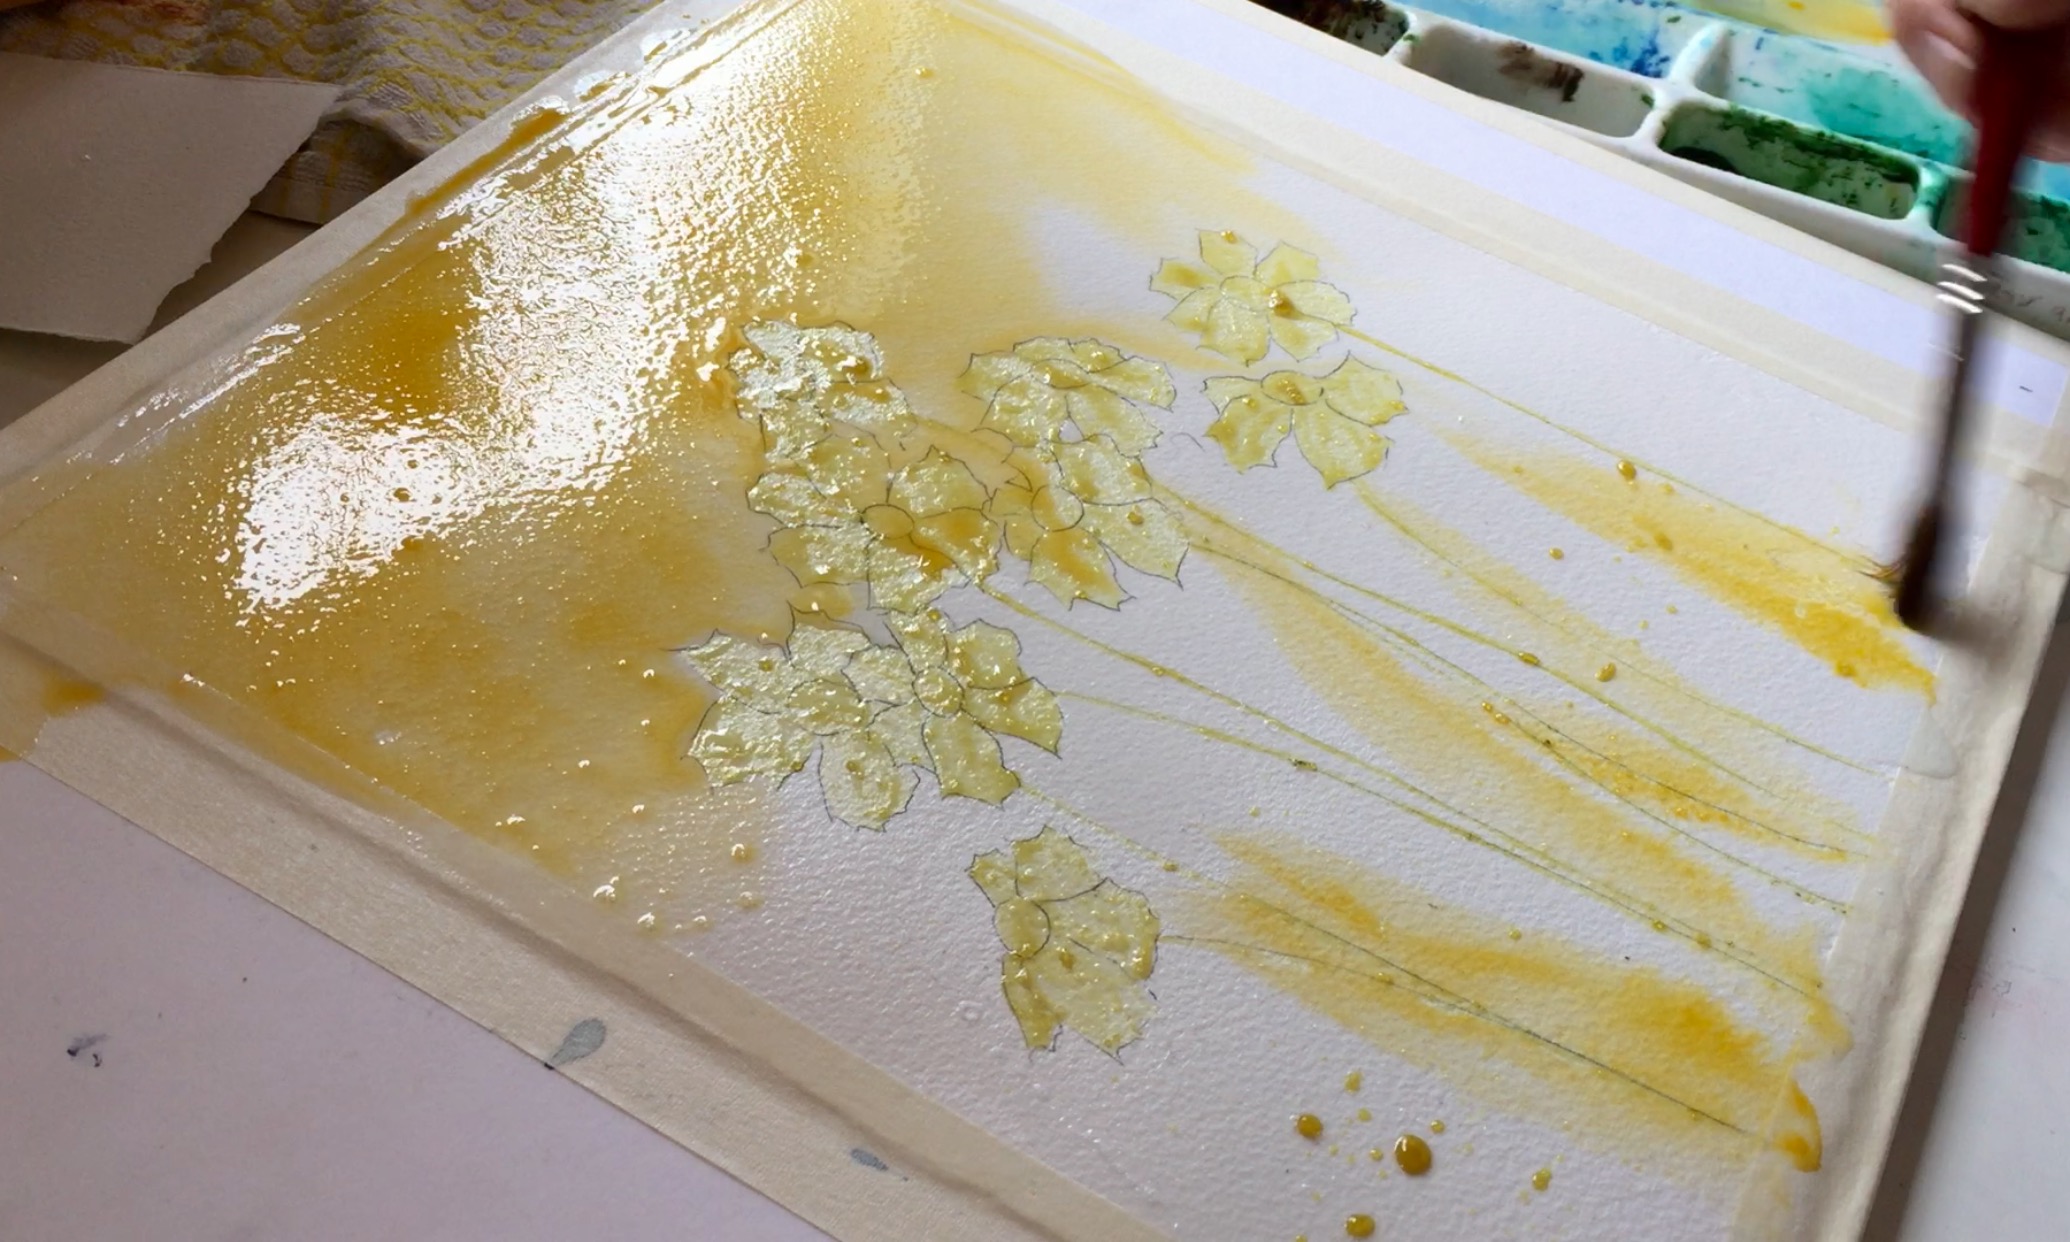
Step 3: Deepening the colors
While you first wash is still wet, switch to a Number 3 round brush and, with a thickened pigment mixture, start adding grass strokes, alternating between the blue, green and yellow colors. Your grass strokes should always start from the bottom of the page, moving up in a quick and fluid motion.
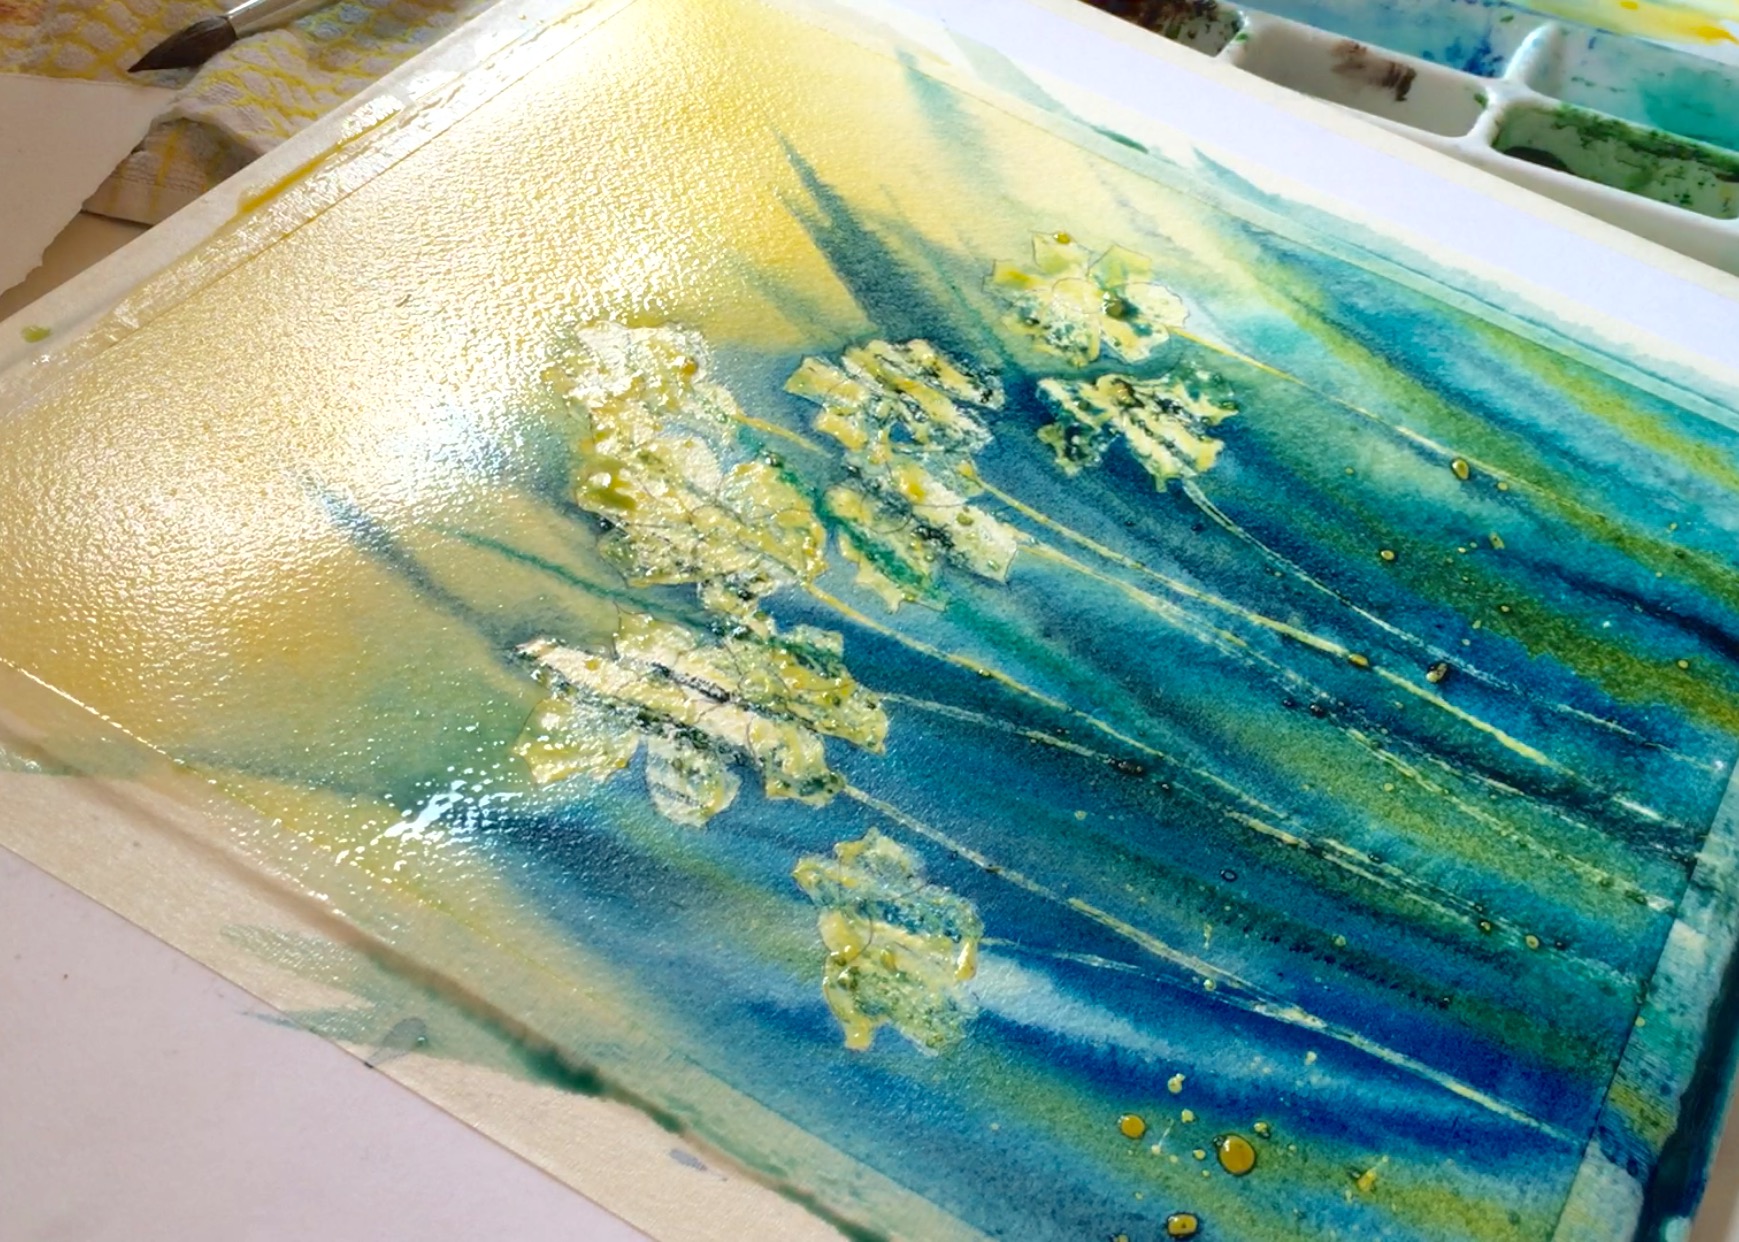
While your wash is still wet, sprinkle a bit of salt onto the bottom grassy part of your painting. The salt will absorb the water and colors and create a beautiful texture as it dries. Just a little bit of salt goes a long way, so don’t over-salt your project! You may also “splatter” your painting by loading your brush with paint and tapping it gently with one hand over the paper.
Allow the entire page to dry until it’s flat and completely dry to the touch. You can use a hair dryer to help speed along the drying process.
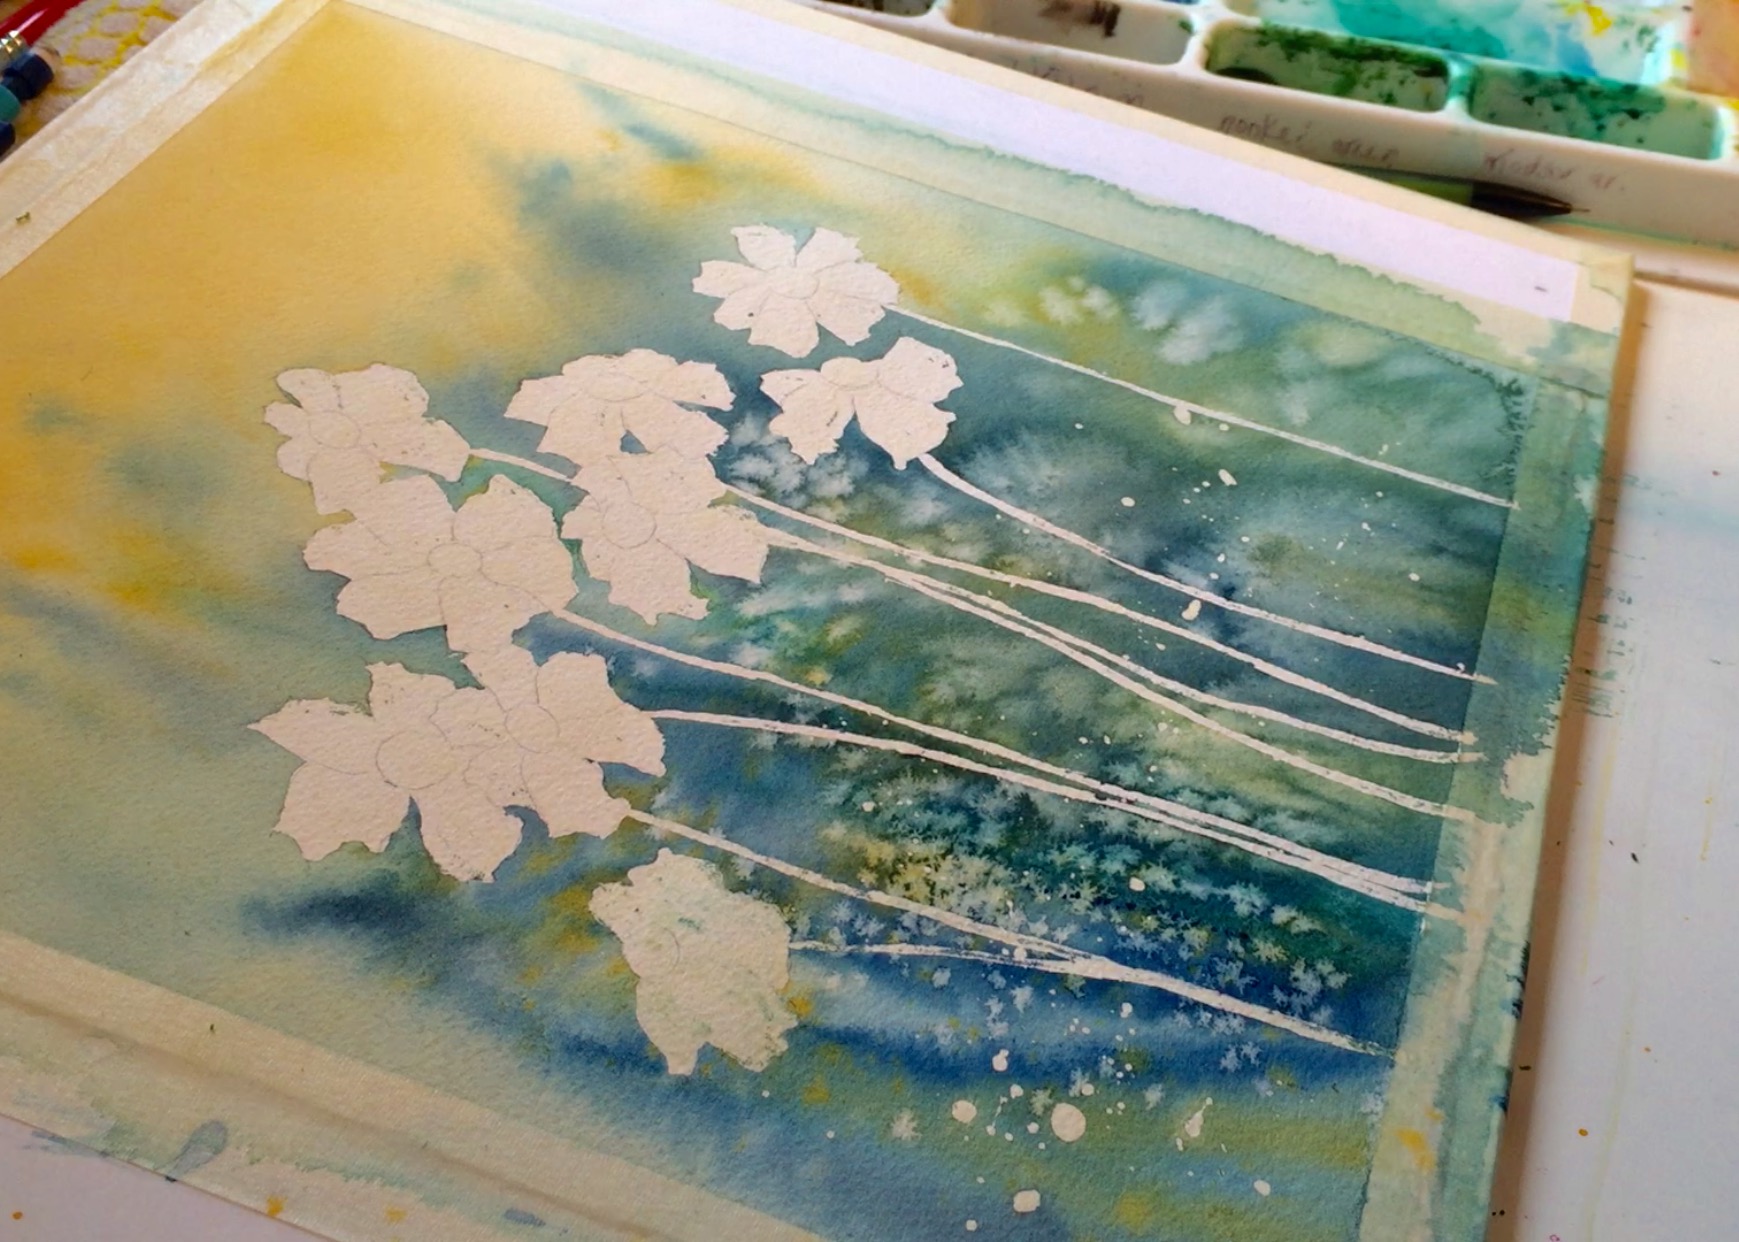
Step 4: Removing the masking fluid
Gently remove all of the masking fluid with your finger or a large eraser, taking care not to damage the paper. Your painting should look something like this:

Notice the beautiful pattern that the salt made on the paper! Once your masking fluid is removed, your artwork should resemble this:
Step 5: Painting the daisy centers
Right now, your flowers are looking like blobs of white on the page, so we will need to add some definition to our flowers! Let’s start with the centers: With a Number 2 round brush and clean water, wet just the round center of one flower. Paint the entire center with the Indian Yellow and then barely touch in a thicker Burnt Umber mixture to the bottom edge of the daisy center to give it depth.
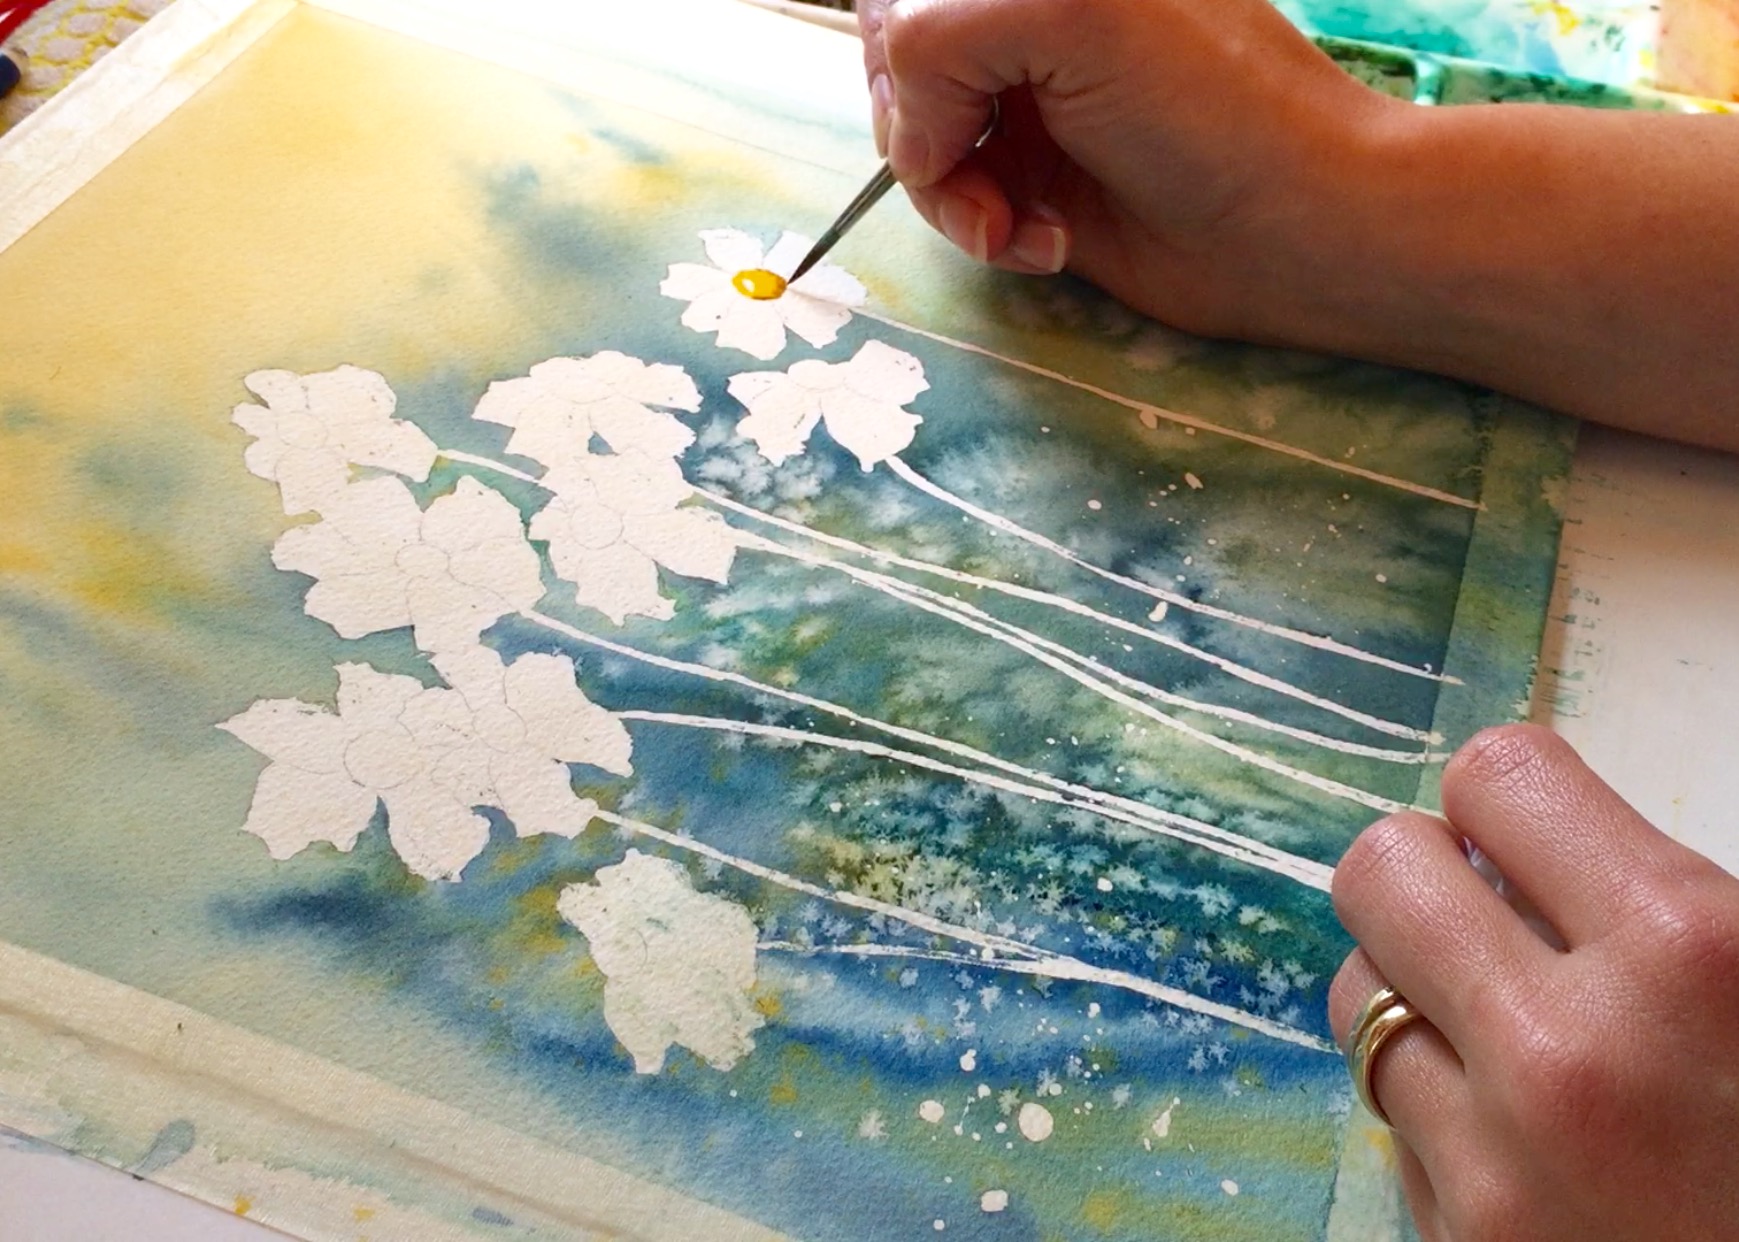
Only work on one flower’s center at a time. Don’t wet several and try to do them all at once.
If you’re feeling particularly adventurous, you may soften the edges of your center with your brush and some clean water: After you’ve painted the center and while it’s still damp, use clean water on your brush to just lightly touch some of the center edges to soften the sides and make them bleed a little bit. This takes a bit of control, so if you’re unsure, practice some centers on a separate sheet of paper.

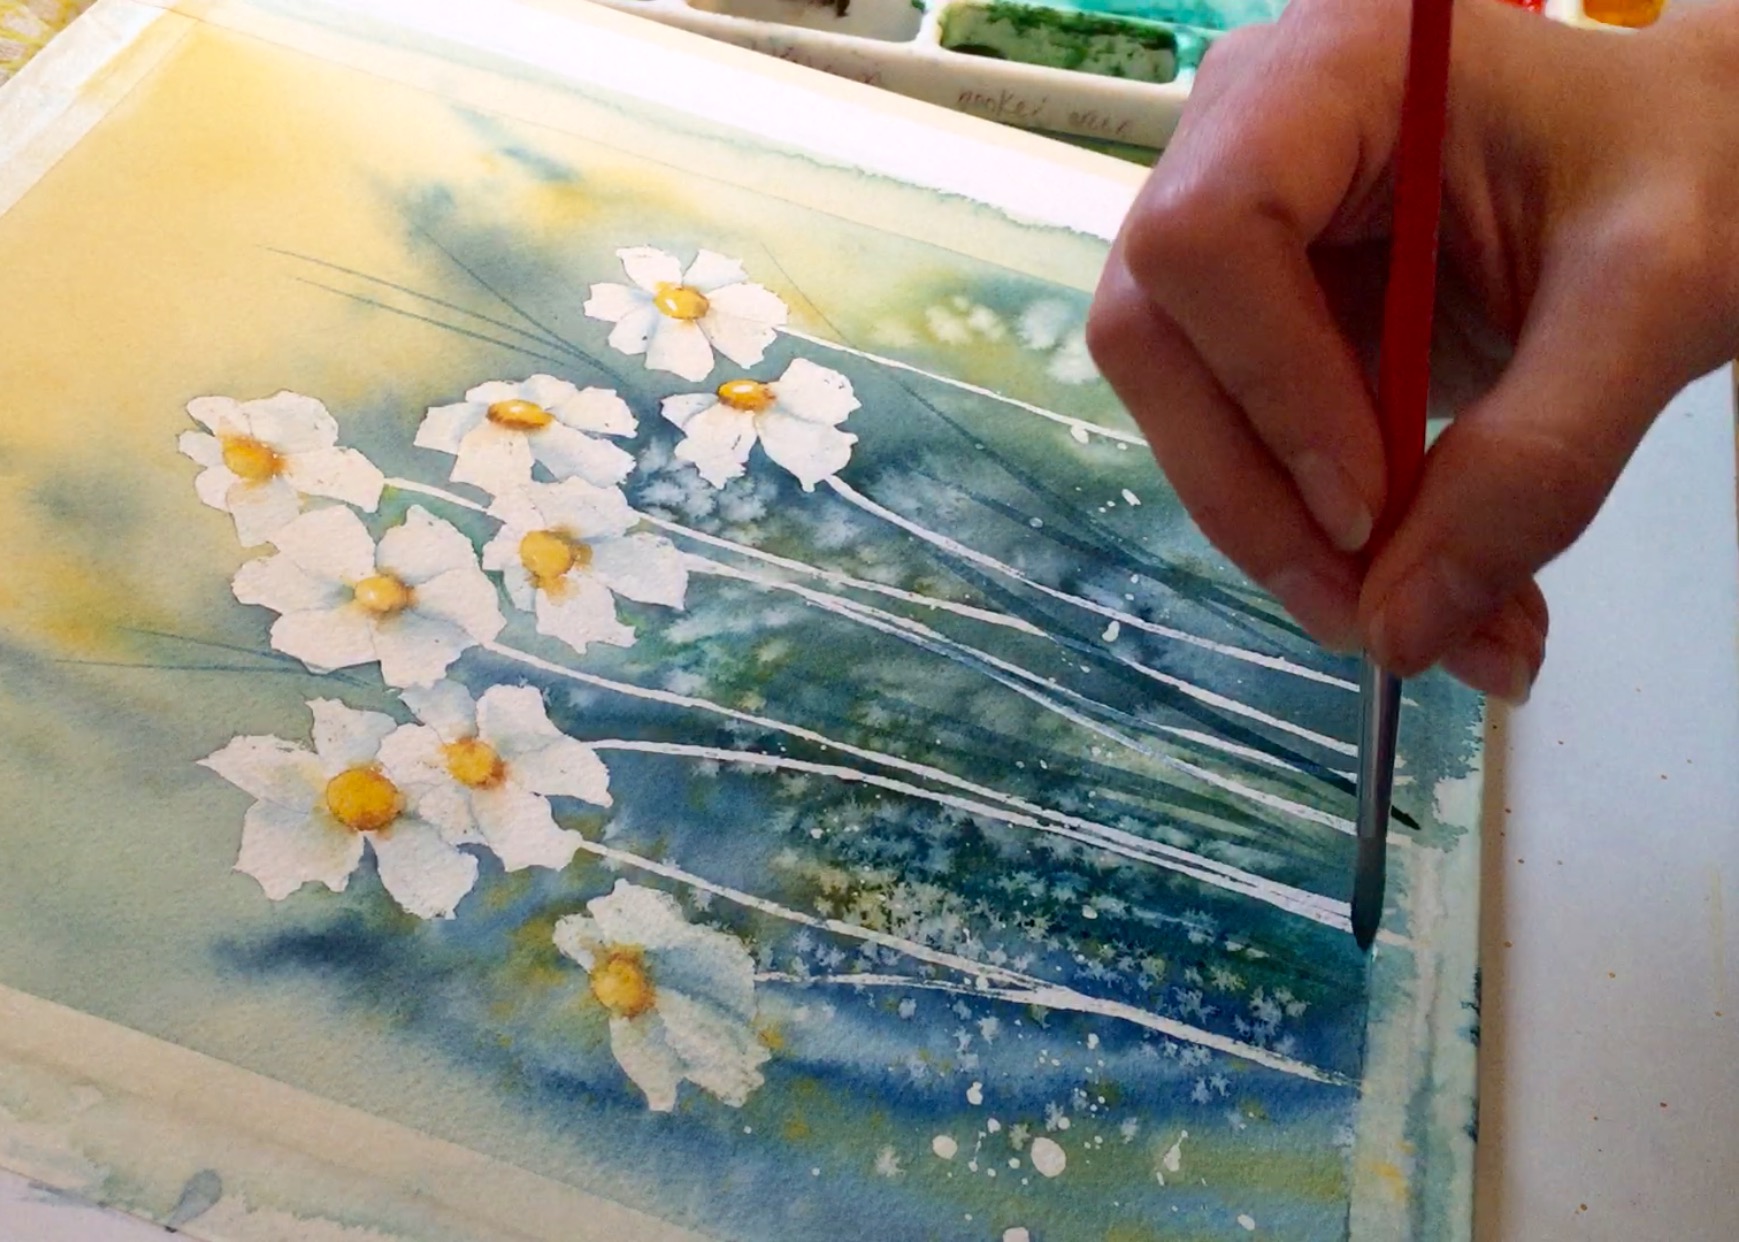
Step 6: Petals and finishing touches
Now, let’s lightly define your petals so they stand out from one another. After the daisy centers are completely dry, wet one petal with clean water. With a very watered-down mixture of the the Cerulean or Ultramarine Blue and a Number 2 brush, touch the blue into the very edges of the petals that overlap with other petals. This creates a soft shadow that delineates one petal from another. The daisies should only have a hint of color on the edges of the petals — after all, you still want them to look white!
You may now paint some wet-on-dry grass strokes to pull your painting together. Use the same bottom-to-top motion that you used in the beginning wash.
Splattering a darker blue or green at the end will add a nice finishing touch, but if you don’t want the splatter to get onto your flowers, cover them with a tissue.
Your daisy painting is now ready for your artistic signature and a frame!
I plan to scale it down for a card.
I want to learn the watercolor techniques
I did this painting twice! Once for me and once for a gift. It is very beginner friendly and very beautiful!
THIS IS BEAUTIFUL!!! CanNOT WAIT to try! Thank you for your inspiration!!! :)
A lovely project ,love the colours .