You can indeed revisit childhood when you least expect it. Creating a paper doll for this post became a pleasant surprise in a nostalgic way for me!
As an artist, you have everything you need to learn how to make paper dolls and design custom clothes and accessories.
www.craftsy.comI was eager find out how to make a paper doll and design a few cute outfits, but as the worked commenced so did the memories: There's such fun in a paper sheet full of enticing outfits, accessories and a doll form that you cut out and become the stylist for.
Keep reading to learn how to make paper dolls all your own.
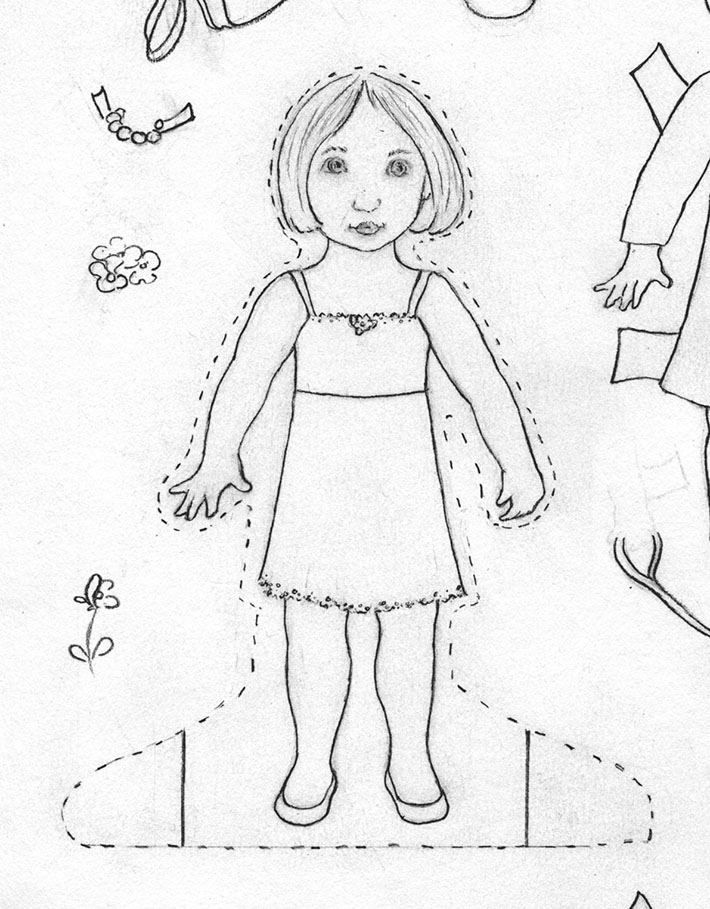 Step 1: Draw your doll form
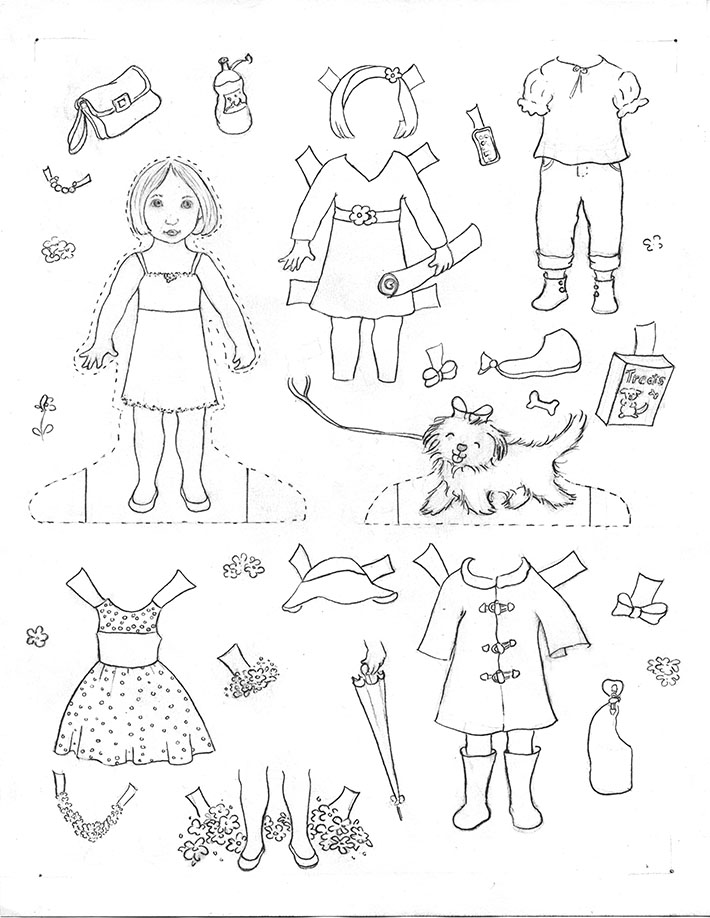
Determine how tall you wish your paper doll to be and draw the form of your choosing. Try to keep the doll in a pose that will be easy to lay outfits over. I also drew a close-fitting slip on my doll, which can be easily concealed.
Then, draw a dotted line around the doll to help as a cutting guide. Add "wings" at the bottom, including solid lines to fold to the back and make a stand for the doll.
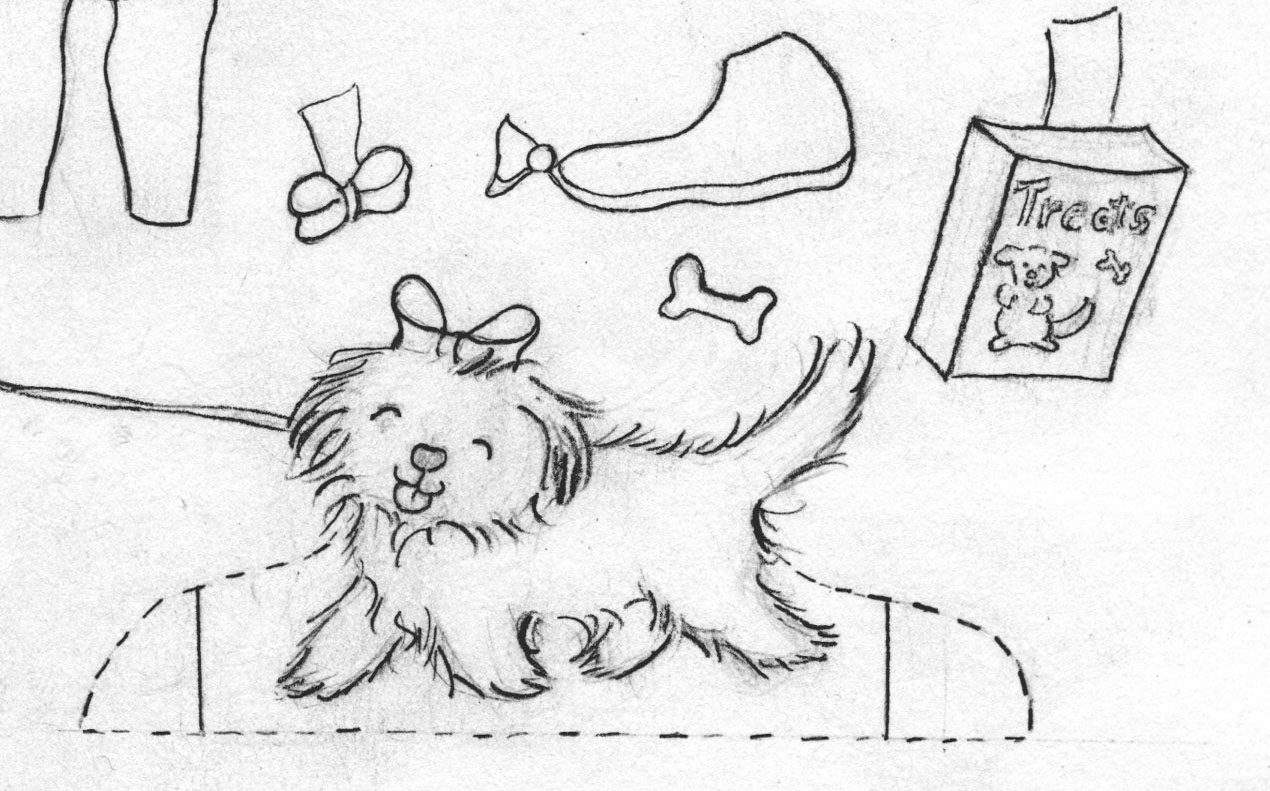 You can draw any form you like for a paper doll — even a puppy!
Step 2: Design doll clothes
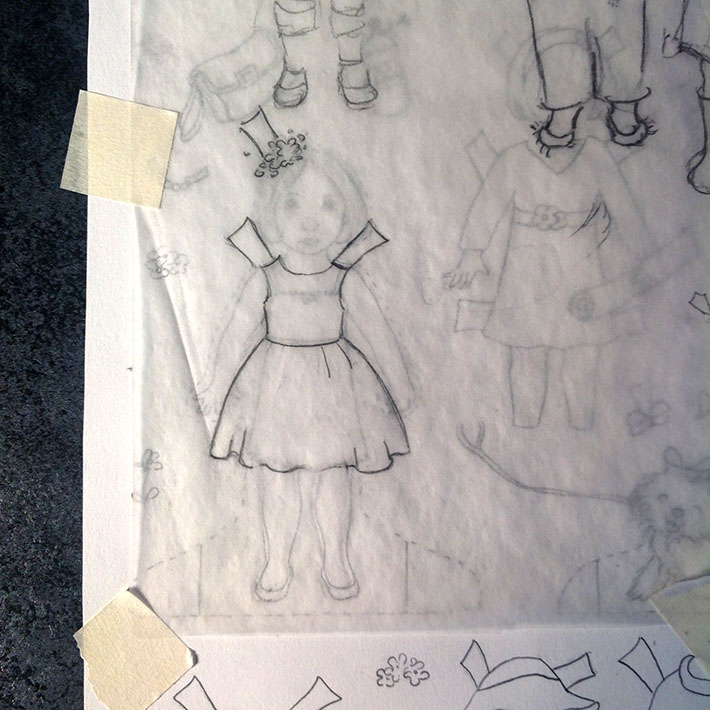
Tape a piece of tracing paper over you doll. Draw basic outlines of clothing, conforming to the shape of your doll. You can add or change details later — for now, the most important thing is to have the outline and proportions of the garment correct.
If you are adding accessories, make sure they are also proportionate to your paper doll form.
Add tabs to fold over the doll form to hold the clothing in place.
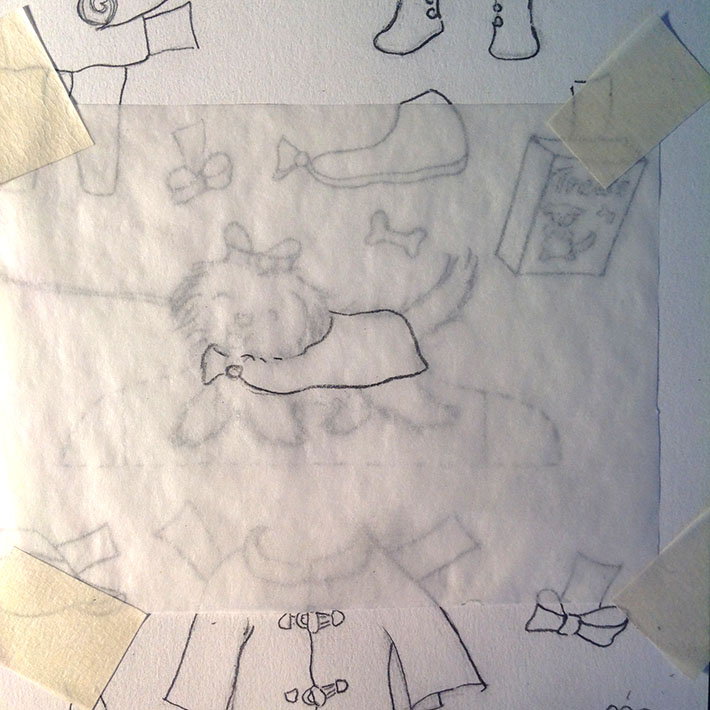 Keep going until you have a few outfits you are happy with.
Step 3: Transferring your designs for finishes
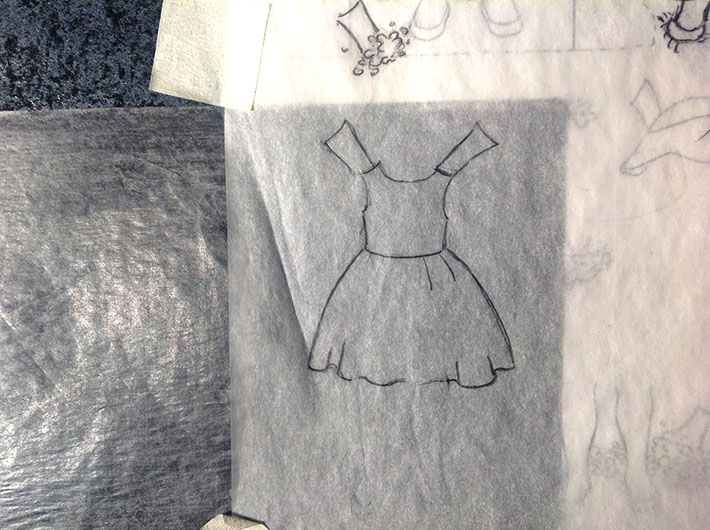
After you have drawn all the clothing and accessories on your tracing paper overlay, you can now transfer your design to a clean sheet of paper for detailing and finishing before you cut it out. Choose a heavyweight paper to make sure the doll will stand up on its own.
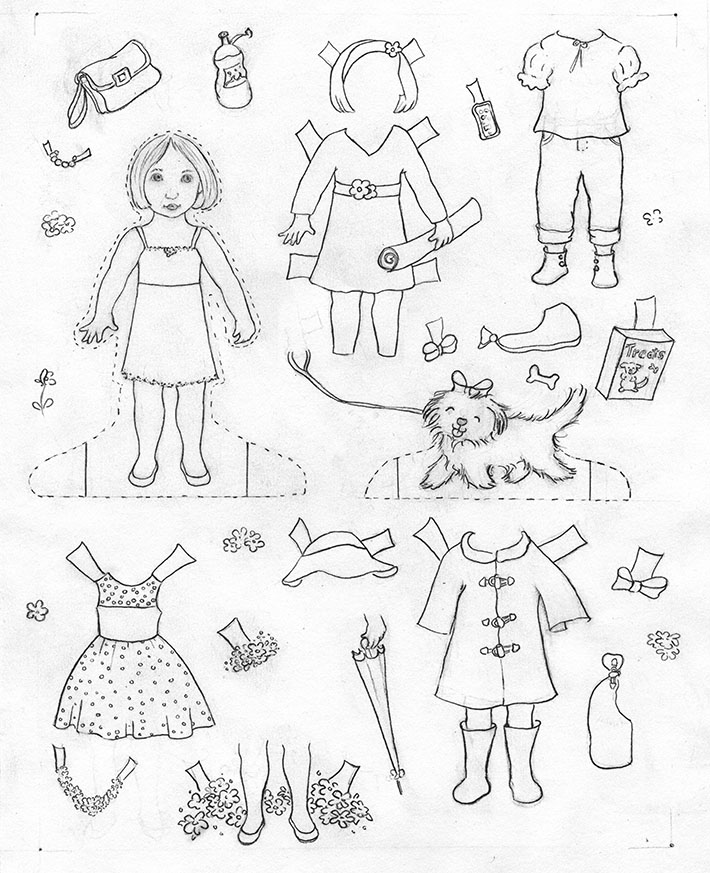 Make sure every item has a tab to fold over and hold it in place on your doll. If you miss any, this can easily be corrected with a small paper tab taped on after.

Step 4: Color your doll and clothes
Now your hard work is done and you can delight in choosing colors for your doll's wardrobe. Don't skip this step, because it would be a lot harder to add color after they are cut out. I used color pencils, but any medium works.
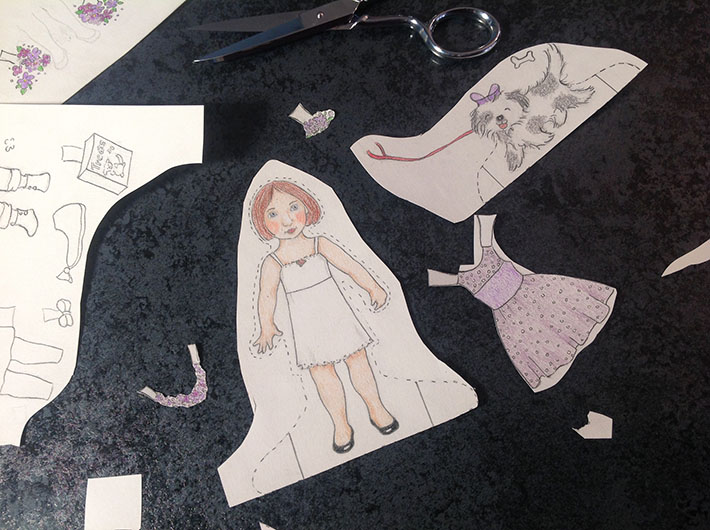 Step 5: Cut out your paper doll
Cut out your doll and clothes when you are finished coloring them. I find that for cutting very detailed pieces, it helps to cut all around it but not too closely on the first pass. Once you release it from the whole sheet it is much easier to maneuver.
Then slowly cut closer, notching out tight spaces. A good rule of thumb is if it feels comfortable to go in close, then do so. If not, give it a few more passes until you feel you can easily go close enough without cutting off important details.
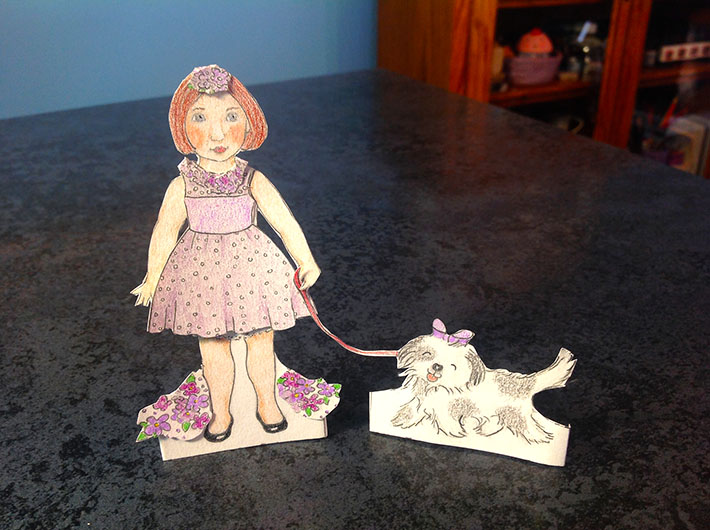
Now you can put together your paper doll's first ensemble!

<strong>I would like to try this with my 6 year old girl. Thank you for sharing!</strong>
What fun. My girls love to make paper dolls.
Paper Dolls is the best thing that I can make for my granddaughters during these Covid tough times. This is very informative and helped me a lot thanks. A good blog always comes up with new and exciting information and while reading this article, I do get a vibe that this blog really have all those qualities. I love the way you write and share your niche ! Very interesting and different ! I genuinely liked the contents..
This is perfect. My sister and I want to introduce our grands and great-grands to the "wonders" of paper dolls.