If you don’t like cutting and stitching loose triangles together on the bias, you’re not alone. Making enough half-square triangles for a quilting project can get totally tiring. But don’t fret — here’s a quick and easy solution to your HST woes.
The Magic 8 Method
Level: Easy
1. Determine Size
First you need to know what size finished half-square triangles are desired.
For example:
- Let’s say you want to make 3” finished half-square triangles.
- Add ⅞” to your 3″ measurement. (Your total is now 3⅞”).
- Multiply your total of 3⅞” by 2. (That equals 7¾”).
- 7¾” squares are the size needed to make your 3” finished half-square triangles.
2. Cut
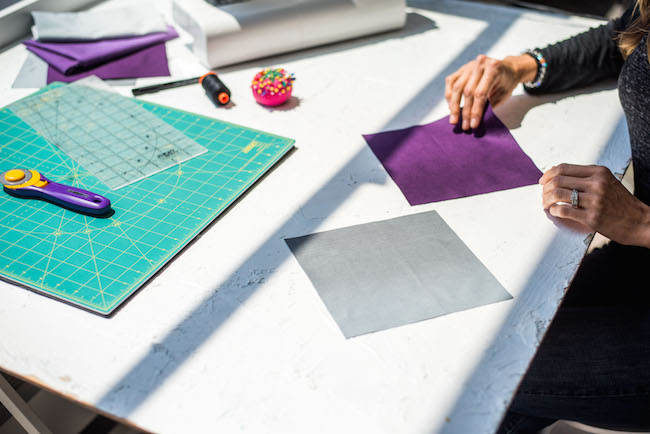
Cut two squares the desired size, based on the formula above.
3. Mark
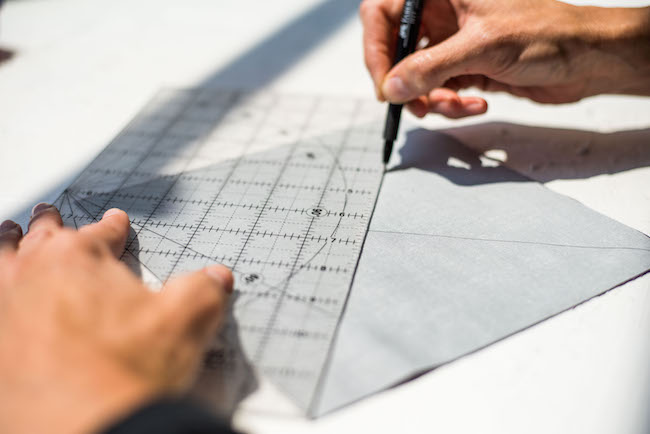
Place the two squares on top of each other, right sides together. Draw two diagonal lines corner to corner on the top fabric.
4. Stitch
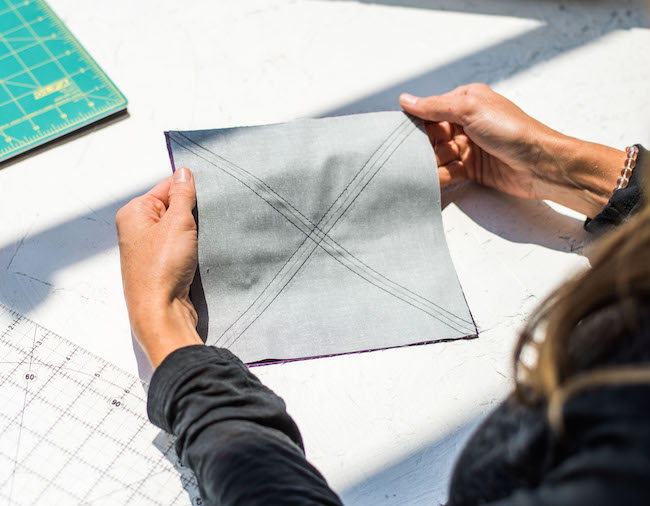
Stitch a total of four lines: two on both sides of each diagonal line, ¼” away from the line.
5. Cut
Carefully cut the sewn square into the eight HSTs. You’ll make a total of four cuts.
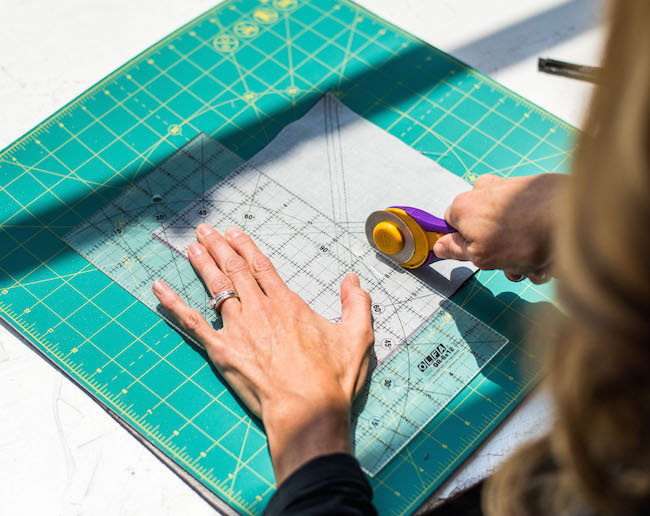
Cut 1: Cut vertically right down the center. Align your ruler with the center where you drawn lines intersect and one straight edge of the fabric squares.

Cut 2: Make a second cut that’s perpendicular to the cut you just made. At this point, it’s best to leave the fabric pieces where they are — don’t try to rotate the fabric! Instead, walk around your table so you are better positioned to make the cut, or turn your cutting mat.
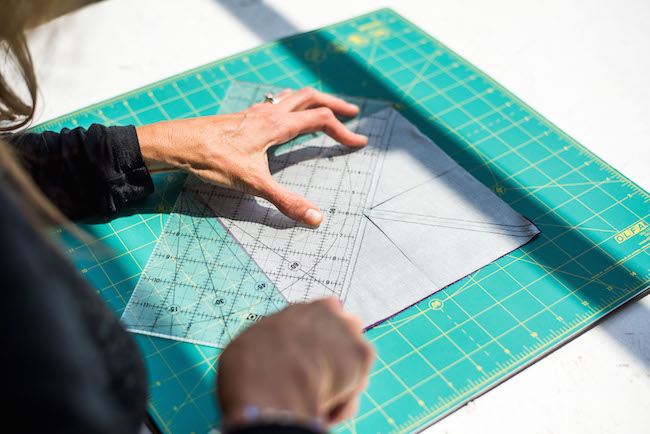
Cuts 3 and 4: Cut on both of the drawn diagonal lines, between your stitching lines. Again, it’s best not to move your fabric; instead, move your body or your board so that you don’t shift the fabric.
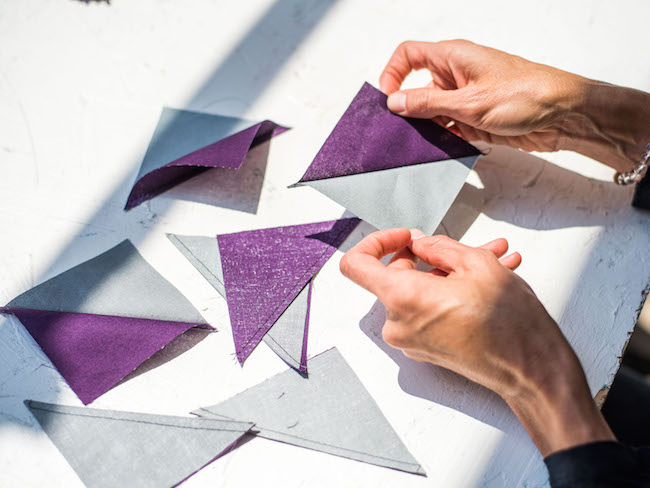
6. Open and Press
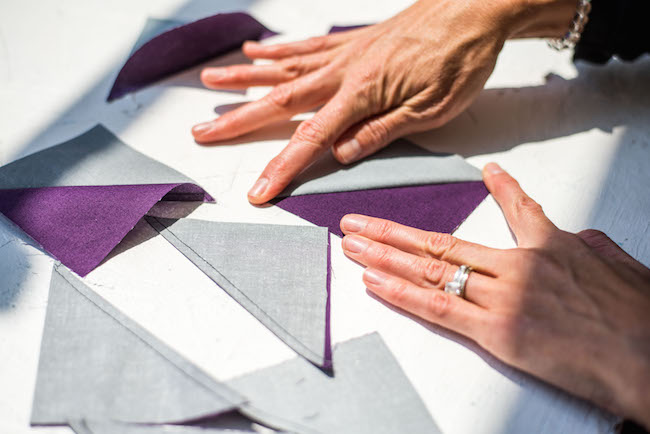
Separate the cut pieces and open them up to reveal your perfect half-square triangles! Press the seams to the darker side and you’re ready to use them in a project.
–>
Wow! I like this method SO much better than those that have you sew 1/4" all around the starting squares or cut everything bigger and then trim it. This has fewer steps and is totally accurate. It's helpful to keep in mind when preparing to make the vertical and horizontal cuts that the measurement from the center intersection to the edge of the block should be exactly 7/8" larger than your finished squares will be.
Why do you add 7/8"? Just trying to understand the math. No my strongest subject. ;)
Thanks
Great idea! If it is as it looks, I'll be doing the happy dance!!!!
Love the fact you gave us the formula for sizing the half square triangles, thank you.
Amazing clear direction for faster sewing
Thanks very much , I will try to do it
This is a great tip! It will make quilting so much more efficient.
Excellent! Does anyone have a ruler that marks 7/8"?
Thank you!