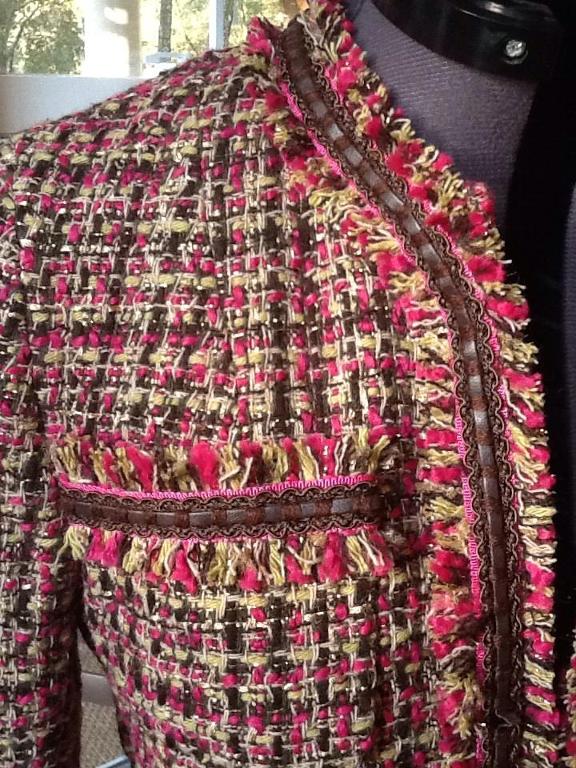
Tweed jacket with fringe trim by Craftsy member Jstarr4250
In my class, I teach students how to sew a classic wool tweed jacket, a chic wardrobe staple, using couture sewing techniques. While the jacket by itself is lovely, sometimes you just need that additional unique detail. Accordingly, one of the questions that crops up regularly is, “How do I make a pretty fringe to decorate the edge of my jacket?”
Here is a simple way to add fringe to your tailored jacket.
Step 1: Choose the right fabric
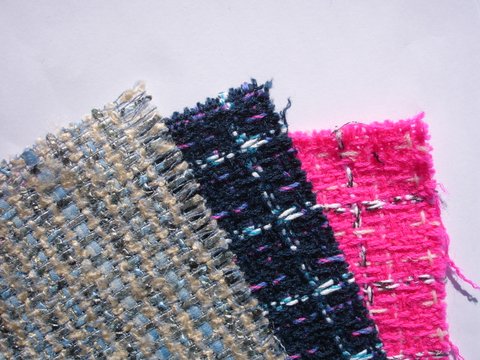
The first step is to select appropriate fabric. Those that are knitted in construction or too tightly woven will not work (so, if you are making an Iconic Tweed Jacket your fabric is likely to be perfect for this technique). You need a loosely woven cloth where the yarns, within the weave, can be teased out easily leaving a pretty fringe of threads behind. Linton Tweed fabrics are ideal but wool, silk, linen, boucle fabric any fabric where the threads can be pulled out, may be used.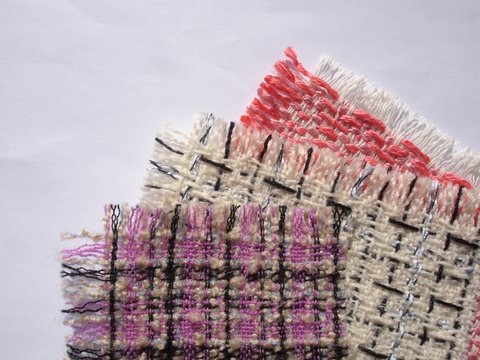
Step 2: Study your fabric.
The next stage is to examine the fabric. Find out whether removing the warp threads (the heaviest threads, placed on the loom first) or the weft threads (the filler yarns woven through the warps) create the most effective result. Take a sample piece and pull out a few warp and weft threads, now compare them. While they will vary in density, consider the finished look you want to create.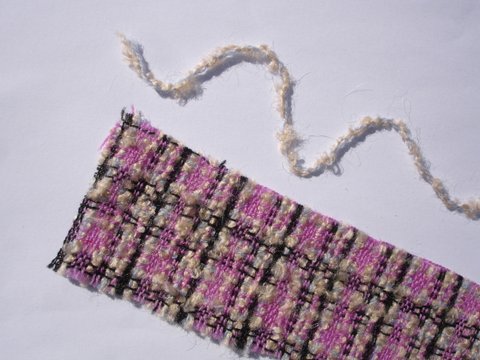
Step 3: Pull a single thread & cut a strip of fabric
Having made a decision about the way you want to use the weave and whether you decide to take out the warp or weft yarns, pull out a few long, bold threads from your fabric length and set them aside. Next, cut a strip of fabric for your fringe in the direction required. In other words, if you will be taking out weft threads, cut the strip from selvedge to selvedge. But, if you will be removing the warp threads, cut parallel to the selvedge. The width of your strip will depend on how you wish to use your finished fringe. You may choose to have a central band with both sides fringed or just a single fringe on one edge of a band. The band remains in place to hold the fringe together and to secure it to a garment. This means you need your strip to be the finished fringe width plus approximately 3/8” (1cm) for attachment.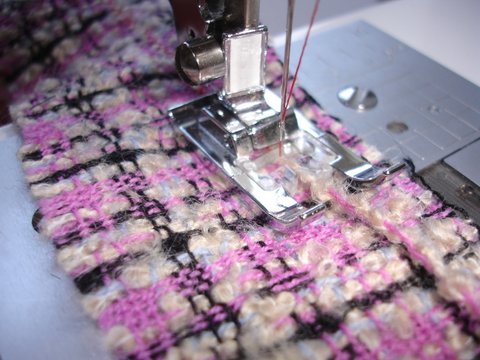
Step 4: Stitch over the strip.
Before removing all the threads from the weave, place the single warp thread you removed earlier and place it on top of your fabric strip where you intend the fringe to stop and your “holding” band to start. Set your sewing machine to zigzag stitch (stitch setting approximately 2mm long by 2mm wide) and sew over the thread, stitching it to a single thread below. If you are making a two-sided fringe, repeat on the other side of the fabric strip with another long thread.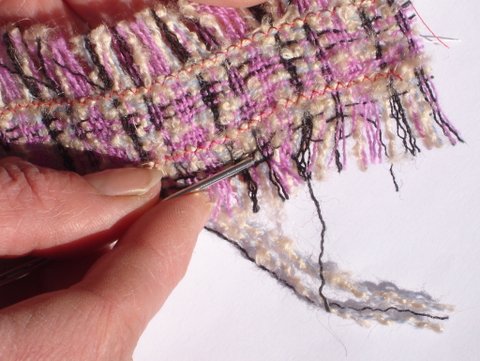
Step 5: Tease out the threads from the weave.
Having secured a thread (or yarn) along the strip, you can now tease out the fringe with a long needle or a tailor’s awl knowing that you will not remove too many threads and a narrow band remains for attaching the fringe to the garment. This way, the strip of fringe will not completely fall apart!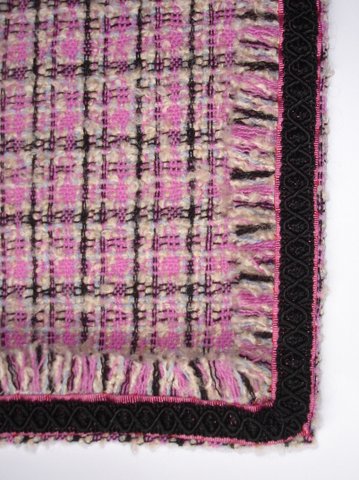
Step 6: Attach your fringe!
Simply place the fringe on the edges, hem, cuffs and pockets of your jacket and cover the remaining weave with your chosen braid. You may choose to use a single fringe or a double-edged fringe or even fold a double fringe through the center to create an extra fluffy finished trim. The choice is yours!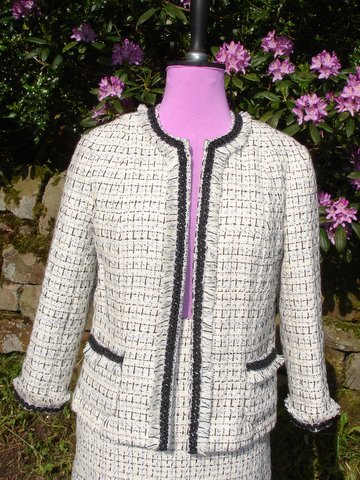
Photo via Lorna Knight
Why not take a look at The Iconic Tweed Jacket, and then have a go at making your own?

Share tips, start a discussion or ask other students a question. If you have a question for an expert, please click here.
Already a member? Sign in
No Responses to “Sewing on the Fringe: 6 Steps to Making Fringe for Your Tailored Jacket”