
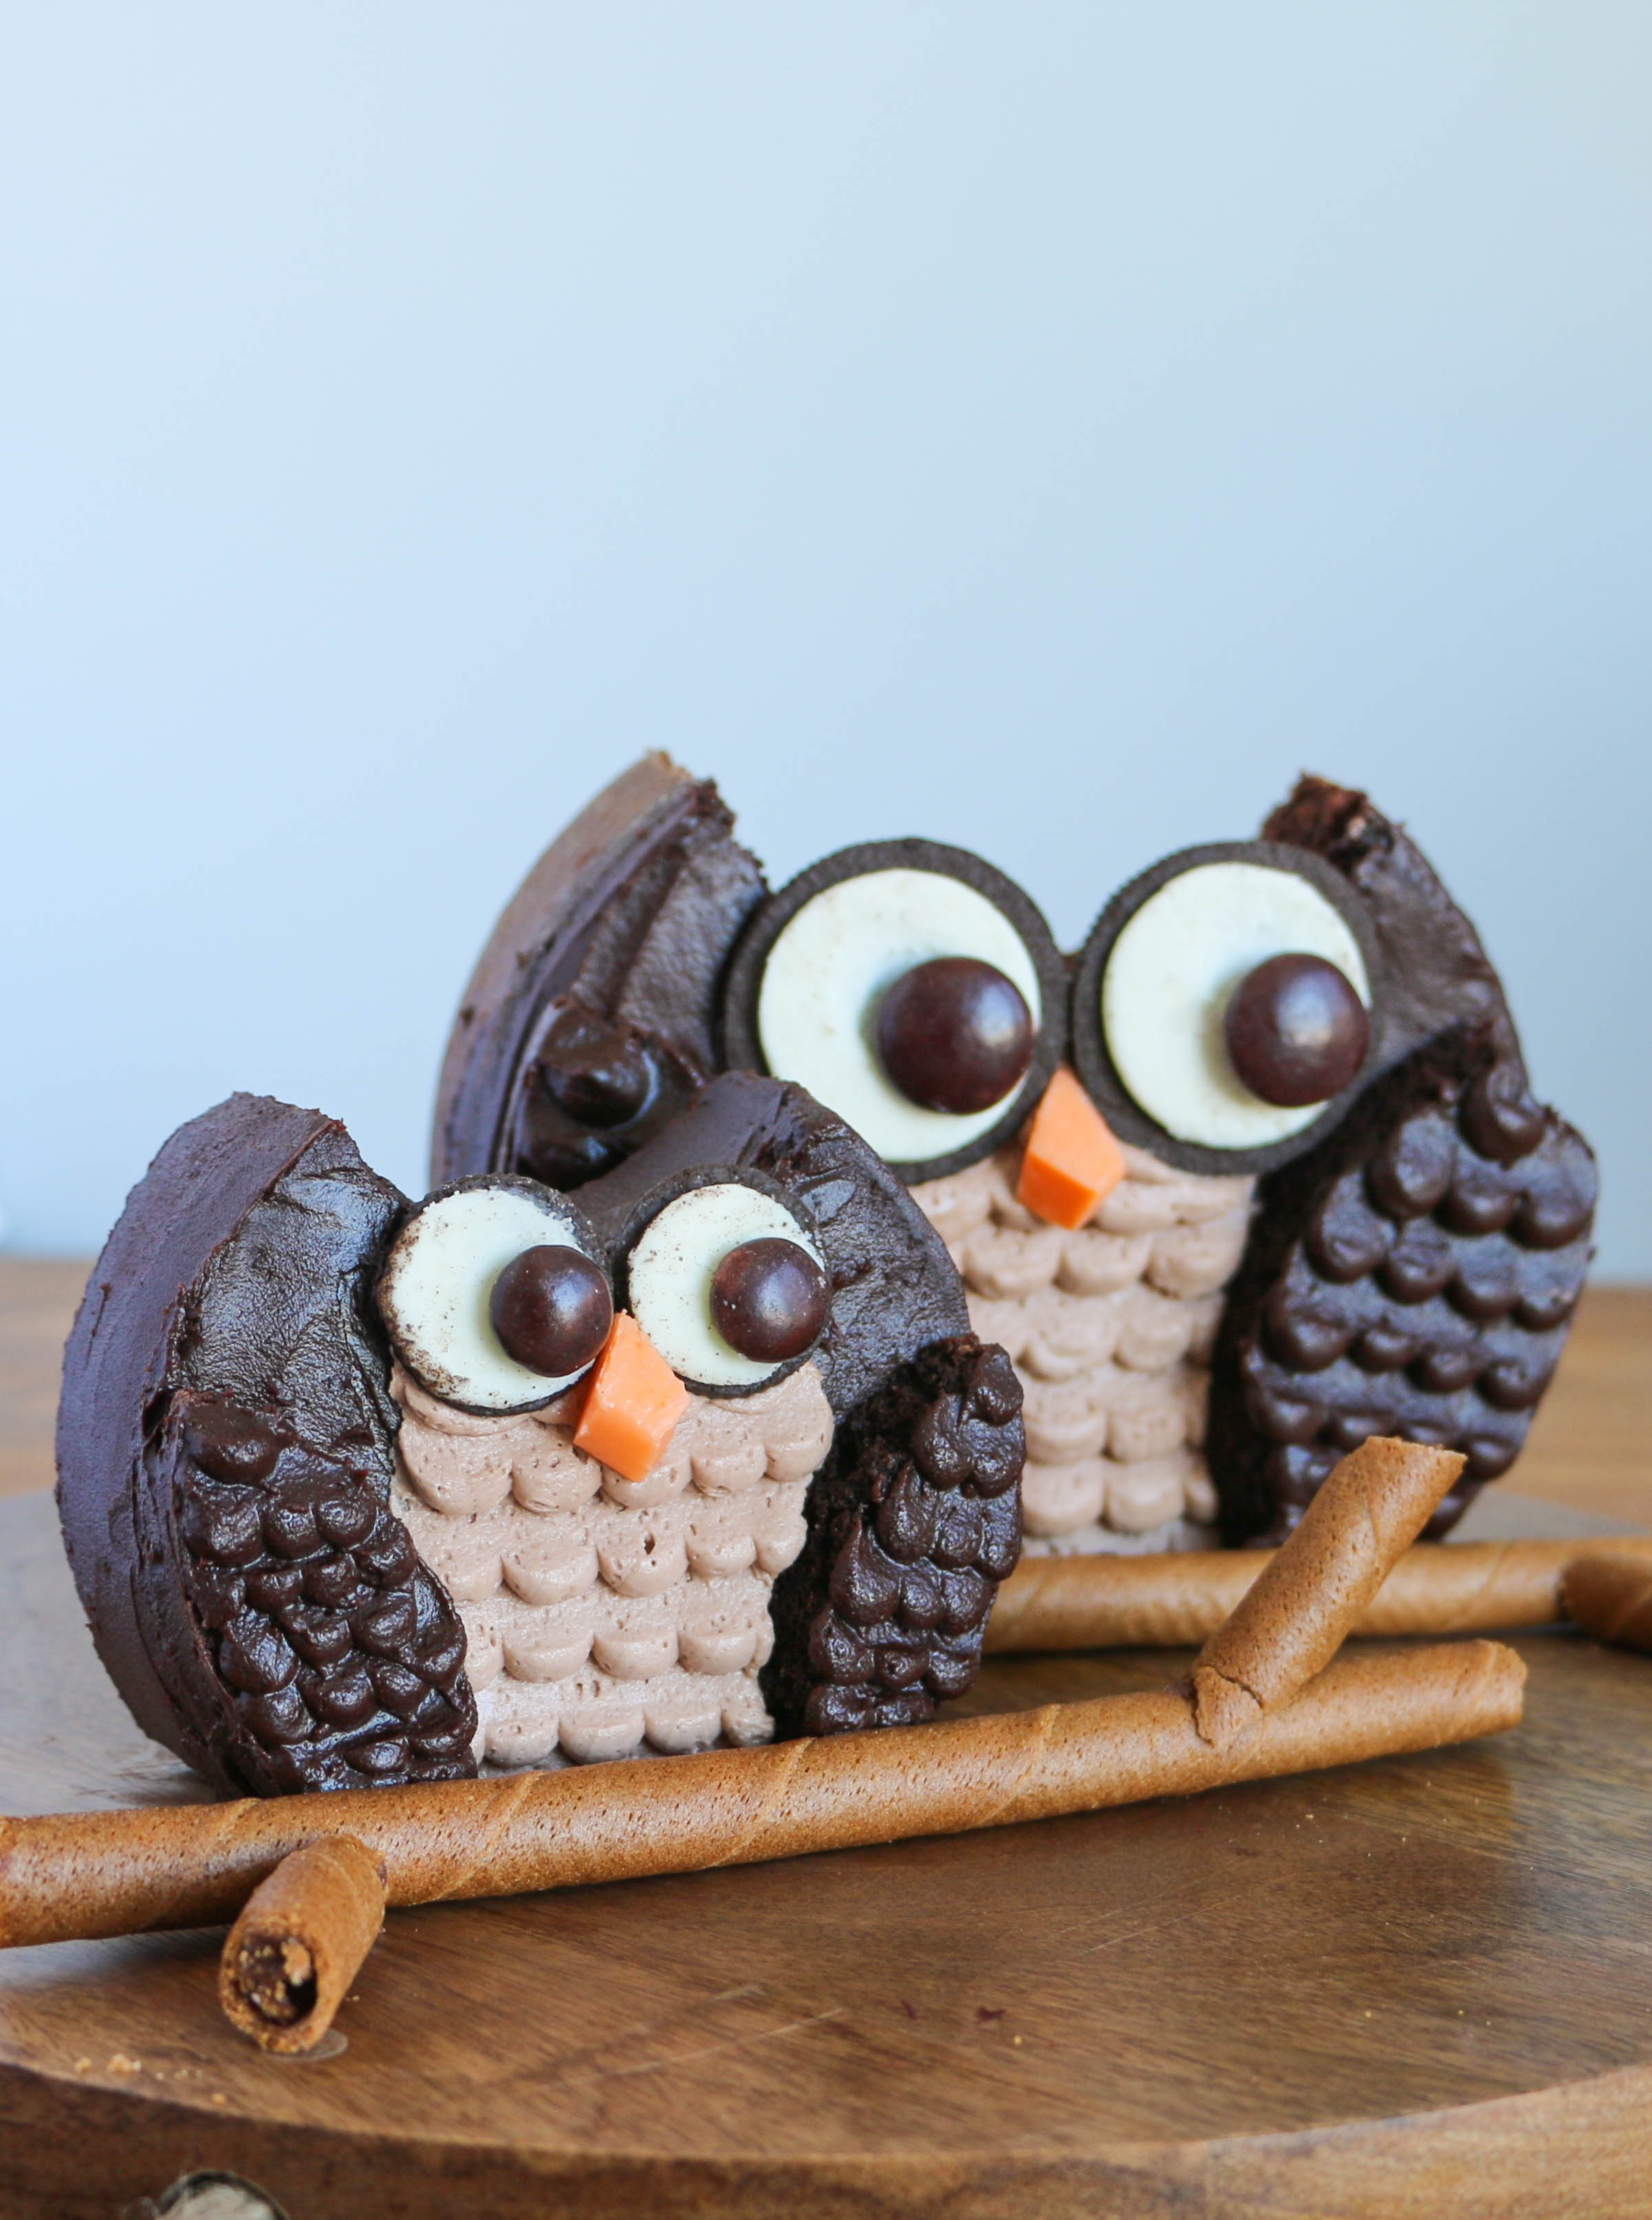
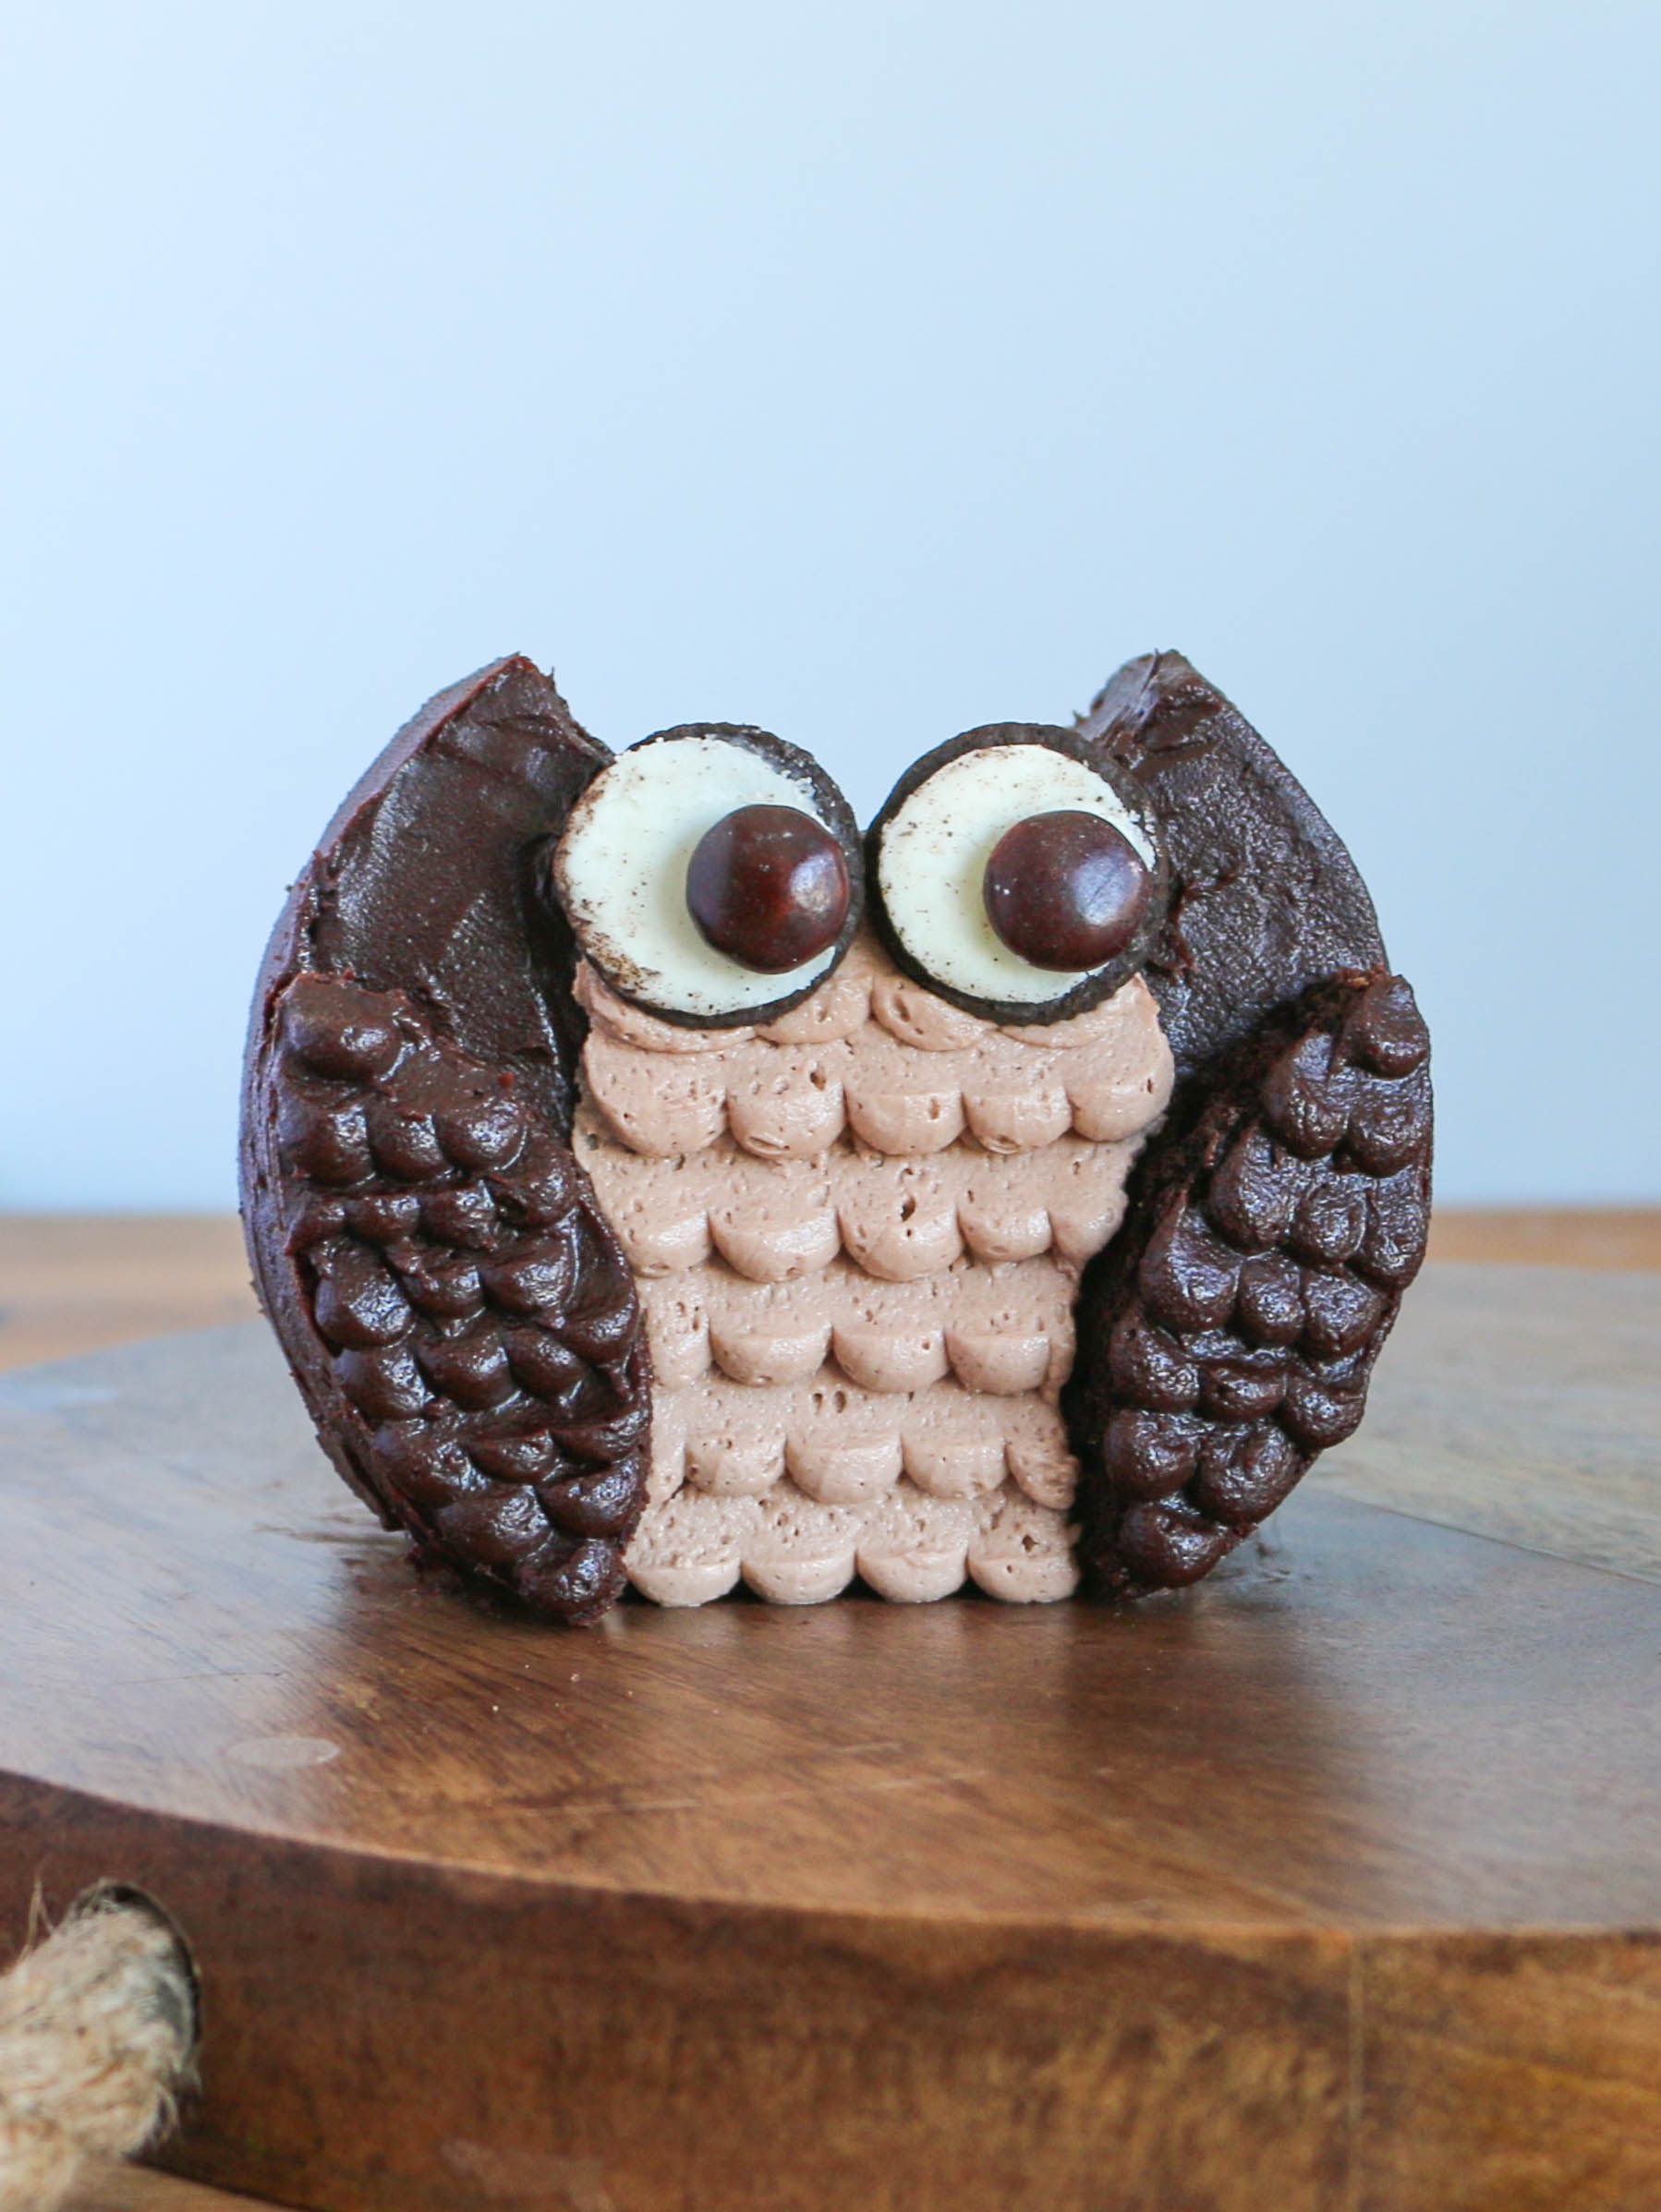
Well, owl be darned! Making an owl cake is easier than it seems. Save complex cake carving for another day, and whip up this feathery cutie with a few simple tools and treats from the grocery store.
Owl images via ErinBakes.com.
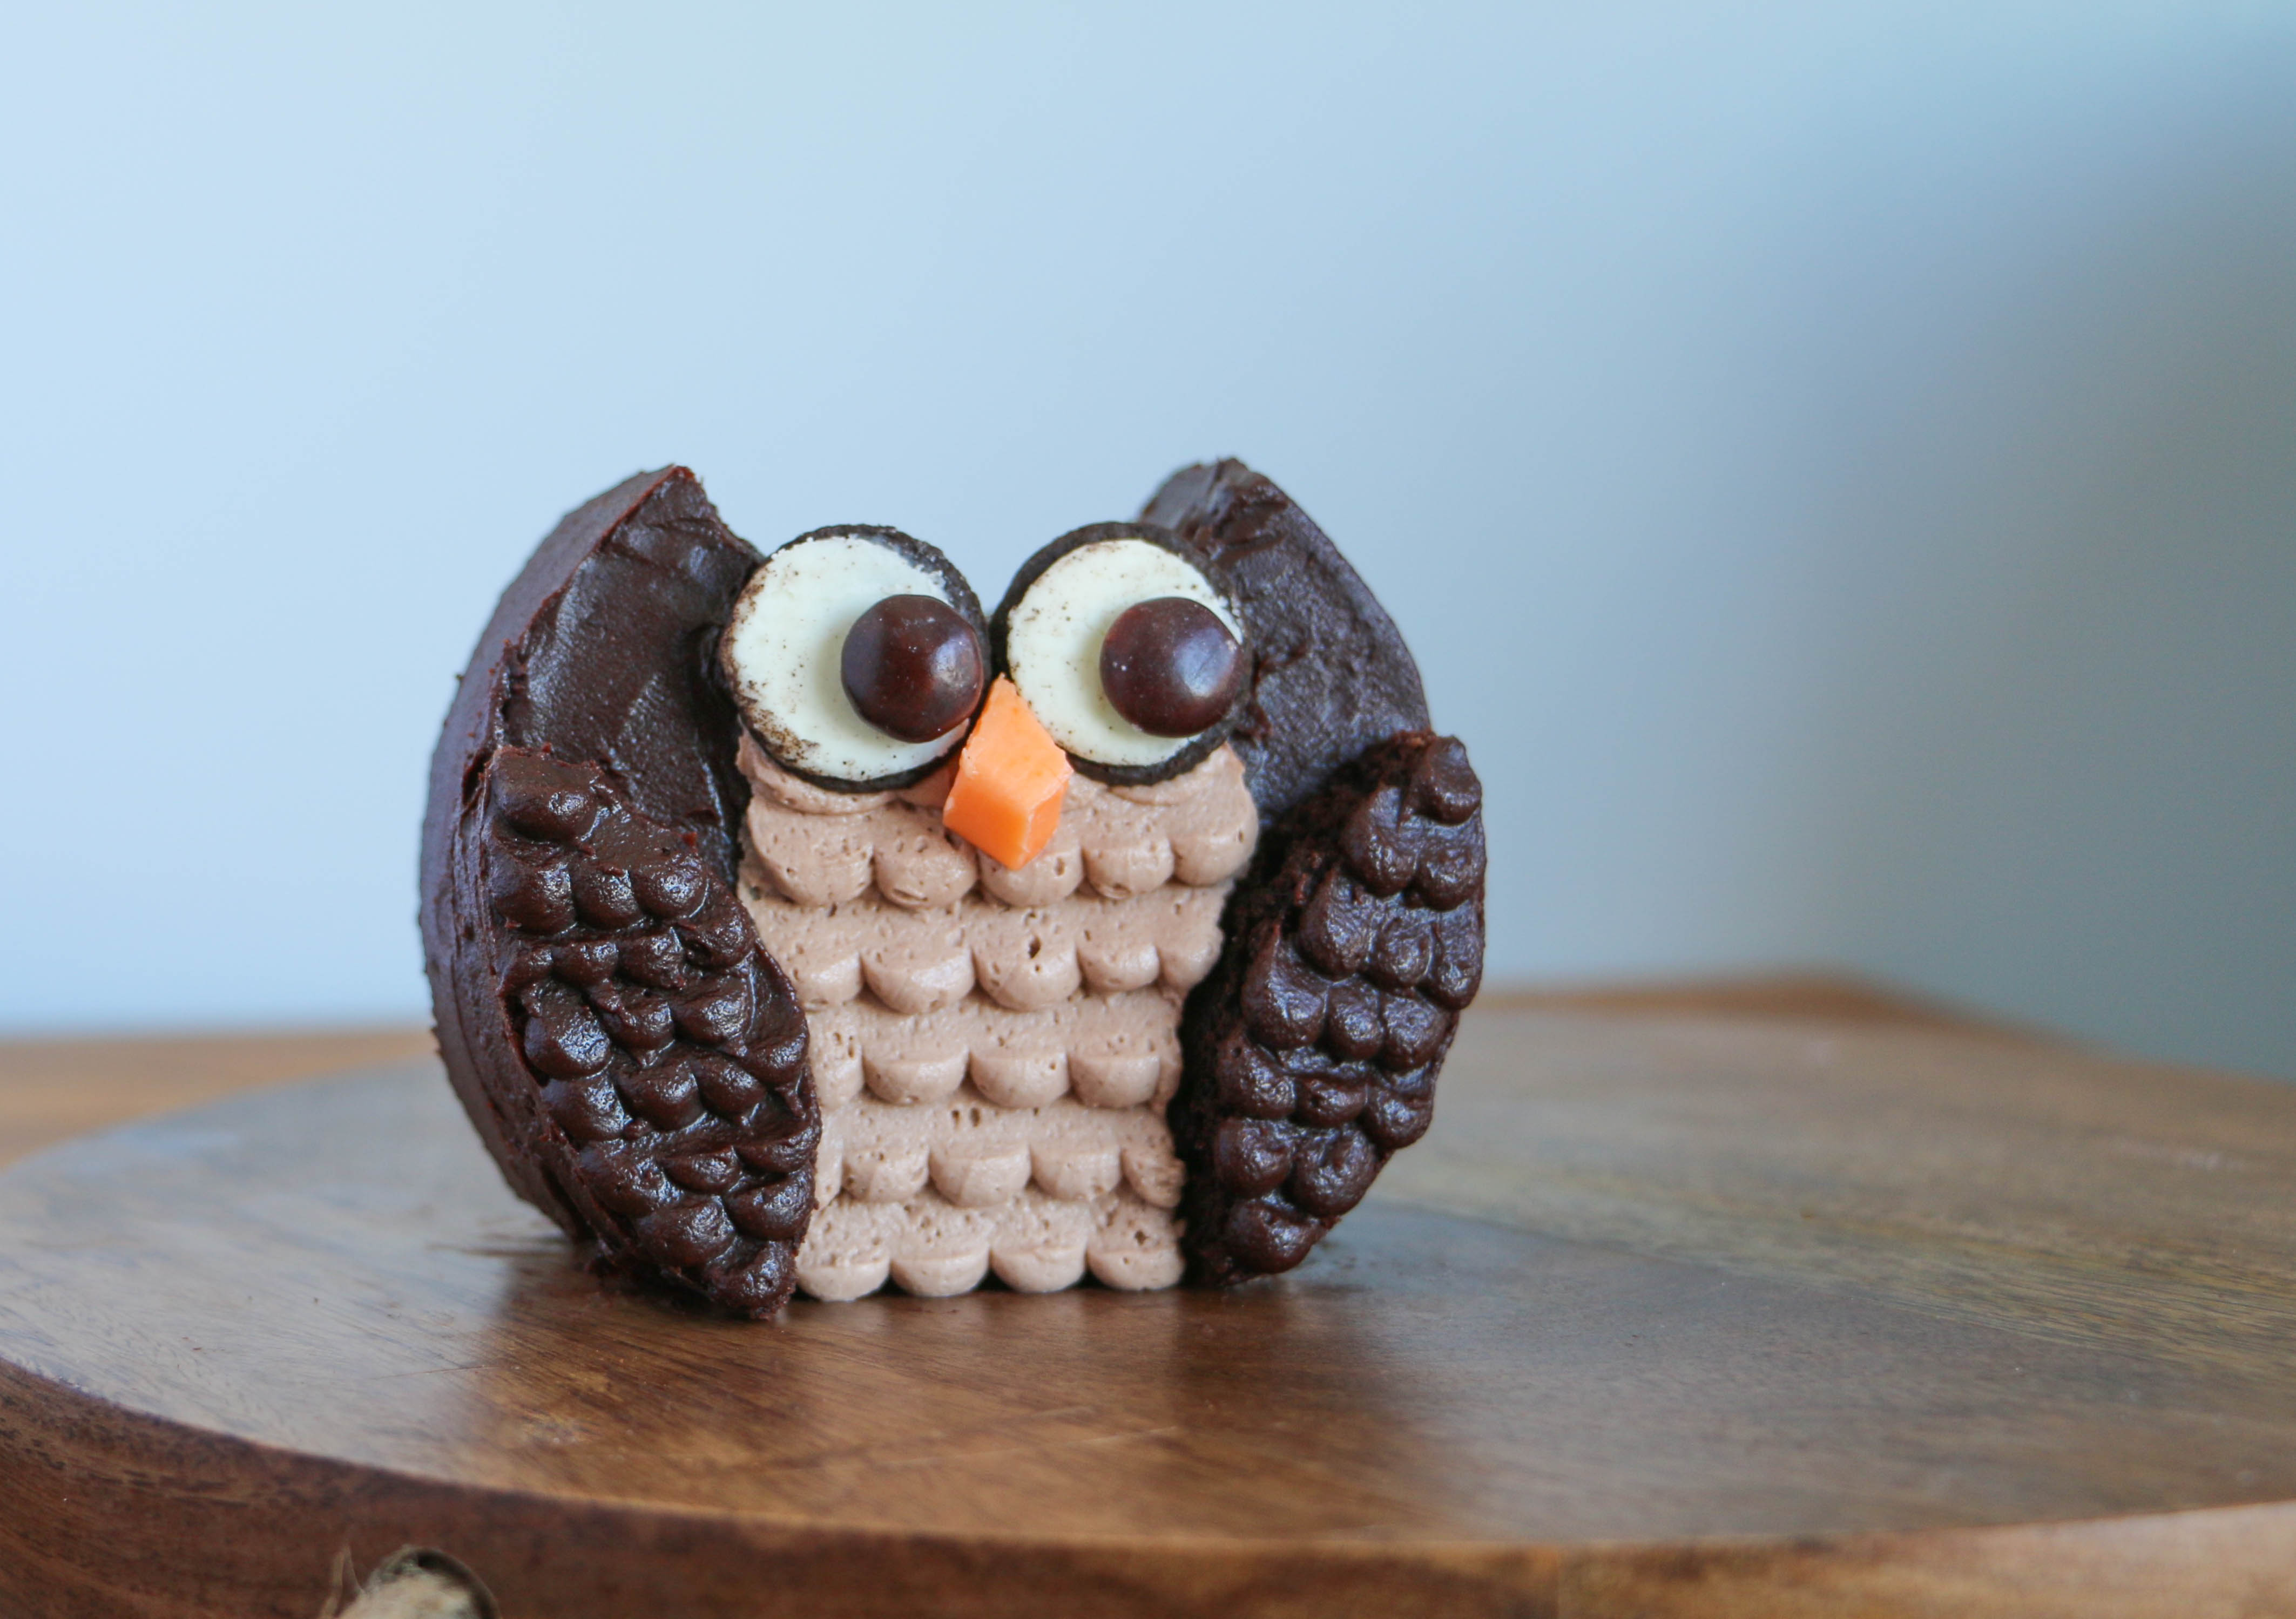
Make an owl cake that stands on its own — no carving needed!
Supplies:
- Round cake
- Circle cutters
- Small icing spatula
- Medium-sized round piping tip
- Piping bags
- Serrated knife
- Paring knife
- Chocolate buttercream
- Light brown buttercream
- Cream-filled sandwich cookies (like Oreos), regular and mini
- Brown candy-coated chocolates (like M&Ms), mega and regular
- Orange chewy candy square (like Starburst)
- Chocolate-filled baton cookies
How to make an owl cake
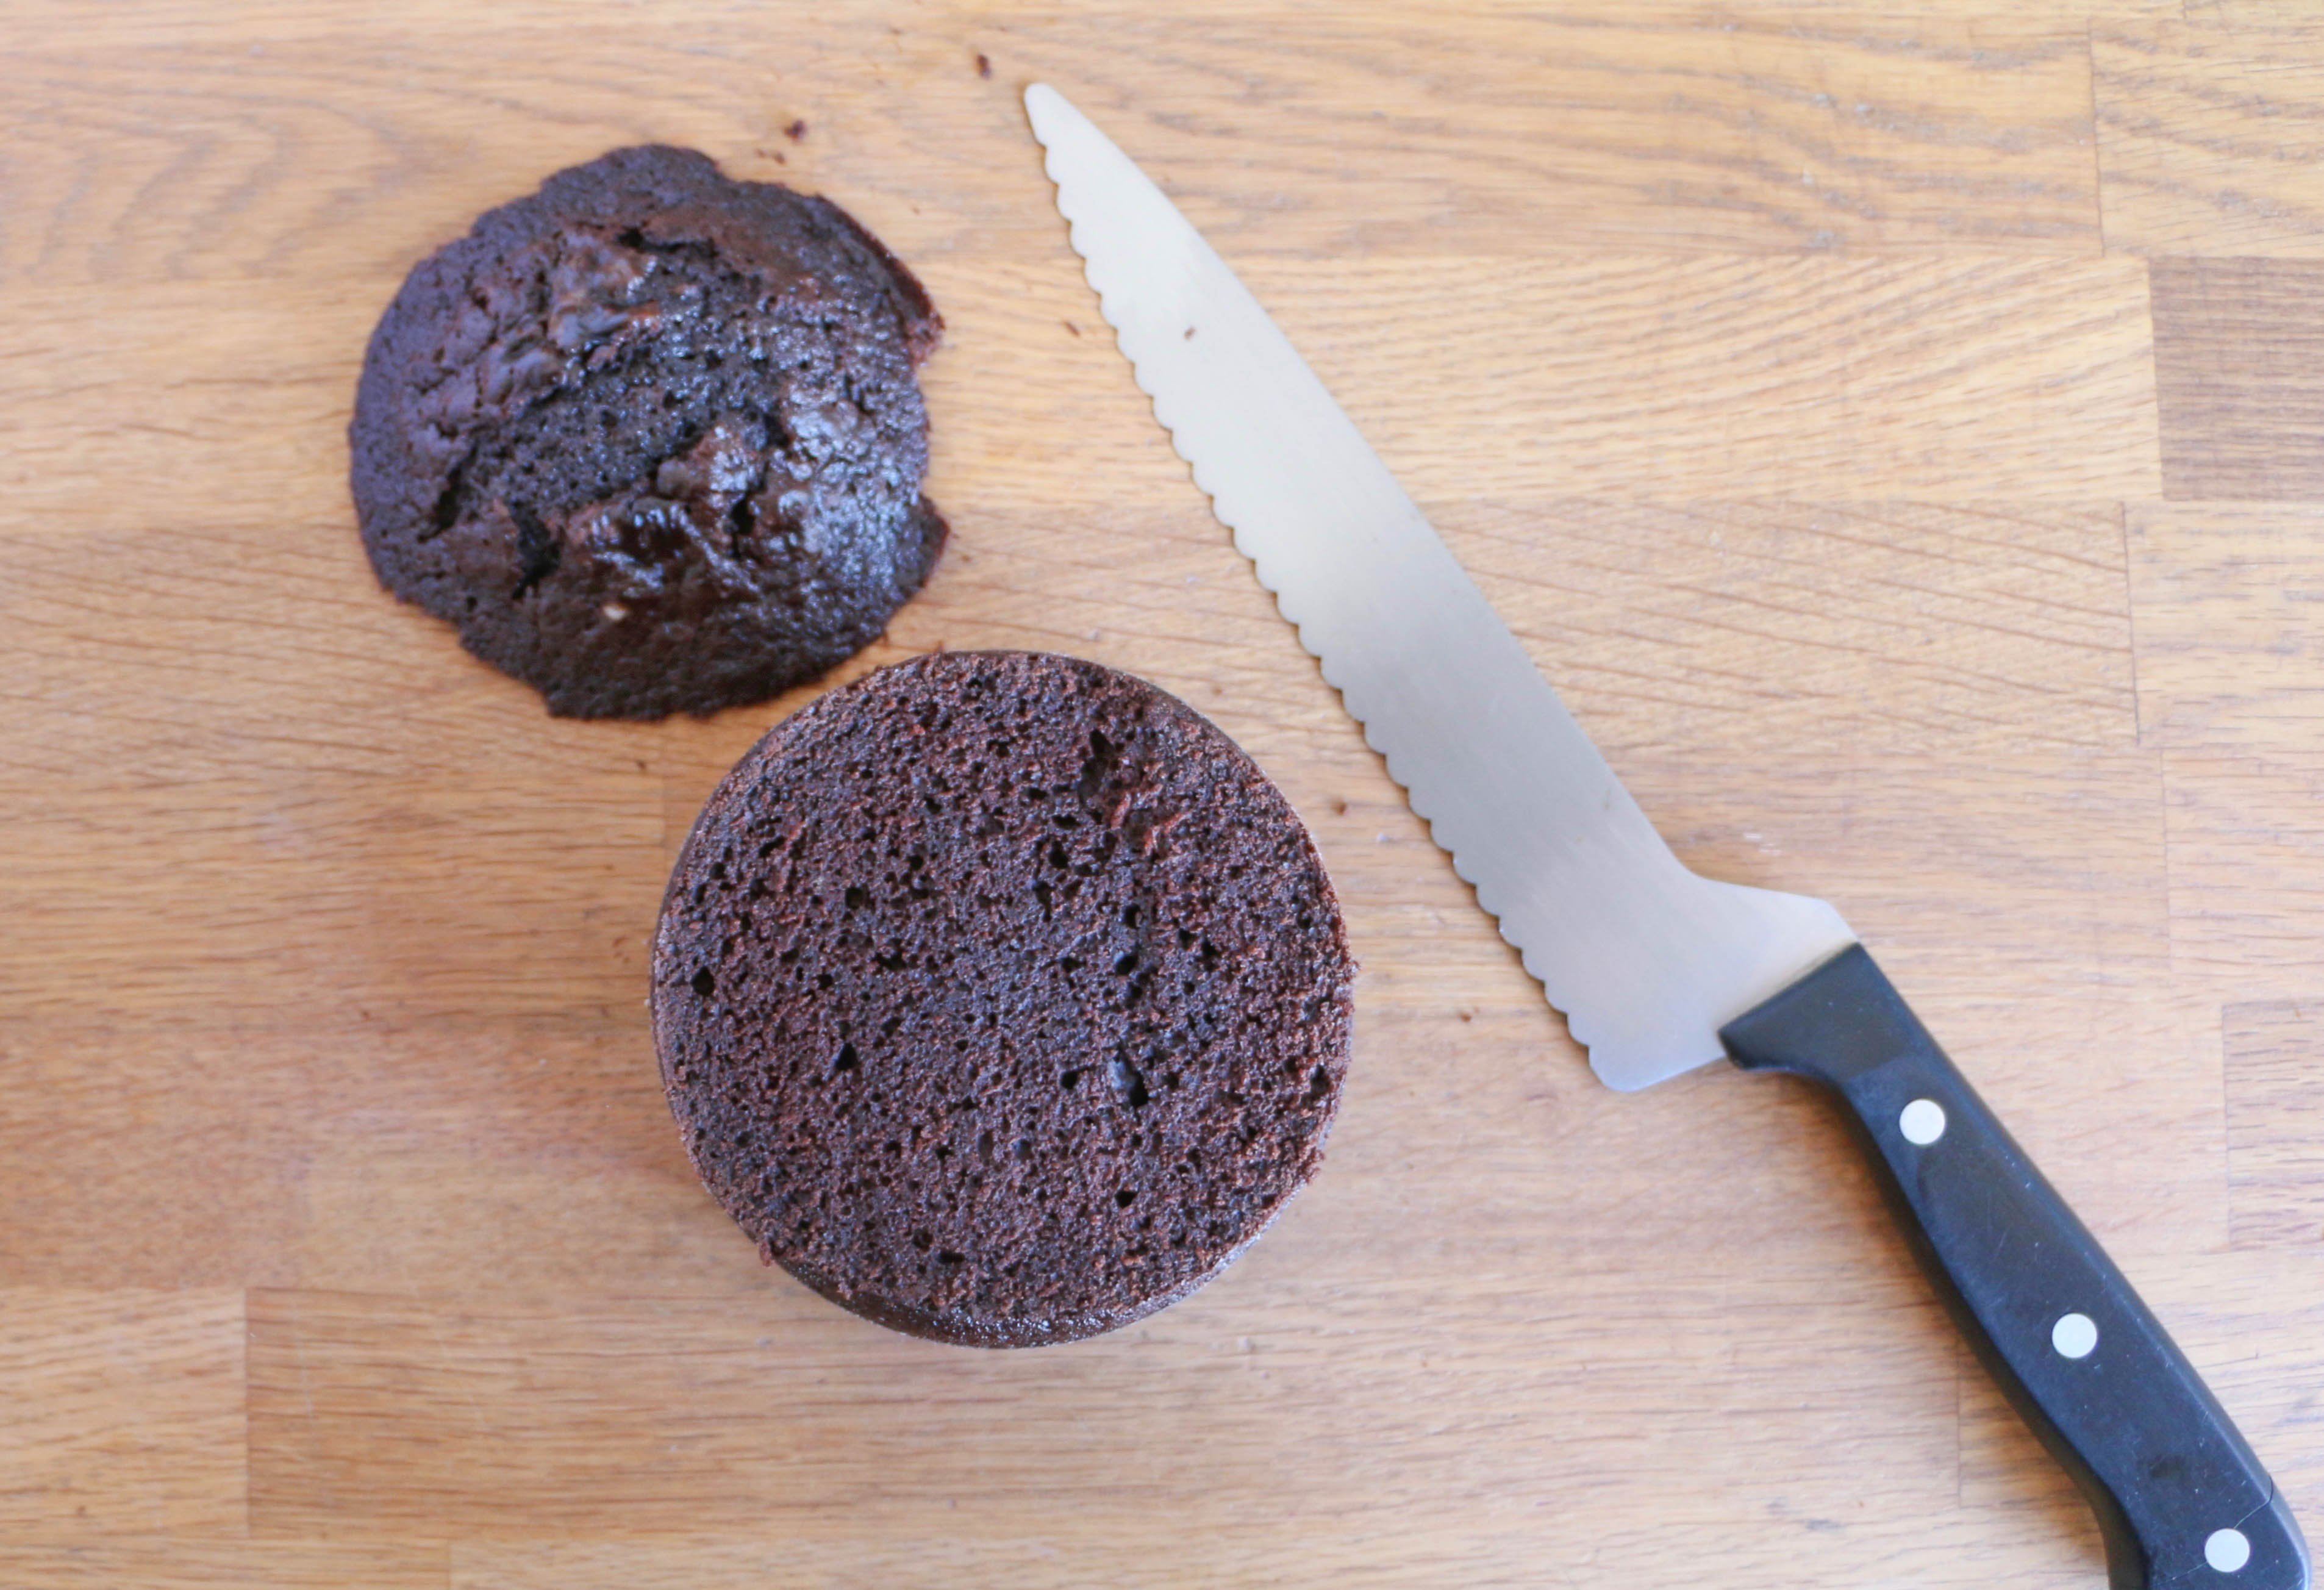
Step 1:
Trim the domed top of your cake so that it’s level. I used a 3-inch round cake for my small owl and a 6-inch round cake for my large owl, but this technique will work with any size. You’ll just want to find cookies and chocolate candies for the eyes that work with the scale of your cake.

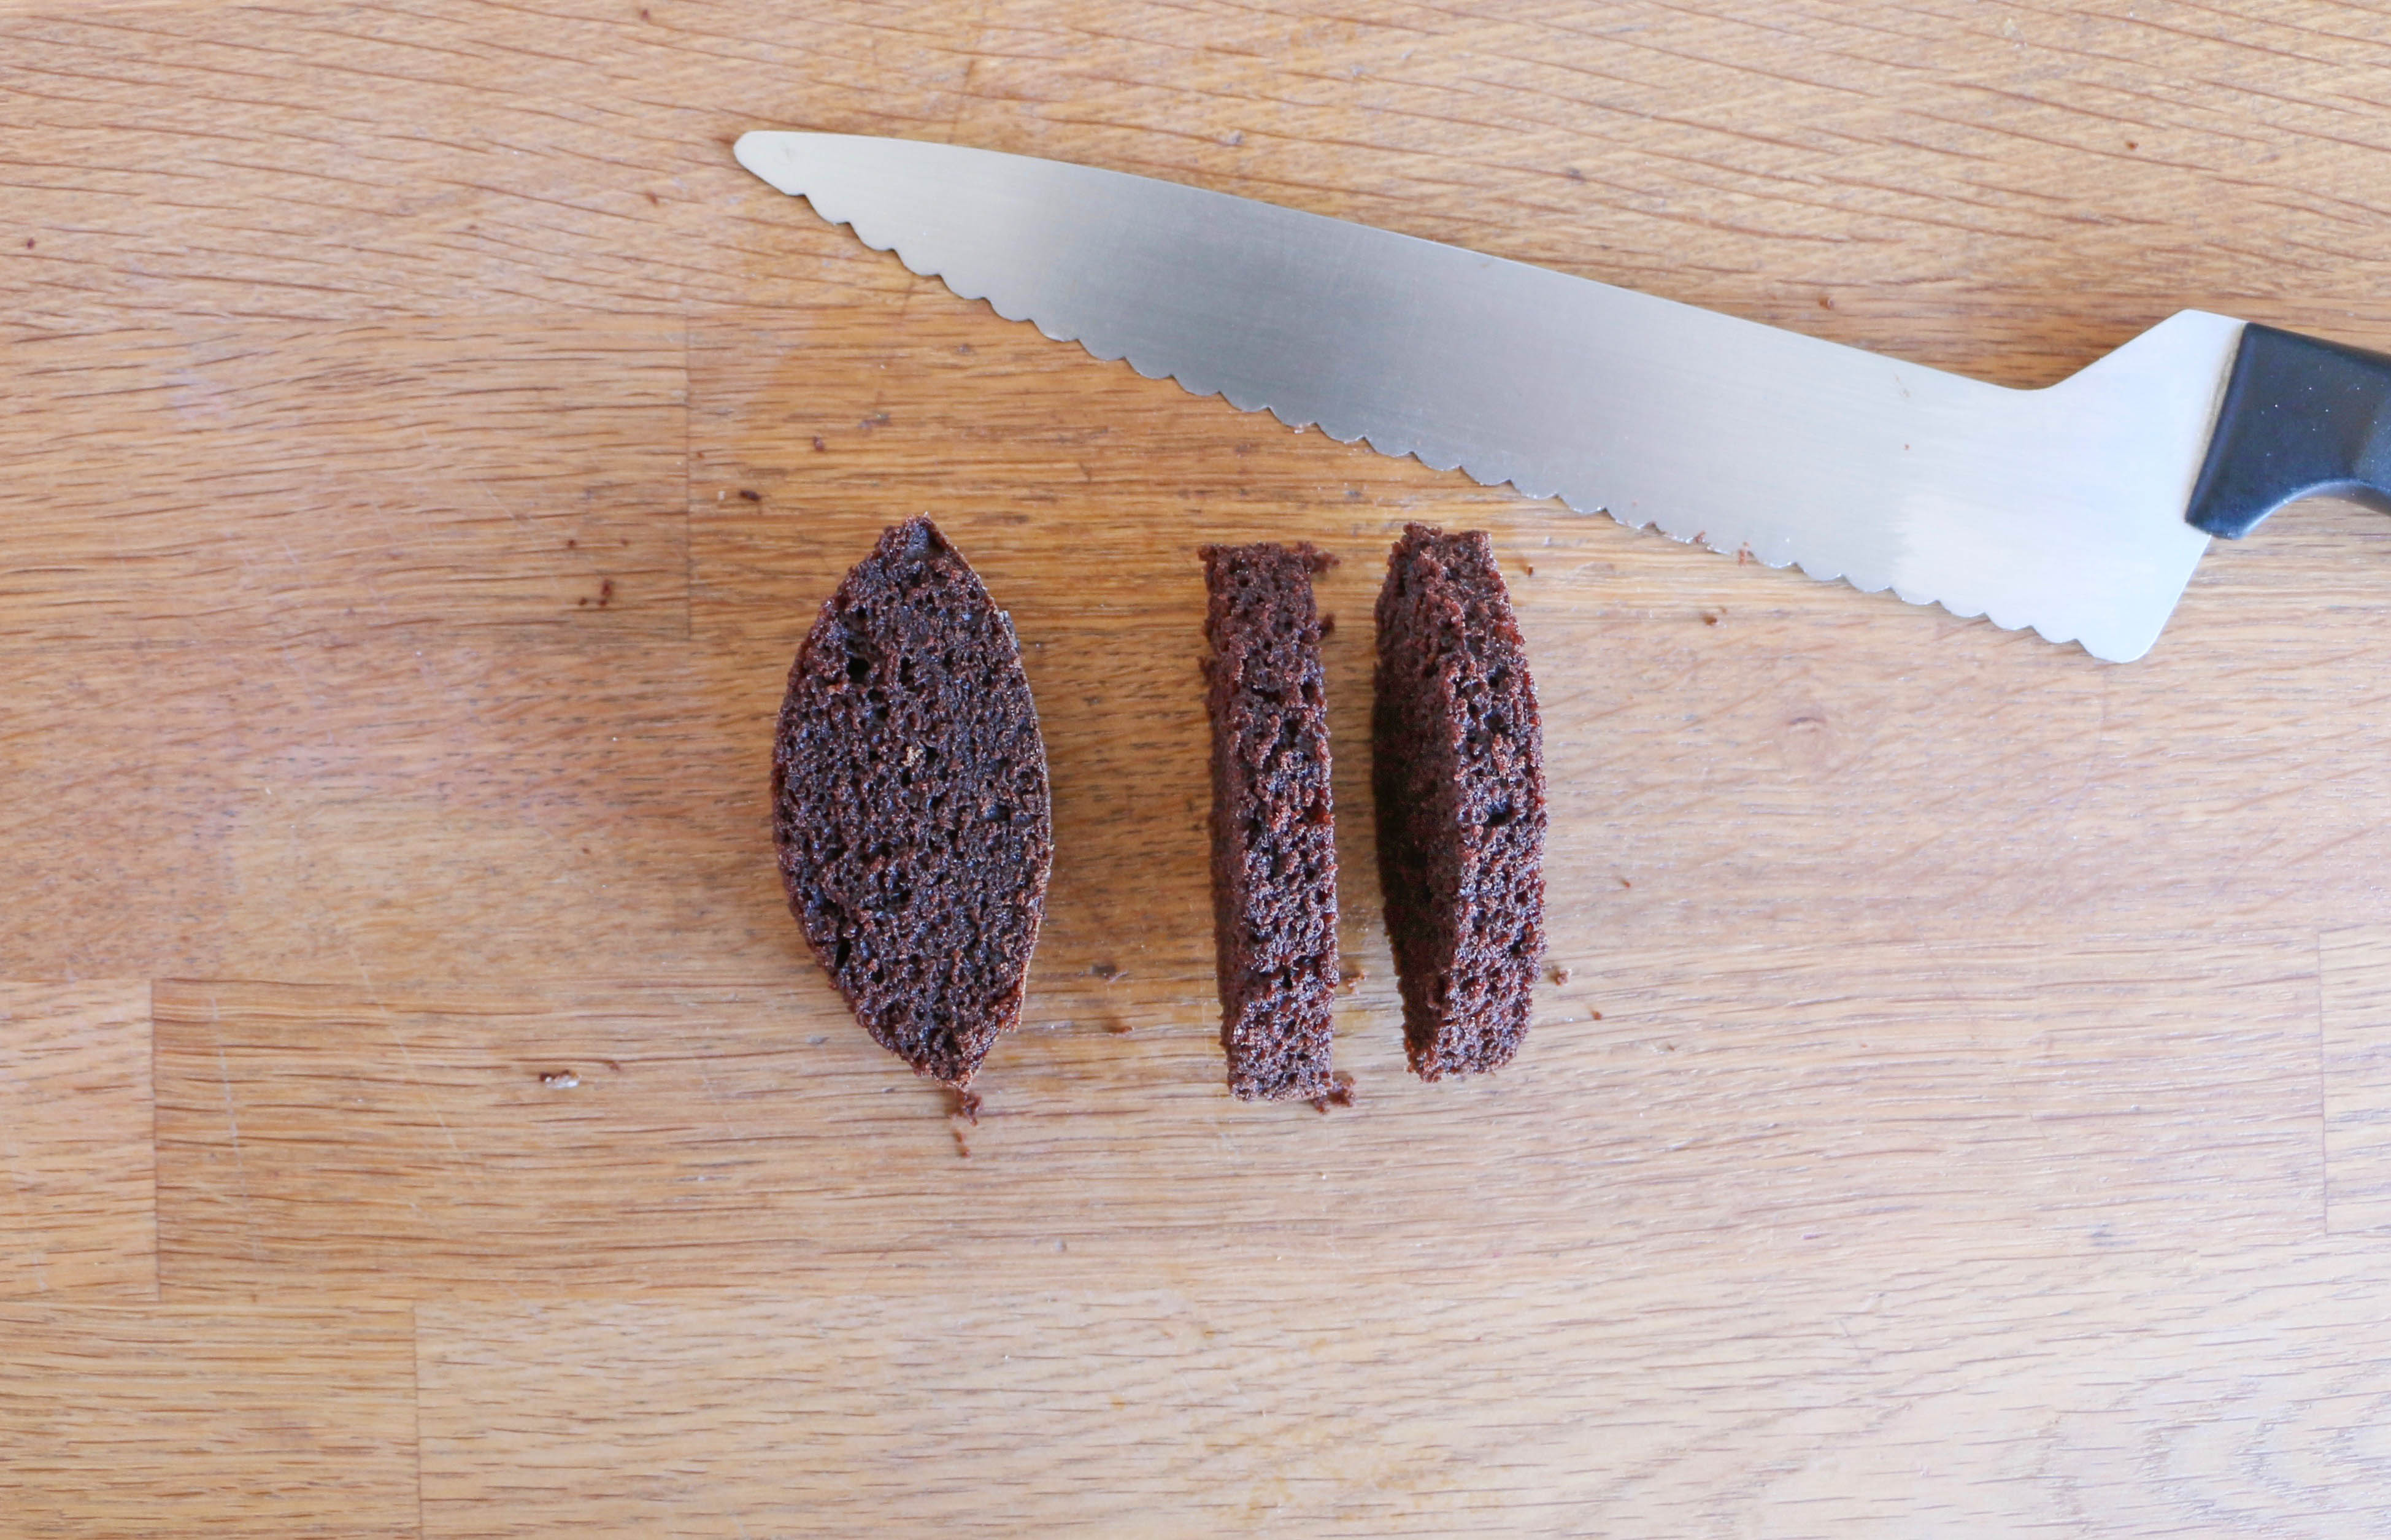
Step 2:
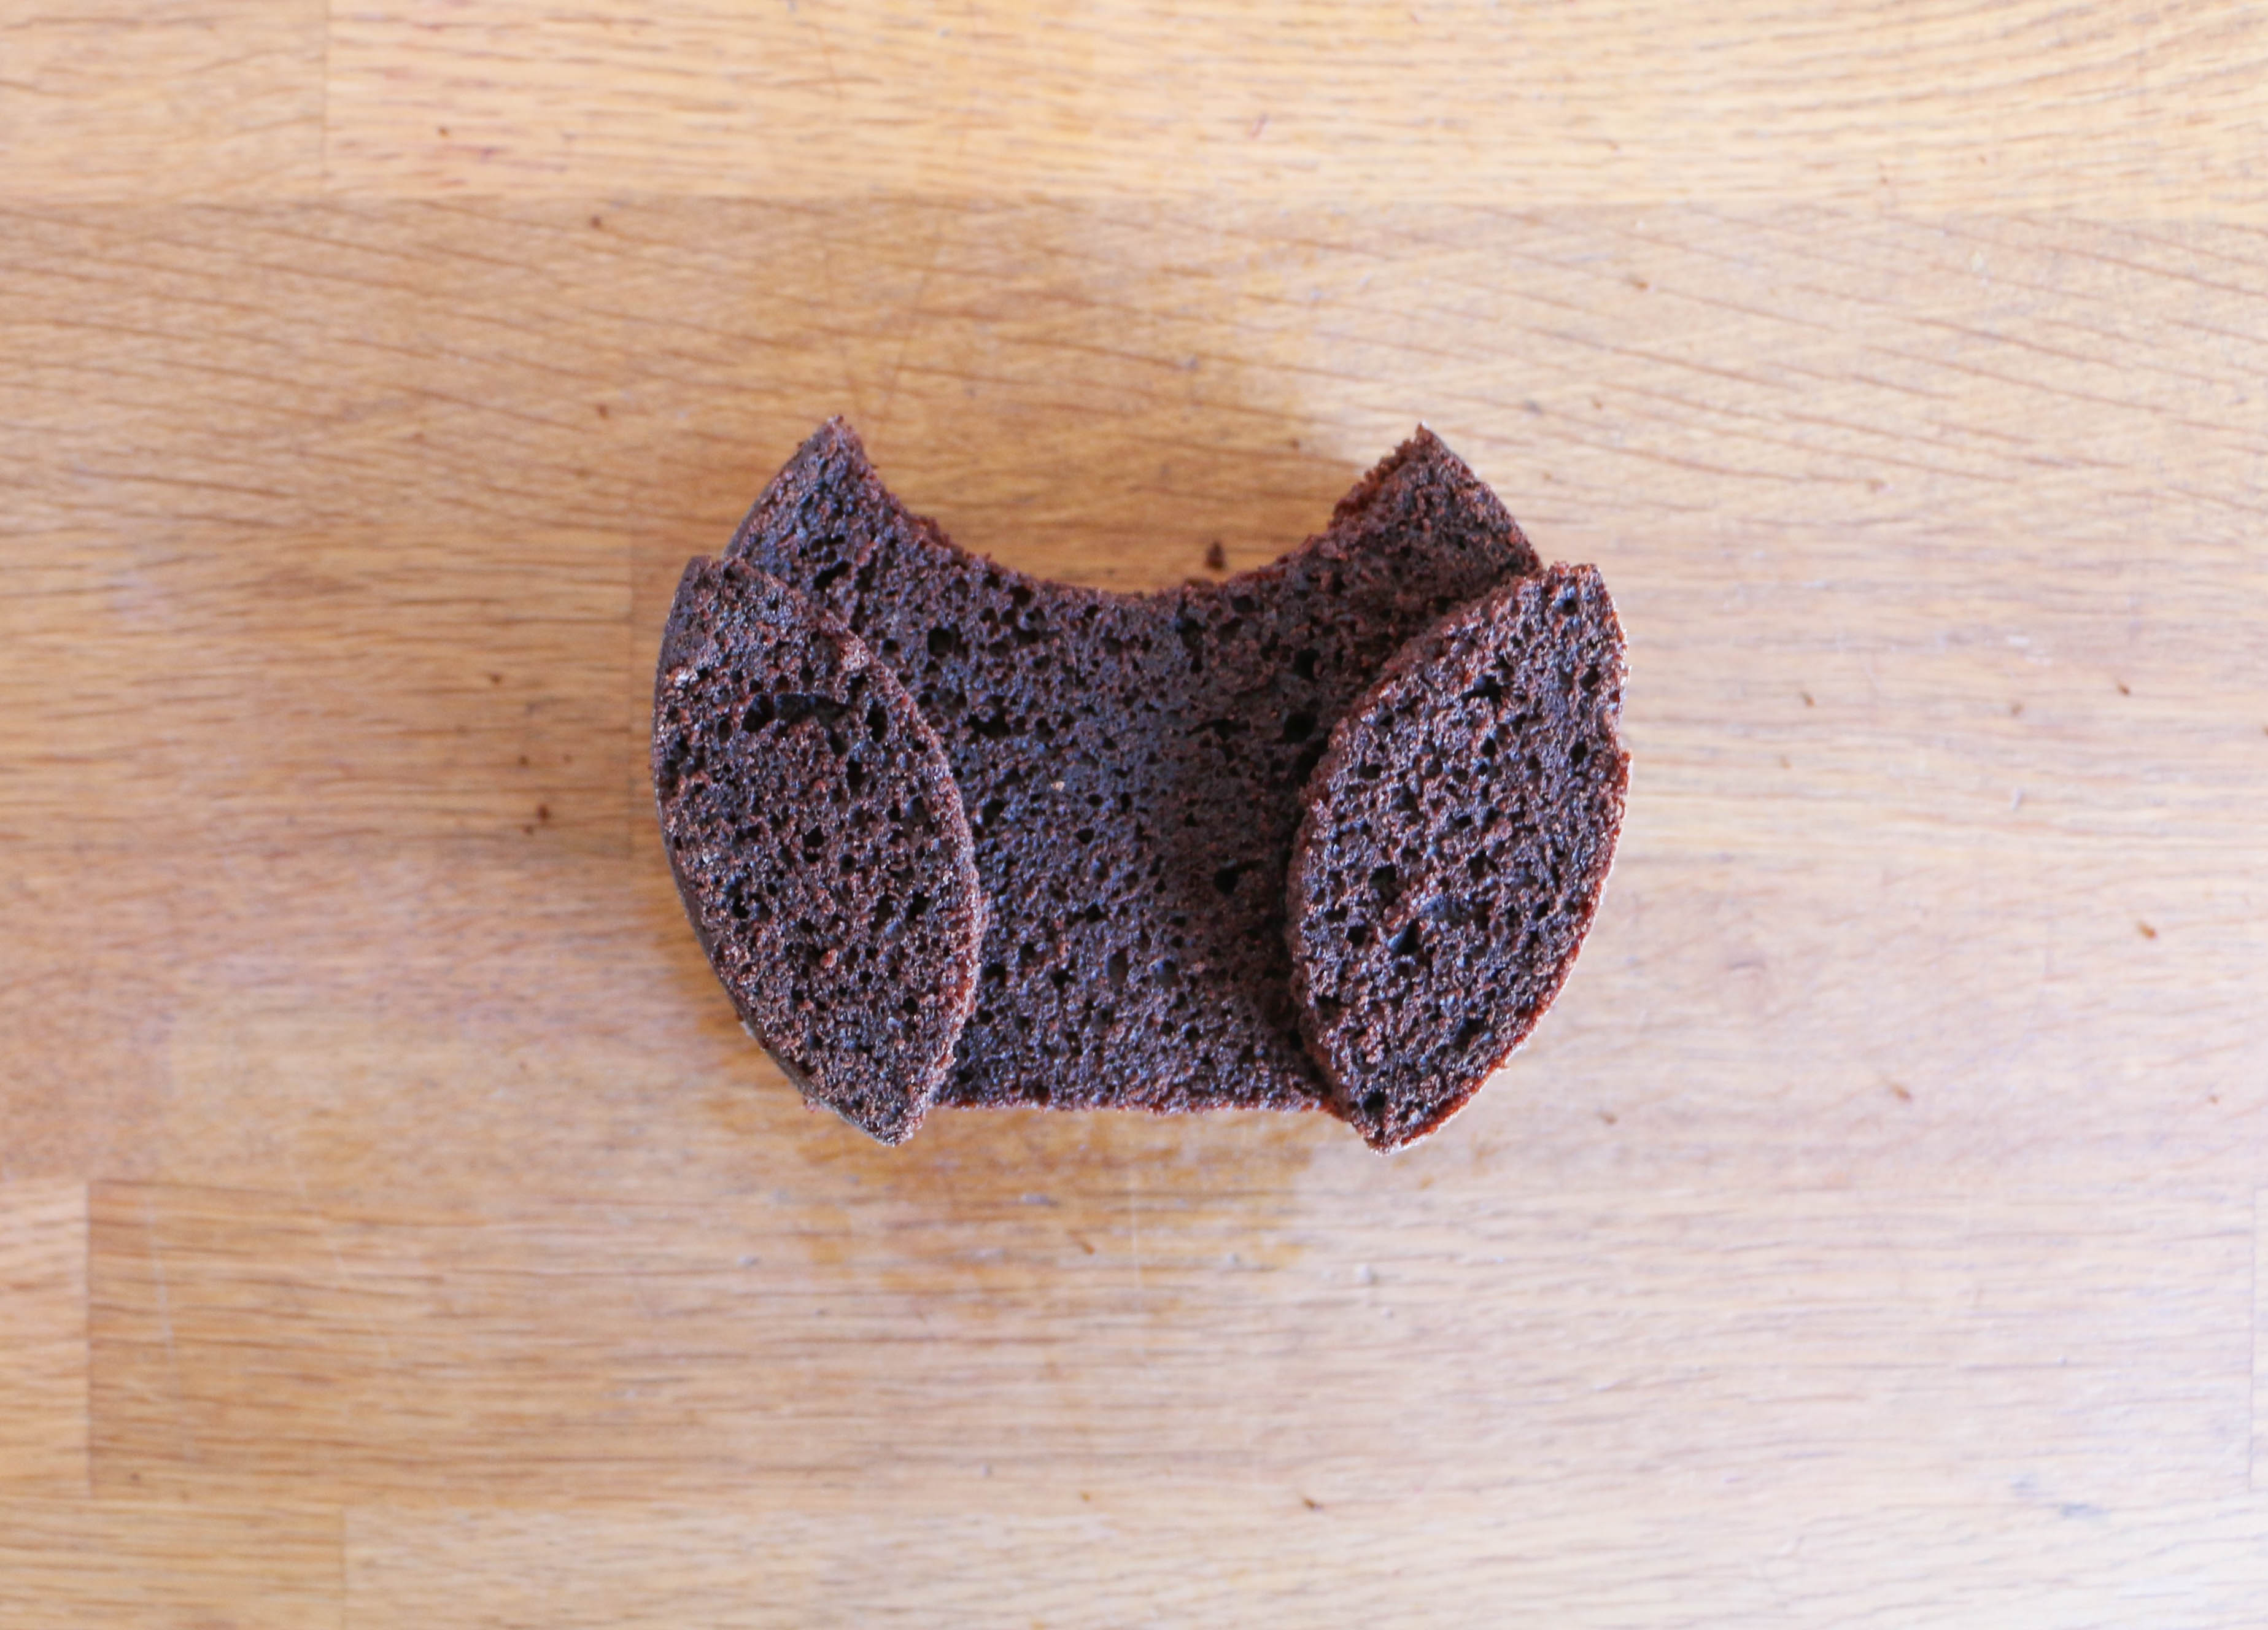
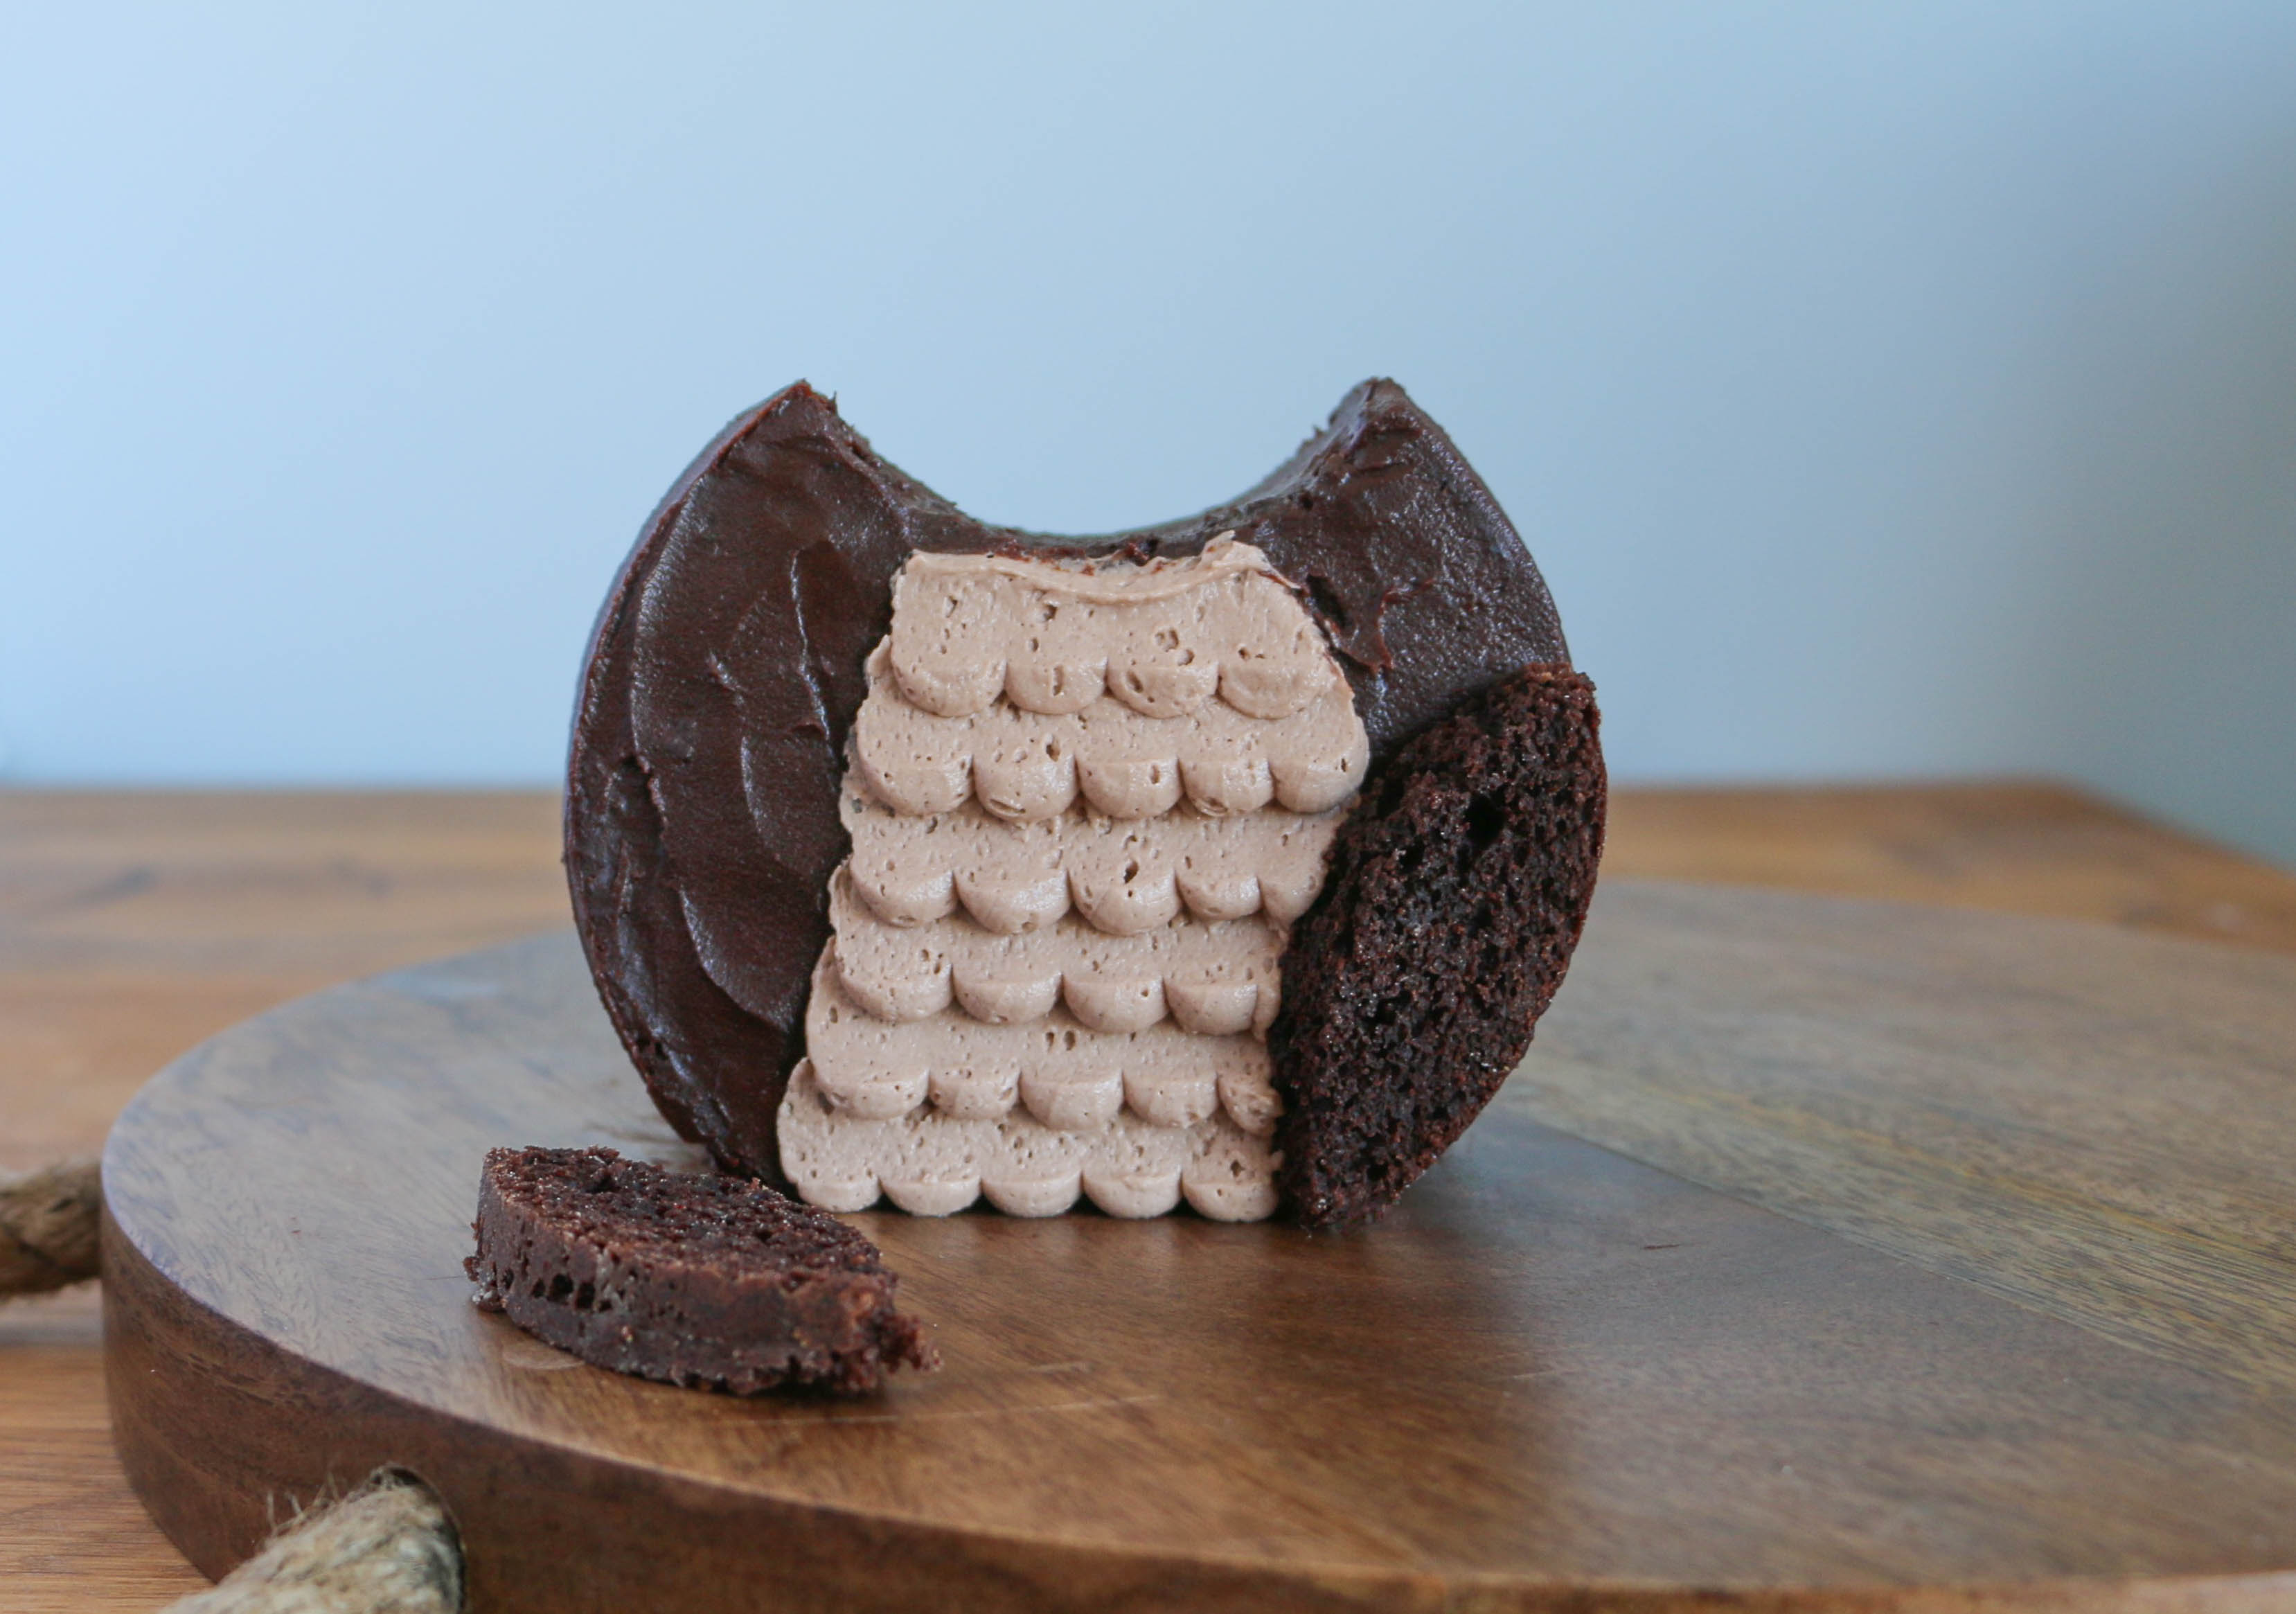
Use a large circle cutter to cut an oval from one side of the cake. Trim off a sliver of cake opposite where you cut the oval and discard. (See photos below.)
Cut the oval shaped piece of cake in half horizontally. Discard one of the sides and cut the remaining side in half again. This will give you two thin oval-shaped pieces of cake to use for the owl’s wings.
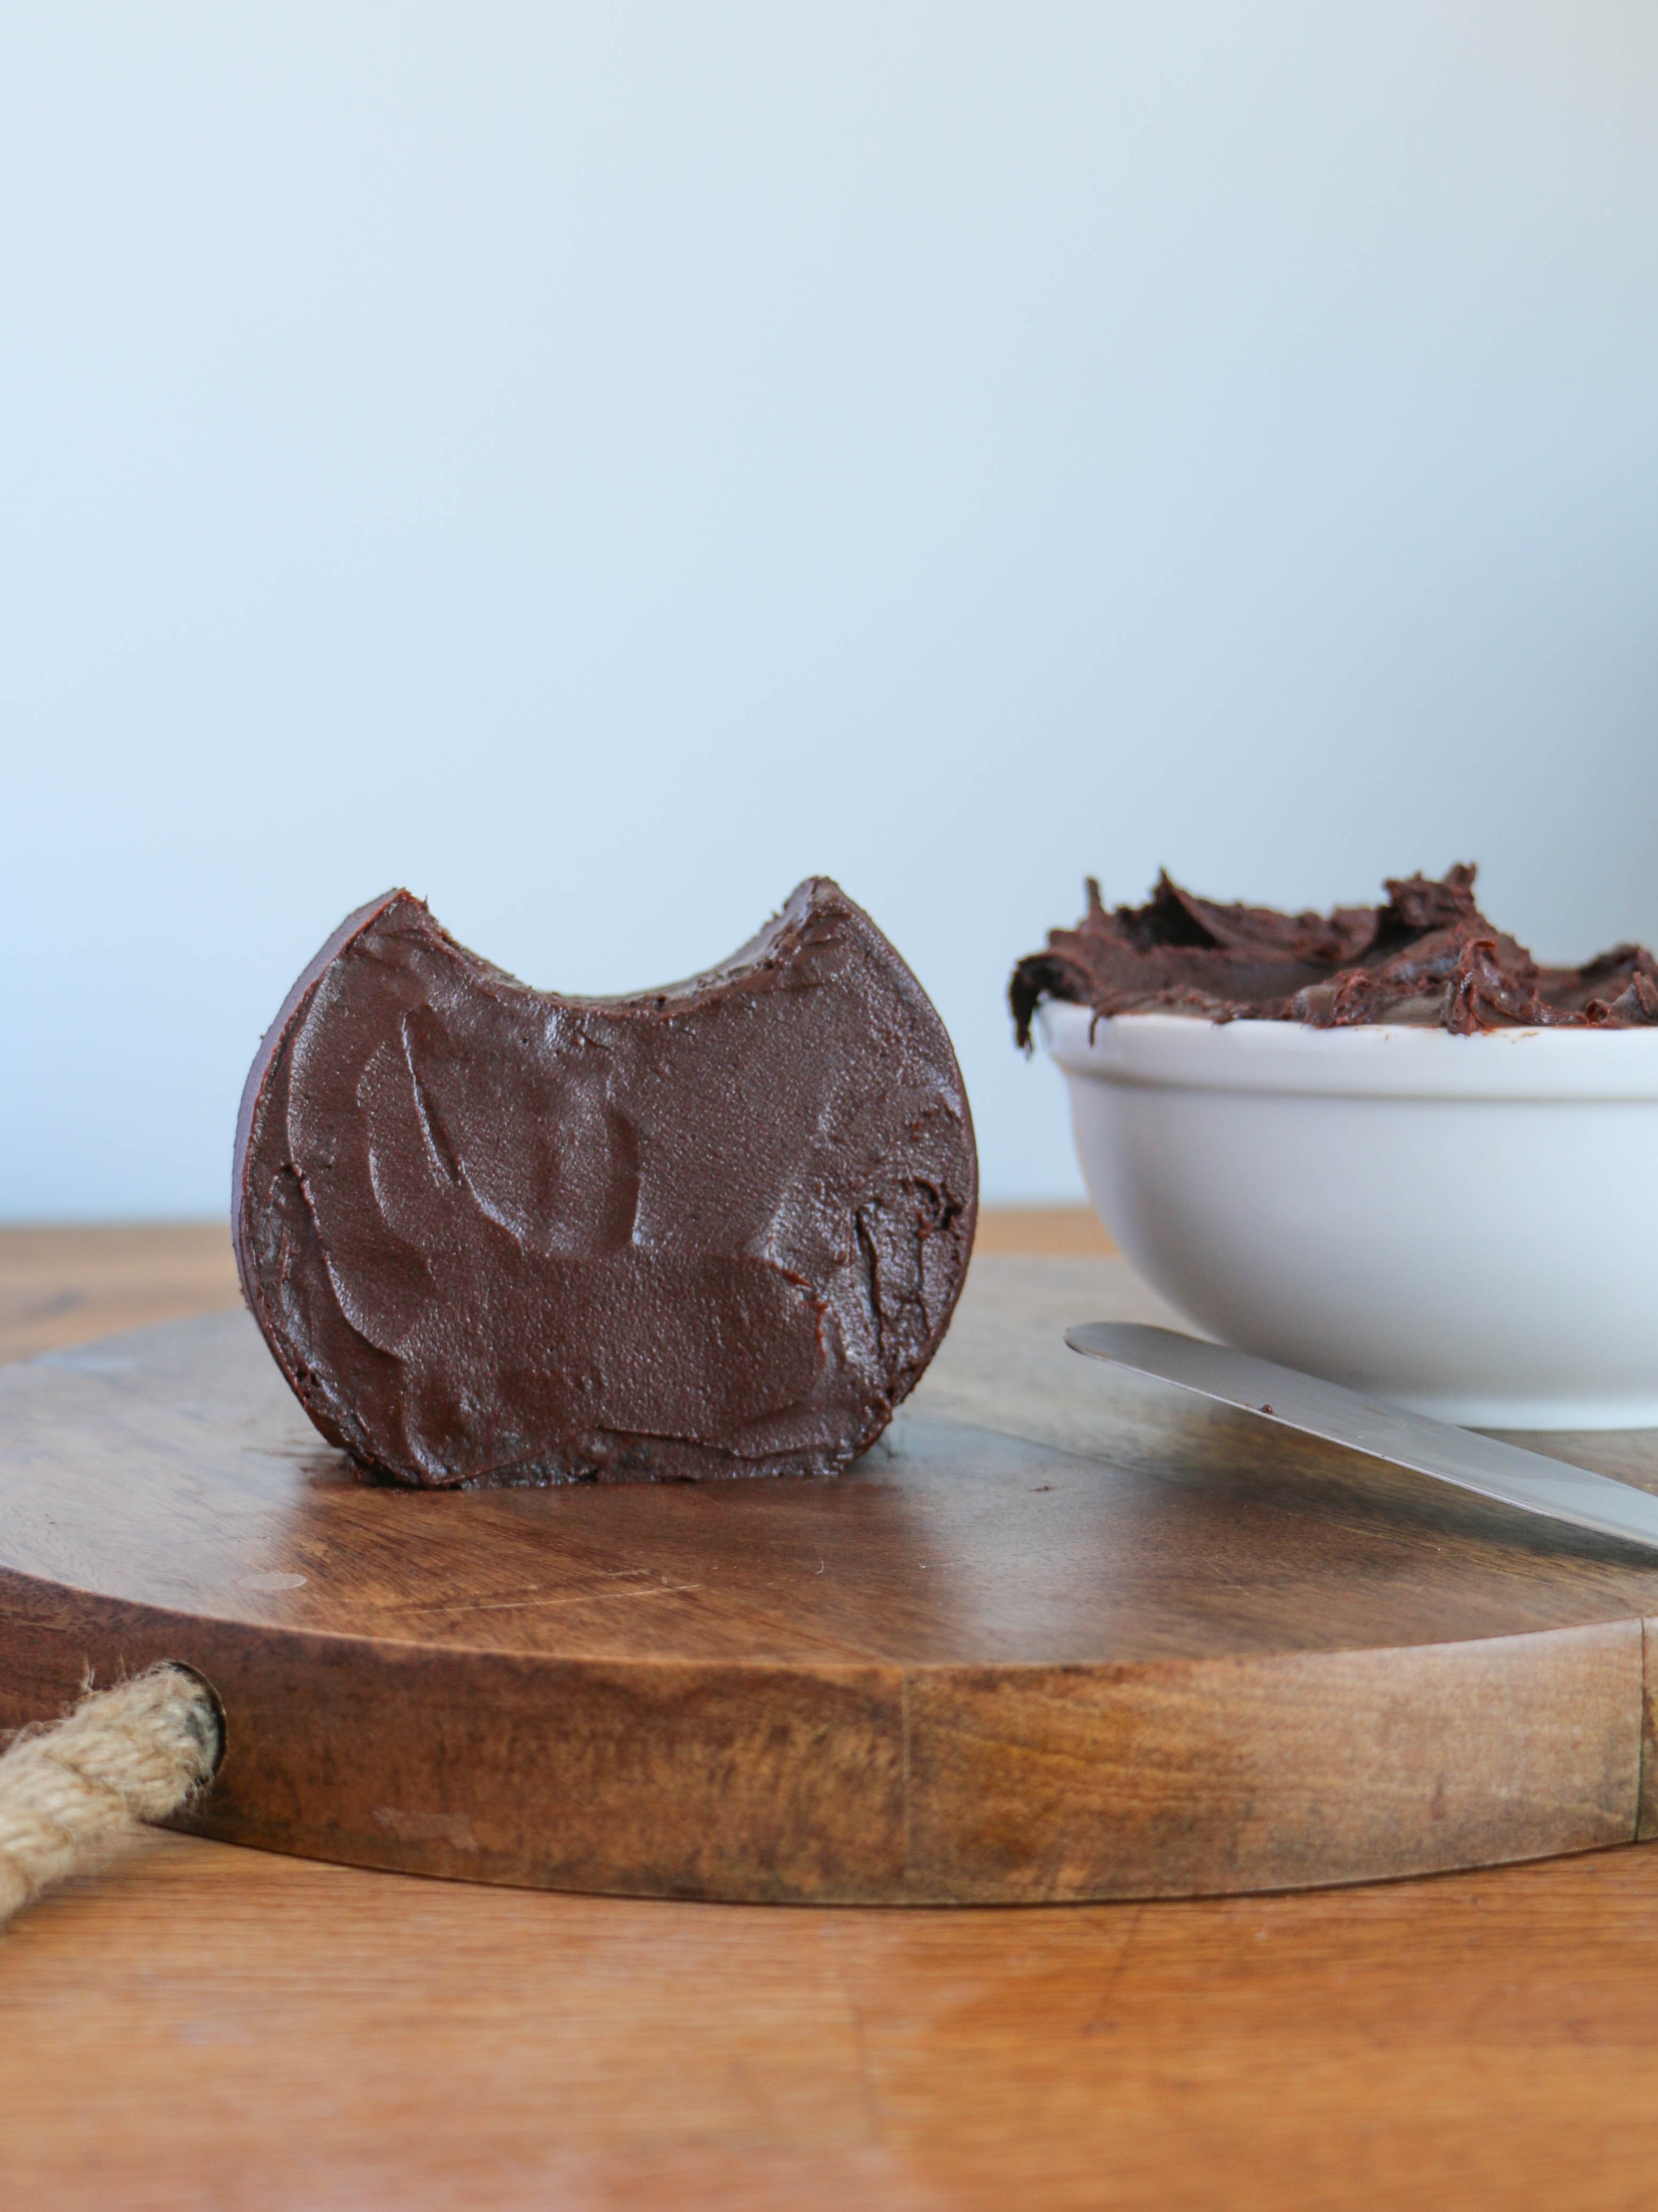
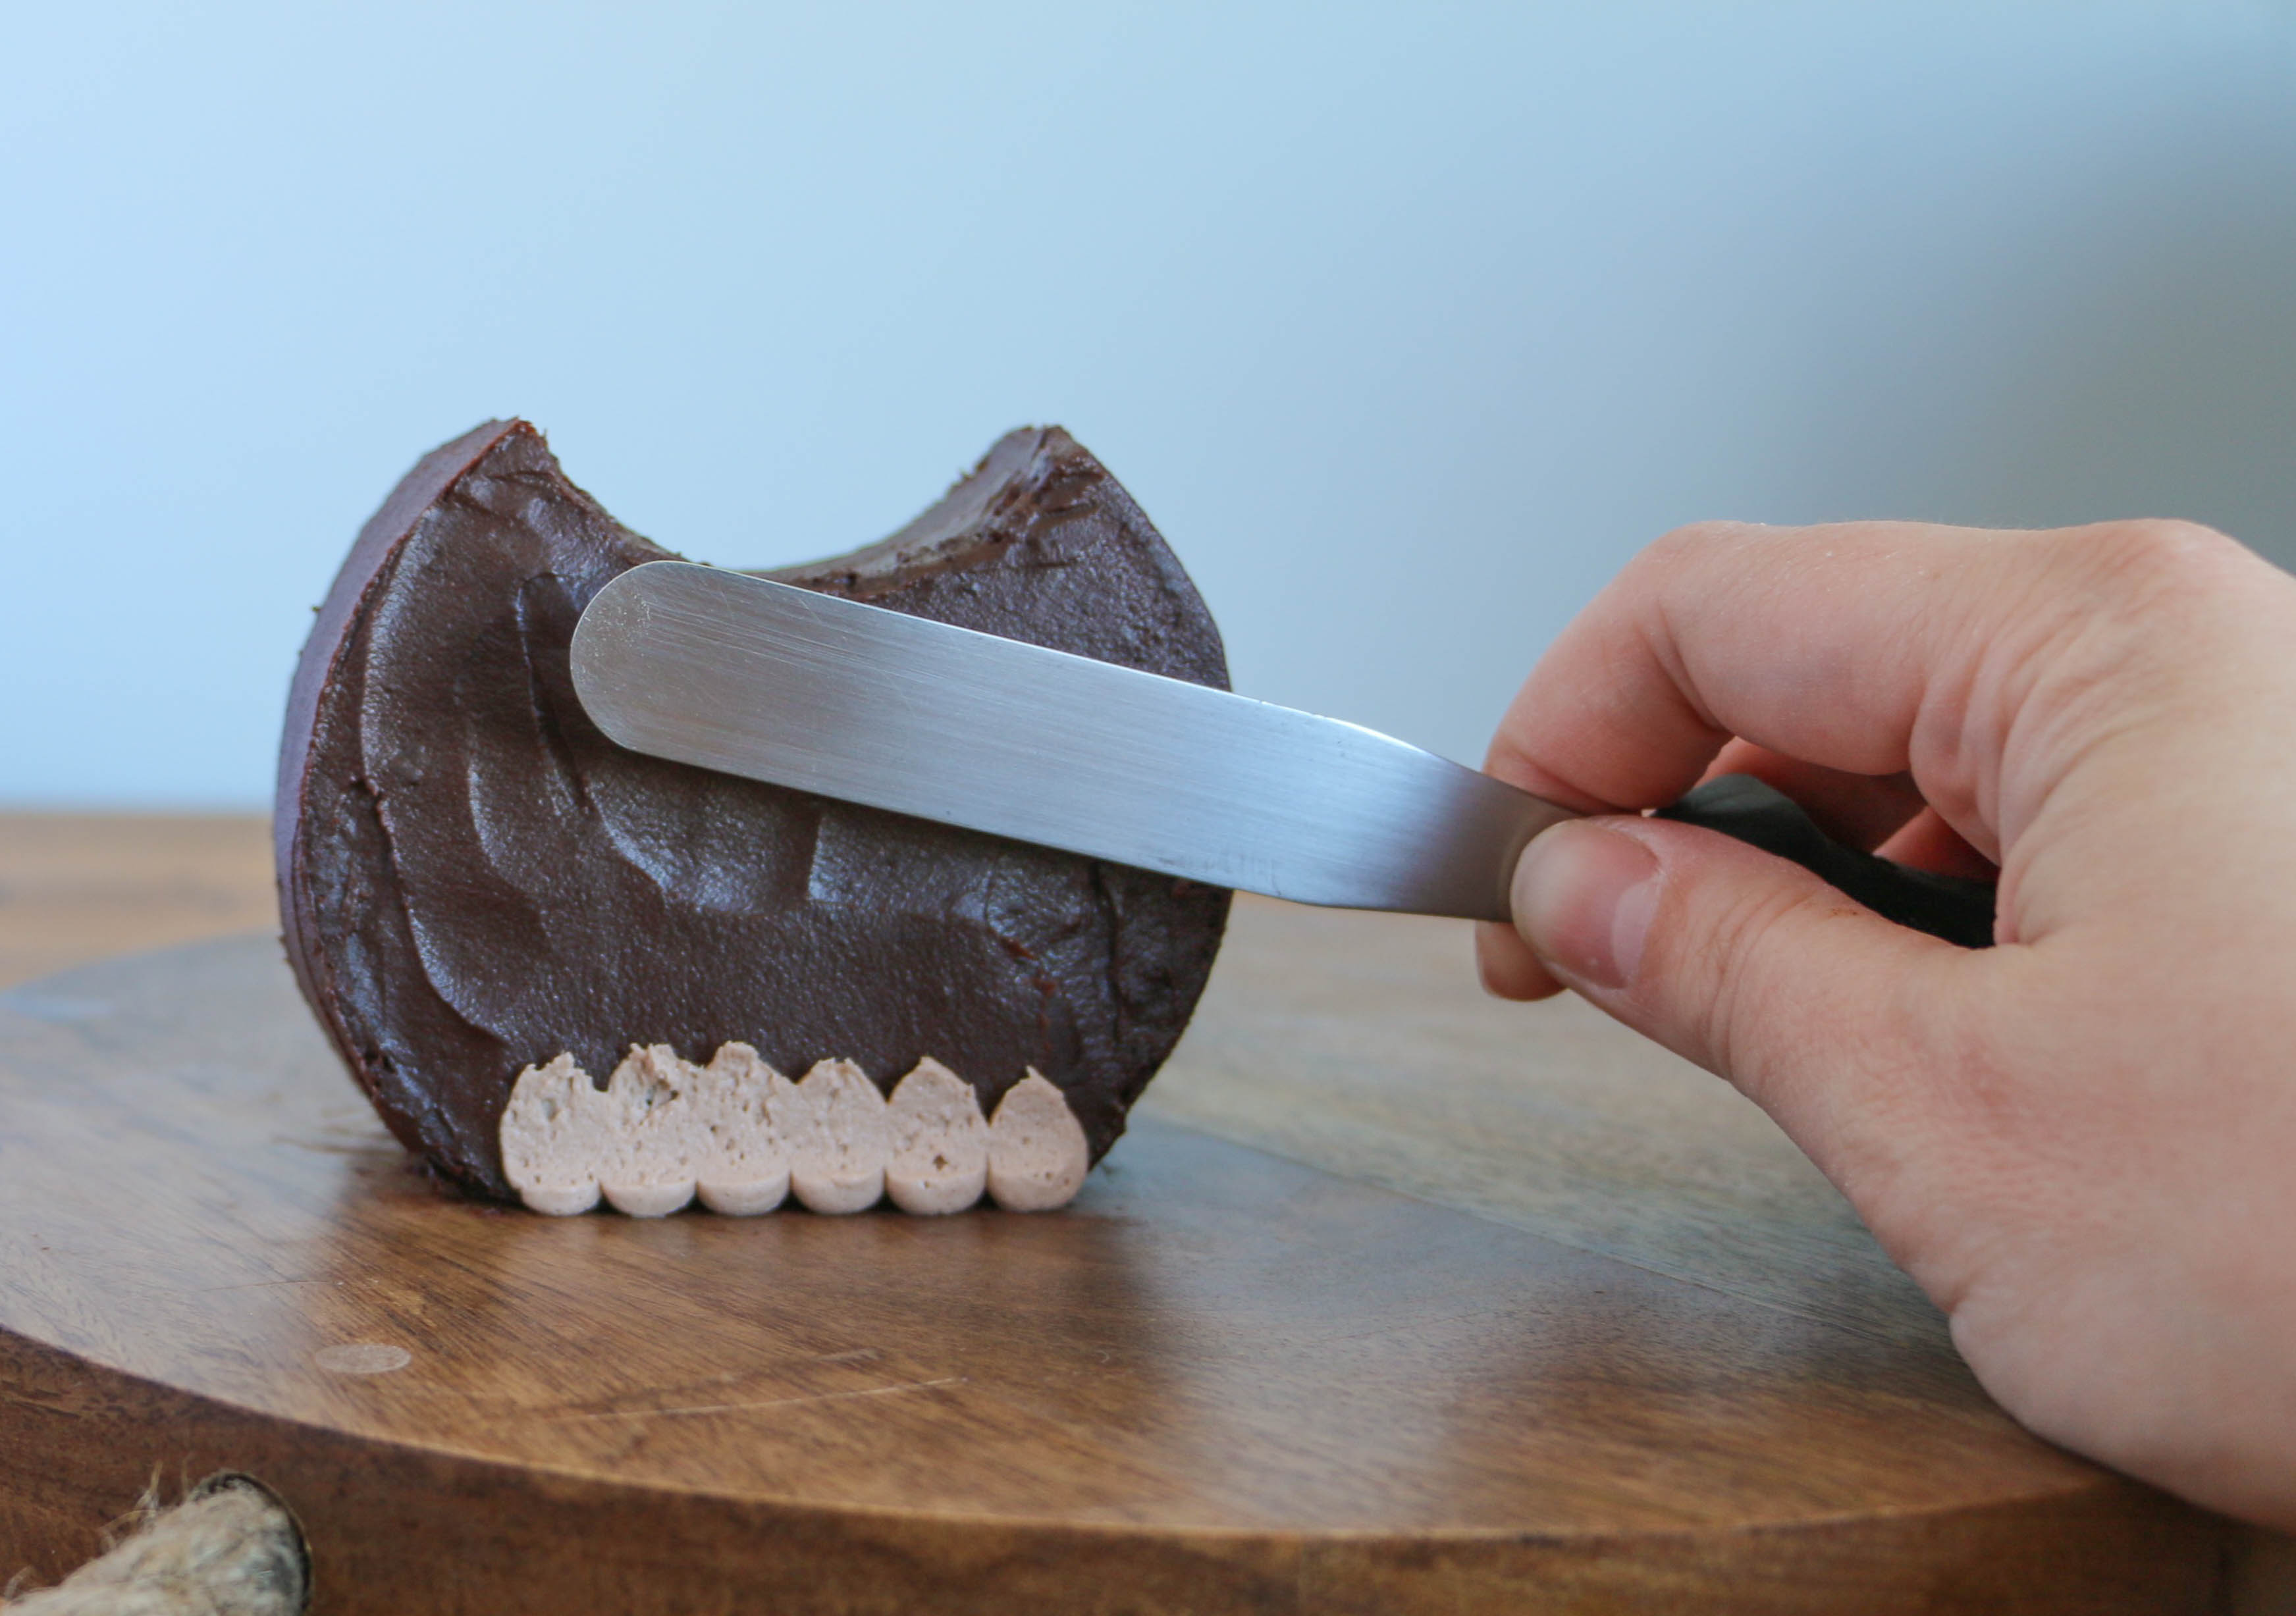
Step 3:
Stand the cake up on the flattened side. With a small icing spatula, frost the cake with chocolate buttercream. I’ve chosen to use shades of brown for my owl, but you could use whatever colors you like! Whites and ivories would make for a pretty snowy owl, while shades of pink and blue would work perfectly for a sweet baby shower cake.
Want more creative buttercream decorating ideas? Get this FREE guide!
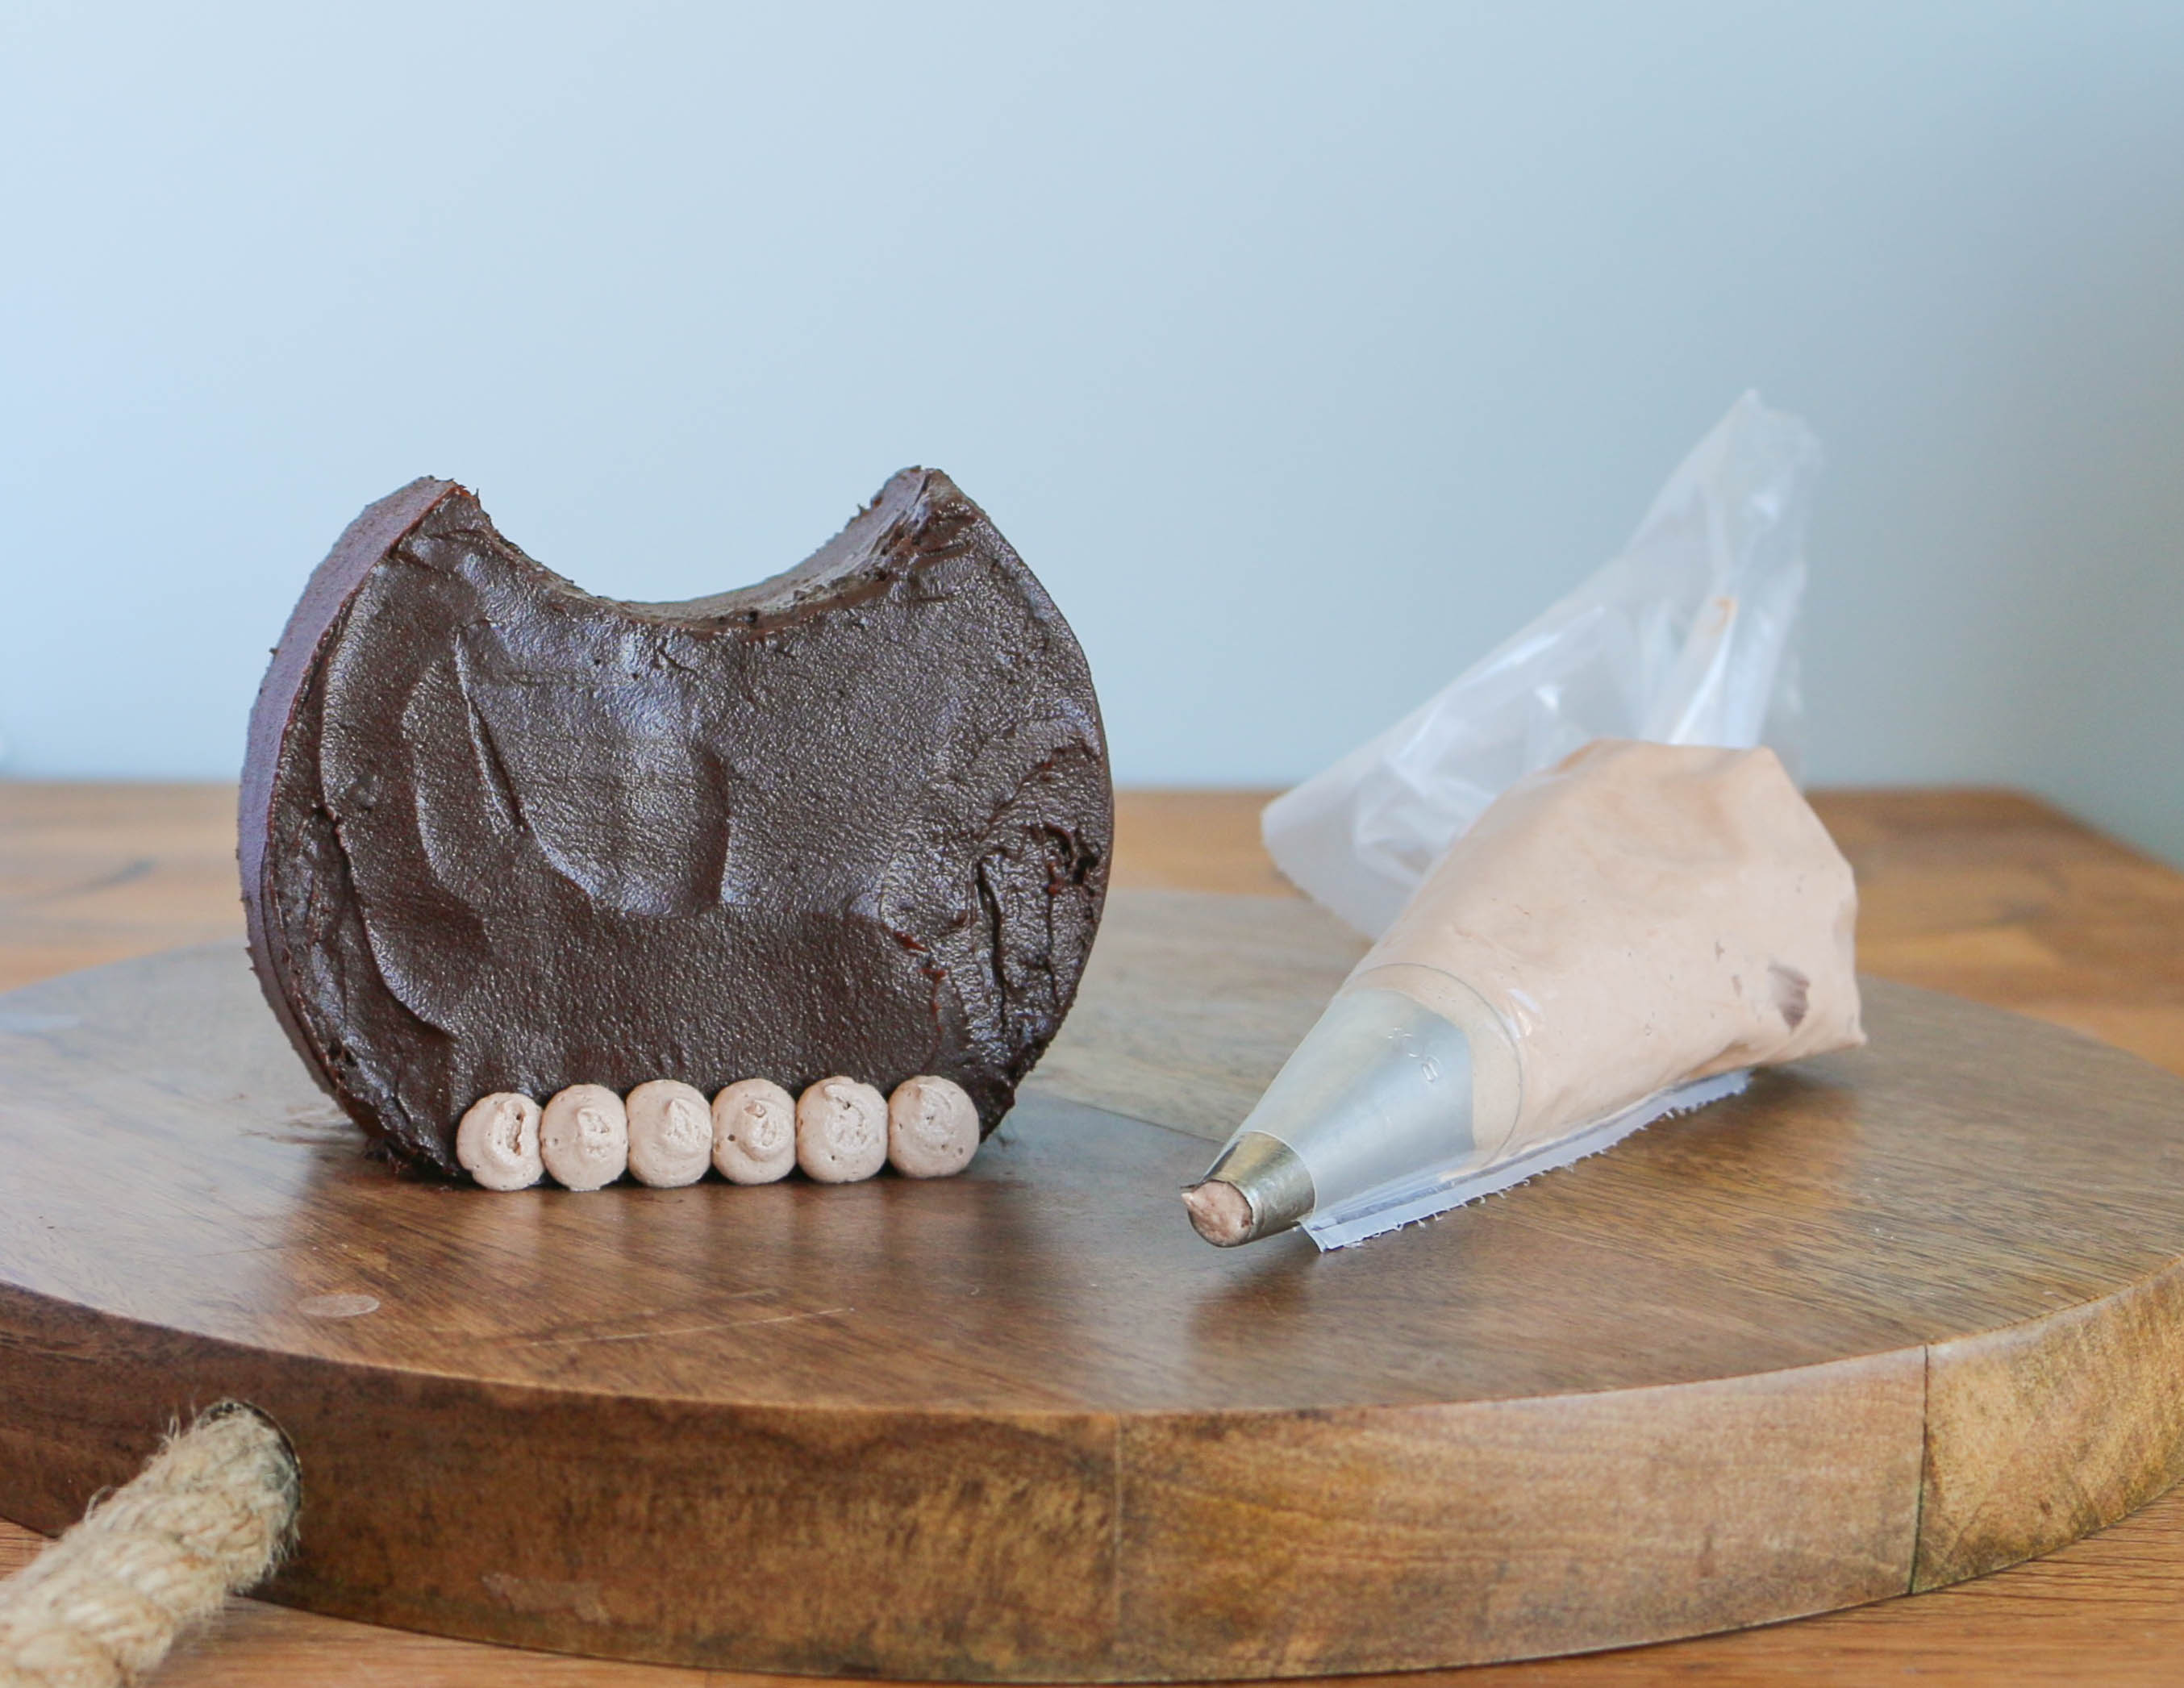
Step 4:
Fill a piping bag fitted with a medium-sized round tip with light brown buttercream. Pipe a row of dots along the bottom edge of the front of the cake.
Place the long edge of your icing spatula centered across the row of dots. Press down and smear the dots upward, similar to the popular pressed petal technique.
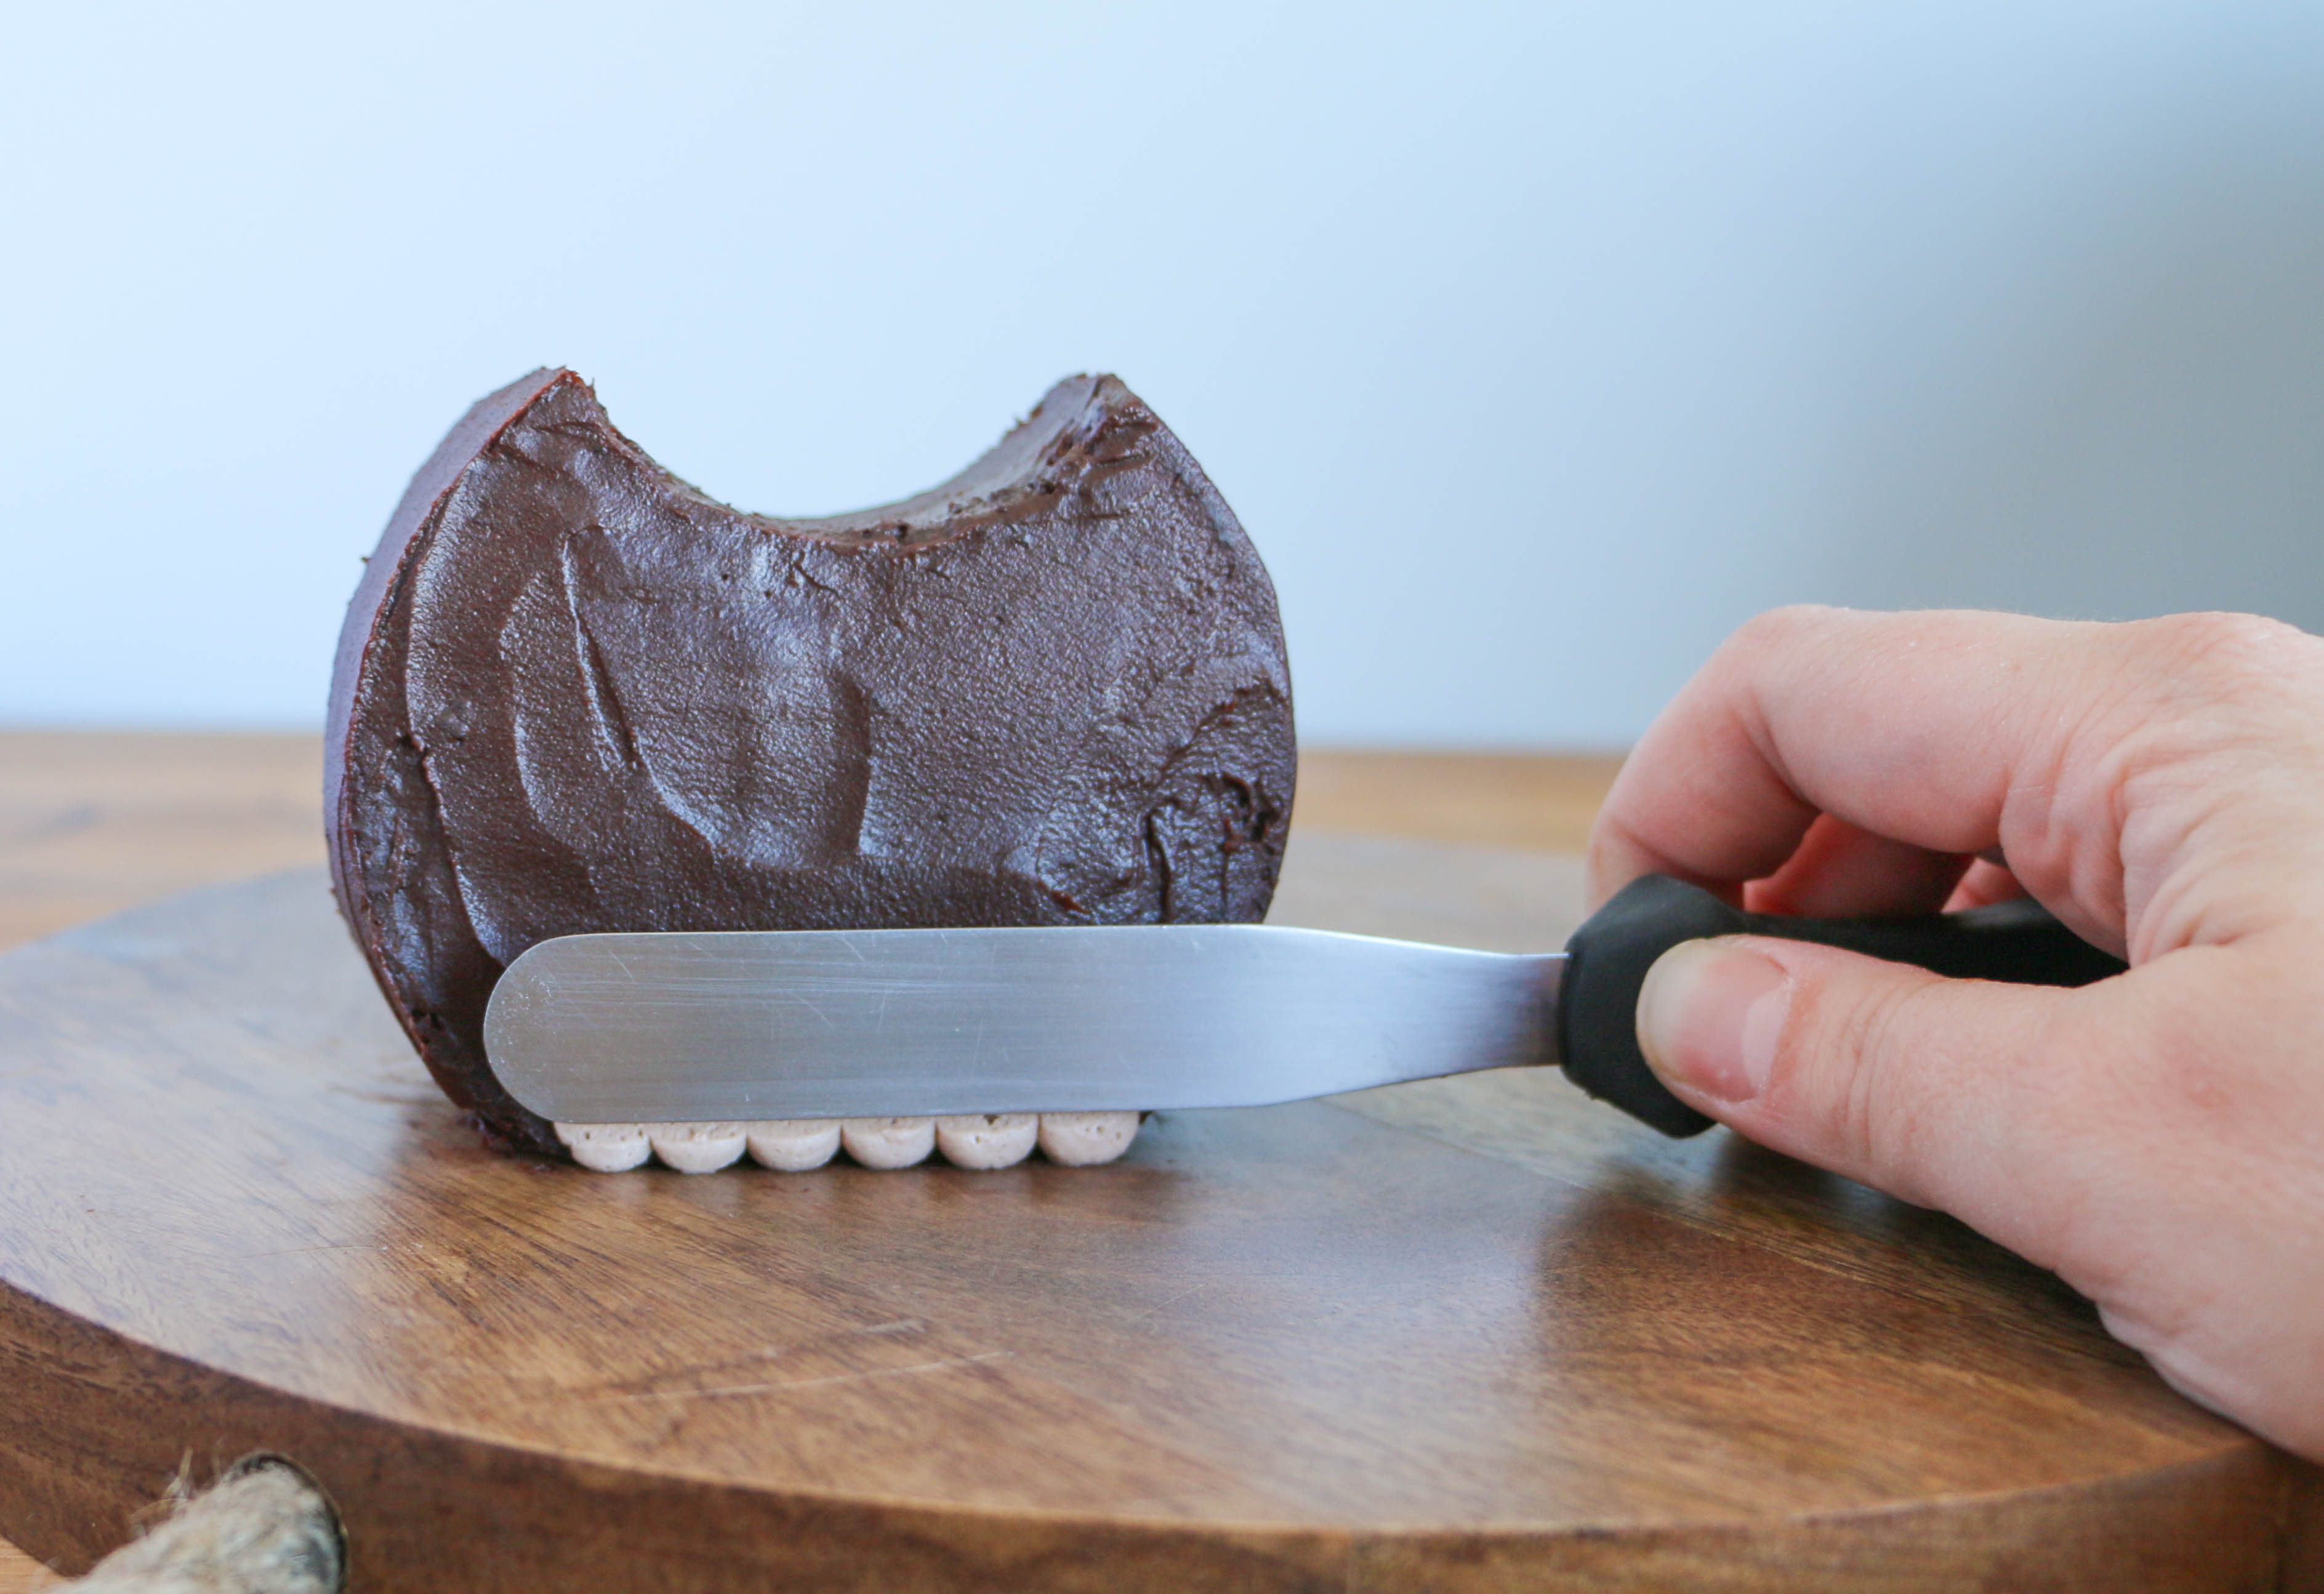
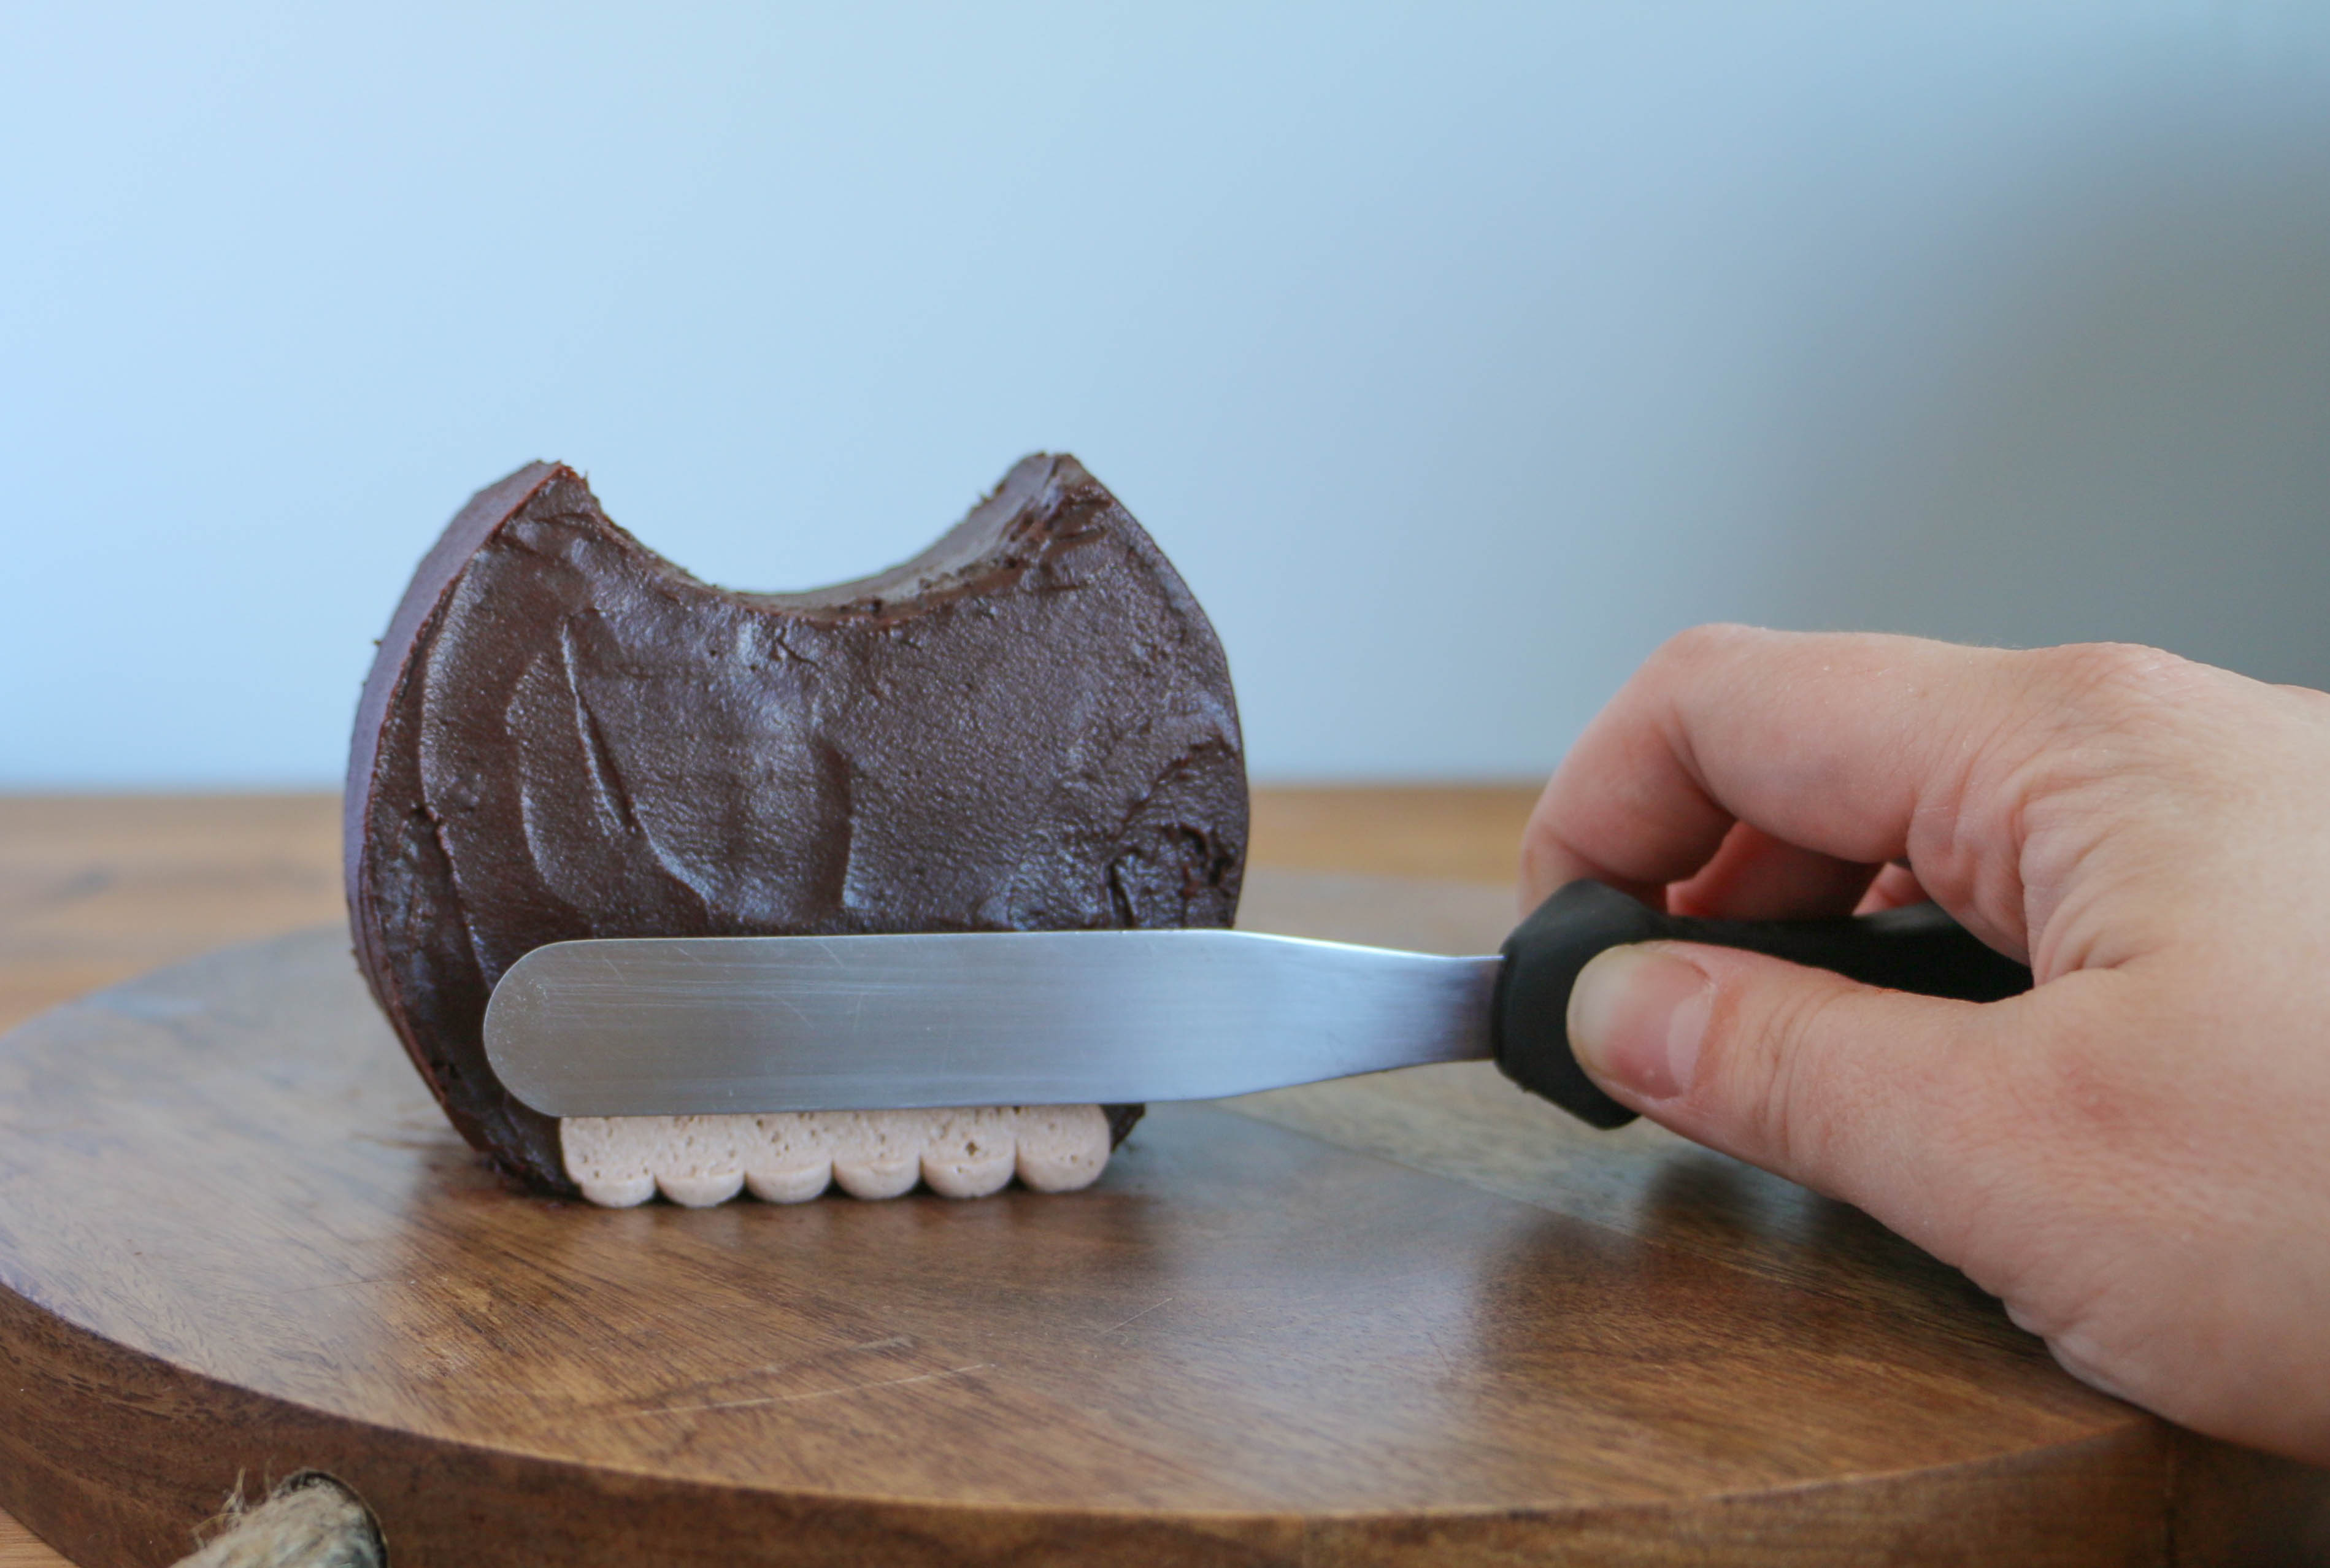
Pipe another row of dots half-way up the smeared portion of buttercream and repeat the smearing process.
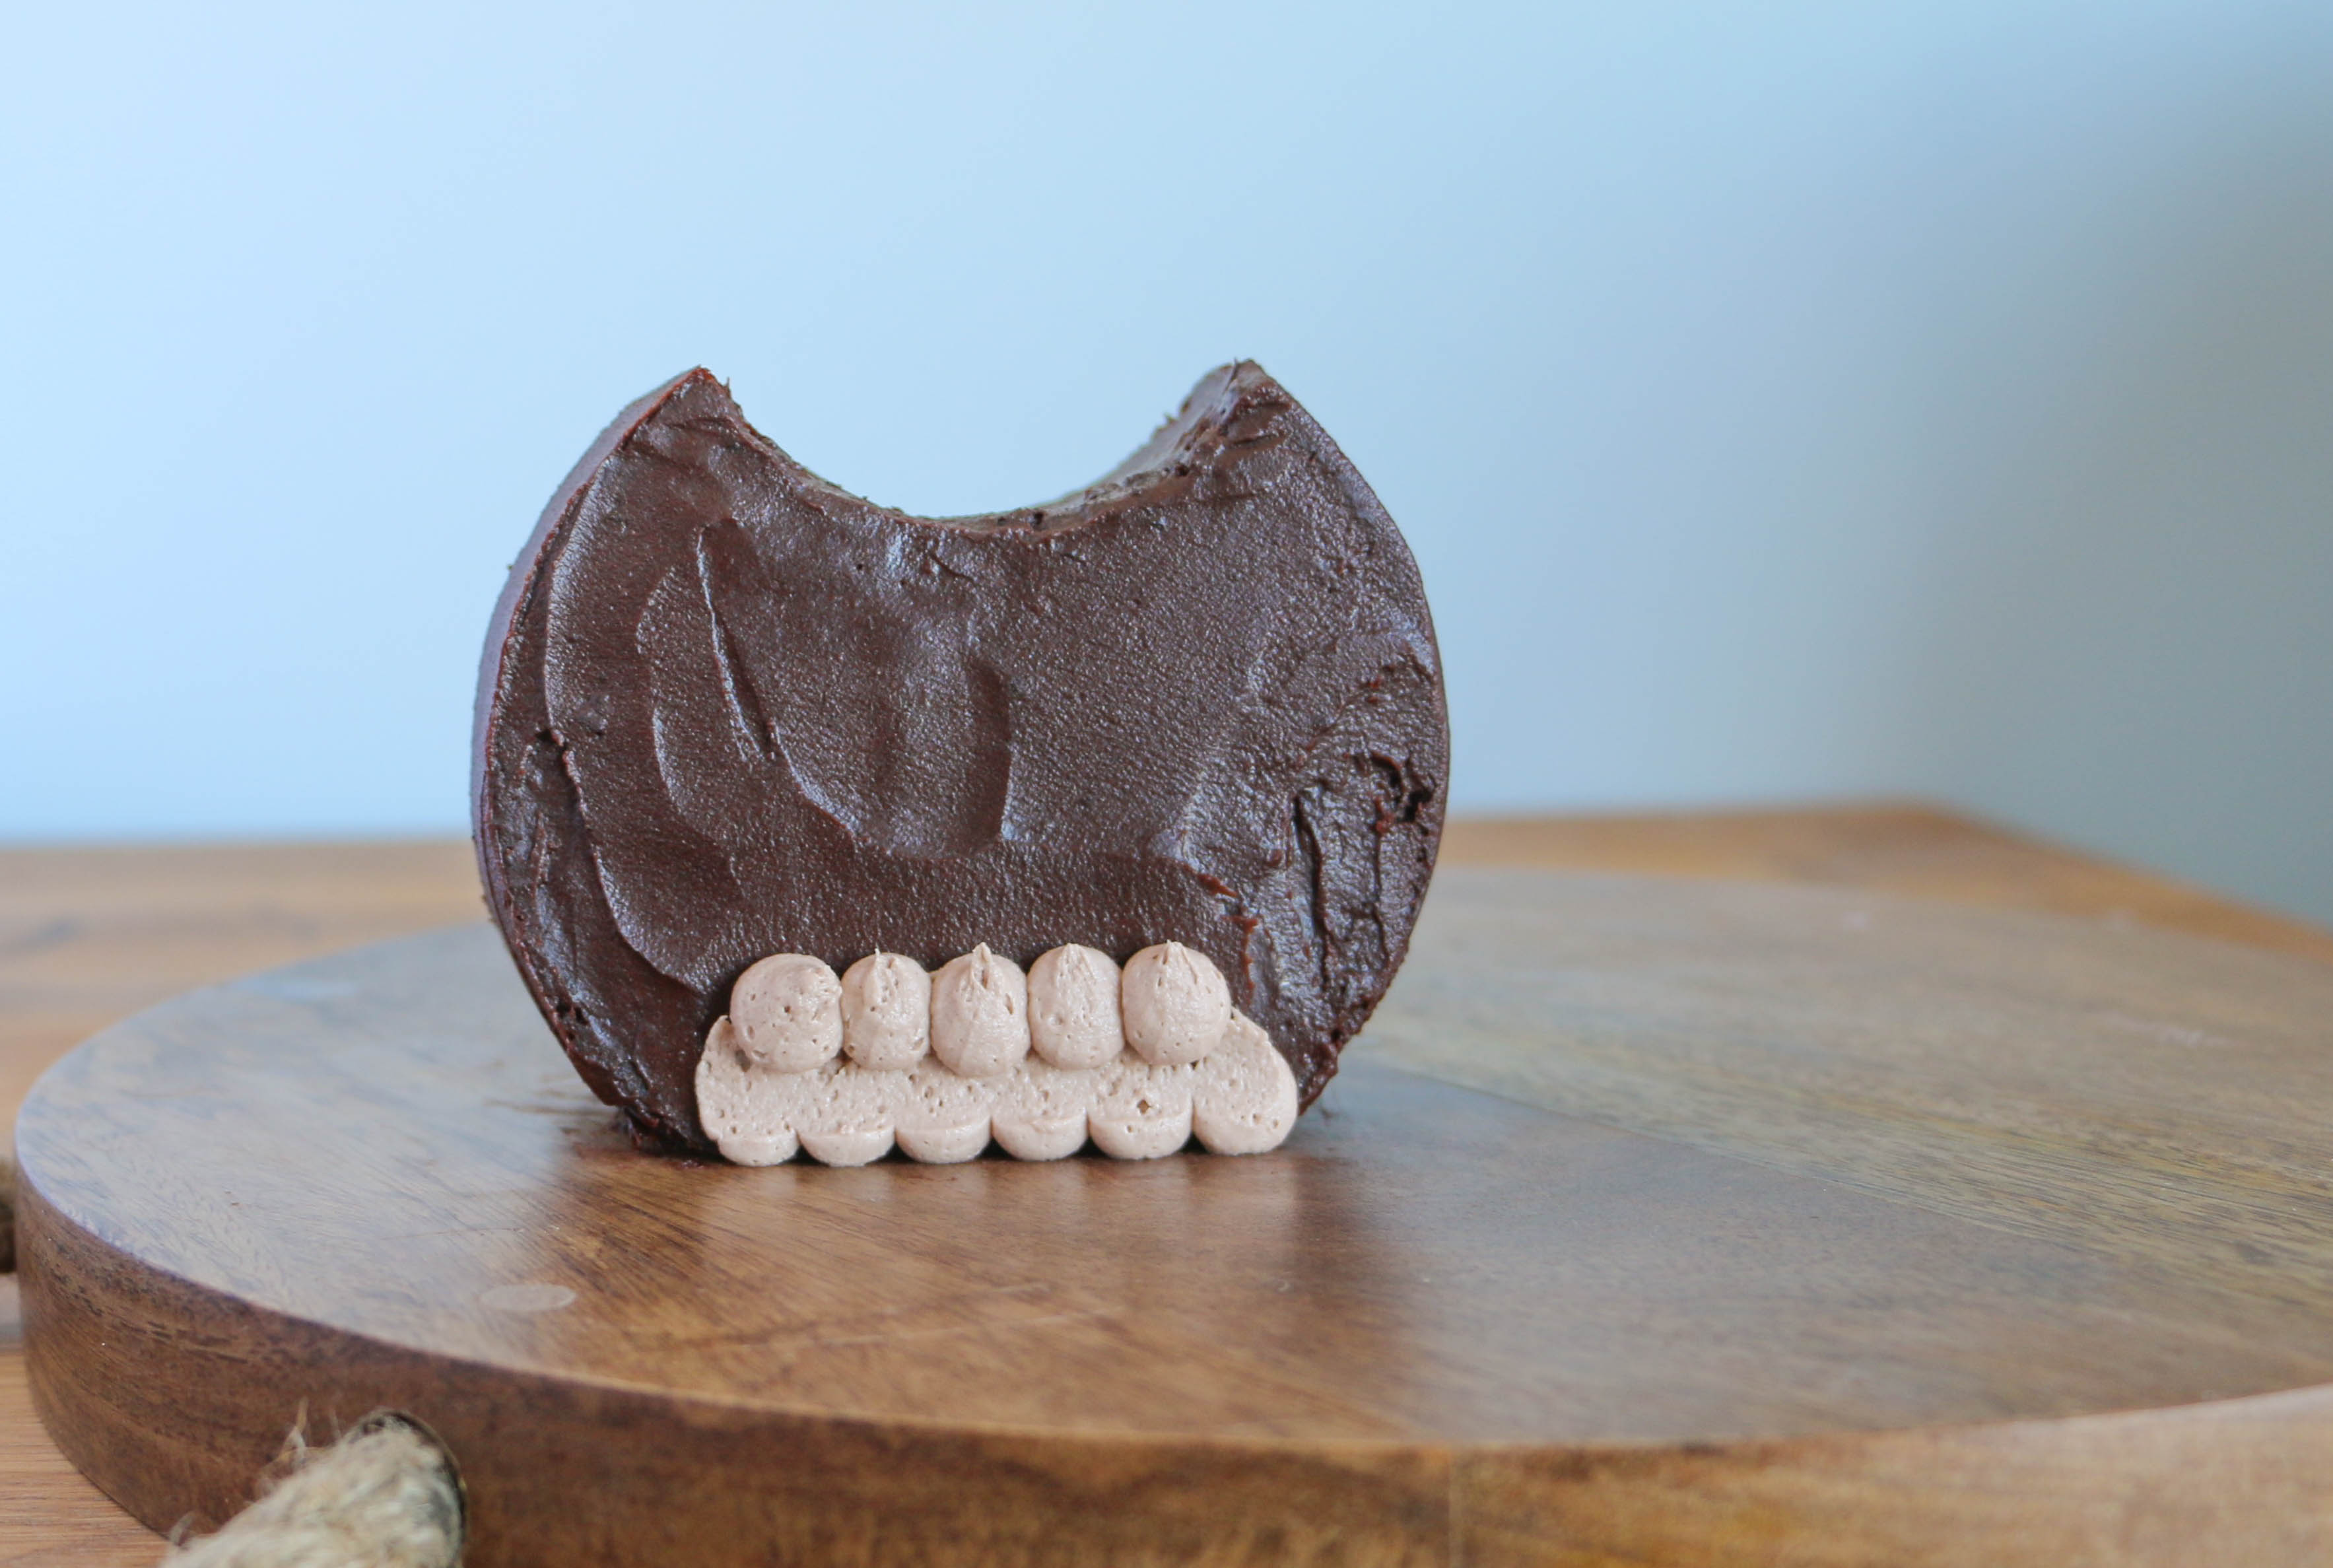
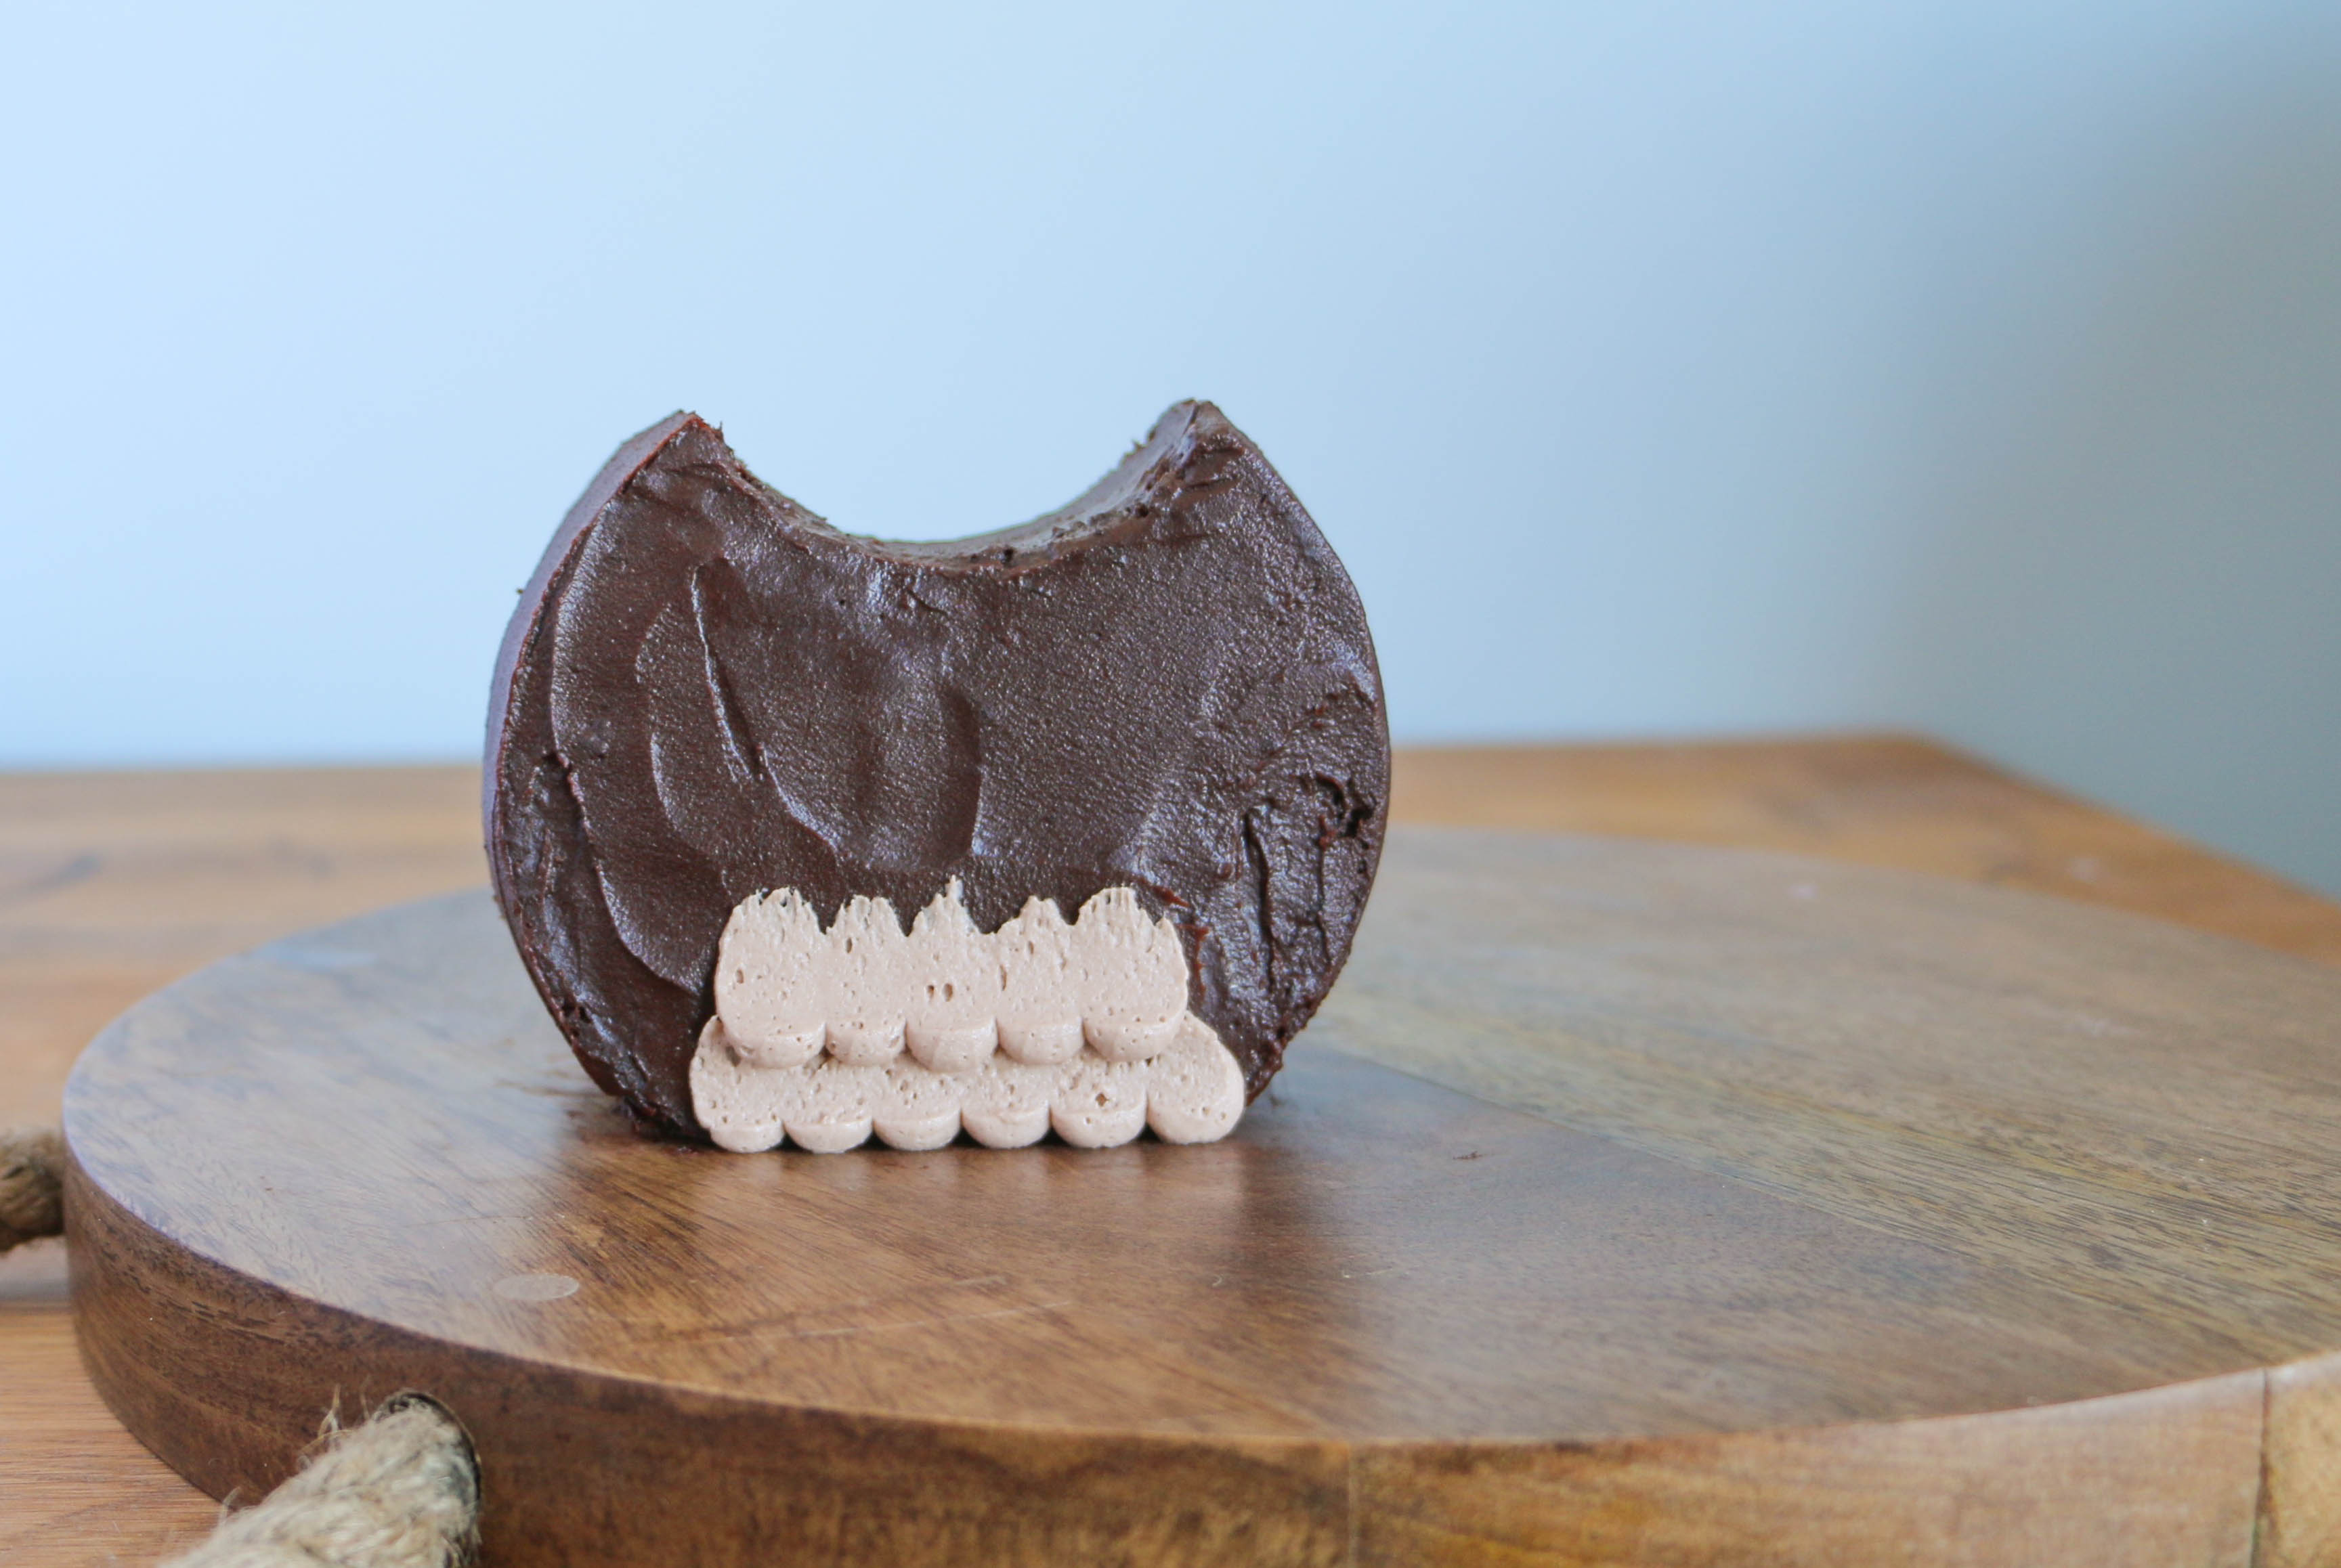
Continue up the center of the cake, piping fewer dots as you reach the top to create the owl’s feathery belly.
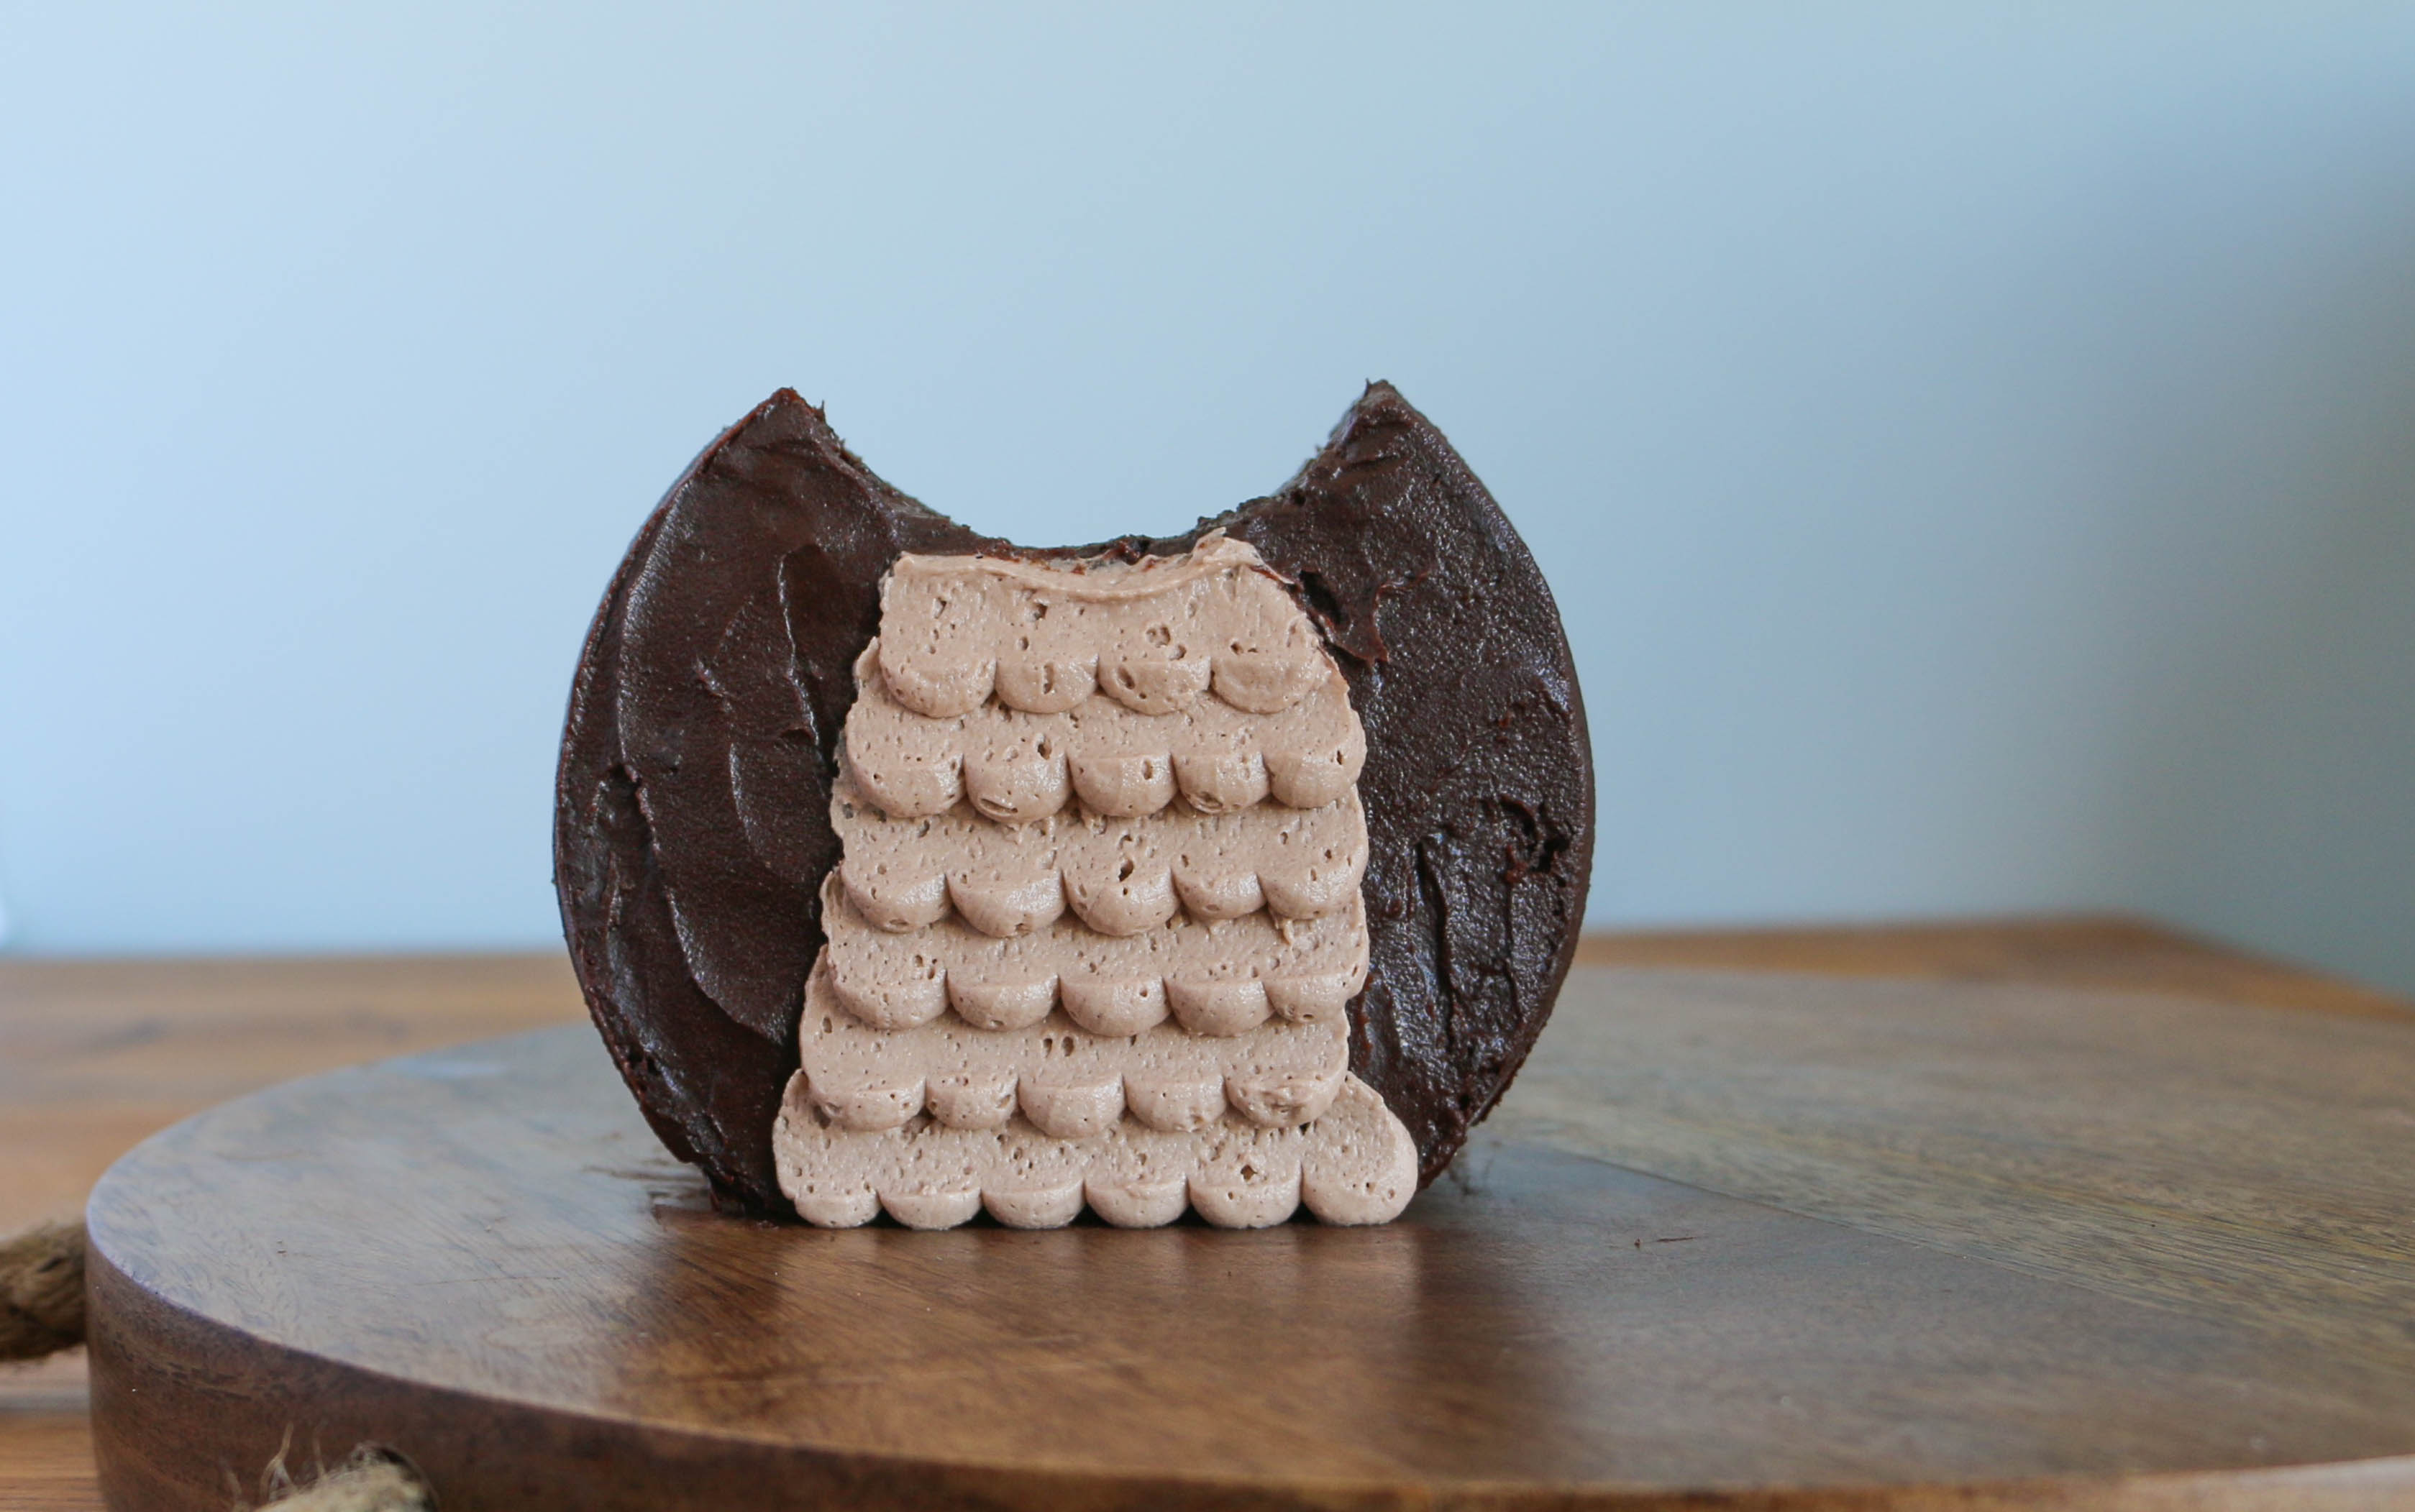
Step 5:
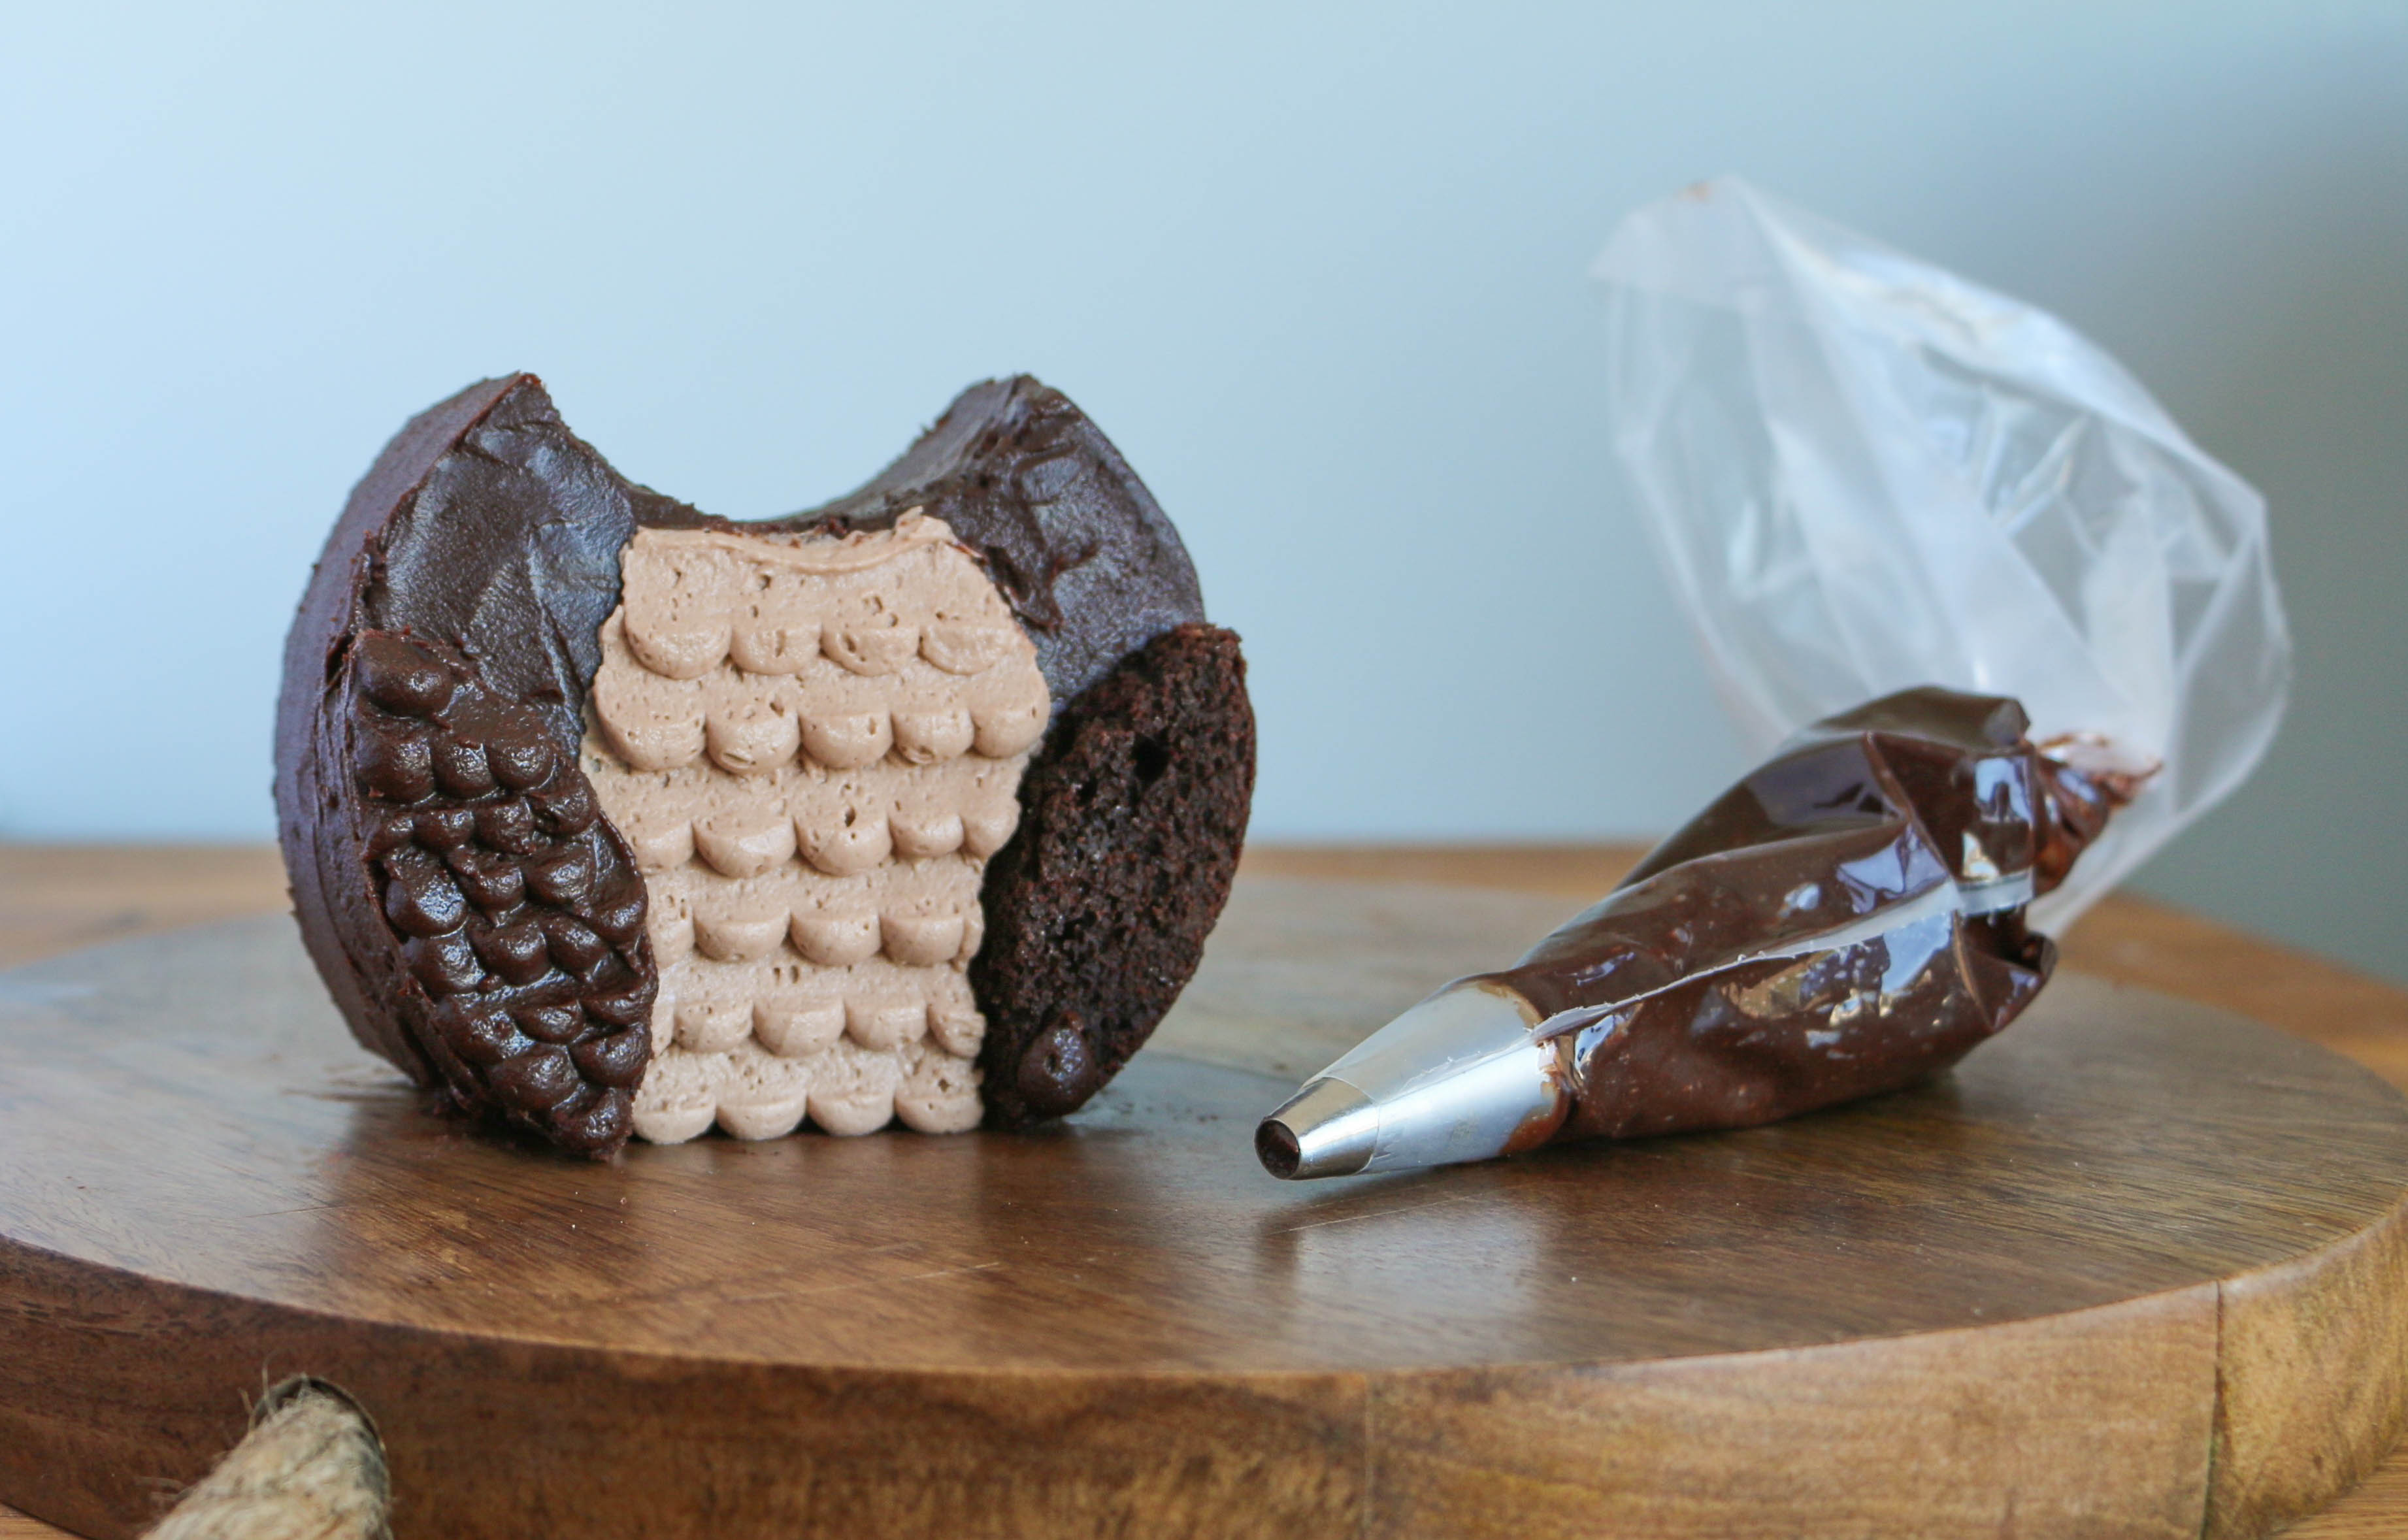
Place the cut ovals of cake onto the front of your owl. Fill a piping bag fitted with a medium-sized round piping tip with chocolate buttercream. Finish the wings with the same piping technique that was used on the belly of the owl. Pipe dots so that the front and sides of the wings are completely covered.
Step 6:
Taking a cue from Craftsy instructor Carrie Sellman’s famous monster eye cake, carefully open two cream-filled sandwich cookies so that all of the cream remains in tact on one side. Press a chocolate candy onto each of the cream-coated cookies.
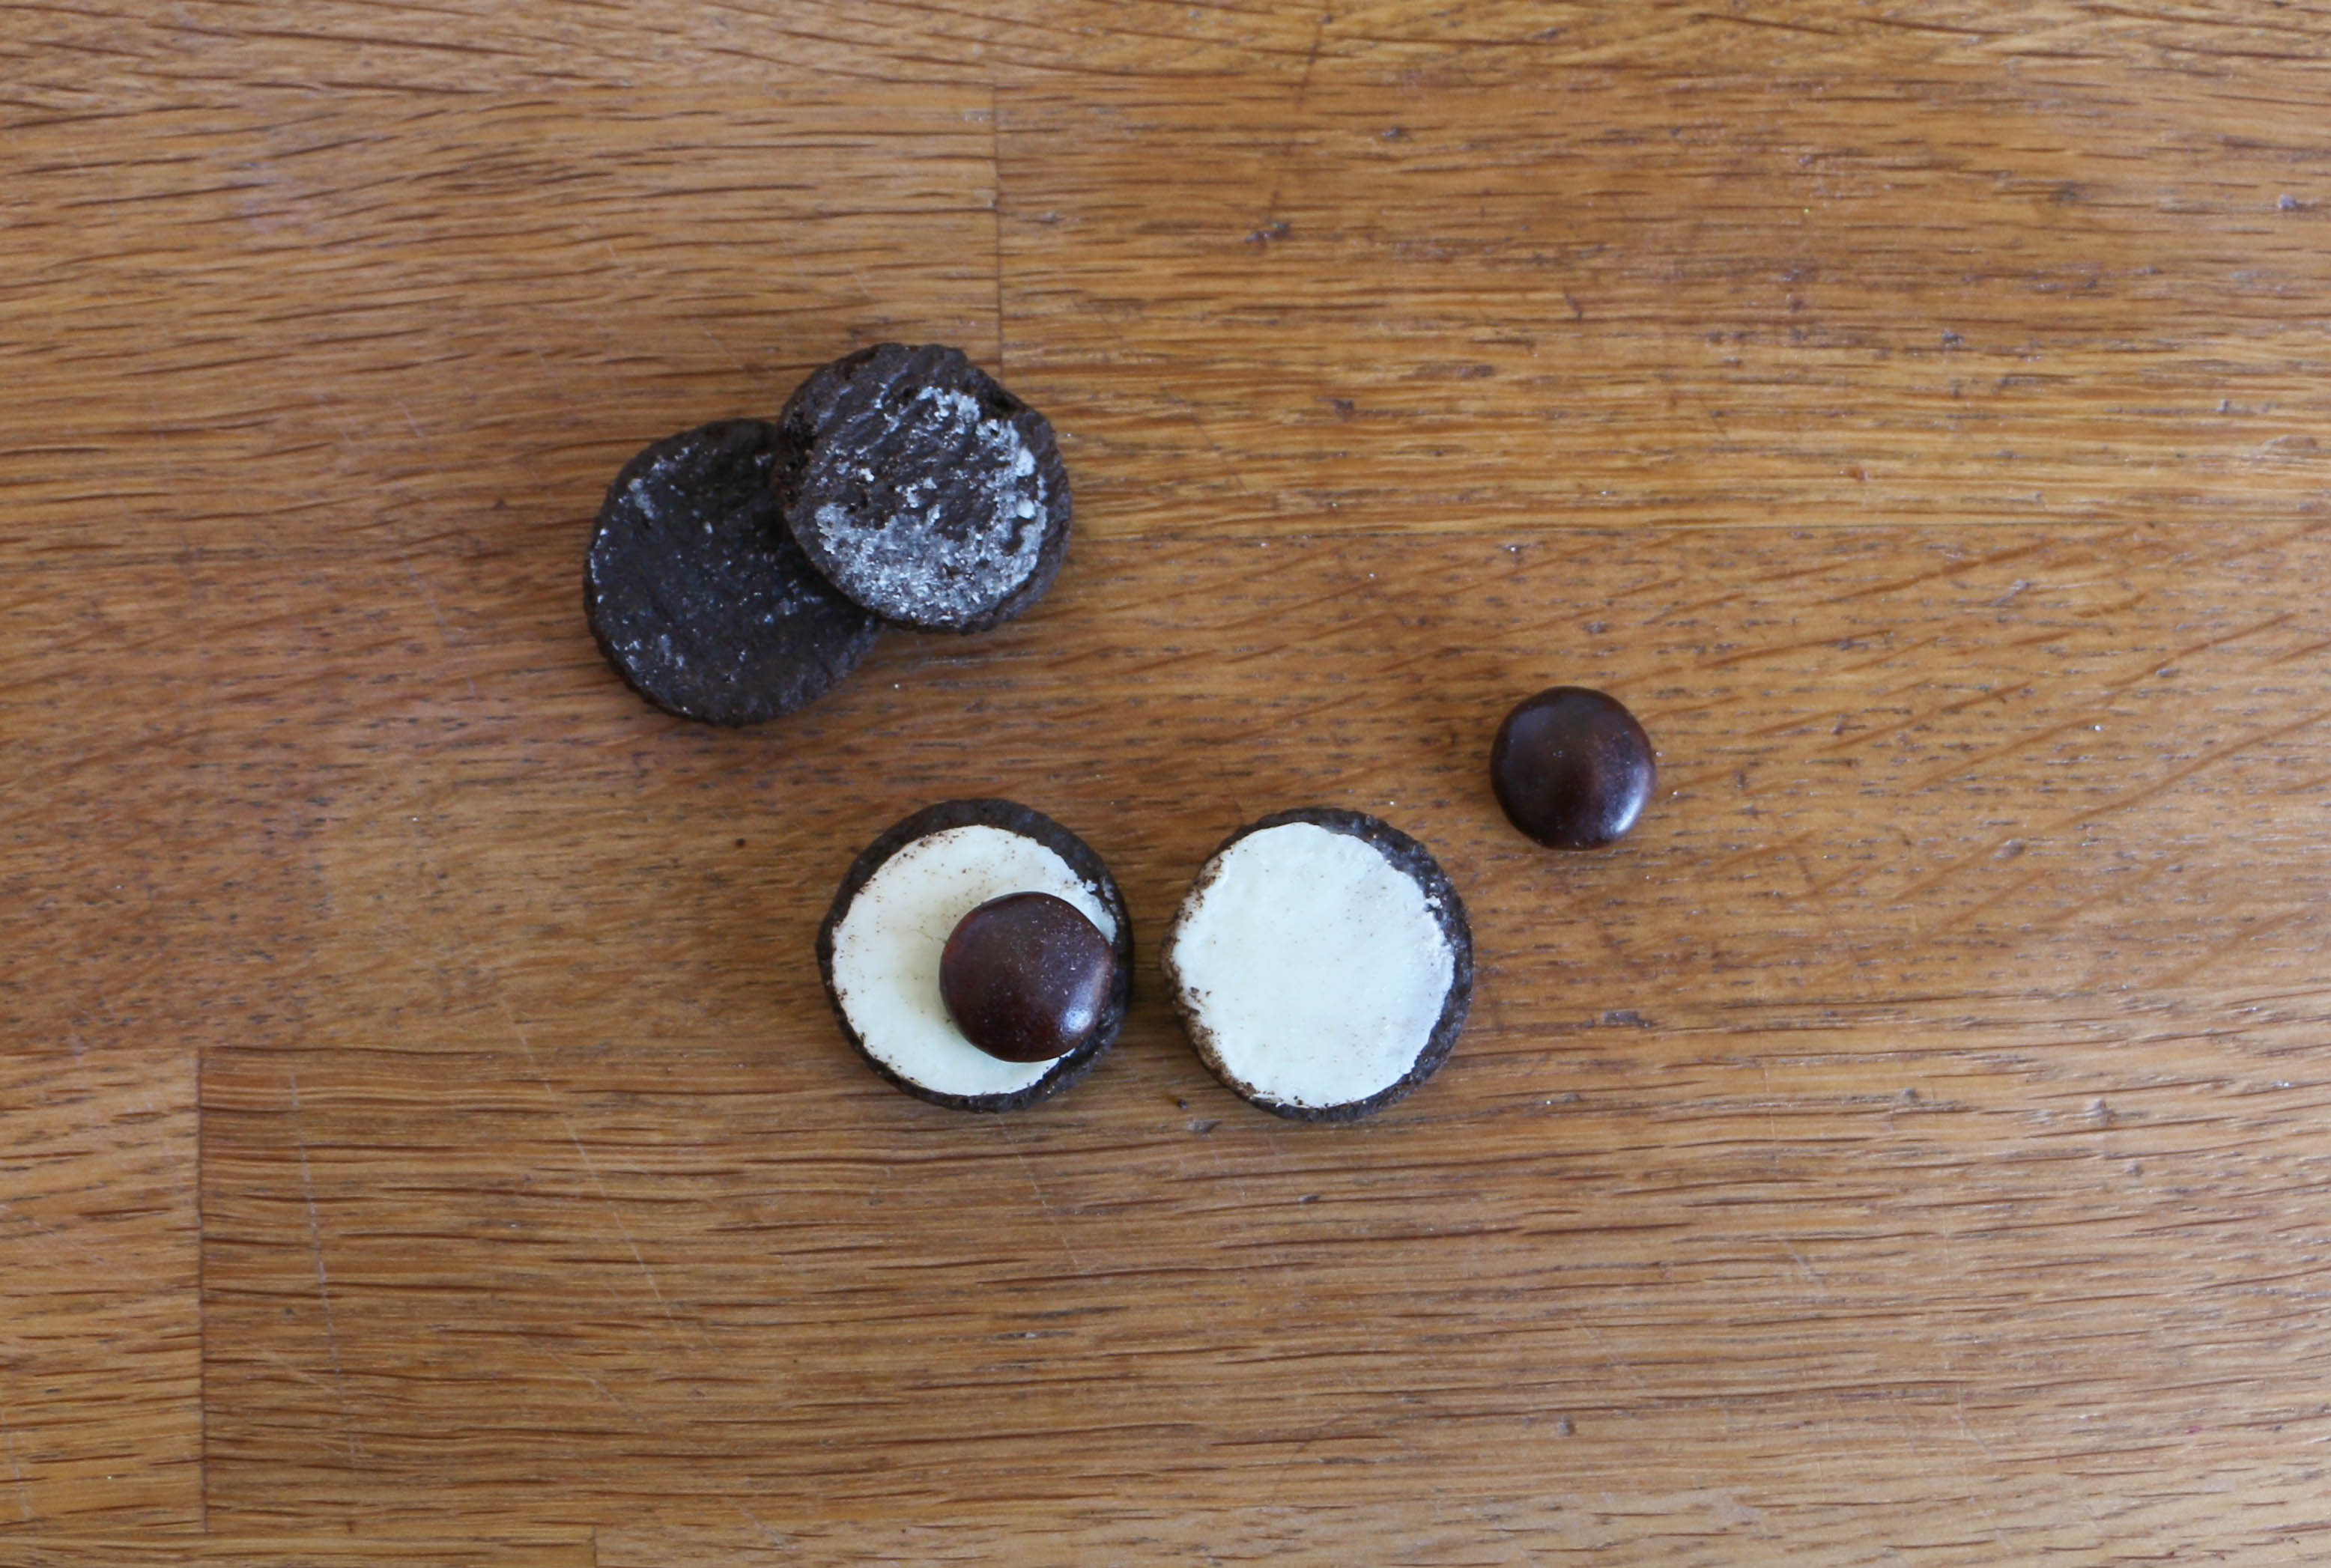
Place the finished eyes onto the owl toward the top of the feathery belly area.
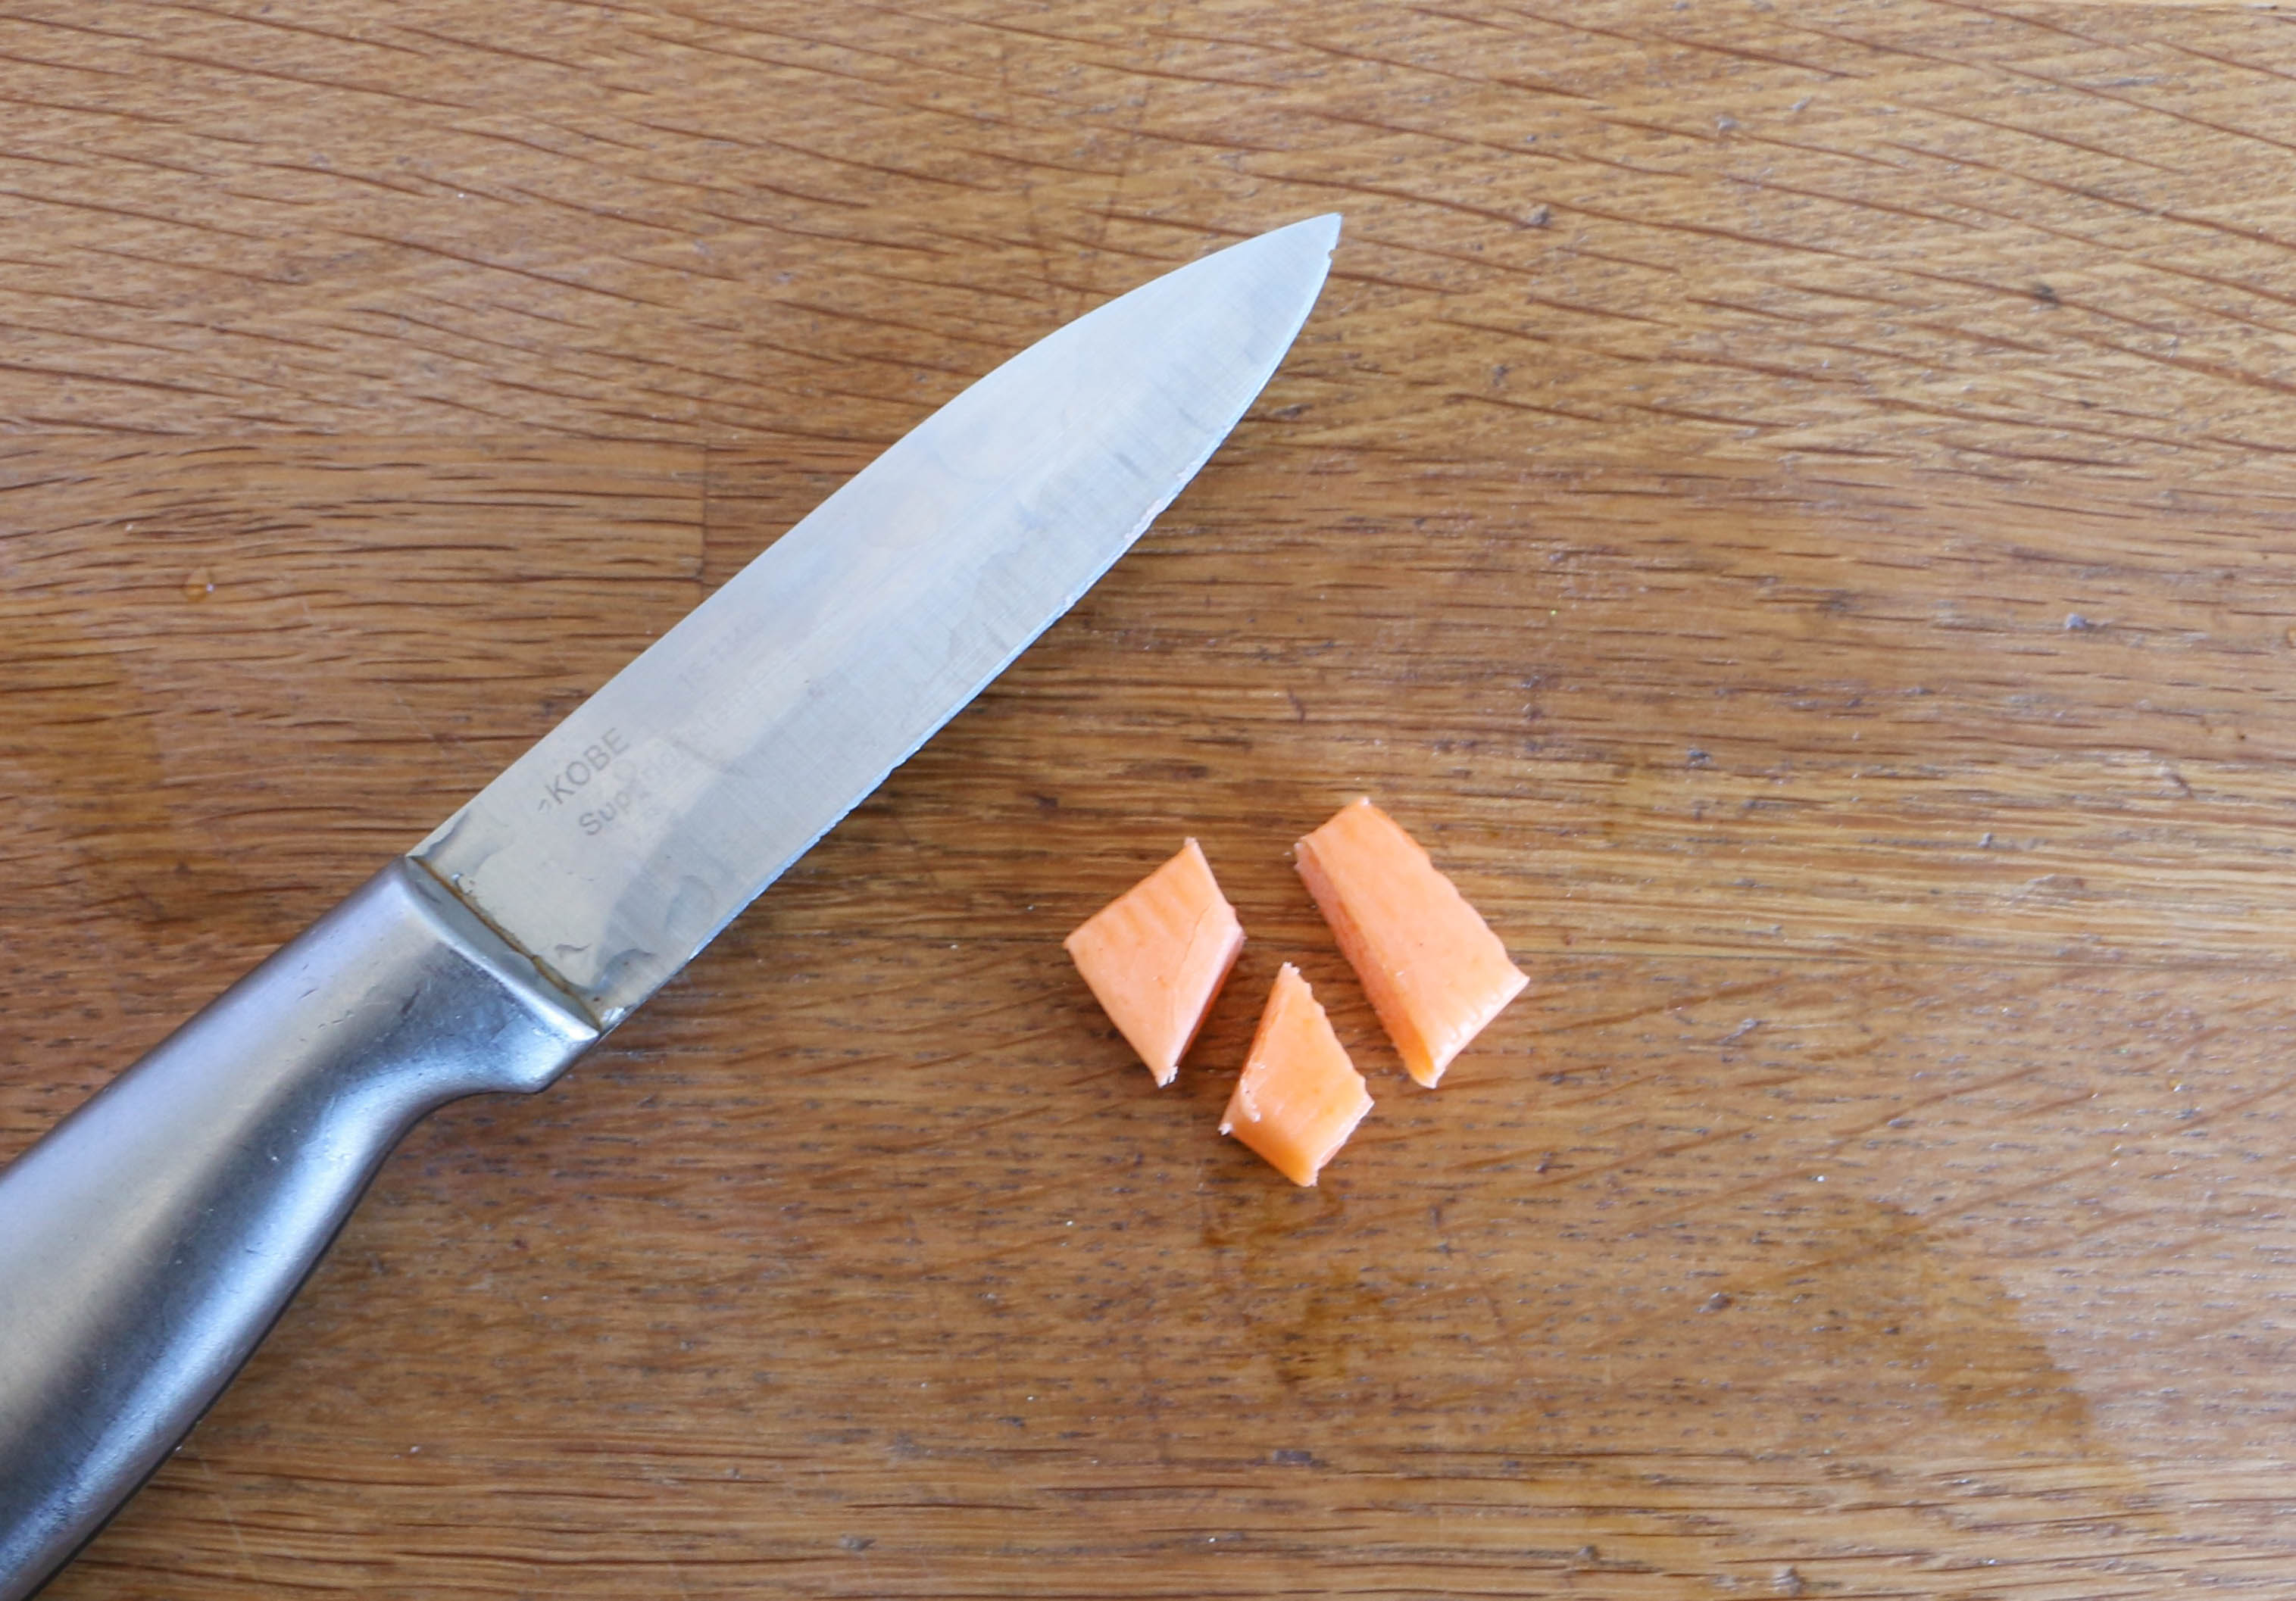
Step 6:
Use a small, sharp knife to trim a square chewy candy into an elongated diamond shape. Press the diamond into the buttercream between your owl’s cookie eyes to create its beak.
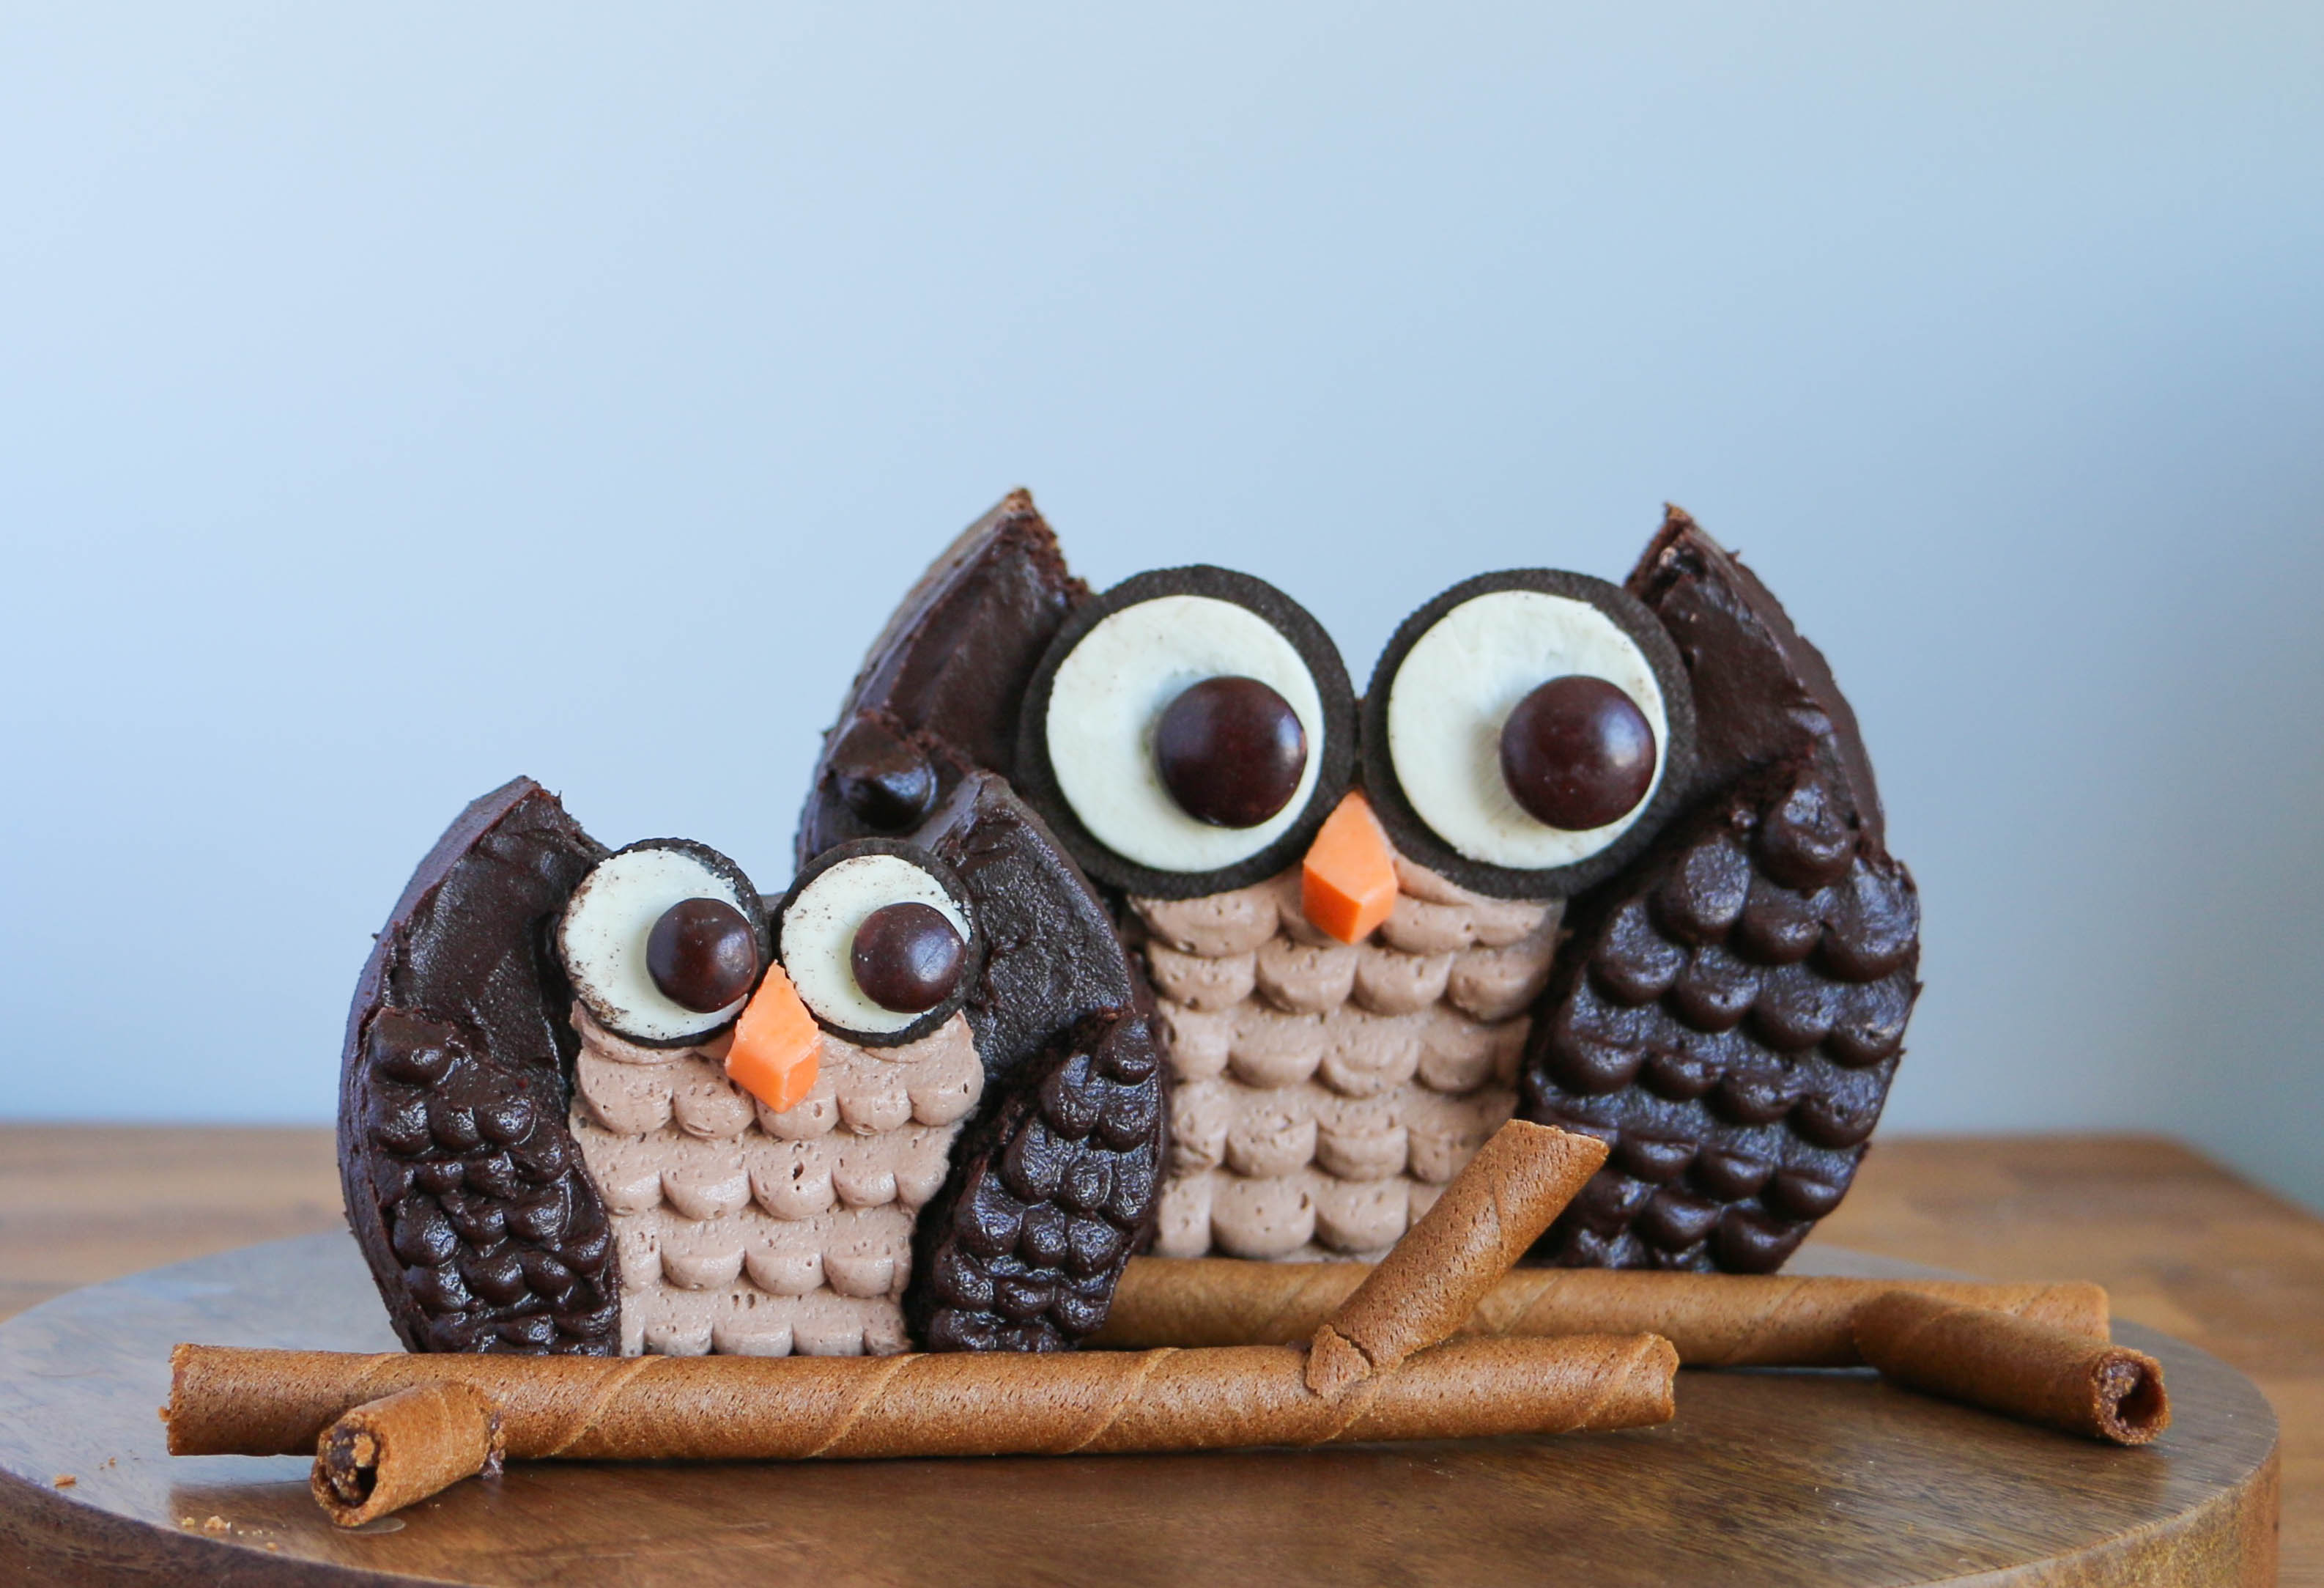
Step 7: (optional)
For a great finishing touch, arrange the chocolate baton cookies around the base of your owls to create little branches for them to perch on. Cut a cookie into smaller pieces to add little twigs to your branches.
Share tips, start a discussion or ask one of our experts or other students a question.
No Responses to “How to Make a Stand-Up Owl Cake in 6 Steps — No Sculpting Needed!”