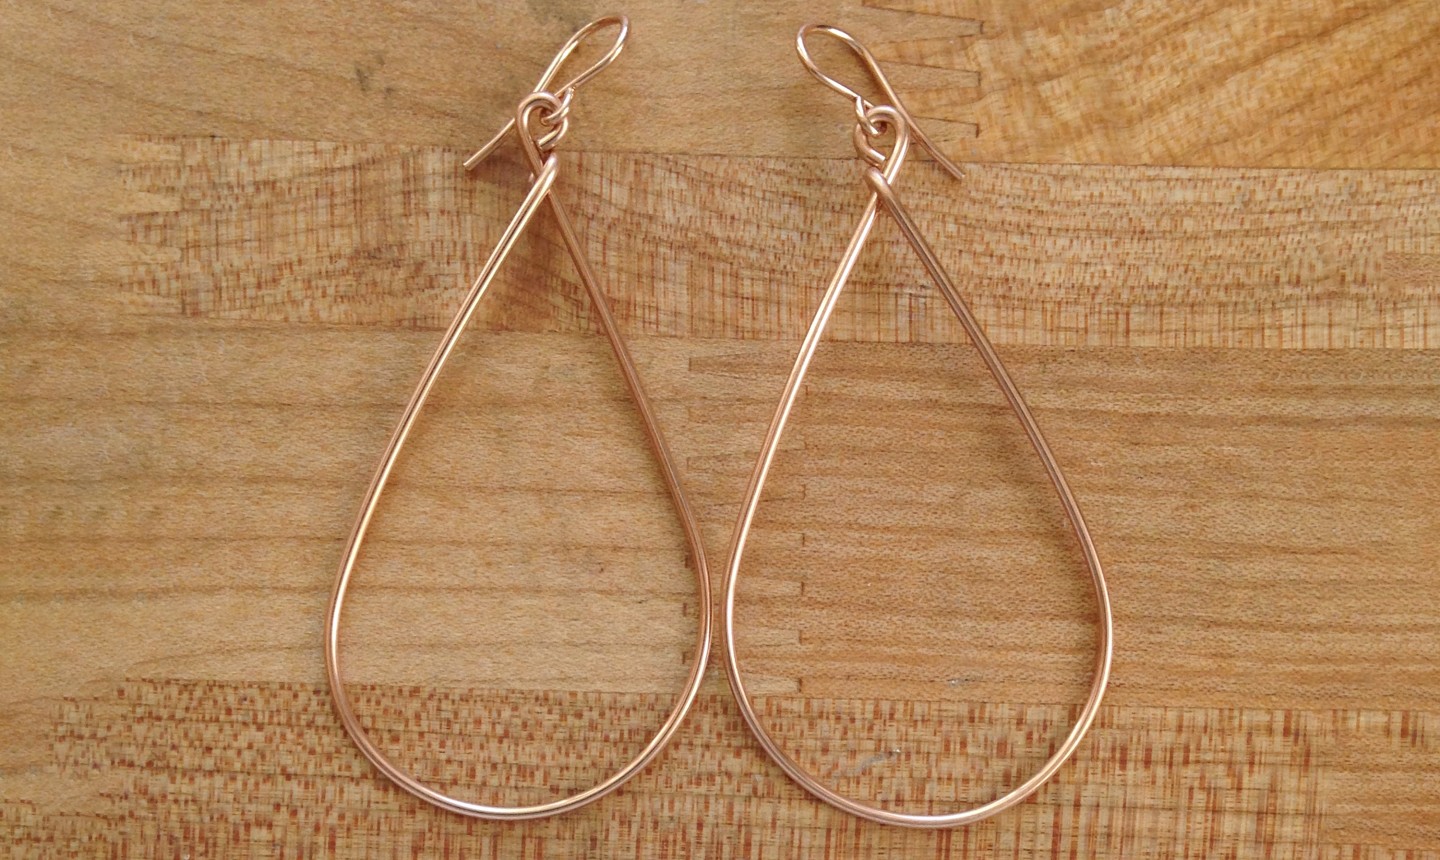
The simple hoop earring is everything. It works with any outfit, never looks like you’re trying too hard and refuses to go out of style.
Even better, you can make this pair with just some gold or silver wire and a few basic jewelry tools. This post can teach you how to make a wire wrapped hoop. You really aren’t trying too hard!
Wire Loop Earrings
Level: Easy
What You Need
- Round-nose pliers
- Flat-nose pliers
- Needle-nose pliers
- Wire cutter
- About 12″ of wire (we used 16 gauge 14/20 rose gold-filled round wire)
- 2 ear hooks
- Something round to form your pieces on (we used a large round mandrel, but you can use a wooden dowel or even a baseball bat — get creative!)
- A file (not mandatory, but will give your earrings a more finished look)
Instructions
1. Measure
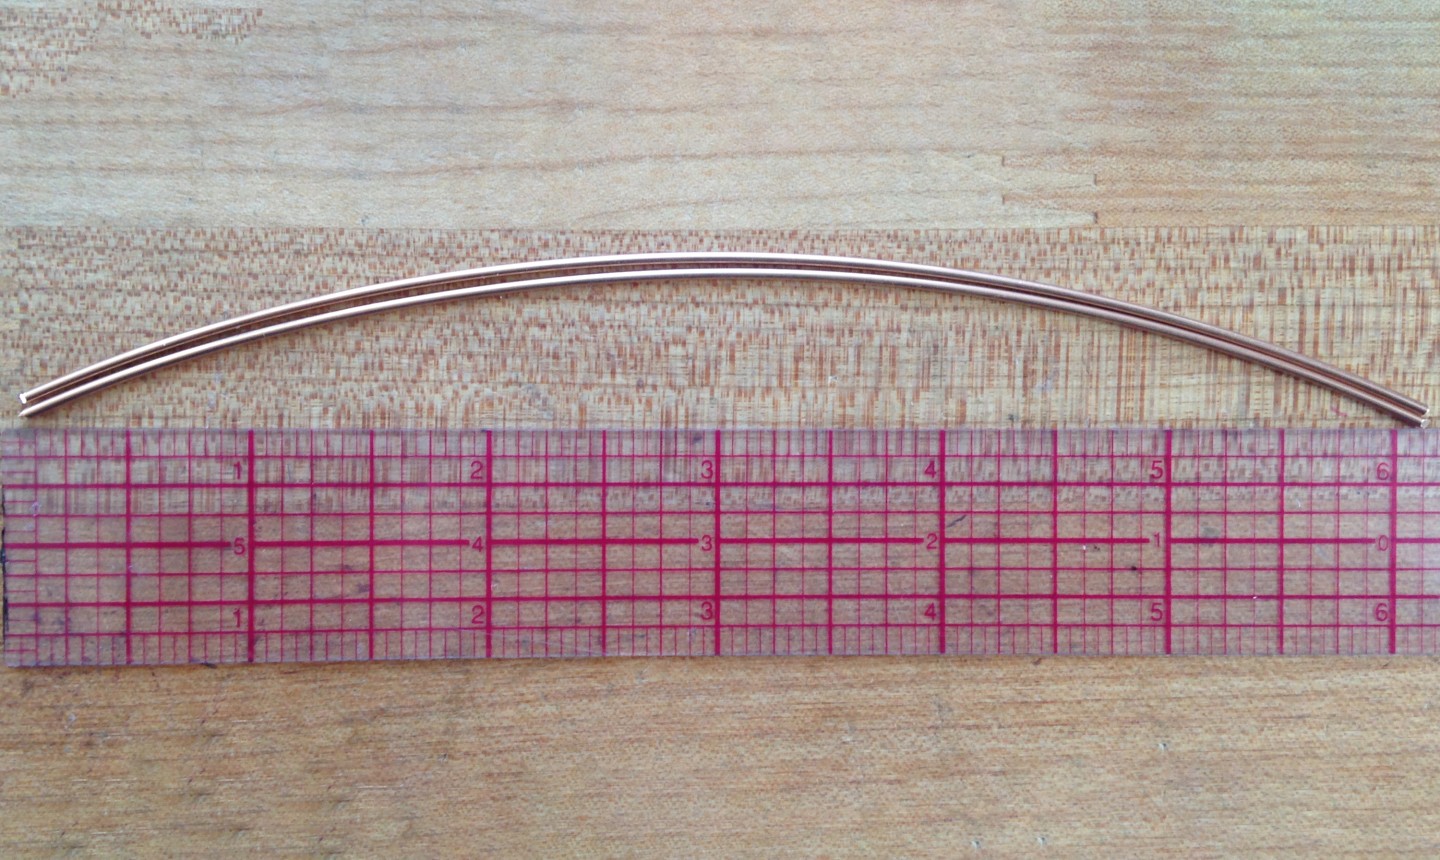
Measure and cut two pieces of wire. My pair will be slightly larger than 6″ each but if you prefer a smaller hoop, you could make them 4½”-5″.
If you’ve used wire cutters, you’ll probably have crimped ends, which will show in the finished piece. You can file my wire ends flat for a cleaner, more professional look.
2. Spool
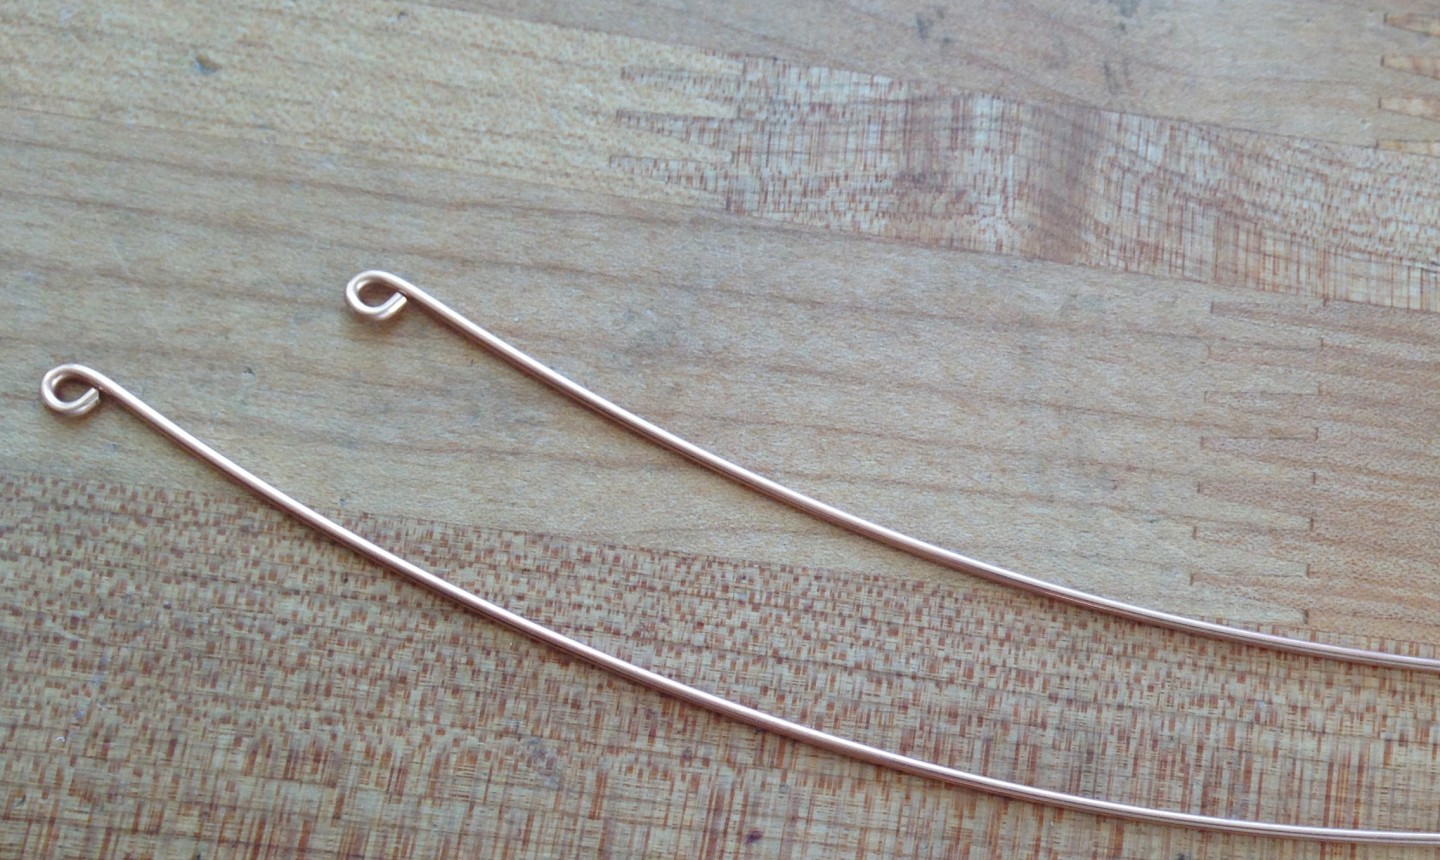
Likely, your wire will have been spooled when you purchased it. This is one of those rare moments when this works to your advantage! Using your needle-nose pliers , make a tiny circle at the end of your wire, going in the opposite direction of the wire’s curve. The loop needs to be large enough for the other end of your wire to fit through, but not so large that it looks sloppy.
3. Form the Hoop
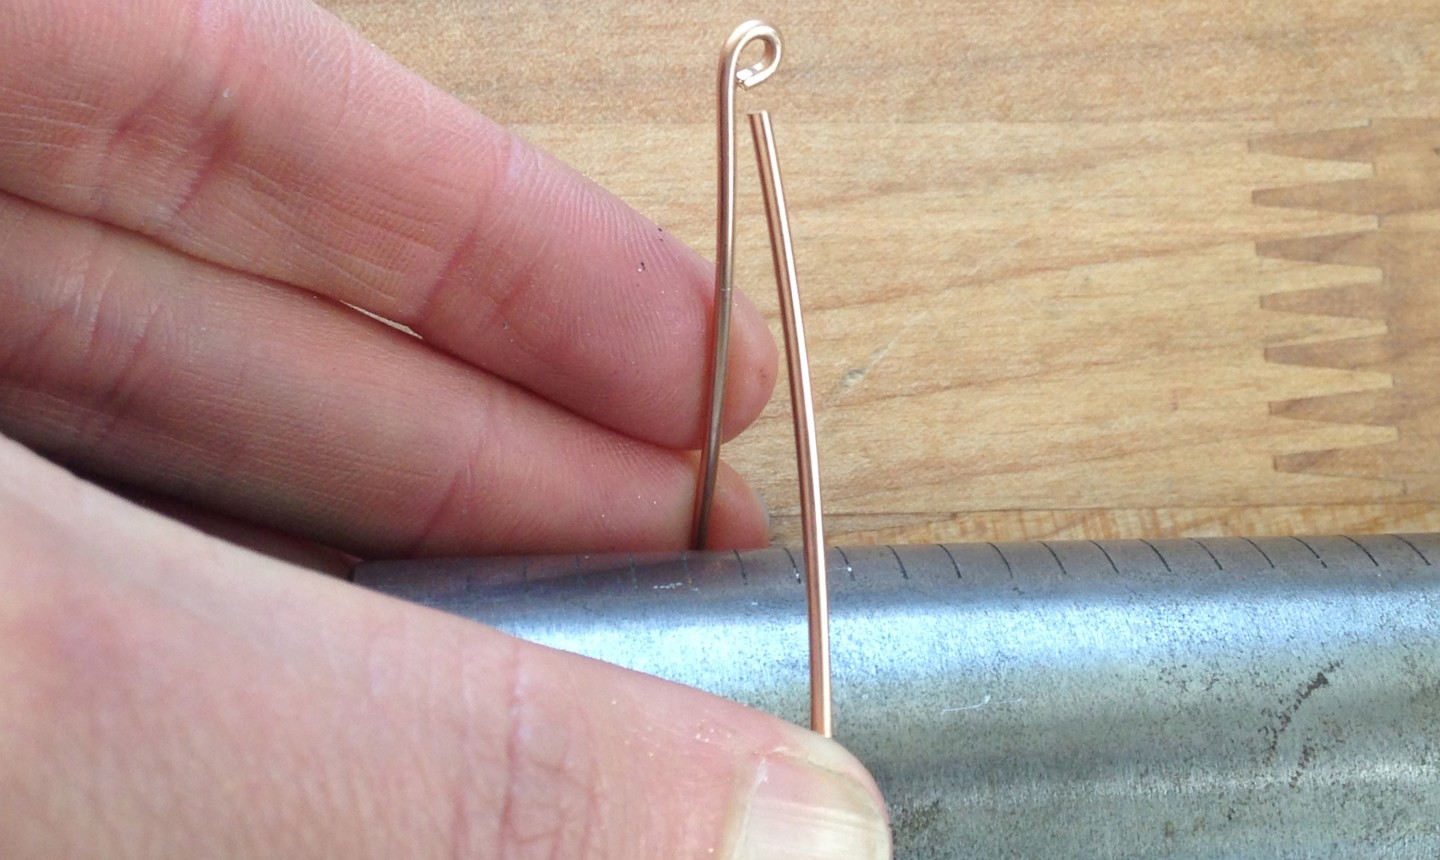
Place your mandrel or other round object in the center of you wire. If you’re using a mandrel, you can now choose the depth of the curve you want. For a wider, more circular hoop, form your hoop around the larger part of the mandrel; for a more teardrop shape, go closer to the smaller end.
Gently push both sides of the wire around your mandrel. Use a light touch and take it slow — if you push too hard, you’ll end up misshaping your hoop.
4. Loop It Through
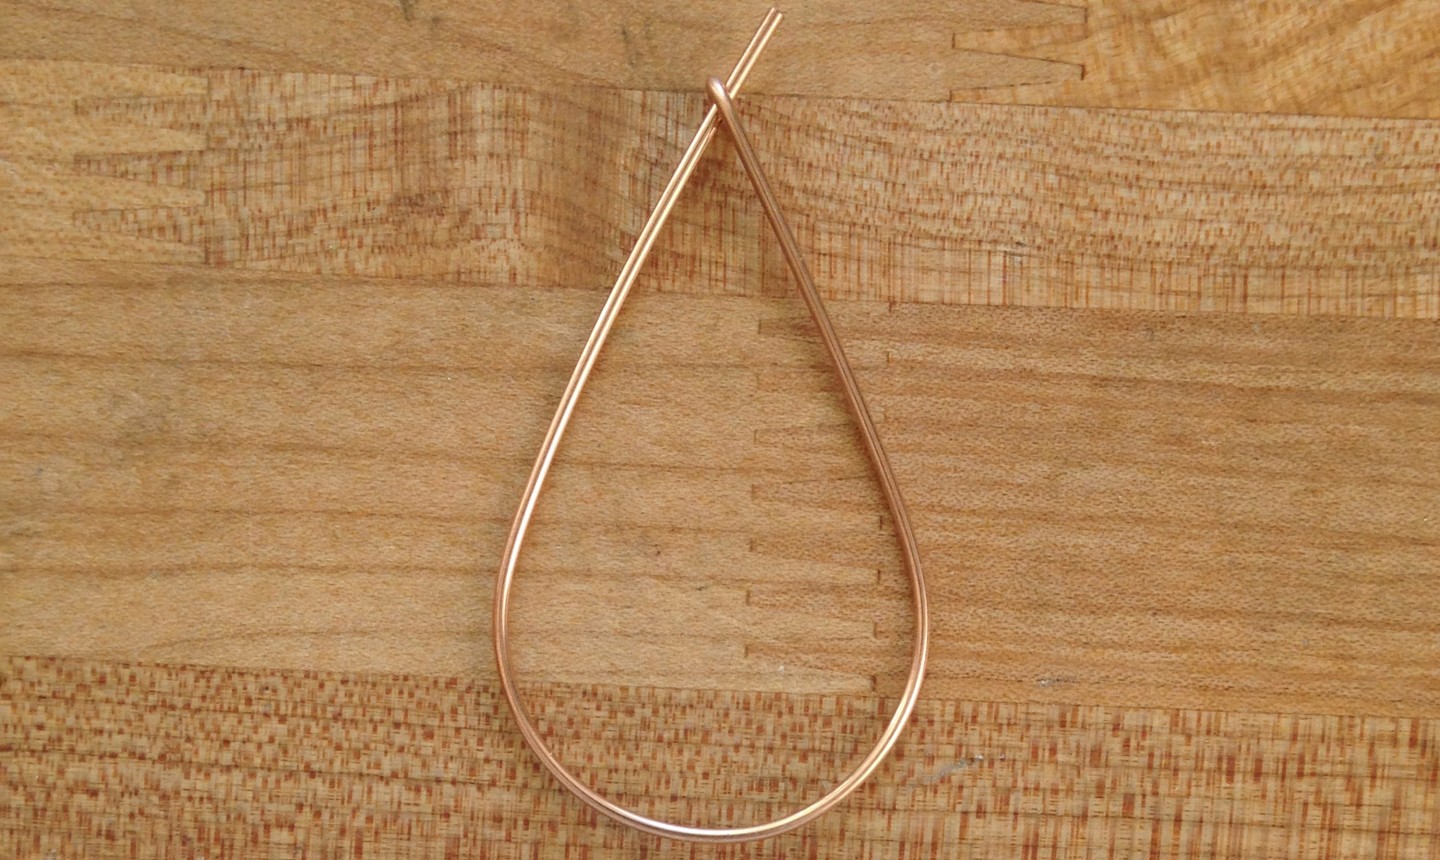
As the two ends begin to meet one another, press a tiny bit harder on the end with no loop so it just fits into the hole on the other side. Slip it through as soon as you can, so you don’t get any extra bending in your wire.
You want to have enough wire extending beyond the hole to make a circle (the same size as your original circle) on this end, too.
7. Complete and Repeat
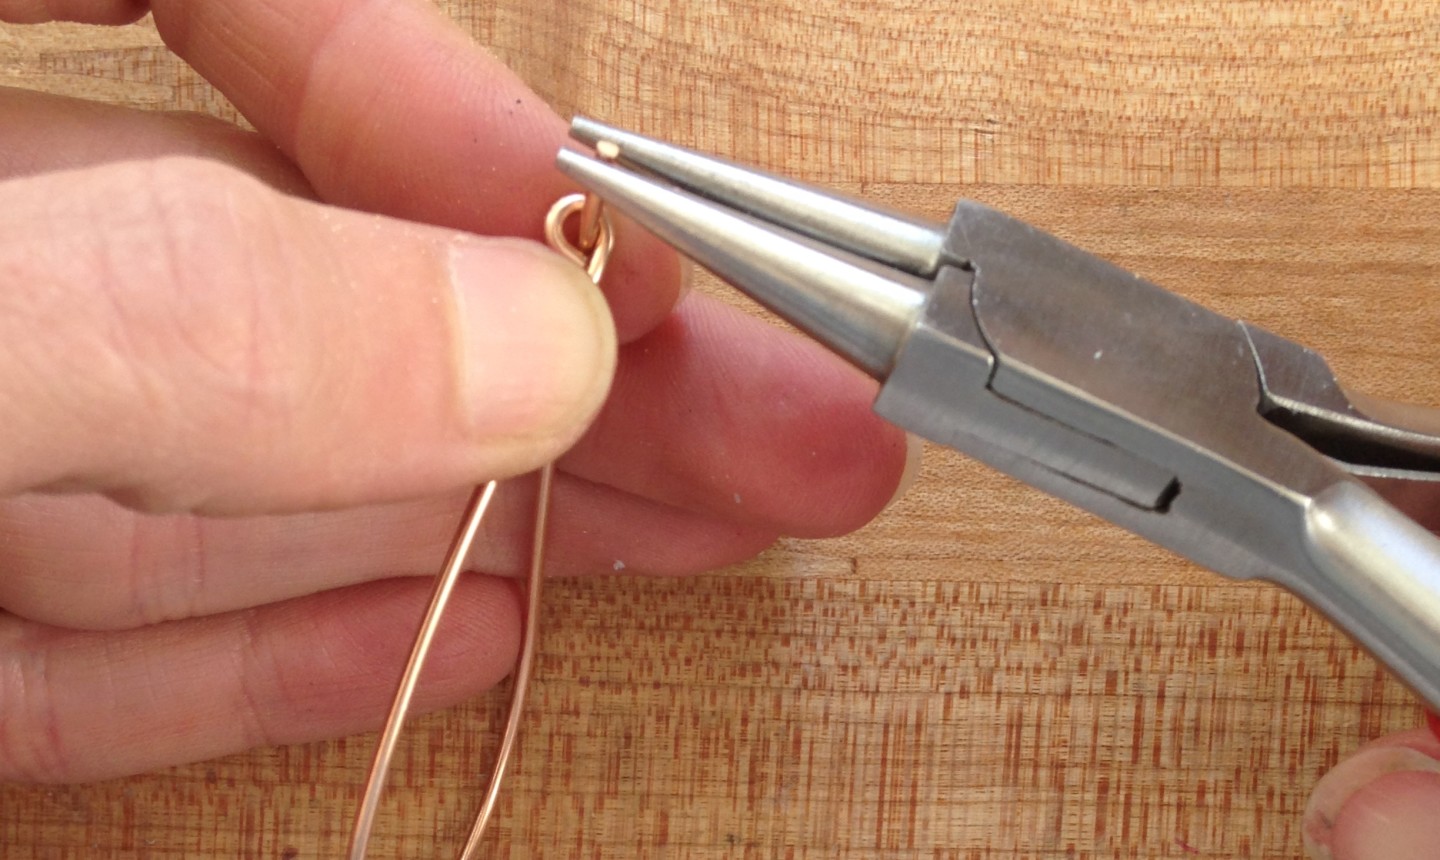
Using your needle-nose pliers, make a small circle; the end should meet just above the first circle.

Use your flat-nosed pliers to adjust any parts that may have gotten a little wonky.
Repeat steps 1 through 9 with the second wire, making sure that you bend the wire at the same spot on your mandrel so you’ll have a matching pair.
Then just attach some ear wires and you’re done!
Pro Tip: You can make these hoops with any kind of wire: craft wire, copper, sterling, 14K gold fill or rose-gold fill. It doesn’t even have to be round. One of our favorite ways to make these is with square 14K gold-fill wire. Keep in mind you may want to practice on the cheaper stuff before you go for the gold (or silver)!
Yay, thank you 🩷
Happy 😃 to be jerr</strong>
Excelente! Me encanta
Simple, pretty