 Photo via Fussy Cut blog
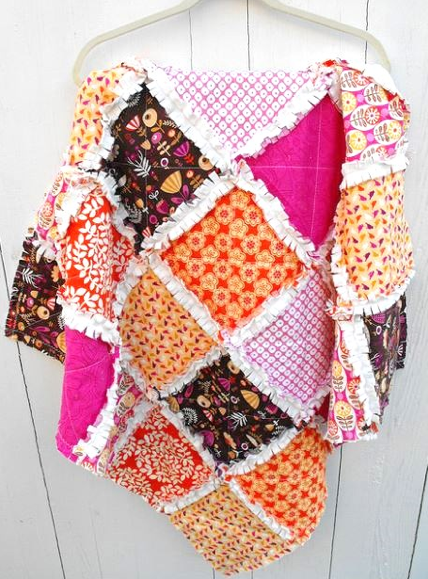
Did you know you can make a charming, super cozy quilt without putting in a ton of time or — wait for it — even really knowing how to quilt? It’s shocking, but true, thanks to one quickie weekend project: the rag quilt.
Rag quilts aren’t actually made of, err, rags. Rather, they get their name from having exposed seams between patchwork squares, which are snipped and frayed to create a “raggedy” look. They’re quicker and easier than many traditional quilts because you quilt as you go, meaning that instead of creating a giant quilt sandwich and quilting it en masse, you make mini quilt sandwiches and sew them together bit by bit. Plus, because it’s frayed, there’s no need to bind the edges at the end!
All this means one thing: so long as you can stitch a straight line on a sewing machine, you can make a rag quilt. So go on and give one a whirl — here’s how.
Rag Quilt
Level: Easy
What You Need
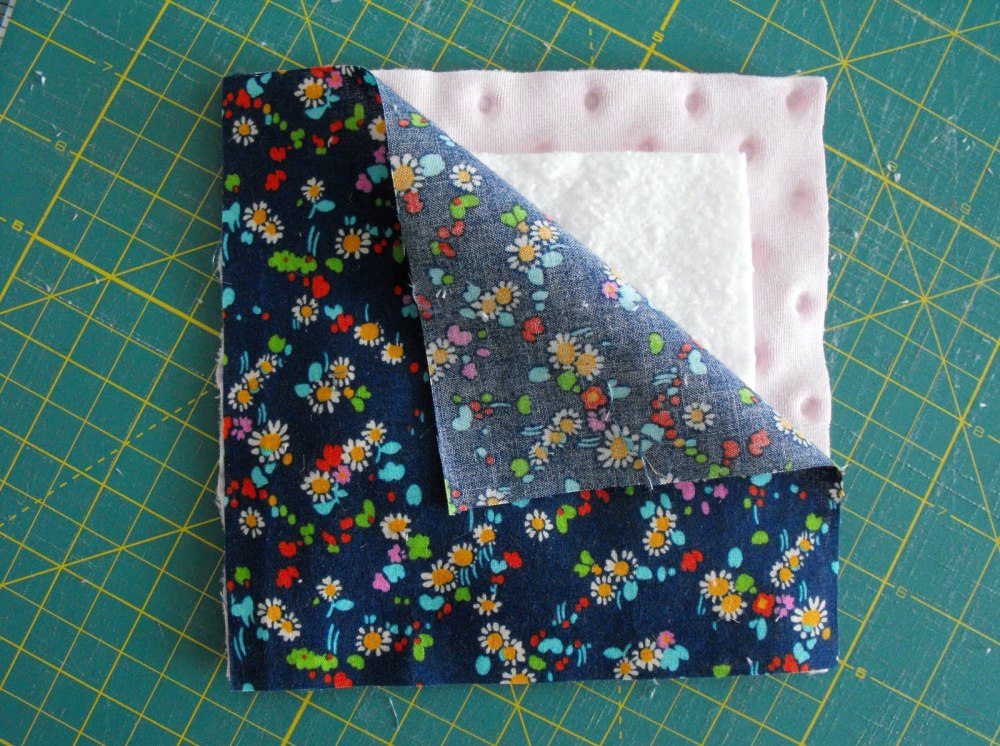
Good to Know: Each block consists of two squares of fabric with the same dimensions (top and backing fabric) and a square of batting that’s about 2″ smaller. For this tutorial, we used a 6½” square of quilting cotton for the top, a 4½” square of batting and a 6½” square of minky for the backing. You can go with any dimensions so long as you follow the above ratio, and you can use precut squares or cut them yourself using stash fabric — flannel, denim and fleece are also great options.
Instructions
1. Make the Sandwich

Place your first block with the top fabric (right side up) on top, followed by the batting and then the backing (right side down). The batting should be centered within your fabric — use a ruler if necessary.
2. Quilt the Sandwich

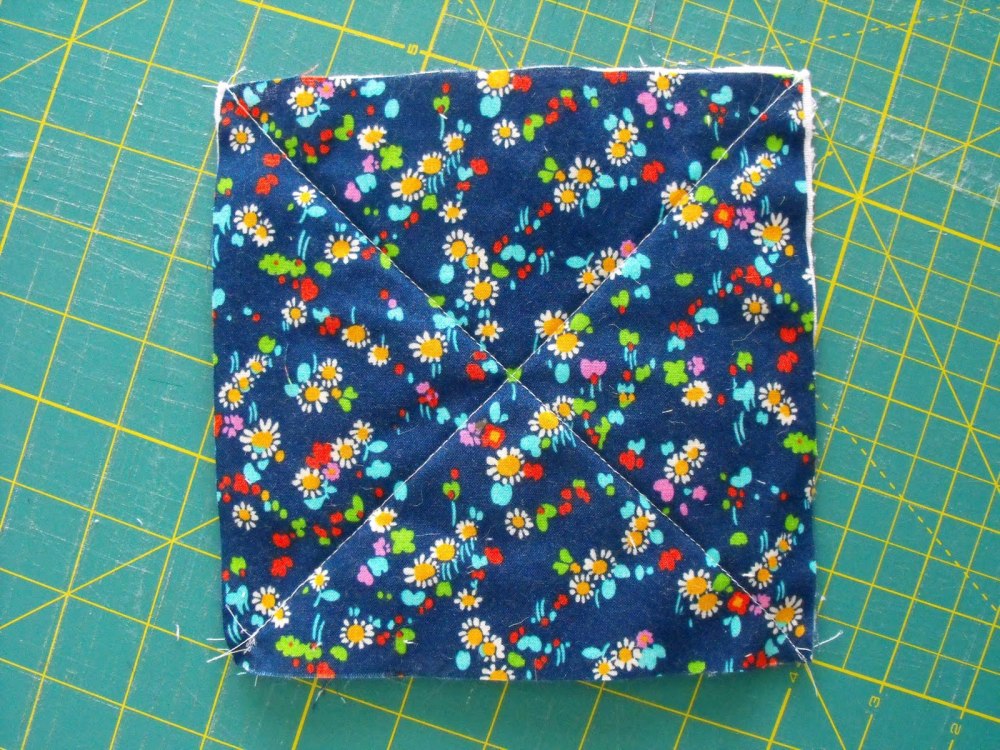
Quilt two straight lines from corner to corner using a straight machine stitch. (We recommend quilting with a walking foot.) This will create an X across your block. Repeat with all your quilt blocks.
3. Join the Blocks Together
Layer two blocks, one on top of the other with the wrong sides together. Sew along one edge with a ½” seam allowance. This leaves the seam allowances exposed on the right side of the fabric.
Continue to layer and sew blocks until you’ve completed one whole row. Once the rows are completed, join the rows together in the same manner. (Place the wrong sides together and stitch with a ½” seam allowance.)
Pro Tip: To make the rows easier to join, nest the seams together.
4. Finish the Edges
Once all of the blocks are joined together with the exposed seams on top, finish the edges by stitching all the way around the quilt with a straight or zigzag stitch.
5. Make It Ragged
Grab your scissors and carefully snip the fabric in the seam allowances, making cuts approximately ¼” apart and being careful not to cut too close to the stitching. (FYI, you’ll snip through two layers at the same time.) Cut all the seams on the quilt, then toss the quilt into the washer and dryer to soften up the raggedy edges. Remove any pesky threads that are sticking out and you’re done!
Lovely idea! Could easily use mom & dad’s or grandma’s & grandpa’s clothing to make a memory quilt.
Looks so cute. I made a Jean quit for my son years back used the Jean material facing out and then used a sheet for the back. Didn’t know about rag quilts. I love the e small steps here
How much fabric do you need for a king quilt? And how many rows in a king quilt? What do you mean by nesting the seams together?
A picture of putting blocks together would be nice, what do you mean nest the seams together?
I have looking at ideas and patterns for 'rag' quilts awhile now, yours looks doable. Thank you
Can you use flannel and minty together? How much yardage do I need for a queen size blanket? What type of batting?