
Now here’s a cake that’s dressed to impress: the Purple Ombré Cake. It’s made using cake layers which have been tinted in varying tones of the same color, which are then assembled in order from light to dark, forming a color gradient. Once sliced into, it has a dramatic “wow” factor. The ability to tailor the cake’s color makes it a desirable choice for both upscale events and as a sophisticated way to incorporate wedding colors.
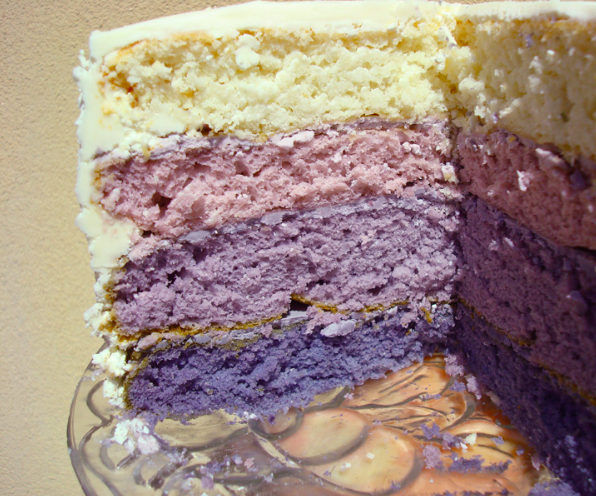
True, it takes some time to tint all those colors and wash all the different bowls you used, but this cake is really not difficult to make. Also, while in this tutorial, the cake is made using shades of violet, you can re-create this cake with any color you’d like!
You’ll need:
- 4 9-inch cake pans (or resign yourself to wash and re-use)
- parchment paper
- non-stick spray or butter
- 4 medium mixing bowls and 4 spatulas
- 2 batches silver white cake batter, unbaked
- 2 batches buttercream frosting
- Food coloring in whatever color you’d like to use (I used violet)
- Frosting spatula
- Serrated knife
Grease four 9-inch cake pans and line the bottoms with parchment paper. If you do not have 4 pans, have the parchment circles ready and re-use the same pans. Do not re-use the parchment circles from previous cakes as they may leave crumbs in a color you don’t want on another cake layer. Also, be sure to let the pans cool completely if re-using. Set the pans aside.
Divide your cake batter evenly between four bowls. Technically you won’t need to tint the batter in one of these bowls, but it is helpful to transfer it to the bowl just to get a visual that you have divided the batter evenly.
Then spoon the cake batter that doesn’t need to be tinted into one of your prepared cake pans. You can set it aside for now.
You’re about to tint the rest of the batter. Preheat your oven to 350 now (or if you are using a different recipe than the one listed in the instructions, follow the temperature for your recipe).
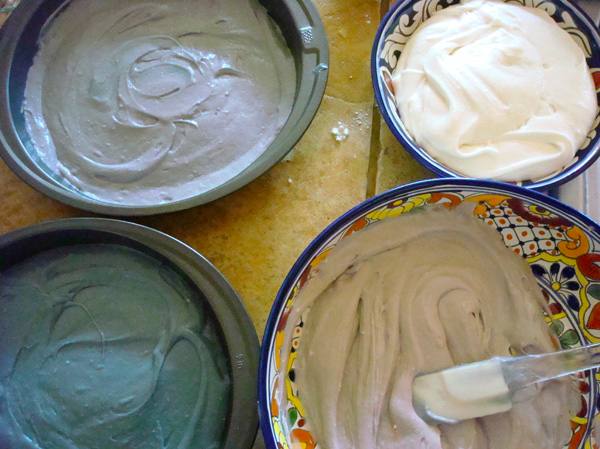
Now, it’s time to tint the batter. To the first bowl, add 2-3 drops of food coloring (or if using gel coloring, a very small amount). You are going for a very light tint here. Keep track of how much food coloring you’ve added.
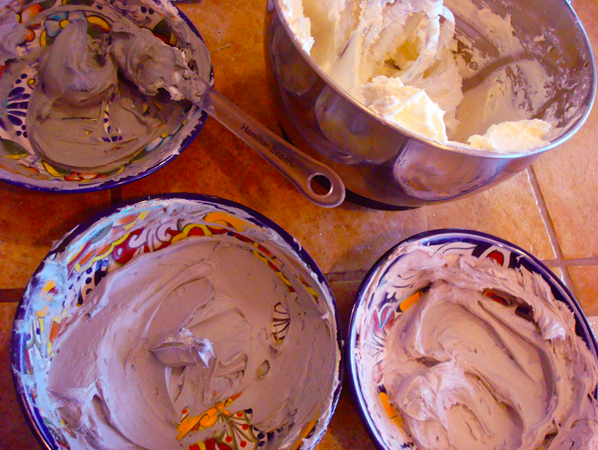
Once you’re happy with the color of the first, add the same amount of food coloring to the second bowl. Now, add 2-3 more drops (or a small amount more). So now, you have added more food coloring than you did to the first bowl. Mix it. Look at it next to the color in the first bowl. It should look like it is a few shades darker than the first bowl. Not a lot darker, but you can tell the difference. Keep track of the total amount you’ve added to this bowl.
Once you’re happy with this color, move on to the final bowl. Add the complete amount of food coloring you added to the previous bowl. Now, add 2-3 more drops (or a small additional amount). Mix, and add a little more food coloring if you need a deeper shade. Once again, it should be noticeably deeper in color than the previous one, but not too much darker.
Now that all of your colors are ready, spread each one in one of the prepared cake pans. At this point you should have four cake pans filled, one with white batter and three with varying shades of purple batter.
Bake the cakes according to the recipe bake time. Once lightly golden and a cake tester comes out clean, remove from the oven.
Immediately run a sharp knife around the perimeter of the pans, to loosen the sides of the cakes. Let the cakes cool in the pans for about 5 minutes, then turn out onto wire racks to cool completely.
If domes have formed, level the cakes off with a serrated knife.
Meanwhile, you can start on the icing. What follows are directions for creating a gradient with the icing for between layers, too. Honestly, this is a subtle effect and it might be preferable (and the cleanup is much easier!) to simply use white buttercream, but to learn how this effect is attained, read on.
If you’ve decided to go for the gradient, first, divide the icing in half. Reserve one half and keep it white. This will be the main icing for the exterior of the cake.
With the other half of the icing, divide it in three parts. Place each part in a separate bowl.
Now, you’ll repeat a process very similar to when you were tinting the cakes. To the first bowl, add 2-3 drops of food coloring (or if using gel coloring, a very small amount). You are going for a very light tint here. Keep track of how much food coloring you’ve added.
Once you’re happy with the color of the first, add the same amount of food coloring to the second bowl. Now, add 2-3 more drops (or a small amound more). So now, you have included more food coloring than you did in the first bowl. Mix it. Look at it next to the color in the first bowl. It should look like it is a few shades darker than the first bowl. Not a lot darker, but you can tell the difference. Keep track of the total amount you’ve added to this bowl.
Once you’re happy with this color, move on to the final bowl. Add the complete amount of food coloring you added to the previous bowl. Now, add 2-3 more drops (or a small additional amount). Mix, and add a little more food coloring if you need a deeper shade. Once again, it should be noticeably deeper in color than the previous one, but not too much darker.
Now, it’s time to assemble the cake. Place the first cake layer (the darkest color) on a platter. If you’ve leveled the cake, place the cut side down, so that the flat surface is on top. On top of this, spoon most of the darkest icing color (reserve a little for the outside of the cake). Spread evenly over this cake layer.
Place the next cake layer (the one that is one shade lighter than the darkest) on top of the iced bottom layer. On top of this, spoon most of the next-lighter icing color, once again reserving a little bit for the outside of the cake. Spread evenly over the cake layer.
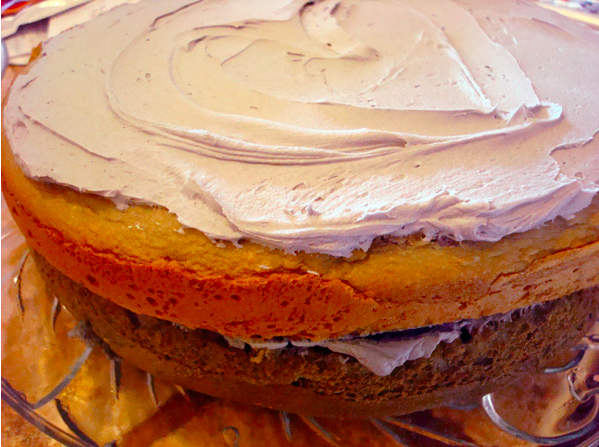
Repeat with the next-lighter shades of cake and icing. On top of this, place the white cake layer.
Apply a thin crumb coat of icing on top of the whole cake. Place in the refrigerator for about 20 minutes or until set.
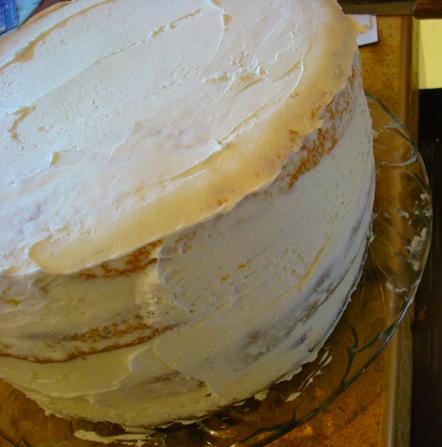
Remove the cake from the refrigerator.
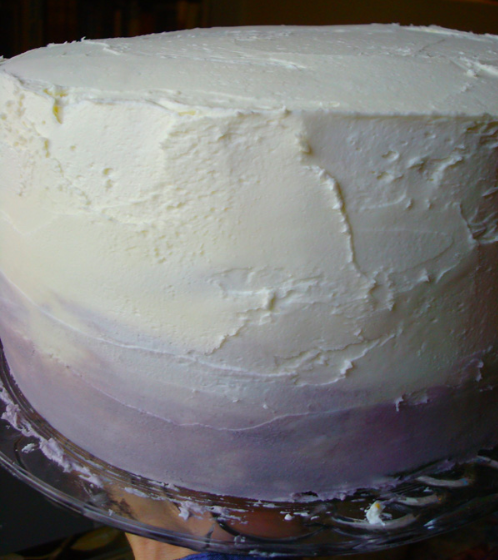
Create a single thin “ribbon” line of the gradient colors of icing on the bottom of the cake, graduating from dark to light. Using a small spatula, smooth the icing so it forms a slight gradient. Frost the rest of the cake using the white icing, smoothing along the line of the colored icing to make a pretty gradient. The division between the colors should fade, making for a white-to-purple gradient toward the bottom of the cake. Now you have a stunning cake that everyone will enjoy! To learn more about creating cakes with exciting designs check out Crafty’s online cake decorating class Piece of Cake!

In case you missed it earlier on the Craftsy blog, learn elegant piping techniques. And come on back to the Craftsy blog this Tuesday to learn how to make sugar flowers.

Share tips, start a discussion or ask one of our experts or other students a question.
No Responses to “How to Make a Purple Ombré Cake”