Fun fact: most garment patterns are designed for a B or C cup size. But according to a survey from lingerie retailer Intimacy, the average woman's bust in the U.S. is actually a 34DD. So if you're sewing a top, you might want to take your measurements and compare them to your pattern before you start cutting fabric. Because the reality is you may need to make your pattern a bit bigger.
That's where the full bust adjustment, or FBA, comes in. It's a technique used to make a garment sewing pattern larger at the bust. This is commonly used with a princess seam, which is a curved seam that has the shaping go over the bust, versus a darted bodice where the darts (single or multiple) shape the bodice by pointing to (but not through) the bust.
It might seem intimidating at first glance, but the FBA is really NBD. No matter which technique you follow (for changing princess seams or otherwise), the adjustments are relatively straightforward. Take them step by step and you'll be finished and ready to sew in no time.
Full Bust Adjustment on Princess Seams
Level: Intermediate
What You Need
Instructions
1. Cut It Out
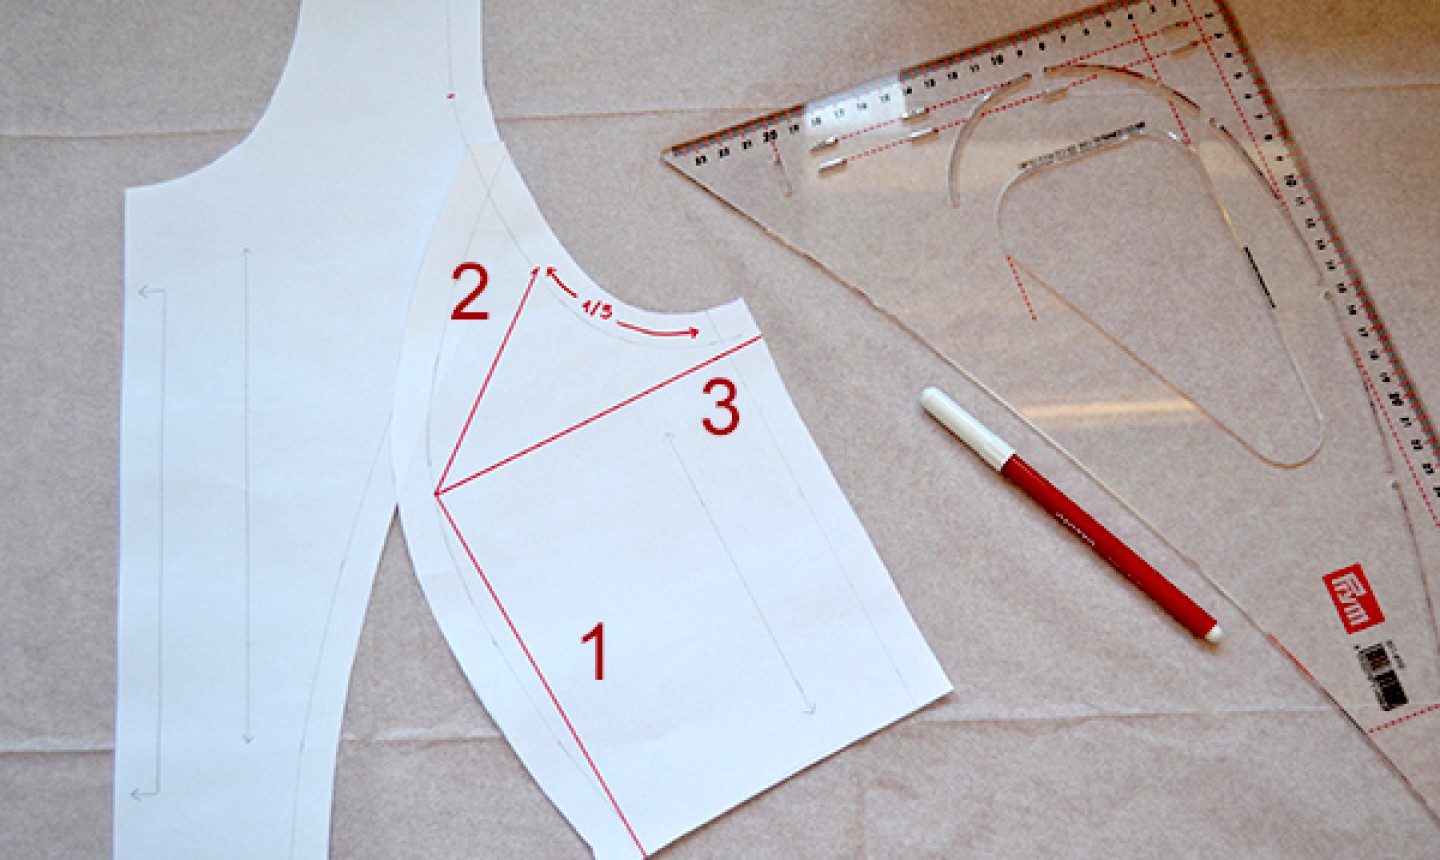
Cut out your pattern's bodice front and side-front pieces. Draw the seam allowances and all the marks (notches, grainline, etc.).
On the bodice side-front piece, draw three lines:
2. Place on Tracing Paper
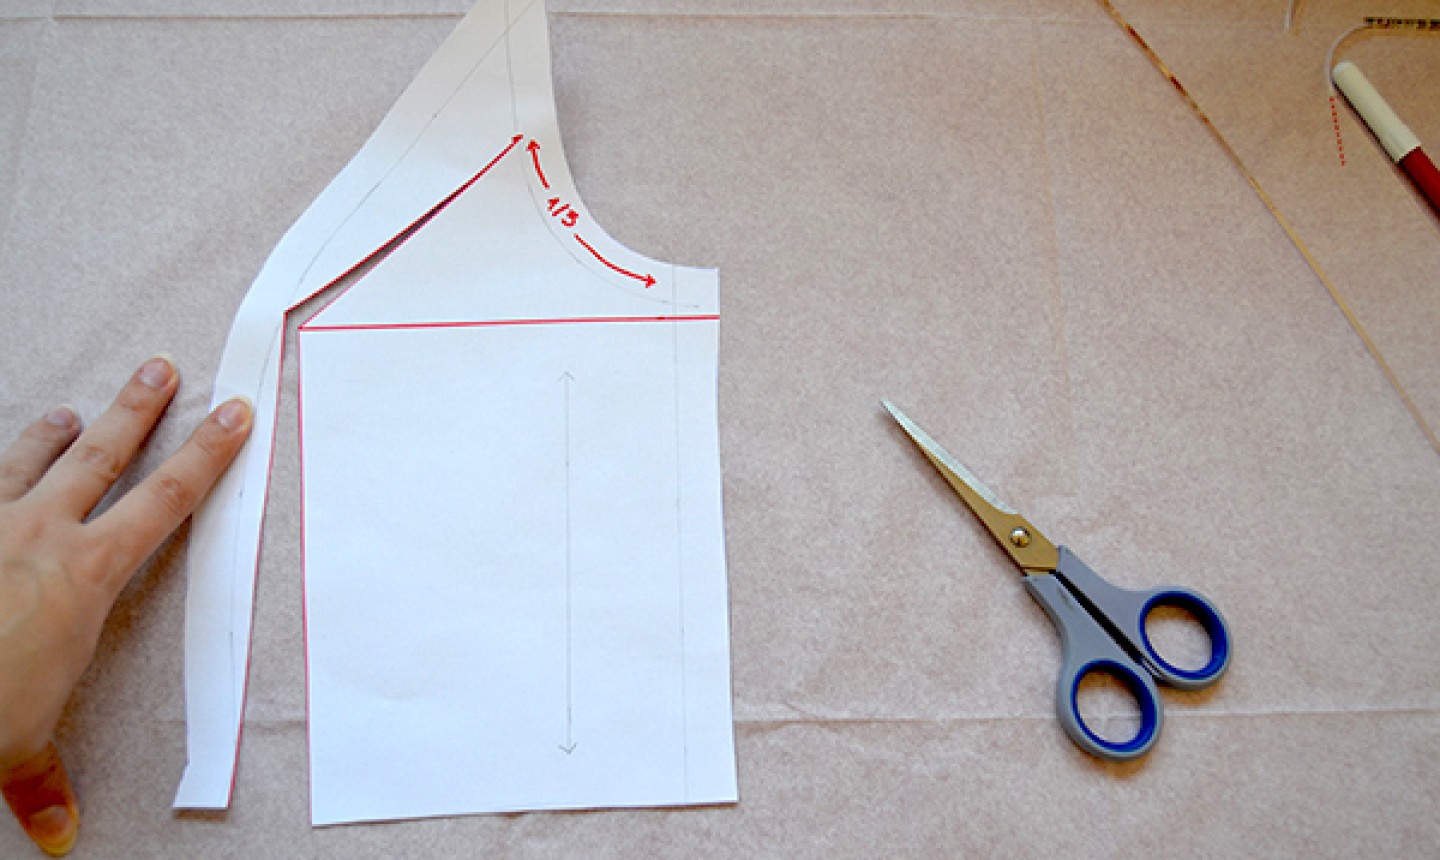
Place your pattern piece over tracing paper. Cut lines 1 and 2, leaving the armhole seam allowance intact.
3. Cut the Seam Allowance
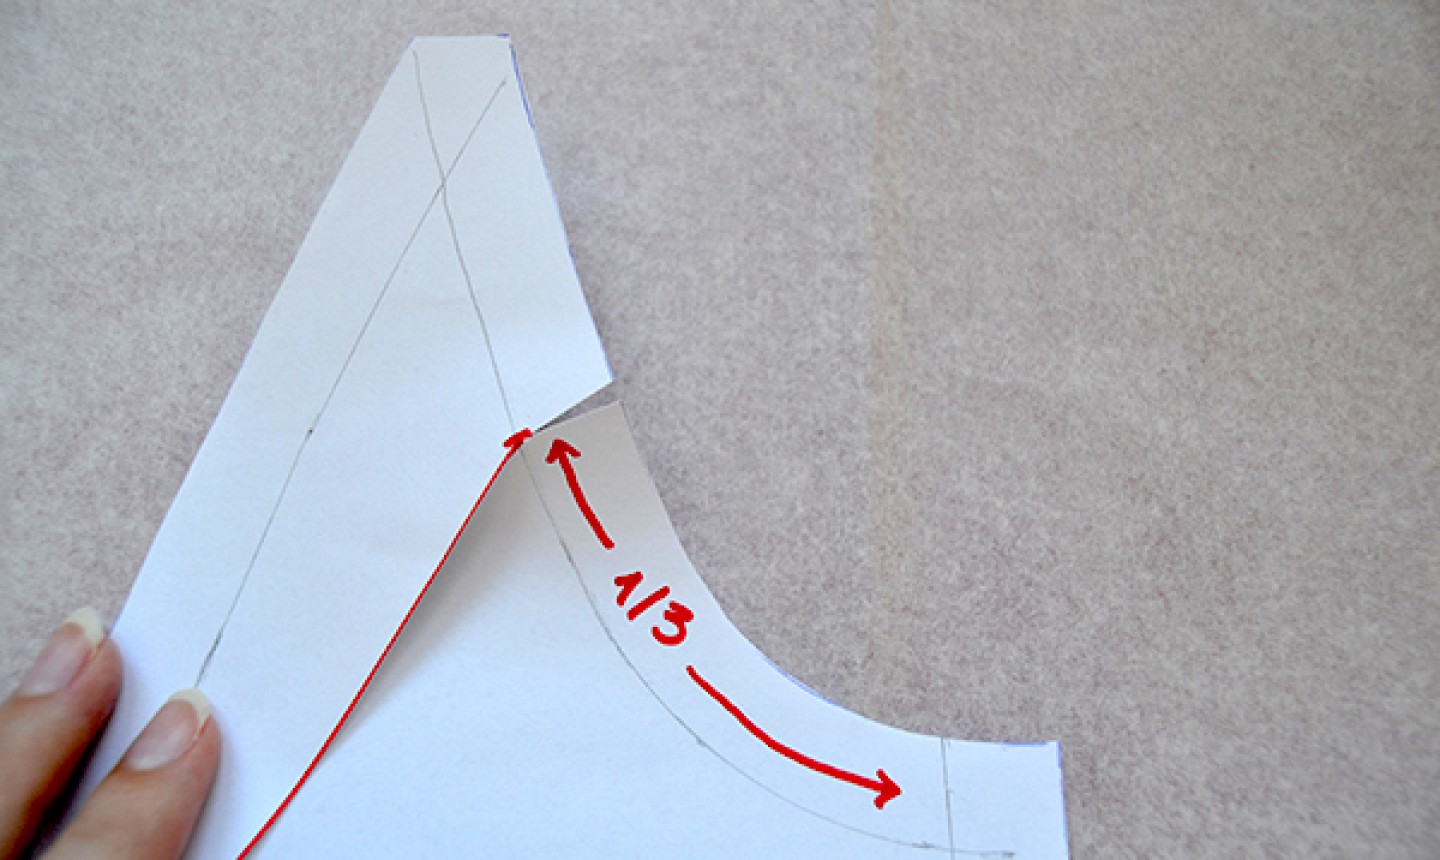
Cut the seam allowance carefully, making sure it stays attached (see photo above).
4. Cut Line 3
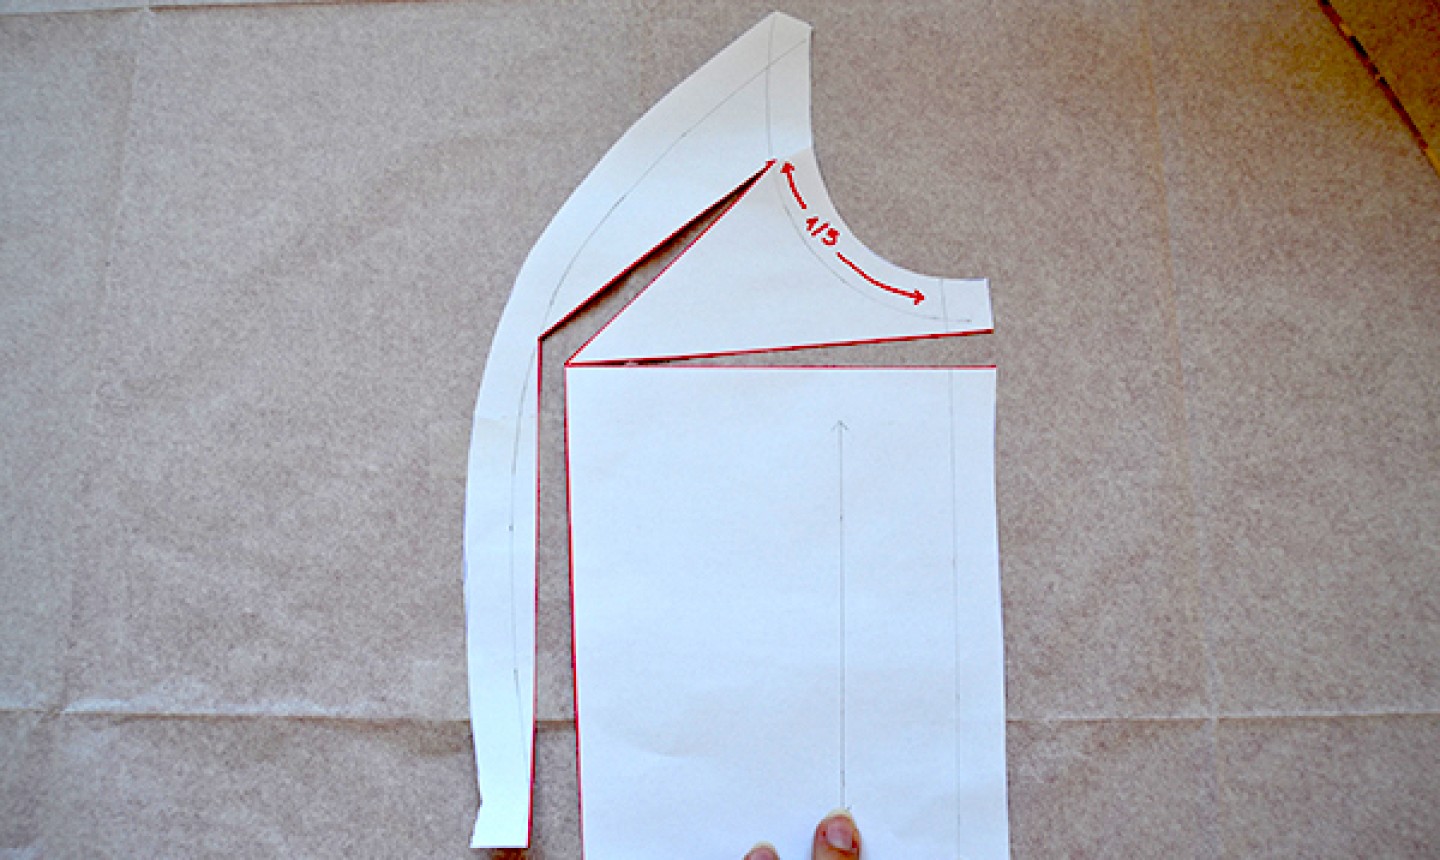
As you're cutting line 3, stop just before you reach the fullest part of the bust. You want the three pieces to stay connected, but they should be able to move individually.
5. Tape
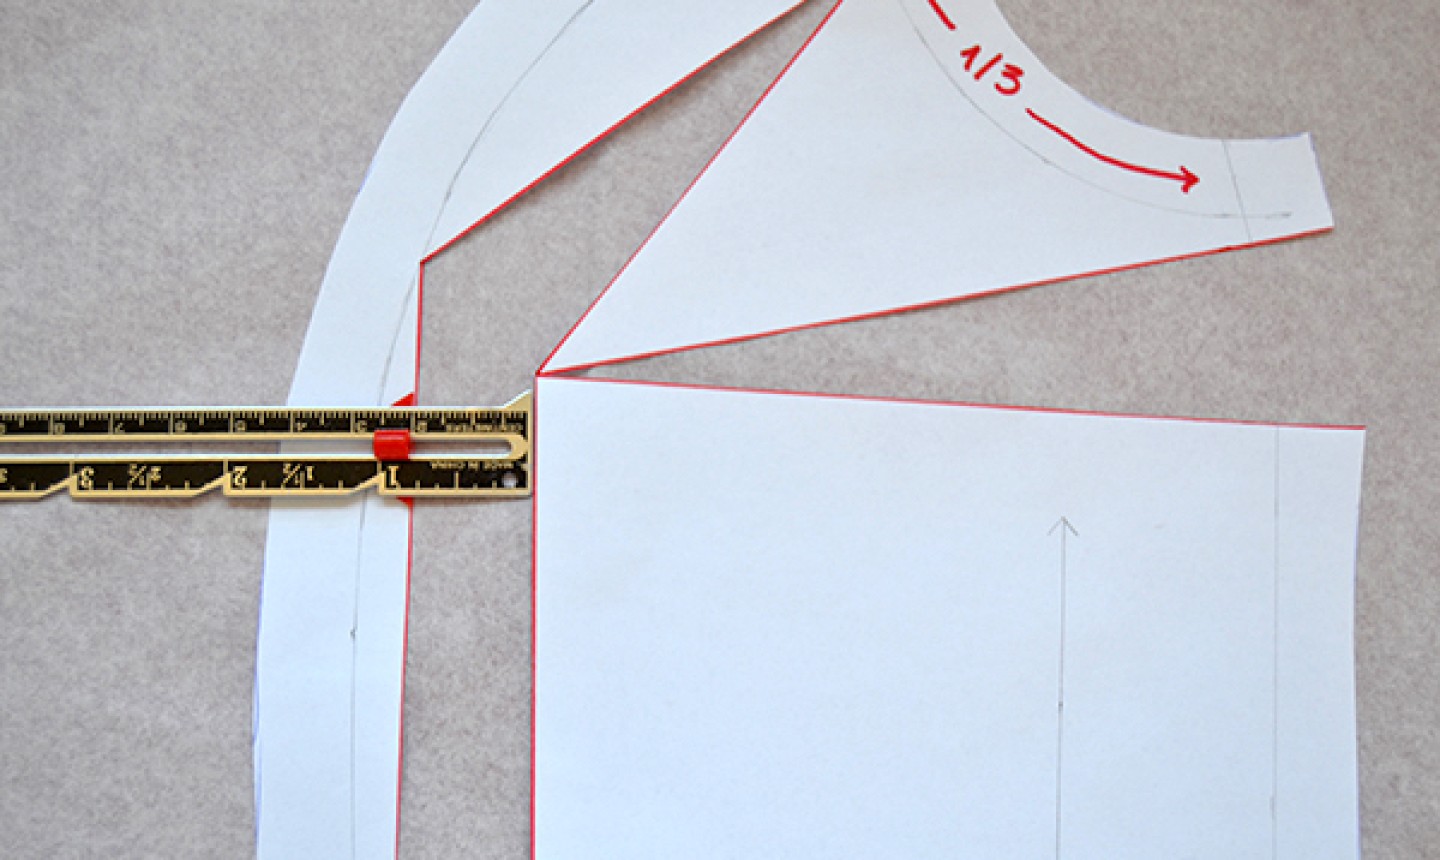
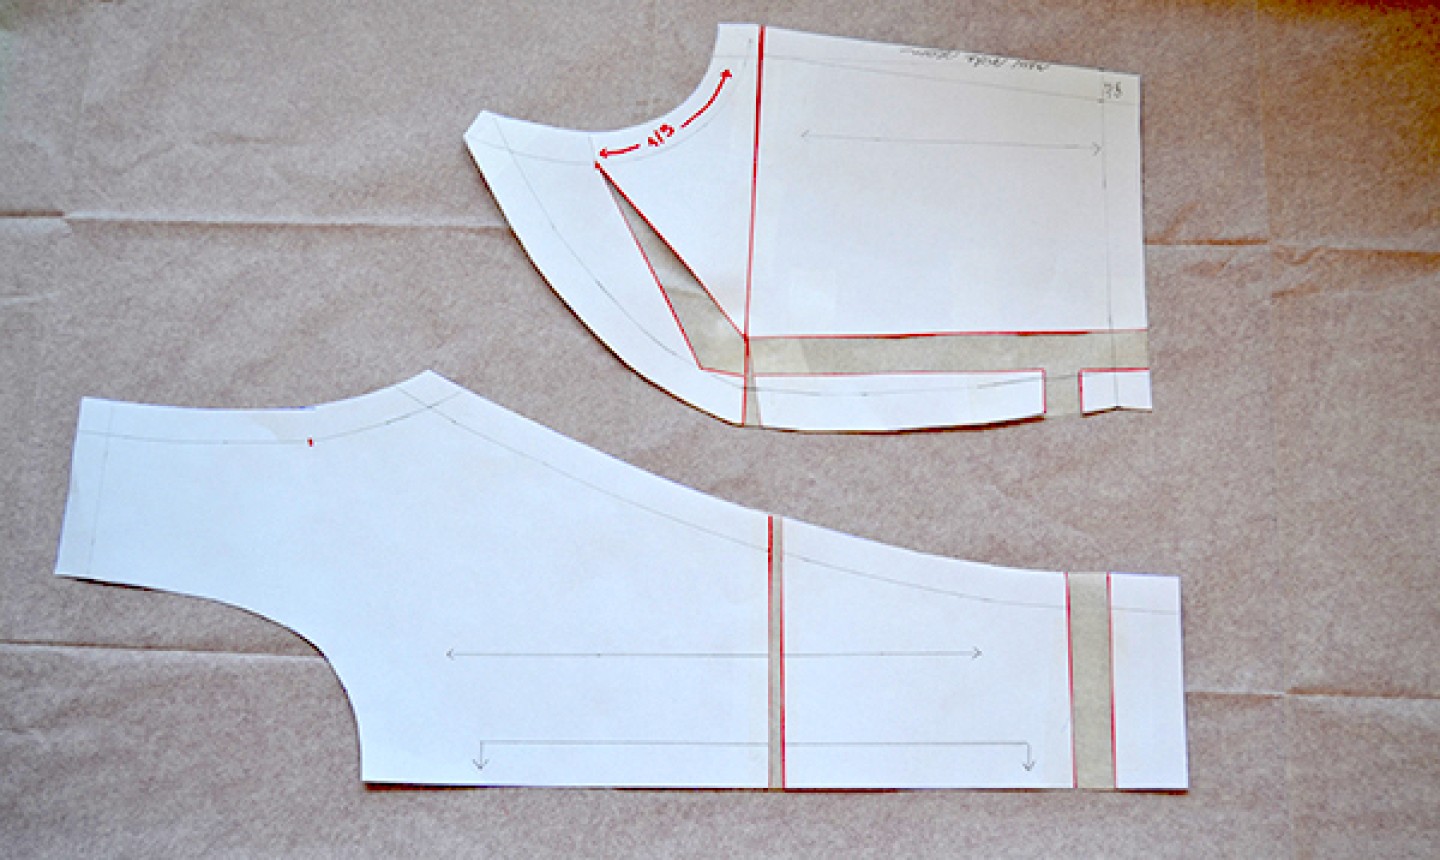
Pivot the pattern along lines 1, 2 and 3 so that the opening at line 1 measures 1" (or however large your increase needs to be). Make sure the increase is even all the way down line 1. Tape the pattern in place on the paper.
6. Align the Waistlines
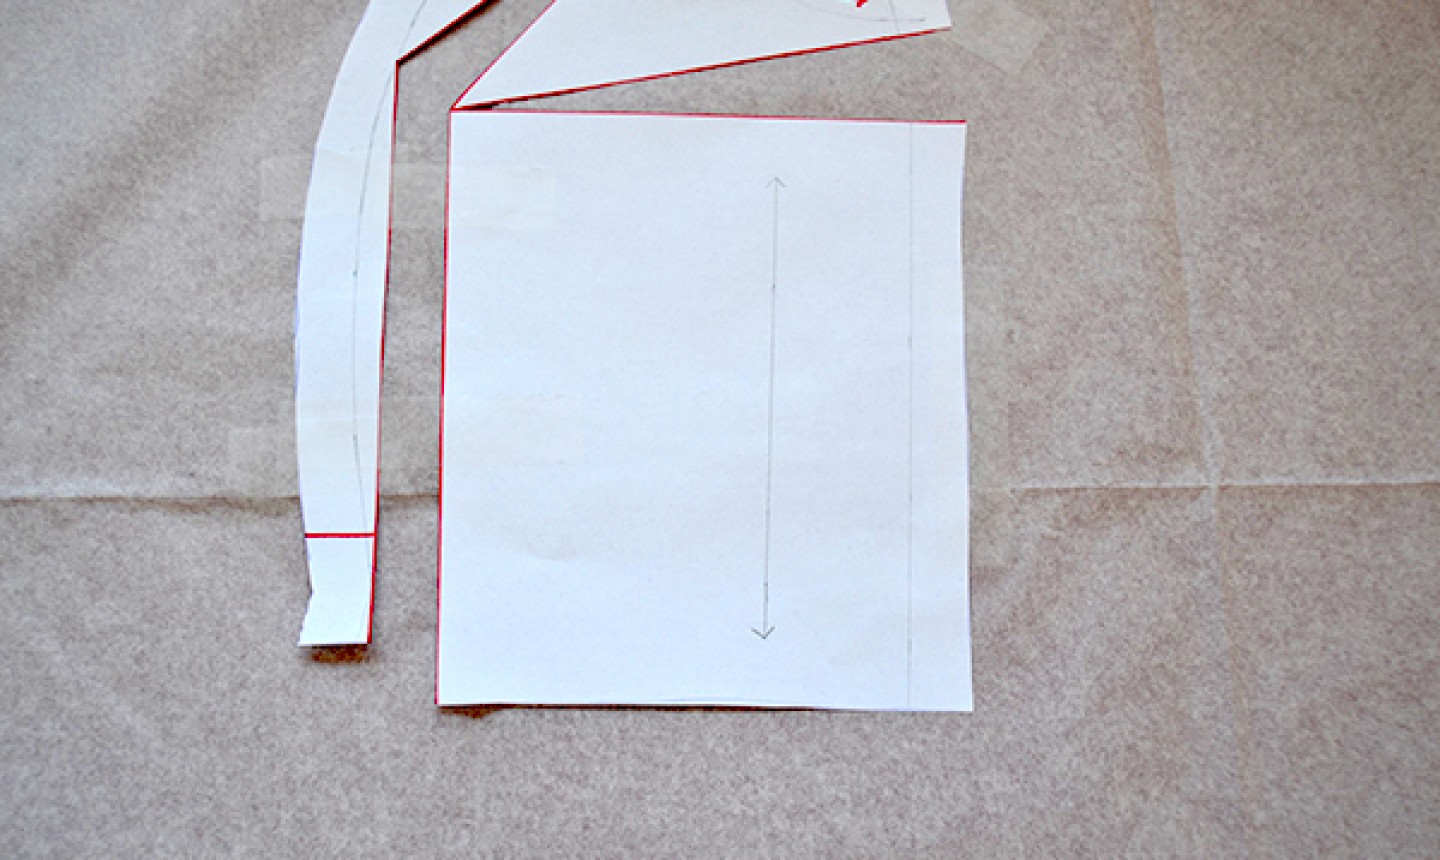
Align the waistlines. You'll notice the waistline (bottom edge) on the princess seam piece is not even with the waistline on the side-front piece. Draw a line parallel to the waistline on the princess seam part.
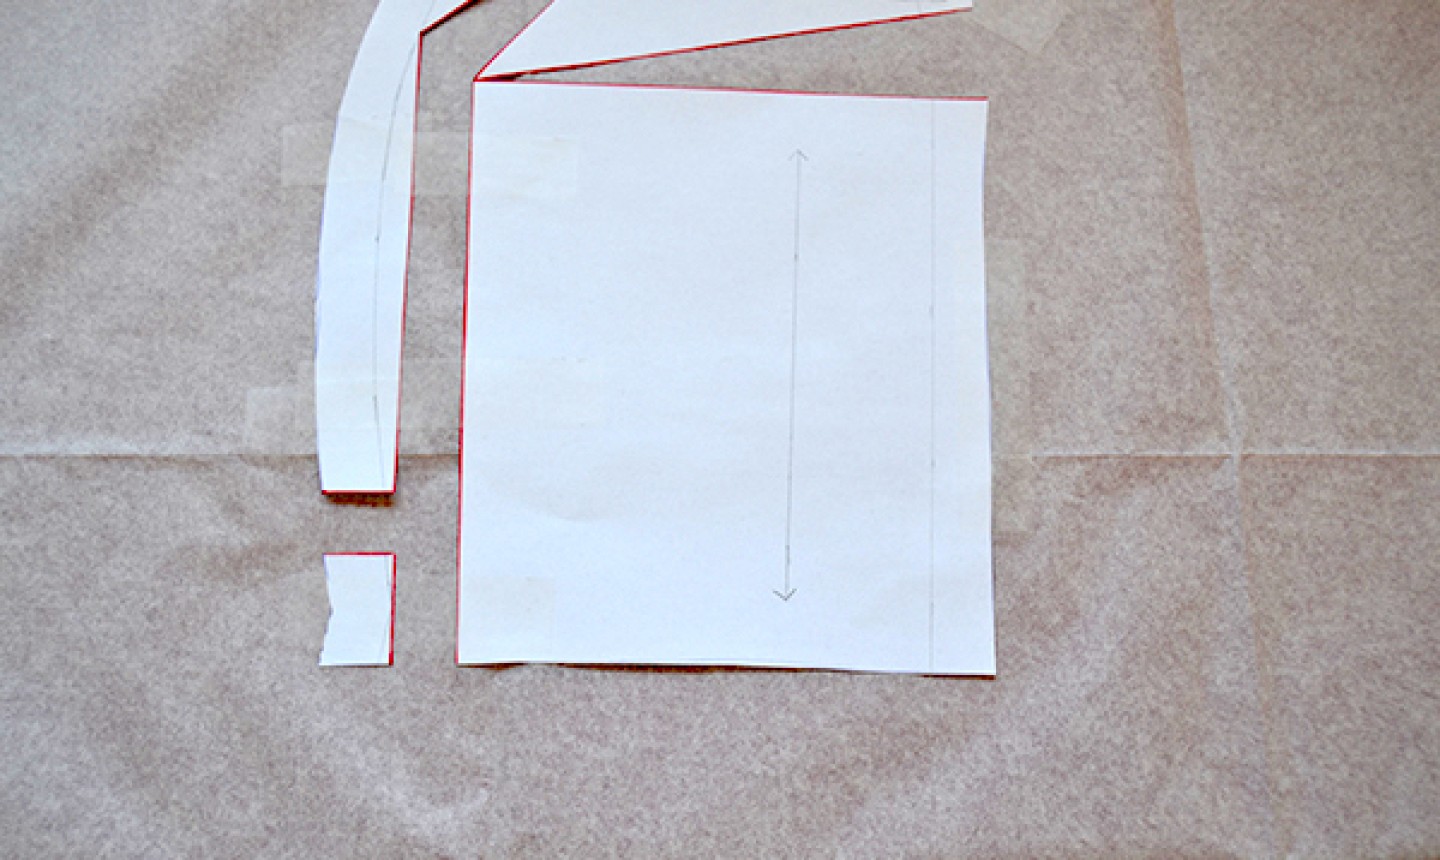
Cut along the line. Move the cut piece down until it aligns with the waistline on the side-front piece. Make sure it's also aligned with the rightmost edge of the princess seam piece. Tape in place.
7. Cut Around the New Piece
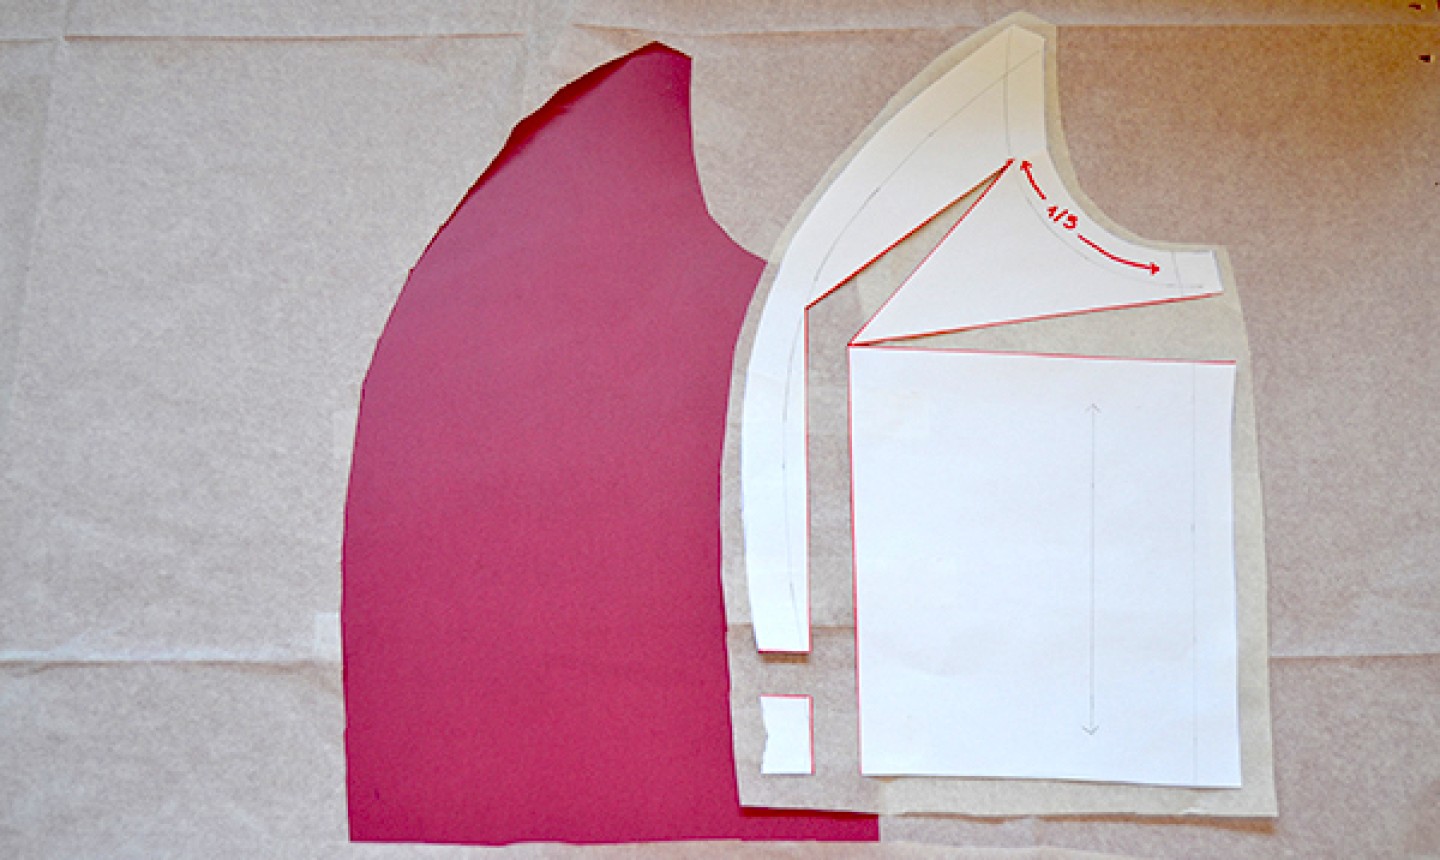
With all your pieces taped in place, cut roughly around the new pattern piece.
8. Extend Line 3
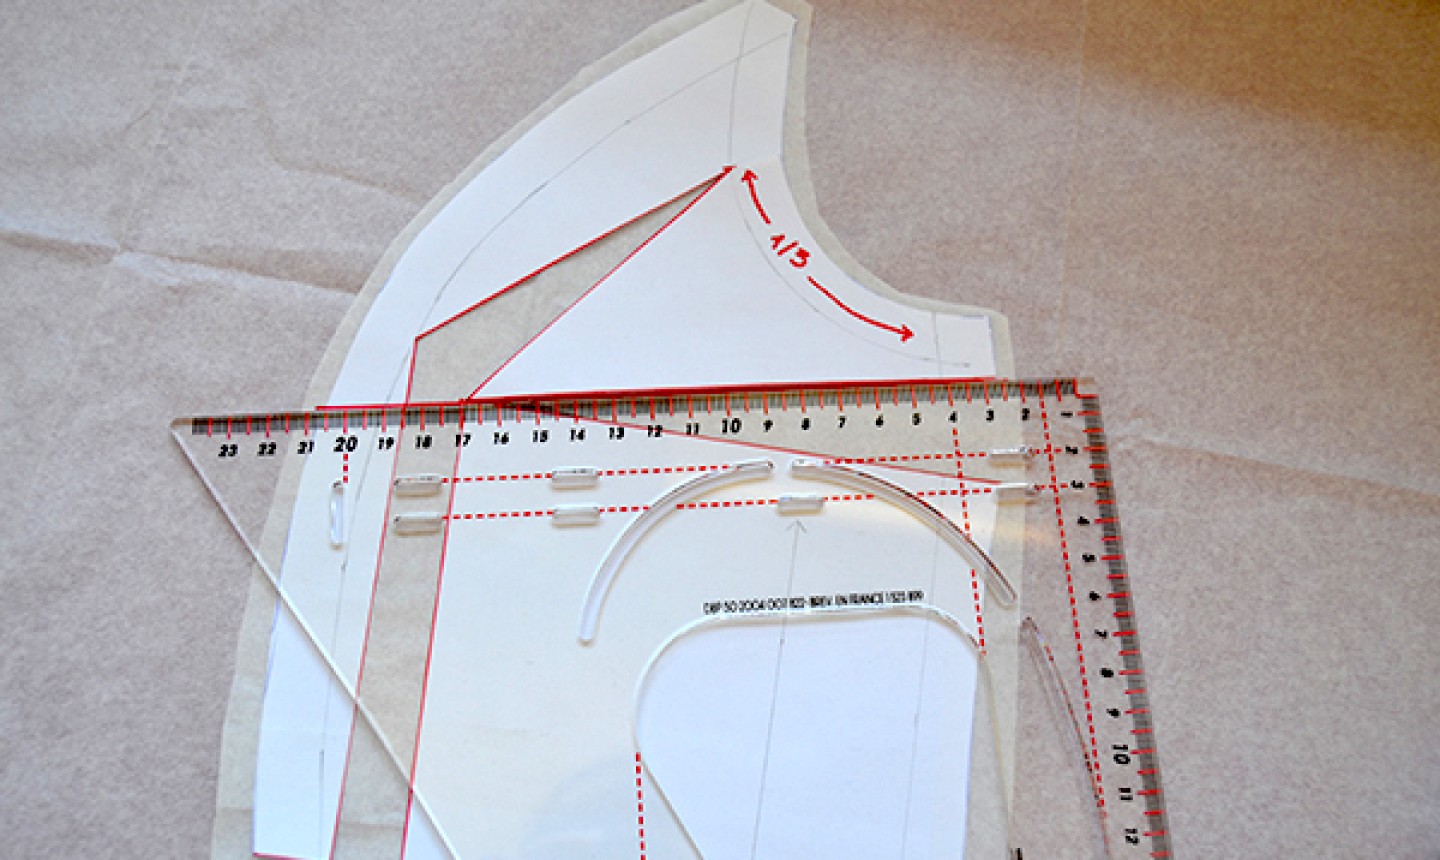
Draw a line to extend line 3 all the way through the princess seam.
9. Cut Along Line 3
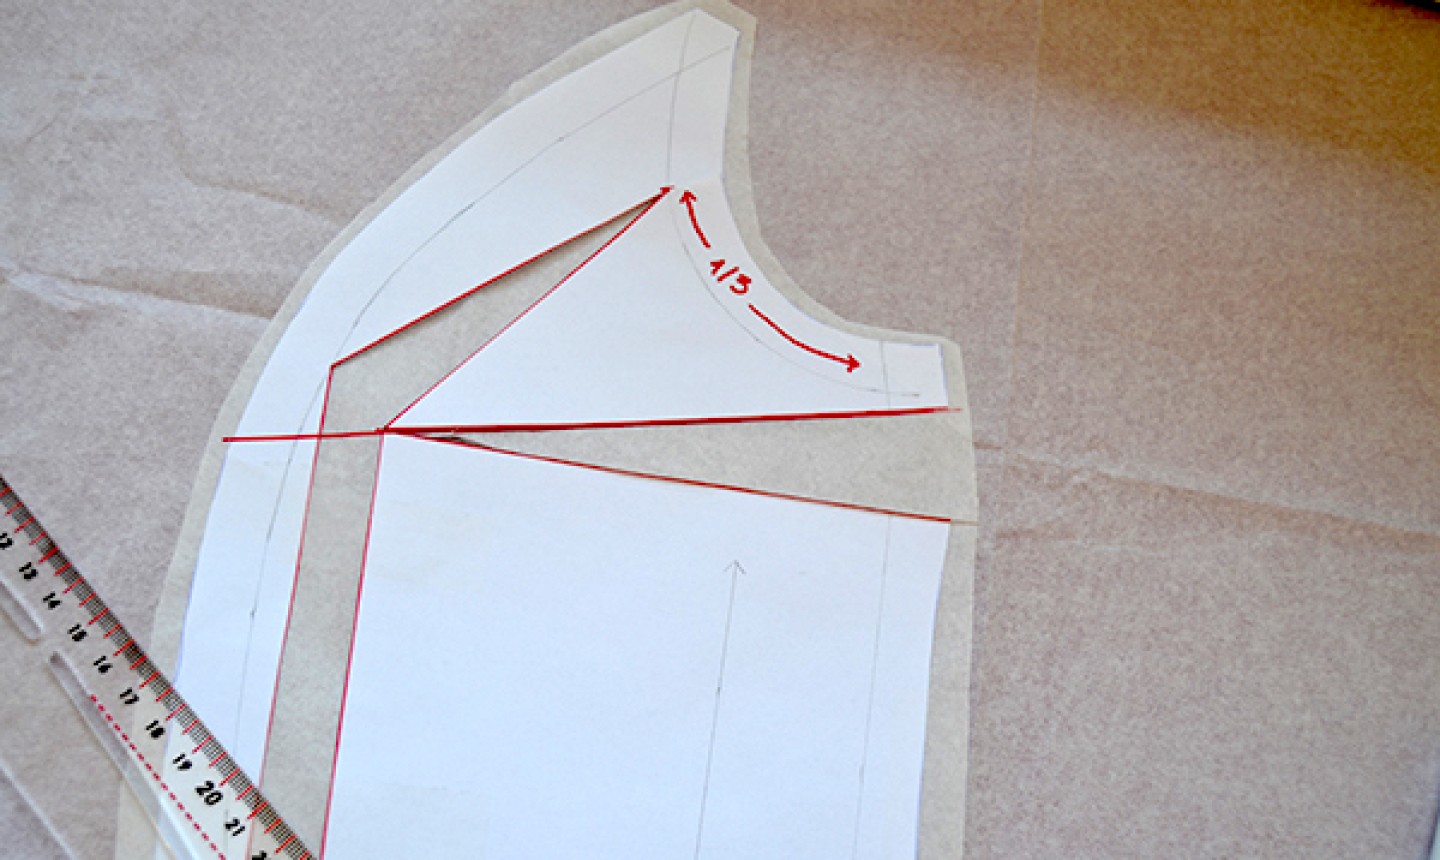
Cut along the horizontal line (line 3) from the outer edge until you reach the fullest part of the bust (line 1).
10. Pivot the Dart Closed
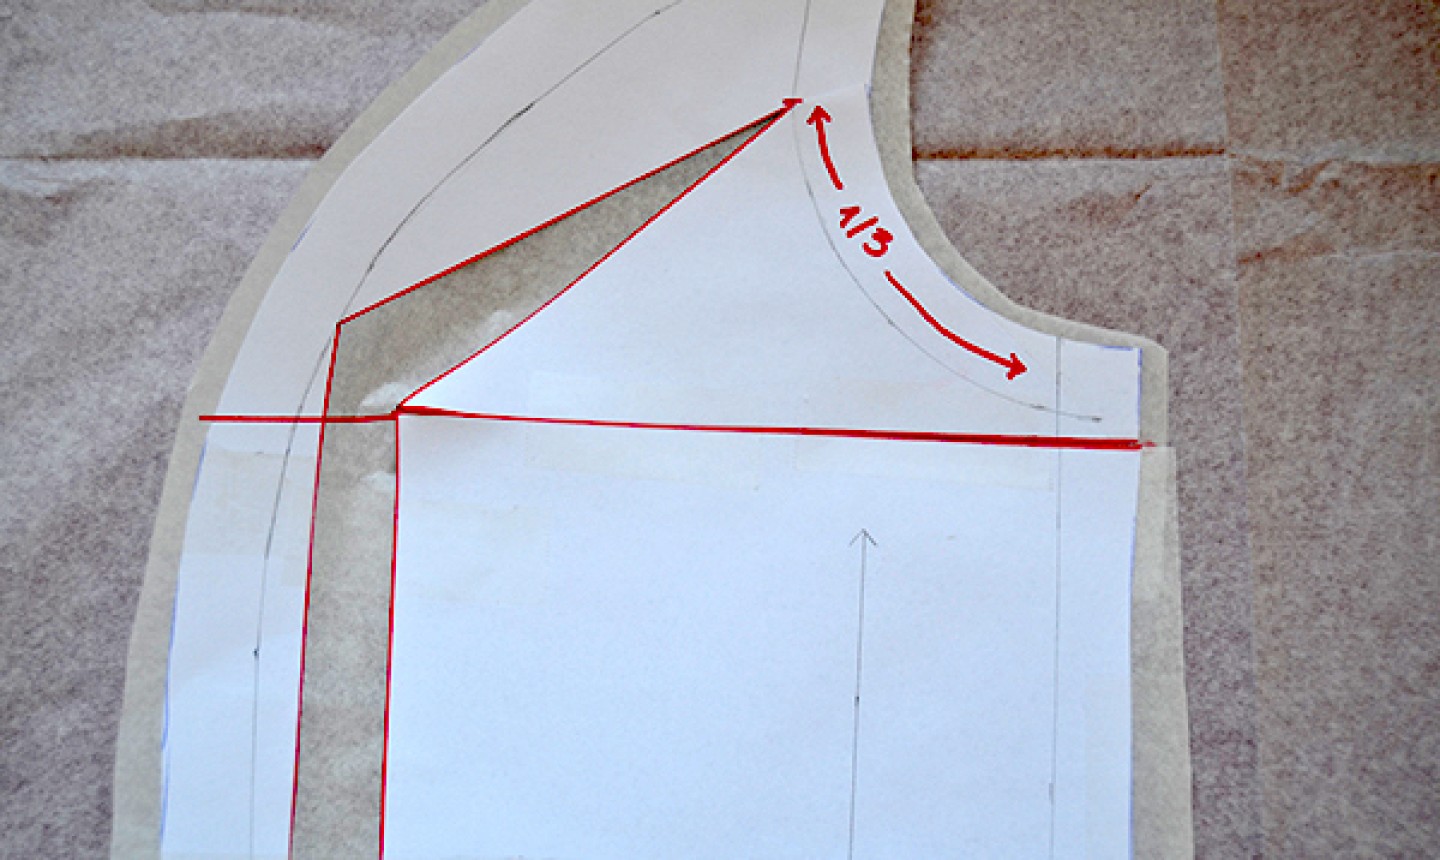
The bottom side-front piece should meet the armhole piece. Tape in place.
11. Cut Line 3 Again
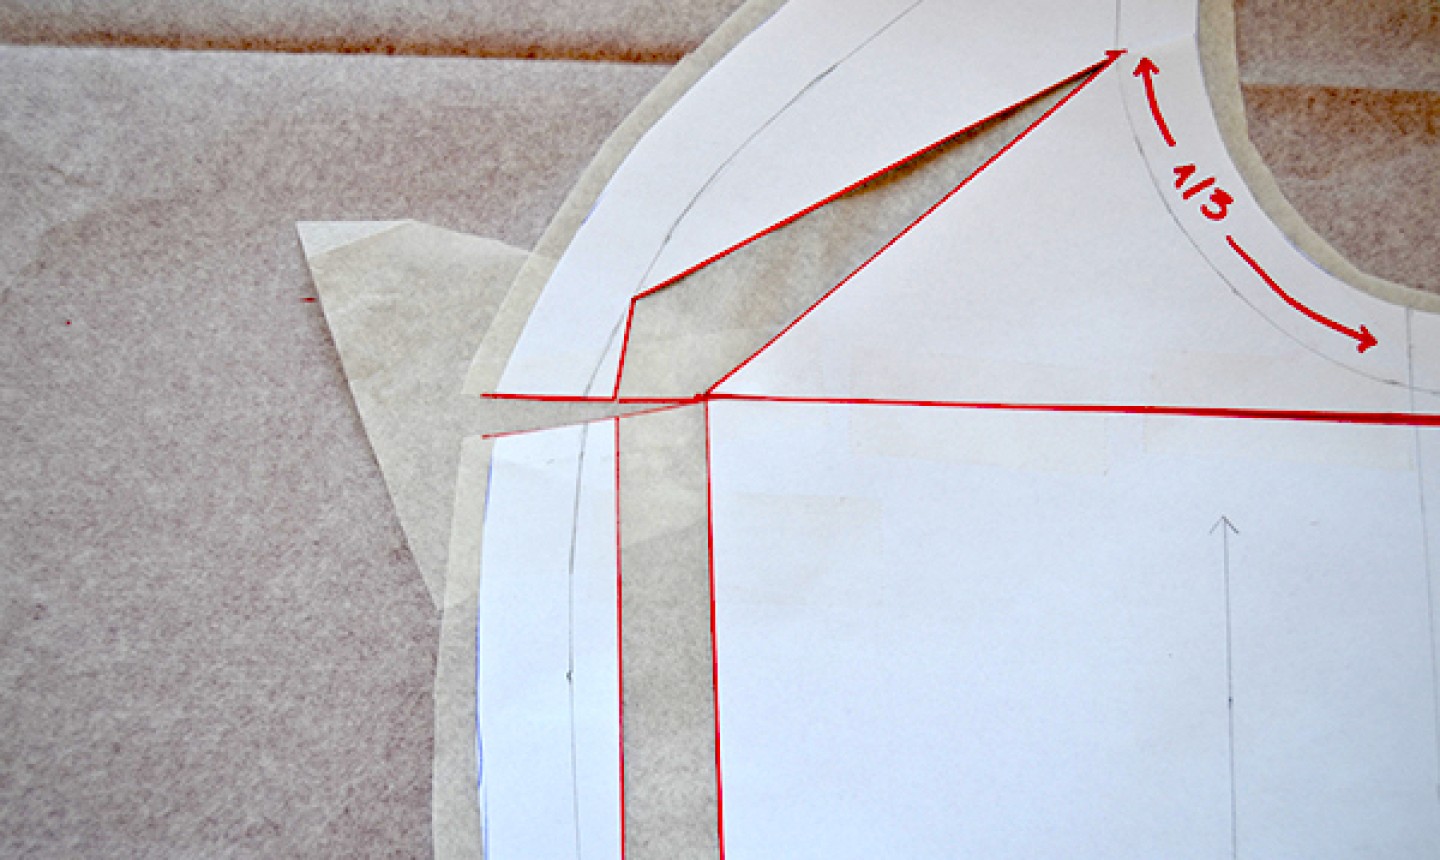
Cut line 3 from the outside edge of the princess seam to the fullest part of the bust, but don't cut all the way through. Spread the dart open until the bottom edge aligns with the bottom edge of the side-front piece. Place a piece of paper under the spread "dart" and tape in place. Trim away the excess paper around the paper pattern piece.
12. Remove the Added Width
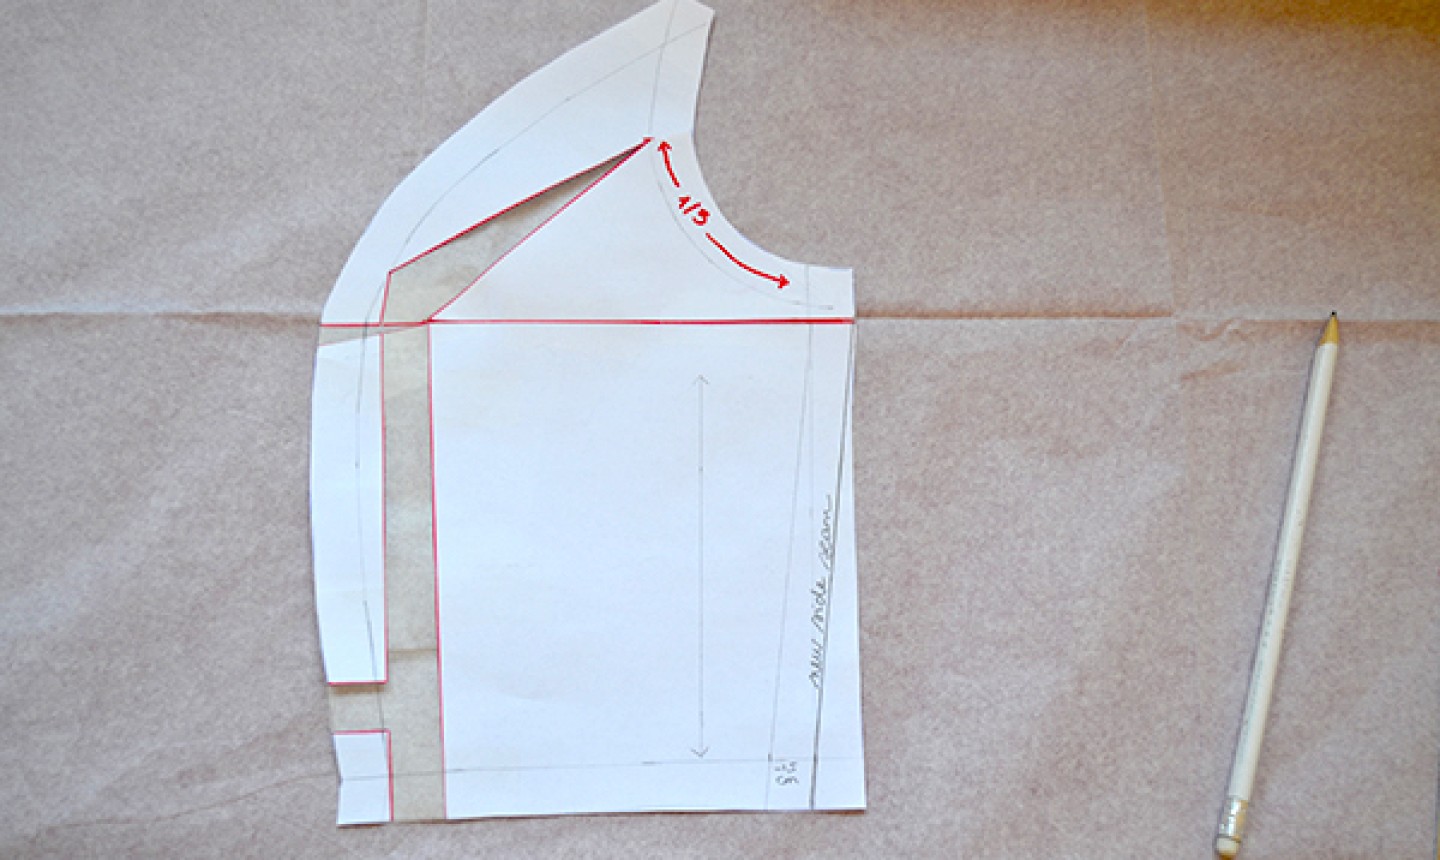
To keep the waistline at its original width, you need to remove the width you added to the bust (1", in this case). Draw a new side seam, starting from the rightmost edge of line 3 and ending 1" from the waistline edge.
13. Add the Increases to the Front Piece
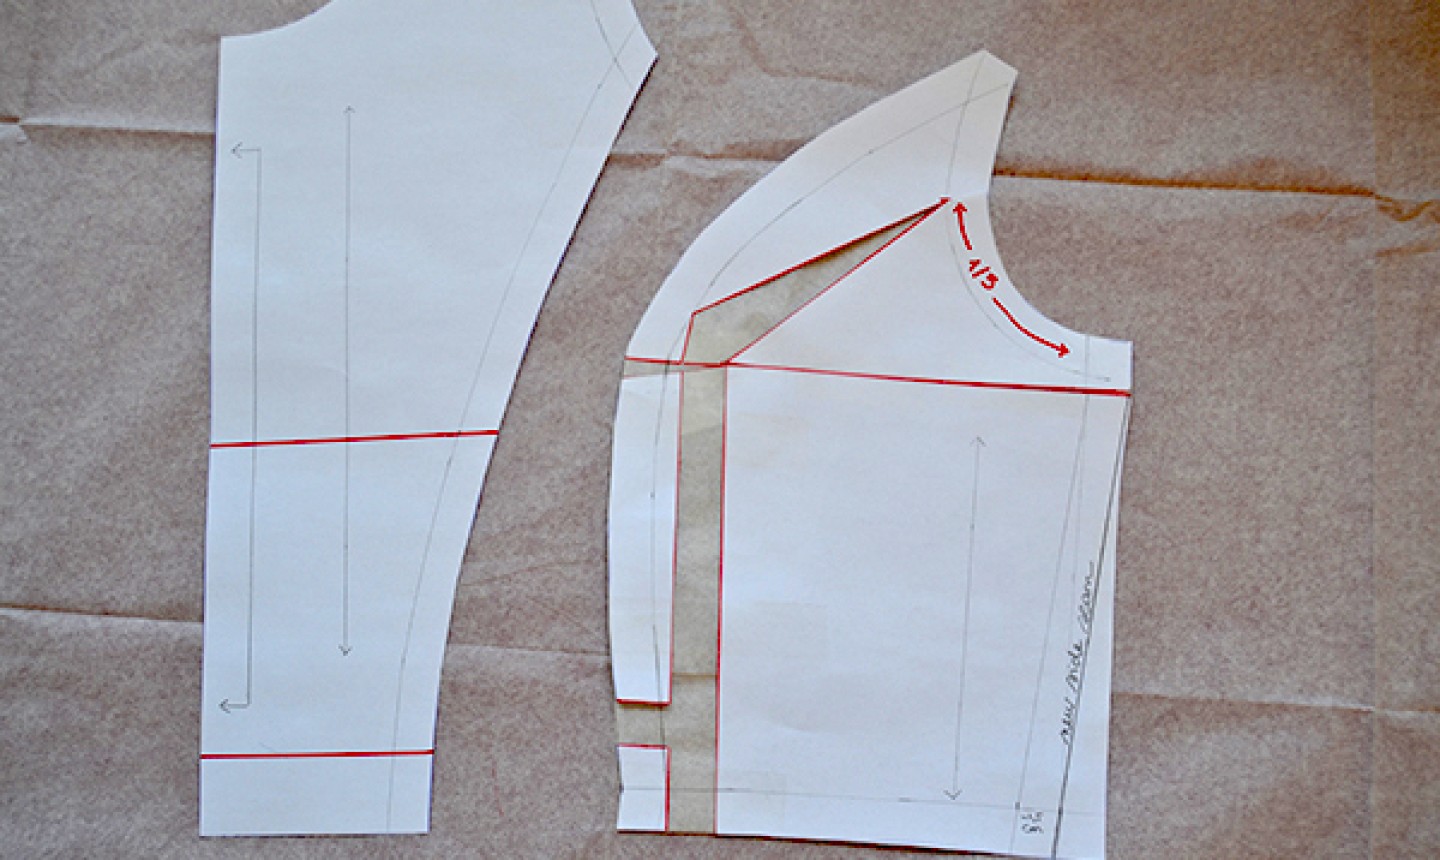
You'll need to add the increases you made for the side-front piece to the front piece. Trace two lines at the same level where you made the two increases on the princess seam pieces. Cut along these lines.
14. Measure the Increase
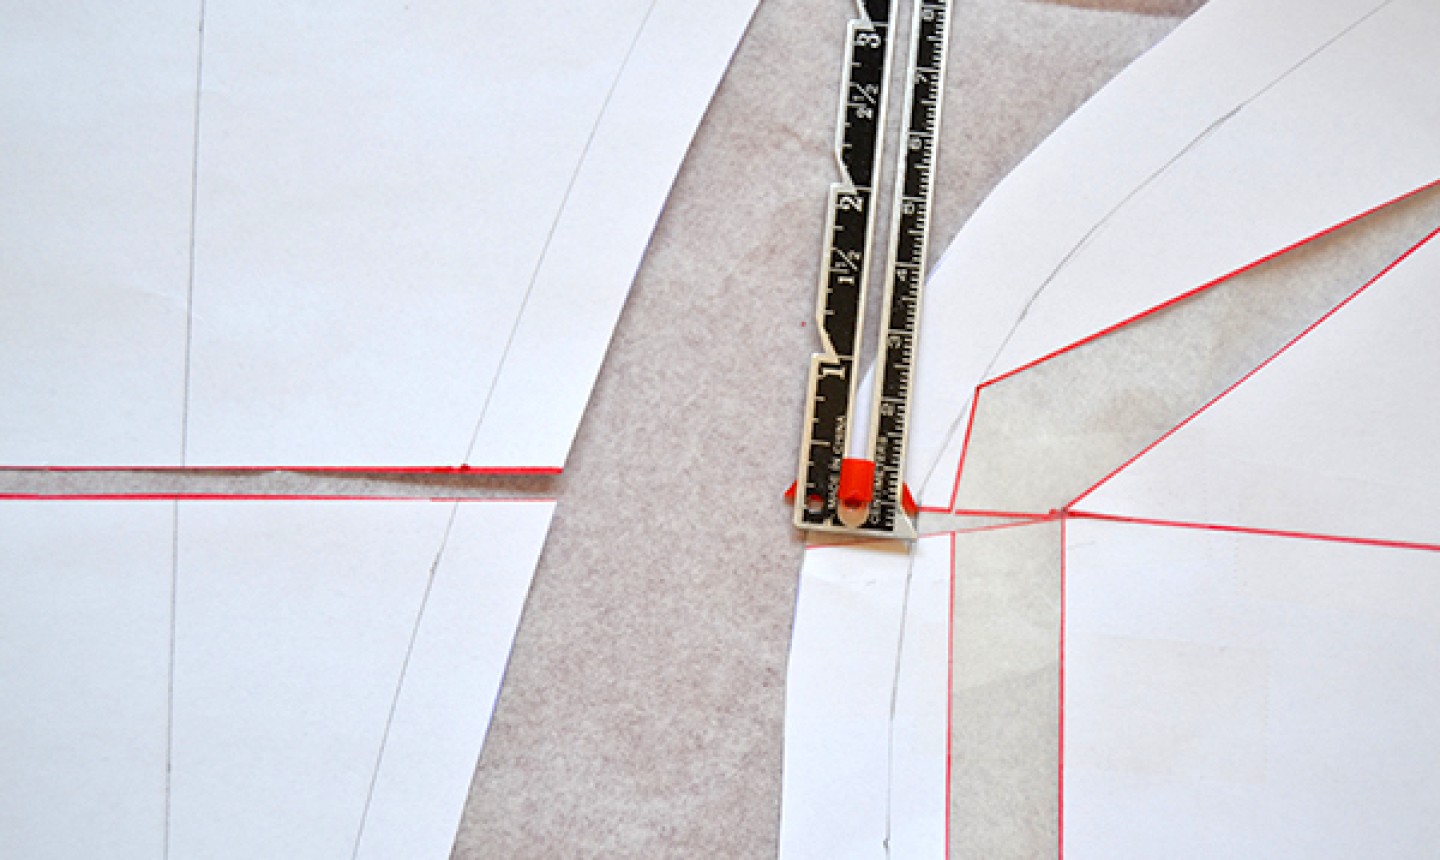
For the last step, measure how much you added at each increase on the side-front piece, then add the same measurement to the front piece at the corresponding places. For the bust, measure the seam allowance line, not the cutting line.

That's it! See, the dreaded FBA isn't so intimidating once you break it down. You've just increased the bust area without touching the waistline, armhole or neckline. And now your new pattern pieces are done!

It would be nice to download a pdf version of these articles.