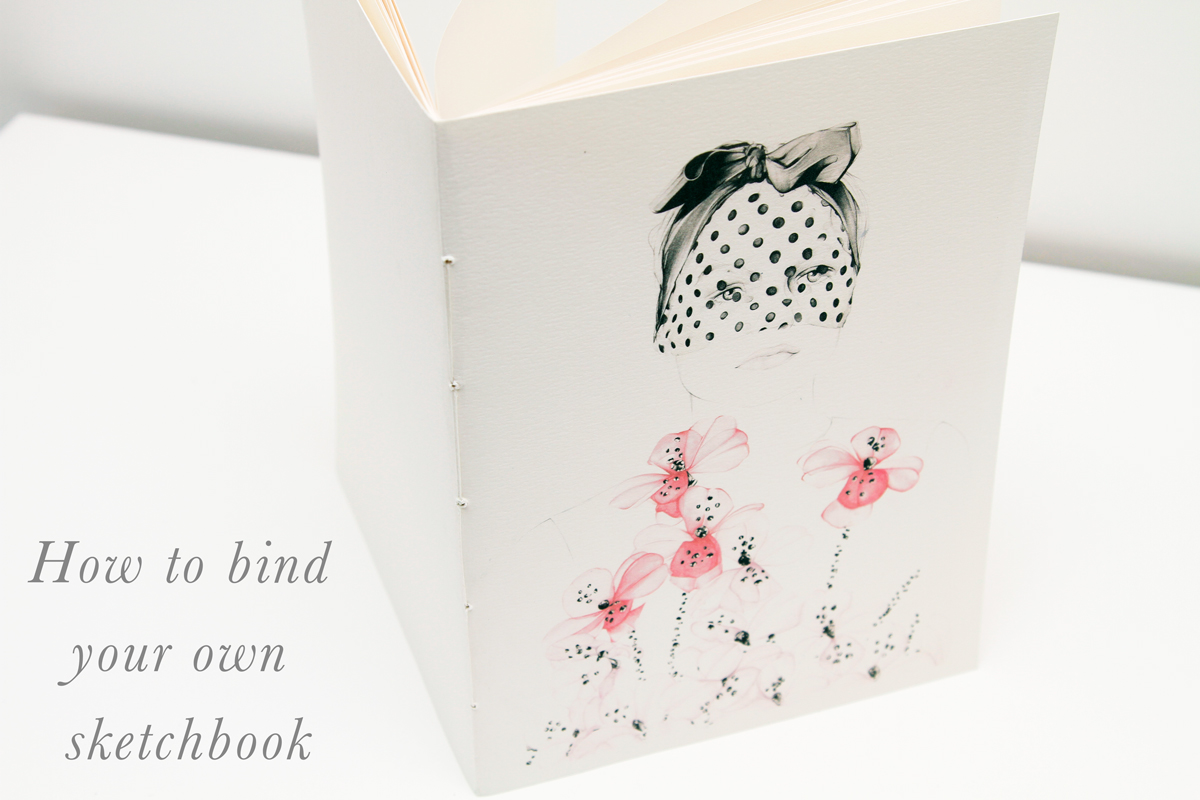
Sure, you could buy a sketchbook or drawing pad — and at some point in your artistic life, you’ll probably want to. But the joy of creating your own version is almost irresistible.
Bookbinding requires no expensive equipment, and you can choose the size, paper decoration and, of course, what you put in it.
While there are several ways to make a DIY sketchbook, in this tutorial, we are going to make an A5 sketchbook bound using the saddle stitch, which is one of the easiest bookbinding techniques. In this technique, the cover and the inside pages are all sewn together at the same time. There are variations of the stitch, but my favorite is the five-hole saddle stitch.
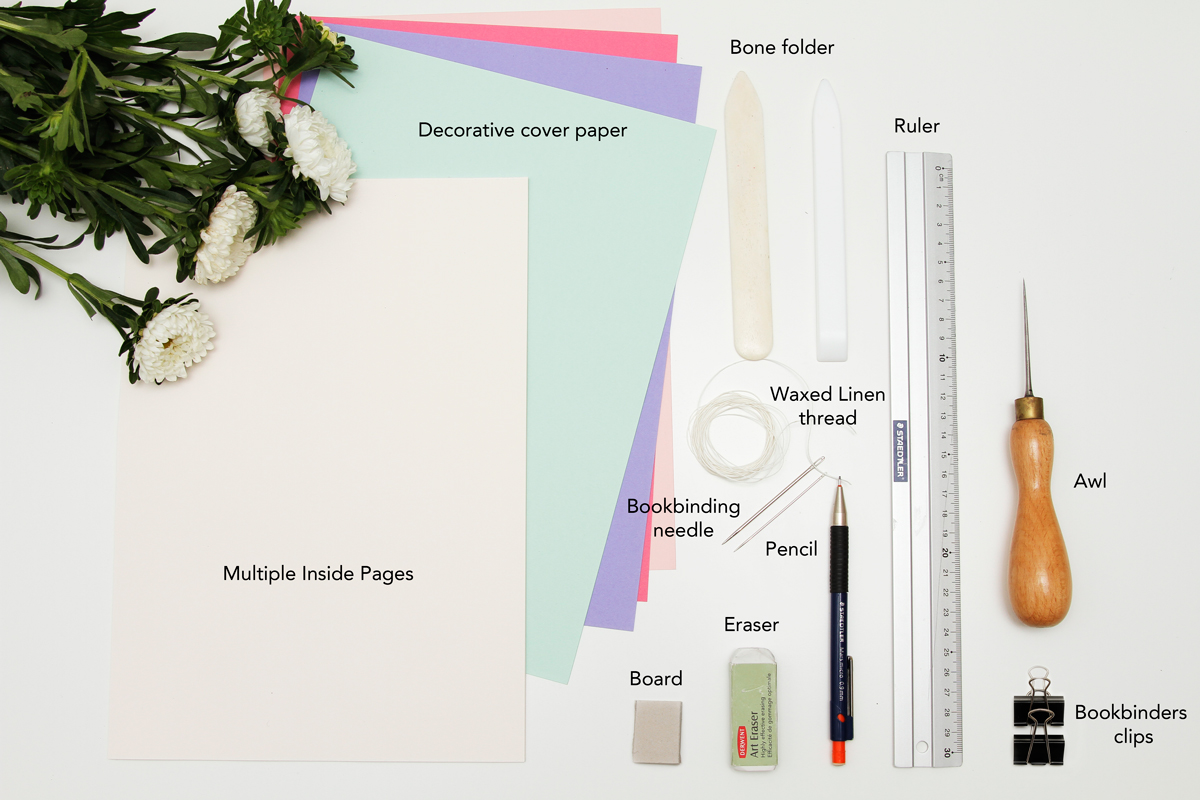
Materials:
- Multiple sheets of A4 paper for inside pages
- 1 sheet of decorative A4 paper for the cover
- Bone folder (made of bone, heavy acrylic or Teflon)
- Bookbinding awl (used to pierce sewing holes)
- Waxed linen thread
- Bookbinding needle
- 2 binder paper clips
- 4 small pieces of board to use with binder clips
- Steel ruler
- Pencil
- Eraser
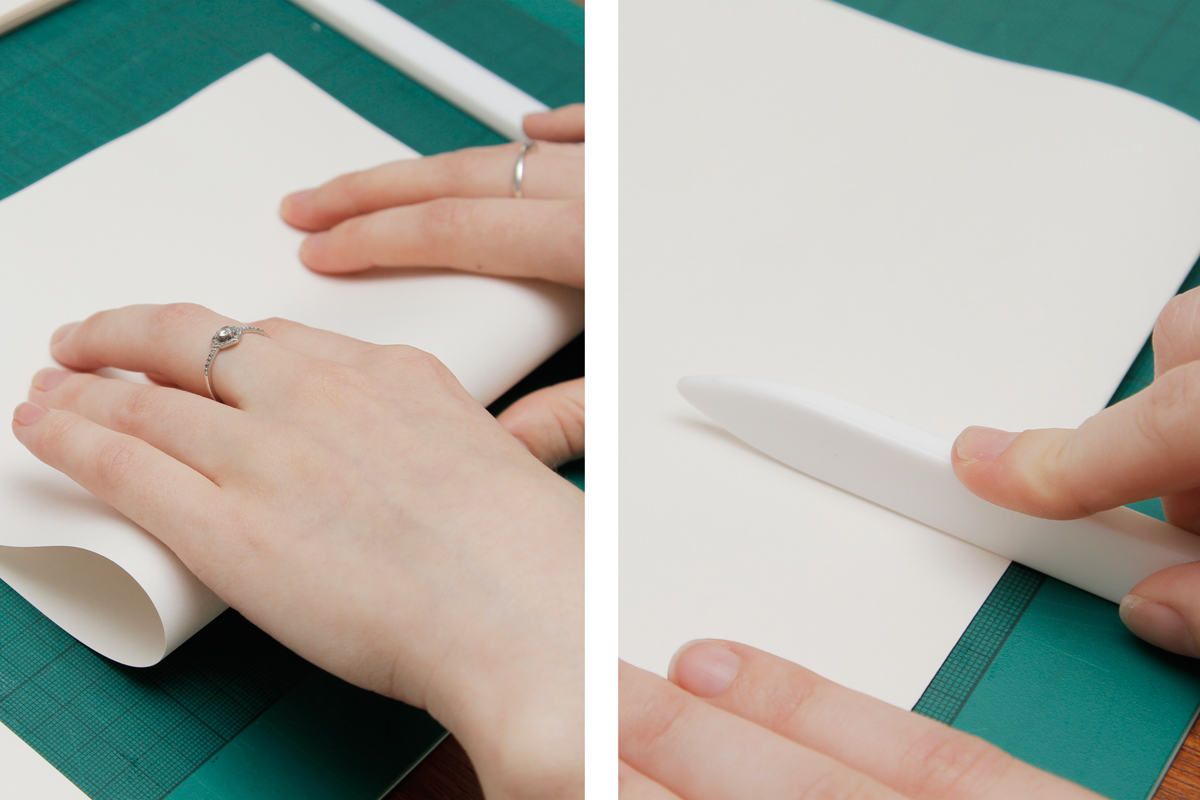
Step 1: Folding the inside pages
Before you can fold the pages, you need to choose the paper. Think about what you want to use the book for. If you often paint with watercolors, you’ll want to use a watercolor paper, for example. Consider weight, too — too thick a paper will not fold easily. I suggest not going above 200gsm. I used a 130gsm cartridge paper.
To fold the paper accurately, use a bone folder, which produce a sharp and neat fold. Fold over your paper, lining up the edges but not creasing the fold. Hold the bone folder perpendicular to the paper. Pressing gently, smooth the side along the fold.
The more accurate you are in this step, the neater your sketchbook will be. Don’t be sloppy!
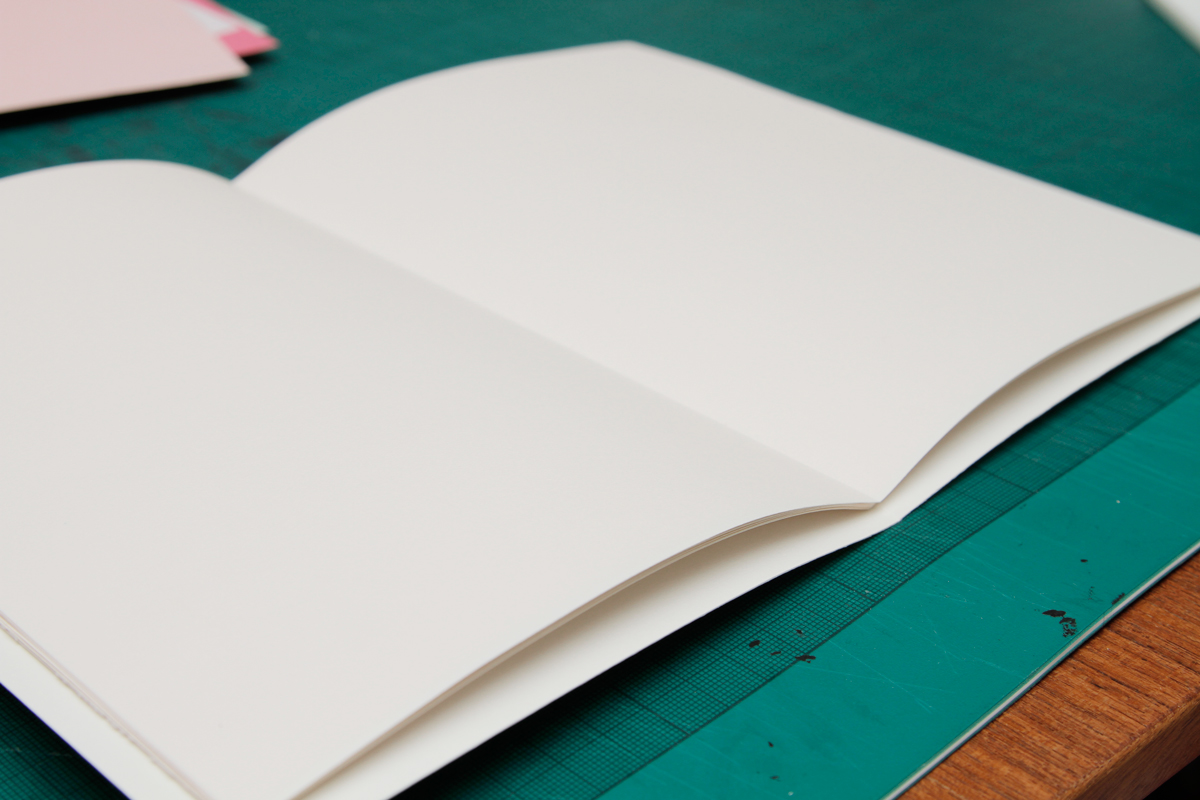
Step 2: Folding the cover
The paper you use for the cover should be heavier than the inside pages — at least 200gsm. For my cover, I printed one of my illustrations onto a 220gsm natural cartridge paper. Have fun and experiment making the cover personal and your own. Fold it exactly the same way as you did your inside pages.
Tip: I like to make my cover ½ – 1½ cm larger in width and height than the inside pages so it neatly covers everything inside.

Step 3: Assemble your sketchbook
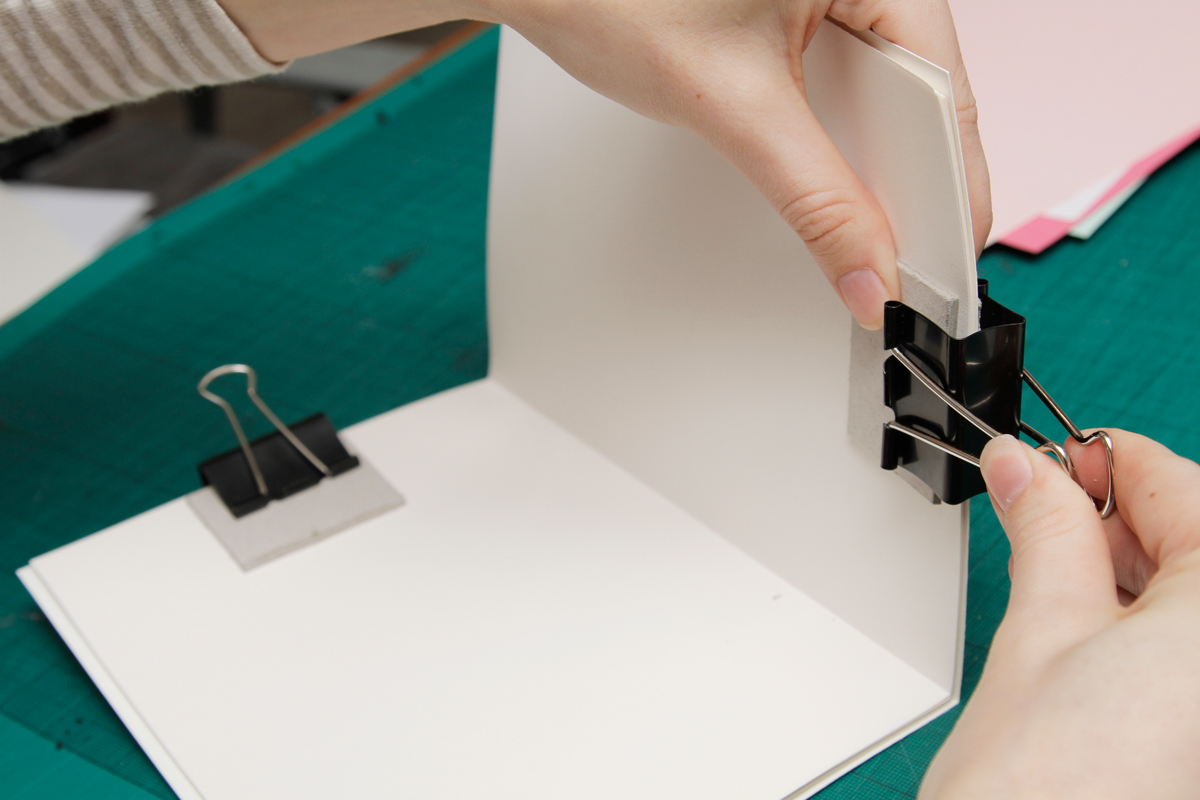
Lay the cover page flat and nest each inside page atop one another. Make sure your book is neat and lined up.
To hold the papers in place, clamp two binder clips on opposite sides of the horizontal length of the book. Use two pieces of heavy cardboard under each clip on either side to prevent damaging or creasing your paper. Do not put them on the spine.
Step 4: Piercing your holes
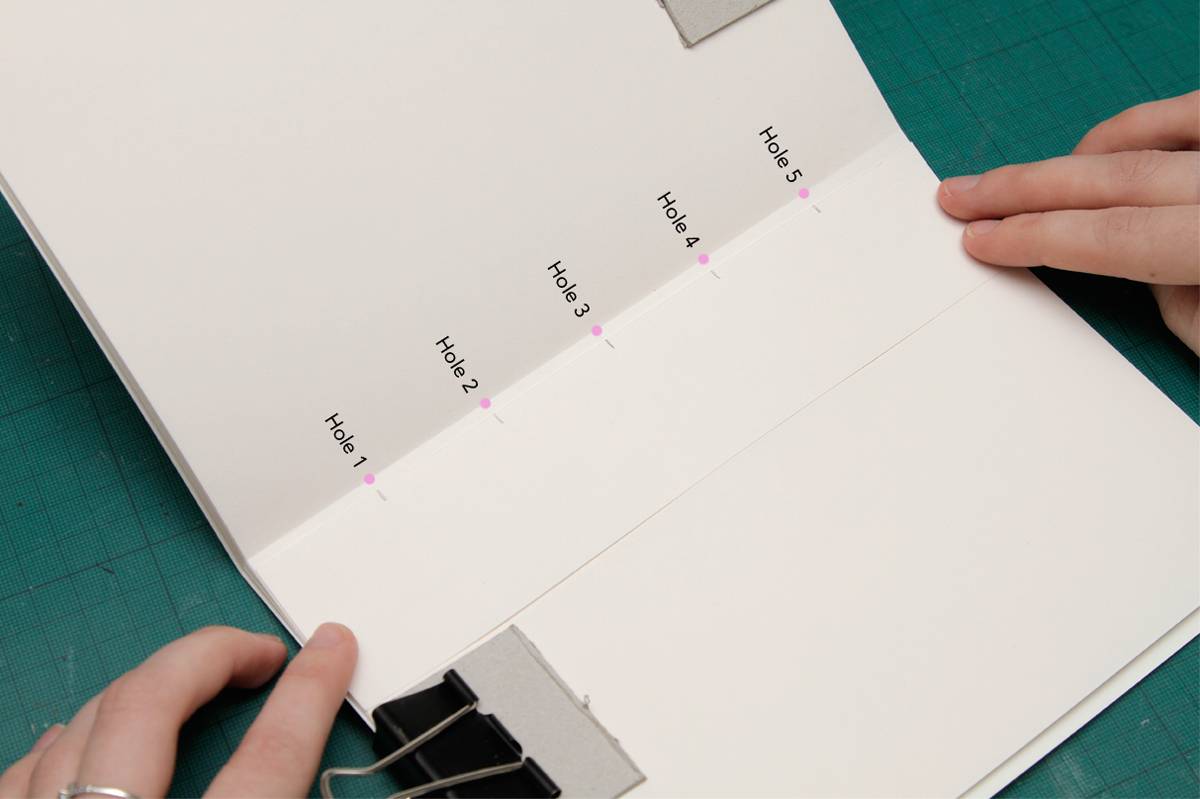
Using a ruler and a pencil, mark out five holes to pierce. Hole 3 will be precisely in the center of your book, and the remaining holes will be equidistant apart.
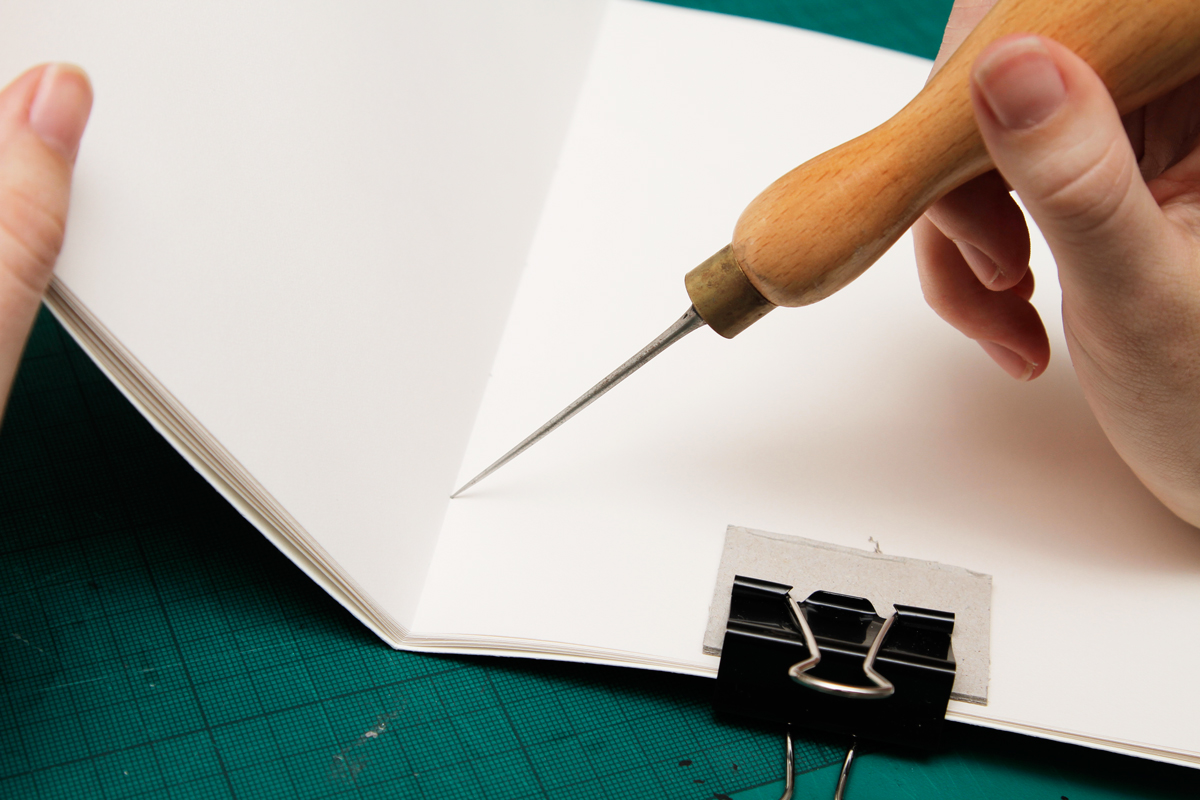
Using your bookbinding awl, pierce the five holes. Holding the awl at an angle will better ensure that the holes will travel straight through the pages and the cover’s spine.
Step 5: Threading your needle
The amount of thread you need depends on the size of your book. As rule of thumb, use a length that can wrap vertically around the book one and a half times. It’s better to have too much than not enough.
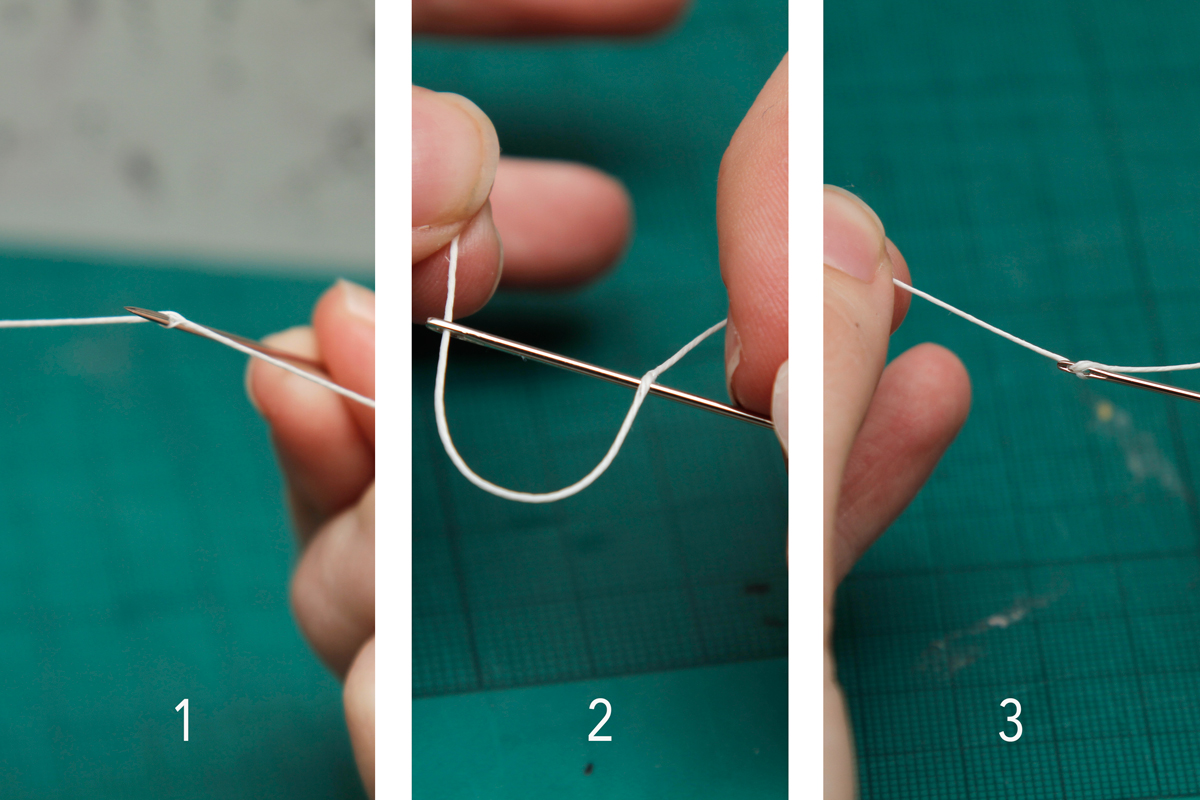
With your needle, pierce through the thread approximately 5 cm from the end. Thread the end through the needle’s eye, slide the thread upward and pull tight. This will prevent the thread from sliding out. A waxed thread isn’t necessary, but it helps. If you do not have a ready waxed linen thread, you can run it through some beeswax.
Step 6: Sew your book
Time to sew the book! Don’t get overwhelmed — we are going to take it one step at a time.
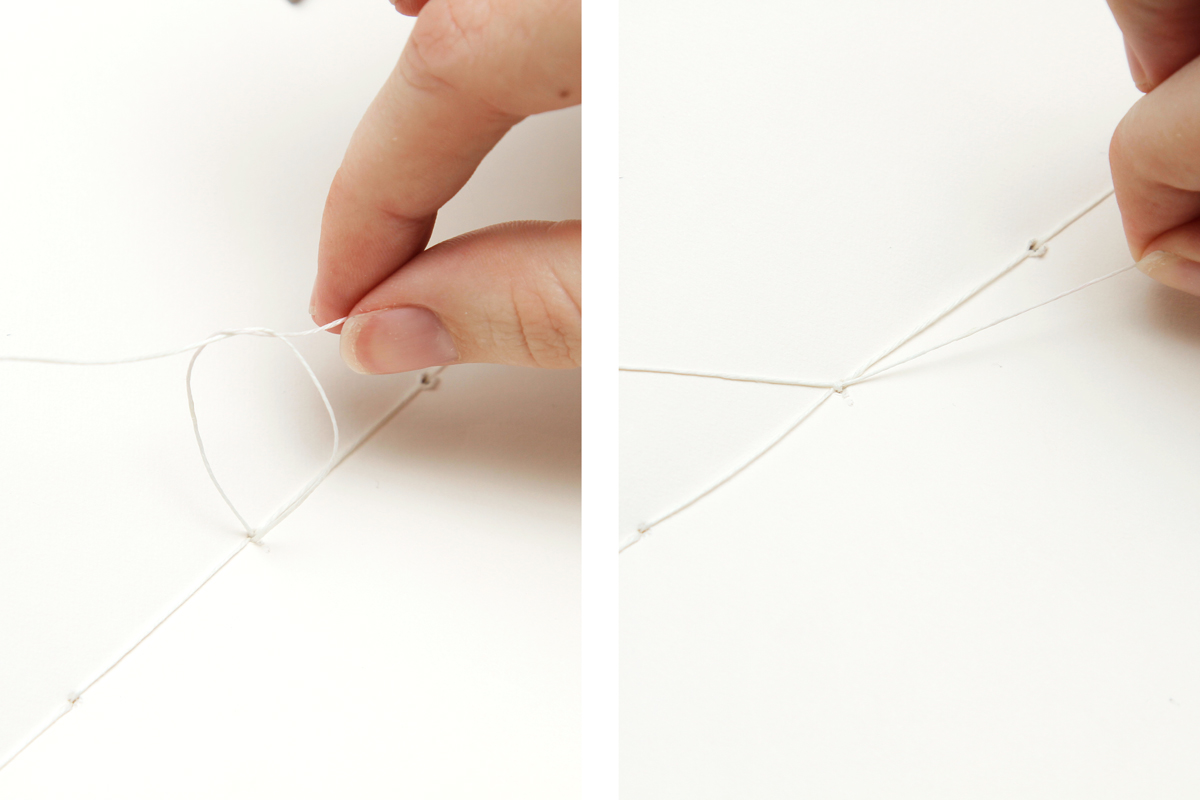
Starting from the inside of the book, take your needle and enter Hole 3.
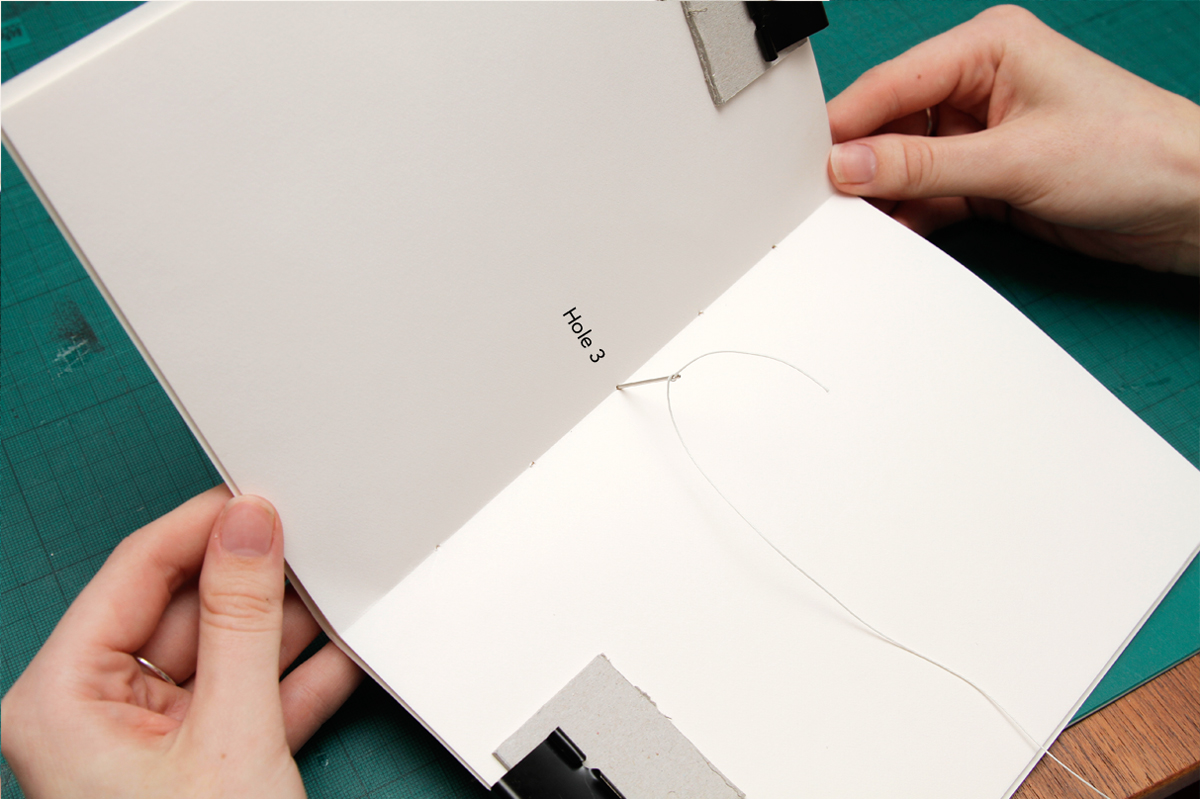
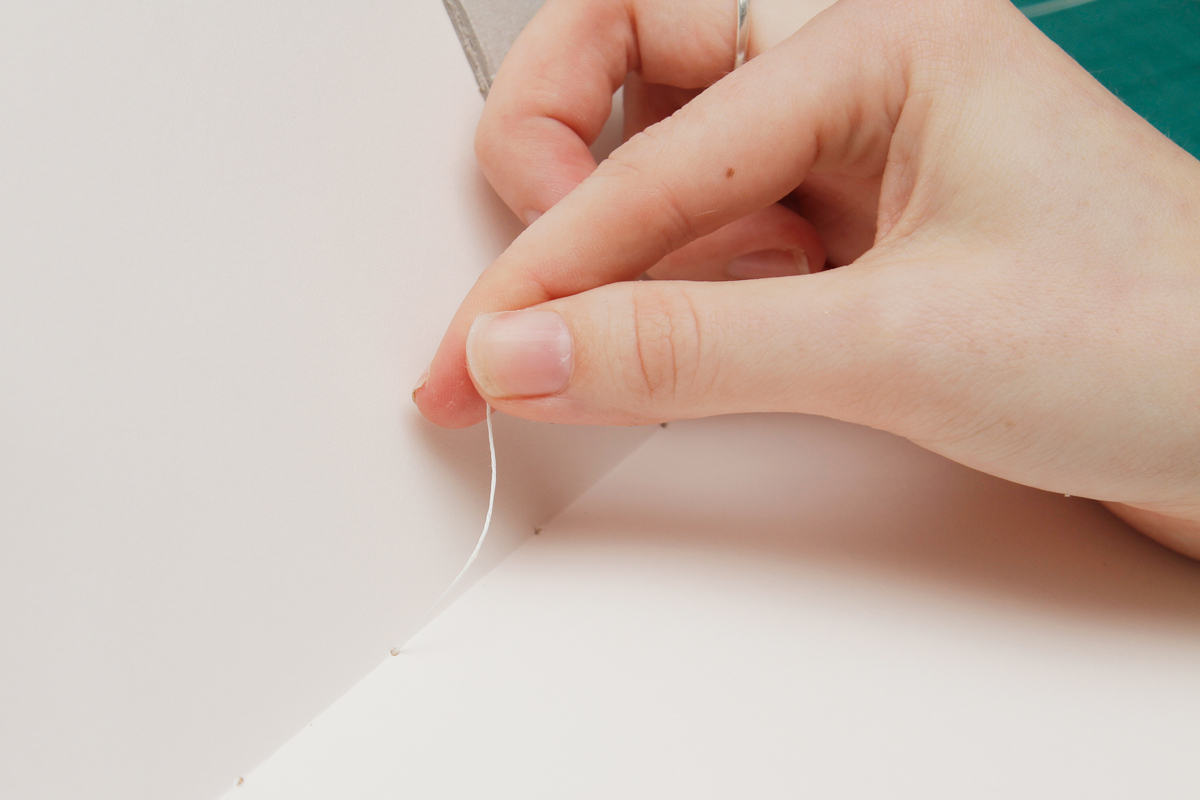
Pull all the way through and leave approximately 3 cm of thread on the inside of the book. You’ll use this tail for a knot at the end.
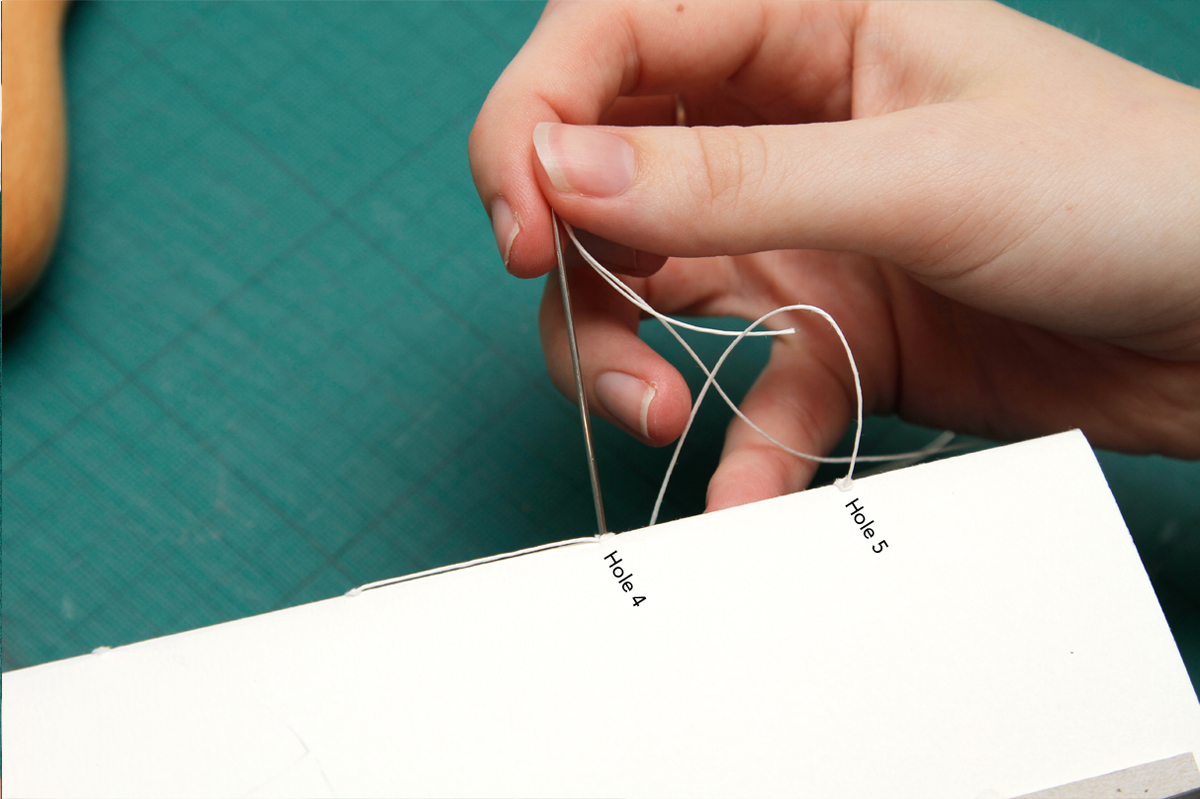
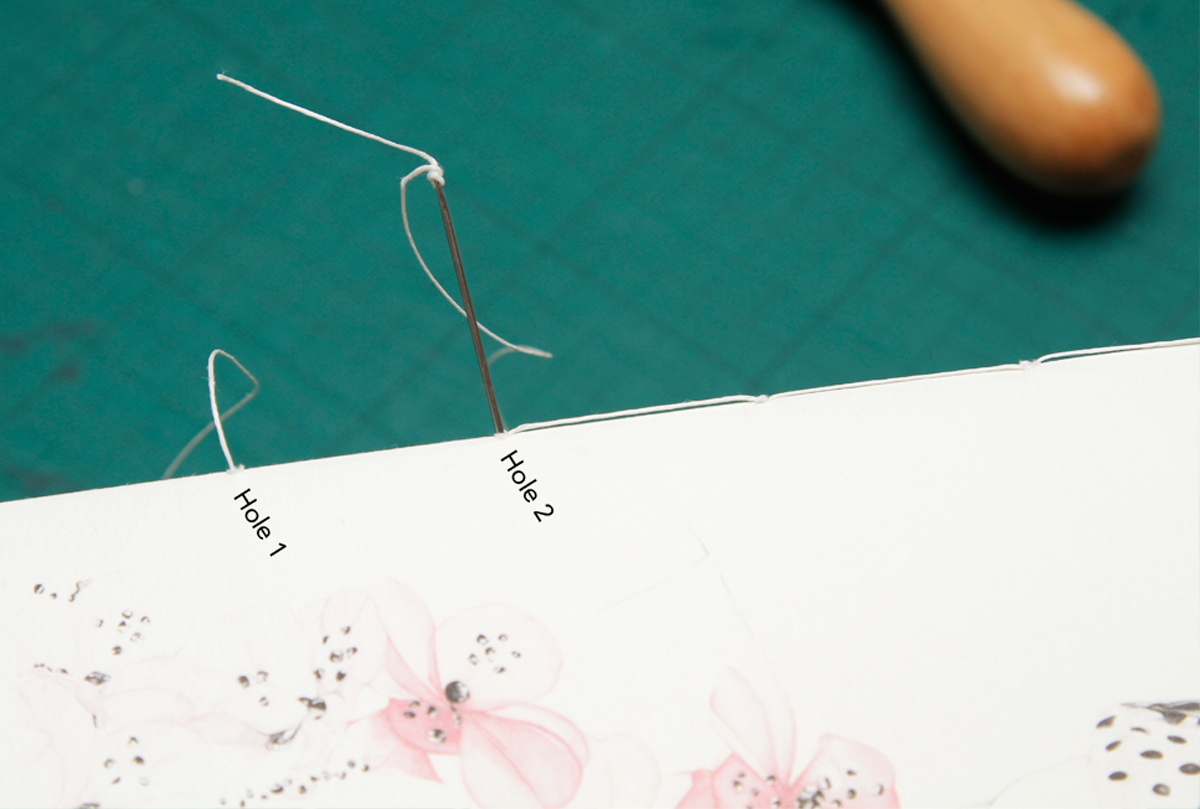
From the outside, go through Hole 4 and pull through to the inside.
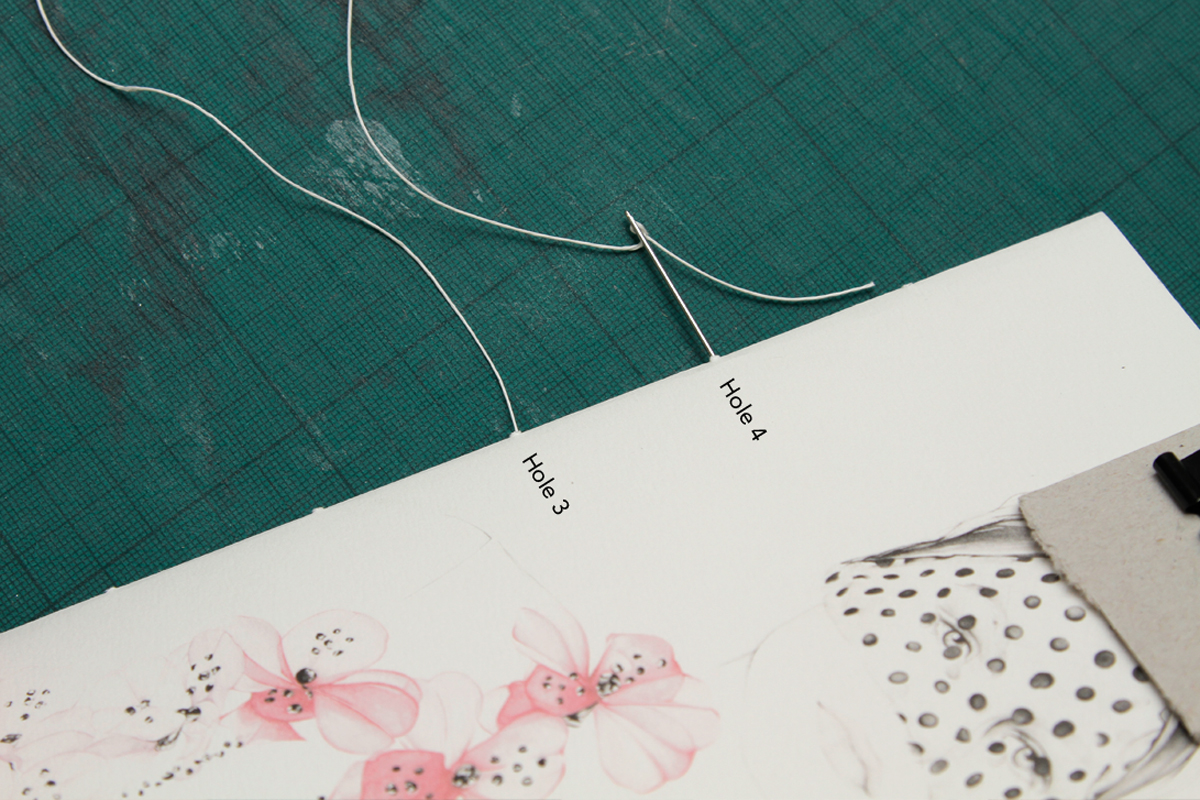
Then, from the inside, go through Hole 5 and pull through to the outside.
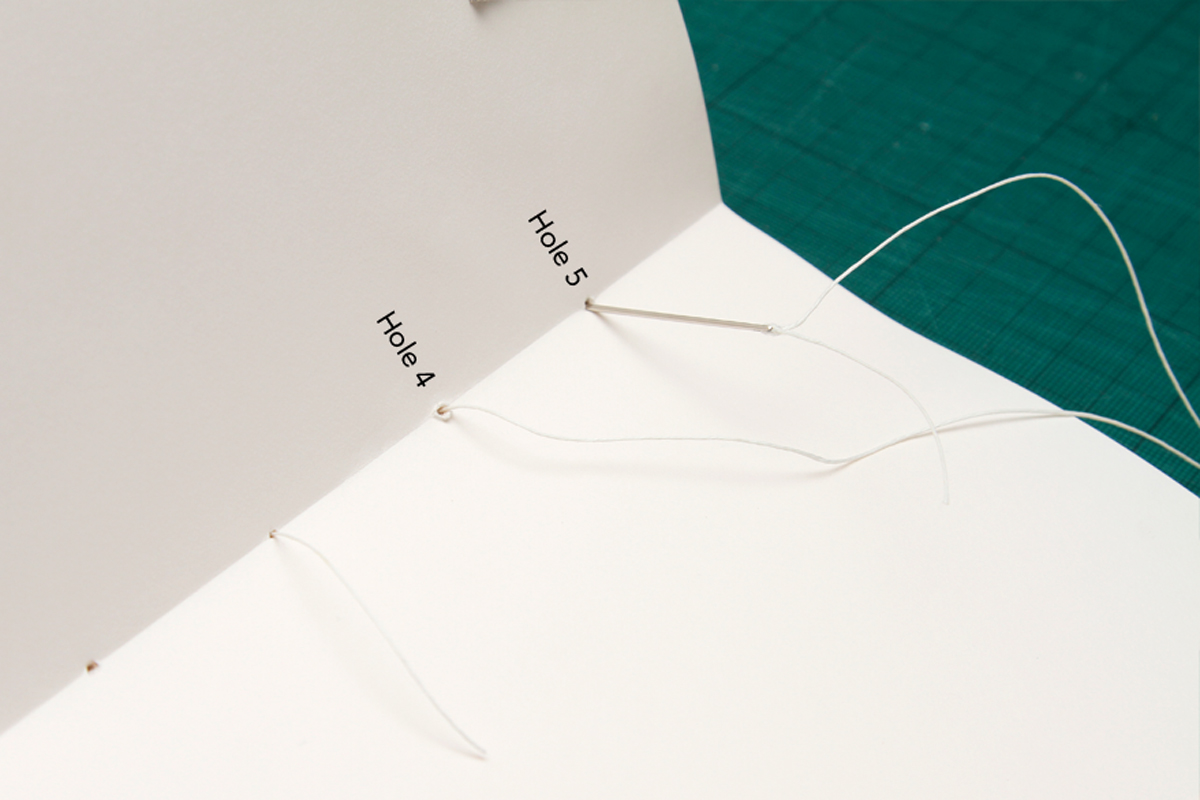
From the outside, go back through Hole 4 and pull through to the inside.
Remember to pull everything tightly while stitching. It is important to keep a good tension — otherwise, you will have a very loose binding and a loose book.
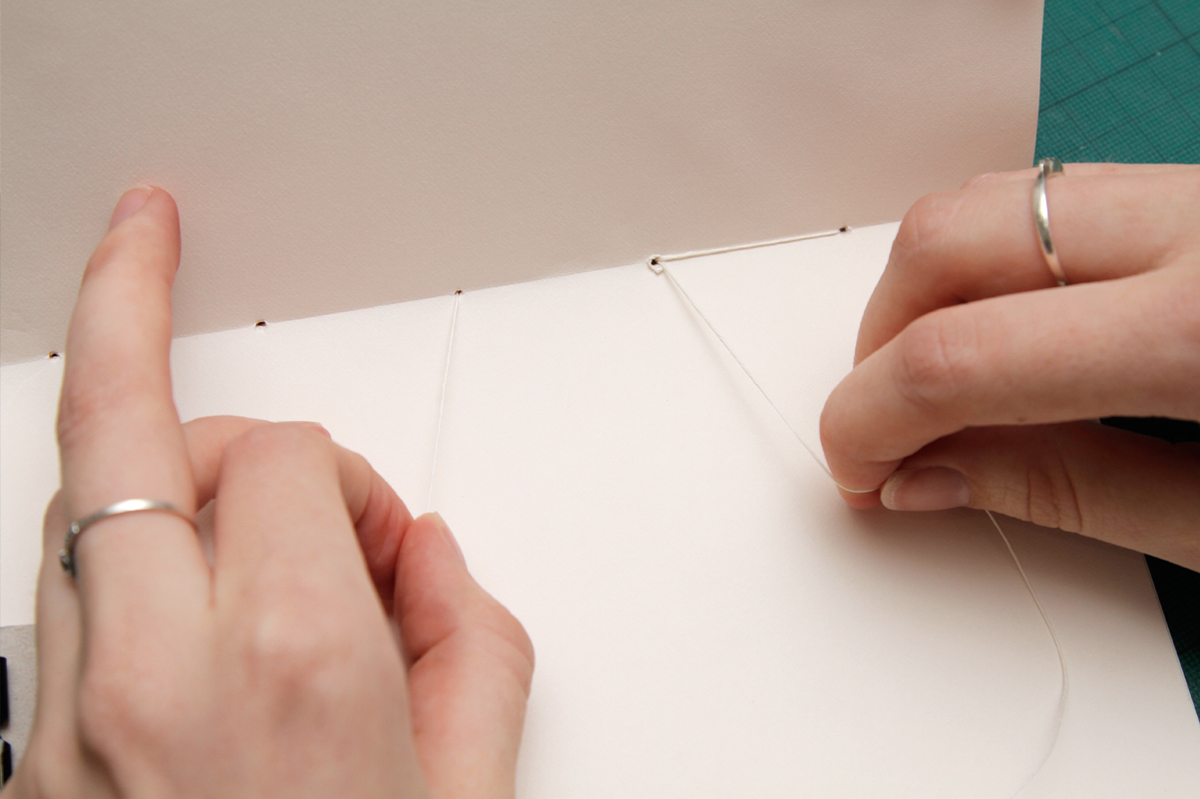
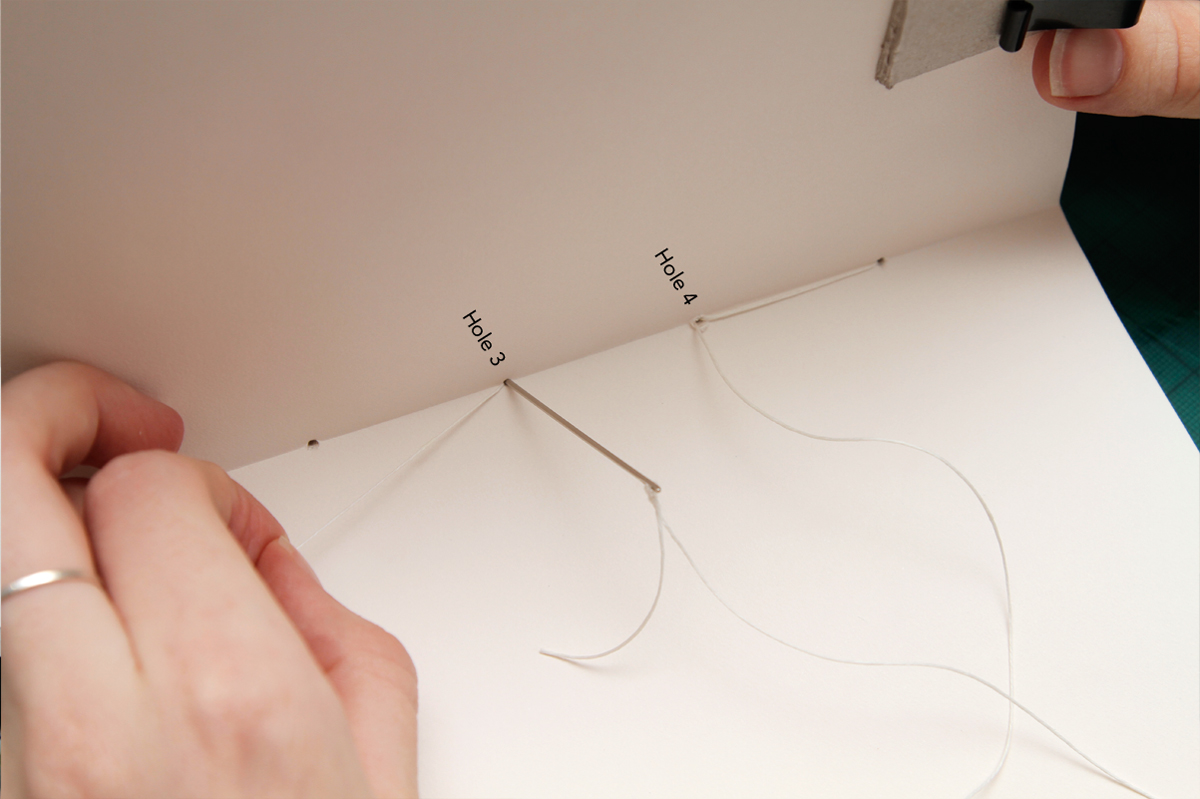
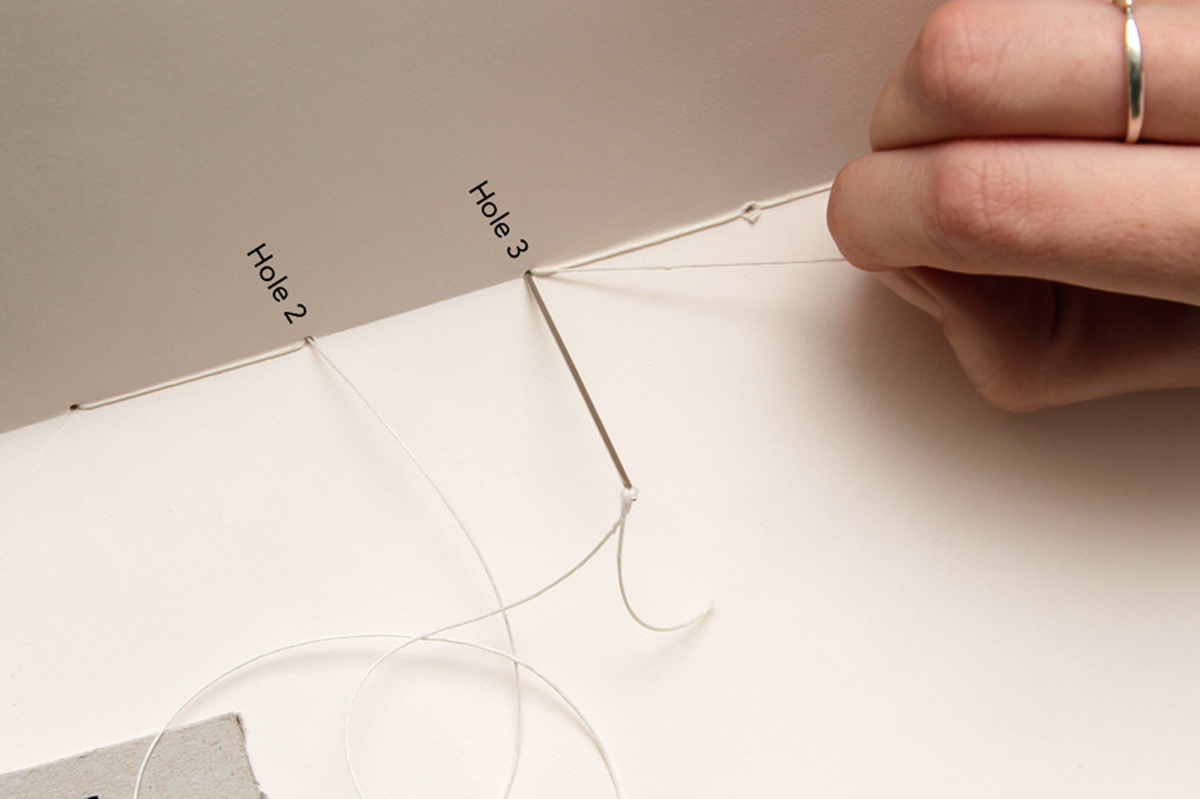
From the inside, go back through Hole 3 and pull through to the outside.
From the outside, go through Hole 2 and pull through to the inside.
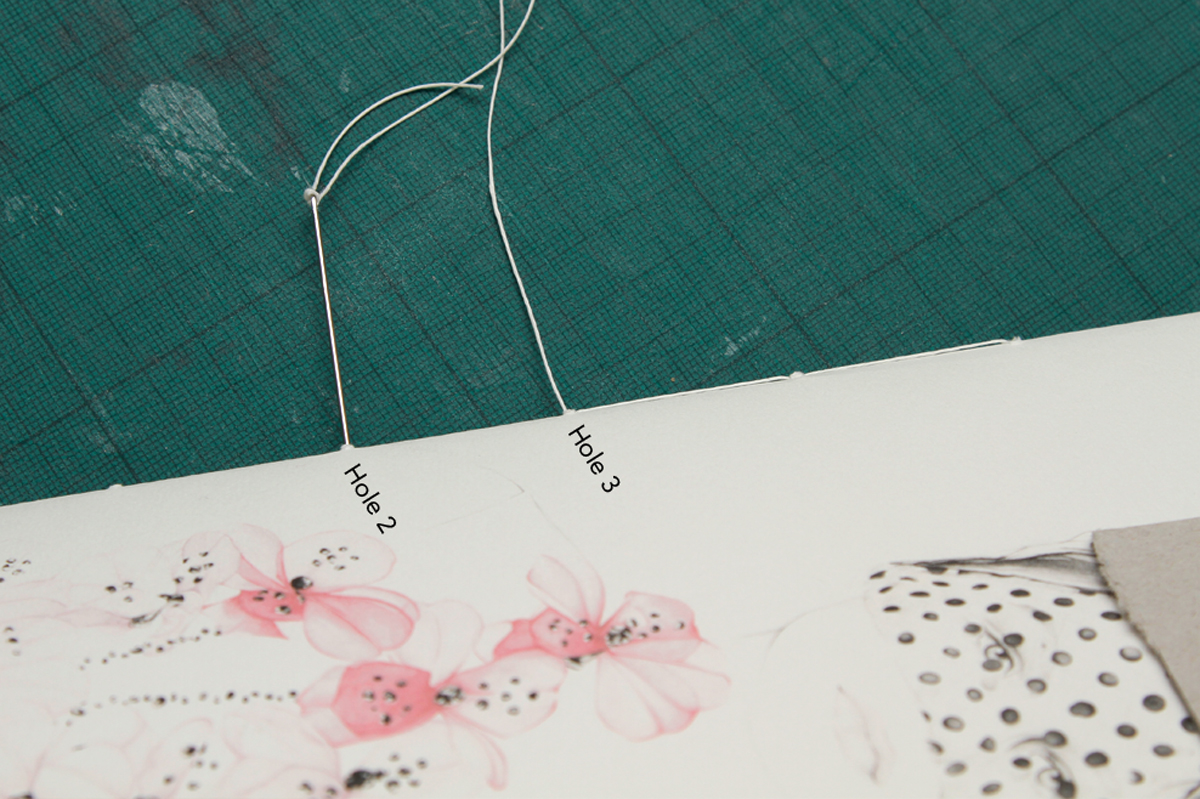
From the inside, go through Hole 1 and pull through to the outside.

From the outside, go back through Hole 2 and pull through to the inside.
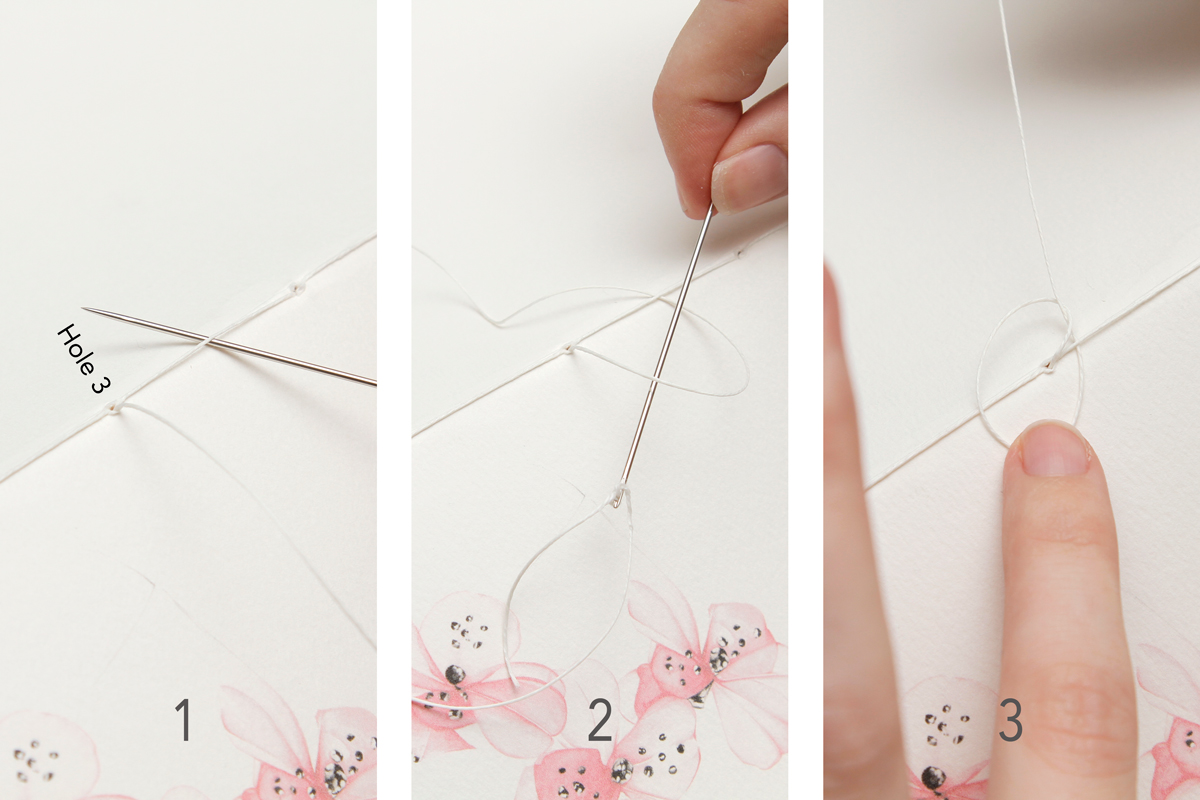
From the inside, go through Hole 3 and pull through to the outside.
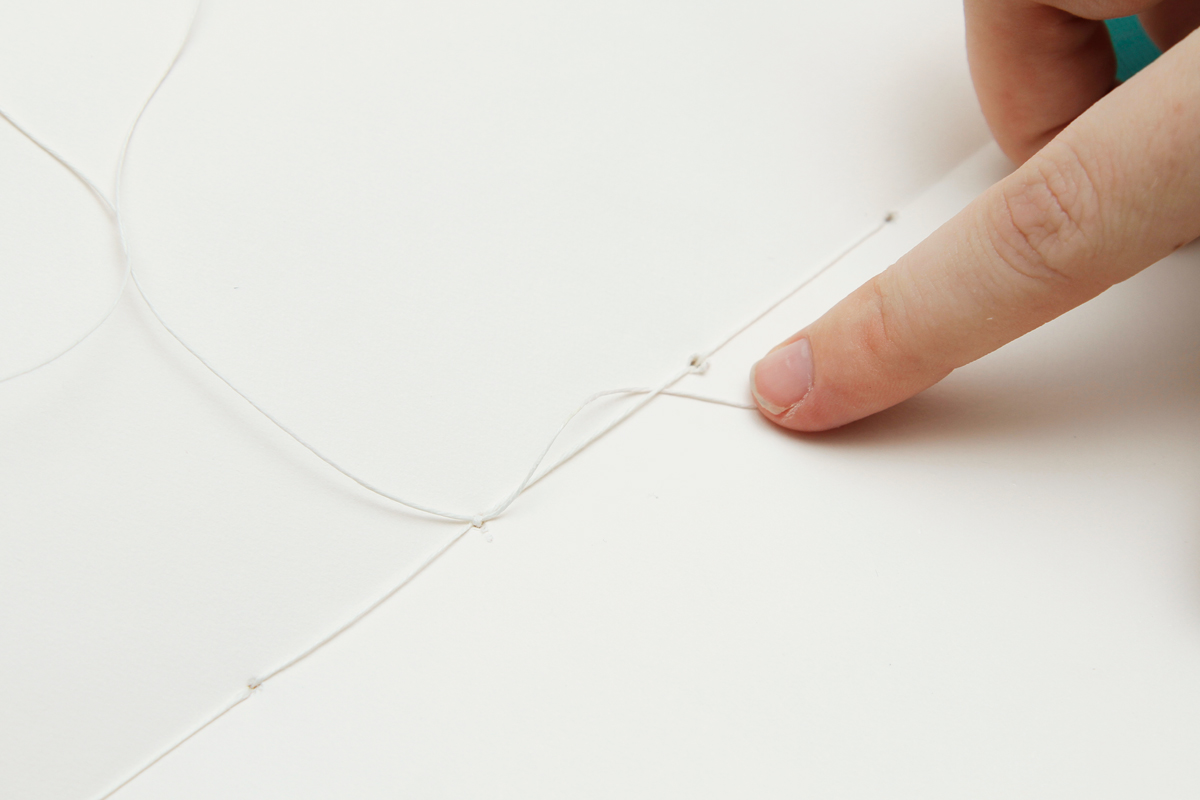
Make a knot: Thread your needle underneath the stitch between Hole 3 and 4 on the outside. Make a loop and thread the needle through. Carefully pull tight so the knot sits neatly on top of Hole 3.
Take your needle and thread it back through Hole 3, pulling the knot to the inside. Be careful not to pull too tightly or you will rip the paper.
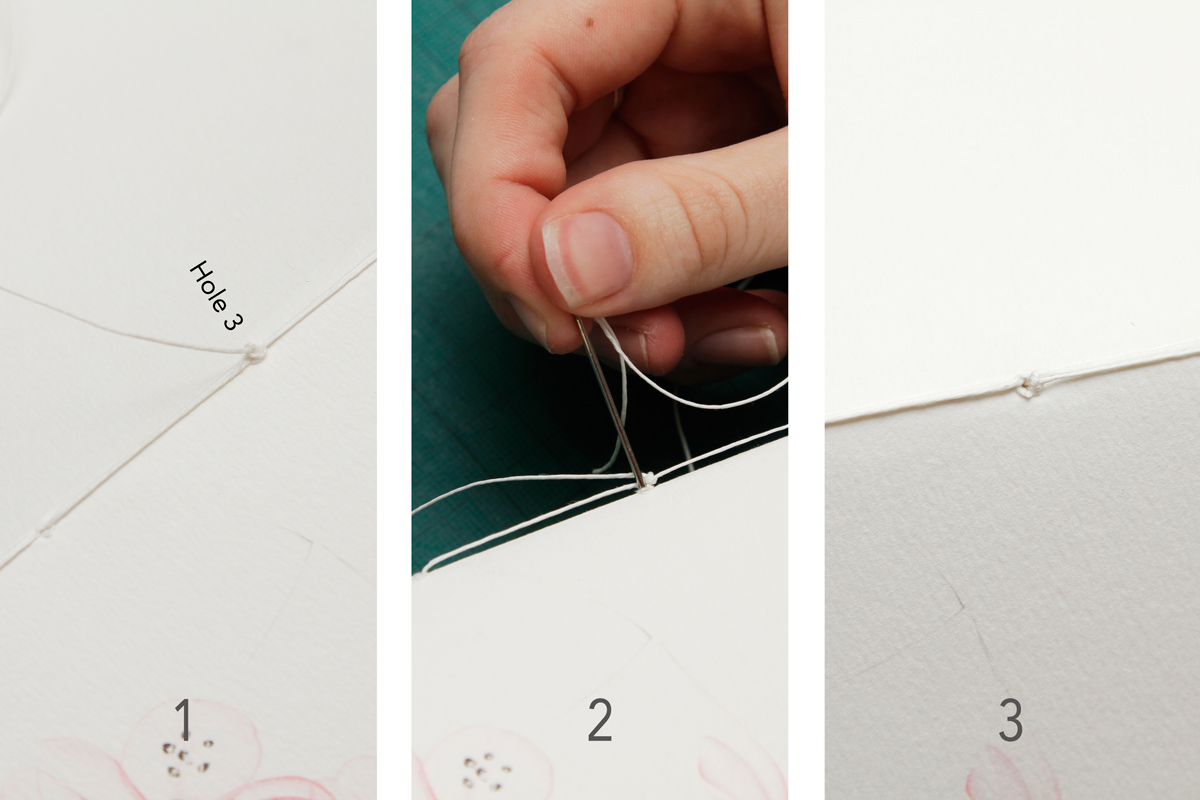
Using both ends of the thread, make a knot and pull tight.
Slip the ends underneath the stitches so they are discreetly hidden, then carefully trim.
Voilà!
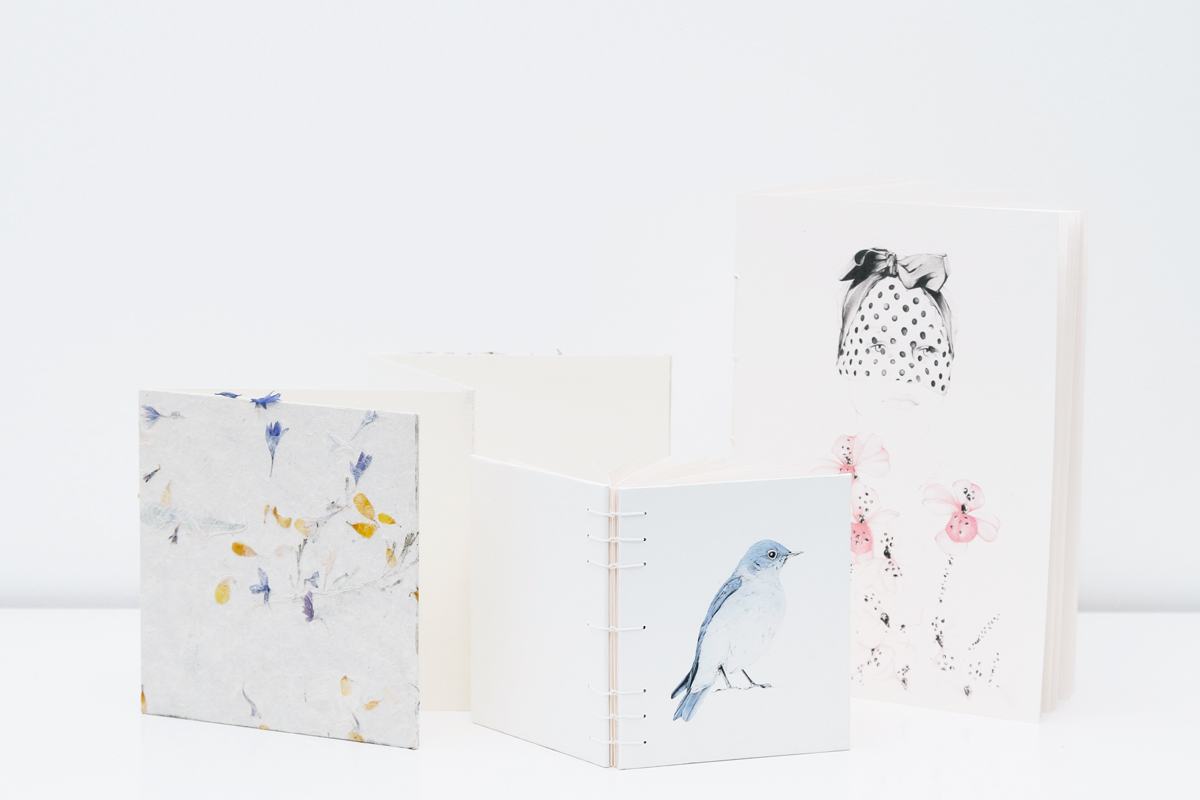
You have now mastered the saddle stitch and have your own personal sketchbook. There are many other bookbinding techniques out there, so don’t feel restricted by size, shape or technique. Have fun experimenting and you’ll never have to buy a sketchbook again!
Love this idea, but would also love more bookbinding courses. Such as creating a paperback or hardcover book
Would love more book binding courses.
UGLY UGLY
very cute but more expensive than to by one but really enjoyed it :)
More book binding classes please!
Way too simple. Add a more structured and thorough course. One where you learn how to make a block and then bind it in hard covers and spine. This just a notebook, or one signature.
Would love to have more bookbinding courses!
Add bookbinding courses please.
Thank you for this course. Please add more bookbinding and box making courses.
Glad to have this tutorial! I, too, would love more bookbinding, book repurposing classes.