Want to try your hand at patchwork quilting? If you’ve never tried patchwork before, there are a few key techniques and tools you’ll want to have to learn how to do patchwork quilting.
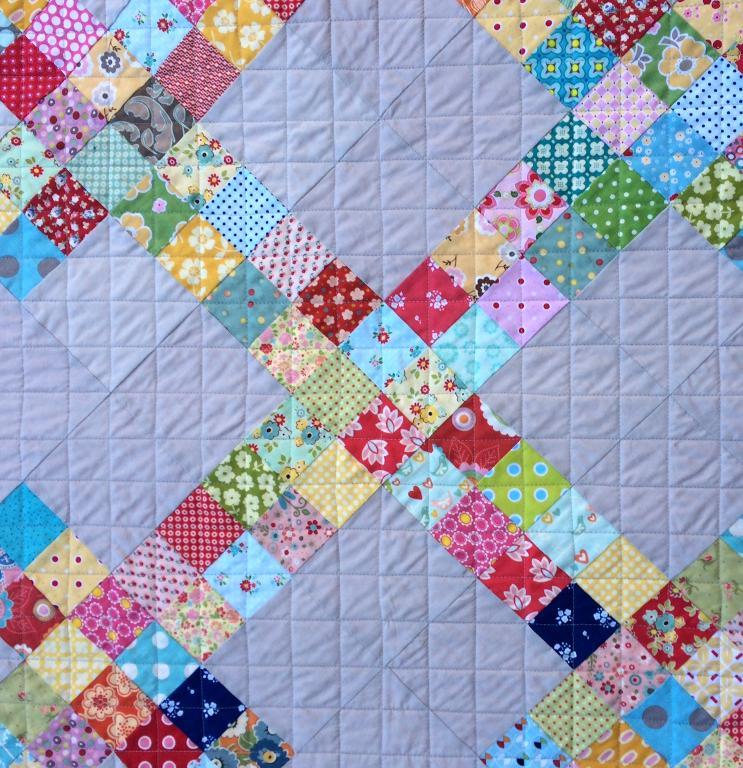
Piper’s Picket Fence patchwork quilting pattern by Pipers Girls
While there are many stages to making a quilt, I’m focusing here on some of the initial steps — cutting, piecing, pressing and squaring — as these are the best starting point. Once you’ve practiced and mastered these steps, you’ll be ready to put your quilt top together, make the quilt sandwich and finish the project.
Check out the essential skills for how to do patchwork quilting.
Step 1: Cutting
What you need
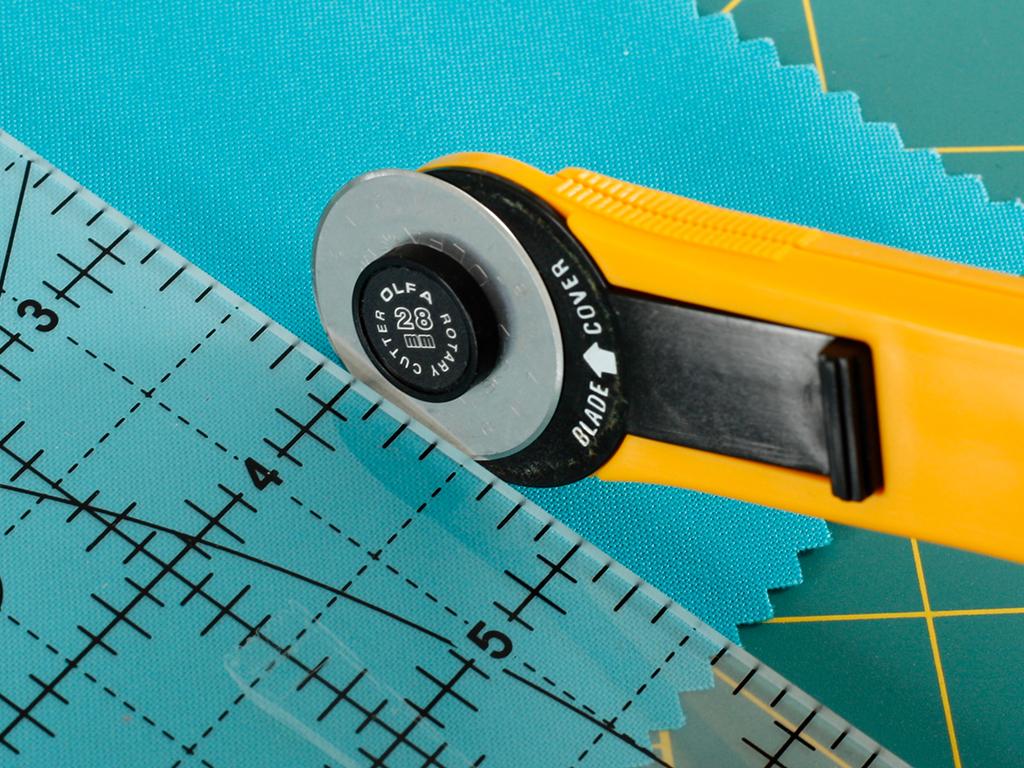
The first step in patchwork quilting is cutting. Rather than using fabric scissors, as we would do for garment sewing, quilters use a rotary cutter, a cutting mat and a quilting ruler.
Quilting rulers are fabulous, and many avid quilters own quite a stash of them! The general rule is that you need to cut an extra 1/4″ around each side of your shape for a seam allowance (most quilting patterns will account for this). Many quilting rulers have an extra 1/2″ built in to them: That is, a 6 1/2″ square ruler will yield a finished (sewn) 6″ block.
How to cut quilting fabric
Place your fabric on the cutting mat, then place a square quilting ruler grainwise on the fabric. Hold the ruler down with your non-dominant hand, and use your dominant hand to hold the rotary cutter. Push the rotary cutter against the ruler and down into the fabric as you roll it away from you.
When you master this movement, you can use the technique to practice cutting shapes.
Step 2: Piecing
Once your pieces are all cut out, it’s time to piece (that’s quilting talk for “sew”) them together. Quilting requires a quarter-inch seam allowance, which allows for minimal bulk in your quilt. If sewing a 1/4″ allowance seems like a daunting task, invest in a 1/4″ presser foot for your machine. Everyone and their sister uses them for piecing quilts, and they’re a nice way to ensure a straight and accurate seam.
Depending on your machine alignment, you may need to adjust your needle width to make sure that the seam is a perfect 1/4″ or just a hair under (called a scant 1/4″) to allow for the fold of the fabric when the seam is pressed. Accuracy is important here! A seam even slightly too wide or too narrow can cause problems later when you’re trying to line up blocks or rows of blocks.
Step 3: Pressing
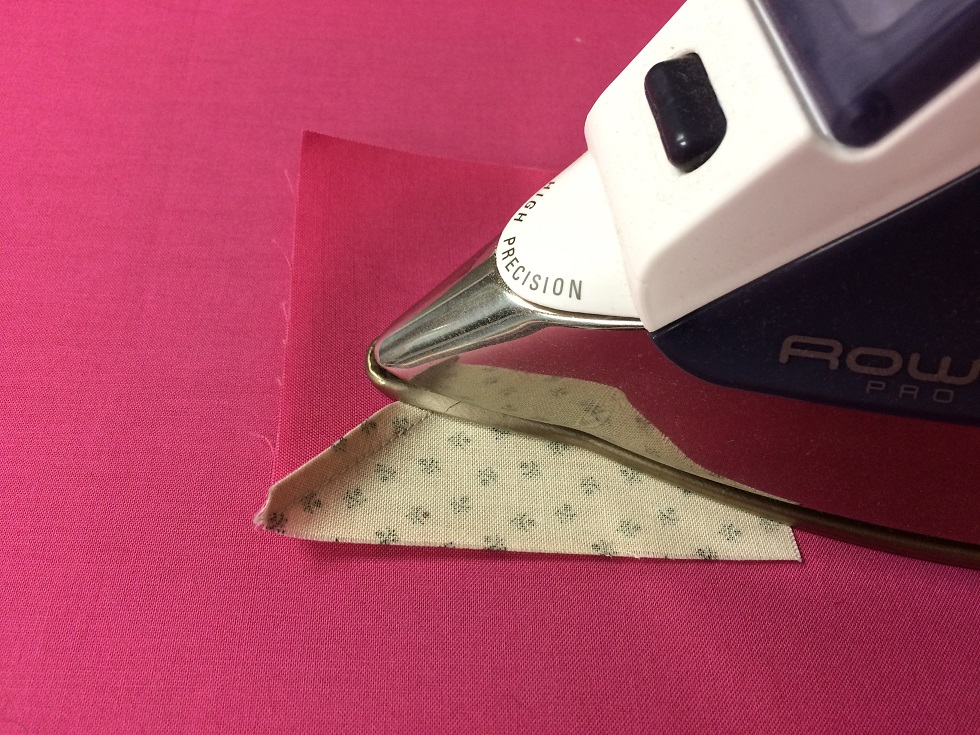
After piecing two shapes together, you’ll want to press them. Don’t skip this step! Pressing is key to ensuring accurate seams and making your quilt lie flat. What we quilters call “pressing” is like ironing, but slightly different in that you do not want to move the iron around on the fabric because this will stretch it out. You’ll also want to refrain from using steam, which will do the same thing.
Instead, spray the block with starch or a pressing spray. Use a tool or the tip of the iron to open the seam or press it to the side of the darker fabric. Then place your iron on the block and hold it still. To move it to a different part of your pieced block, lift it up and place it in a new spot.
Step 4: Square it up
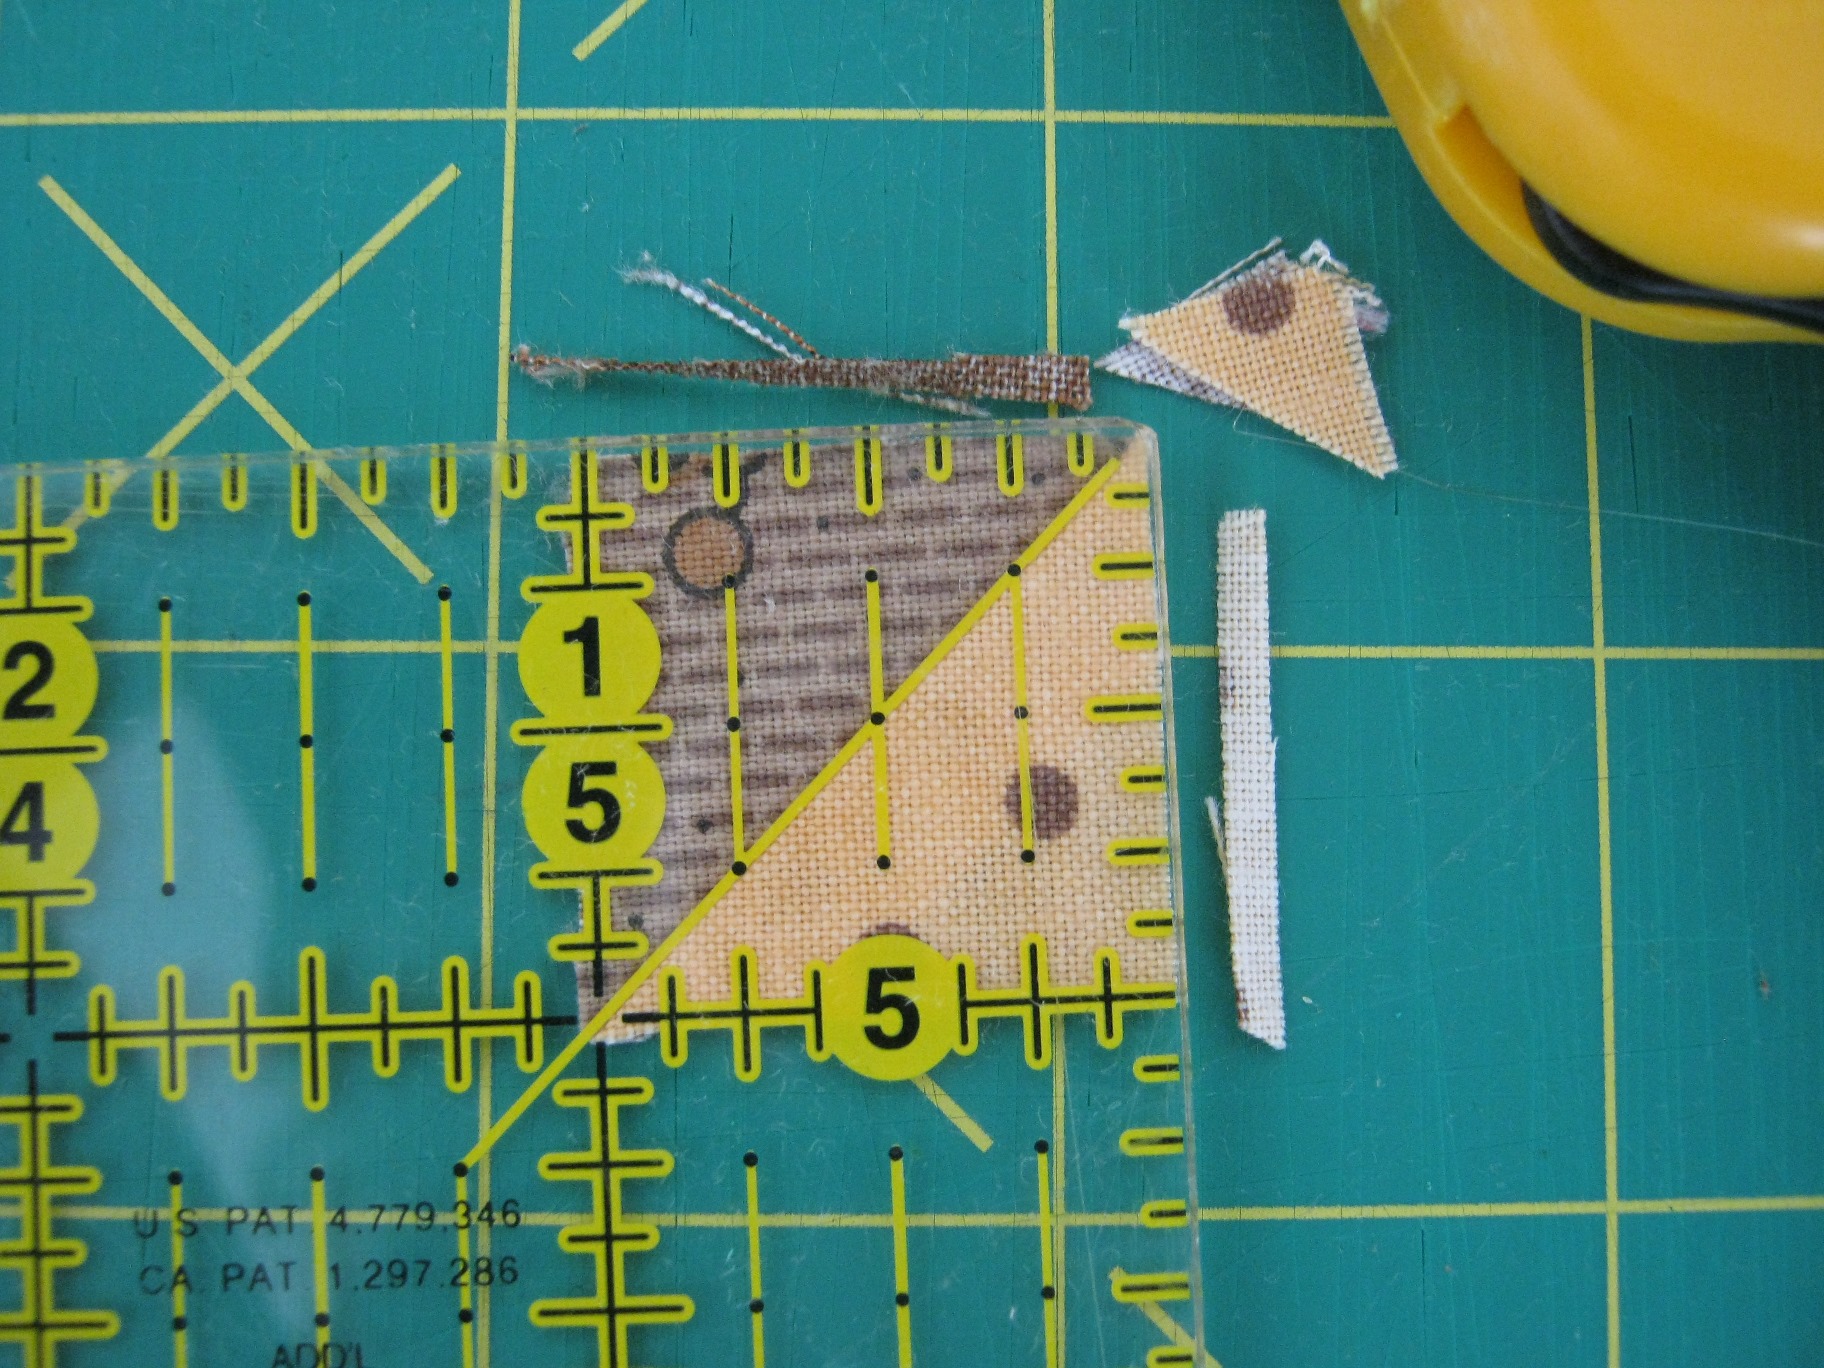
Once you’ve created a quilt block, squaring it is the next step. Squaring means trimming the tiny strips of excess fabric that extend past the desired size of the block. (Note: This step is only for pieced blocks. When you’re first starting out and you’re just sewing squares, they should already be square as you cut them that way.)
Don’t forget seam allowances here! In our example above, if we want a finished 6″ block, we want to make sure that our raw block size after piecing is exactly 6.5″.
It helps to have a square ruler that is at least the desired size of your unfinished block. (If you have a larger ruler, simply use painter’s tape to section off the extra part of the ruler and pretend that it’s the right size.) Place the center of the ruler in the center of the block, then use your rotary cutter to trim around the edges.
These are all great skills to have before you venture forth into your first quilt! Practice your cutting, stitching, pressing and trimming, and you’ll be well ahead of the curve before you even start.

I love doing patchwork. I want to know more about making quality quilts. UR I love doing patchwork and quilts. I want to know more and make the best.
Beginner patchwork