Braised chicken is an interesting topic, because while most people have heard of it or even sampled the finished product, few have actually done it. When it comes to food and cooking, it’s safe to say that braising chicken is a less frequently used method than baking or frying.
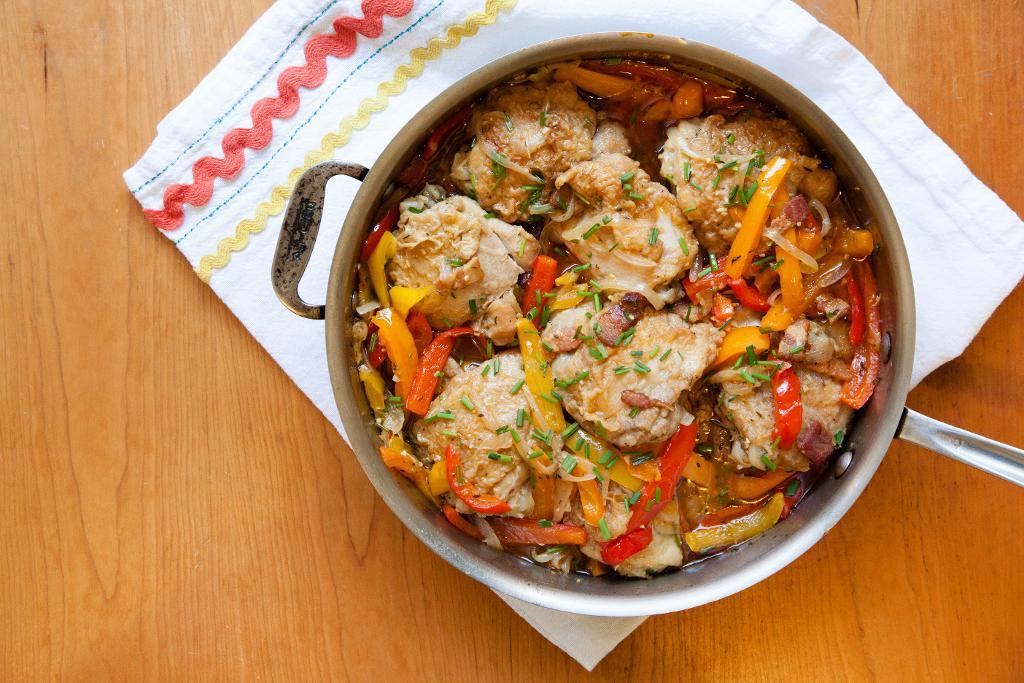
But really, braising chicken is a method worth exploring, because the process is simple and the results are mighty. It involves a simple three-part process: sear the chicken, deglaze the pan, then cook it slowly in a flavorful liquid. The result is moist, fork-tender cuts of chicken that make for a fantastic main dish. Add some vegetables and rice or homemade bread and you’ve got a meal.
The word “braise” comes from the French term for live coals. In days past, thrifty French home cooks would slowly simmer meat and vegetables with liquid in covered pots suspended over coals (the old time version of what we’d now call a Dutch oven). The moisture would stay inside, making even inexpensive and tough cuts of meat tender and very flavorful.
If you’re really ready to hone the art of braising, check out the course Secrets of Slow Cooking. But for now, we’ll talk about an easy way to get started with braising chicken.
Why braise chicken in modern times?
There are a few distinct advantages to braising. Here are just a few:
It’s easy. Although it is a three part process, it actually does not require much attention once you enter the slow cooking portion of the recipe. Plus, it can basically all be made in one pot.
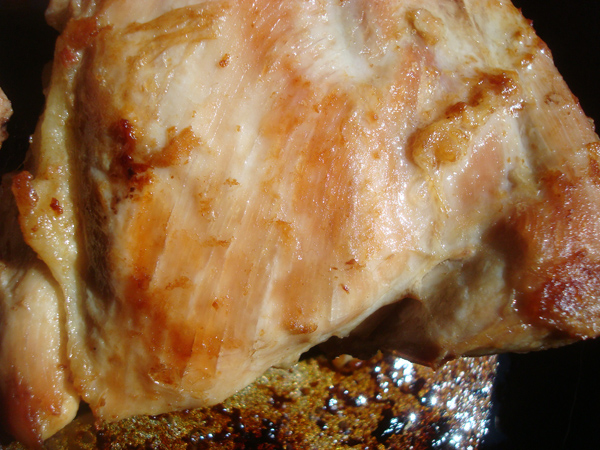
It makes meat tender. which is that the slow cooking makes the meat extremely tender, making it an economical way to soften what can be non-glamorous or tough cuts of meat. Tough cuts of meat would include any muscular part–so with a chicken, many will favor the thighs for braising.
It makes meat flavorful. The chicken will absorb the flavor of the liquid it’s braised in, which can make for a delicious flavor without having to make a separate sauce.
Finally, it’s a very forgiving method. To be honest, it’s tough to mess up braising. The slow cooking process in liquid keeps meat from drying out, even if you leave the pot on the burner or in the oven five minutes too long.
Necessary equipment: what do you need to braise chicken?
It will be far easier to make braised chicken if you use a pot which can be used to sear and cook–then, it is an easy one-pot meal with minimal cleanup. For this reason, many cooks favor a Dutch oven or oven-safe cast iron skillet. Some cooks will also use a slow cooker.
If you don’t have a dutch oven or skillet, you can still make braised chicken, but you might have to engage in a little more cleanup.
Braising liquids: What liquid do you use to braise?
You have a lot of freedom here. Chicken or vegetable stock, wine, beer, salt water, or even apple cider are just some examples. Consider what you’ll be serving the chicken with, and this may give a cue to what you’d like to use for your braising liquid.

Other notes
The skin: Must you remove it? Many recipes ask you to remove the fat and skin from the chicken. But what if you are the type of person who lives for that crispy skin? Many will remove the skin because during the slow cooking part of the recipe, it can become soft and flabby and generally unappetizing. But if you really ensure that the skin is extra-crisp during the searing process, it should be fine.
What about bones? You can use chicken with or without bones. Considering how tender the chicken becomes during the braising process, it’s easy to cut off of the bone after it’s done. Since it’s usually much cheaper to buy bone-in chicken, it might be a good choice for these recipes.
How should I store braised chicken? Store the meat in a bit of braising liquid or sauce to keep it from drying out.
Oven versus stovetop braising: Where should I braise?
Stovetop braised chicken is easy to monitor because you have an easy visual. Oven braising has the advantage of indirect heat. But either is forgiving. Here’s a basic recipe for both, and then some suggestions for additions and flavorings that can be added.
Stovetop braised chicken
Ingredients
- 4 chicken thighs
- salt and pepper
- olive oil
- white wine vinegar
- 1 to 1 1/2 cups braising liquid
Procedures
Step 1:
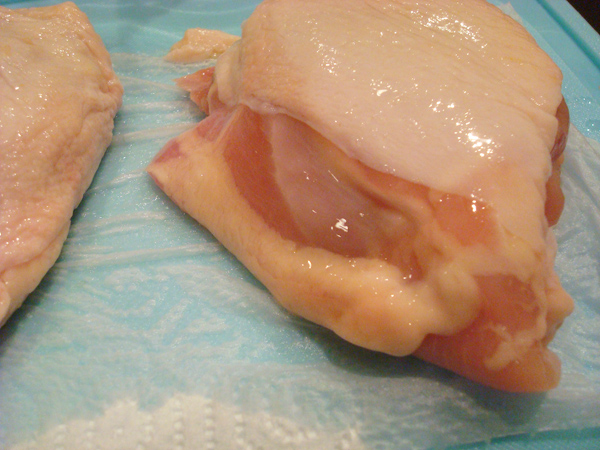
Wash the chicken thighs, and pat dry with paper towels. Season on the top with salt and pepper.
Step 2:
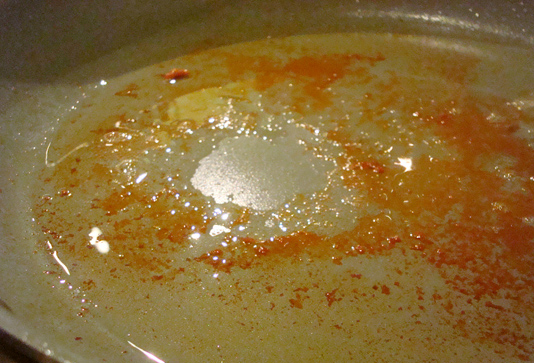
In a large skillet or Dutch oven, heat a small amount of oil until it begins to shimmer. Add the chicken, seasoned side down, to the skillet. Sear until golden, 3 to 5 minutes on medium high heat. Season the unseasoned side during this time.
Step 3:
Flip the chicken and repeat the searing on the other side. Remove from the pan but keep nearby. The meat will not be completely cooked–it will still be pink inside. Don’t worry, you’re not done.
Step 4:
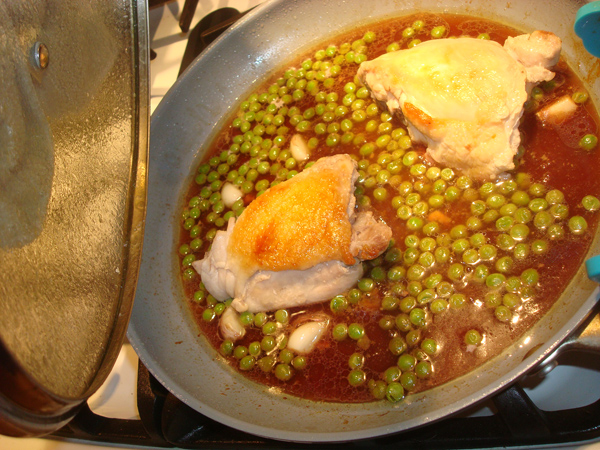
Now, it’s time to deglaze the pan. Have some trust: it’s not as fussy as it sounds, and it will add flavor to your finished product. Add about 3 tablespoons of white wine vinegar to the pan, and increase the heat to high. Scrape the bottom of the pan with a spatula to lift any brown pieces of meat that have stuck. If you want to pan fry some vegetables, this would be a great time to do it, right in the pan with the residual fat.
Step 5:
Reduce heat to low. Add the braising liquid you’ve chosen, and place the chicken gently on top. If you’ve added veggies or garlic or anything, just keep them right in the pan and add the liquid and chicken on top. Cover the pot and simmer for 35 to 45 minutes, flipping once during the process. If you find that the liquid is reducing too much, add a little more, but be careful when lifting the lid.
Step 6:
Check the chicken by cutting a small piece. Do the juices run clear? If so, the chicken is done. Transfer the chicken to another plate. It’s done, and now you’ll finish the sauce.
Step 7:
Skim any excess fat from the remaining liquid. Increase the heat to high and cook at a rapid boil until the sauce is thickened and reduced by half, about 10 minutes. Use this as a sauce on the chicken. Season with additional salt and pepper if desired.
Oven braised chicken
Ingredients: same as above
Procedures
Step 1:
Preheat oven to 350 degrees F (175 degrees C).
Step 2:
Follow steps 1 through 4 on the stovetop method above, using a cast iron or oven safe skillet. But then, instead of simmering over low heat, place the oven safe pan in the preheated oven.
Step 3:
Bake, uncovered, for 40 minutes or until juices run clear when you slice off a piece of chicken.
Step 4:
Remove the chicken from the pan, skim excess fat, and reduce the sauce on the stovetop, as specified in step 5 in the stovetop recipe. The sauce may have already reduced quite a bit during the oven period, though, so this may not even be necessary depending on how thick you like your sauce.
Now that you’ve mastered the basic method, here are a few flavor variations to consider.
Each works with the same quantities of chicken listed in the recipe above.
Mexican braised chicken
- 3 cloves garlic, minced
- 1 tablespoon ground pepper
- 1 jalapeno pepper, diced (with seeds if you want spicy)
- 1 tablespoon taco seasoning
- 1 28-ounce can diced tomatoes, in juice
- Hot sauce, to taste
Follow steps 1 through 3 on the stovetop method listed above. When you remove the chicken to deglaze the pan, add the garlic and sauté until lightly browned. Add the pepper, jalapeño, taco seasoning, and give it a stir. Place the chicken back in the pot, and add the tomatoes in juice as your braising liquid. Stir in some hot sauce if you’re interested. Follow the remaining stovetop or oven cooking steps.
Balsamic braised chicken
- 1/2 cup balsamic vinegar
- 3/4 cup water
- 1 teaspoon dried basil
- 1 teaspoon dried rosemary
Follow steps 1 through 4 on the stovetop method listed above. Place the chicken back in the pot, and the balsamic vinegar and water as your braising liquid. Season with the basil and rosemary. Follow the remaining stovetop or oven cooking steps.
Braised paprika chicken
- 2 tablespoons smoked paprika, divided
Following the stovetop instructions above, season the chicken with salt, pepper and 1/2 tablespoon of the paprika before searing. Add 1/2 tablespoon of paprika to the second side.
Continue following the stovetop instructions with a braising liquid of your choice (red wine, dark beer, or chicken broth all work well with the paprika). Season with the remaining paprika near the end of the simmering time. This variation tastes great with onions, garlic, and potatoes.
Share tips, start a discussion or ask other students a question. If you have a question for an expert, please click here.
Already a member? Sign in
No Responses to “Two Simple Ways to Braise Chicken”