If you’re looking for stitches that make your crochet pop, post stitches should be your go-to. They’re the secret trick found in crochet cables, ribbing, basketweave stitching and so much more.
Typically, crocheters work stitches through the top of the stitch. (AKA that little V on the top edge of the fabric where you insert your hook.) The bottom part of the stitch — that actually makes up the fabric — is called a post. So when you’re working post stitches, you work around the post instead of into the top of the stitch, inserting your hook into the space between the posts of the previous row.
Post stitches can be made working into the front or back of your stitch to create different effects, and can also be used with different stitches (think single, double, triple, etc.). To keep it simple, we’re demoing with double crochet stitches, but the same method can work for any stitch.
Front Post Stitch
Level: Easy
The front post double crochet creates a stitch that’s raised up from the fabric.
Instructions
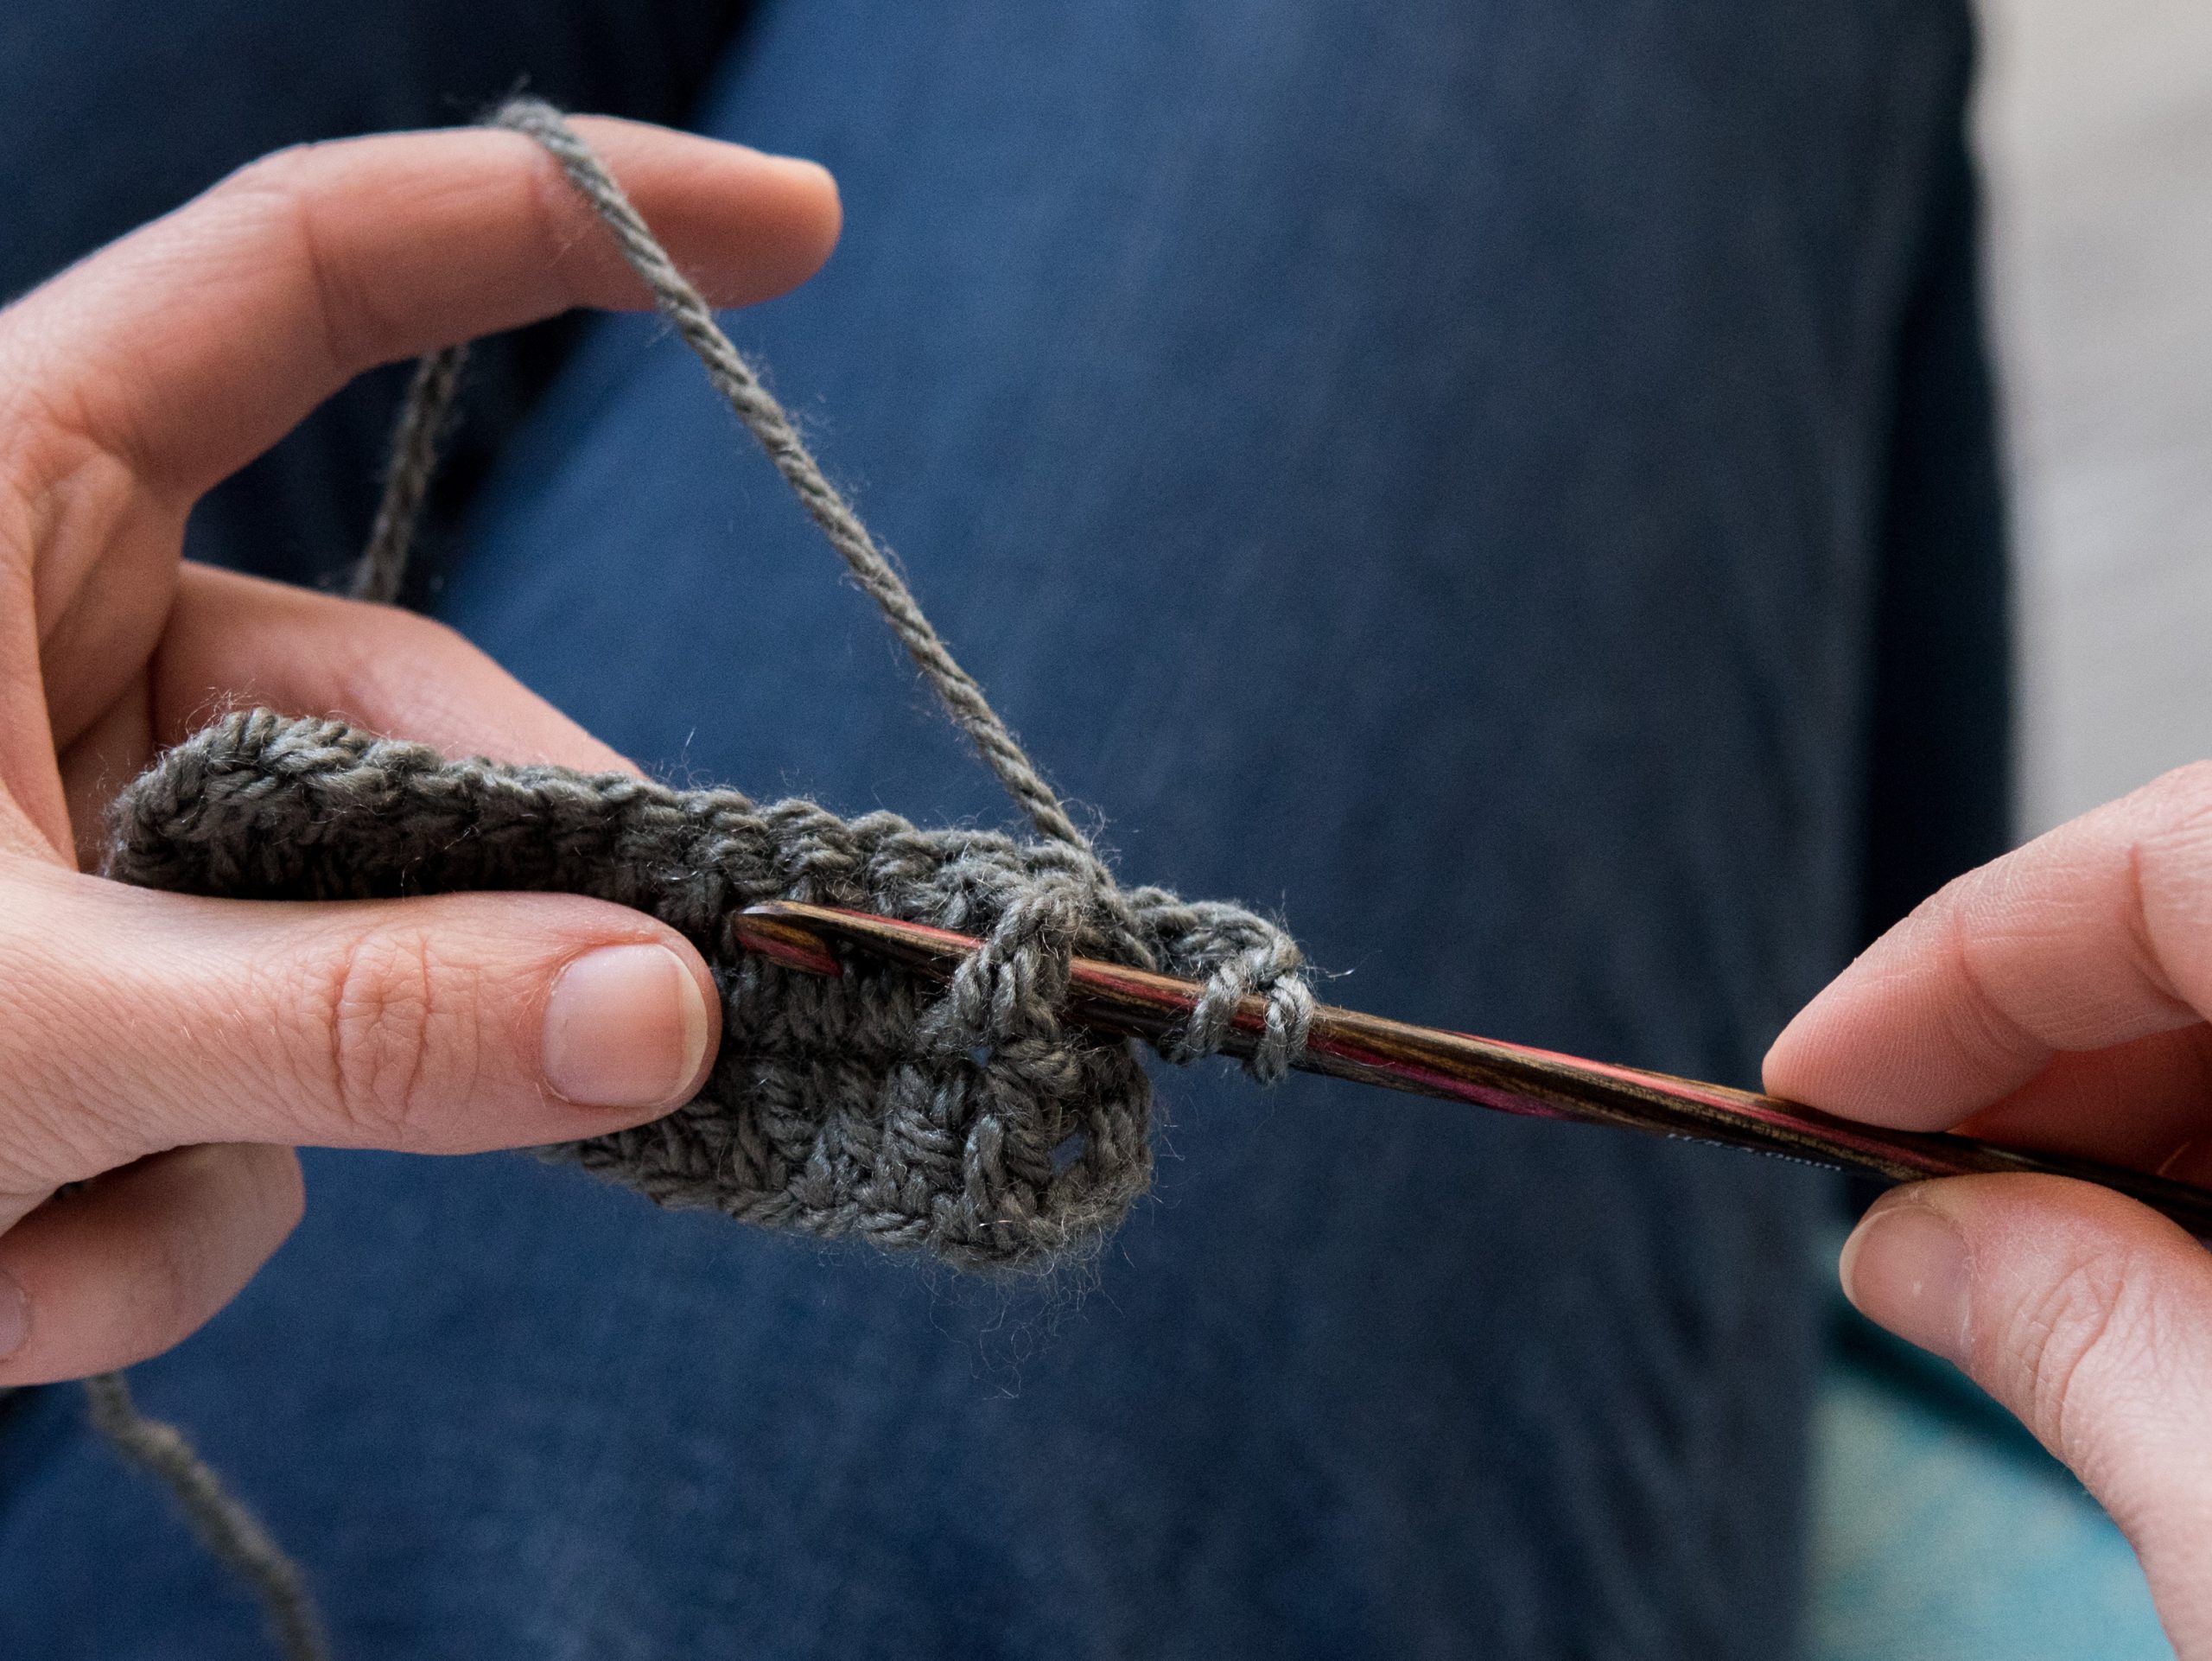
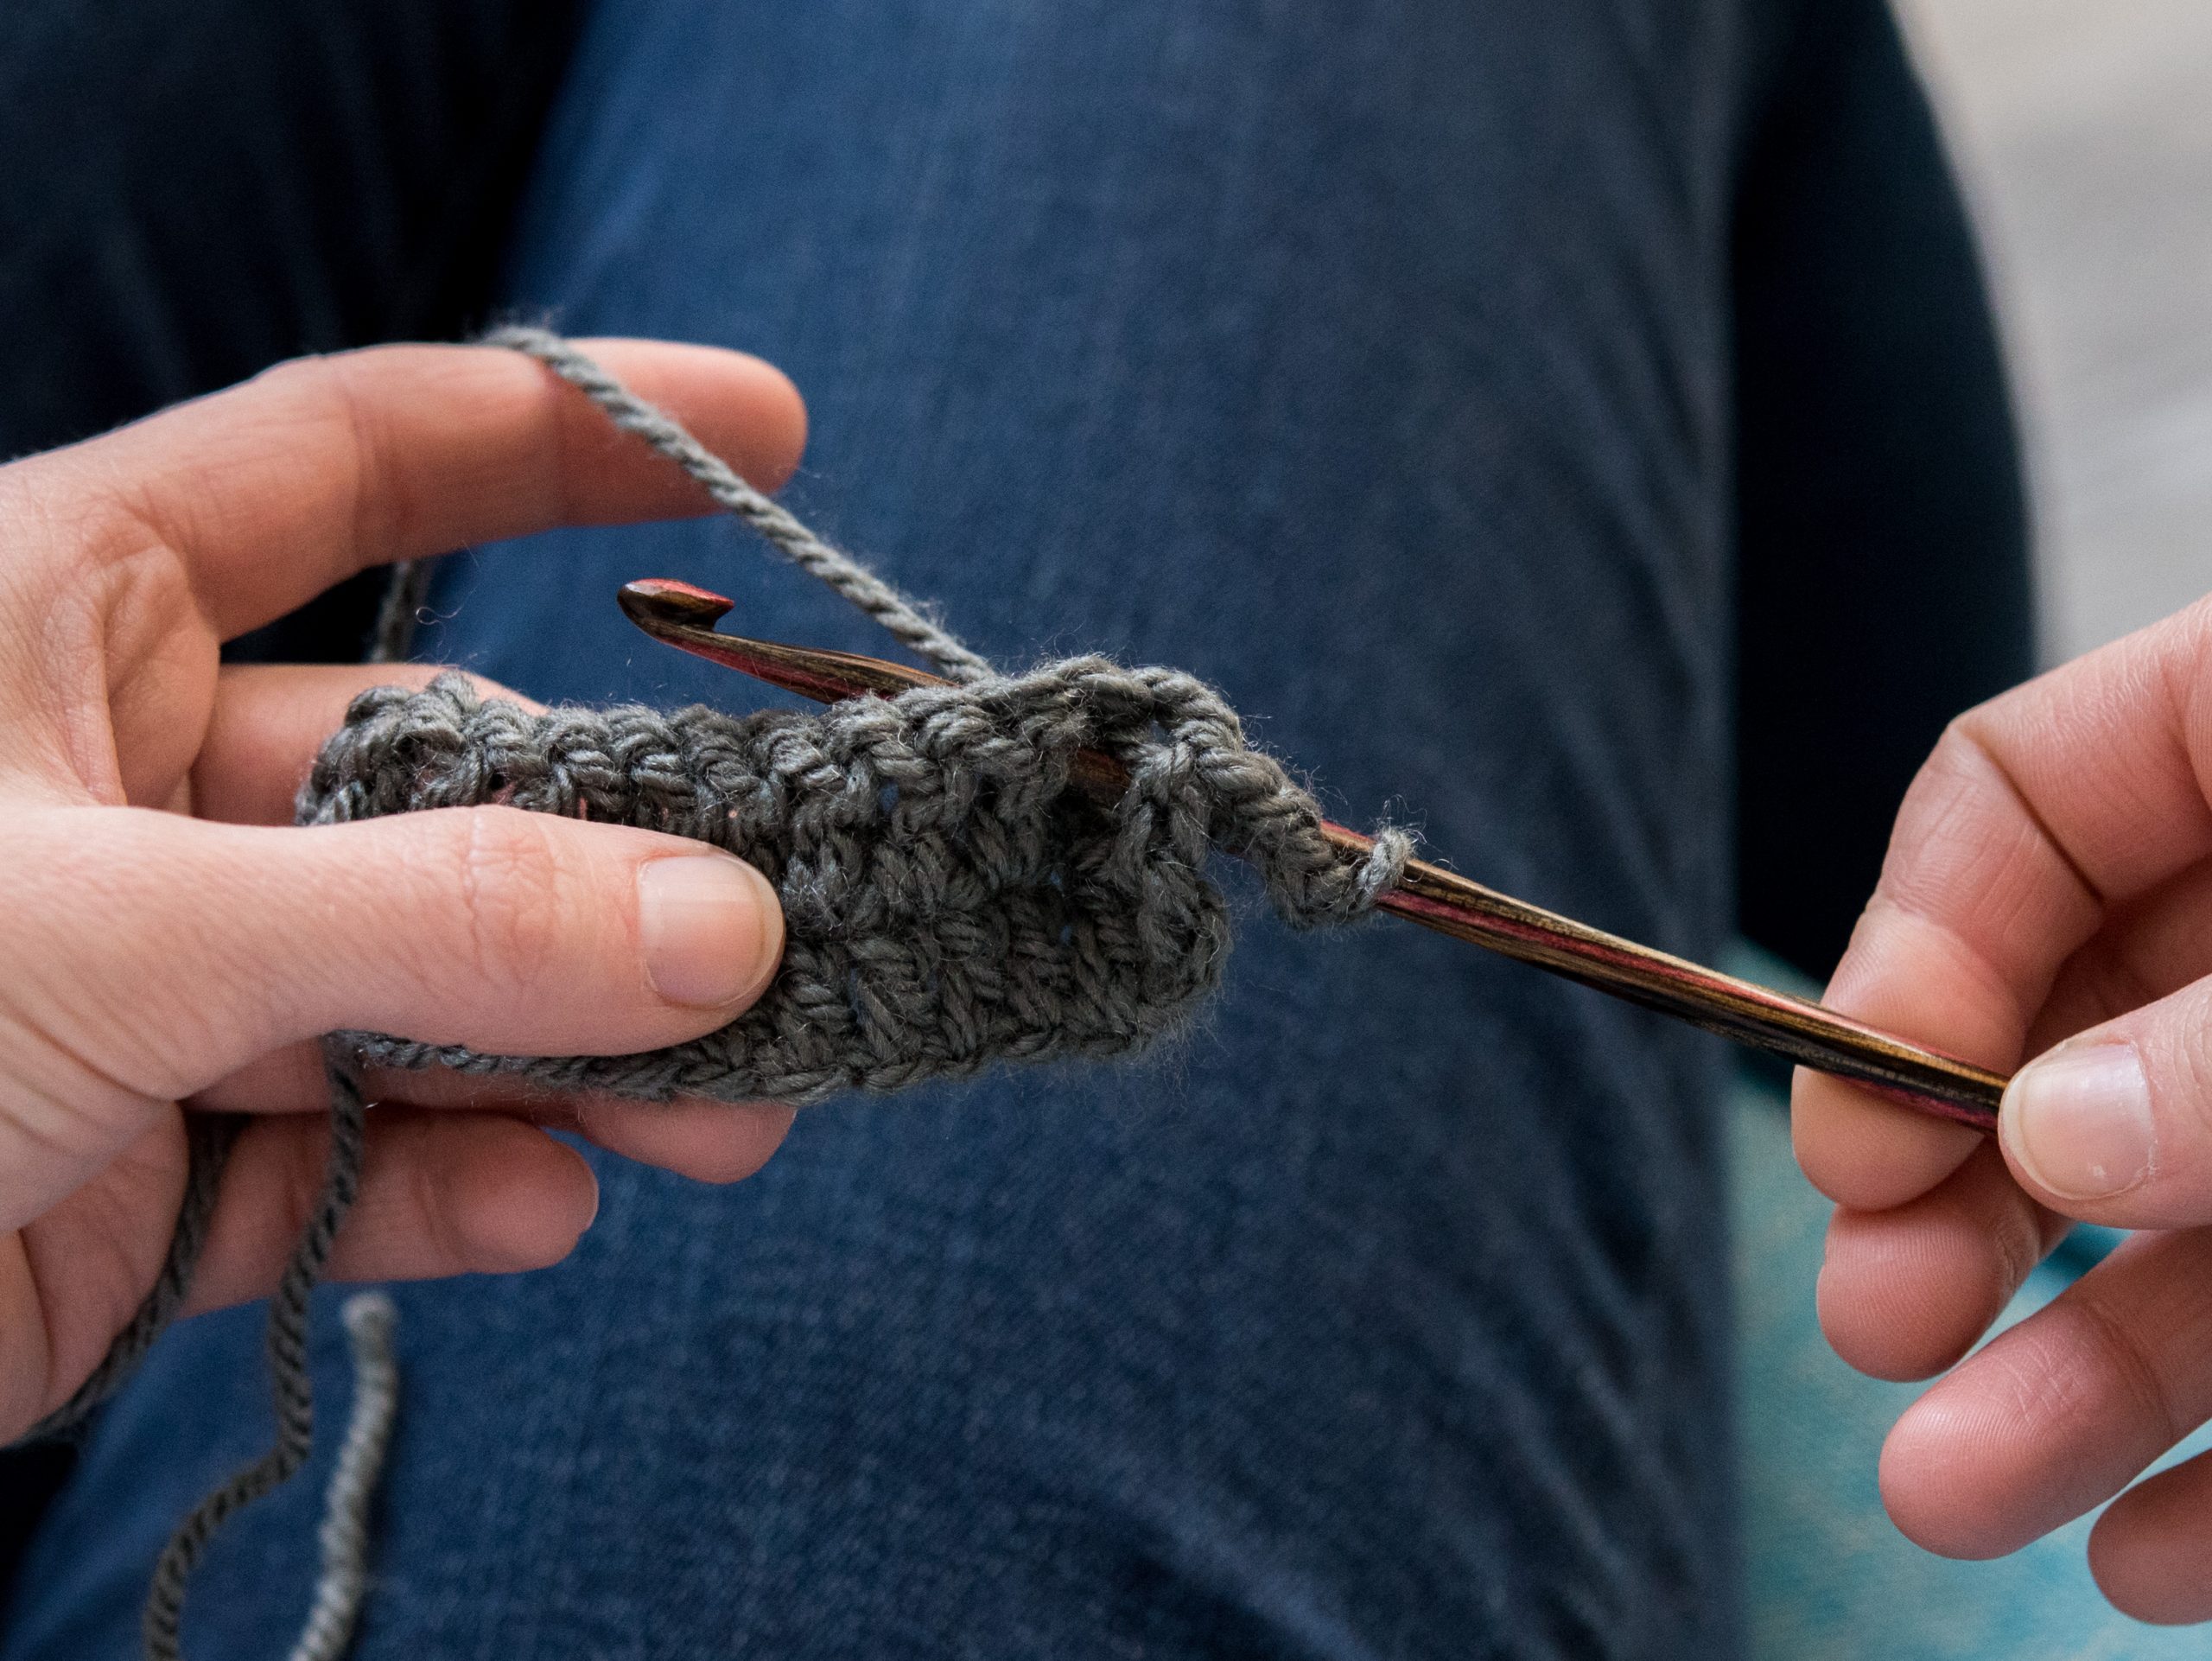
1. Yarn over and insert your hook from the front of the work. Insert the hook from right to left around the post of the next stitch.
2. Yarn over and pull a loop. You now have three loops on your hook.
3. Yarn over and pull through the first two loops.
4. Yarn over again and pull through the remaining two loops.
What you’re basically doing is inserting your hook from front to back, then back to front (going around the post). You then work the stitch as usual.
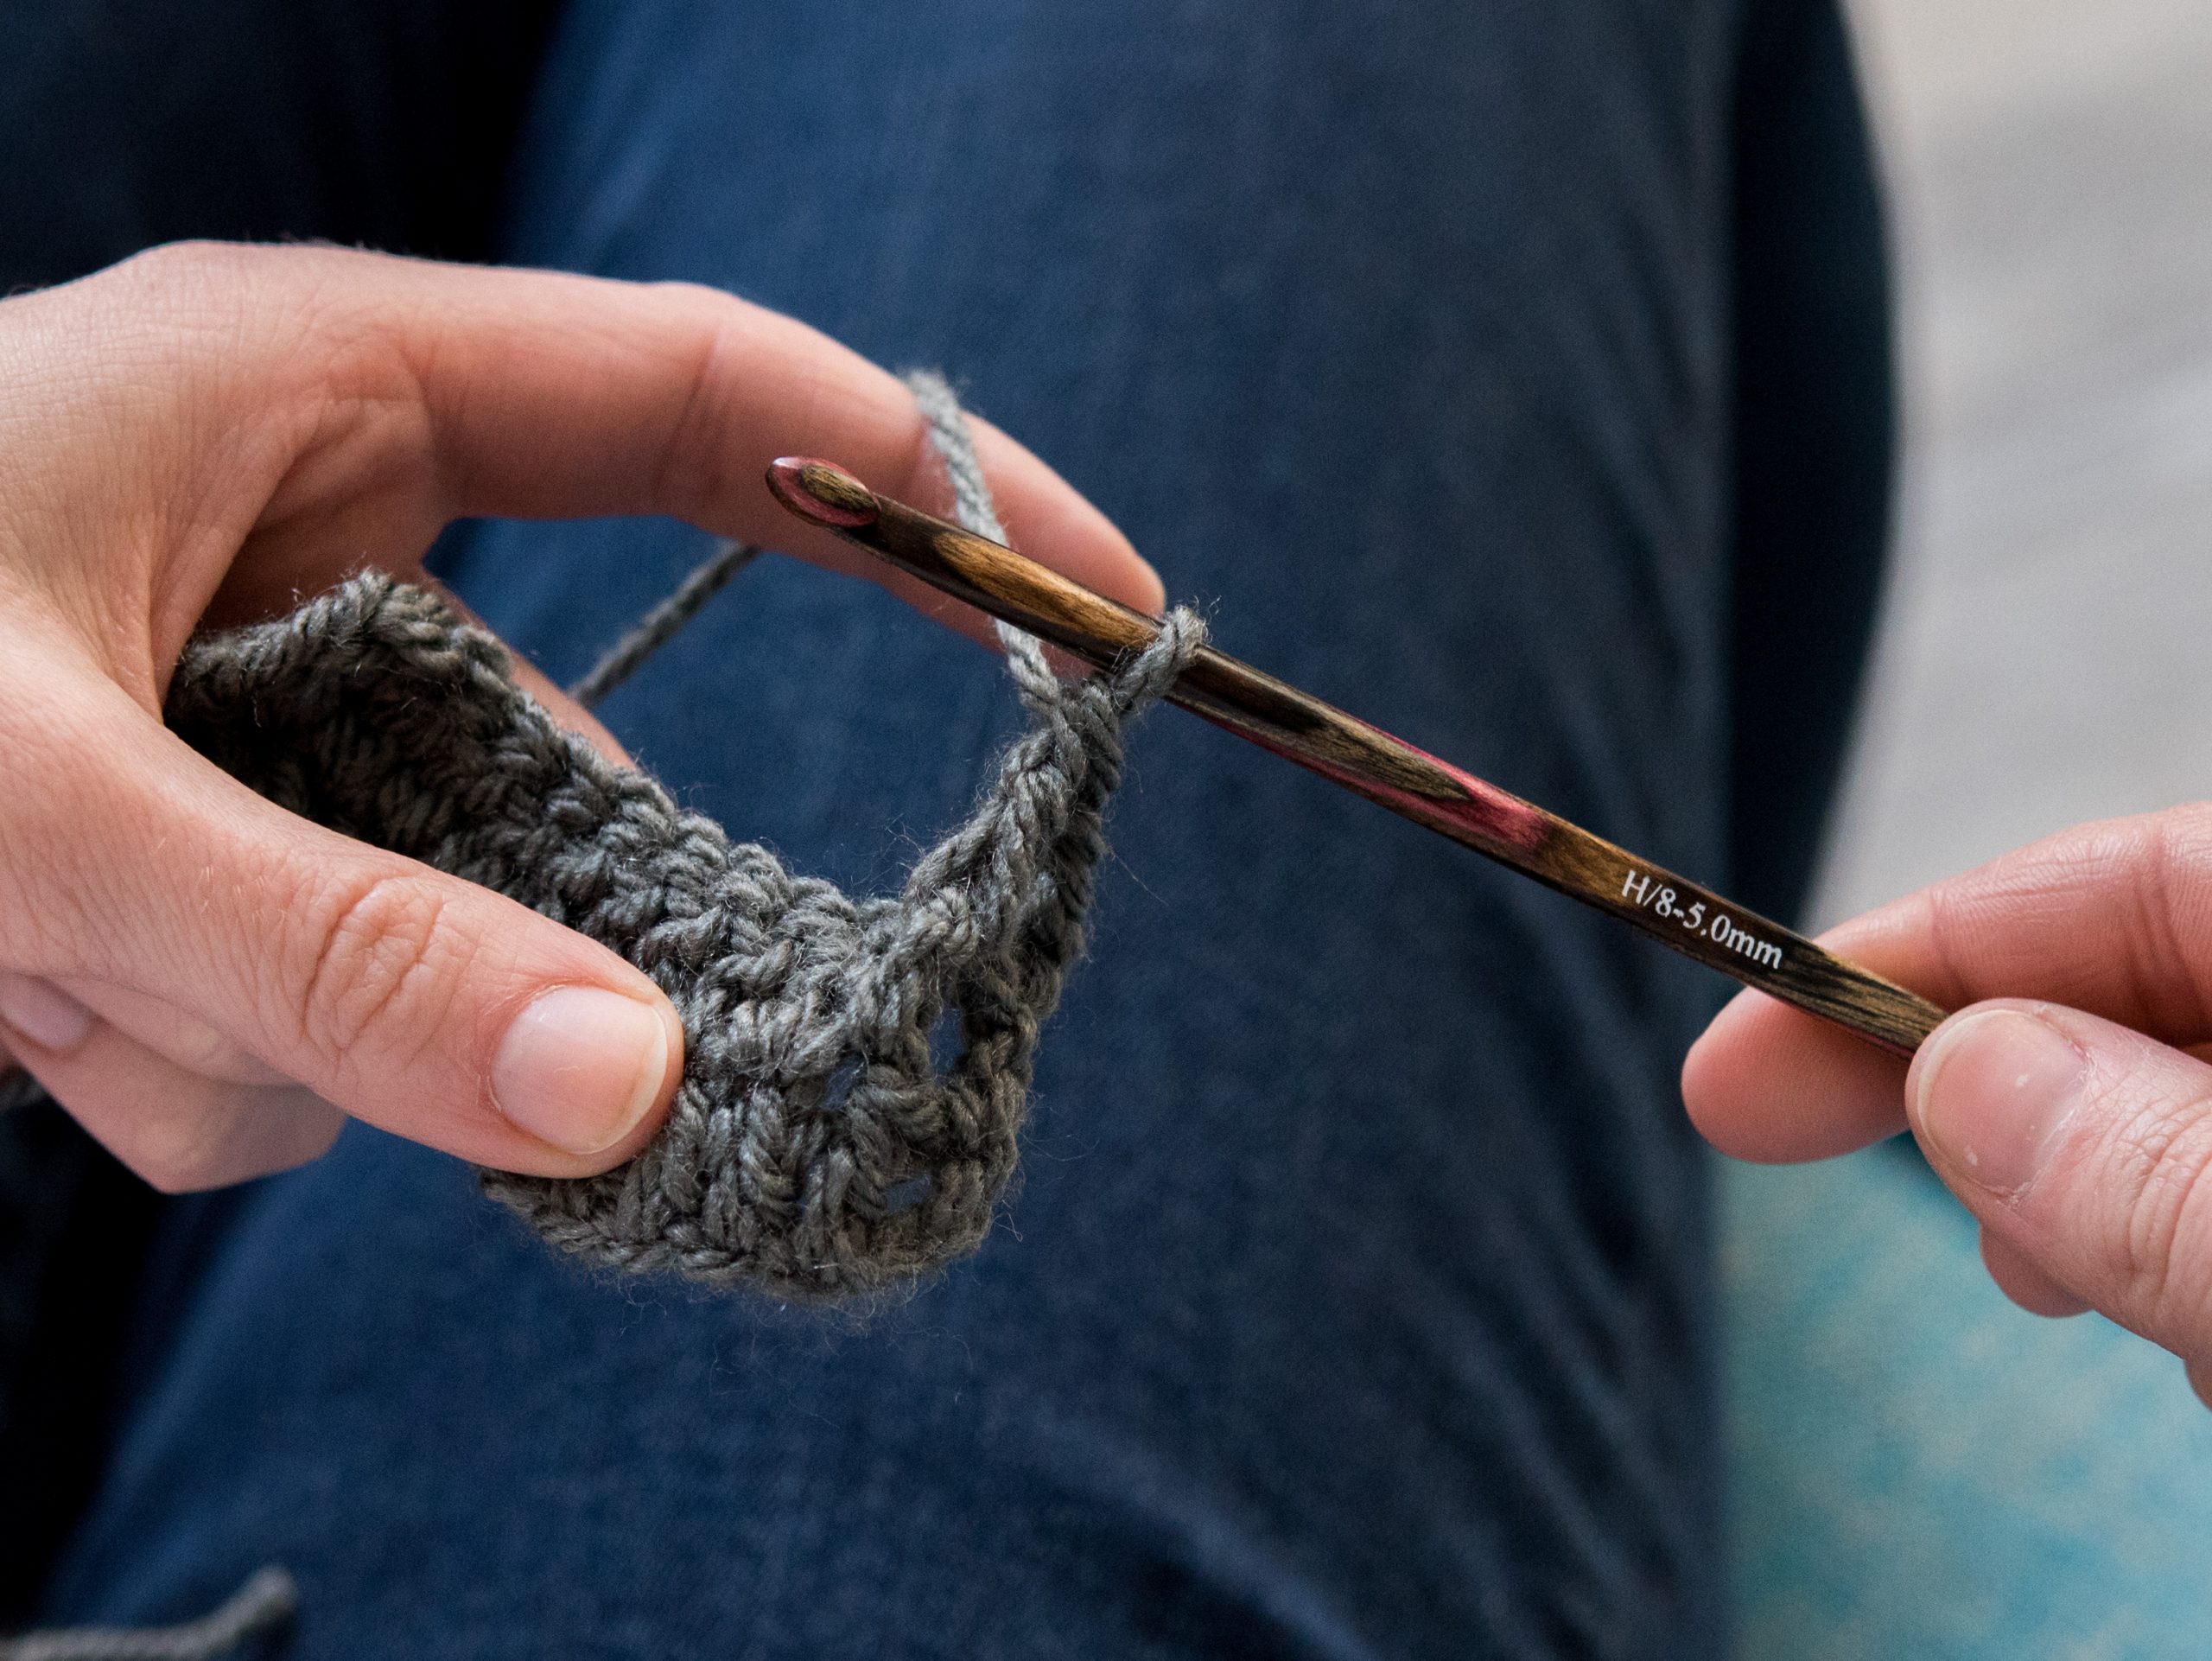
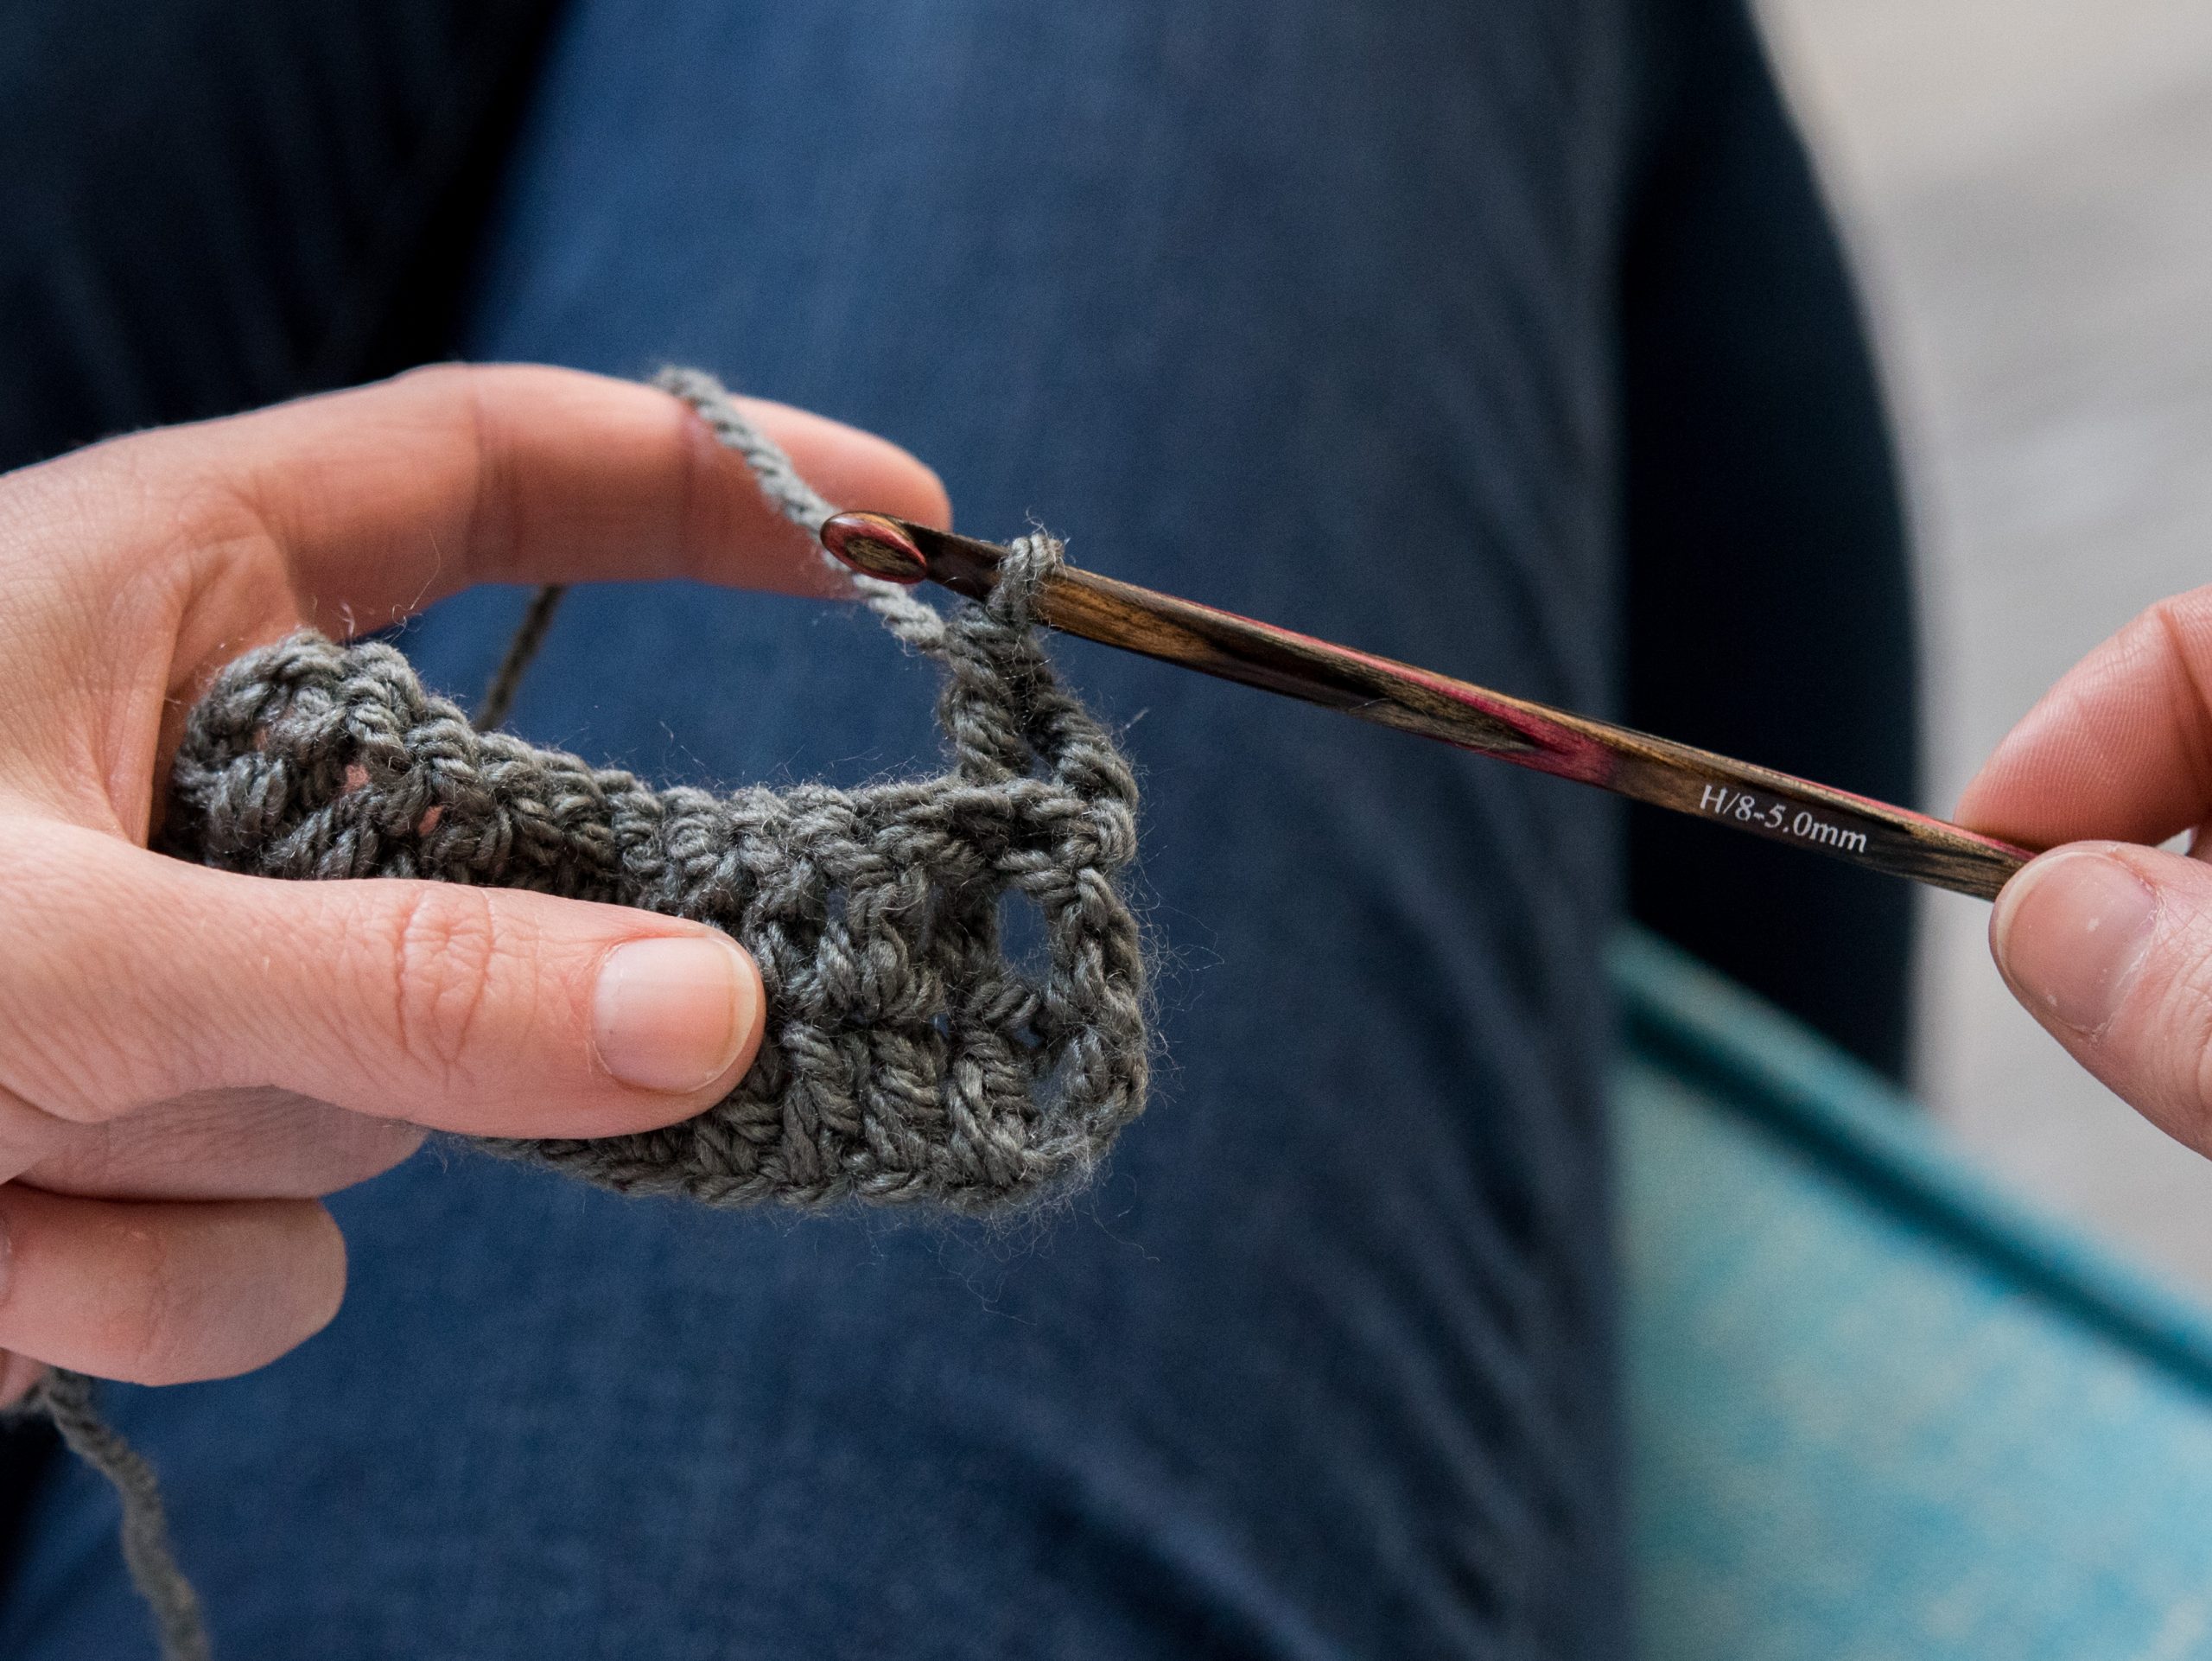
On the rest of the rows, you may end up working a post stitch around a previous post stitch. It sounds confusing, but it’s actually a lot easier to see the posts once they’re raised.
Back Post Stitch
Level: Easy
The back post double crochet creates a stitch that’s raised on the wrong side of the fabric.
Instructions
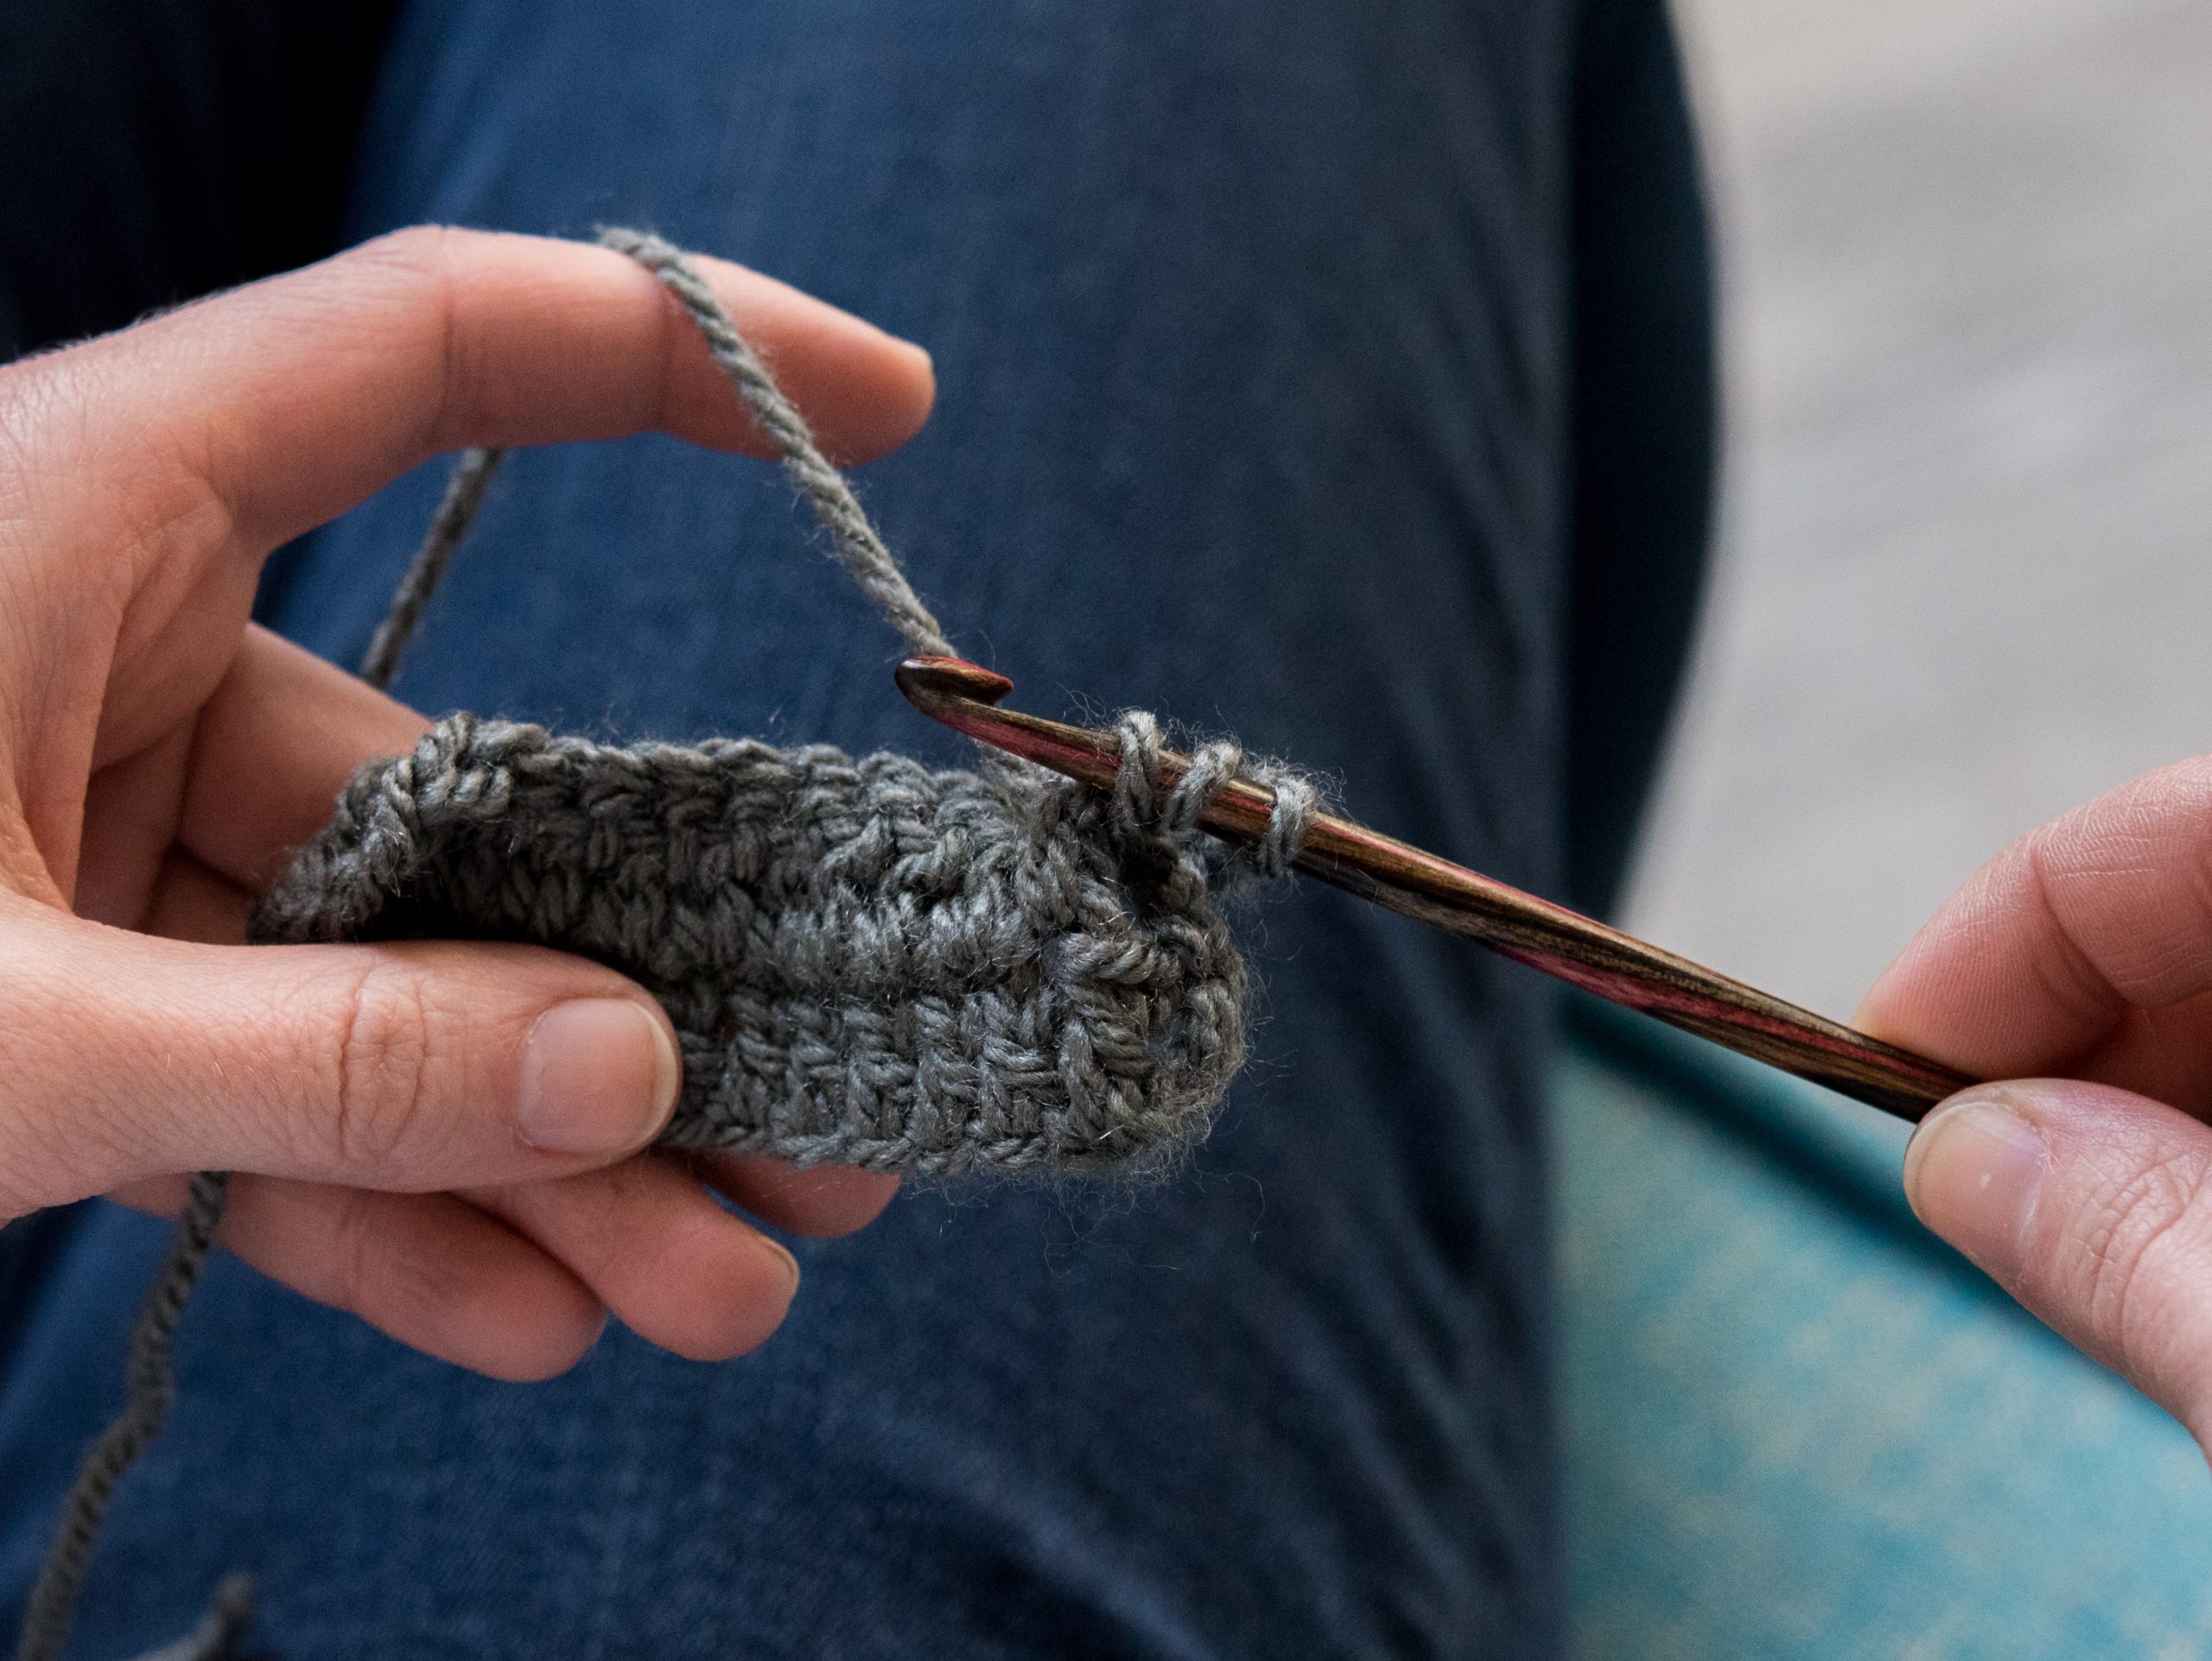
1. Yarn over and insert your hook from the back of the work. Insert the hook from right to left around the post of the next stitch.
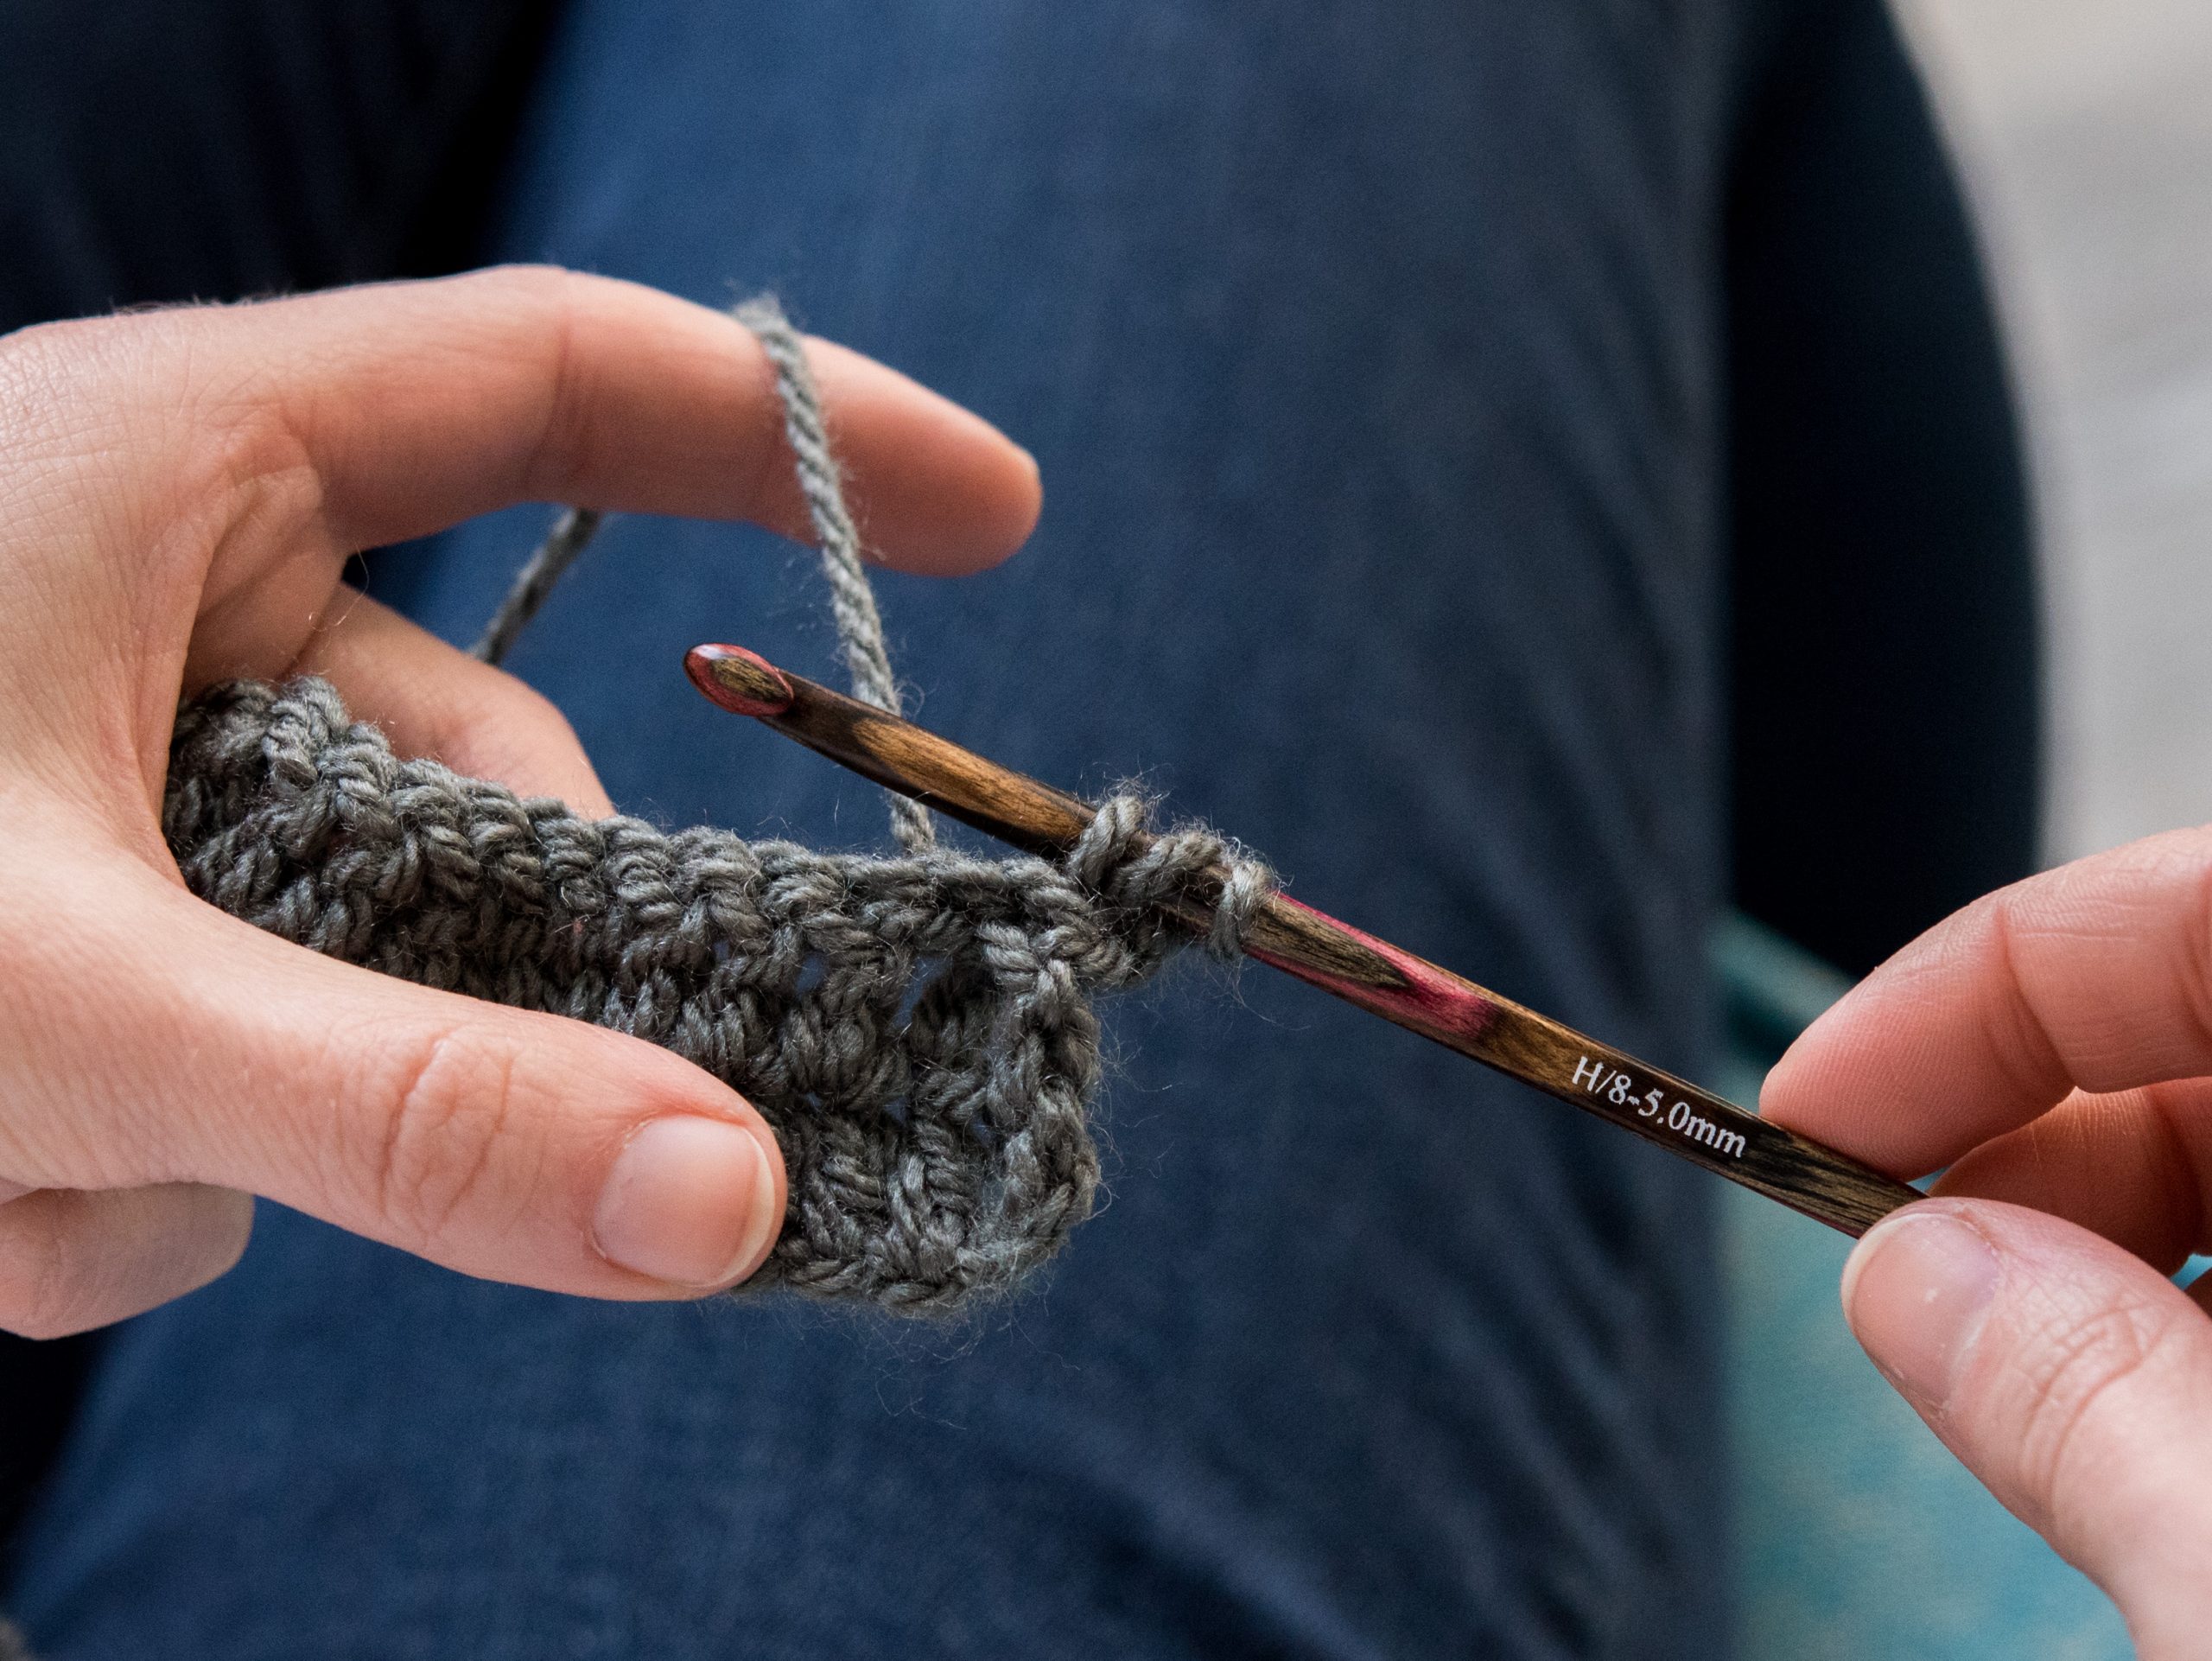
2. Yarn over and pull a loop through. There are three loops on your hook now.
3. Yarn over and pull your first two loops through.
4. Yarn over again and pull the other two loops through.
For this post stitch, you’re inserting your hook from back to front, then to the back (around the post) and completing the stitch.
Put Those Stitches to Use
Now that you’ve got post stitches in your back pocket, try them in these gorgeous stitch patterns.
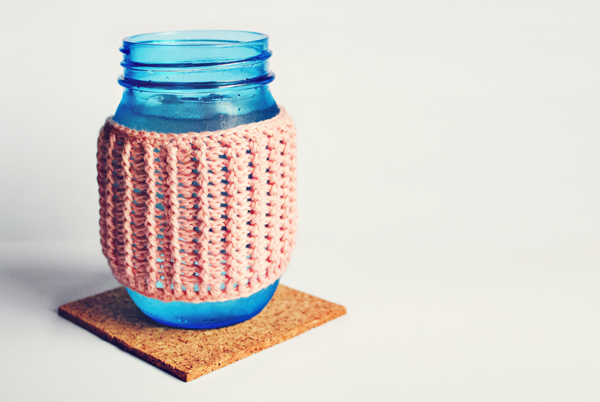
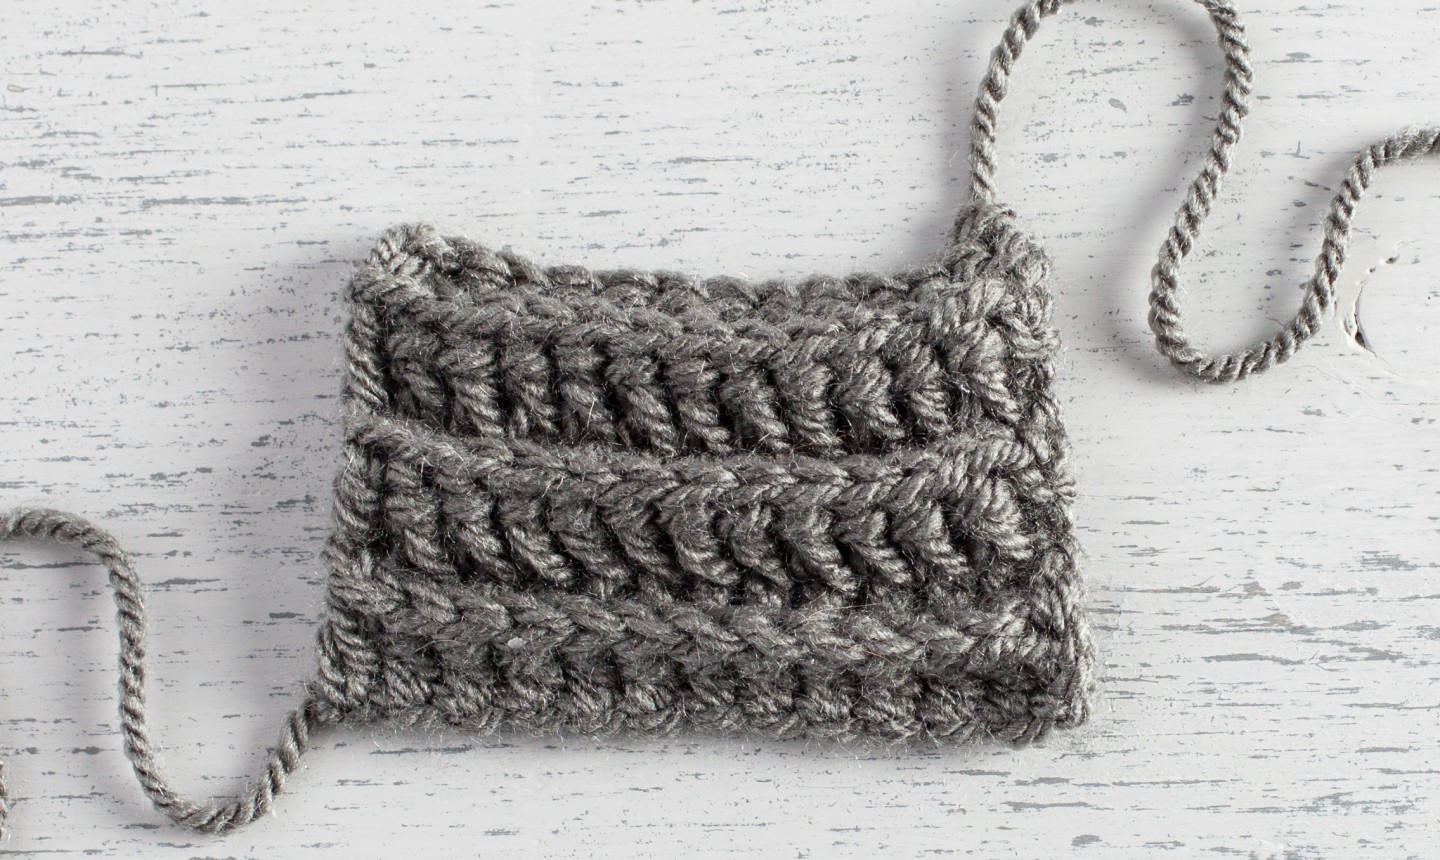
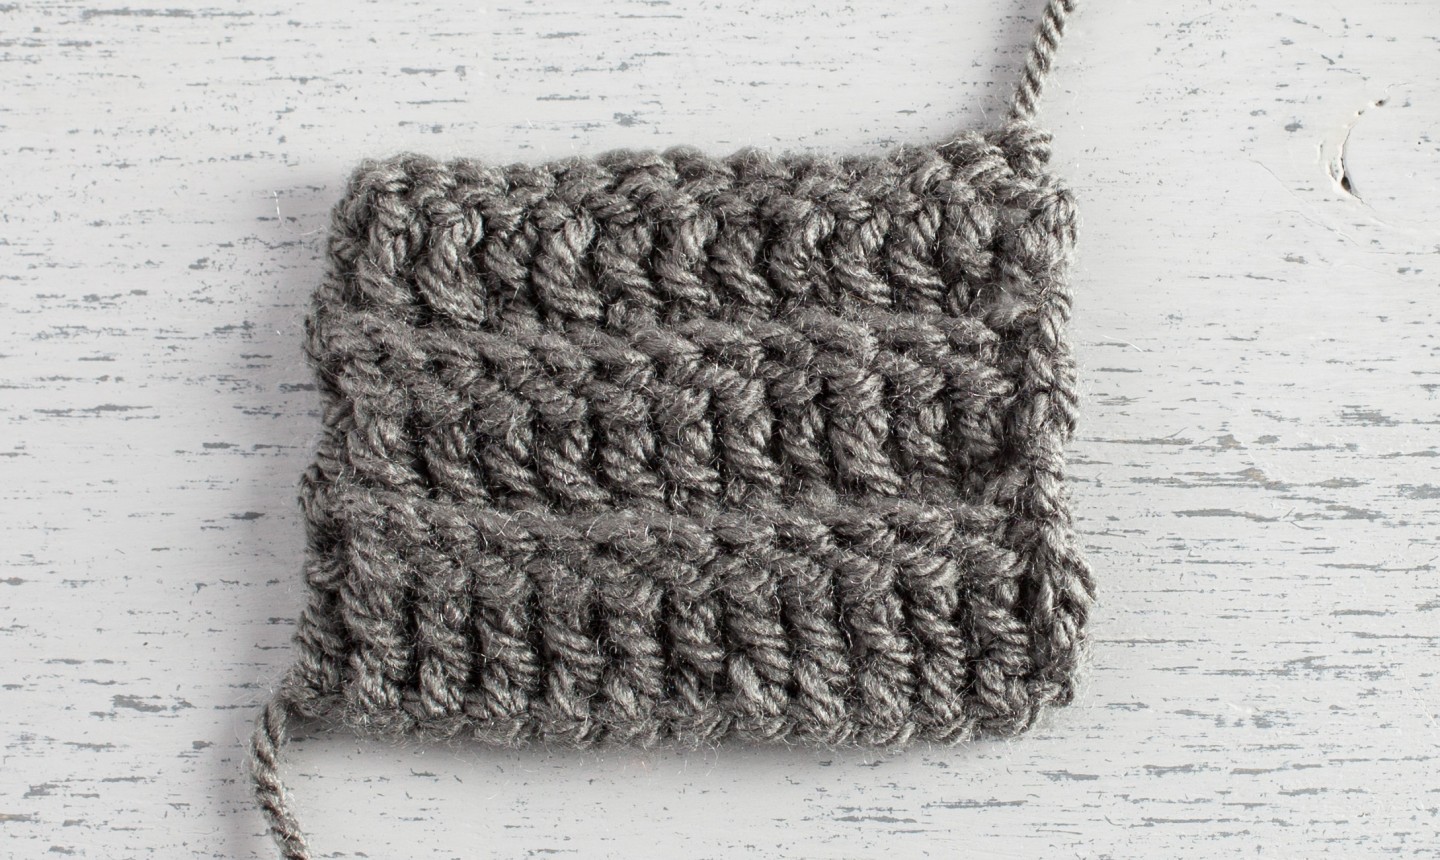
You can create a ribbing by alternating the front post and back post stitches. The textured effect is perfect for hat brims, glove edges, socks, cowls and more. The mason jar cozy in the image above was created with alternating front and back post double crochet stitches.
Stitch Crochet Cables
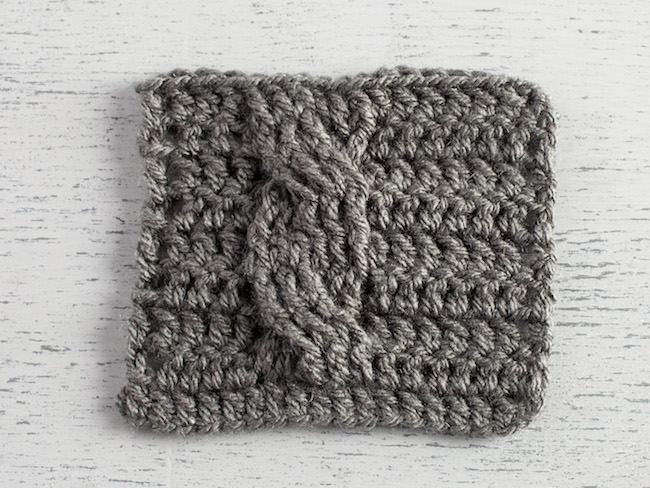
Knitting isn’t the only way to create that timeless cabled effect. You can use post stitches in all kinds of ways to get cables into your crochet projects.
Try a Basketweave Stitch
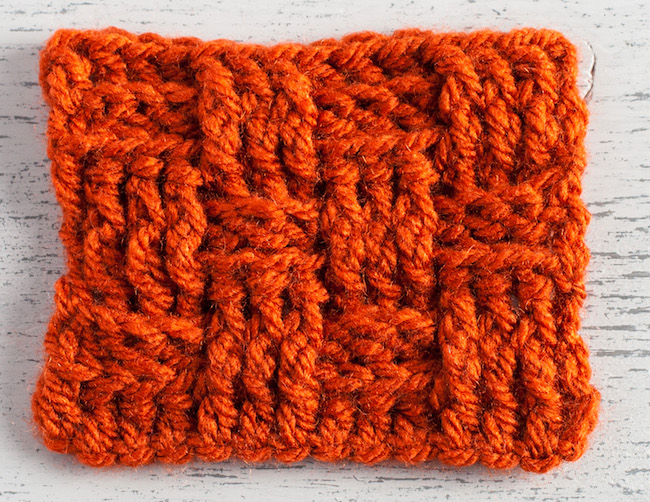
The basketweave stitch alternates groups of front and back post stitches to create an intricate woven design. Use it on blankets, handbags and scarves, or any time you want to add gorgeous texture that goes on for days.
Love it
Popcorn stitch
I have used backpost double crochet(us terms) for a border around a baby blanket 1 row of each 4 colours used and it is curling . What can I do please
I’m trying to learn how to Front Post Stitch .