You’ve gotta love a quilt that takes its name from a hairstyle. Like the fancy ‘do, French braid quilts and quilt blocks give the illusion of woven strands, and they’re sewn from fabric strips in prints or solids. And while they look intricate, they’re actually a cinch to piece — even if you’re a beginner.
There are two different ways to make this quilt (which is also sometimes called a friendship braid). The first uses a regular ruler, while the other uses a binding tool that cuts down on wasted fabric. Below is a tutorial for both methods, so you can choose the one you love most.
Method 1: The Regular Ruler
Level: Easy
What You Need
Pro Tip: You’ll be pressing the quilt block in between each strip, so there’s a lot of starting and stopping involved. Consider chain piecing three or four French braid rows at the same time, so you don’t have to keep moving fabric on or off the machine.
Instructions
1. Cut Your Fabric
Cut your fabric into strips 2½” wide. (You can use precut 2½” wide strips to speed this along.) Cut the strips into 7″ long pieces, so you have six strips in each color.
Pro Tip: If you’d like a wider block, you can cut your strips to 10″, giving you four strips of each color.
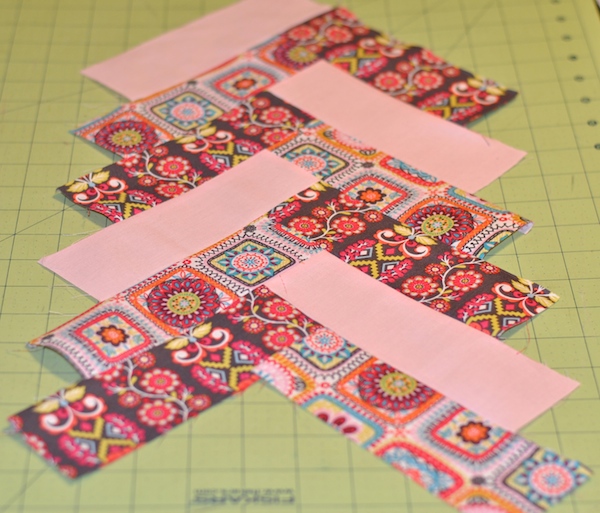
2. Lay ‘Em Out
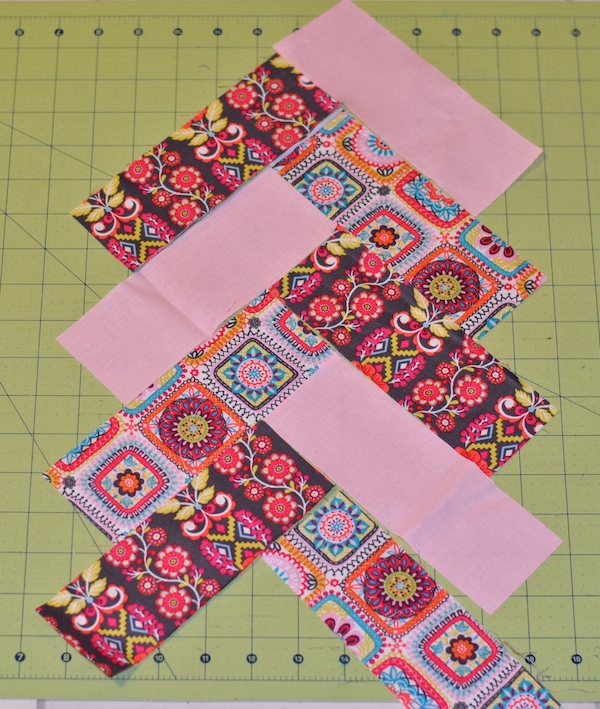
Lay out the strips as pictured above, alternating so no two strips of the same fabric touch. You can use as many strips as you’d like, depending on the height of your quilt.
3. Stitch a Seam
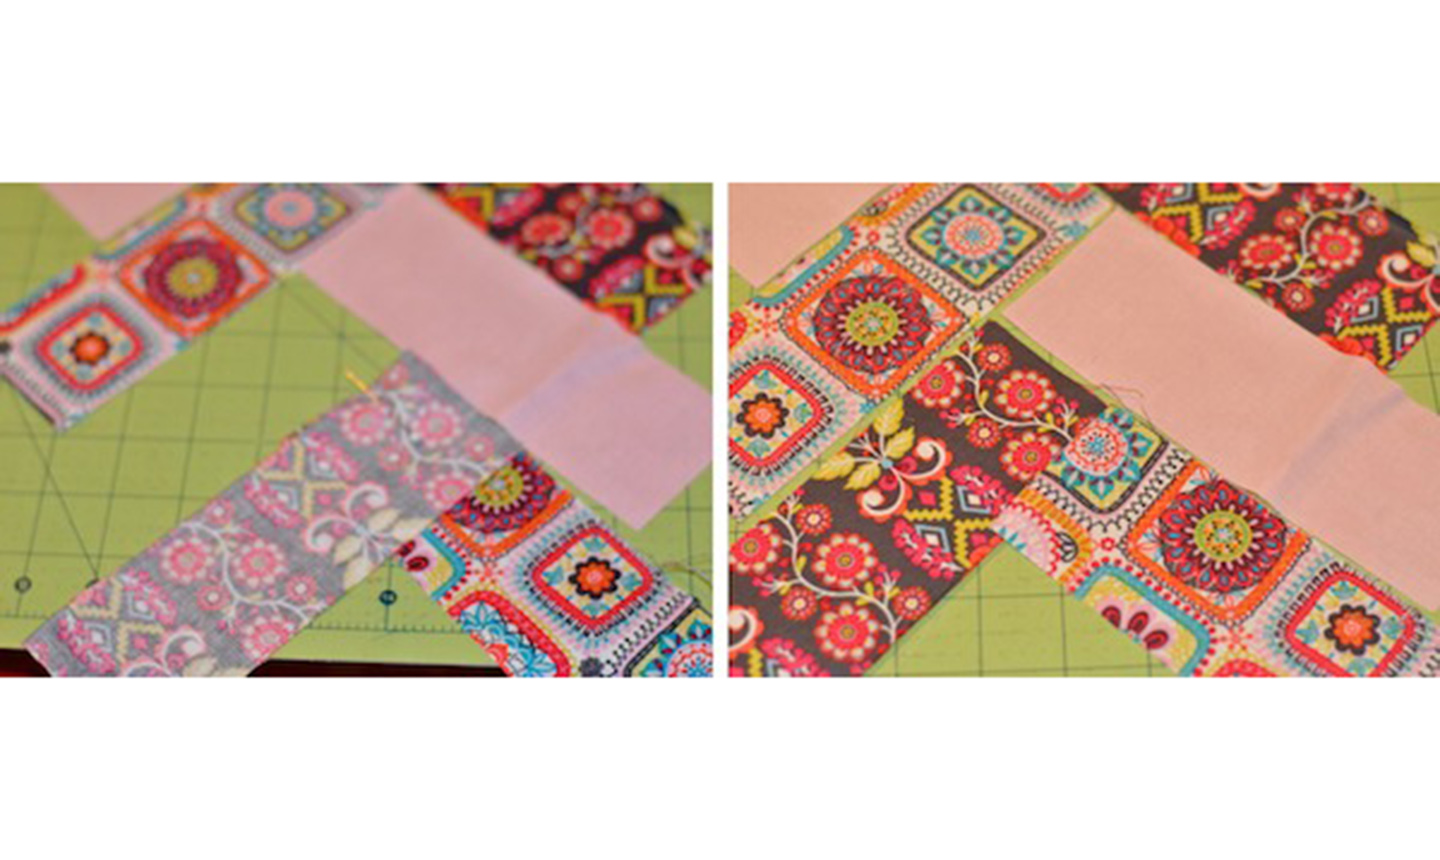
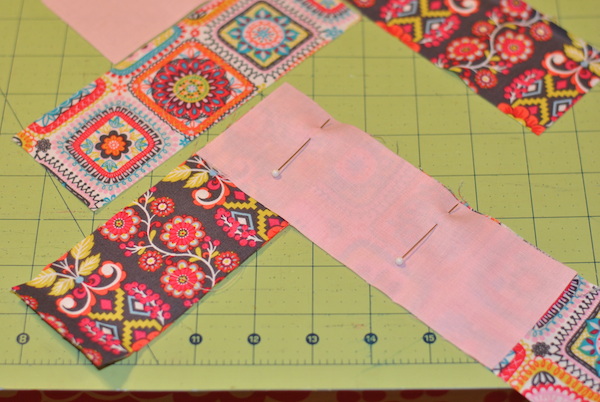
Starting at the bottom of the block, flip the bottom left fabric over the tip of the bottom right fabric. Pin in place and stitch where the strips intersect. Press the seam toward the bottom of the block, then flip the strips back to their original position.
4. Join Another Strip
Choose the strip that’s just above the seam you just sewed. Flip the strip down over top of the ones you just joined. Pin the strip in place and stitch ¼” from the edge. Press the seam toward the bottom of the block.
 Continue working your way to the top of the block, turning strips down and stitching them as you did in the steps above.
5. Trim
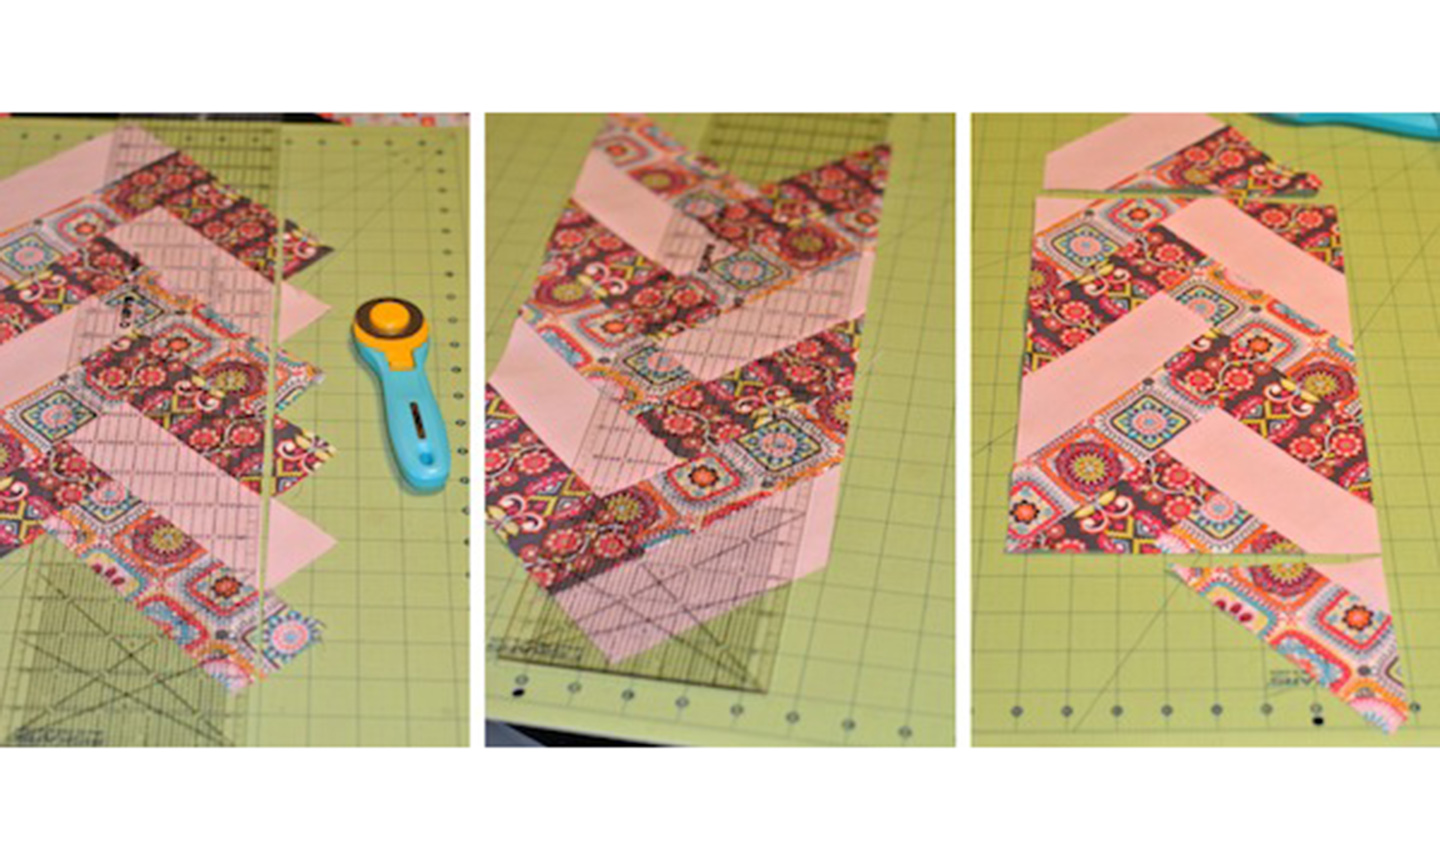
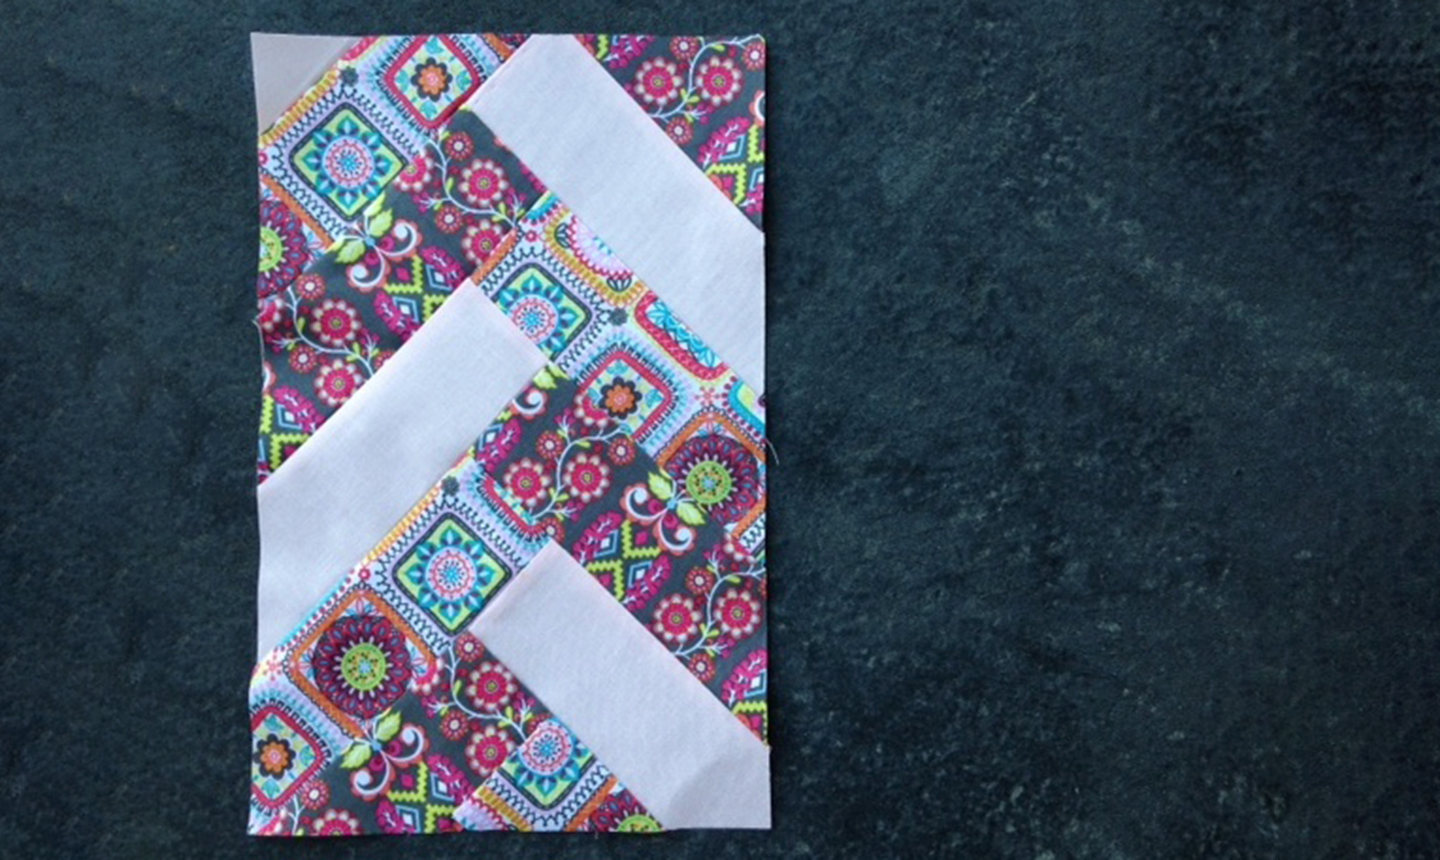
Once you’ve joined all the strips, line up the ruler on the right side and cut off all of the points to form a straight edge. Flip the block and repeat on the other side. Square up the top and bottom of the block to form a rectangle. You’re done!
Method 2: The Binding Tool
Level: Easy
What You Need
Instructions
1. Measure Up
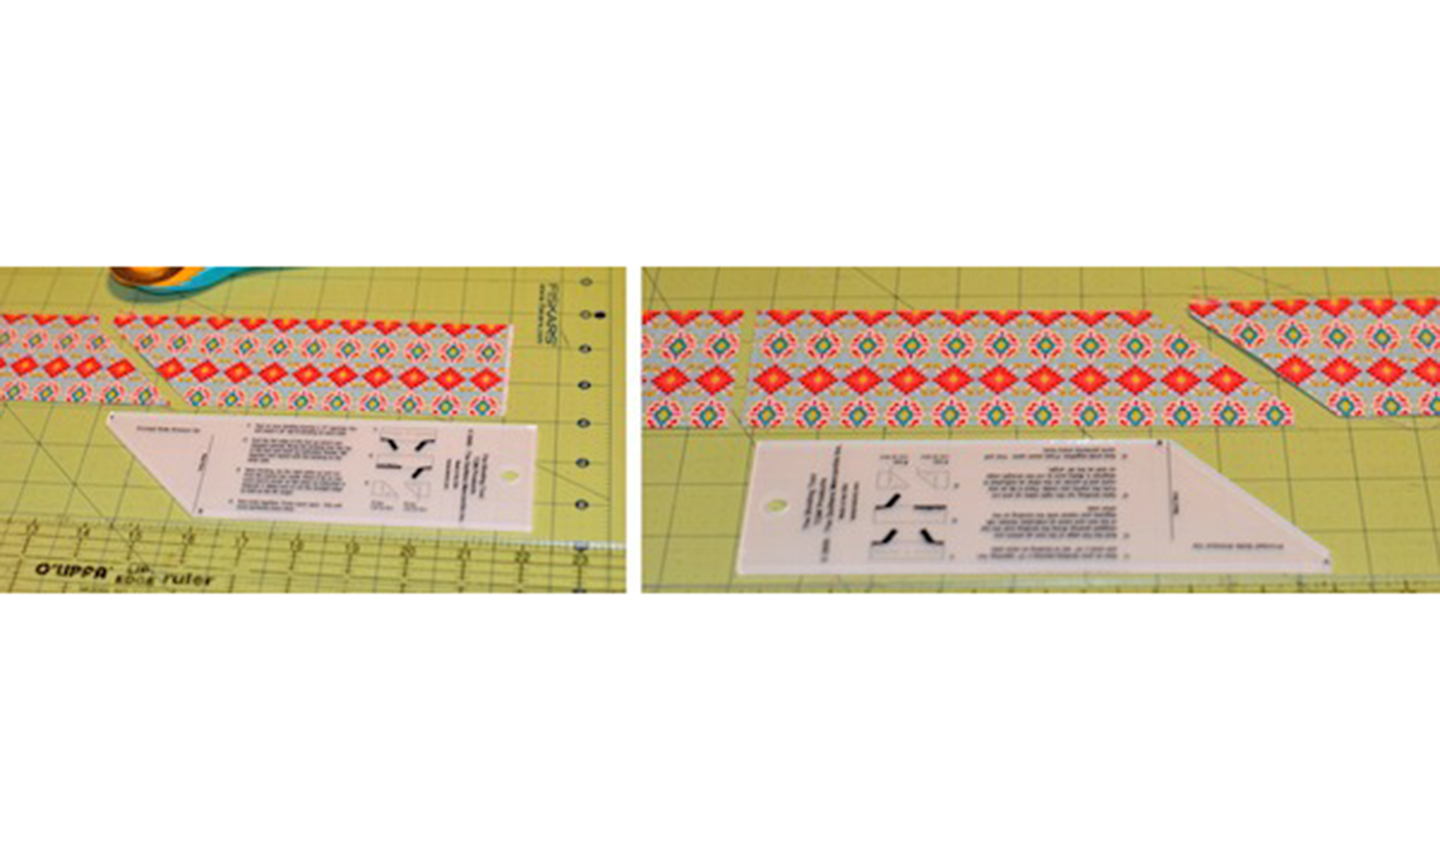
Place one 2½” wide strip in front of you. Line up the straight edge of the binding tool ruler with one short end of the fabric strip and cut at the angle. Rotate the ruler so the angle matches up with the angle of the fabric and cut again (this time along the straight edge). You should be able to cut five of these pieces from one strip.
2. Arrange the Strips
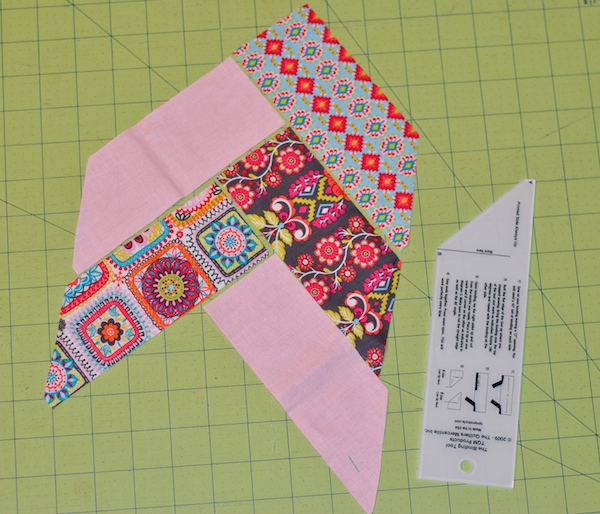
Lay the fabric strips out like the photo above, alternating them so no two strips of the same fabric touch. Because the strips are cut at two different angles, you’ll You’ll probably need to play around to find a piece that’s the right color and pointing in the same direction.
3. Stitch a Seam
Starting at the bottom of the block, flip the bottom left fabric over the tip of the bottom right fabric. Pin in place and stitch where the strips intersect. Press the seam toward the bottom of the block, then flip the strips back to their original position.
4. Join Another Strip
Choose the strip that’s just above the seam you just sewed. Flip the strip down over top of the ones you just joined. Pin the strip in place and stitch ¼” from the edge. Press the seam toward the bottom of the block.
Continue working your way to the top of the block, turning strips down and stitching them as you did in the steps above.
5. Trim
When it’s time to cut, you’ll only need to trim the top and bottom of the block. Then you’re done!
Thank you
LikethisFrench Braid Quilt, going to give it a try
Looks so nice. Just need to pick a fabric set
I have been waiting to make this quilt. Gonna give it a go for my son and his wife for Christmas. Teal, blue, green and maybe white.
Beautiful quilt!!
How cN I get the full pattern thankyou
Like the pattern. What size is the center piece of the braided strip.
Very good!
Beautiful
I can’t seem to understand the instructions and I’m a long time quilter help me some more