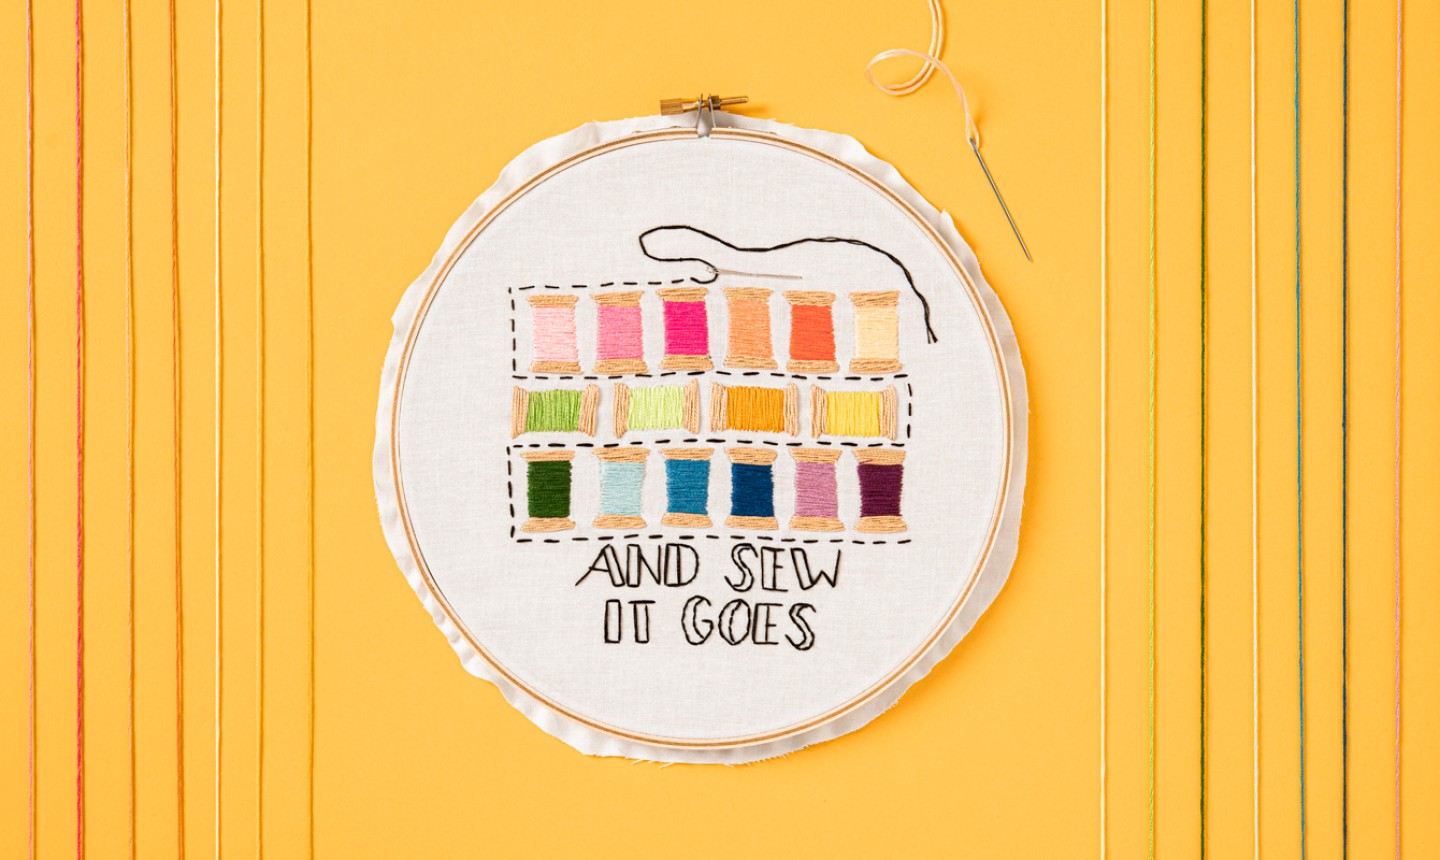
Whether you want to spruce up your sewing room or gift this to a friend who loves crafting as much as you, this cute hoop is *sew* easy to stitch together. Download the free pattern created by Jo Gick, a finalist in season 1 of NBC’s Making It, then follow her beginner-friendly tutorial to get started.
And Sew It Goes Embroidery Design
Level: Easy
What You Need
Instructions
1. Transfer the Pattern
Print out the pattern and lay fabric on top of it. Use a lightbox or sunny window to lightly trace the design onto your fabric with a pencil or embroidery marker. Hoop up by placing that fabric between the embroidery hoops and tightening the screw.
2. Stitch the Colored Threads
Separate out three strands of your first color (we used light pink) and thread them onto your needle. Use the satin stitch to fill in the colorful thread on each spool: start by pulling your needle up from one side of the shape, like the bottom right corner, all the way over and down through the bottom left corner. Continue until you fill the entire shape. Repeat on each spool, using your desired colors.
3. Stitch the Wooden Spool
Once you’ve finished all the colors, go back to each spool and use tan thread and a satin stitch to create the wooden top and bottom. (No need to separate strands for this part, just use the thread as is!)
4. Add the Details
Grab your black thread and use a running stitch to create the stitched line that wraps around the spools of thread: start at the bottom right corner and push the needle up from the back of your fabric, poking it through the front a short distance away. Create one stitch at a time, following the pattern until completed.
After your last stitch, leave a long tail of thread and arrange it on the design as shown. Tack it down with a few stitches. Use silver metallic thread to fill in the needle design with a satin stitch.5. Stitch the Wording
Use a simple backstitch to outline all the letters: start by pulling the needle and floss up through the fabric and do one stitch forward. From underneath, space the needle out the length of your desired stitch, pull up through the fabric and bring the needle and floss back down through the end of the previous stitch. Continue until you’ve outlined all the letters. (You can also fill each one in with a satin stitch , but we left them as an outline.)


Lovely 😊
Thanks for such an amazing blog and very help full for the embroidery designs I saw cartoon embroidery designs in different styles your Embroidery style is a unique way, and the same pattern use in Digit IT please visit this site hope you gain great knowledge of Embroidery Digitizing relates.