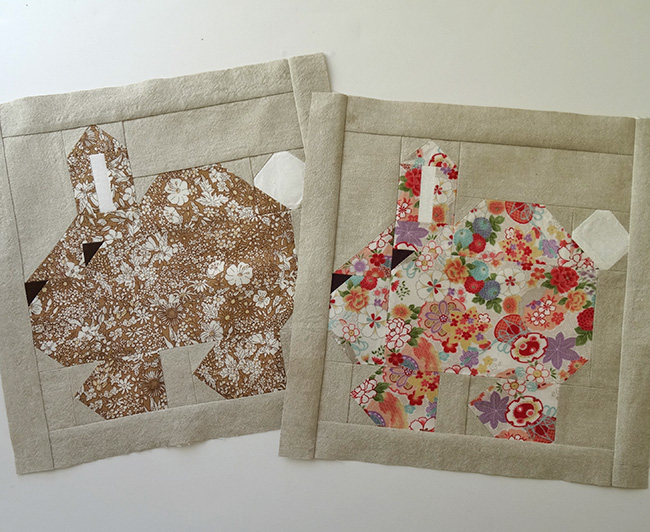
Watch out — these bunnies multiply fast, and you may just find yourself with an entire quilt’s worth of blocks after an afternoon of getting lost in your stitching. The best part: it only calls for two fat quarters (yay, precut fabric!) and a few fabric scraps.
Bunny Quilt Block
Level: Intermediate
Size: 12½” x 12½” (unfinished), 12″ finished
What You Need
Good to Know: Unless otherwise noted, stitch all seams with a ¼” seam allowance and press the seams open to reduce bulk.
Instructions
1. Cut Your Fabric
Download the patterns and follow the cutting instructions as listed. Label all units as you cut them.
2. Draw the Lines
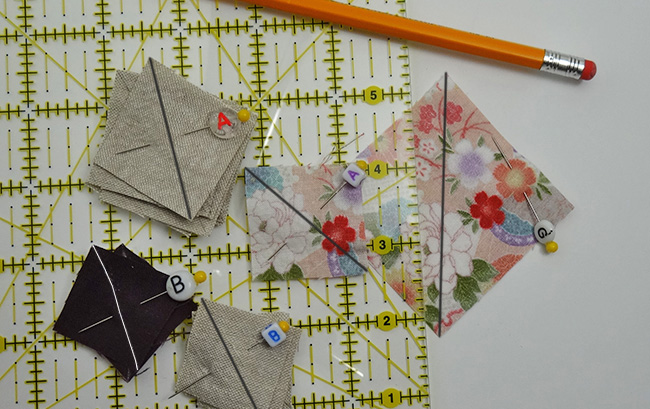
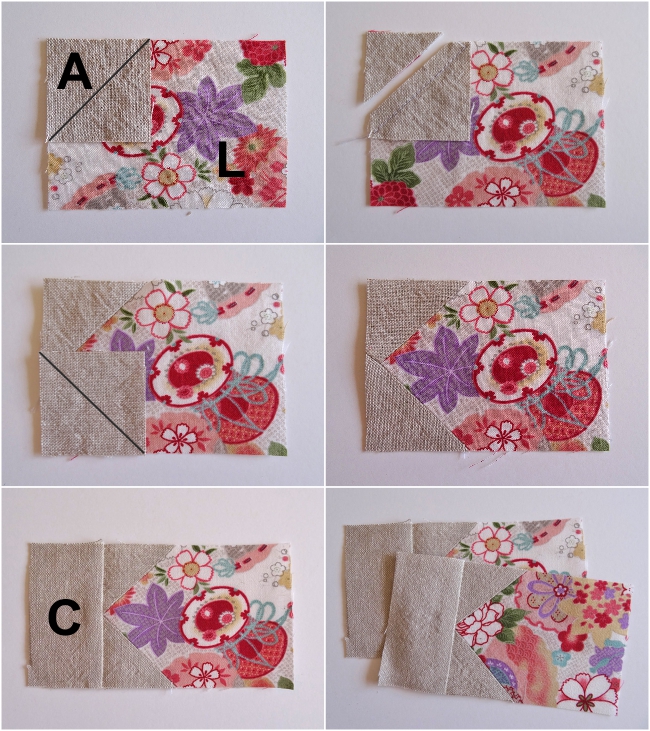
Mark a diagonal line from corner to corner on the back of Bunny Body G and all A and B units.
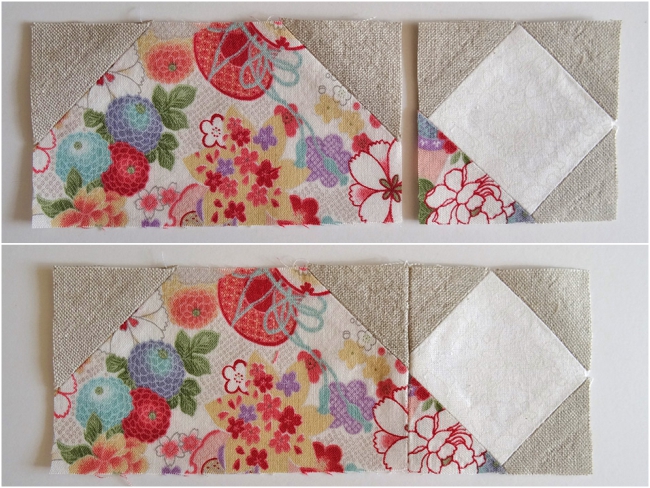
3. Sew the Ear Unit
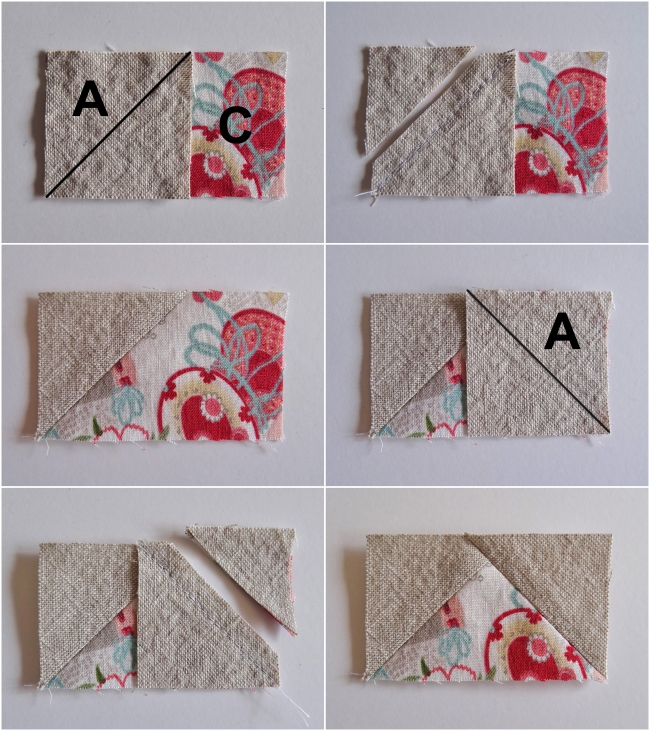
Align a Background A square right sides together with the top left corner of a Bunny Body C unit. Stitch along the marked line. Trim the seam allowance to ¼” and press the seam open.
Place another Background A unit right sides together with the top right corner of the Bunny Body C unit. Stitch, trim and press open as before.
Trim the unit to 2½” x 1½” if needed.
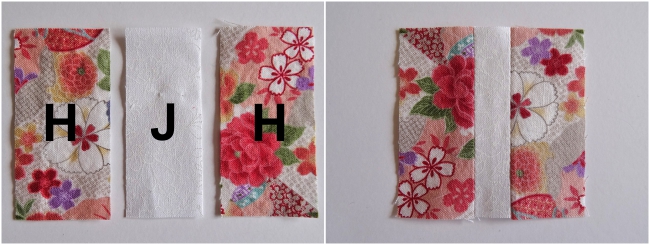
Attach a Bunny Body H unit to each side of the Ear J unit to create the middle ear.
Stitch the ear units together with another Bunny Body C unit as shown. Set the ear unit aside.
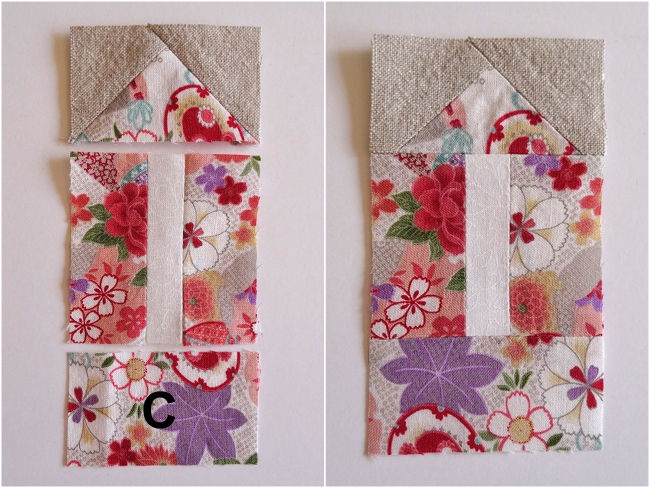
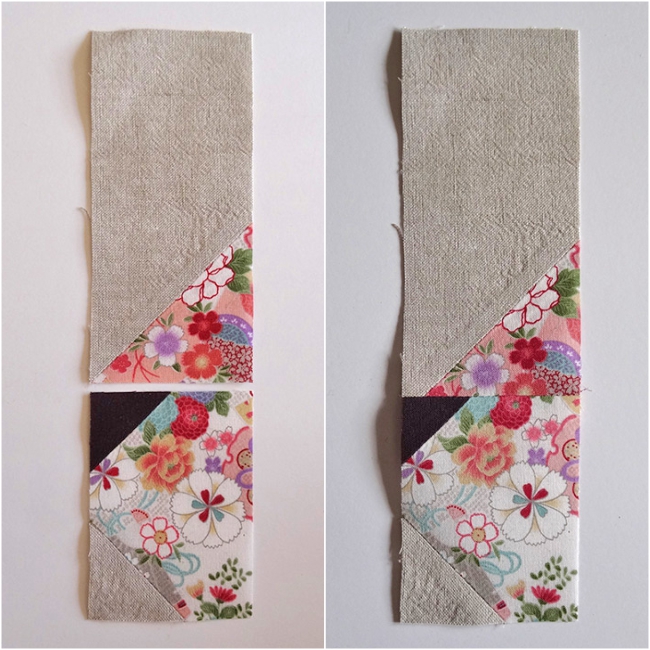
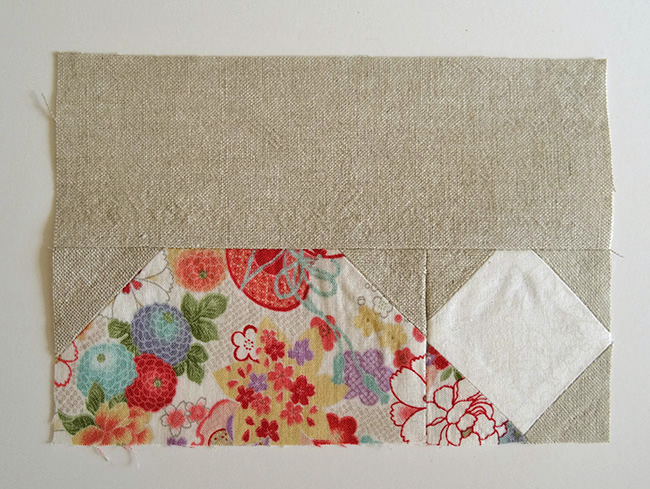
4. Sew the Feet
Align a Background A unit right sides together with the top left corner of a Bunny Body C unit. Stitch along the marked line. Trim the seam allowance to ¼” and press the seam allowance open.
Align a second Background A unit right sides together with the bottom left corner of the last Bunny Body C unit. Stitch, trim and press open as before. Trim the unit to 2½” x 3½” if needed.
Stitch a Background C unit to the left of the foot unit. Press the seam allowance towards C. Trim to 2½” x 4½” if needed.
Repeat Step 4 to sew a second foot unit.
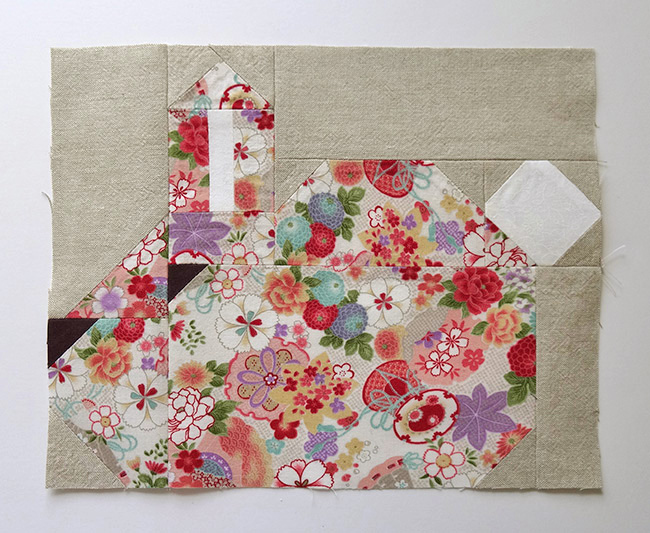
5. Join the Feet
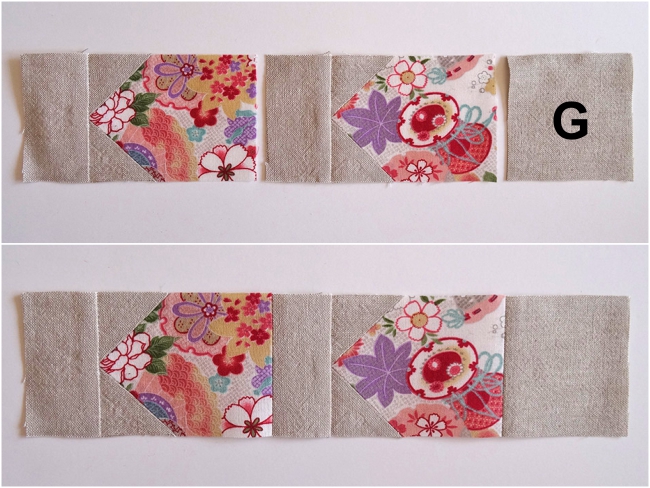
Stitch the feet units to the Background G unit, noting the orientation pictured above. Set the foot unit aside.
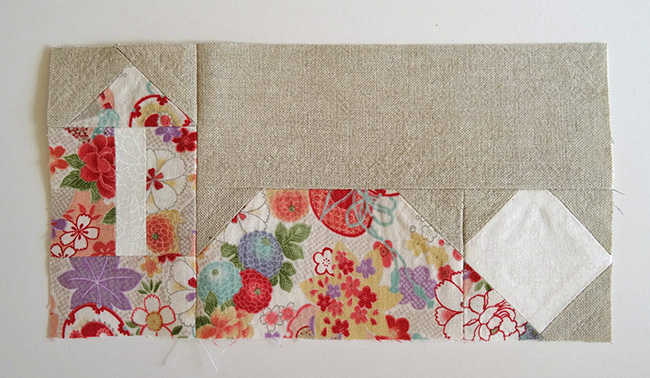
6. Make the Bunny’s Face

Align the Bunny Body G unit right sides together with the bottom right corner of the Background D unit. Stitch along the marked line. Trim the seam allowance to ¼” and press the seam allowance open. Trim the unit to 2½” x 5½” if needed.
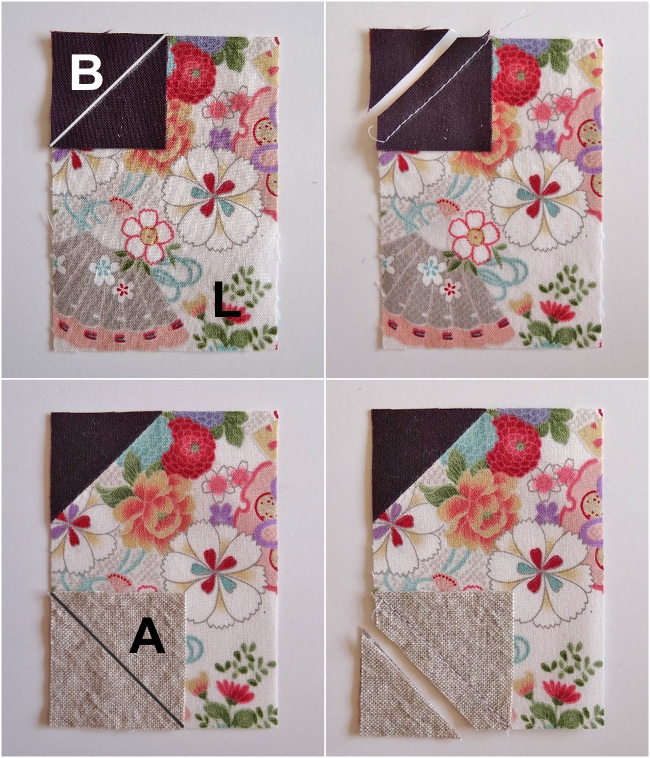
Align a Nose B unit right sides together with the top left corner of a Bunny Body L unit. Stitch along the marked line. Trim the seam allowance to ¼” and press the seam allowance open.
Align a Background A unit right sides together with the bottom left corner of the Bunny Body L unit. Stitch, trim and press open as before. Trim the unit to 2½” x 3½” if needed.
Stitch the top and bottom of the bunny’s face together, noting the orientation of the units. Set the face unit aside.
7. Stitch the Bunny’s Back
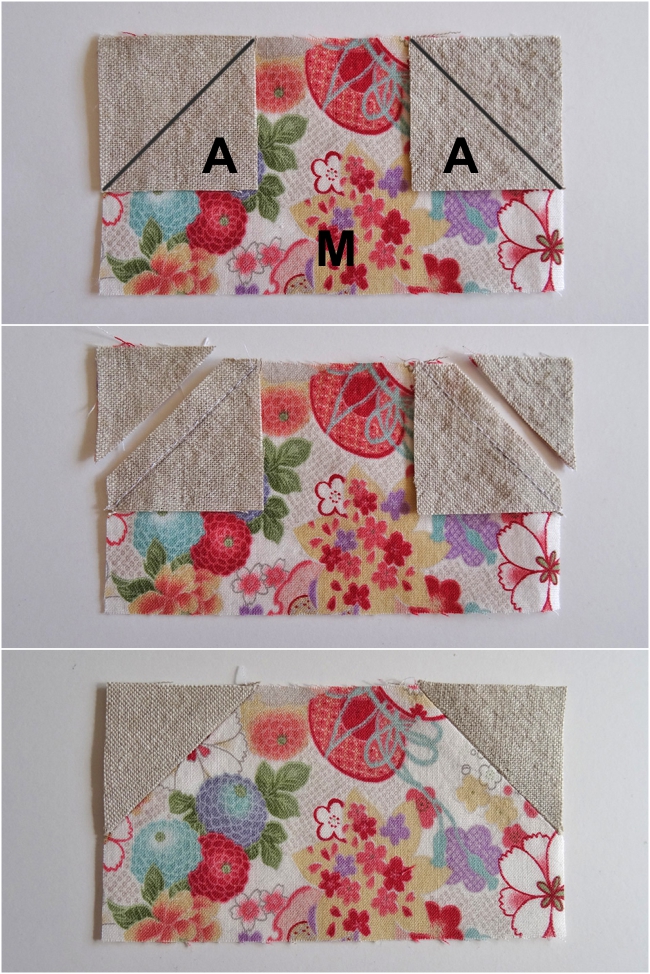
Align two Background A units right sides together with the top corners of the Bunny Body M unit. Stitch along the marked lines. Trim the seam allowances to ¼” and press the seam allowances open. Trim the unit to 2½” x 4½” if needed.
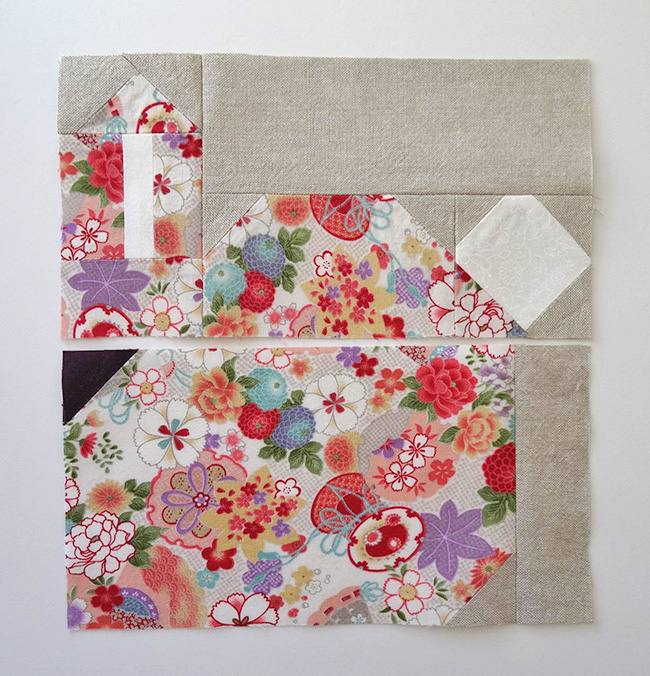
8. Give ‘Em a Fluffy Tail
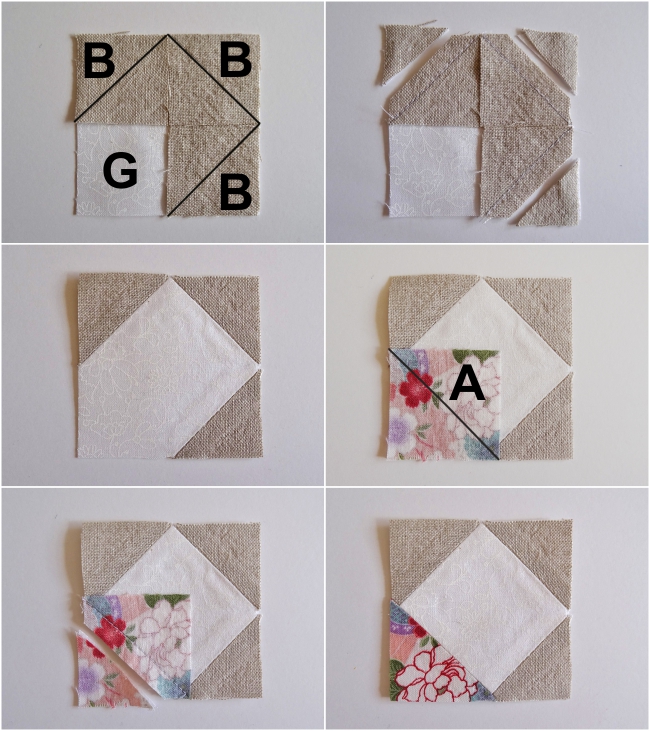
Align three Background B units right sides together with the top left and right corners and bottom right corner of the Tail G unit. Stitch along the marked lines. Trim the seam allowances to ¼” and press the seam allowances open.
Align the Bunny Body A unit with the bottom left corner of the tail unit. Stitch, trim and press as before. Trim to 2½” x 2½” if needed. Set the tail unit aside.
9. Sew the Body
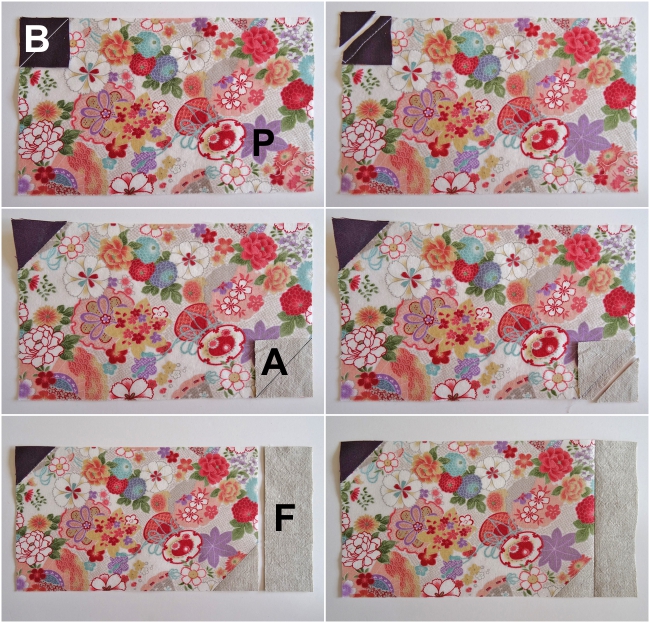
Align an Eye B unit right sides together with the top left corner of a Bunny Body P unit. Stitch along the marked line. Trim the seam allowance to ¼” and press the seam allowance open.
Align a Background A unit right sides together with the bottom right corner of the Bunny Body P unit. Stitch, trim and press open as before.
Stitch the Background F unit to the right of the body unit. Trim to 8½” x 4½” if needed. Set the body unit aside.
10. Join the Units
Sew the tail unit to the right of the back unit.
Add the Background E piece to the top of the back/tail unit.
Stitch the ear unit to the left side of the back/tail unit.
Add the boy unit underneath the ear/back/tail unit.
Stitch the face unit to the left of the previous units.
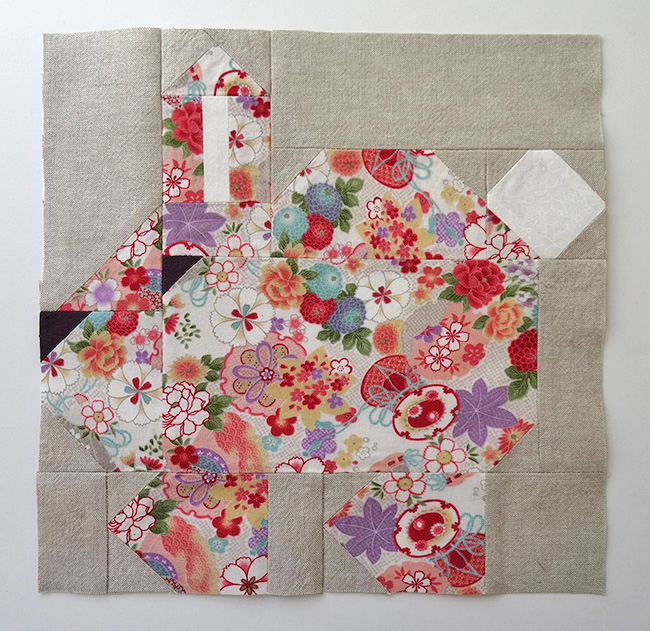
Add the foot unit to the bottom of the sewn units. Trim block to 10½” x 10½” if needed.
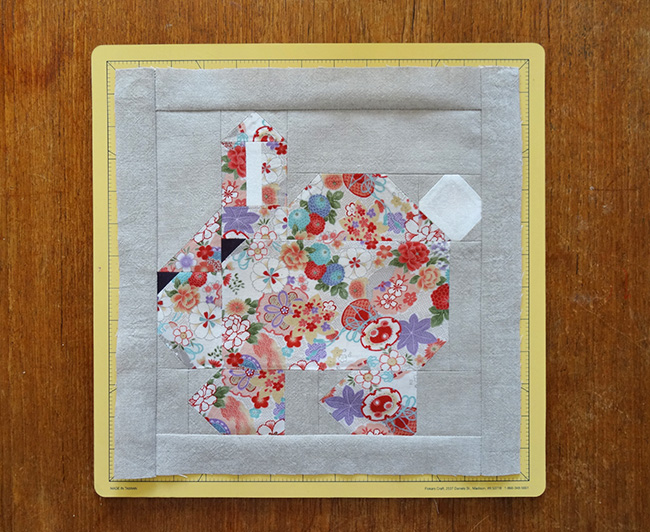
11. Add the Borders

Add the two shorter frame pieces to the top and bottom of the block. Press the seam allowance toward the frame.
Add the two remaining longer frame pieces to the left and right sides of the block, again pressing toward the frame.
Trim the block to 12½” x 12½” if needed, and you’re done!
This traditionally-pieced block can be sewn into an Easter throw pillow, a table runner for dinner or a light quilt for chilly spring mornings. The options are endless!
I love this pattern but can not figure out where to down load the cutting instructions. I need them to make this project. Was very disappointed that the cutting instructions were not with the sewing instructions!
Bunny very Cute. Love this design .
Luv patterns
Very nice free patterns