Make the classic crochet granny square more interesting with a unique border to finish it off! While you can use any edging you like on a granny square, today I'm sharing a few of my favorite options for giving granny squares the perfect finishing touch.
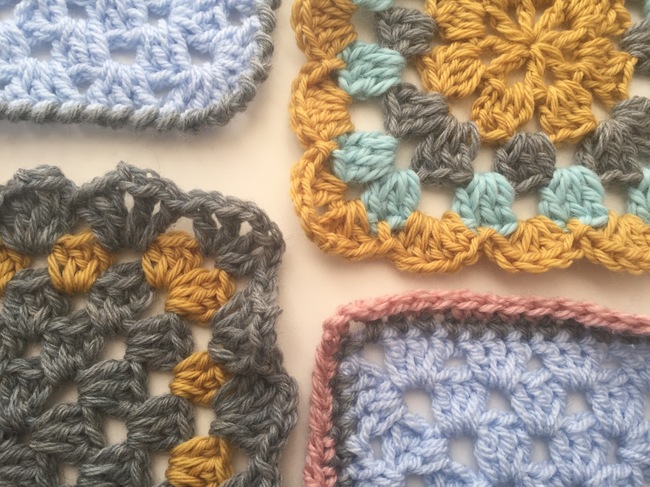
Photos by Kathryn Vercillo of Crochet Concupiscence
Simple borders for granny square
These crochet edgings all have flat edges, which allows you to easily join one motif to the next. Use these when you have small granny squares that you will be connecting to each other to make a new project.
1. Slip stitch edging
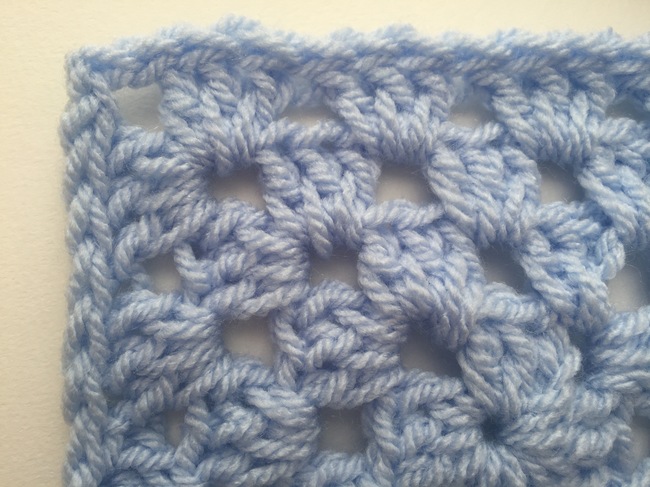
Before we get into the more decorative granny square border options, let's talk about the simplest way to finish off a granny square, which is to give it a slip stitch border.
This is usually done using the same color as was used to crochet the final round. Begin in the same corner where you left off that last round and simply slip stitch into each stitch all the way around.
If the stitch feels too tight, try using two slip stitches in the corners instead of just one. Slip stitch into the first stitch to close the round. Finish off and weave in ends. Easy!
2. Single crochet edging
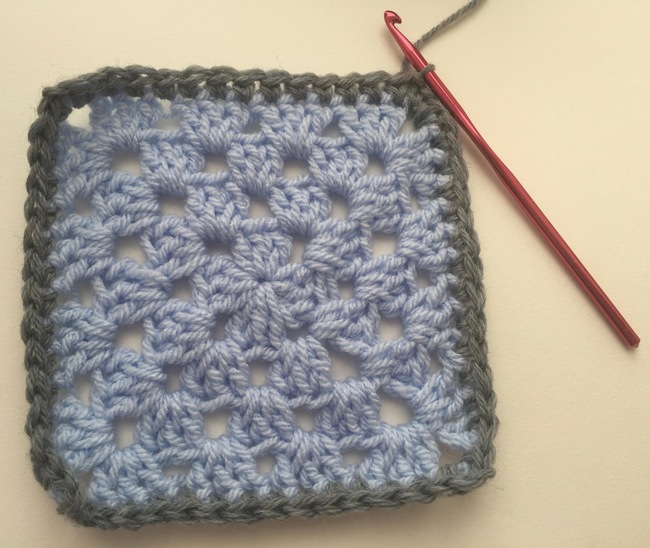
The single crochet stitch is actually one of the best options for a border for crochet granny squares. A single round of single crochet provides a nice finish to the square, especially if it's worked in a color that complements the colors in the granny square and allows the granny square design to really stand out.
One-round single crochet border tutorial
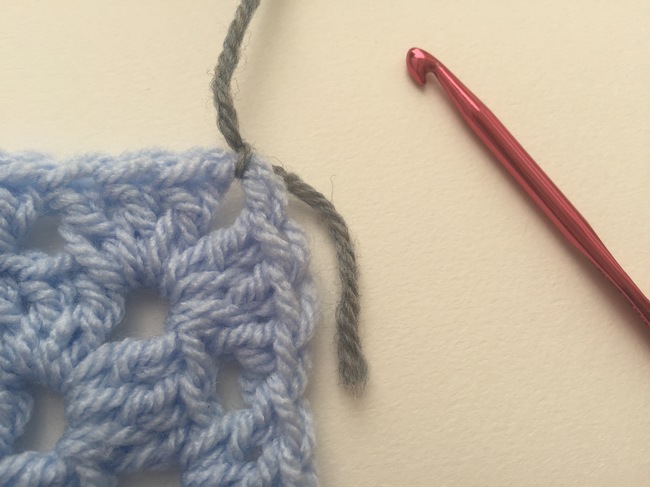
Join yarn in any corner.
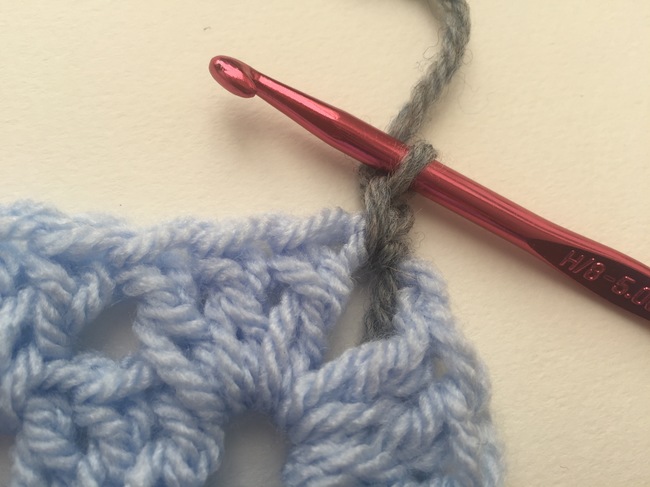
Chain one.
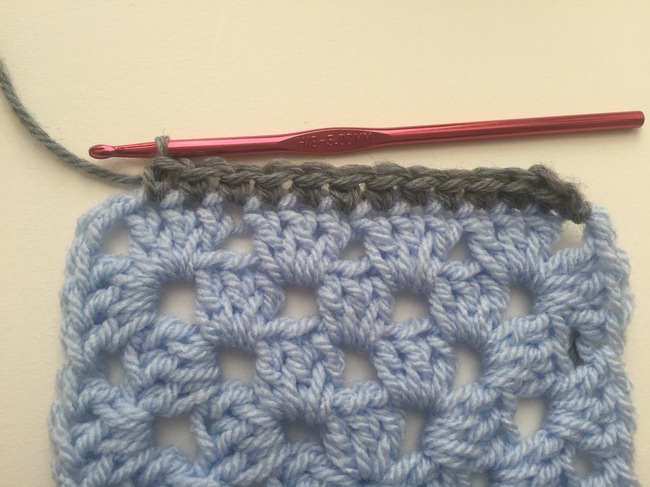
Single crochet in each stitch across until you reach the corner.
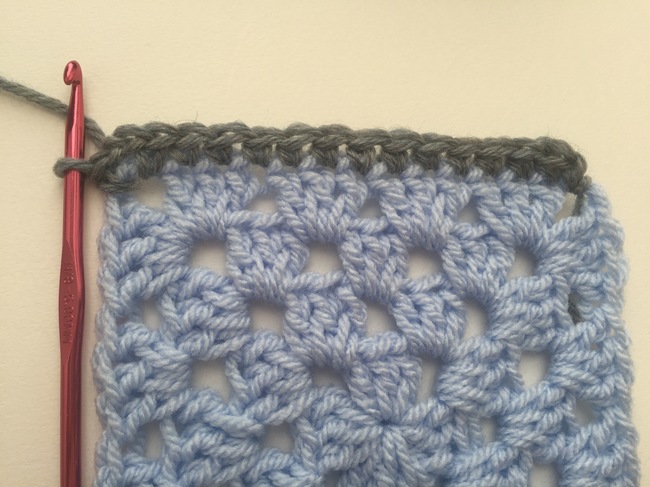
Work into the corner: sc, ch 2, sc
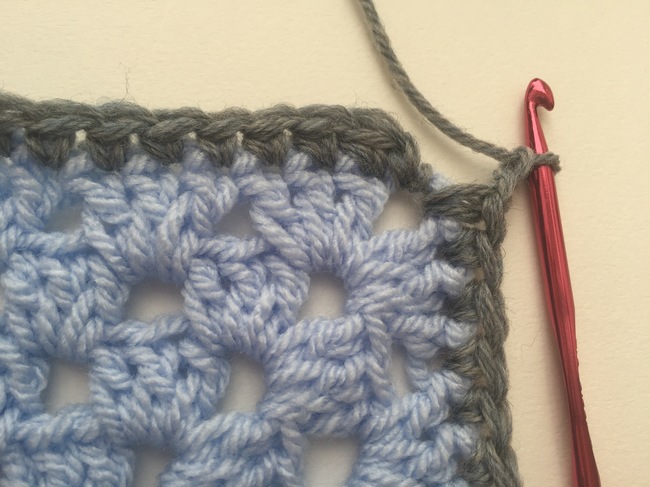
Continue working around the entire square, making a sc into each stitch and working the corners as described above. When you get back around to the starting corner, sc in corner, ch 1, and then sl st to first ch to close the round.
Adding additional rounds to single crochet border
Single crochet edging is great as a quick, one-round border for a project. But you can also play around with it by adding additional rounds.
Extra rounds may be worked in the same color or a different color, giving you a lot of versatility to create a bunch of different border effects using just this basic stitch.
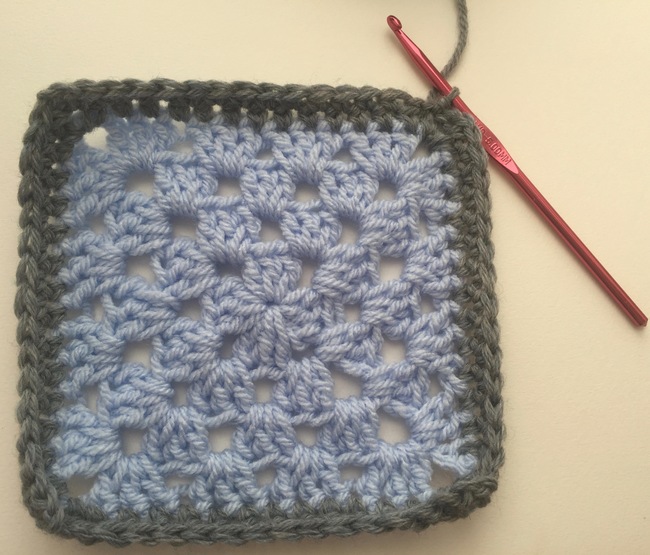
Each round of the border will be worked using the same instructions as the first round.
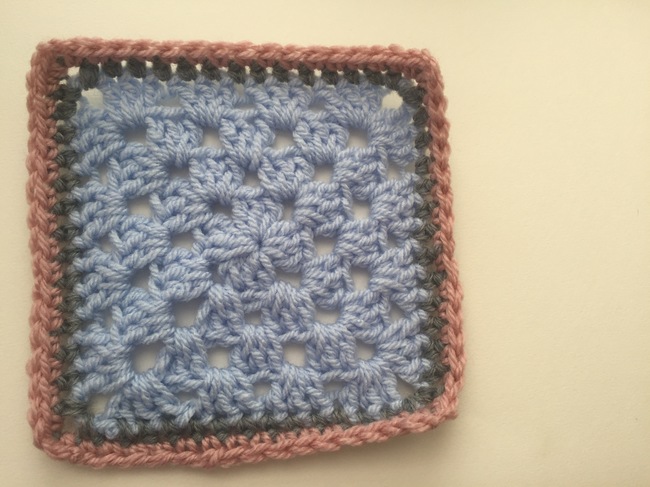
Have fun playing with color changes to create interesting edgings around granny squares using just this basic crochet stitch.
3. Edging with other basic crochet stitches
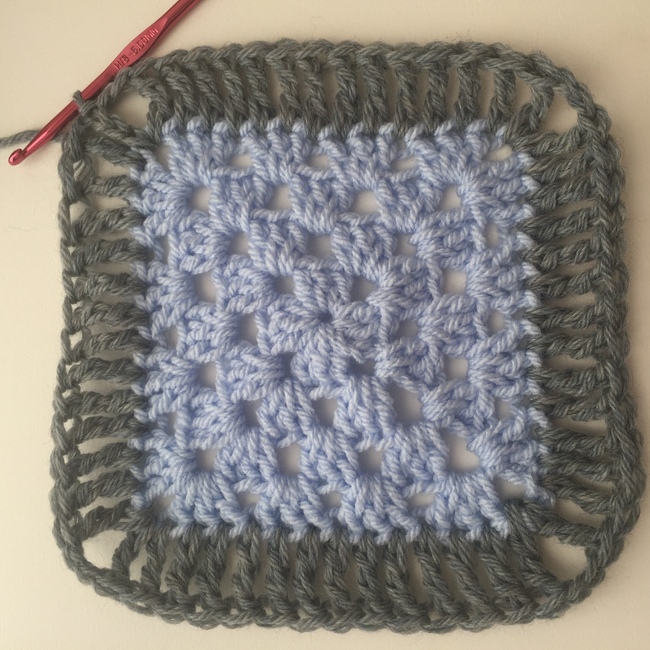
Single crochet isn't the only basic stitch that works really well as a flat border for granny squares. All of the other basic stitches have their own great effects when worked as granny square edgings.
- Half double crochet is just a tad bit taller than single crochet and provides a nice thickness for a single round border.
- Treble crochet (as shown in the photo above) is taller than the stitches used in the granny square and so it really stands out as a more openwork design that captures the eye's attention. A single round of treble crochet is great if you want a wide border on your granny square.
- If you want to try something really unique, use even taller crochet stitches like the quadruple treble crochet.
The instructions for each of these basic stitches are essentially the same as single crochet with the exception of the height of the starting chain. With a single crochet border, you begin with a ch-1 in the corner. Increase this chain by the appropriate number for your stitch (2 for hdc, 4 for treble crochet, etc.)
4. V-stitch crochet edging
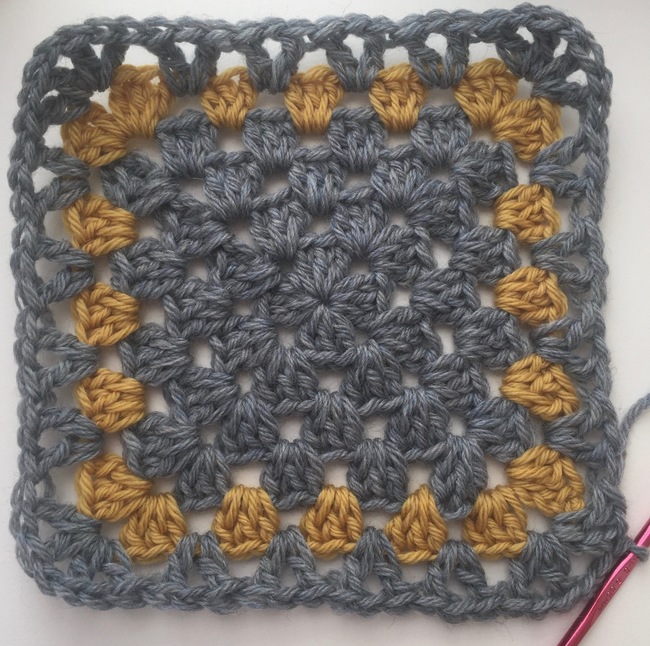
The V-stitch makes a great choice for a granny square border! It uses the same stitch as the classic granny square (double crochet), but there is a terrific subtle contrast between the 3-dc groups of the granny square and the 2-dc V shapes of the border.
V-stitch border tutorial
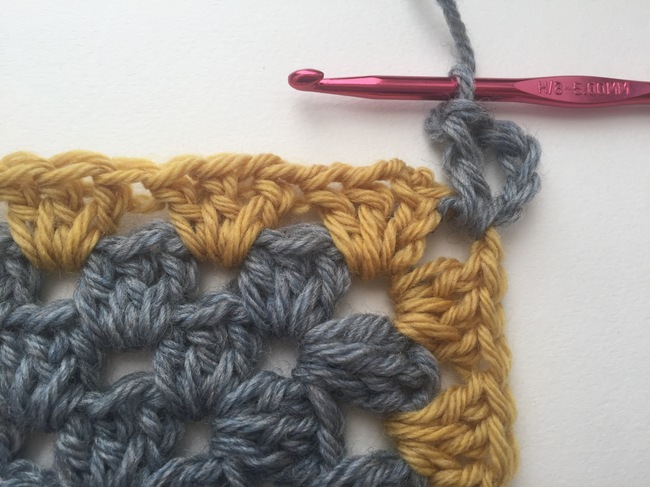
Begin by joining your yarn in any corner. Chain 4 (counts as first double crochet and ch-1). Dc in same corner.
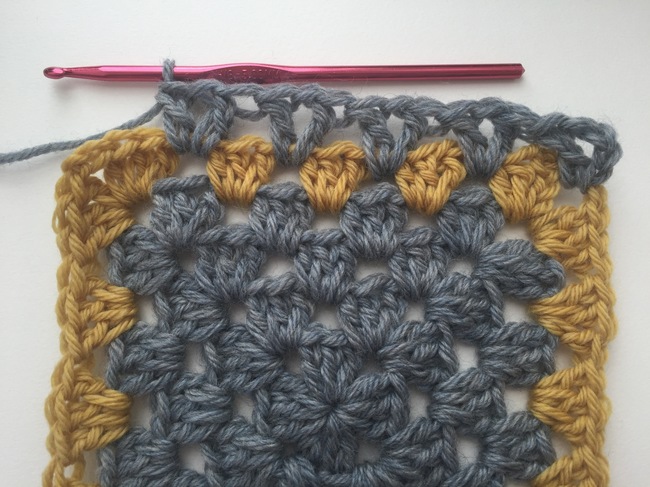
V-stitch (one V-stitch is dc, ch 1, dc) in each space across the row until you reach the corner.
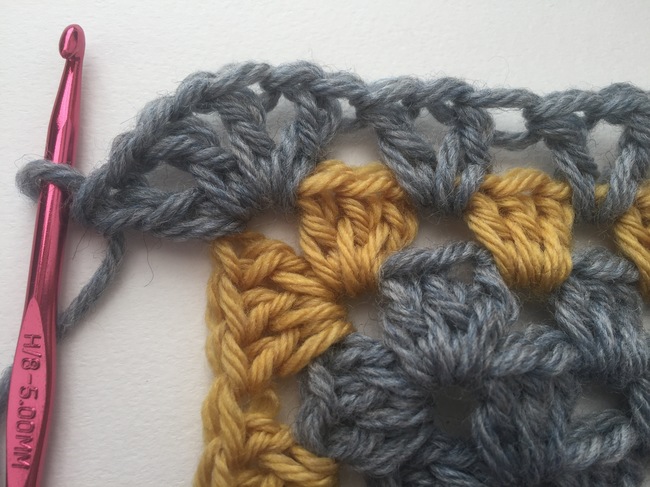
When you get to the corner work: V-stitch, ch 1, V-stitch. In other words, work the following into that corner: dc, ch 1, dc, ch 1, dc, ch 1, dc
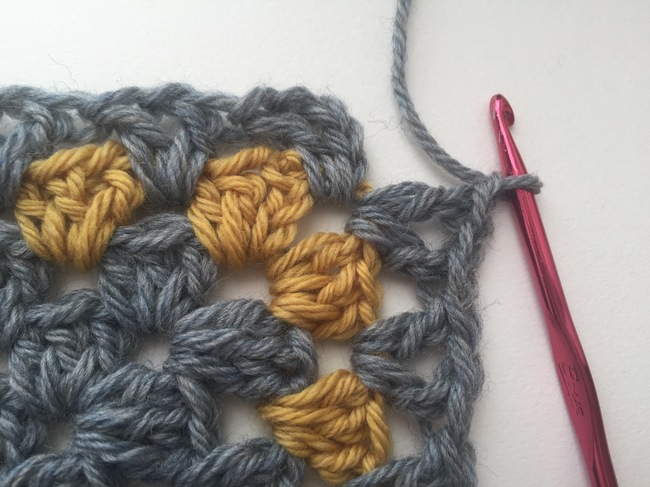
Continue working around the square, crocheting a V-stitch into each space and working the corners as described above. When you reach the starting corner, make one V-stitch, ch 1 and slip stitch to the third ch of the starting chain to close the round.
Decorative granny square borders
Looking for something with a little more flair? These decorative designs might do the trick!
Be warned: With these borders, you won't wind up with a flat edge, making it more difficult to join yoru granny squares together. Instead, save these ideas for when you want a crochet square to stand on its own. Use these for projects as small as coasters or as large as single granny square blankets.
5. Crab stitch border
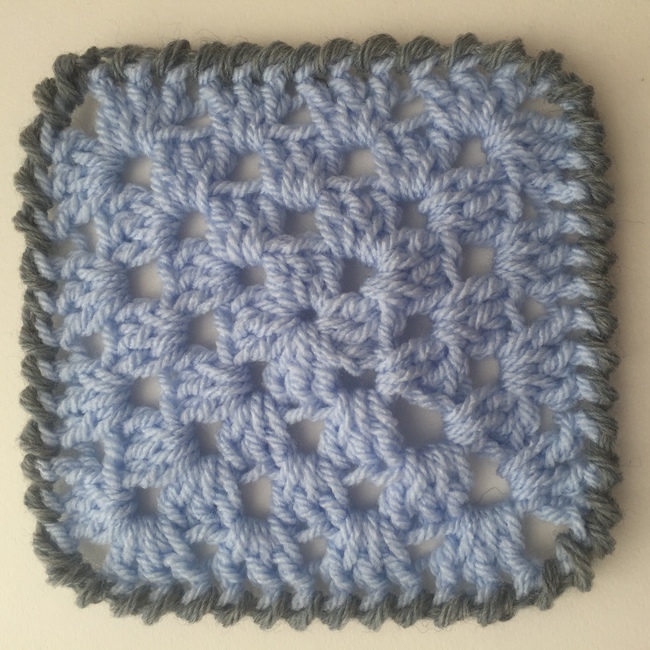
The intriguing twisting design of crab stitch, also known as reverse single crochet, is a fun choice for a crochet granny square's edging.
Crab stitch border tutorial
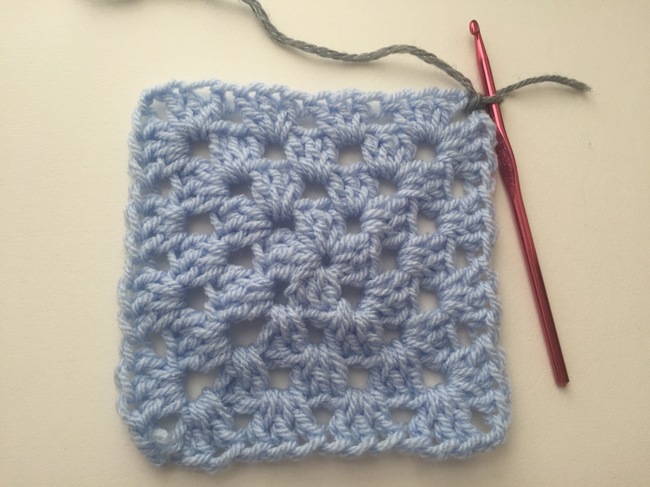
Join yarn in any corner.
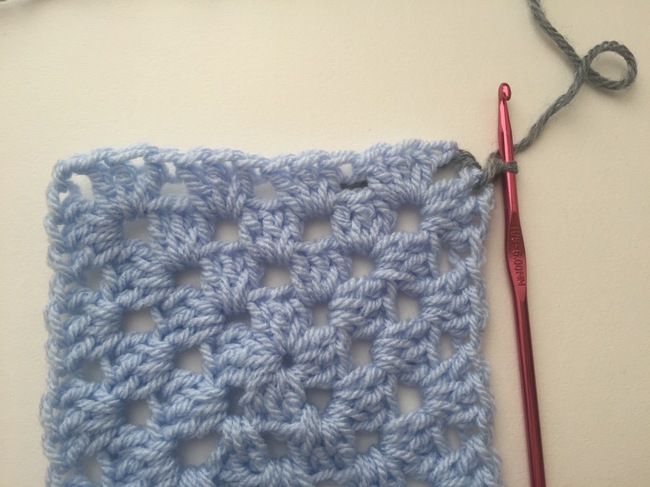
Insert crochet hook into the stitch that is to the right of that corner. Yarn over and pull through.
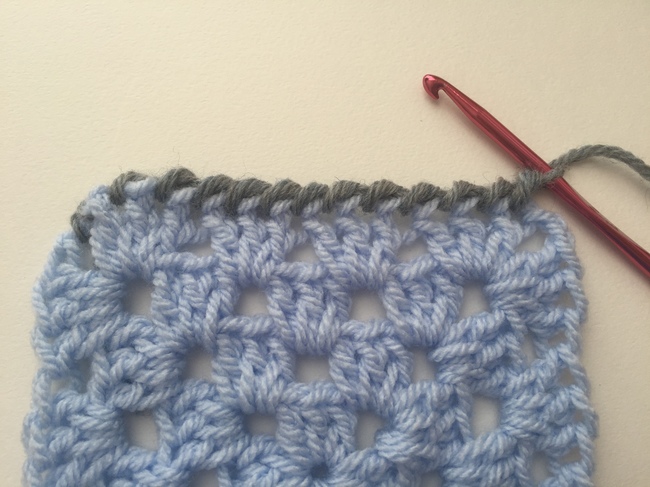
Repeat that crab stitch across row.
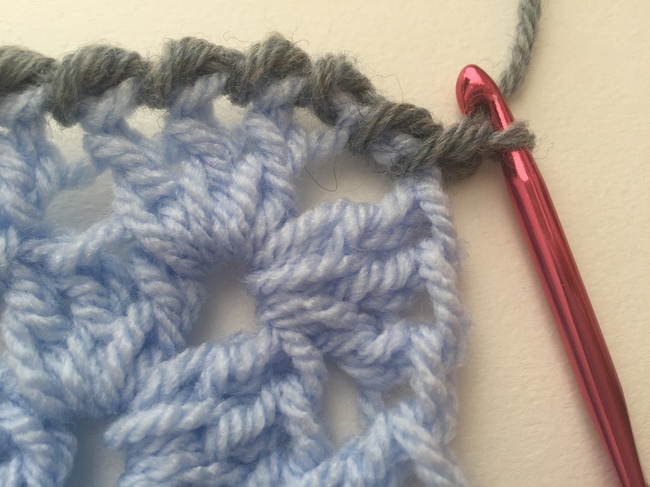
When you reach the corner, work two crab stitches into the corner. Continue around the square in the same manner, working one crab stitch in each stitch, with two in the corners. When you get back to the starting corner, work on crab stitch then sl st to the first stitch to close.
6. Shell stitch edging
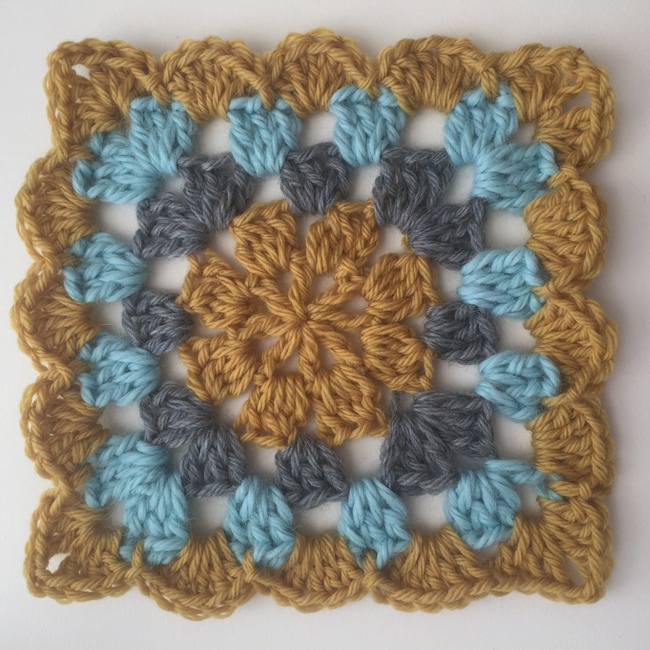
There are so many variations of the crochet shell stitch, and any of them can make an interesting border for a granny square. The wavy organic nature of the stitch provides a great contrast to the geometric square and pleases the eye. Let's look at two options for a shell stitch edging (but know that you can play with many more).
Option 1
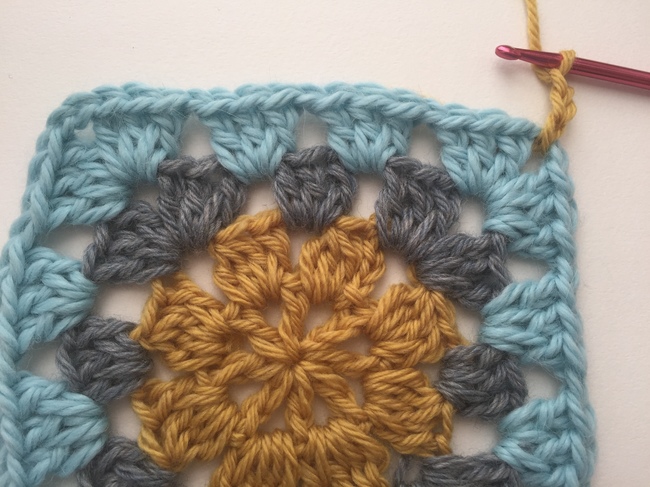
Join yarn in any corner. Ch 3 (counts as first dc).
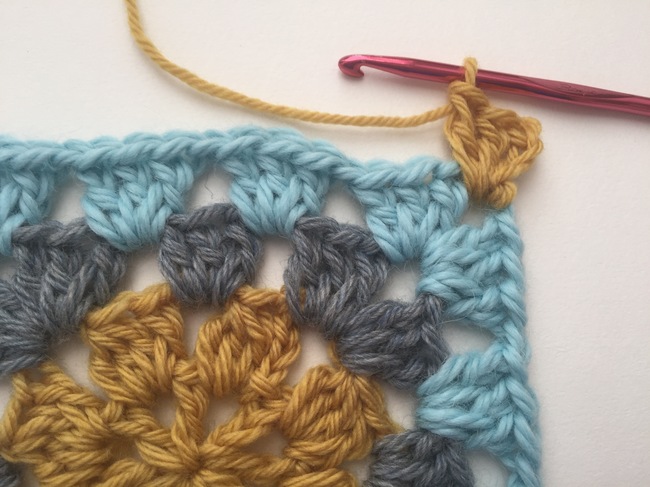
Work 2 dc into same corner.
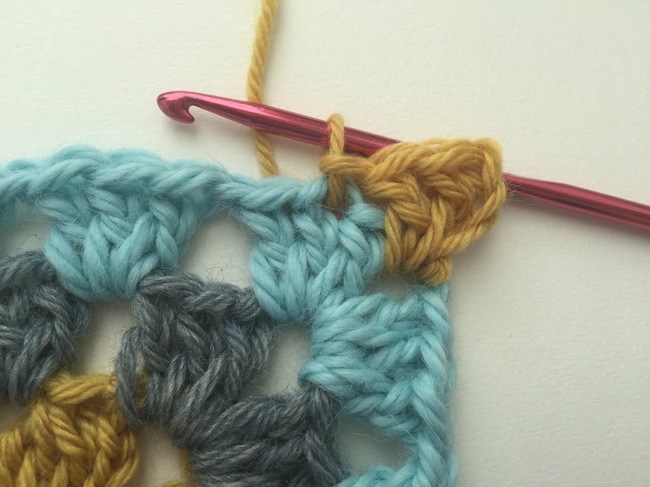
Sl st into second stitch of the next 3-dc group of the previous round.
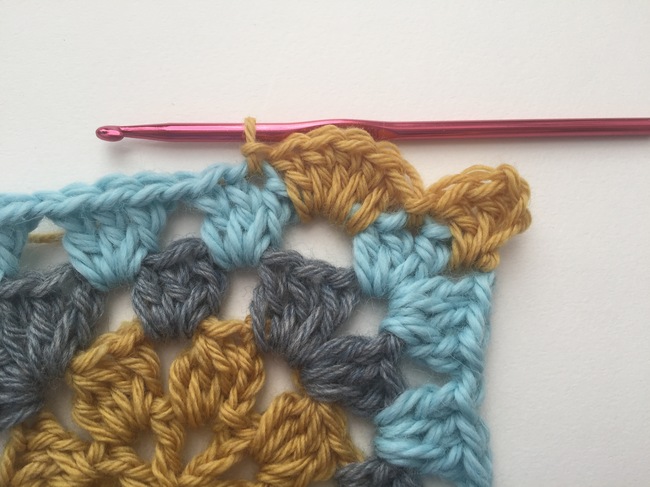
5 dc in next space, sl st into second stitch of the next 3-dc group of the previous round.
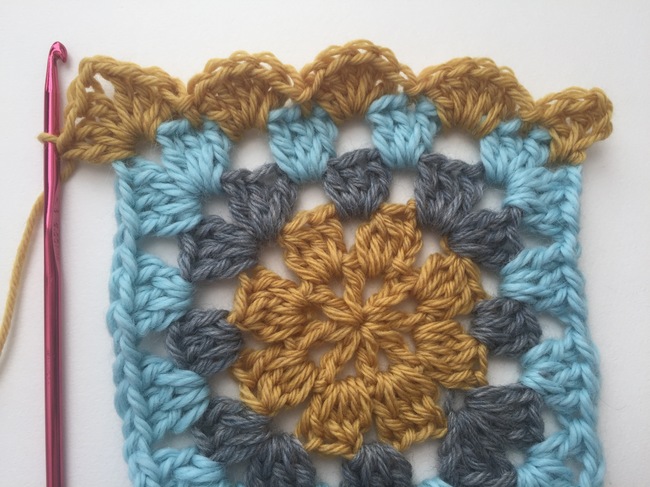
Repeat across the row until you get to the corner. In the corner work: 3 dc, ch 2, 3 dc. Continue around the square in the same pattern. When you get back to the starting corner work 3 dc, ch 2 and then sl st into top of ch-3 to close round.
Option 2
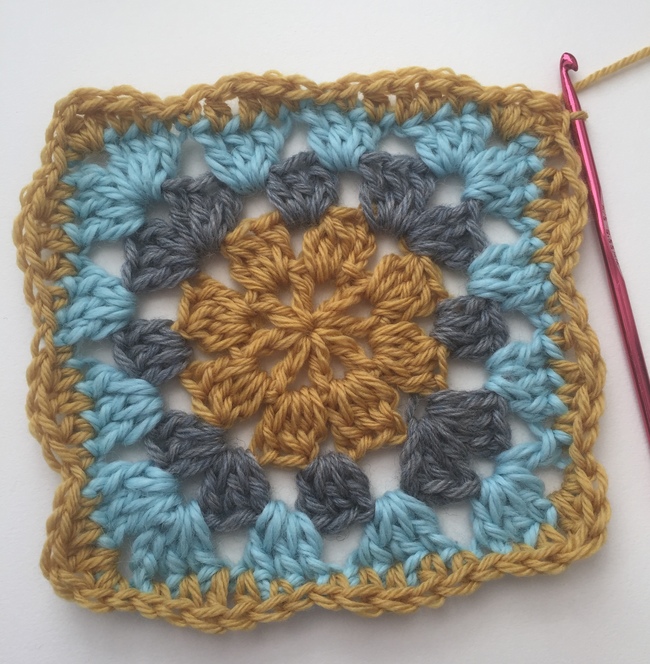
Here's the next option for a shell stitch crochet edging, which is a subtler option.

Join yarn in any corner. Ch 3 (counts as first dc).
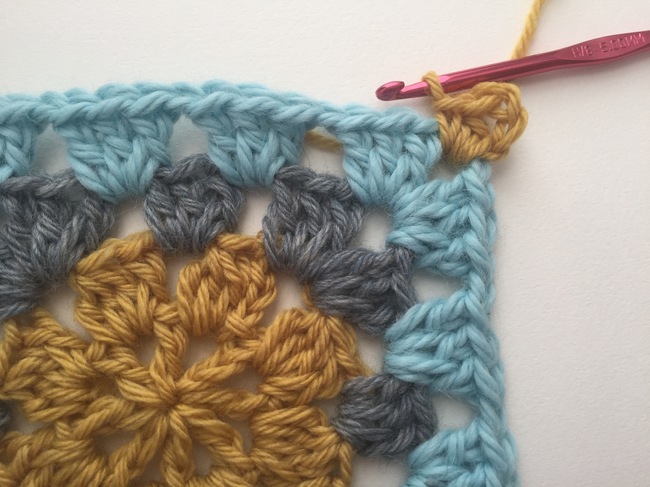
Work into same corner space: hdc, sc.
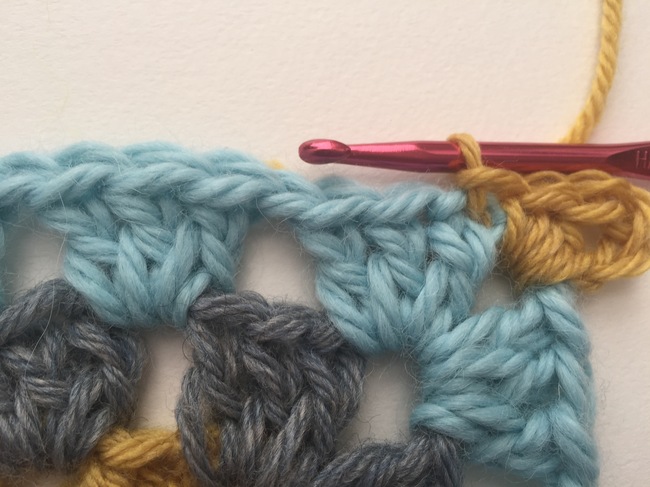
Sl st in next st.
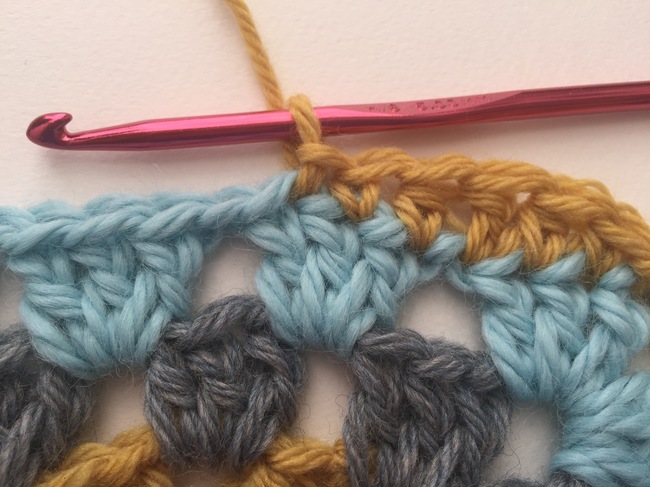
Sc, hdc, dc, hdc, sc, sl st (one st in each st of the previous row).
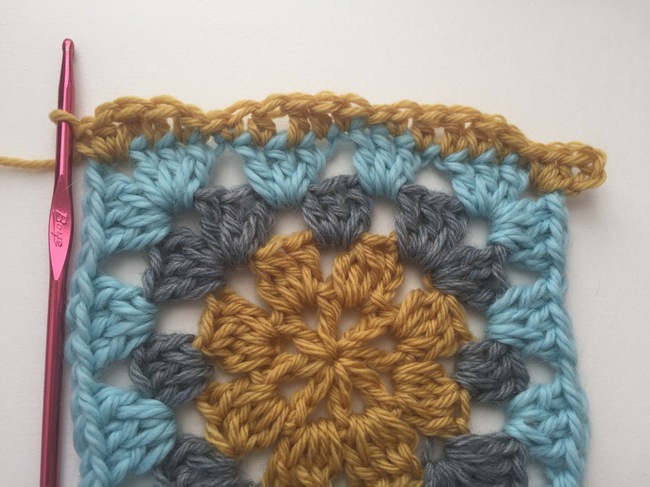
Repeat the previous step across the row until you get to the corner. In the corner work: dc, hdc, sc.

Repeat this pattern around the entire square. Sl to top of first dc to close the square.
7. Double V-stitch edging
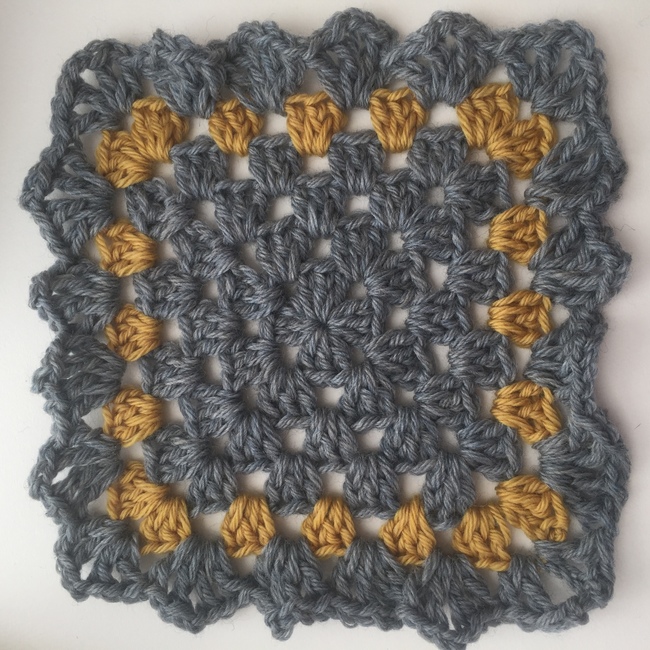
The traditional V-stitch creates a nice flat border, as we saw above. This double V-stitch is almost like a more angular variation on the shell stitch.
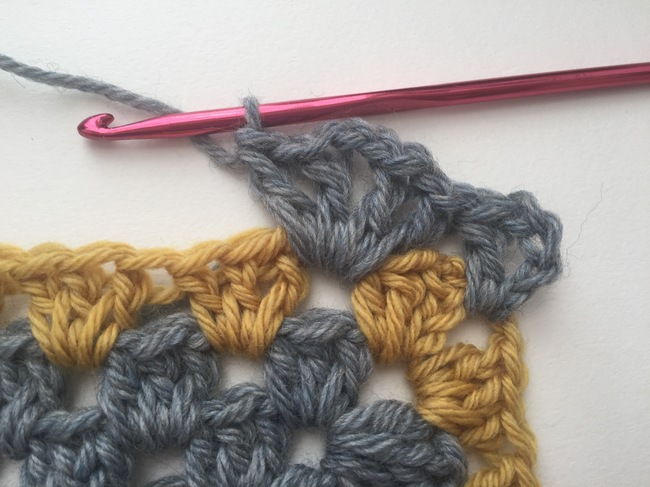
Joining yarn in any corner, ch 4, dc in same space. In each space around, work: V-stitch, ch 1, V-stitch.
Note: In this square, you work the same stitch in corners as in each space, so even the corners will be V-stitch, ch 1, V-stitch. When you get back to the starting corner, make a V-stitch, ch 1 and sl st to third chain of starting chain to close round.
8. Ruffle edging
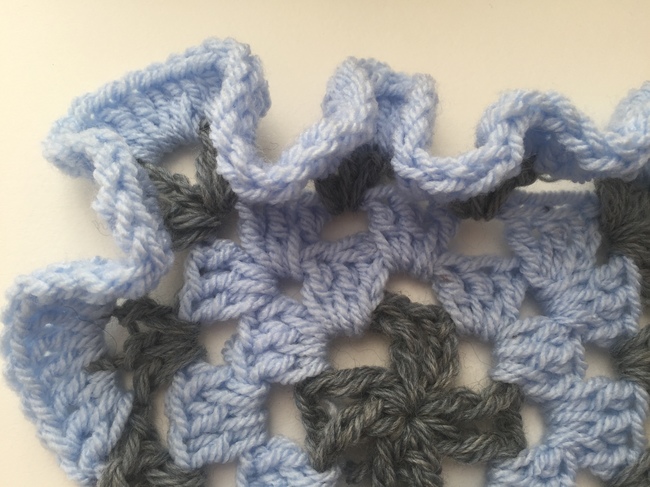
The basic technique of hyperbolic crochet (adding many stitches into each stitch from the round below) creates a beautiful ruffled edge that really stands out around a granny square.
The ruffled edge means that the item won't sit flat on a surface, so it's not necessarily a great choice for a placemat or something that sits on a table, but it is great for projects like washcloths.
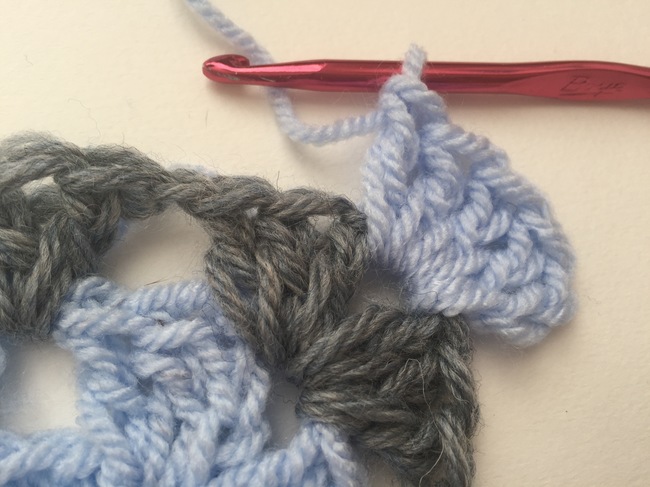
Begin in any corner and chain 3. Make 5 more dc in same corner.
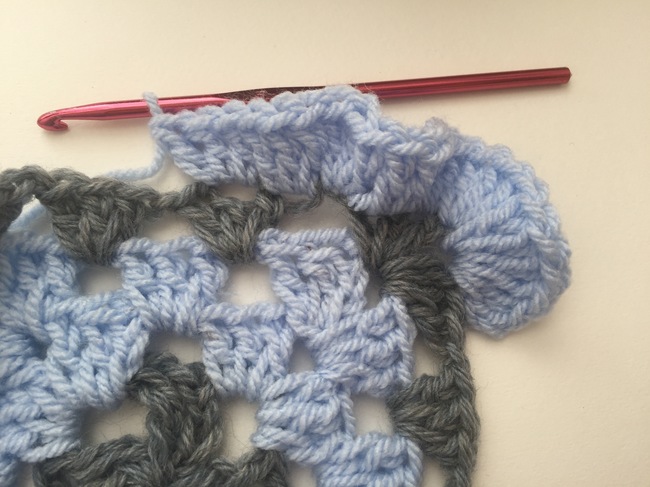
Work 3 dc into each stitch across. Note that you are working into each stitch, not into just the spaces.
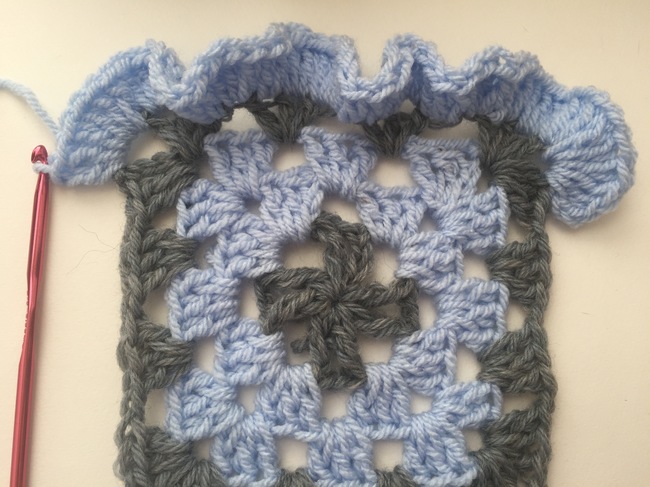
When you get to the corner, work 6 dc in corner space. Proceed around the square in the same pattern, with 3 dc stitches in each st and 6 dc stitches in each corner. At the end, sl st to the top of the first ch 3 to close round.

These edgings that I looked at are very pretty. Thank you for your help.
I'm interested to know. I'm in the process of finishing off my rectangular granny square. However I am Wanting to make a wide border to contrast the granny square Help please
Please help!!I have made a giant Granny Square and need to stop it but I dont know how. It just keeps going like a kalidascope!! Please show me how to tie it off. Someone must have experienced this!
Love your granny square combinations🌷