Finishing is possibly the most gratifying part of any woodworking project — and potentially the most stressful. You’ve put a lot of time and effort into what you’re making, and the pressure to get the finishing touches just right can be intense.
But you can relax a little: There is a simple, foolproof way to apply shellac and wax, and we’re going to share it with you right now.
What Is Shellac, Exactly?
Shellac is one of the oldest finishes in woodworking. It’s made from the resin secreted by the lac bug and deposited on trees. Manufacturers in India and Thailand harvest the residue, refine it and sell it either as flakes or in premixed form.
Shellac comes in a spectrum of colors, from super blonde (which is nearly colorless) to garnet (which will impart a rich red/brown tint to wood). Woodworkers can also add tints to shellac for a custom look.
What You Need
Good to Know: You can use denatured alcohol as a solvent, but be super careful. In order to make the alcohol undrinkable, most manufacturers add methanol — a highly toxic substance, even in small amounts. But some versions of denatured alcohol use methanol alternatives, so check labels before buying. You can also use 190-proof Everclear as a solvent. It’s more expensive than denatured alcohol, but you don’t have to worry about toxicity.
Applying the Shellac
First, be sure that the surfaces of your project are as smooth as possible, whether you sanded, scraped or planed them. Holding the project up to a light at a low angle will help you spot scratches or spots that still need smoothing. You can spray or wet the surface with the alcohol (it’ll evaporate quickly) to reveal any flaws.
The next step is applying the shellac. Although you can use it straight from the can, we recommend diluting it, mixing one part shellac with one part alcohol — it’s easier to apply a couple of thinner coats of shellac than one thick coat.
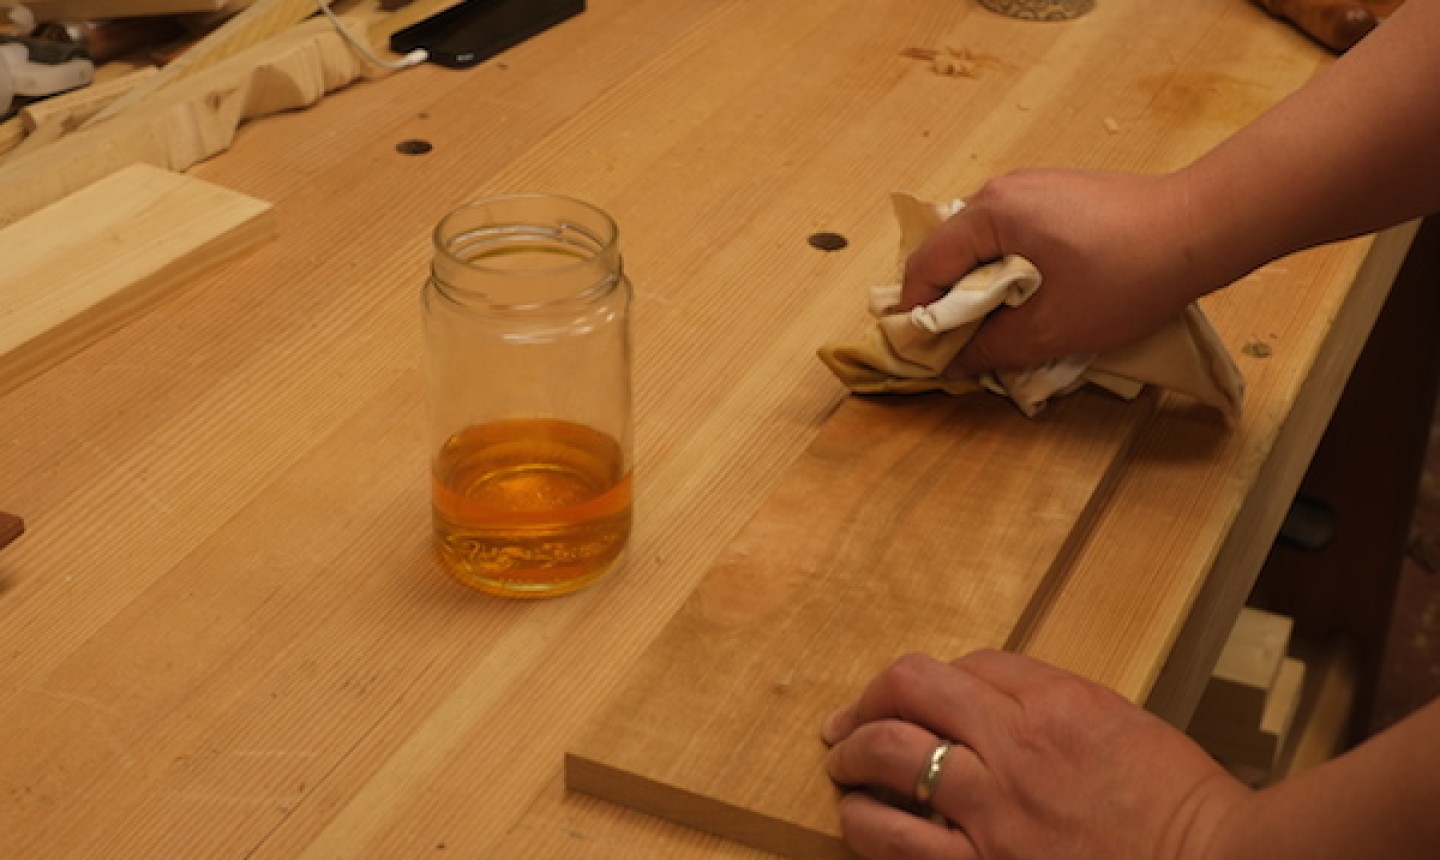
Wad up your rag, dip it into the shellac and wipe on the finish. It may feel like you’re just wiping the surface with a wet rag.
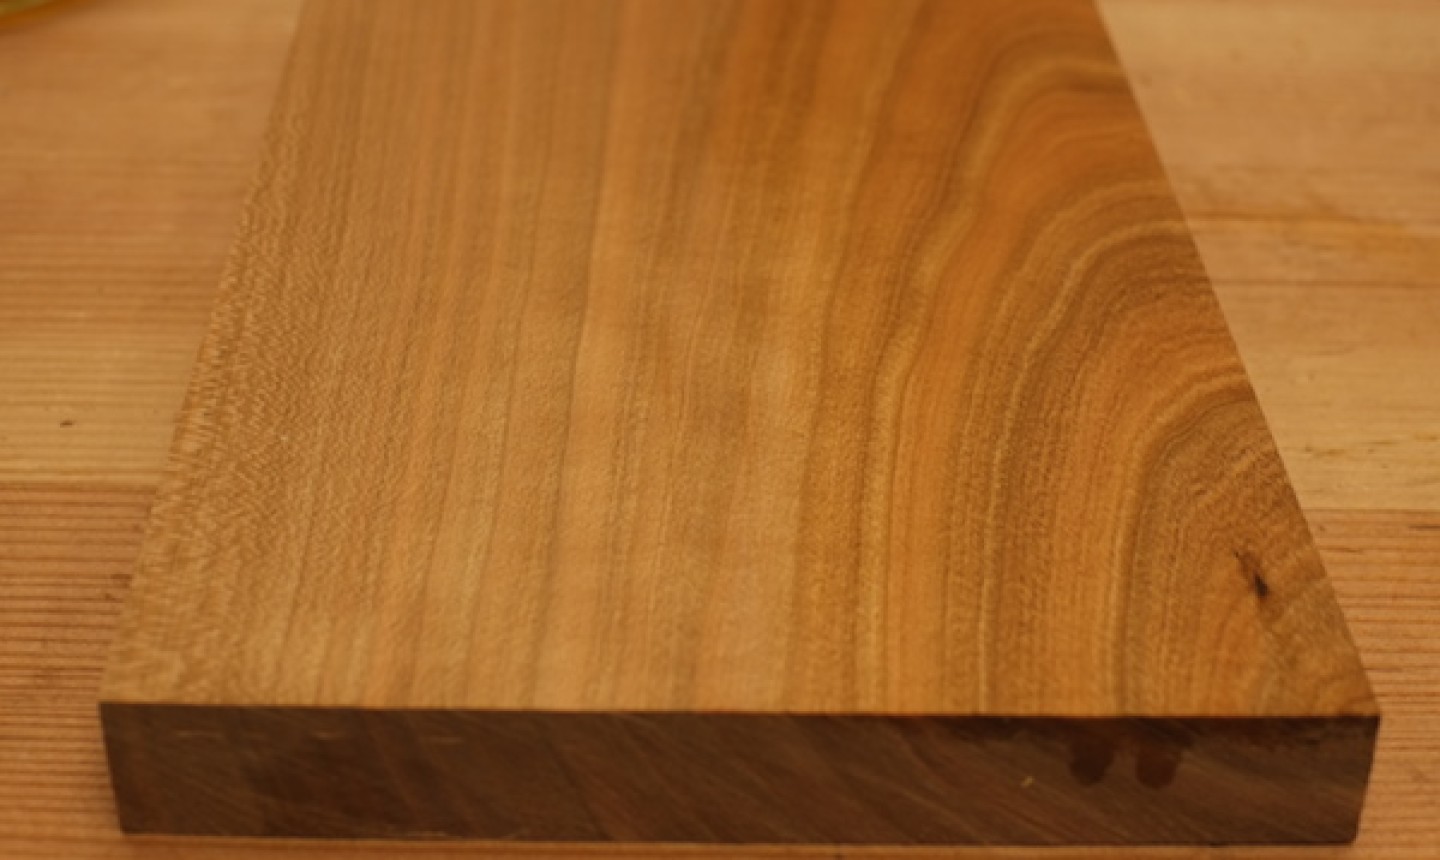
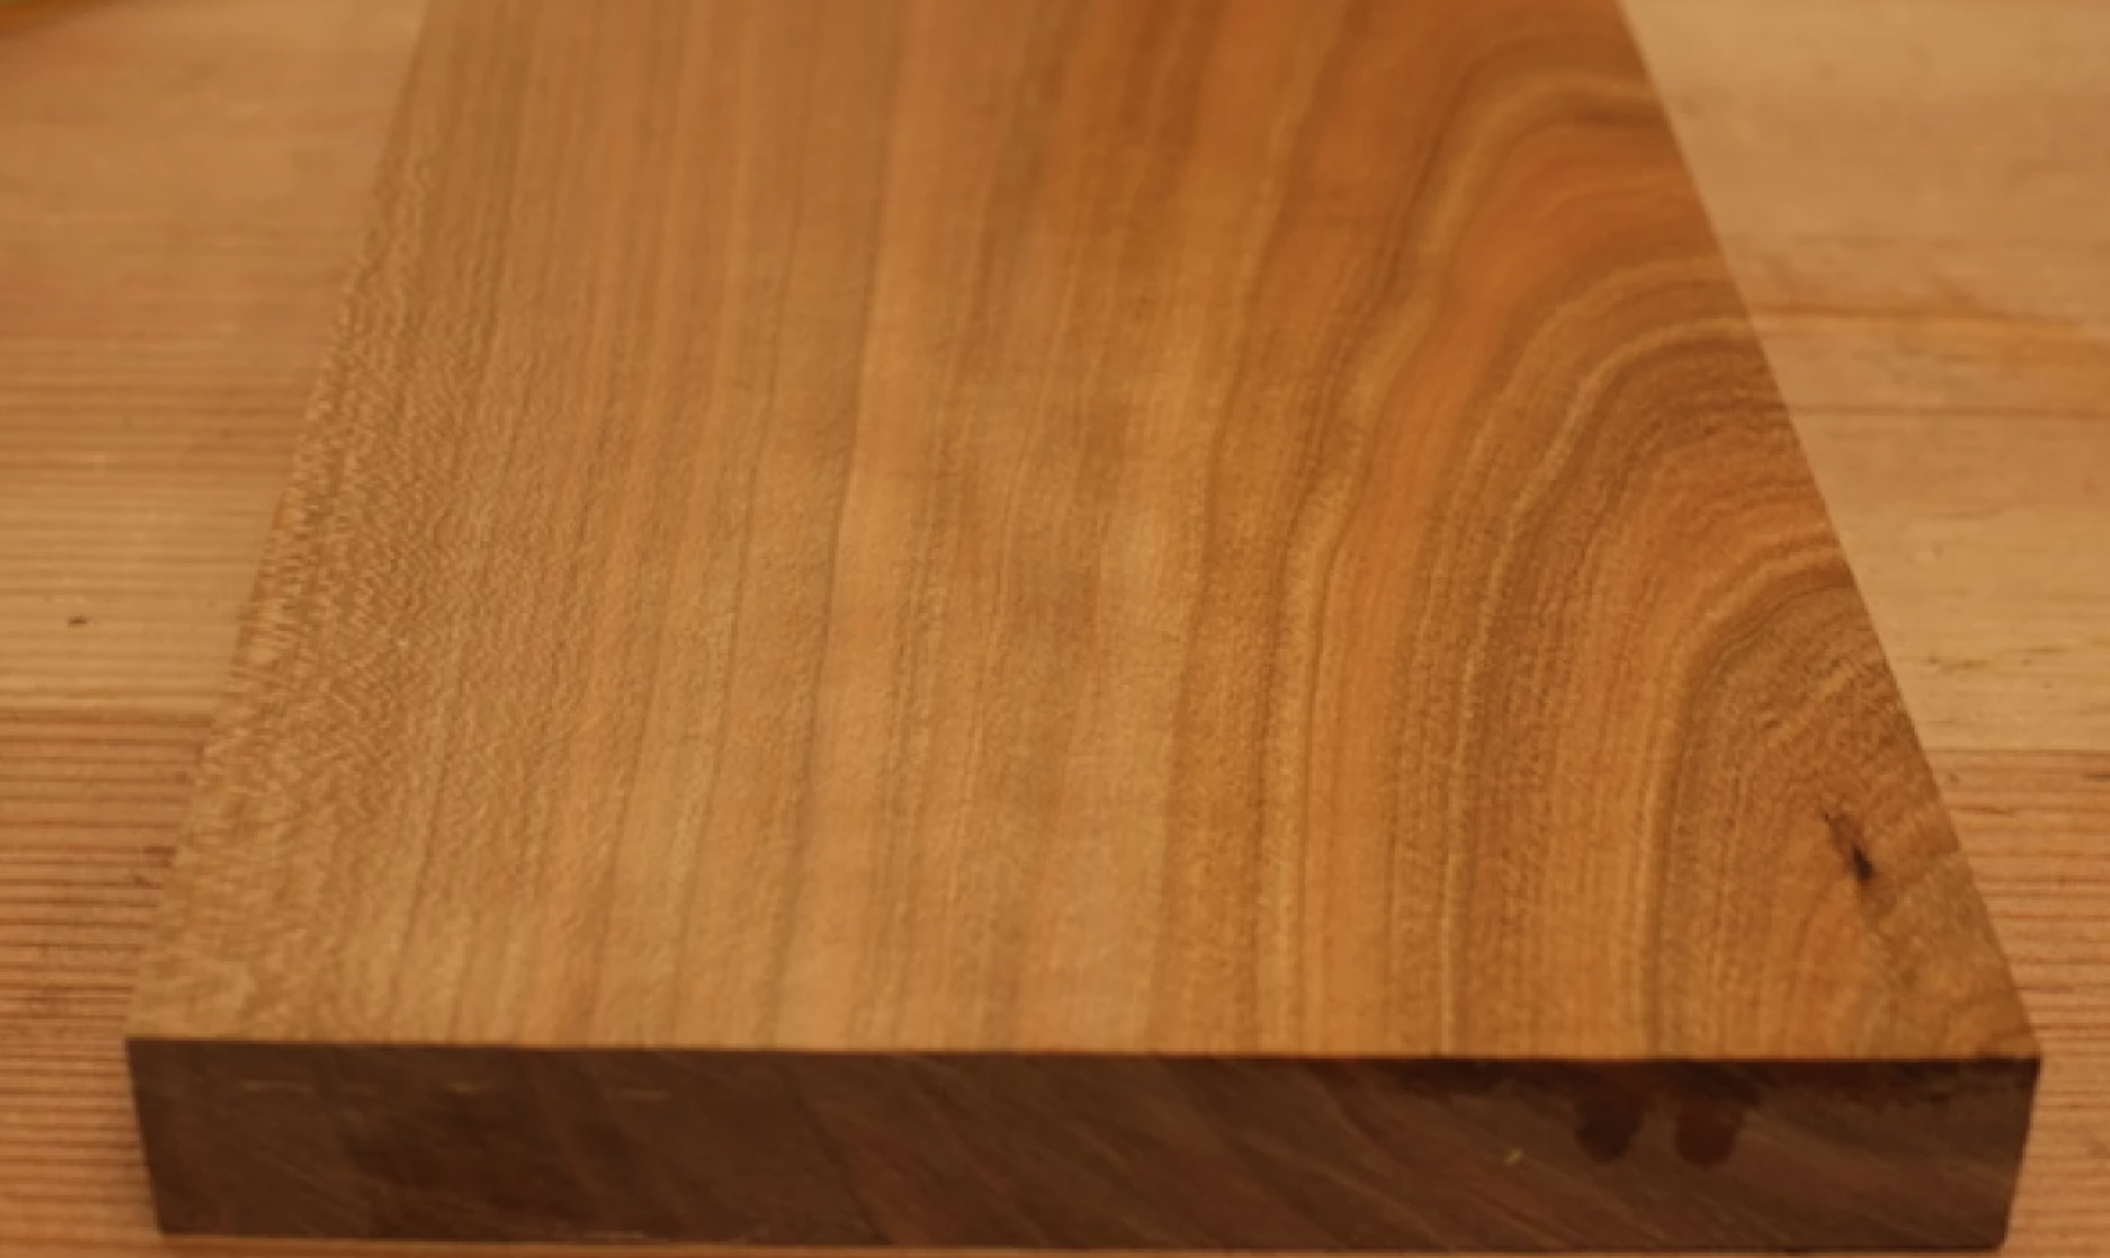
You should quickly see a change in the appearance of the grain, along with a color change. In the picture above, shellac has been applied to just the right side of the board. When you compare the right side with the unfinished left side, you should be able to see darker color, along with the popping of the grain.
Since alcohol dries fairly quickly, you could wipe on one coat, then come back in an hour or so for the next one. If you’re impatient, make the shellac more dilute by adding more alcohol. You’ll have to apply more coats, but each may dry so quickly that by the time you’re done covering your project, you can start right away with the next coat.
If you happen to miss a spot when applying a coat, don’t worry! Since shellac can redissolve in alcohol, you can go over the missed spot with more shellac and the alcohol will melt the new layer of shellac into the older one.
Keep applying shellac until you get the look you want. More shellac will give you a thicker, shinier finish. You can also apply fewer finishes to get a “close to the wood” appearance. Totally up to you.

Once you’ve applied the last coat of shellac, take the brown paper bag and rub it over your project. This’ll remove any dust nibs that may have accumulated while you were wiping on the shellac.
Don’t throw away your old rag! Instead, let it dry out and then store it in a paper bag. The next time you want to apply some shellac, you can reuse this rag, assuming the shellac color is the same (the alcohol will dissolve any shellac left on the rag).
Finishing With Paste Wax
Now you’re ready for your final step. Using a clean rag, apply a layer of wax; you won’t need very much. As with the shellac, it’s better to apply a few thin layers than one thick layer.
Buff out the wax with a clean rag when you’re done, then admire your beautiful finish!
Go ahead and put the rag back into the can of paste wax so it’s ready to go for your next woodworking project.
Pros and Cons of Shellac and Wax
There are a lot of reason to finish your woodworking project with shellac and wax. They’re easy to apply, for starters, and give you great results. Plus, if the finish gets damaged later, you can just apply more shellac (it’ll blend right in) and more wax. Plus shellac is non-toxic.
But there are some downsides to this type of finish. Shellac doesn’t hold up well to liquids, so you might not want to use it on a kitchen table, say, or a bar, or anyplace else where spills or condensation might happen.
Still, for a lot of projects, shellac and wax are the combo you want. When you’ve almost completed a project and are feeling a little tense about the finish, shellac and wax give you something invaluable: peace of mind. Relax, you’ve earned it!

Hey everyone, I highly recommend checking out <a href="https://enjoywoodcraft.com/">Enjoy Wood Craft</a>! Their handmade wooden products are crafted with exceptional quality and attention to detail.
This post on finishing cherry wood is a must-read for anyone working with this beautiful material. The detailed tips are perfect for ensuring that your made wooden items—whether furniture or smaller projects—shine with a rich, enduring finish. Thanks for providing such helpful advice for crafting stunning cherry wood pieces!
I have a cherry kitchen table that I finished years ago with a Poly product. It has become sticky to the touch! I will sand it and refinish but why did it become sticky and what should I now use? thanks